Hi! In one of my previous blogs, I talked about accessing OCI Object Storage with a custom domain using a CDN, namely Cloudflare. That blog post talked about accessing public Object Storage buckets (which don’t require authentication). Can we use the same setup to access private buckets? Yes, we can. Let’s see how!
OCI Object Storage refresh
OCI Object Storage works with buckets and objects inside the buckets. In the previous blog, we saw that we can access objects inside public buckets directly in a web browser but what happens if you want to access private buckets and objects inside those private buckets? Private buckets require some sort of authentication so we can no longer use web browsers. Instead, we have to rely on OCI CLI, REST APIs, or SDKs. Each of those methods has its own way of providing authentication to the OCI Object Storage service and retrieving the data. Let’s dig a little deeper into REST APIs.
The REST API calls can be made to different endpoints:
– Object Storage Service API
– Amazon S3 Compatibility API
– Swift API
In this blog post, I will cover the Swift API method and I will use Cloudflare to make it a true Vanity URL access.
Swift API calls
To access private buckets with the Swift API we need:
a) The endpoint – the Swift API can be accessed with three different hostnames:
1. swiftobjectstorage.[region].oraclecloud.com
2. swiftobjectstorage.[region].oci.customer-oci.com
3. [tenancy-namespace].swiftobjectstorage.[region].oci.customer-oci.com
For this blog, I will use the endpoint under point 1 but the same process (with small differences) can be applied to any of the three endpoints. The endpoint under point 1 is not customer specific so we have to append the tenancy name to the request. In the end, the request looks like this:
https://swiftobjectstorage.[region].oraclecloud.com/v1/[tenancy-namespace]/[bucket]/[object]
b) The authentication – authenticating to the Swift API endpoint is done with a username and password, which will be:
1. Username: your OCI IAM user which you use to connect to the OCI Console, in the format IdentityDomain/User ; note that the required OCI IAM policies that grant you access to the Object Storage will still apply.
2. Password: the password is an access token that you configure under your user in the OCI Console.
As explained in the previous blog, there are some challenges related to HTTPS because the OCI Object Storage Swift API will only respond to SSL connections for those OCI-owned domains so we need to rewrite the host header and we will also show how to do path rewrite for true Vanity URLs. We’ll see how we do that in Cloudflare.
Cloudflare prerequisites
To use Cloudflare you need:
a) A DNS Zone onboarded to Cloudflare – Cloudflare is both a registrar and a DNS provider so you can either buy the zone directly from them or simply point your registrar to the Cloudflare DNS servers. The procedure to do this is here.
b) The zone above MUST be under an Enterprise license – Cloudflare supports multiple license types (including a free tier) but you will have access to the relevant menus only if the zone is under an Enterprise license. More details here.
If the two prerequisites are met we can move to the demo part of the blog.
Demo
Building the environment is simple, I will use:
– A private OCI Object Storage bucket, in Ashburn, named private-bucket, containing one object, a PNG file.
– A DNS Zone, cdn-lab.cloud, which I have onboarded to Cloudflare, under an Enterprise license.
Here is a picture of what we are trying to achieve:

Let’s get started.
1. OCI Private Bucket
Create an OCI private bucket and have a file in it. I will use the Object Storage service in the OCI Ashburn region.
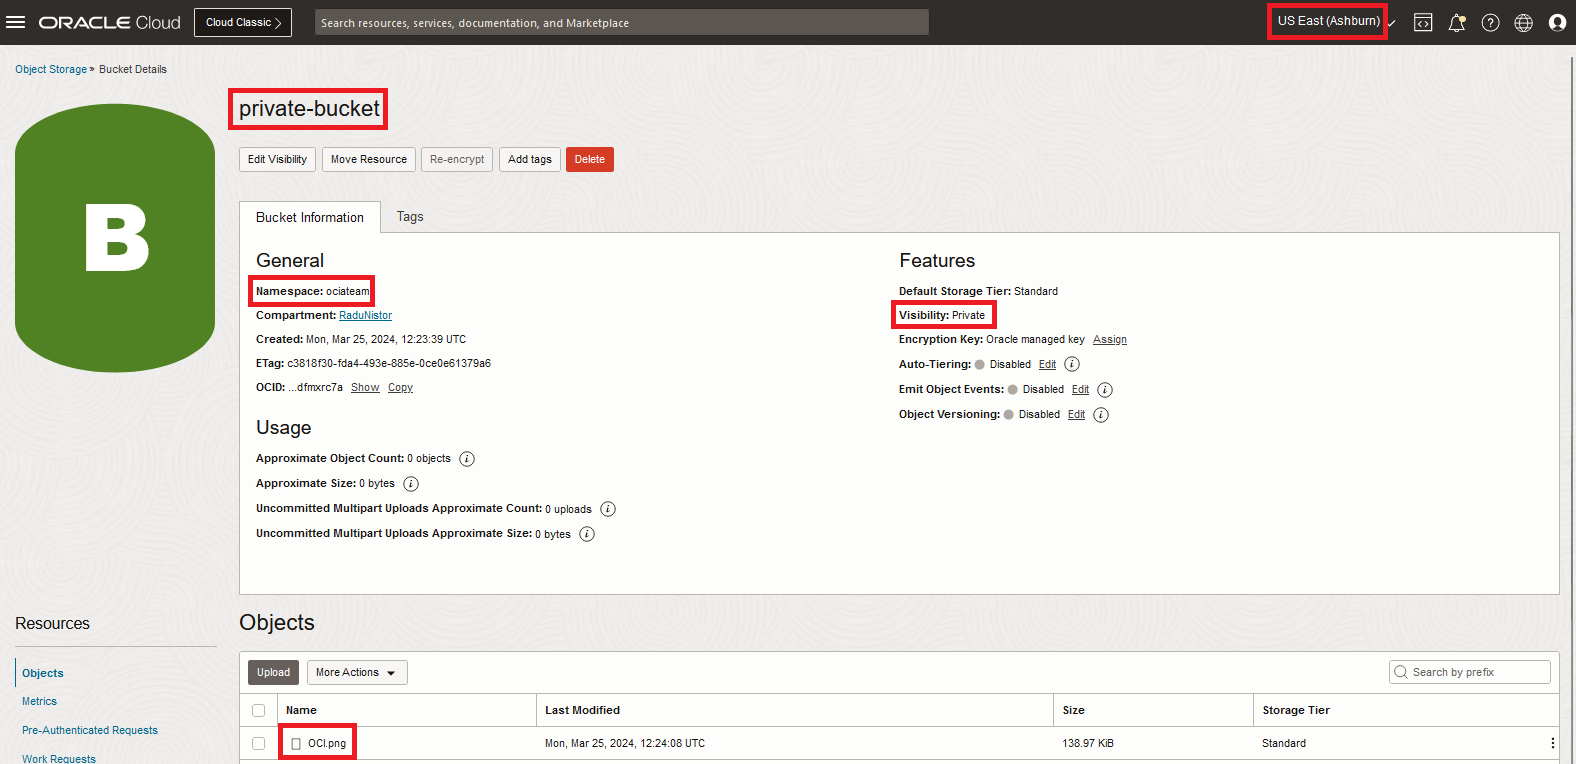
From the highlighted things, we need:
– Region: Ashburn
– Bucket namespace: ociateam
– Bucket name: private-bucket
– Object name: OCI.png
With them, we can build the Swift API call, which will look like this:
https://swiftobjectstorage. us-ashburn-1.oraclecloud.com/v1/ociateam/private-bucket/OCI.PNG
2. Authentication
To authenticate to the Swift endpoint we will need the user and the user token which will act as a password. Go to the top right menu in your OCI Console to see the user and Identity Domain.
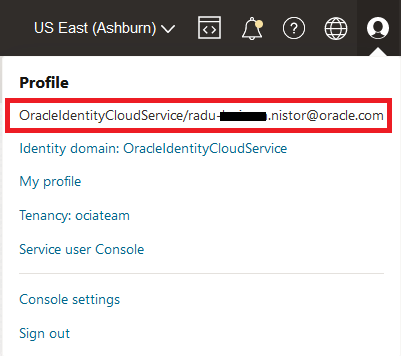
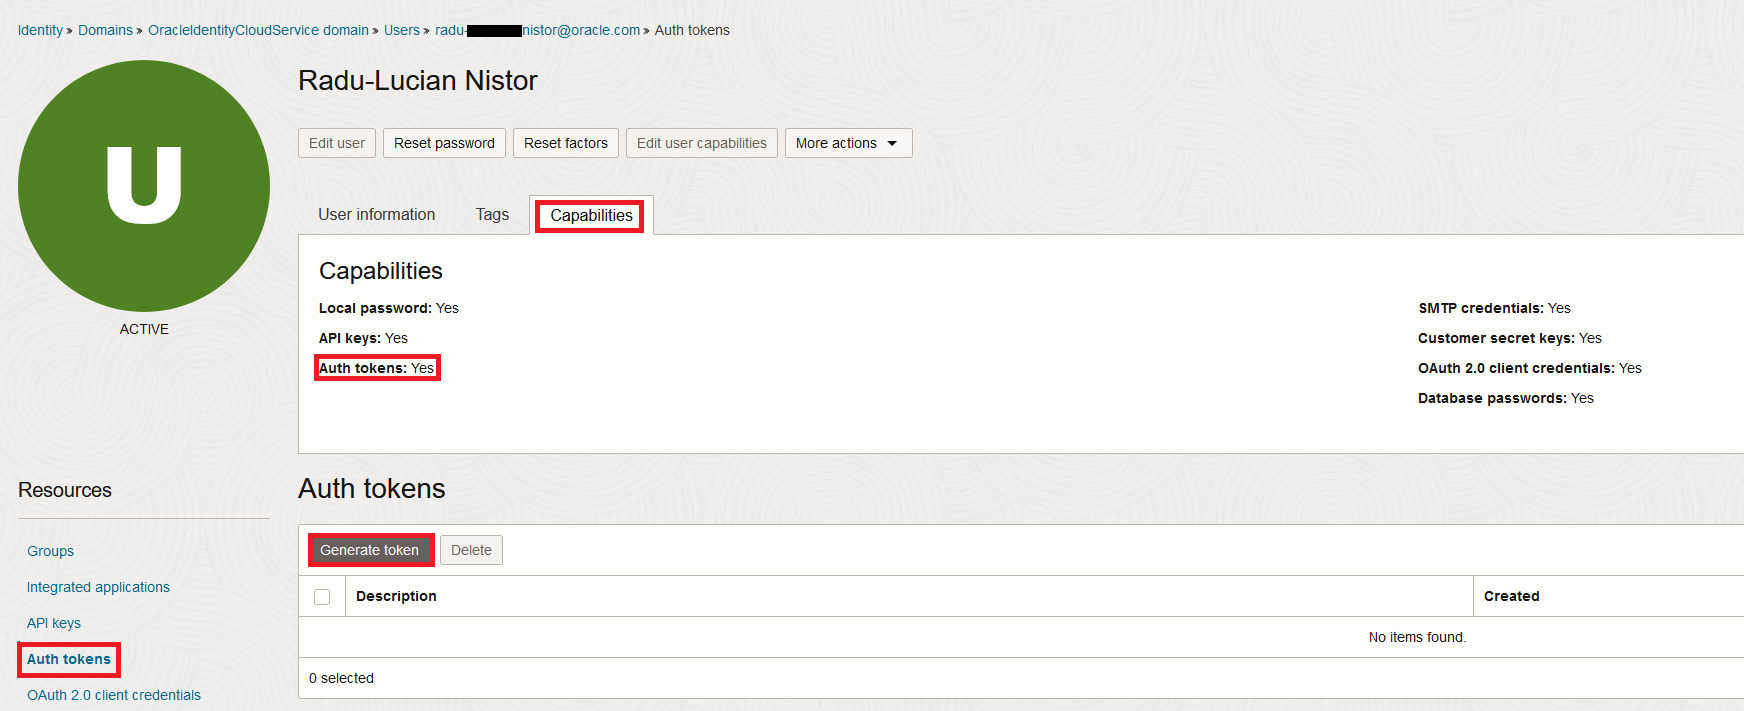
In the picture above you can see the user together with the Identity Domain. Now click on the Identity Domain. In the menu that opens, click users and select your user. In the user details menu, click on Capabilities and make sure you have “Auth tokens: Yes”. Next, click on Auth tokens and generate a new one.
Note down the token, that will be the password to access object storage.
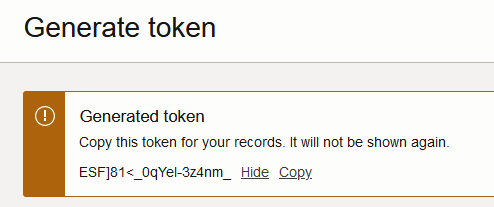
Now that we have the Identity Domain, user, and password we can build the call to the Swift Endpoint. Let’s see how a Curl command would look:
curl -u 'OracleIdentityCloudService/radu-xxxxxx.nistor@oracle.com:ESF]81<_0qYel-3z4nm_' -v -X GET https://swiftobjectstorage.us-ashburn-1.oraclecloud.com/v1/ociateam/private-bucket/OCI.png -o OCI.png
Let’s test it:
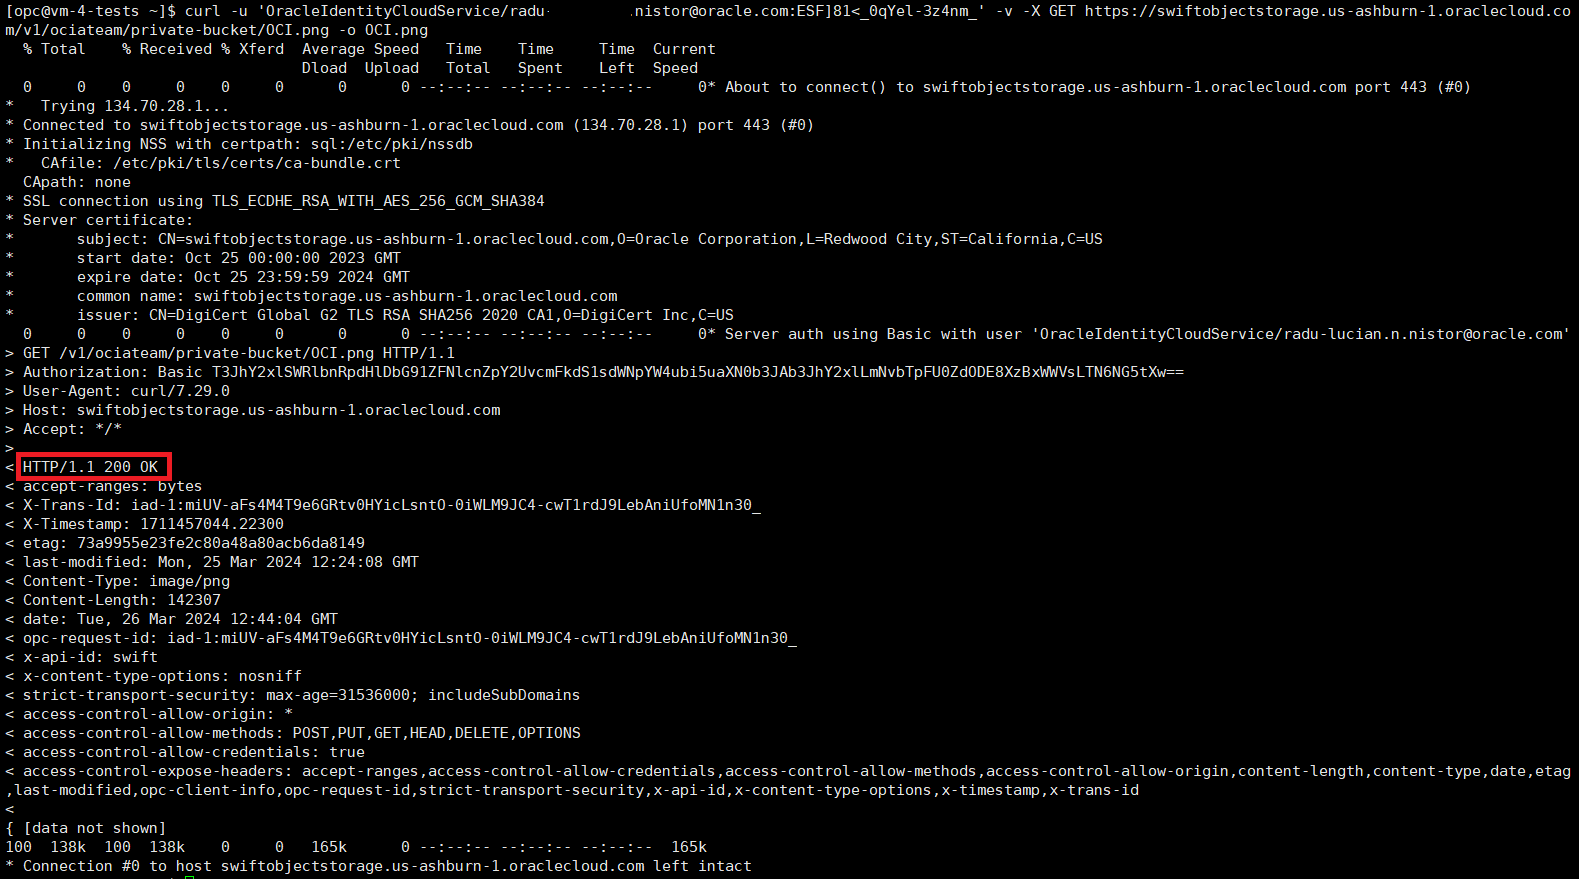
Now that we’ve successfully set up Swift endpoint access to a private bucket we can move to Cloudflare.
3. Cloudflare setup
In the interest of not making this blog too long, I will not go over the Cloudflare procedure in detail. You can get that from the previous blog as the same procedure applies. Note that you will need:
a) A CNAME entry:

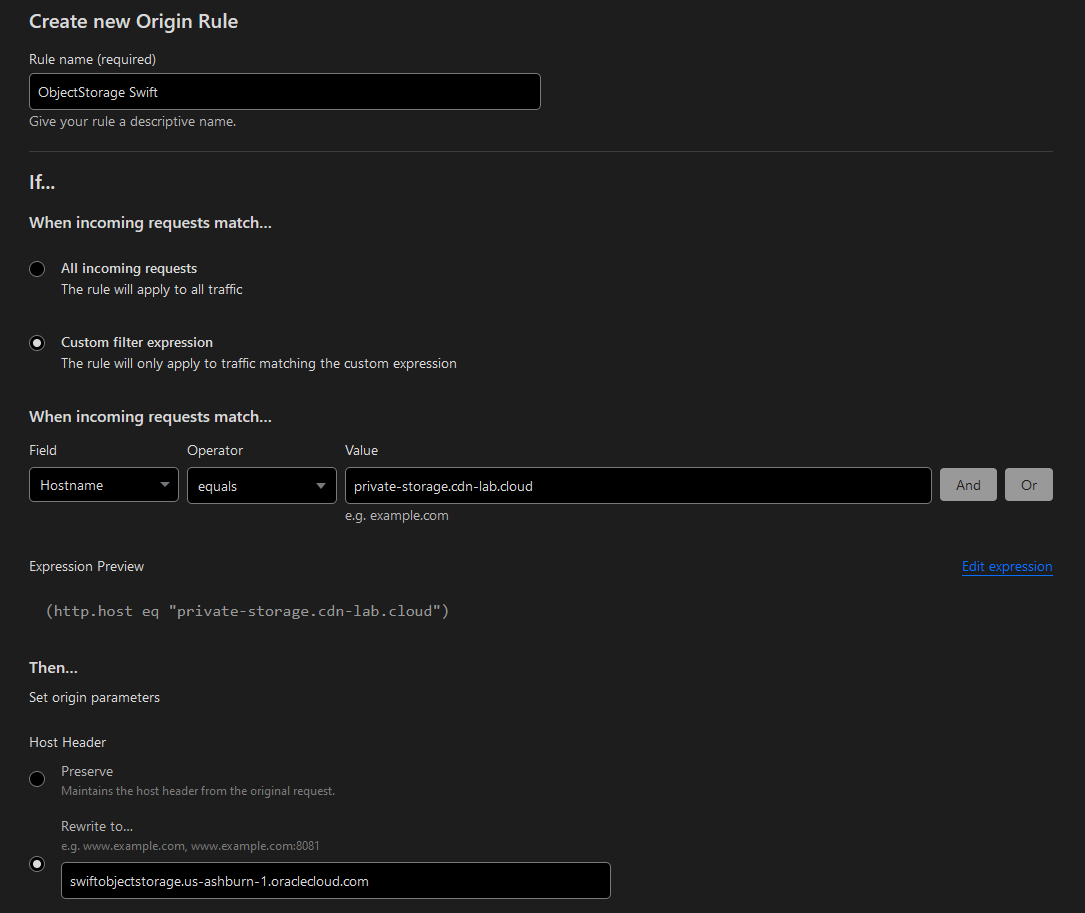
b) An Origin rule
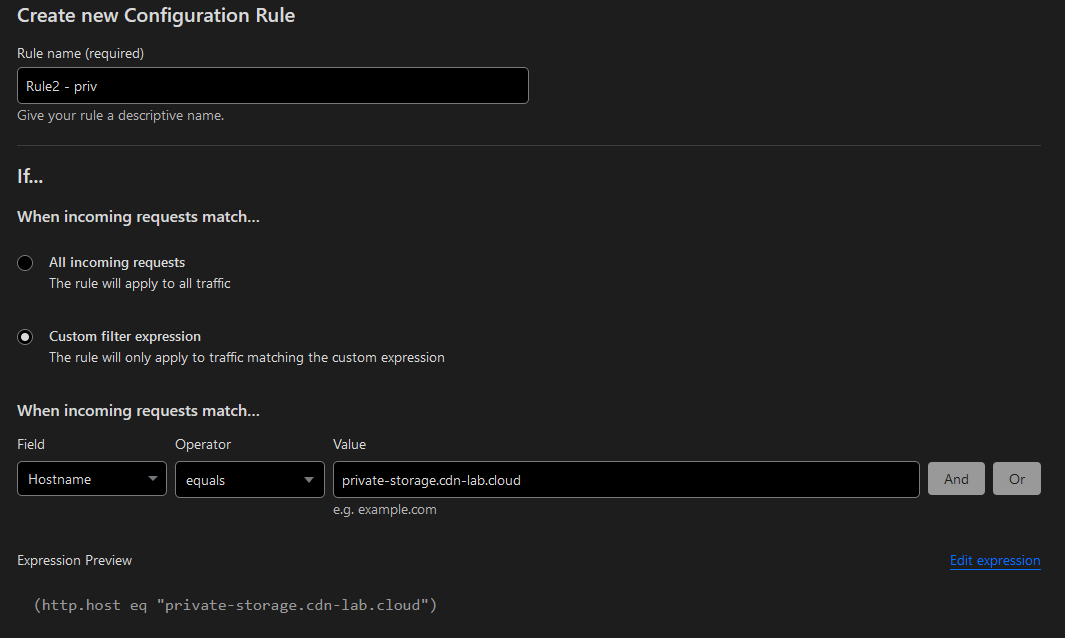
c) A Configuration rule

d) The optional Transform rule to make it a true Vanity URL
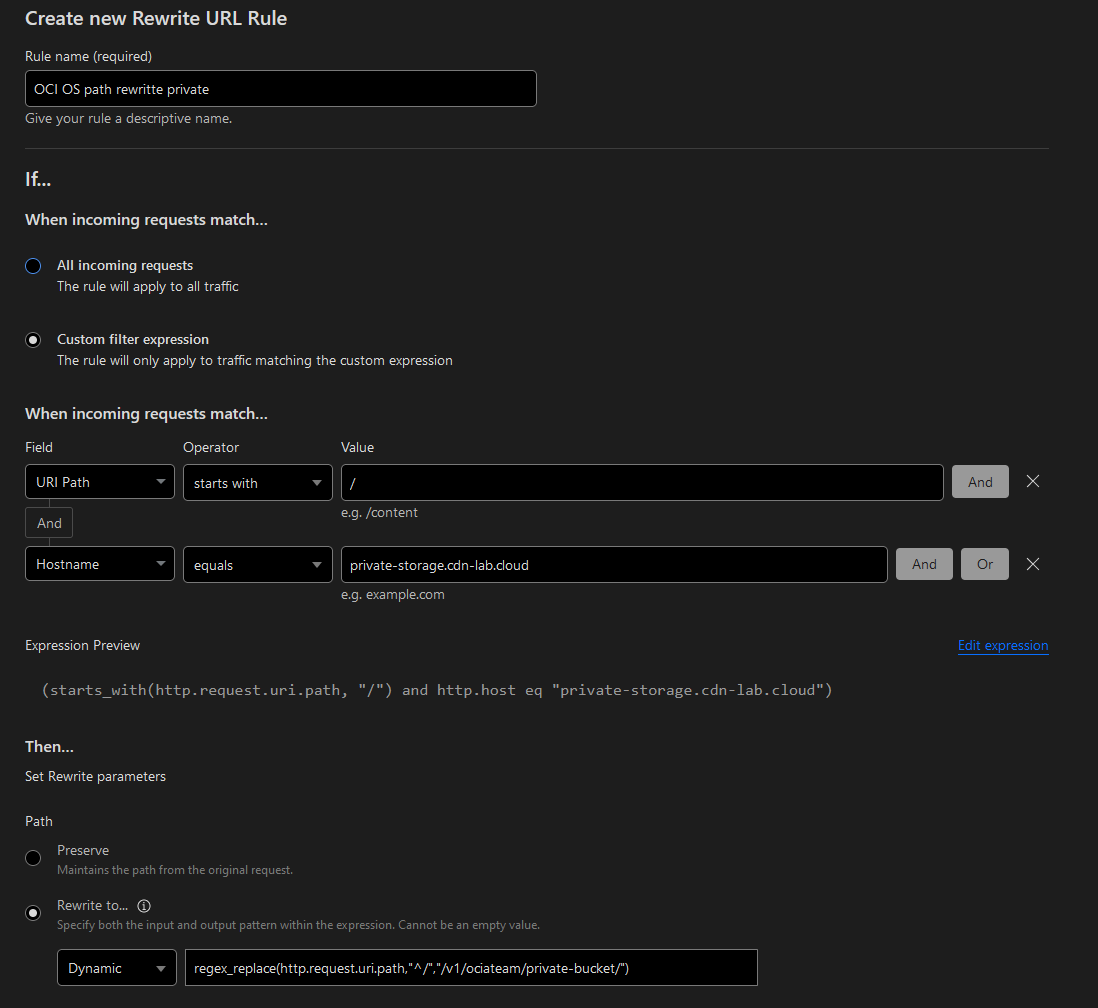
Modify the dynamic rule to match your bucket’s namespace and name:
regex_replace(http.request.uri.path,"^/","/v1/ociateam/private-bucket/")
Once all of them are in place we can use the custom URL to connect to the bucket, like this:
curl -u 'OracleIdentityCloudService/radu-xxxxx.nistor@oracle.com:ESF]81<_0qYel-3z4nm_' -v -X GET https://private-storage.cdn-lab.cloud/OCI.png -o OCI.png
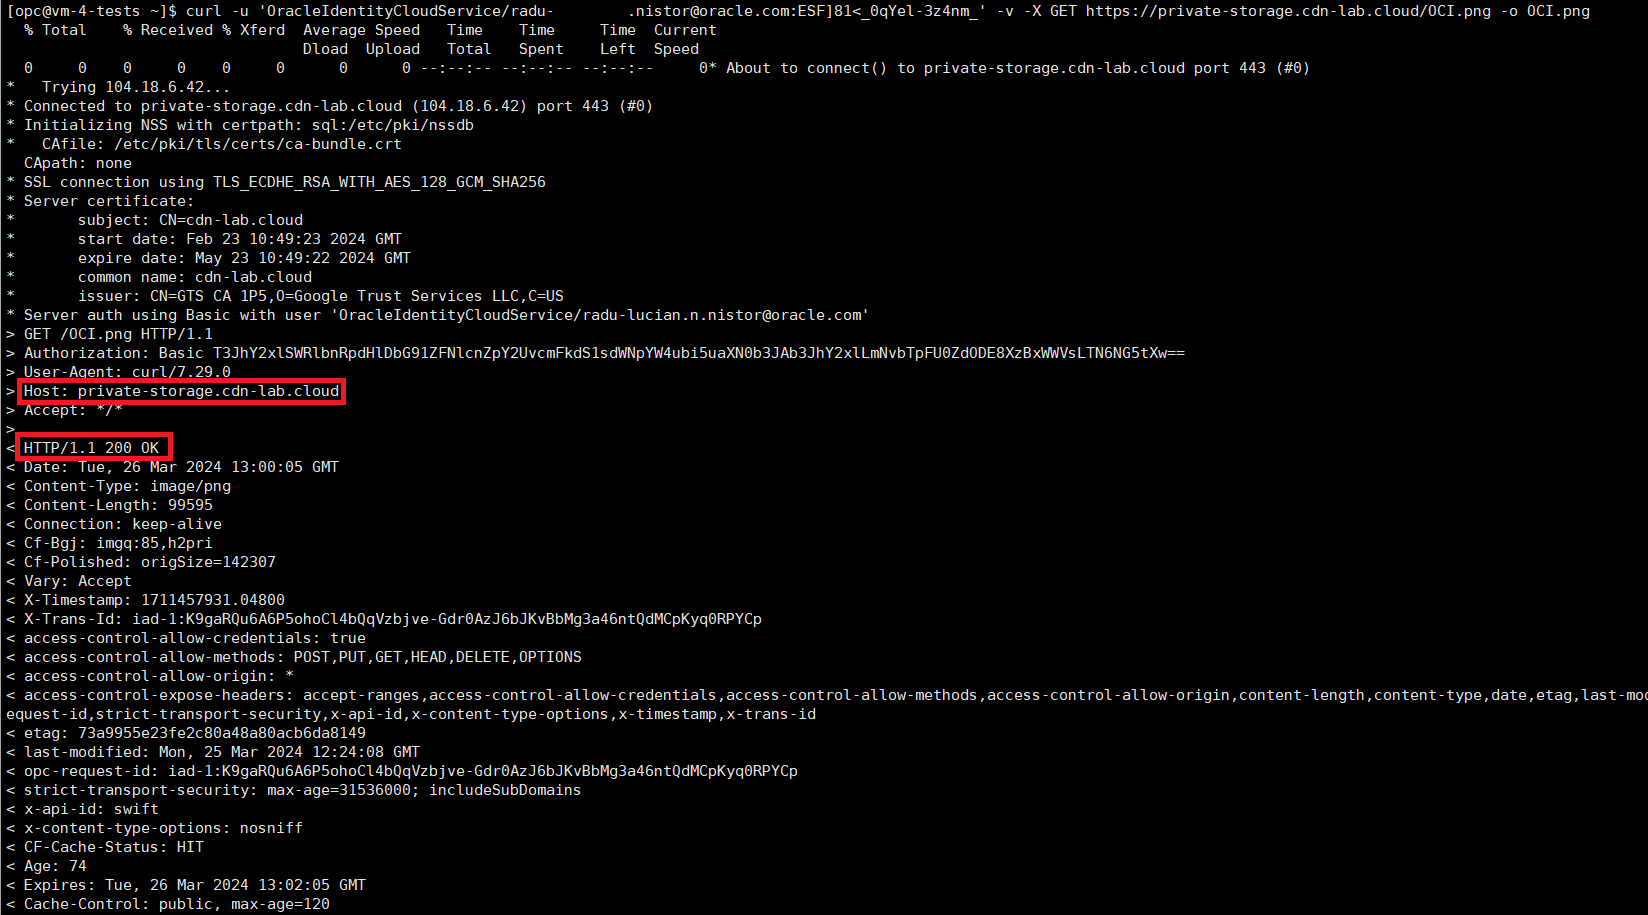
If you don’t like Curl you can always use an API client like Postman.

