Intro…
They say you should always start a post with an introduction. So here you go:
“Oracle Cloud Infrastructure (OCI) Object Storage provides scalable, durable, low-cost storage for any type of data.” Normally when you interact with Object Store you use an API key often via one of the handy SDKs. But sometimes that’s not what you need. Object Store offers a feature called Pre-Authenticated Request (or PAR) that allows an administrator to create a special HTTPS URL that embeds authentication and authorization within the path. With that PAR someone (usually someone else!) can upload or download one or more files from the Object Store bucket without using an SDK or the OCI-specific APIs.
You’ll often use something like curl or a program to upload or download from the bucket via the PAR. But what if you want to do it in the browser?
This post shows you the (almost) simplest possible HTML you need to allow your users to upload to Object Store with a PAR link and just a plain old web browser. You can use this code to understand the very, very basics before you go integrate it with your site or workflow… and of course make it pretty!
First let’s start with the very basics.
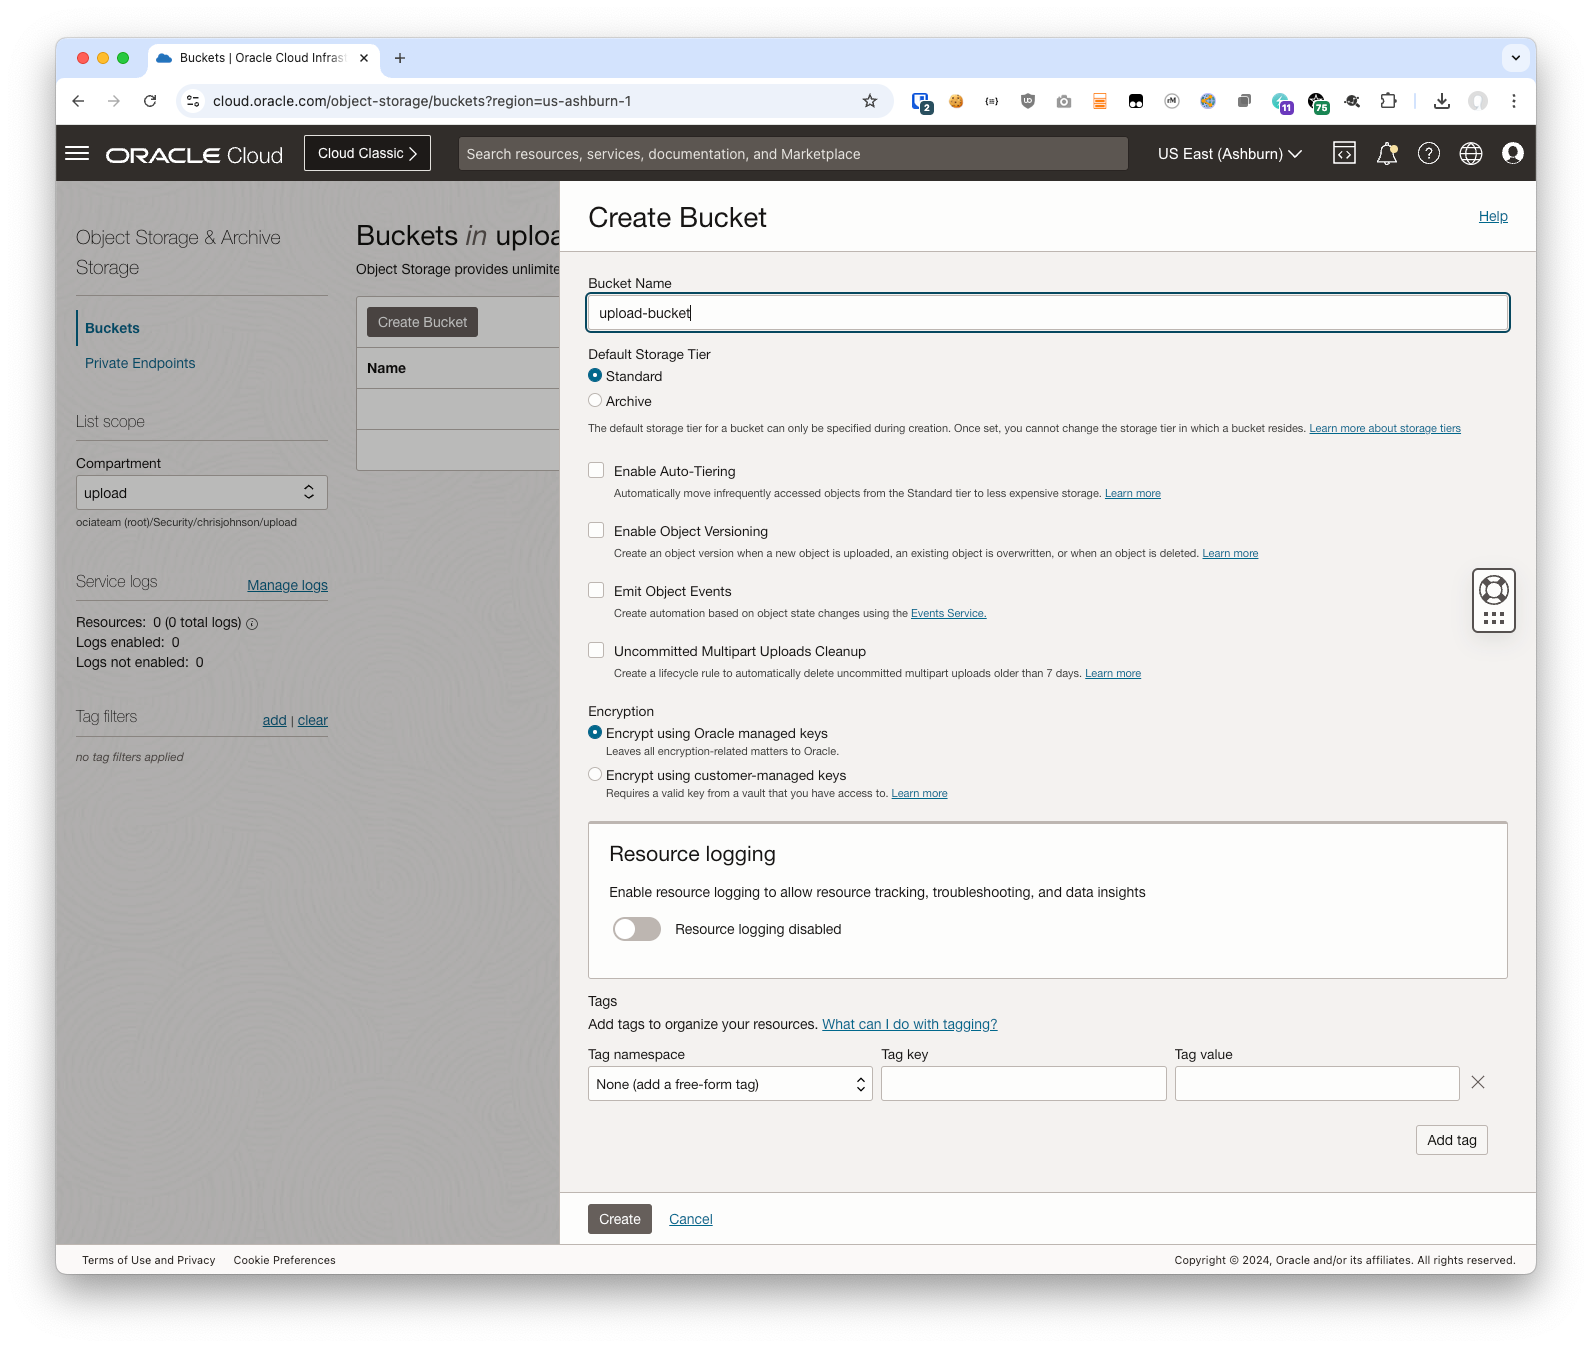
Setting up Object Store & Creating a PAR
I won’t bother you with all of the individual steps, but navigate to OCI Console, then Storage, Object Store and find your existing Bucket or create a new one. For more info check the docs.
On the left click on Pre-Auithenticated Requests and then on the Create button:
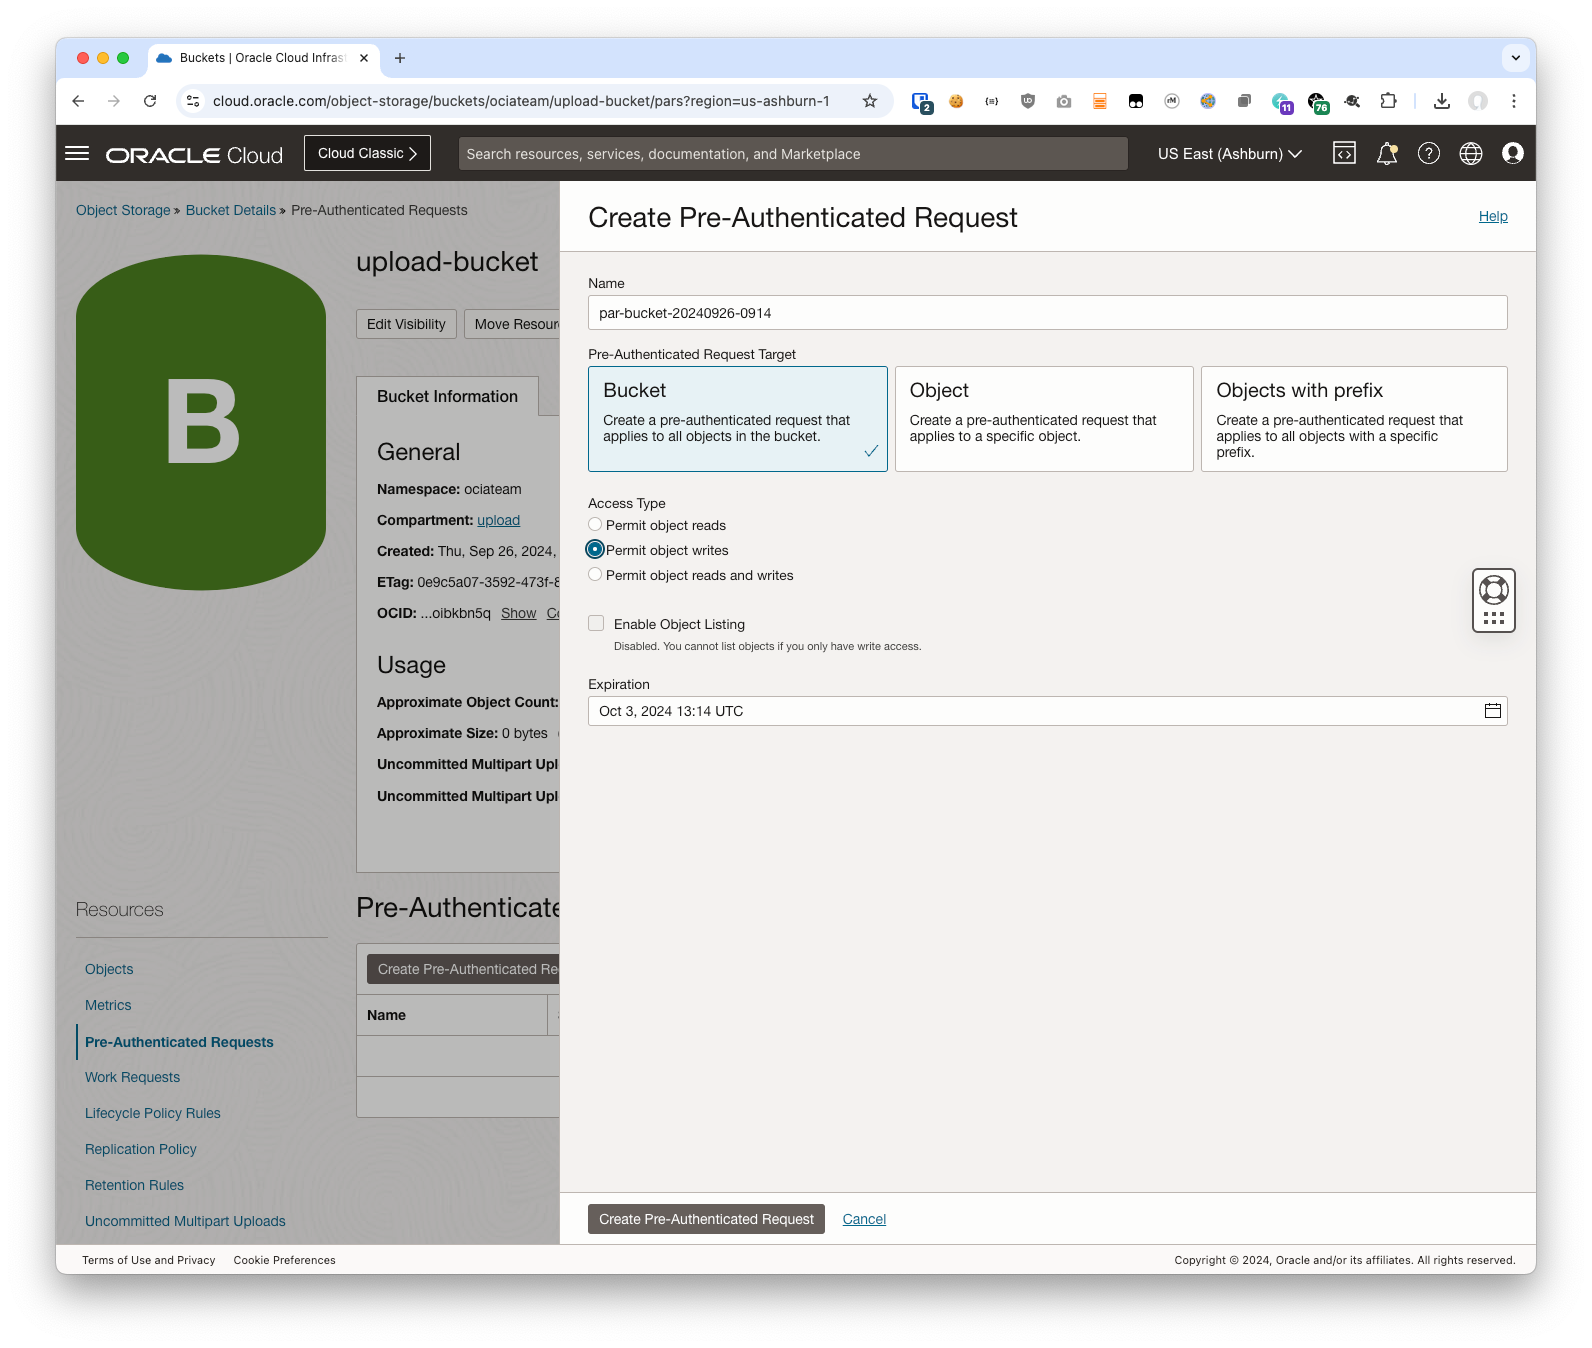
In this case we want to allow the user to upload to the bucket so we choose that. Make selections for the other options as you see fit.
Copy the URL you get – we’ll need it in our HTML file later.
Create your HTML
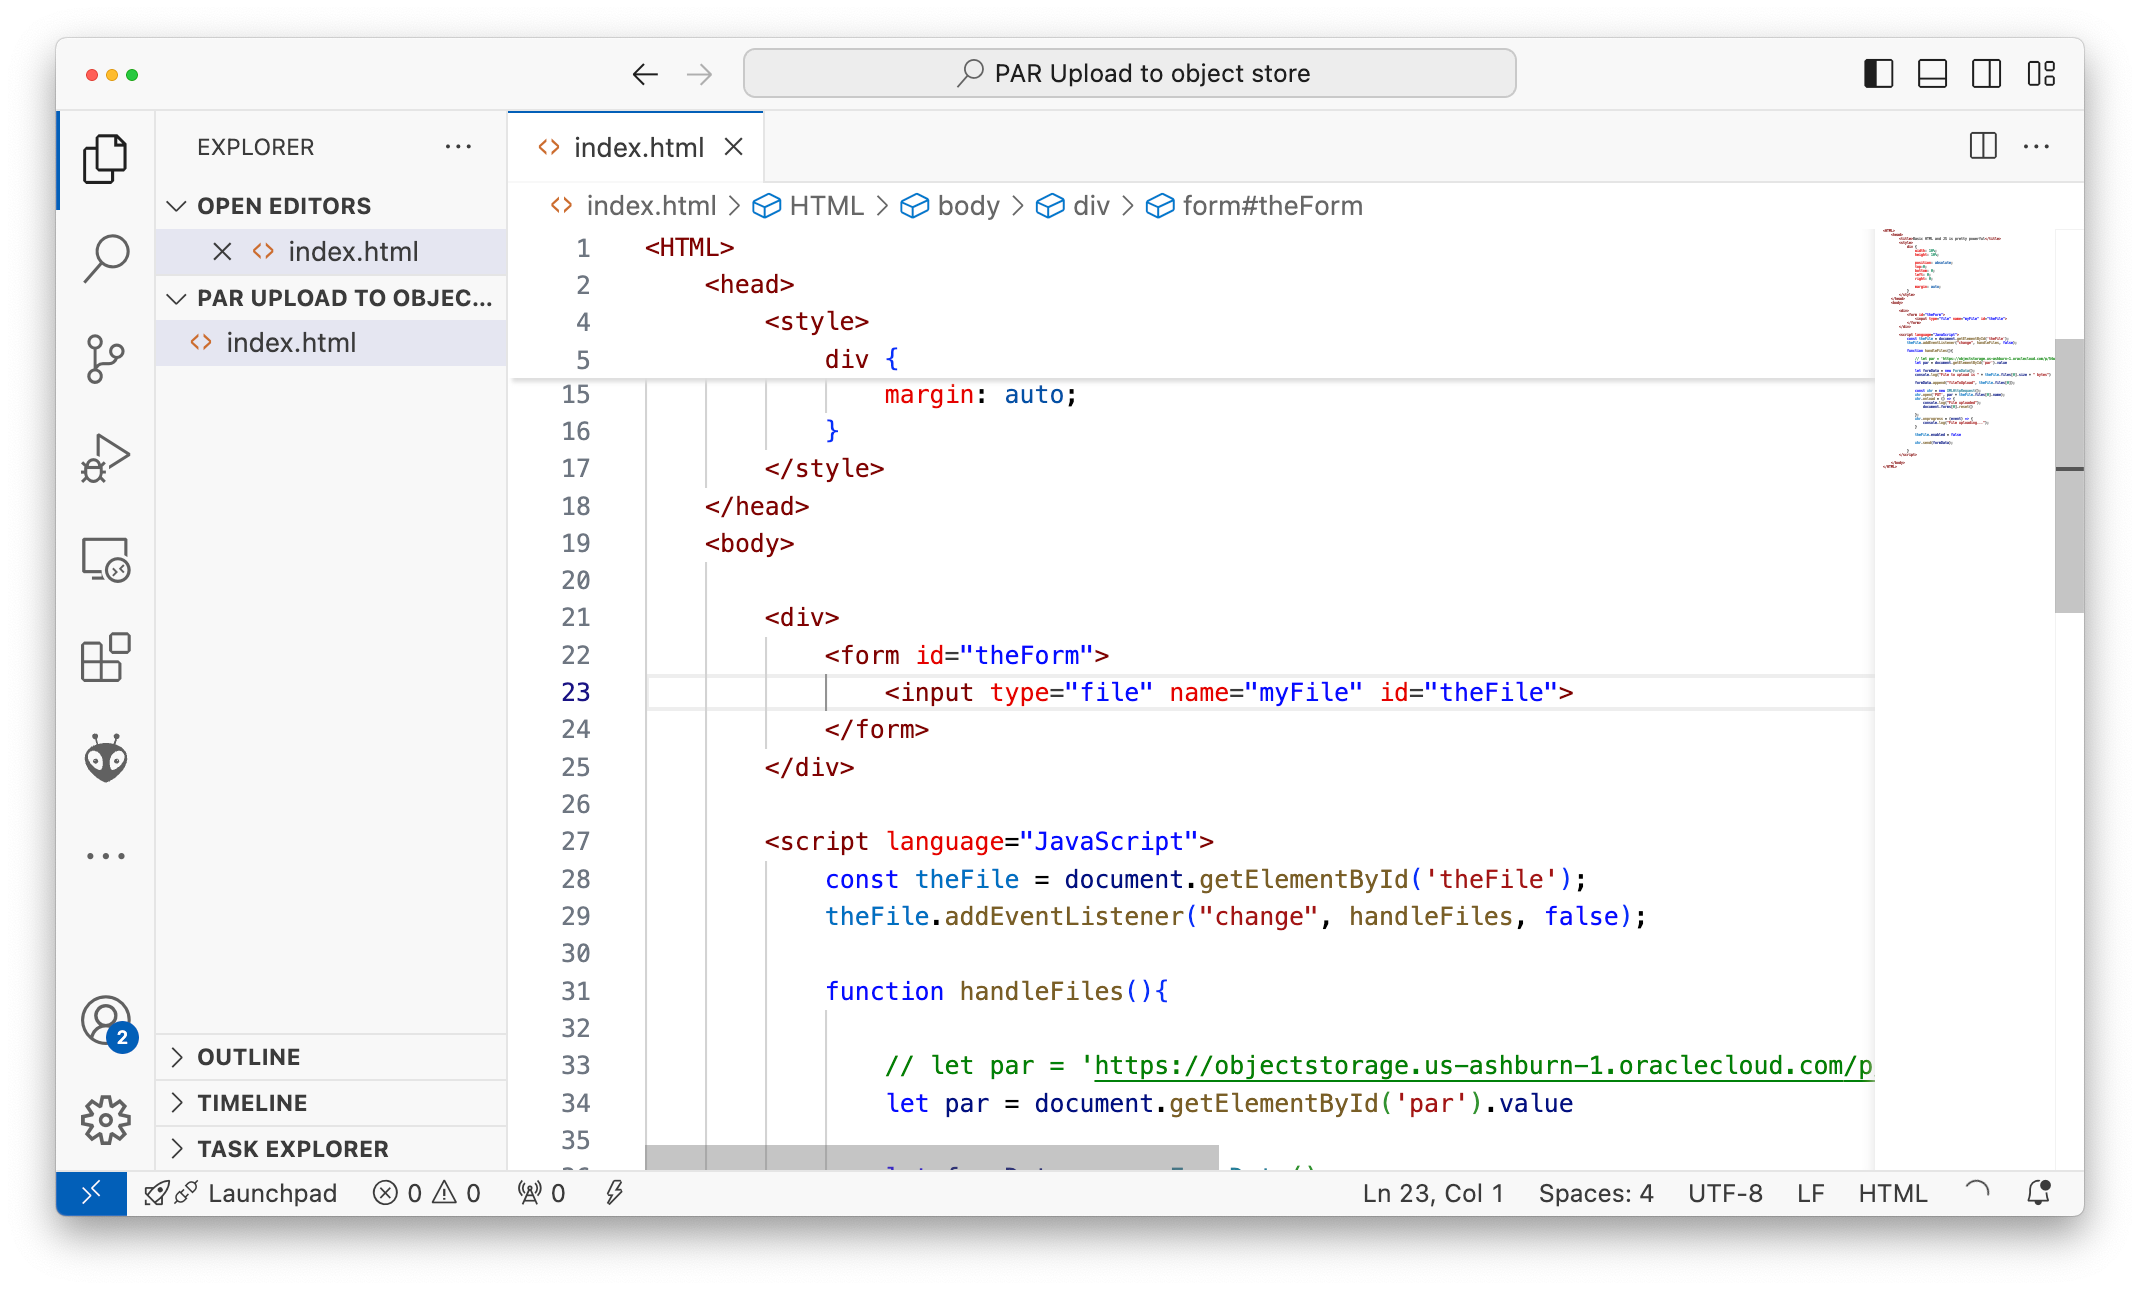
Next we need an HTML file with BODY and a FORM for the browser to load. That should be something quite like this:
<HTML>
  <BODY>
    <form>
      <input type="file" id="theFile">
    </form>
  </BODY>
</HTML>
Grey haired readers will note that I gave the file input an id= (though name=). I’m going to use JavaScript to make the upload happen automatically and immediately. If you’re old school you could use the the onchange= property to set a function to be called when the file is changed, but the more modern thing to do is add a handler later. And having the id (or a name) makes the JavaScript easier and more reliable.
And that’s your minimal HTML form.
Open the HTML file in your browser
Go ahead and open the file with your browser and you’ll get a file chooser and nothing else:
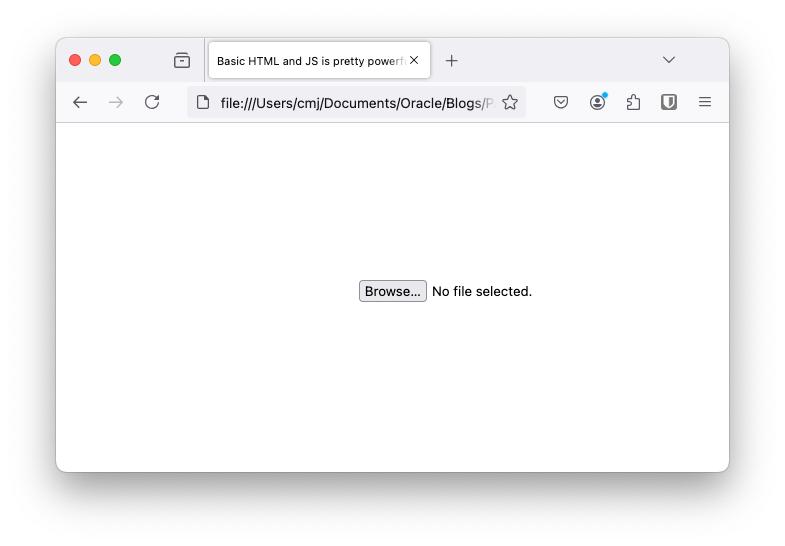
You can add buttons and colors and whizzy animations. But again I’m keeping this super minimal.
Next we need to add some JavaScript. Immediately below the HTML form copy this in:
        <script language="JavaScript">
            const theFile = document.getElementById('theFile');
            theFile.addEventListener("change", handleFiles, false);

            function handleFiles(){
                // disable the file upload for the moment
                document.getElementById('theFile').enabled = false

                let par = 'https://objectstorage.us-ashburn-1.oraclecloud.com/be/sure/to/change/me'

                let formData = new FormData();
                console.log("File to upload is " + theFile.files[0].size + " bytes")

                formData.append("fileToUpload", theFile.files[0]);

                const xhr = new XMLHttpRequest();
                xhr.open('PUT', par + theFile.files[0].name);
                xhr.onload = () => {
                    console.log("File uploaded");
                    // reset the form to re-enable the file chooser
                    document.forms[0].reset();

                };

                xhr.send(formData);
            }
        </script>
Be sure to update the URL in the line:
let par = 'https://objectstorage.us-ashburn-1.oraclecloud.com/be/sure/to/change/me'
That’s literally all there is to it.
Save your file, refresh the browser and drag ”n’ drop files onto the “Browse” button to your heart’s content.
I have a slightly more advanced version of this in a gist here. And will probably make more changes in the future.
Got a good tip like this? Feel free to share!