Introduction
This blog series will address use cases where some users need access to Fusion Applications, while others, who do not have access to Fusion Applications, need to access SaaS Extensions.
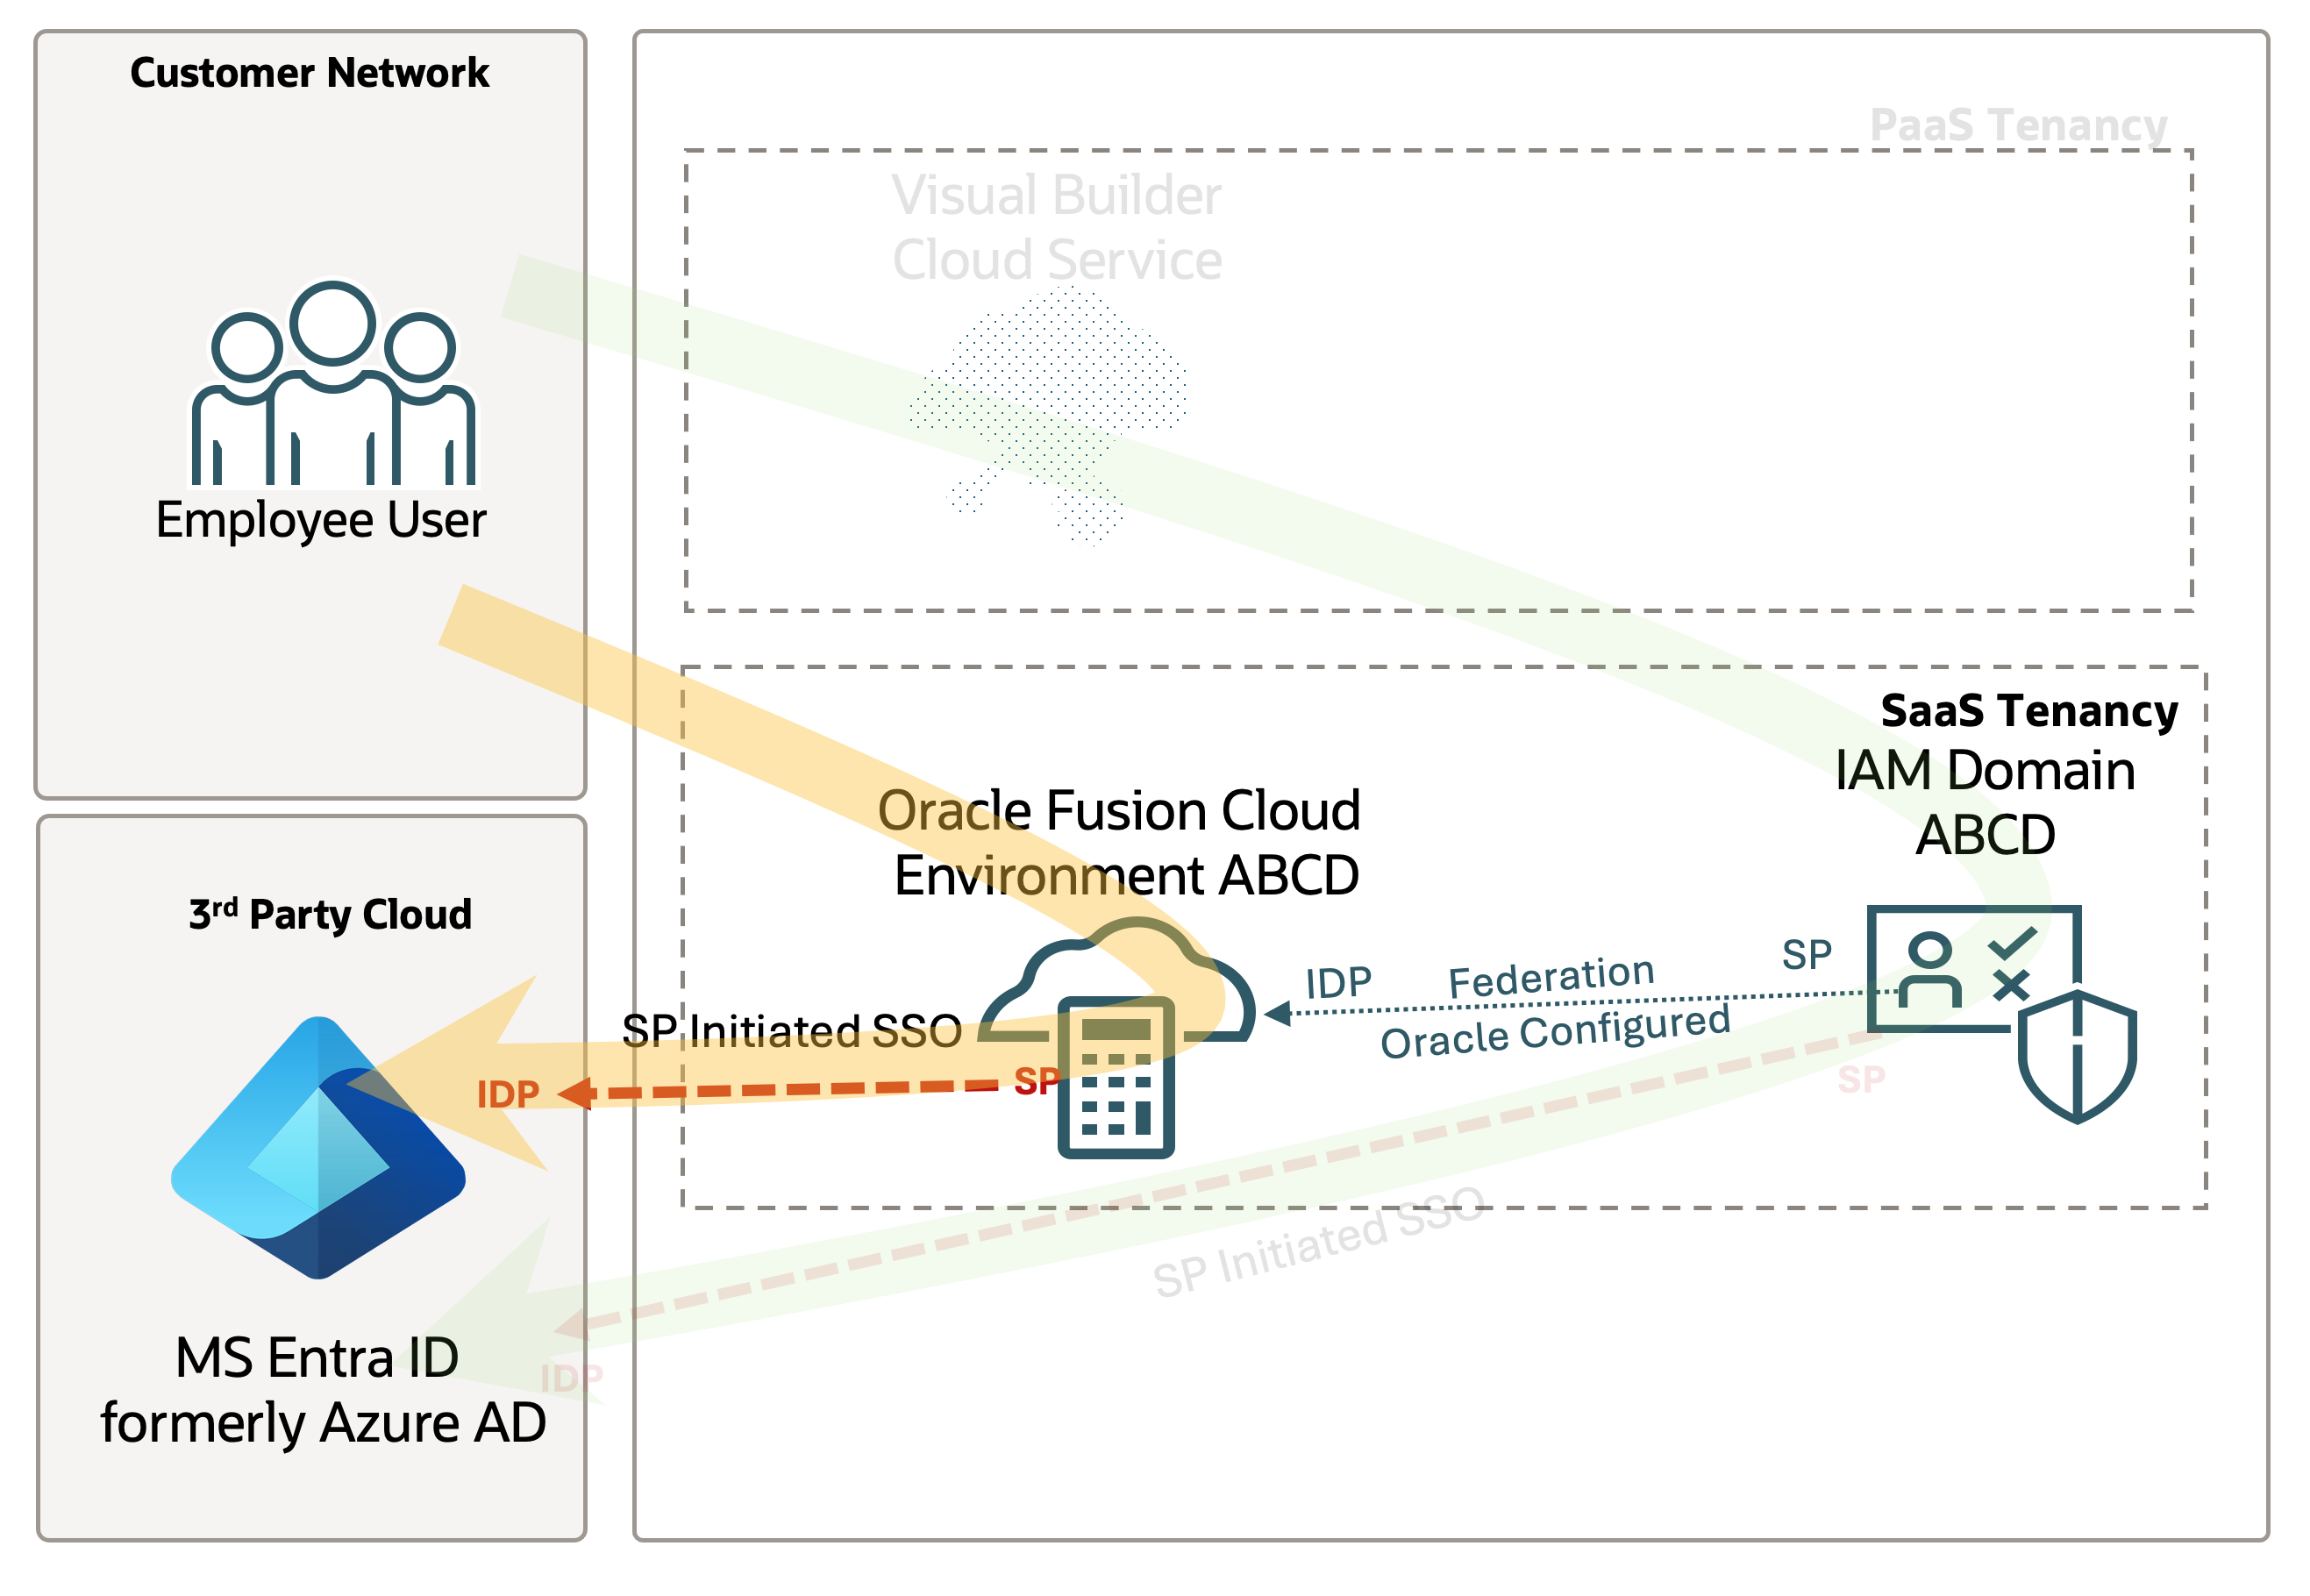
Consider a retail company that uses Microsoft Entra ID as their identity domain. They need to provide Fusion Apps access to their Supply Chain Admin while also granting Storefront employees access to a custom portal that retrieves data from Fusion Apps. However, these employees do not have access to Fusion Apps.
In this scenario, two distinct configurations are required: federating your Oracle Fusion App instance and utilizing the provided Fusion Identity Domain to grant access to non-Fusion users for OCI services used in SaaS Extensions. This will be covered in Part 1 and Part 2 of this blog series.
Note: All Oracle Fusion Cloud Applications environments are now provisioned with the Oracle Cloud Infrastructure Identity and Access Management identity domain. This Fusion Applications identity domain is preintegrated with the inbuilt identity system of Fusion Applications and serves as the identity backbone for several tools of Fusion Applications, such as Oracle Visual Builder Studio. It enables federated SSO and token-based authentication across Fusion Applications. This Fusion Applications identity domain is also available to you to deploy your extensions and integrations.

For more information about the difference between IdP and SP initiated flows, please refer to this blog post : SP Initiated vs idP Initiated SSO
Part 1 : Oracle Fusion Cloud Application SSO with Microsoft Entra ID
In this blog post, we are going to cover the Oracle Fusion SSO configuration using an external IdP, in this case, Microsoft Entra ID.
This scenario is suggested to clients looking to provide Fusion SP and IDP-initiated SSO and provisioning of Entra ID users to Fusion.
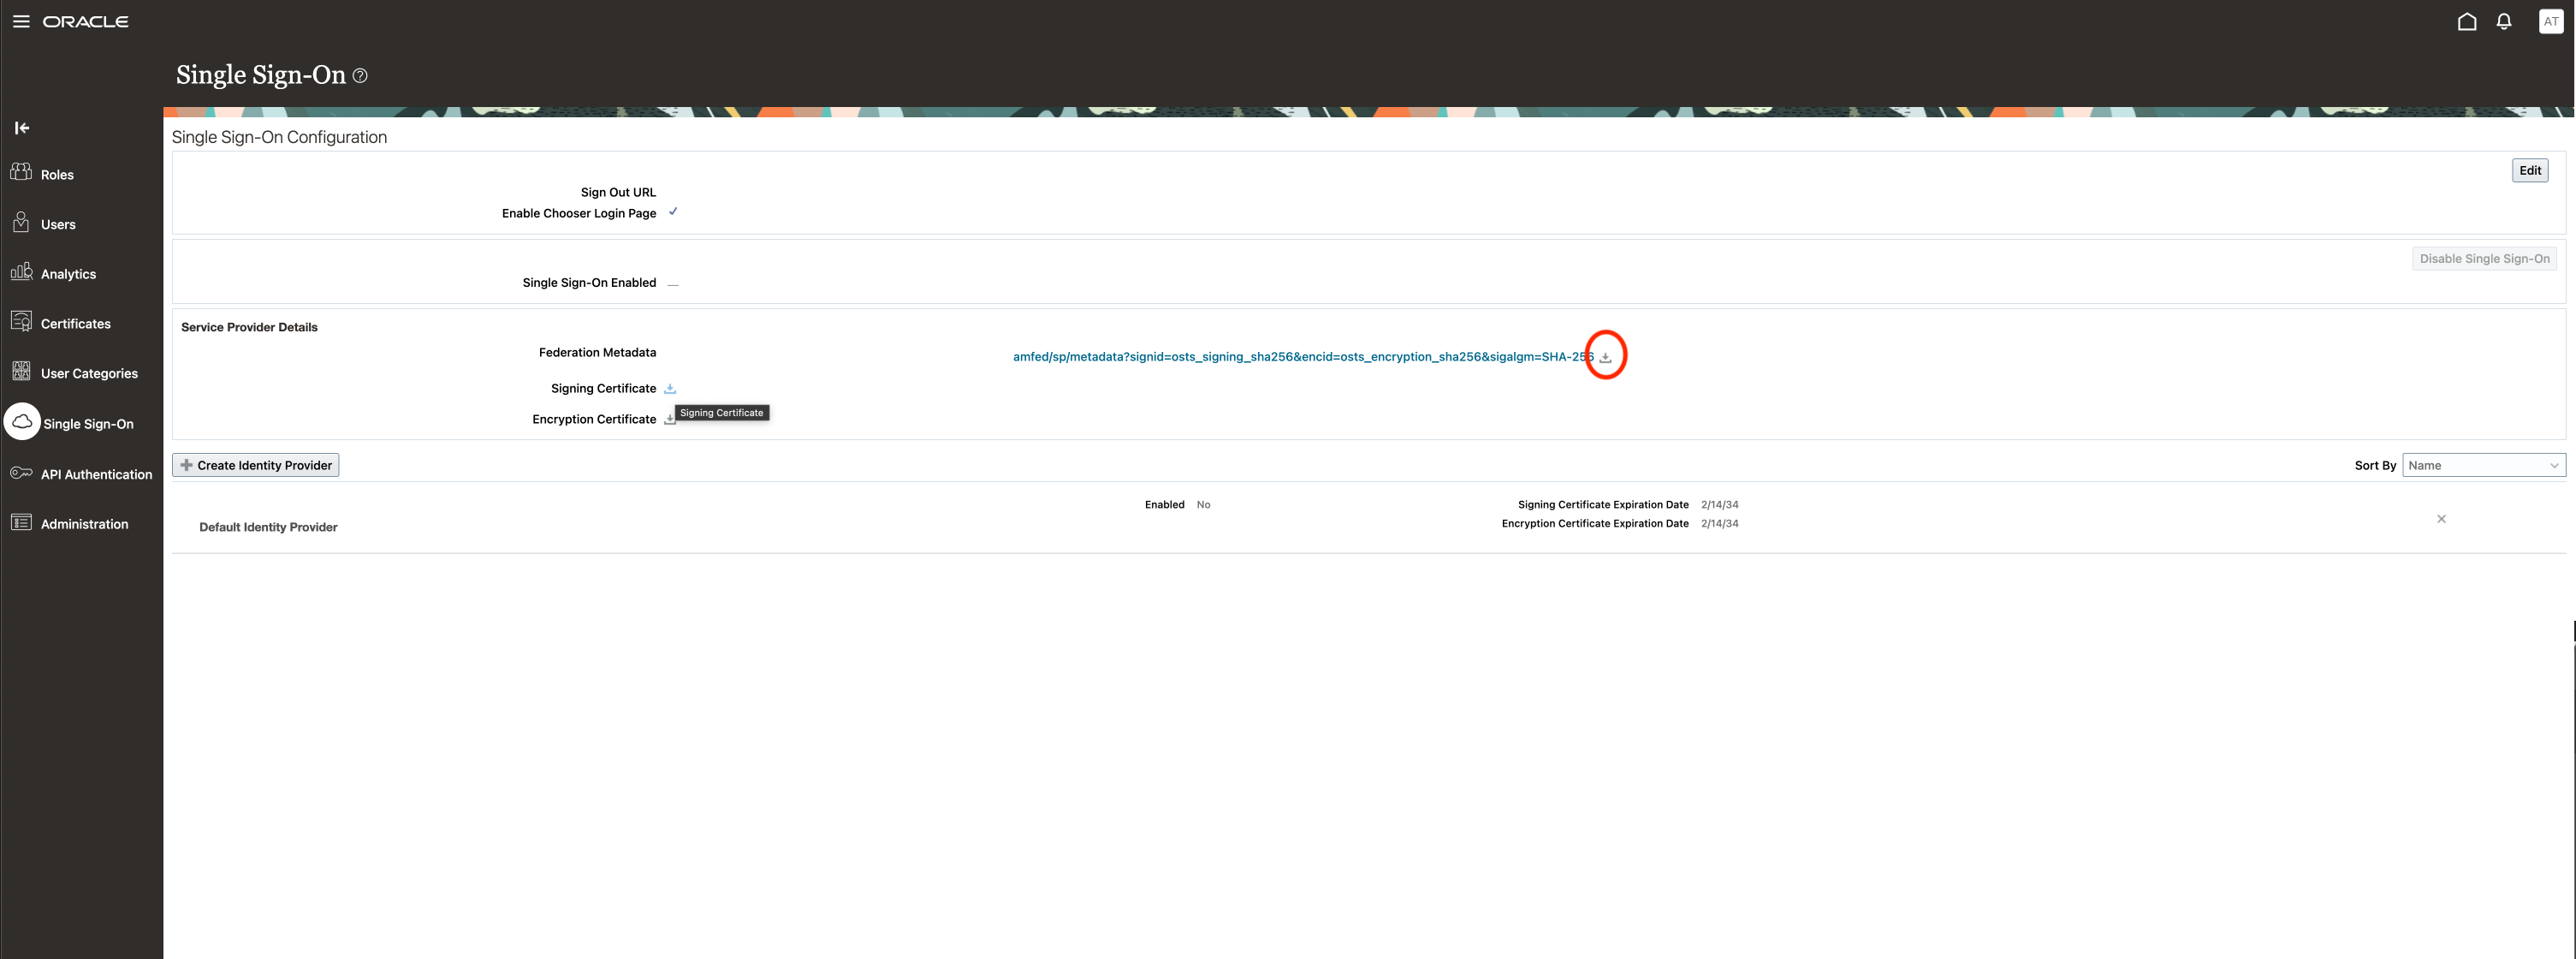
Download Fusion Federation Metadata
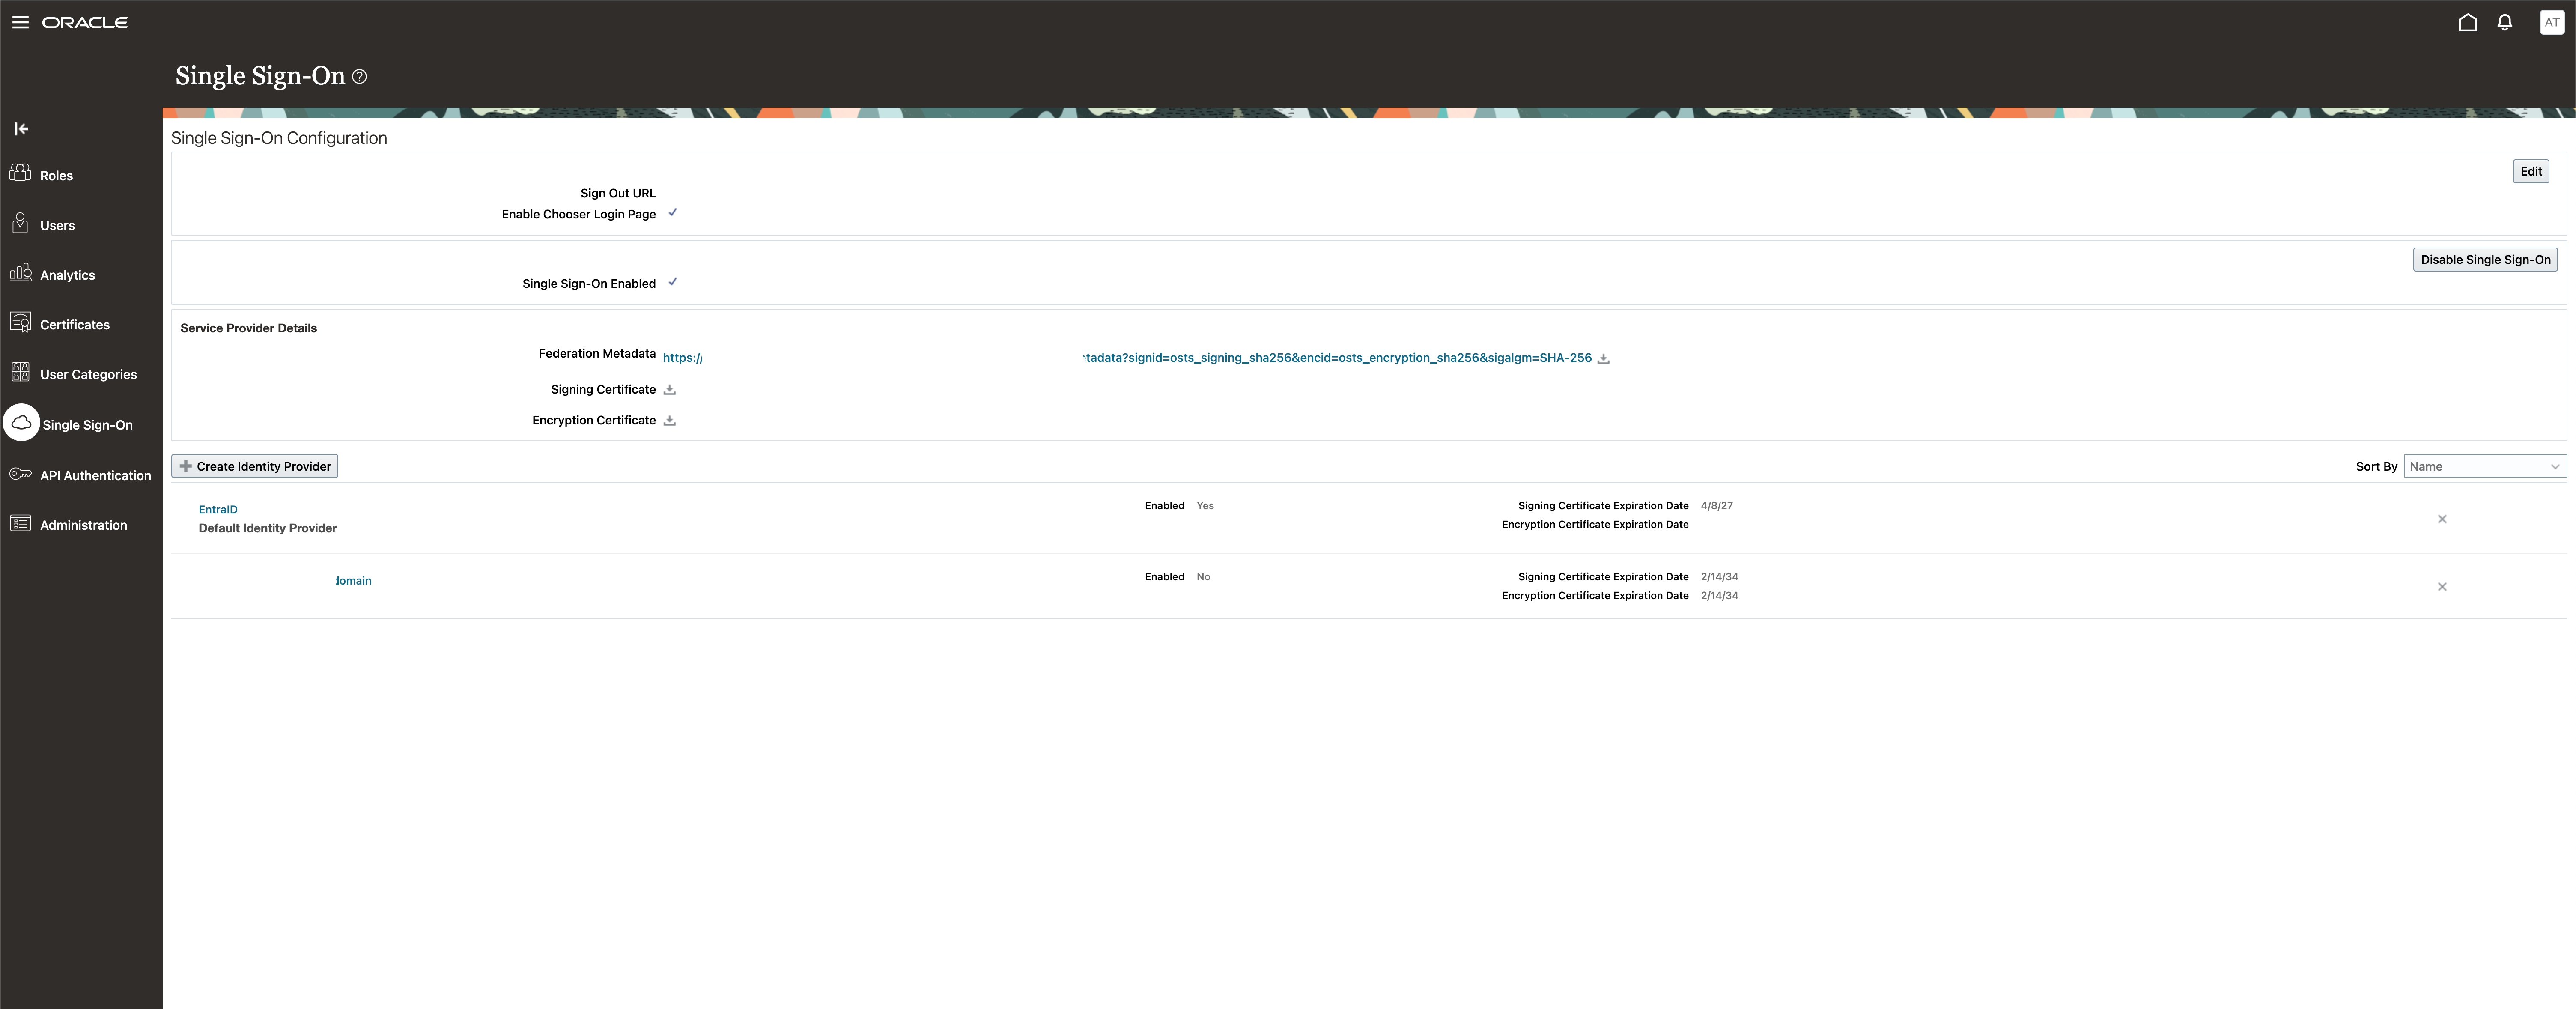
On your Fusion instance, go to the Security Console, Single Sign-0n, and download and store the federation metadata that will be used in the next steps.
Entra ID Enterprise Application configuration
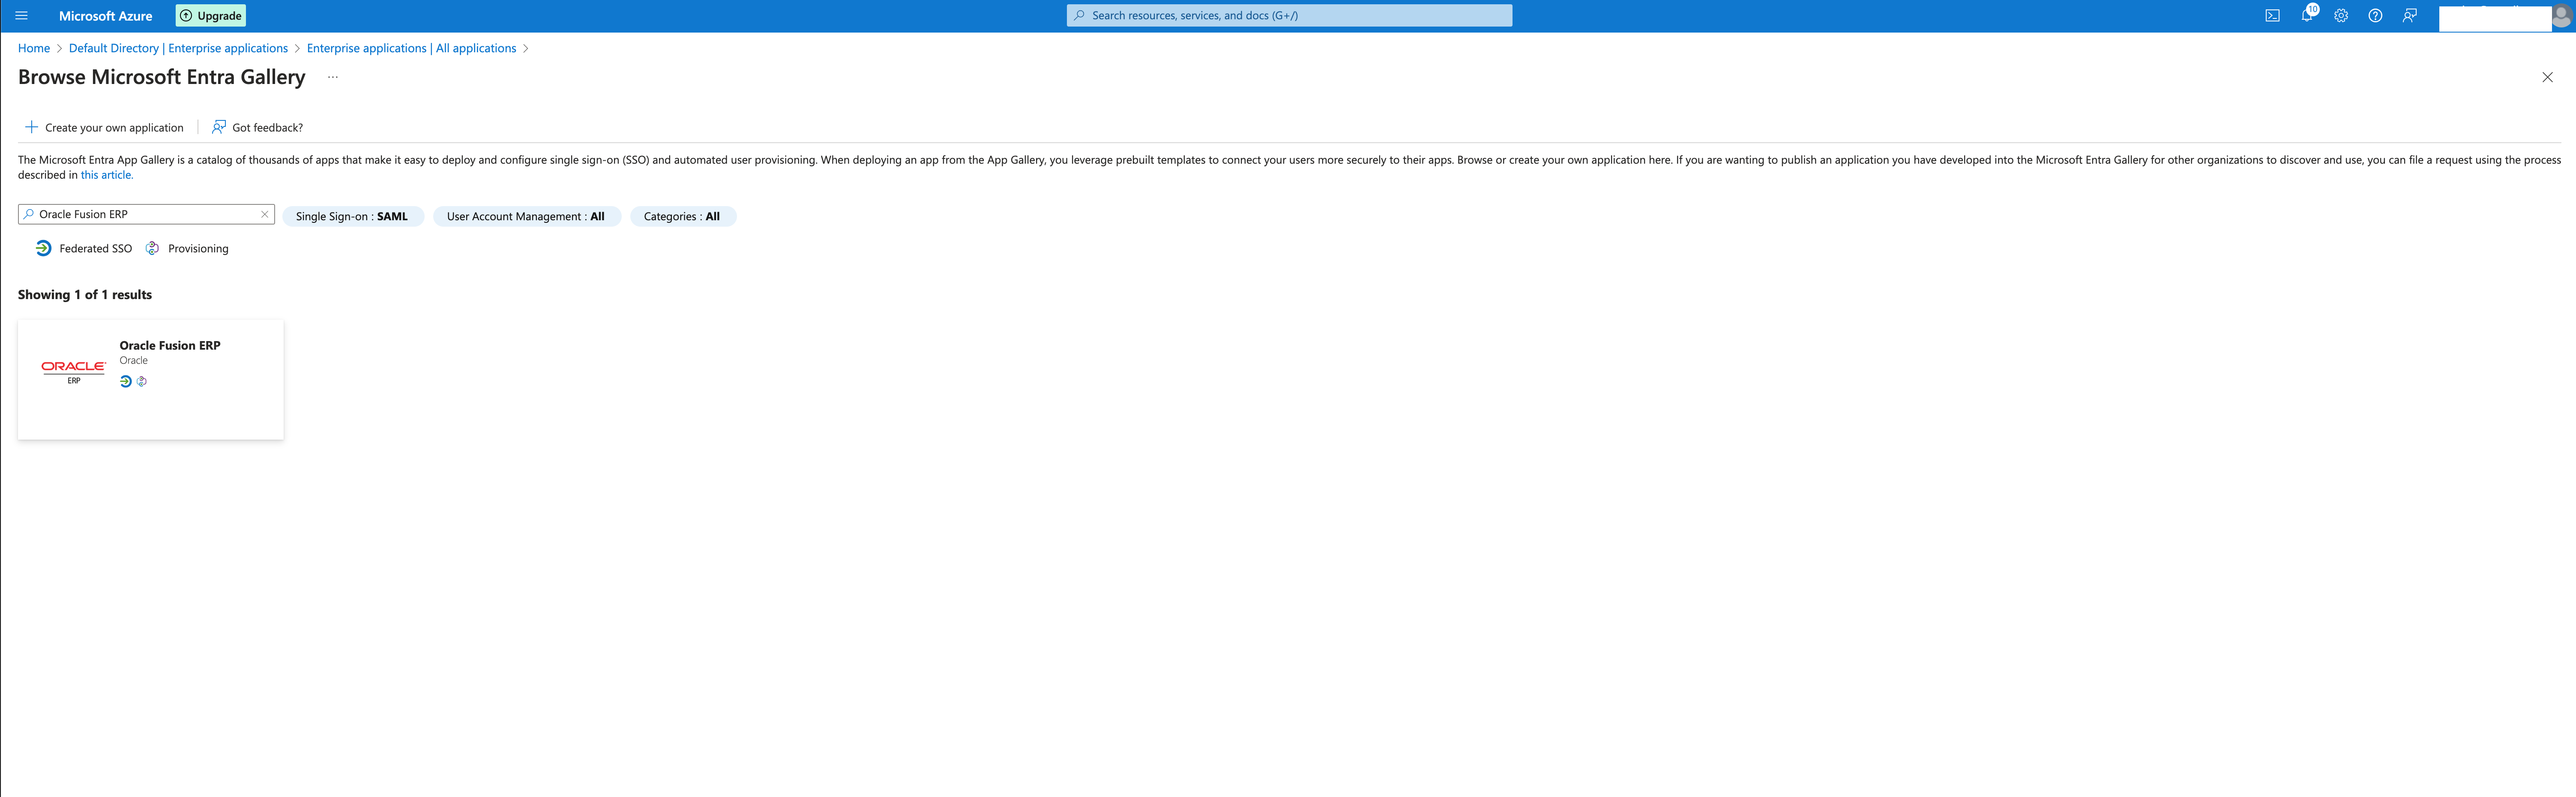
Oracle provides an Enterprise Application on the Entra application gallery that is used to configure the Federation and Automated Provisioning.
Login to Azure, go to Entra ID and select the domain you want to set up the application.
Select Enterprise application and click to add a new one, on the gallery please search for Oracle Fusion ERP ( this application be used for any Fusion application, not only the ERP ).
Select the application and provide the name of your Fusion instance and click Create.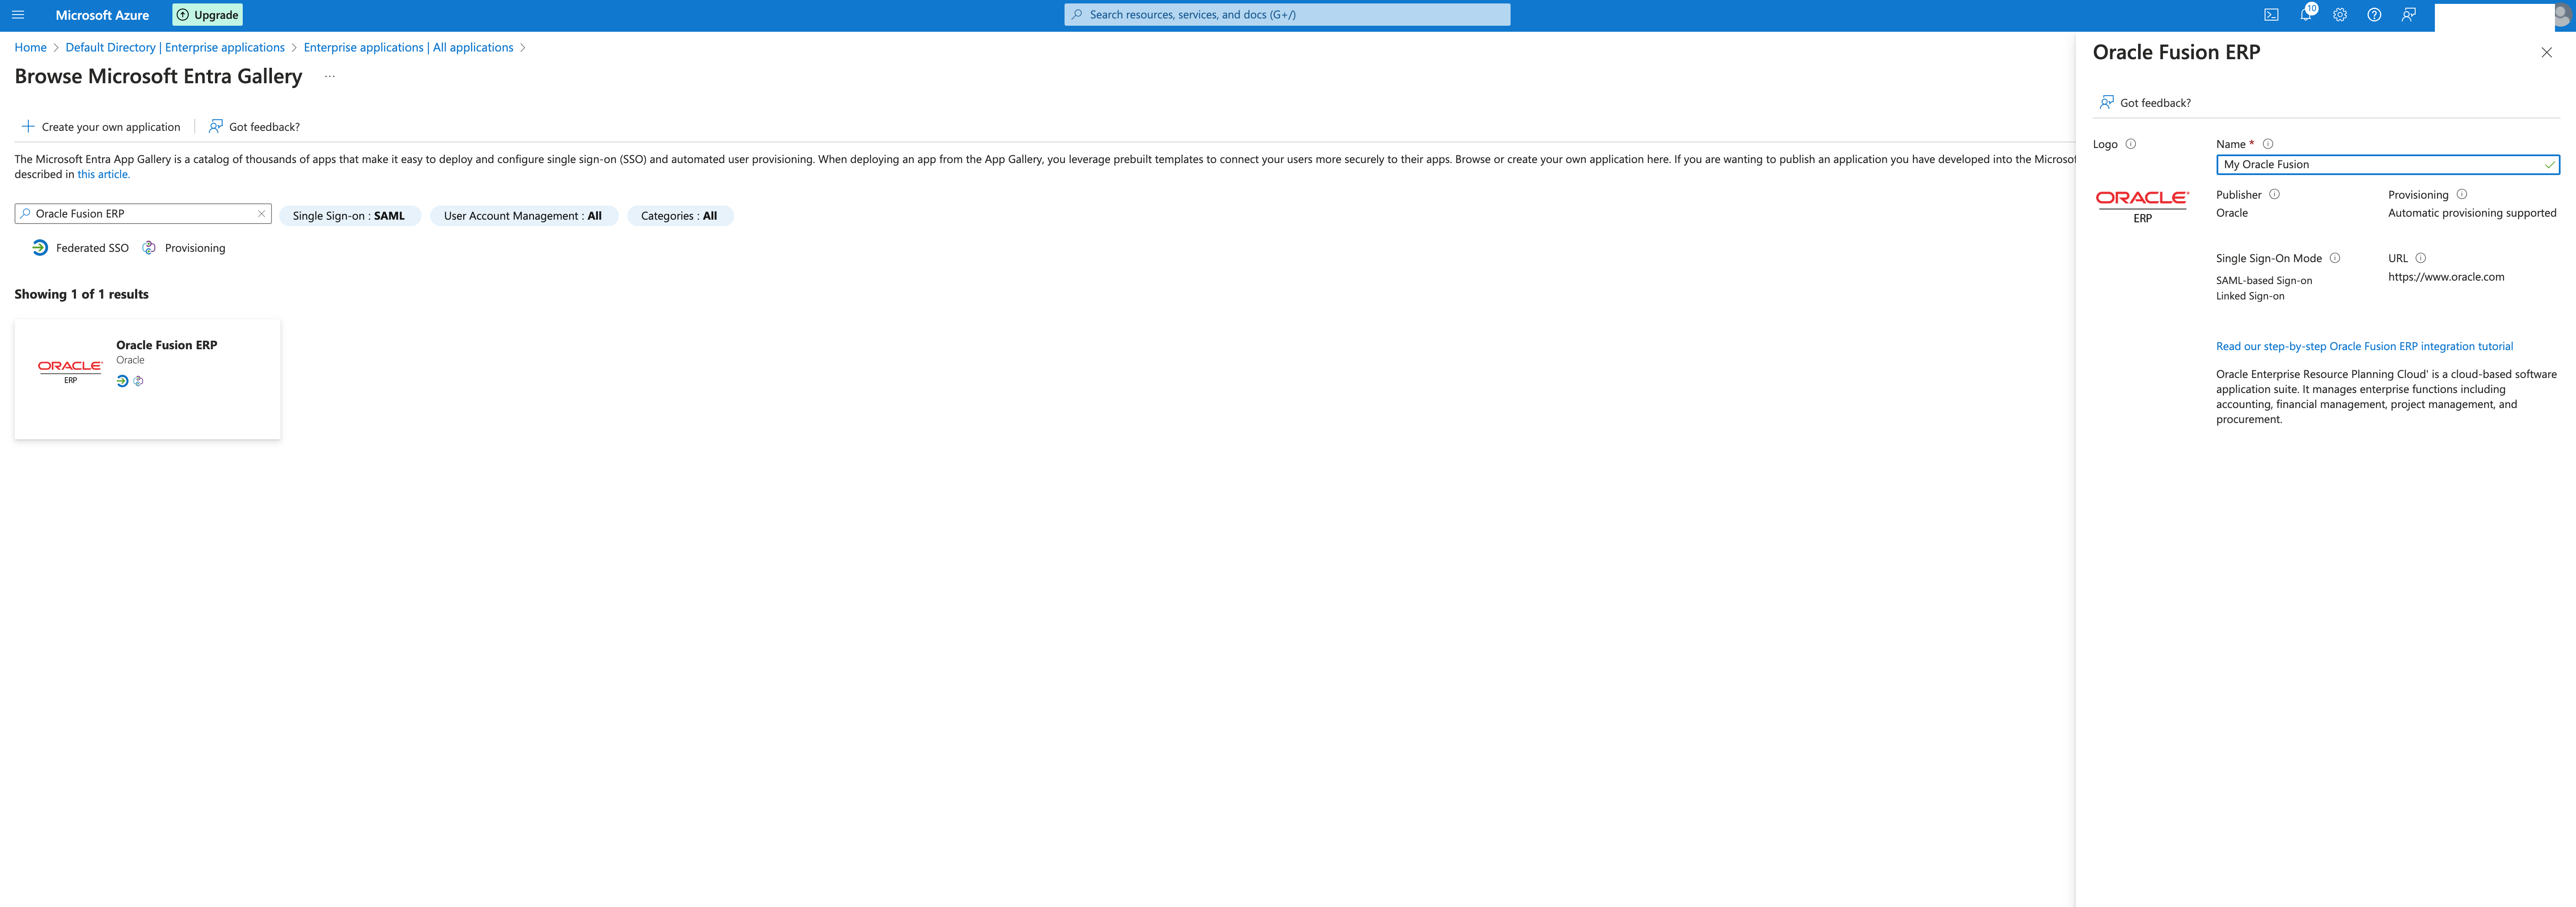
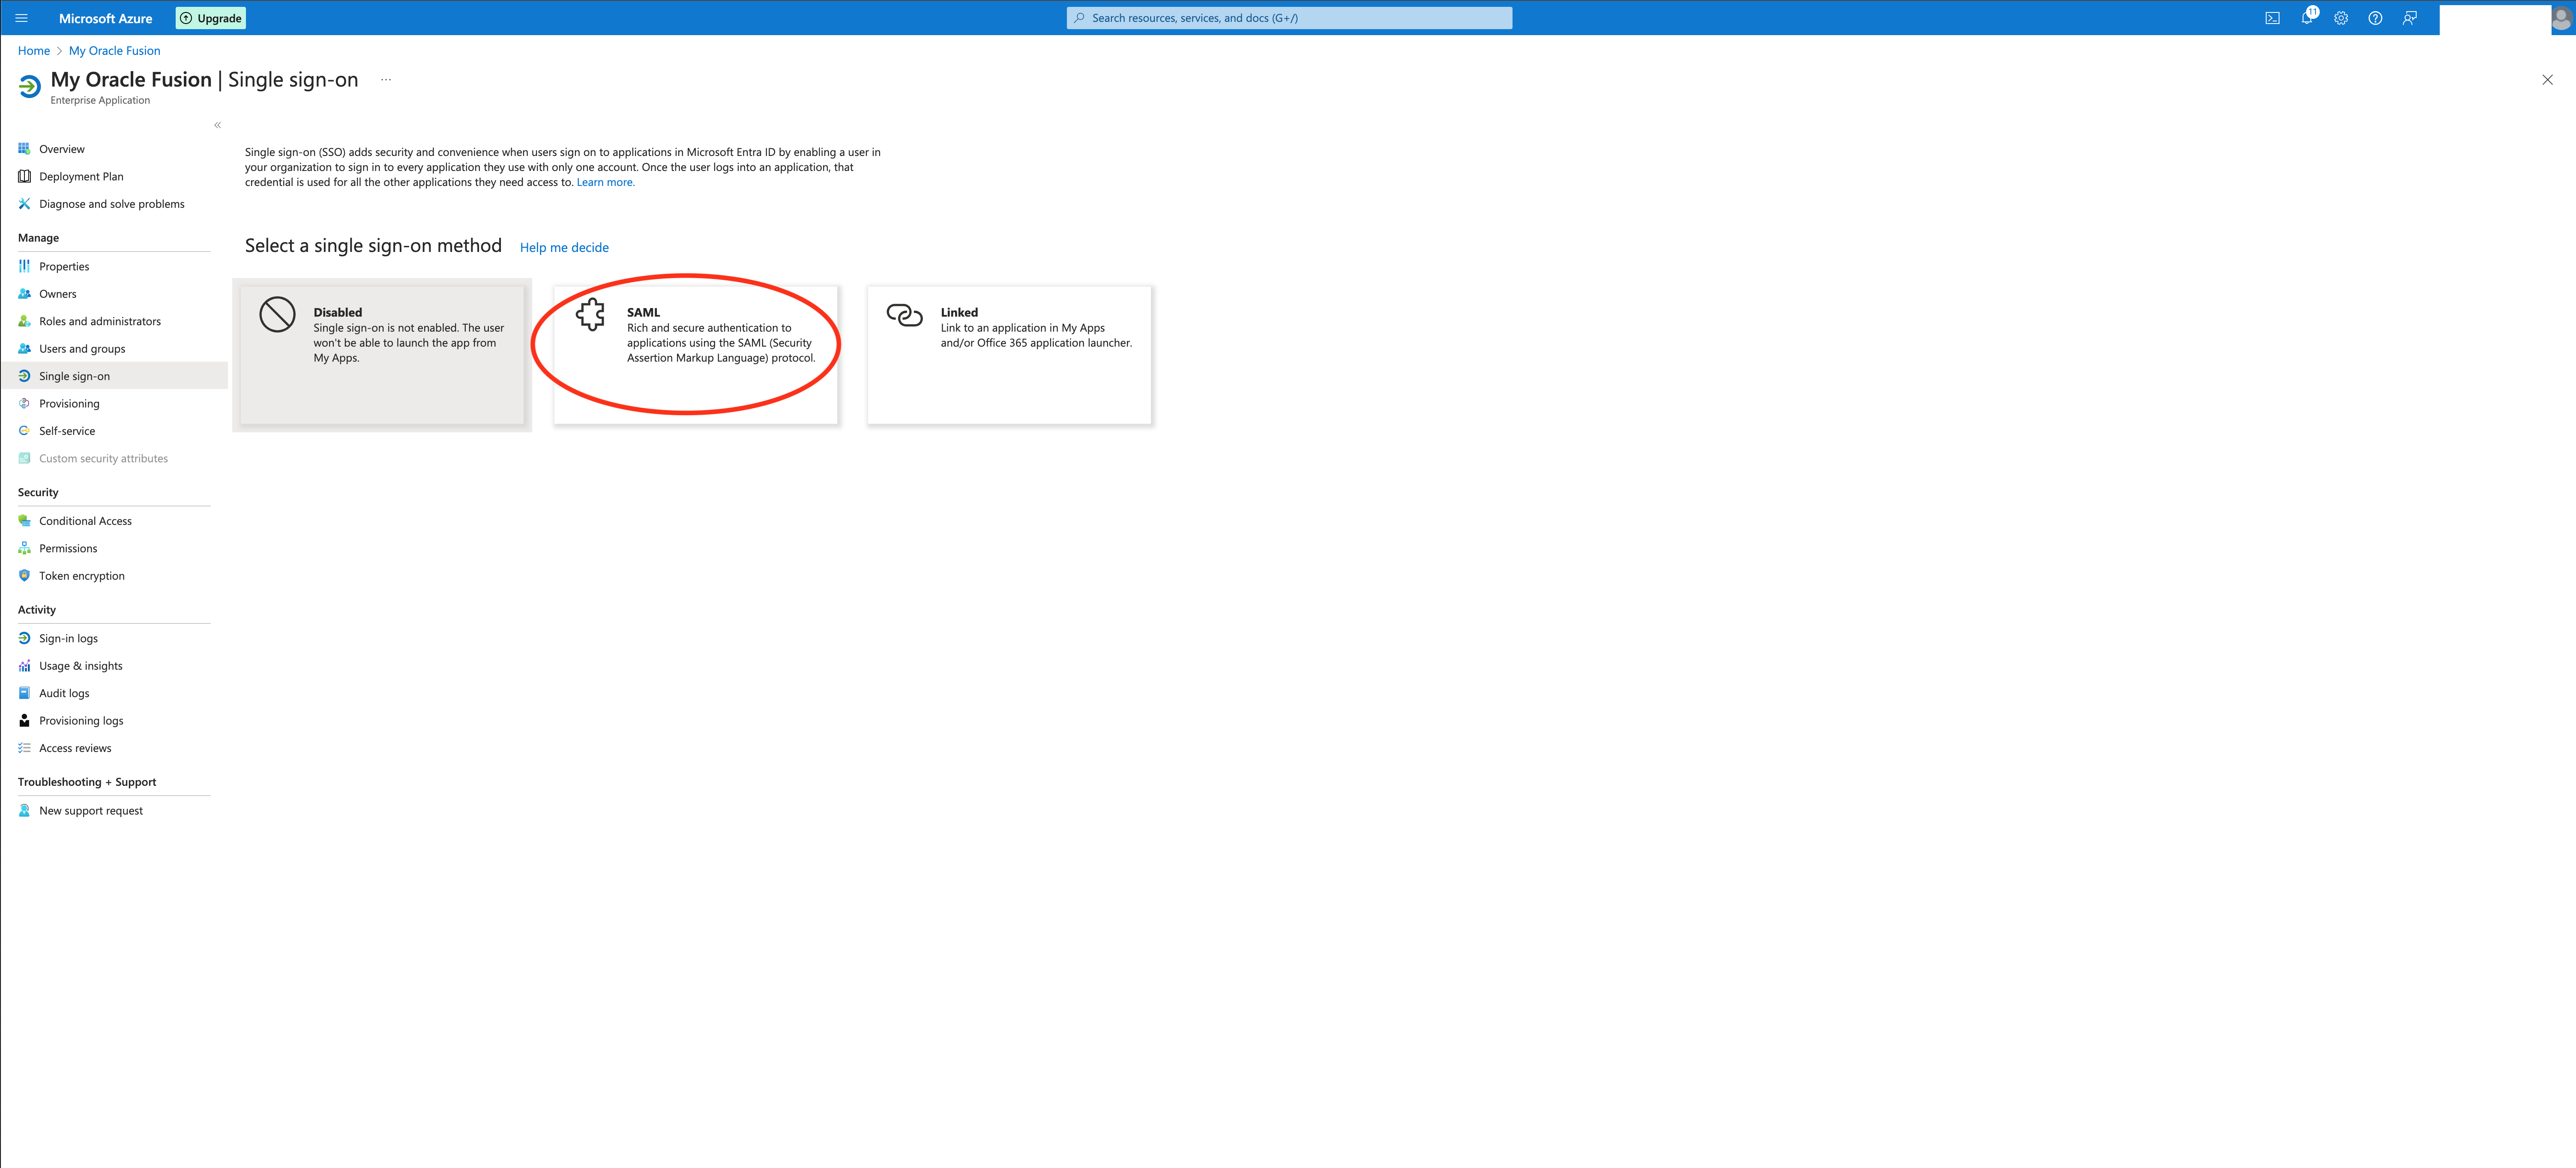
The application will be created and you can select the SAML option :
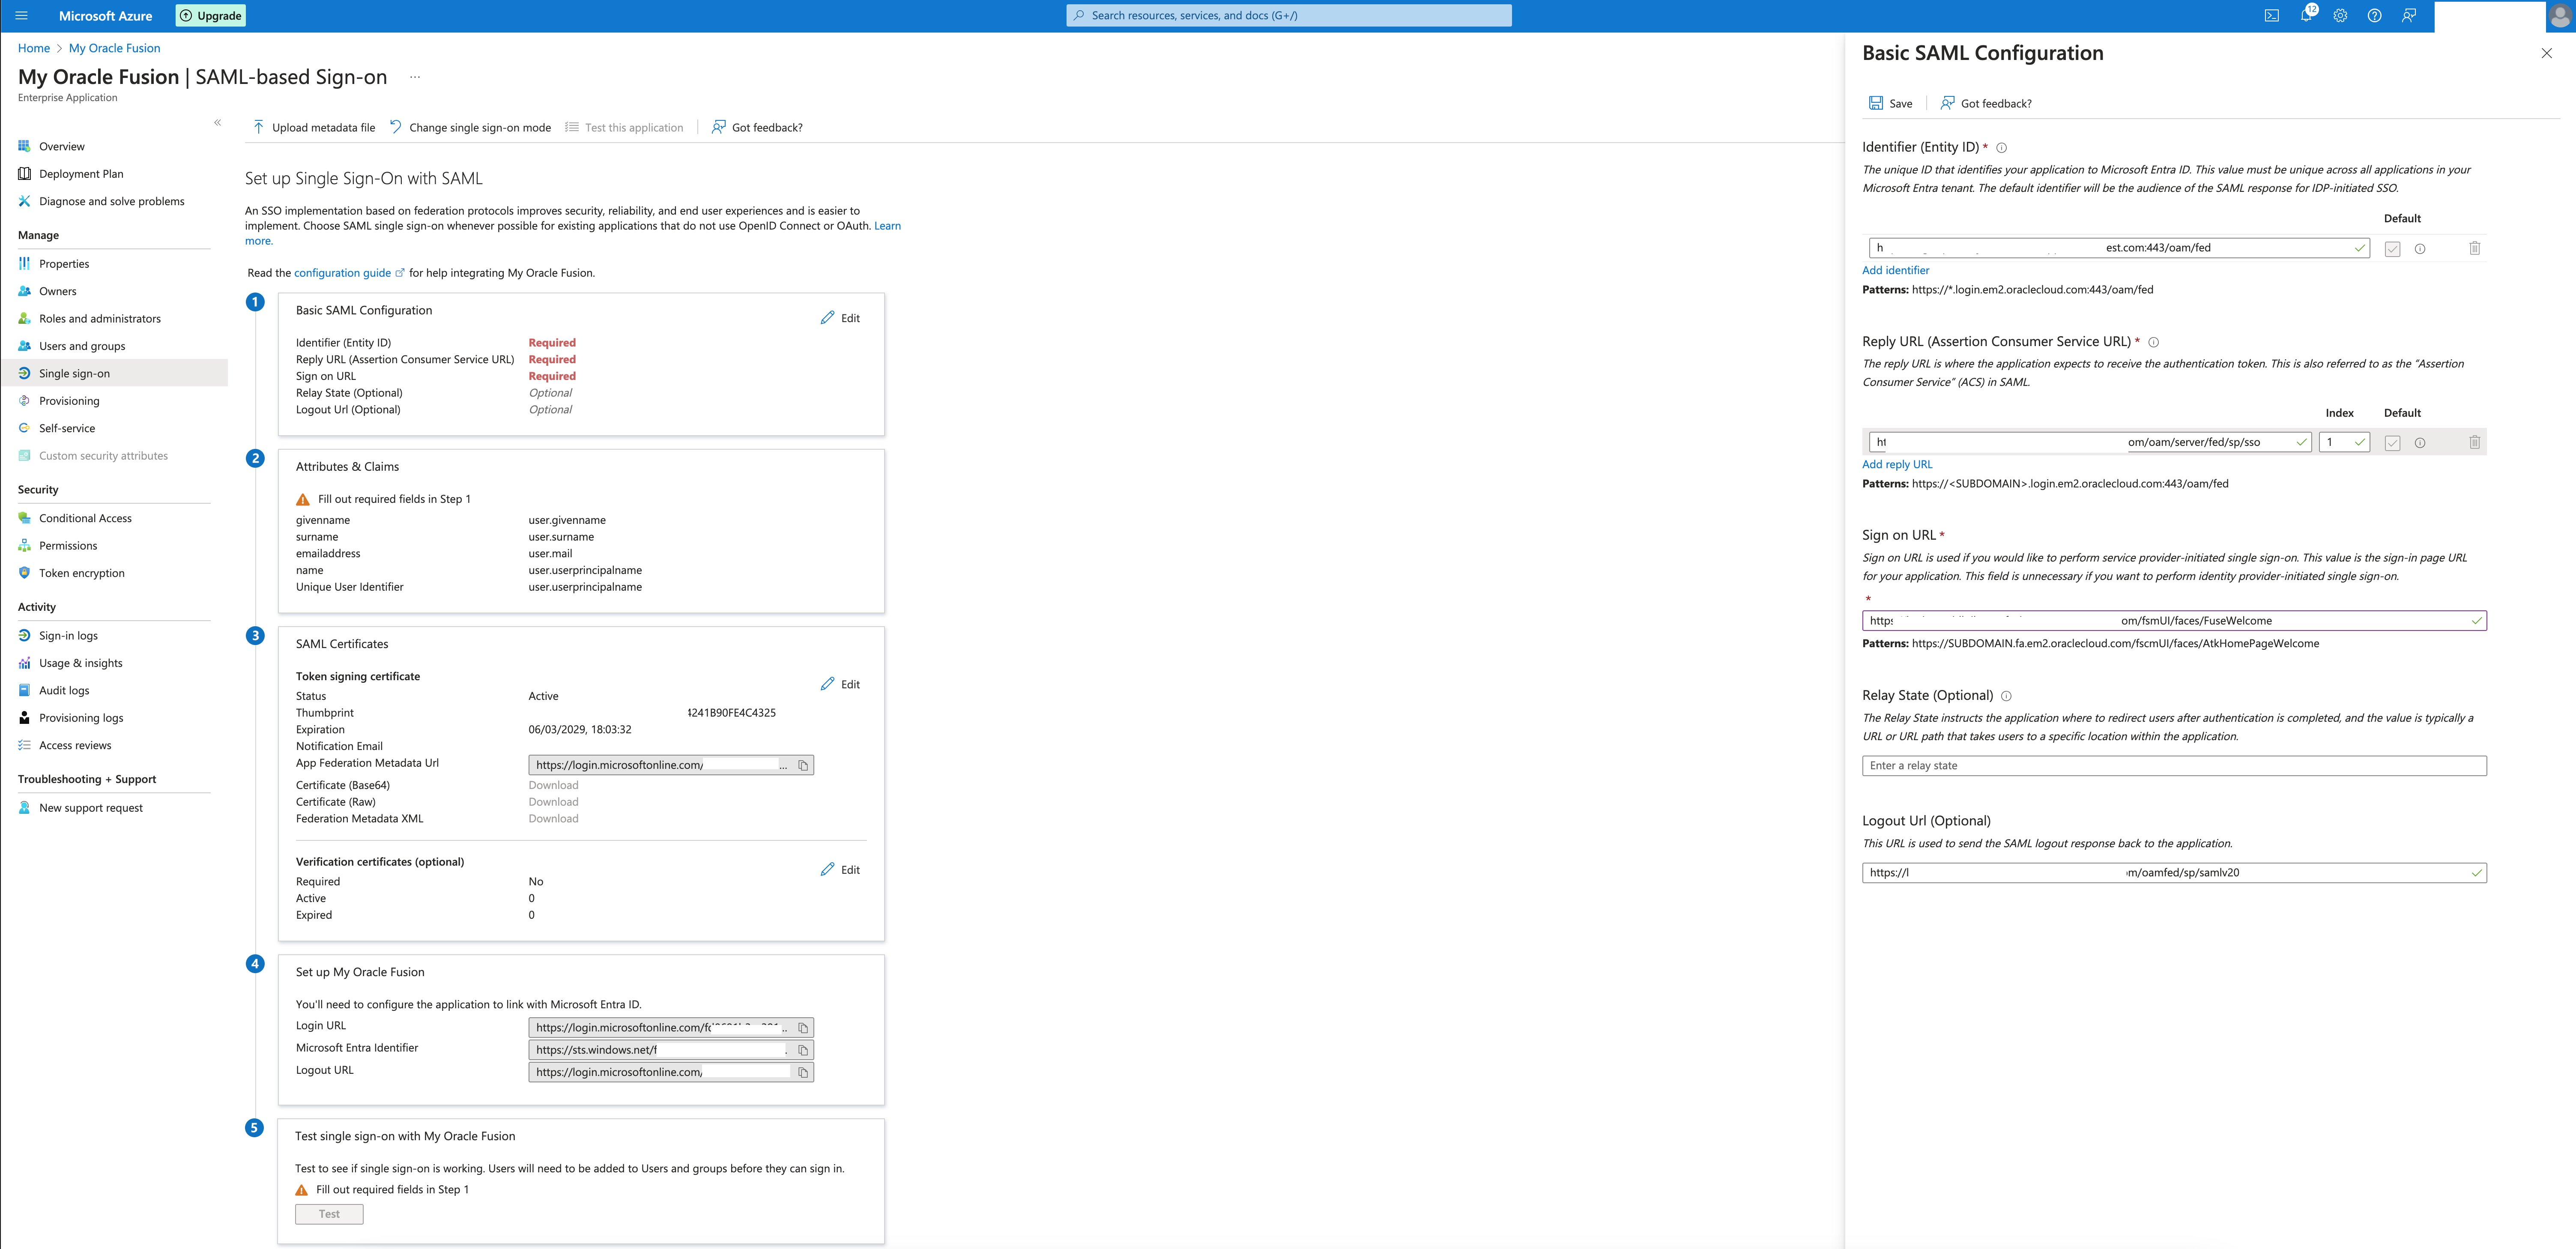
The next step is to upload the Fusion Federation Metadata file downloaded in the first step :

Identifier and Reply URL are filled with the information from the metadata file, we need to provide the Sign-on and Logout URLs:
Sign On URL : https://<your fusion apps url>/fscmUI/faces/FuseWelcome
Logout URL : https://<your fusion apps url>/oamfed/sp/samlv20
Save the config
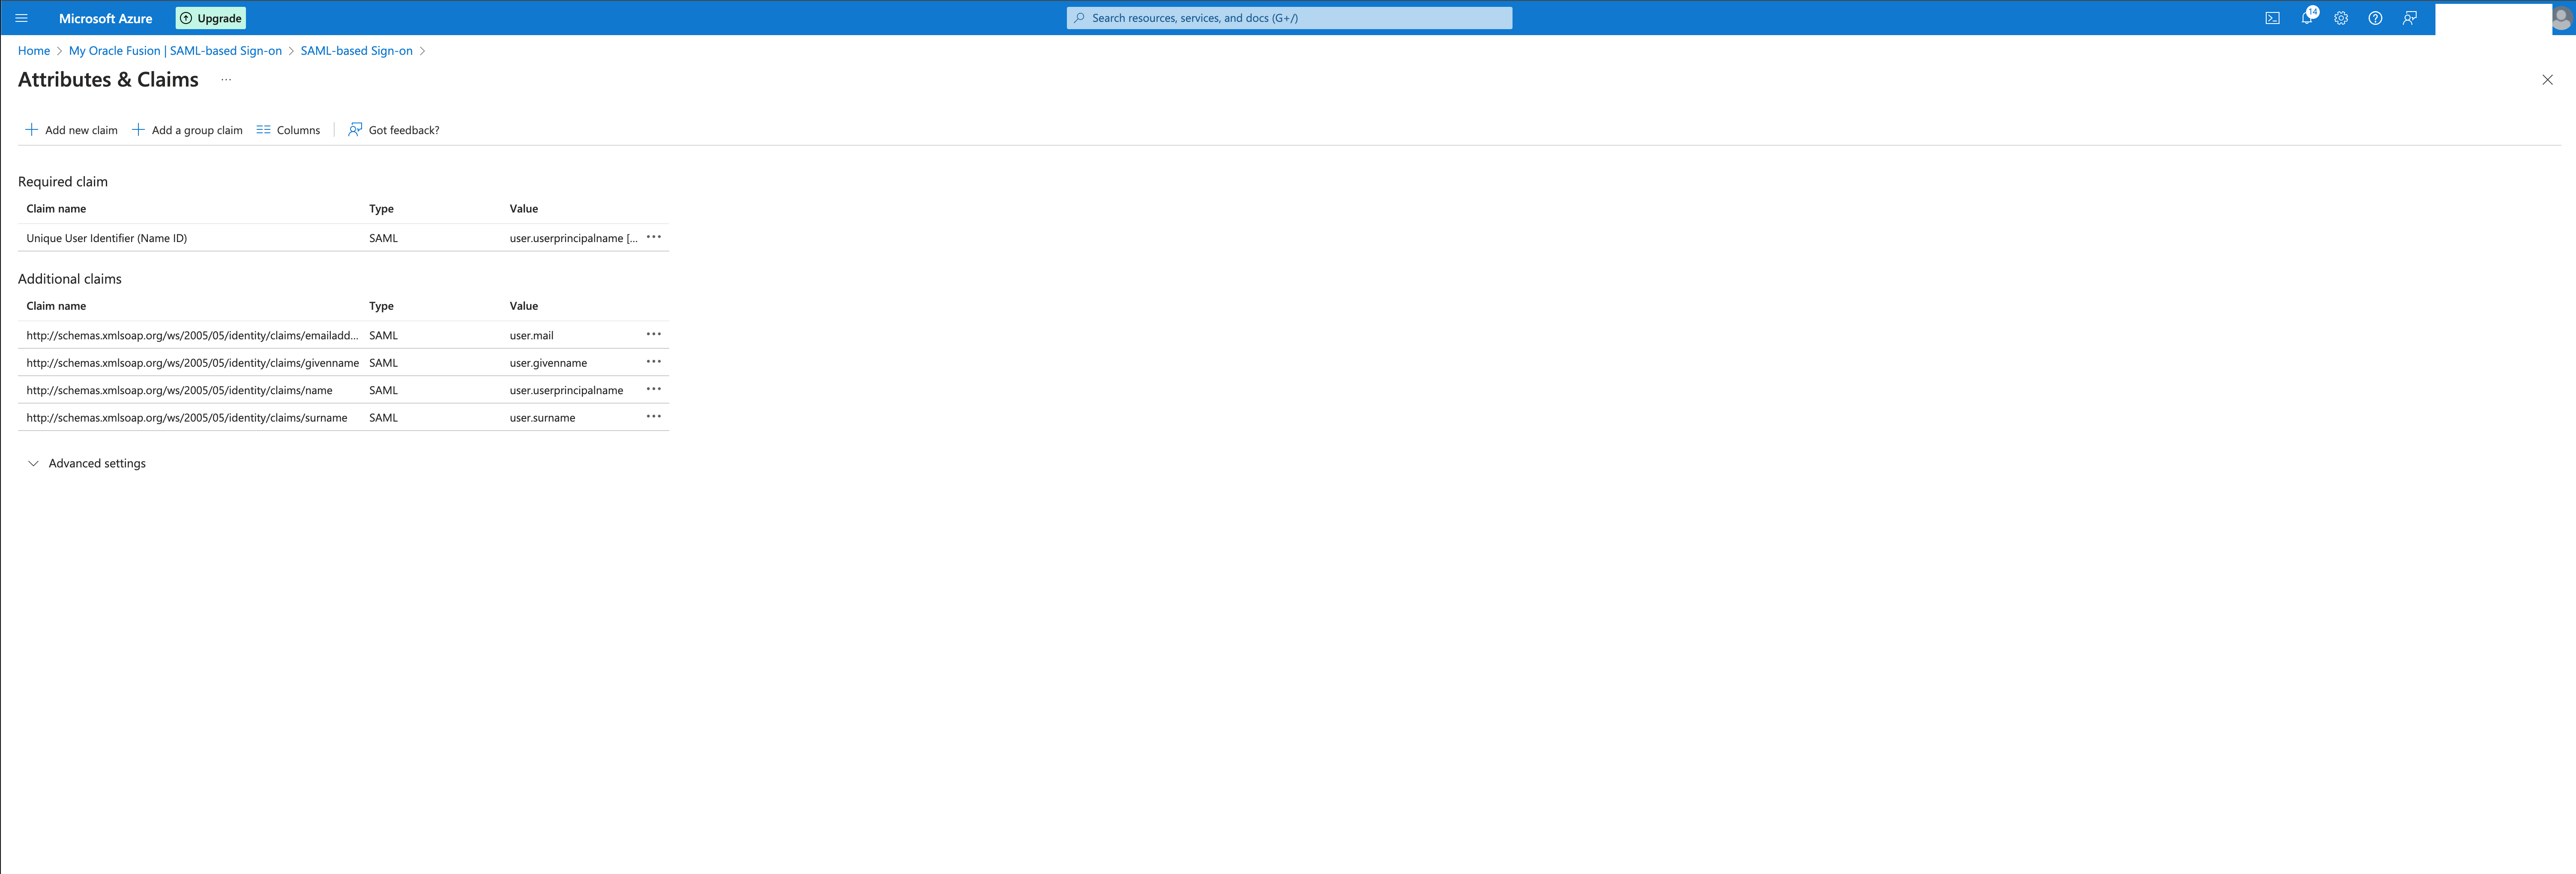
After providing the Basic info, you can proceed to edit the Attributes and Claims if needed.
The default configuration will map the Entra ID user’s principal domain to the Fusion user.
Download and store the Federation Metadata XML under SAML certifications that will be used later.
Now, go to Users and Groups and add the users/groups that will have access to your Fusion Instance.
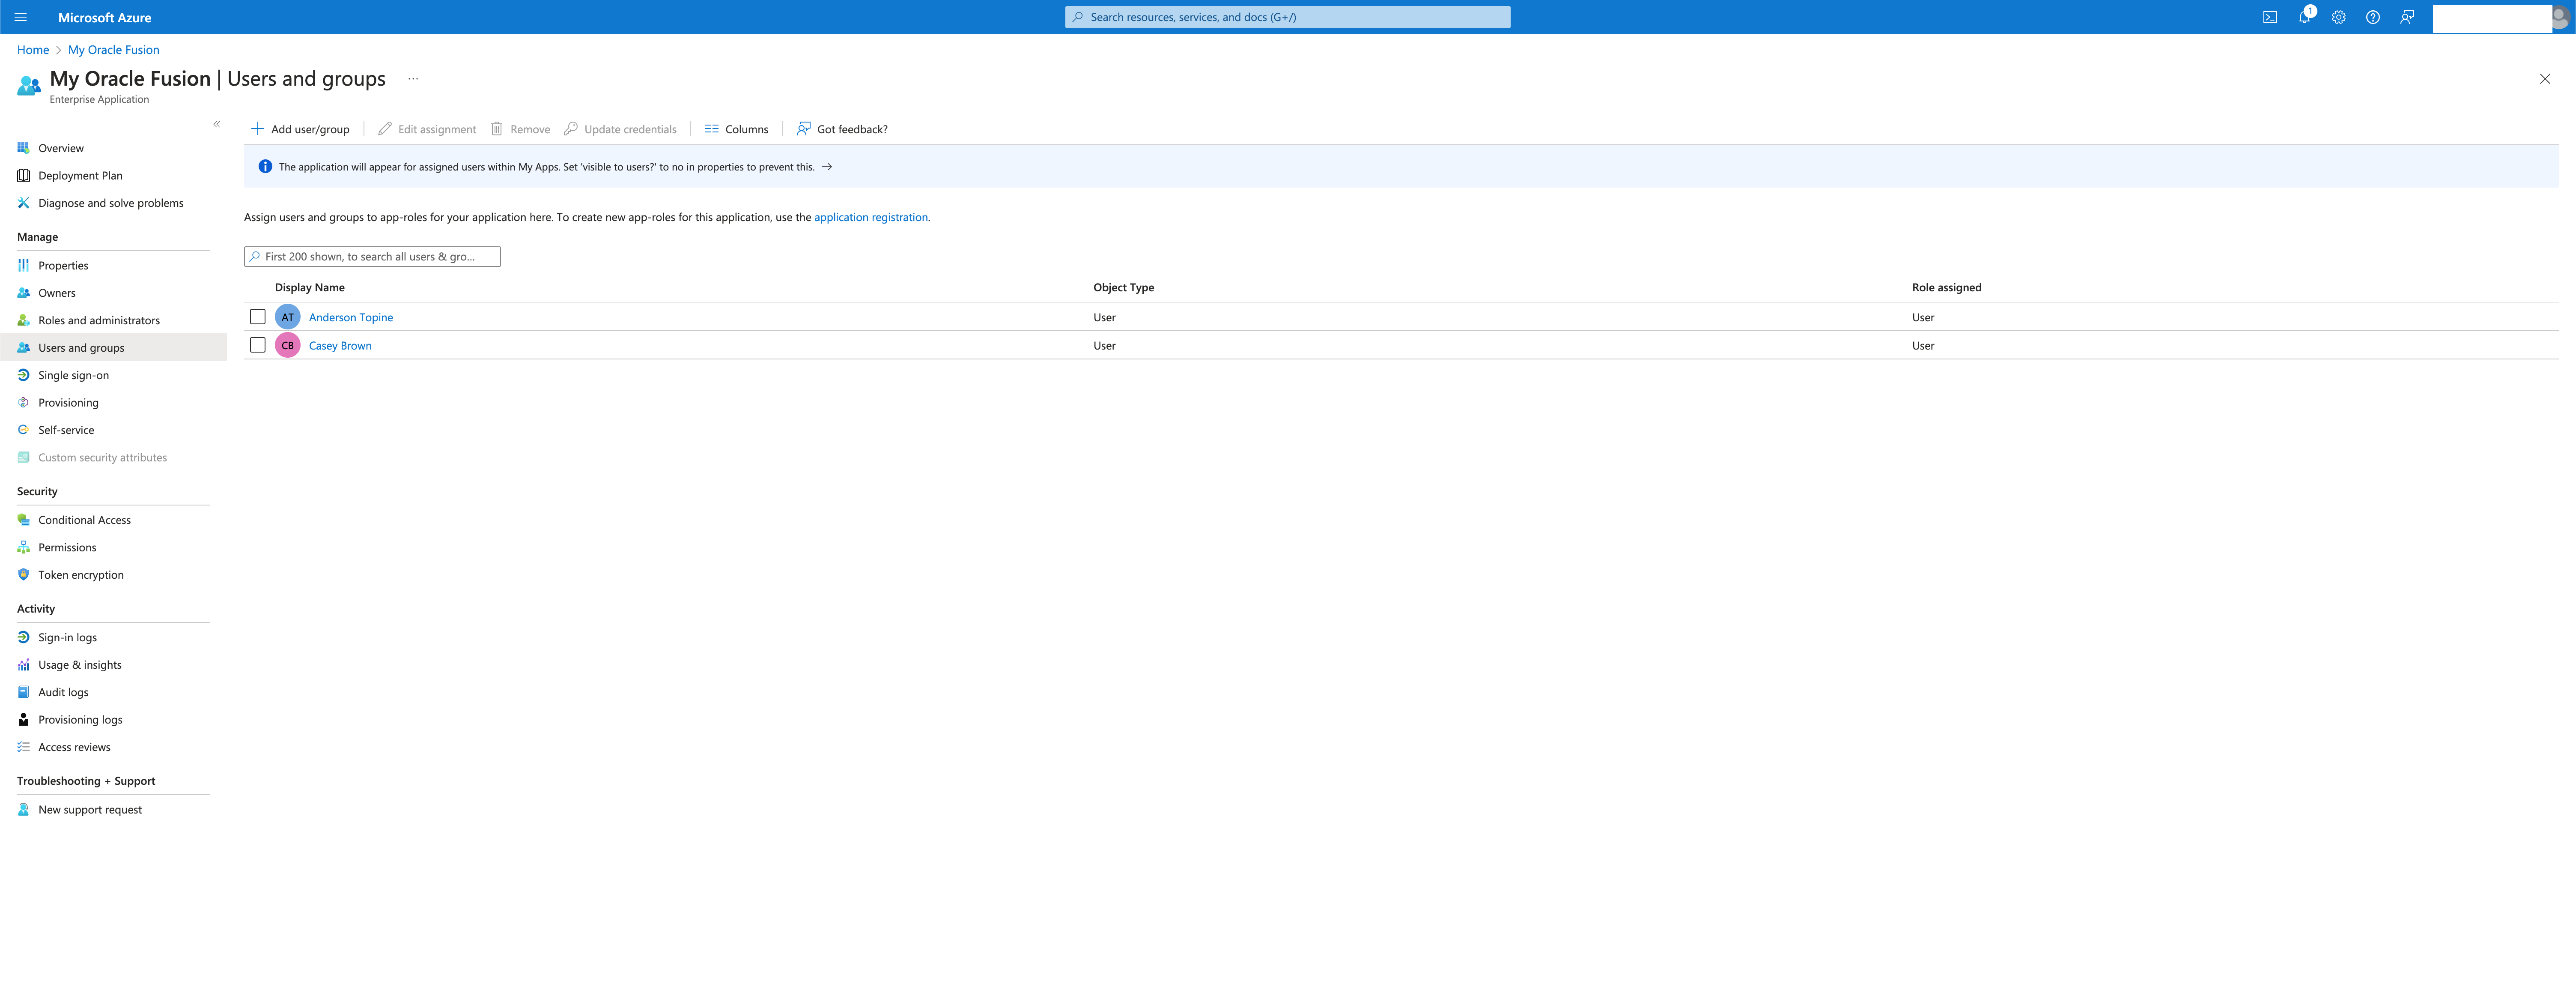
Now, we have the SSO configured on the domain and the list of users authorized to use the application.
Auto Provisioning
Once the SSO config is ready, we need to set up the provisioning to sync Fusion and your Entra ID Domain.
Select Provisioning on your Enterprise Application and get started.
Set the provisioning mode to Automatic and provide the tenant and admin user information.
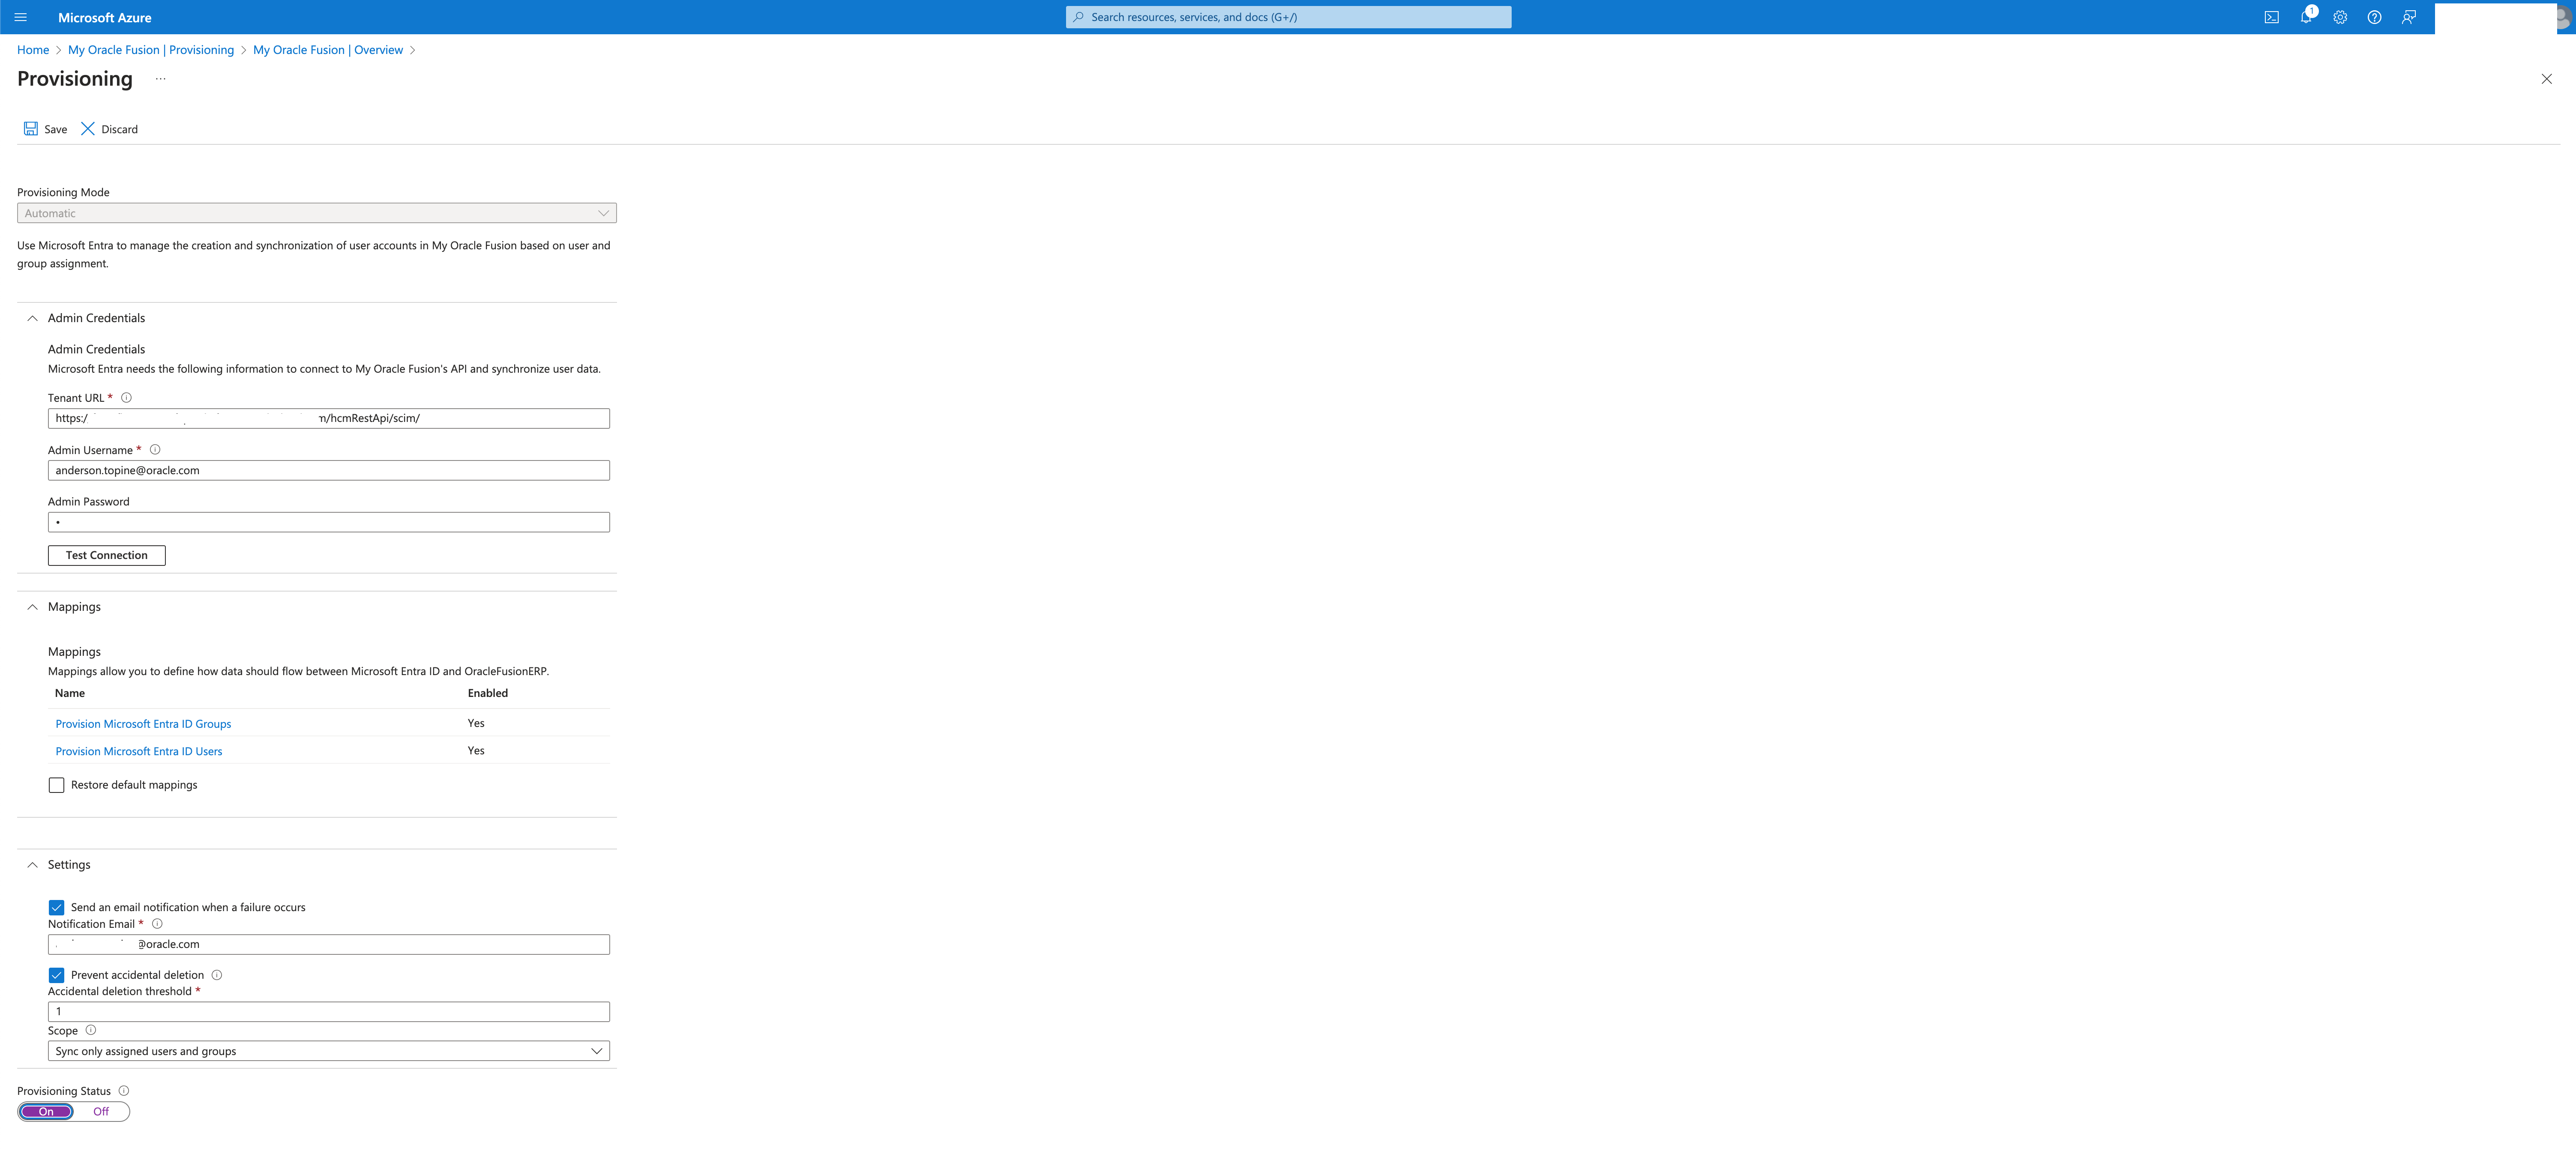
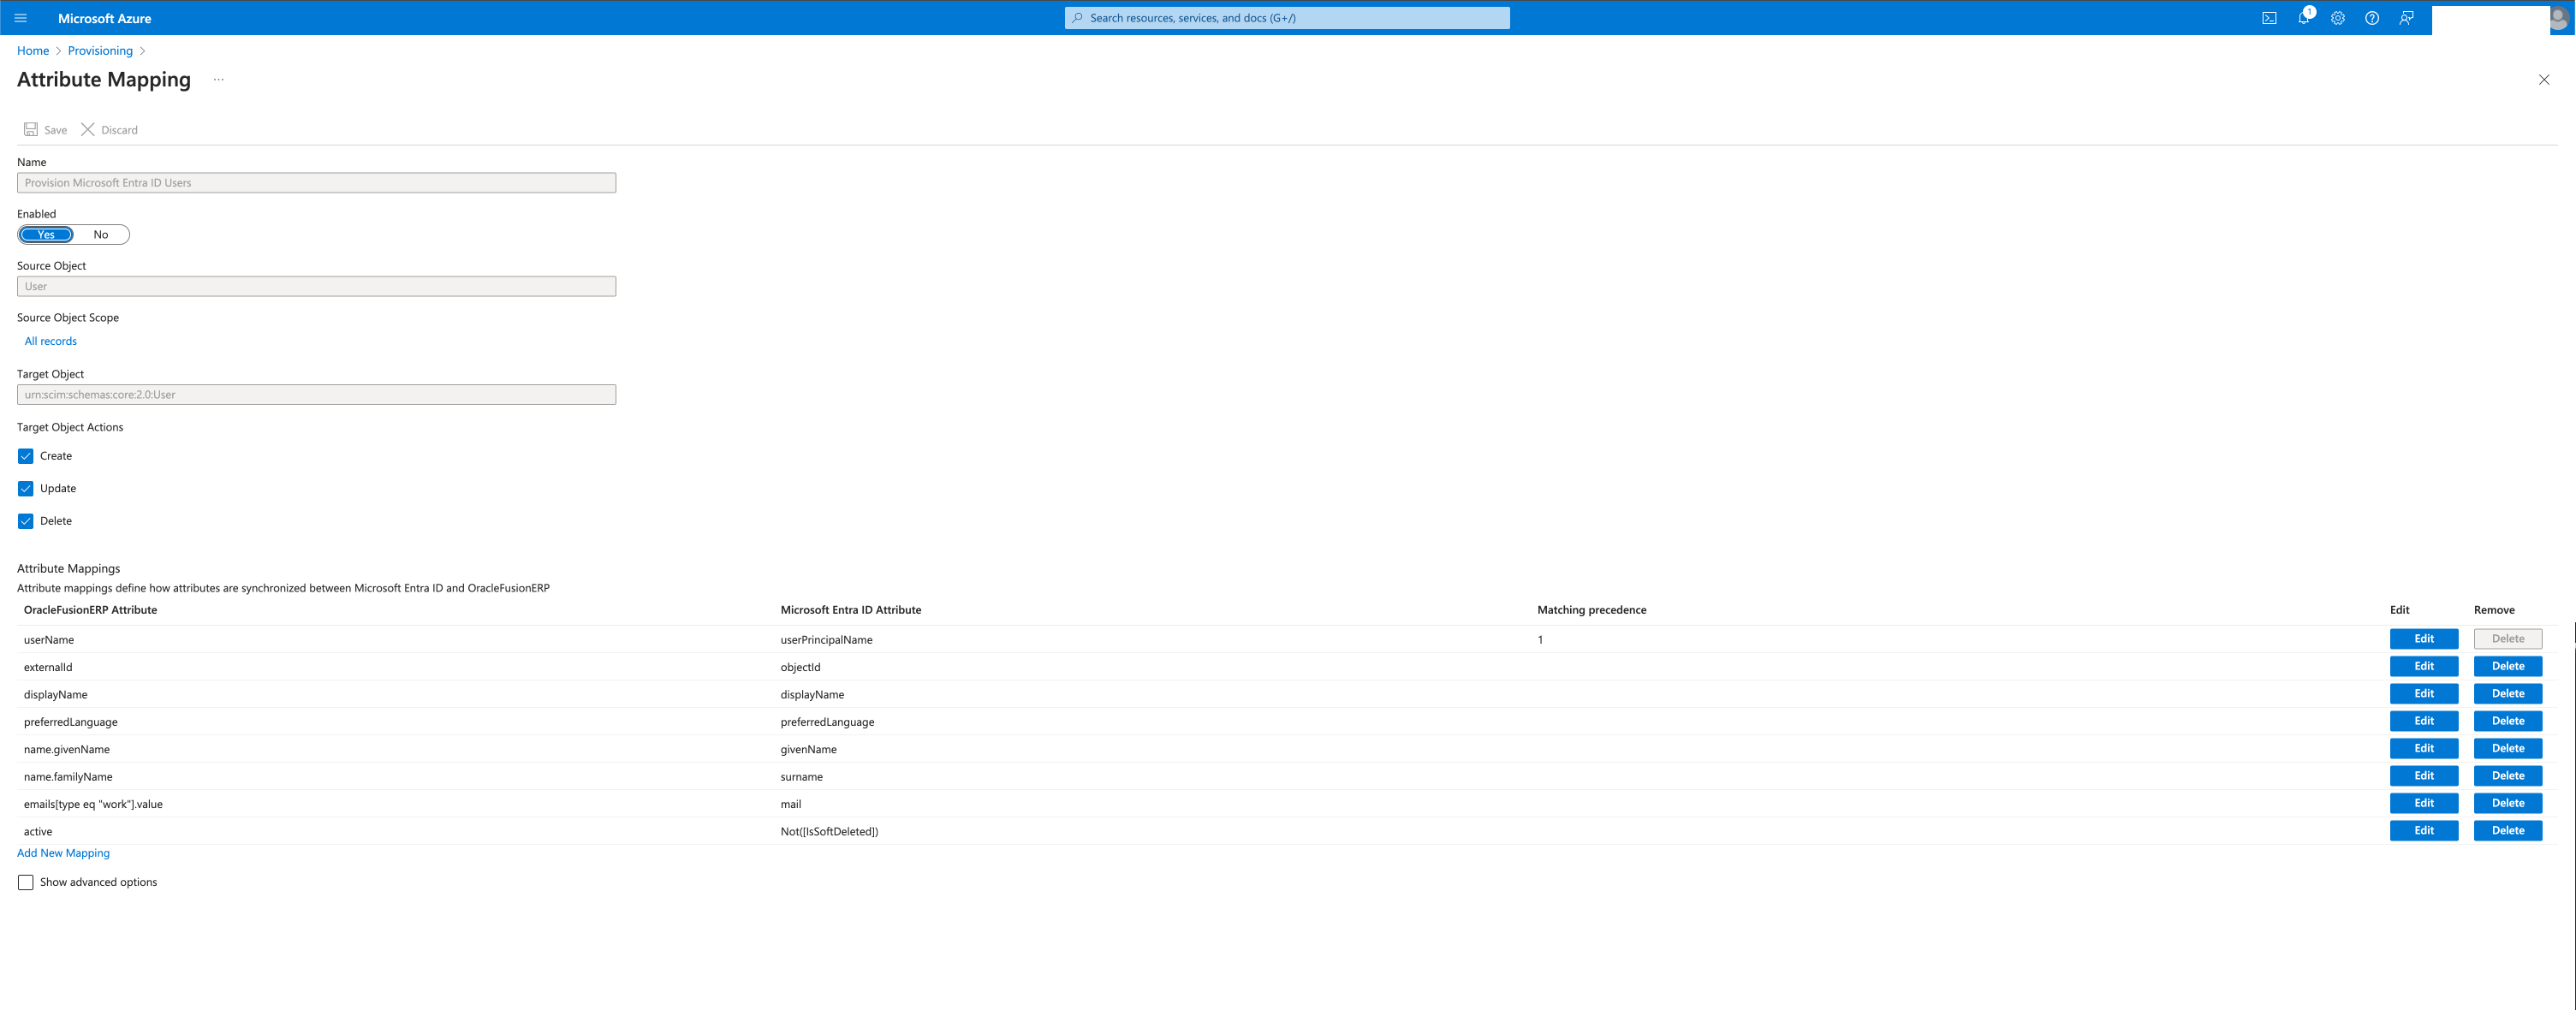
Please review the mappings “Provision Microsoft Entra ID Groups” and “Provision Microsoft Entra ID Users”, those are the mappings for the provisioning.
Enable the Auto Provisioning and save.
The current status is available in the overview section
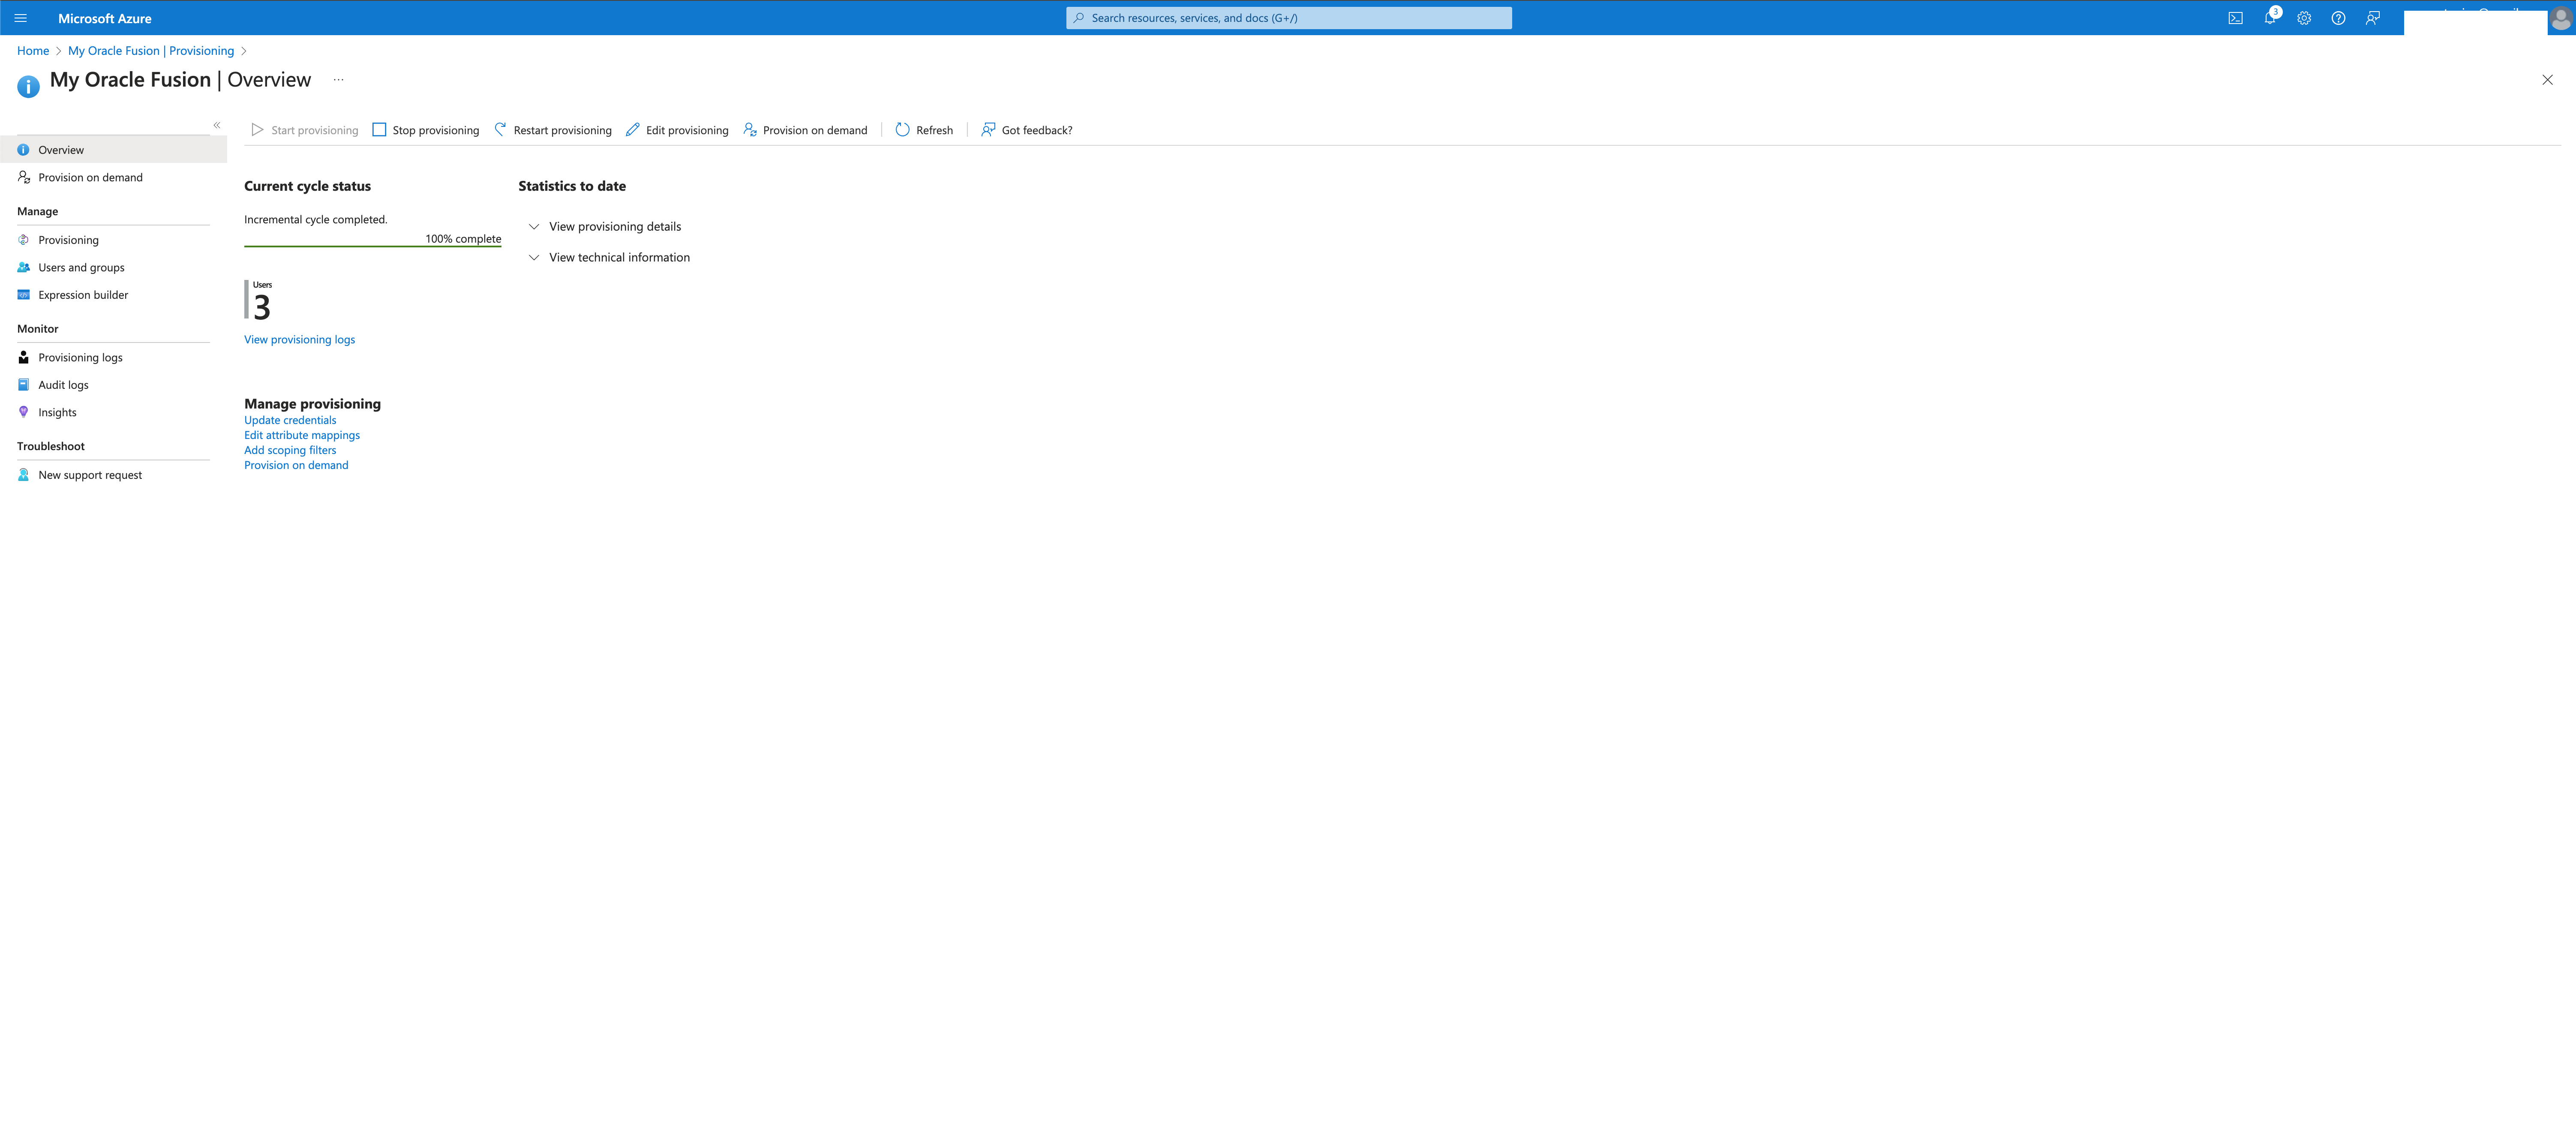
The Sync will happen in fixed intervals. The first sync would take more time to finish as all the users/groups attributed to this application will be synced.
Fusion SSO Setup
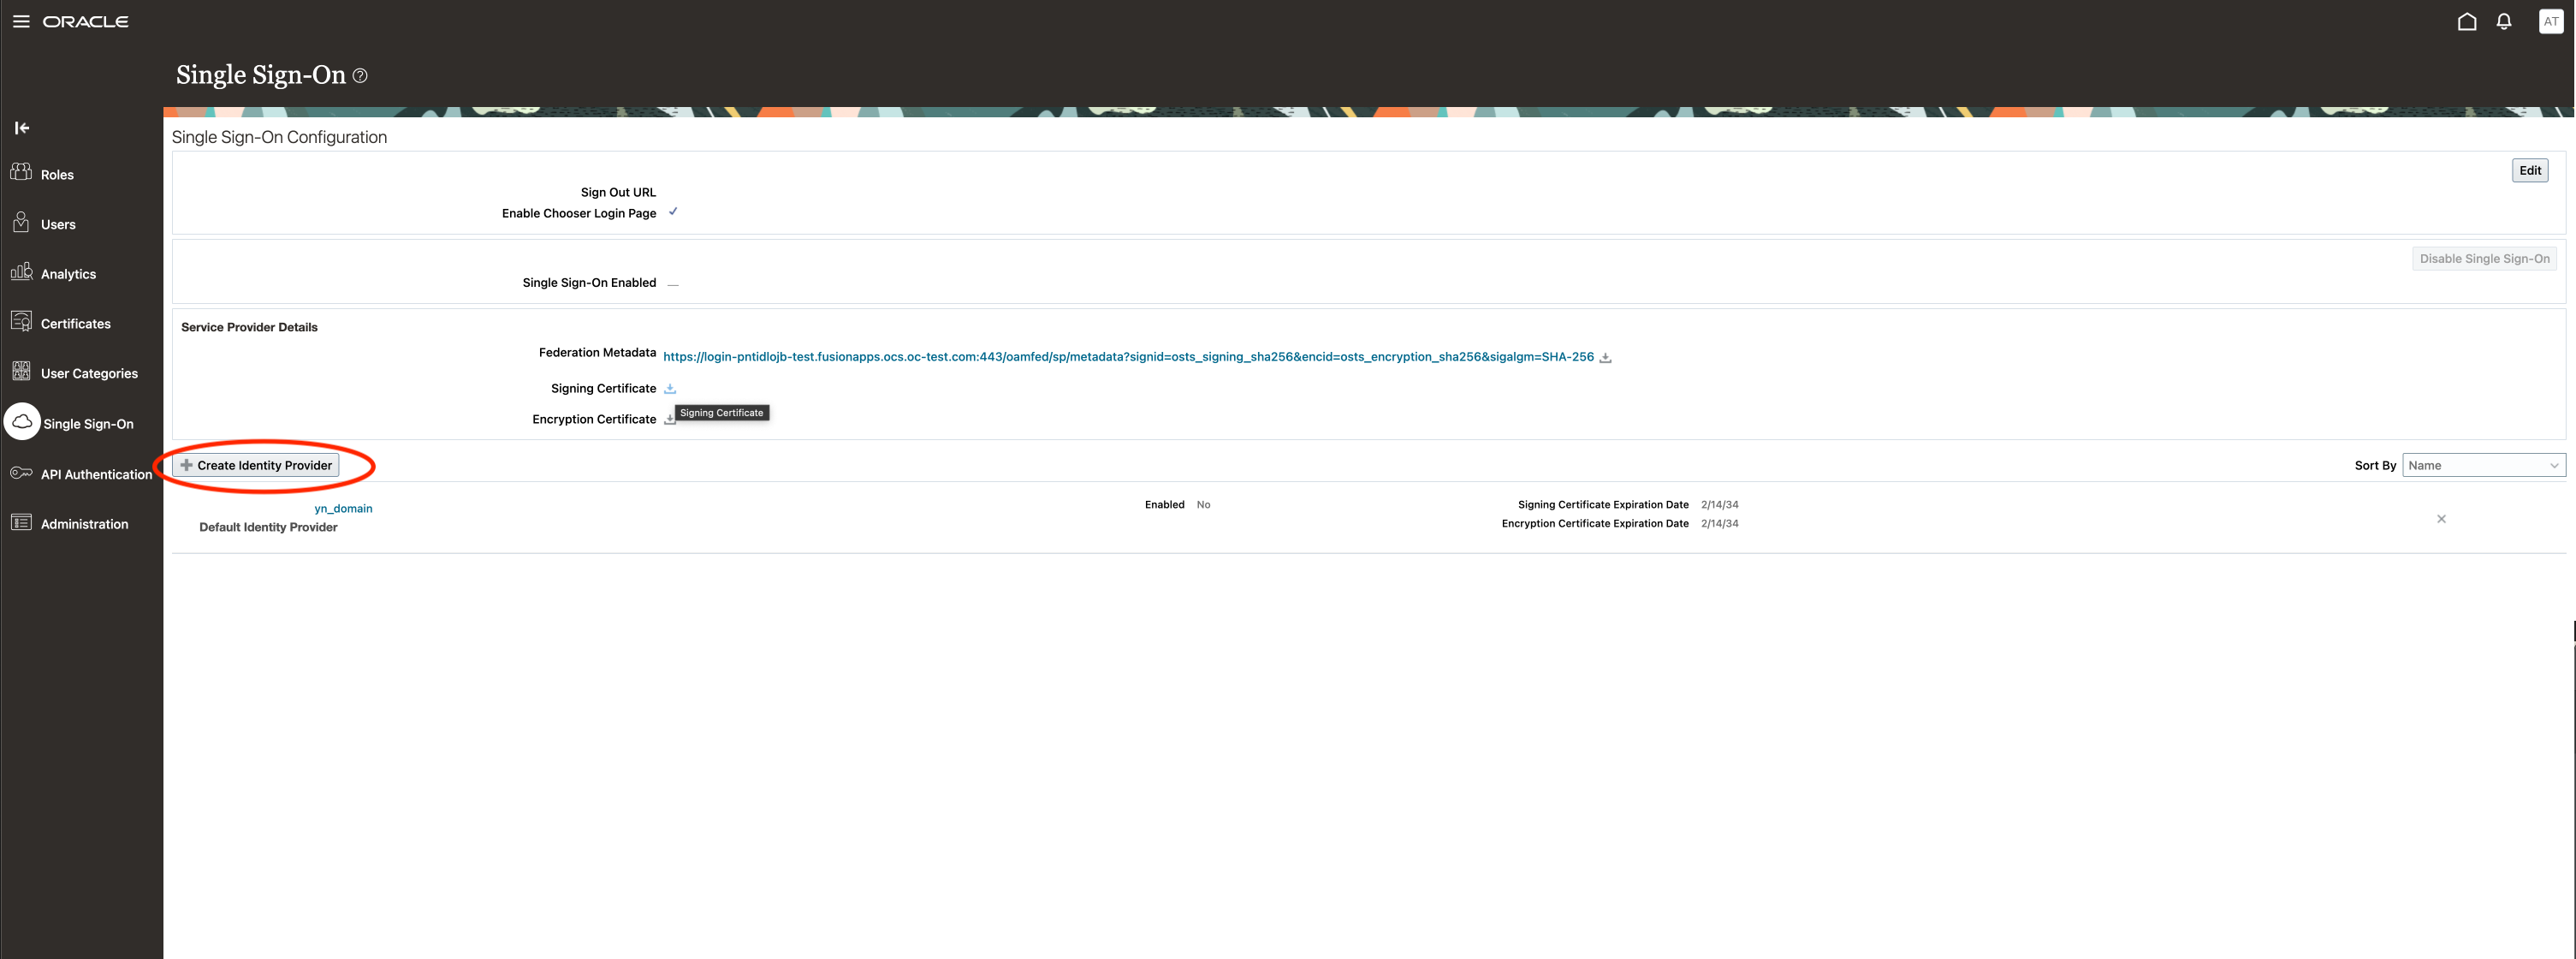
We are now ready to set up the Federation on Fusion.
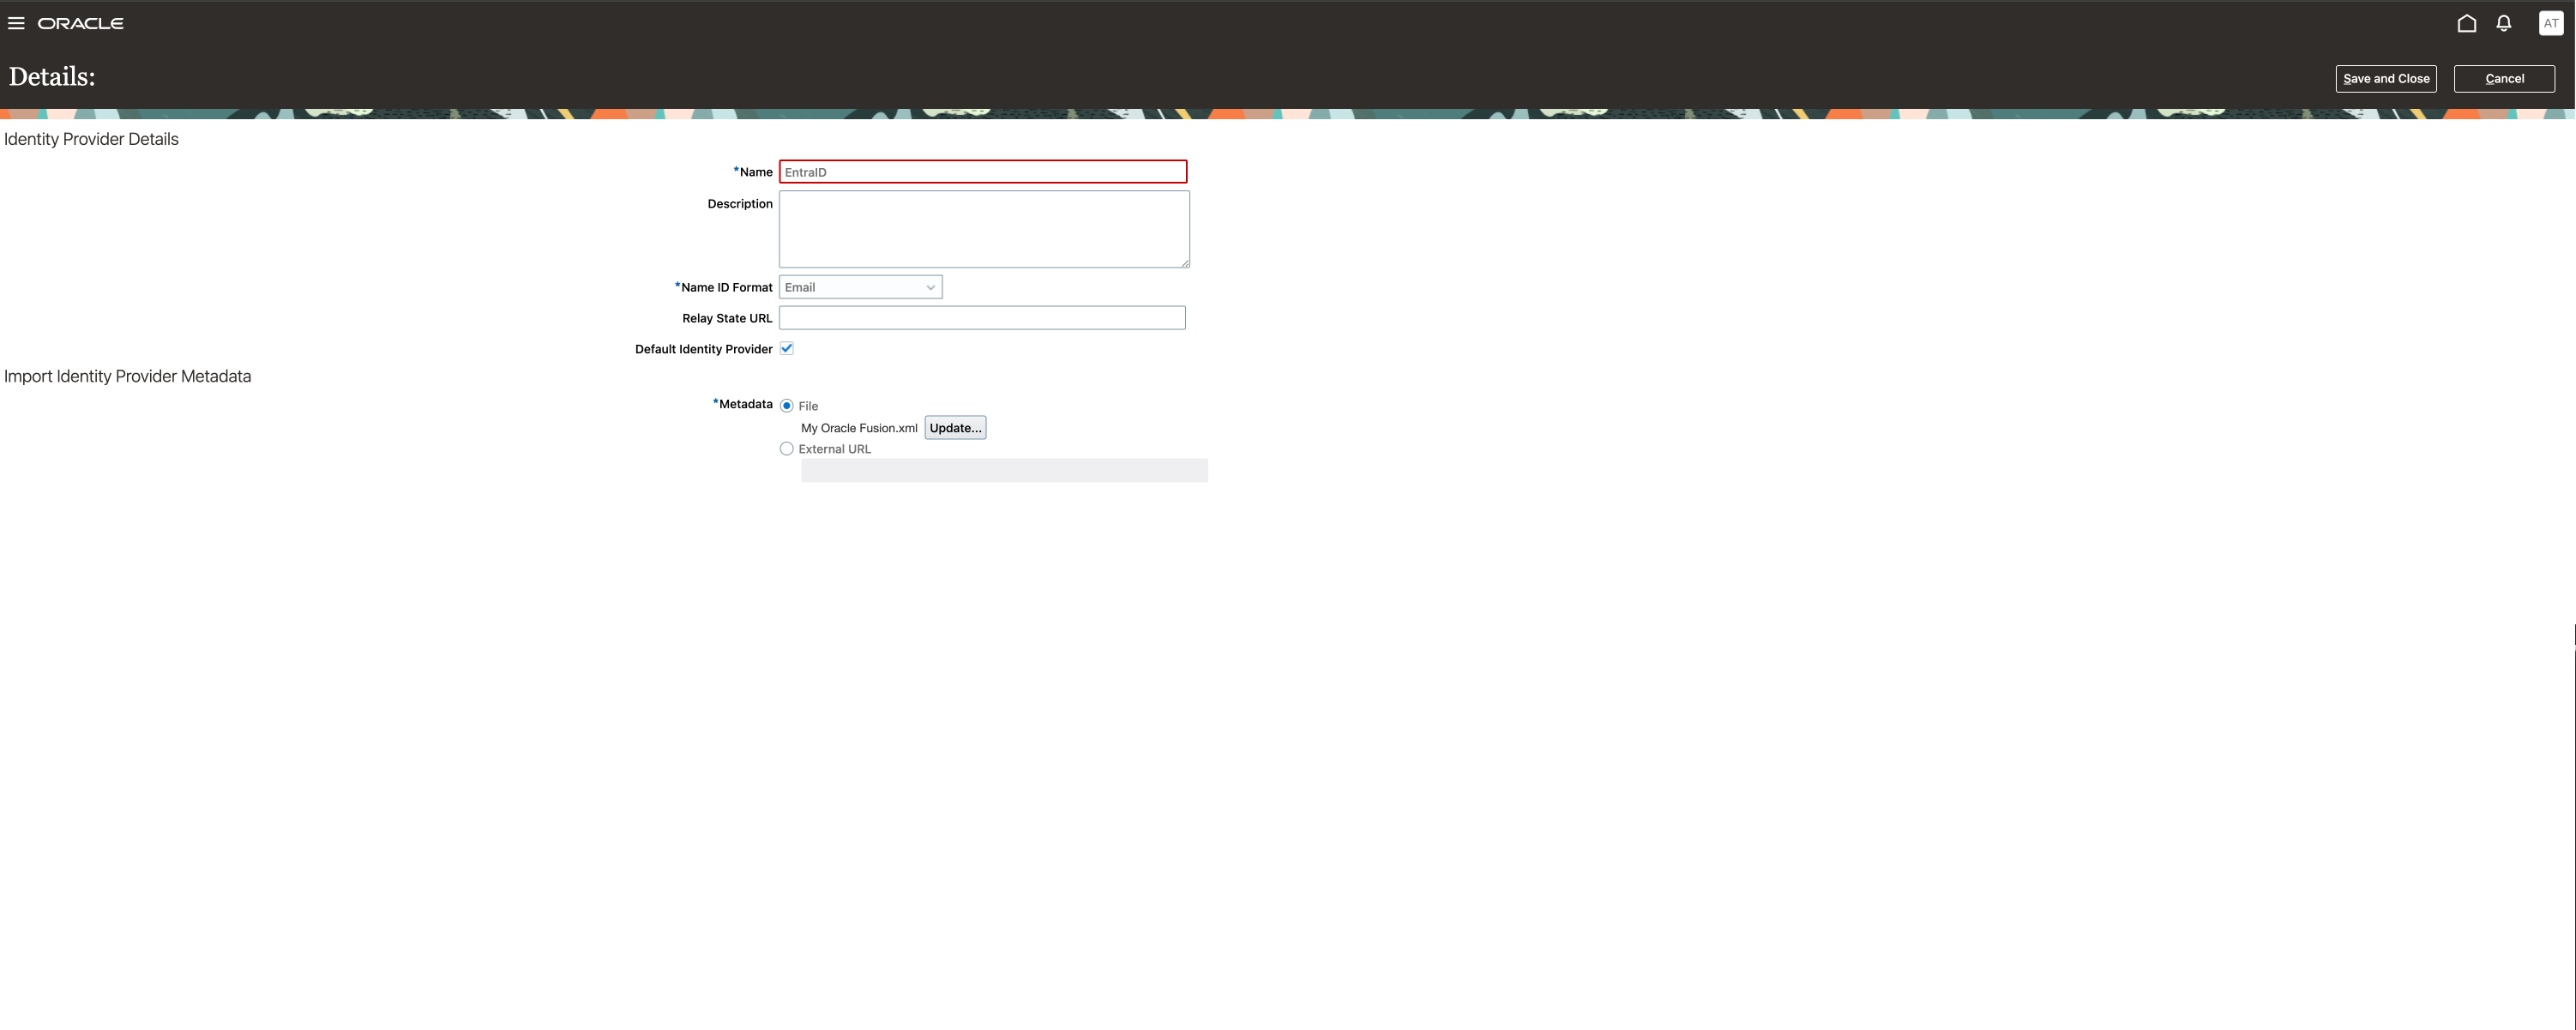
On the Security Console, go to Single Sign-0n and create a new Identity Provider
Click on Edit in the upper right corner and input the information requested.
Upload the federation metadata file downloaded from your Enterprise Application Setup on Entra ID
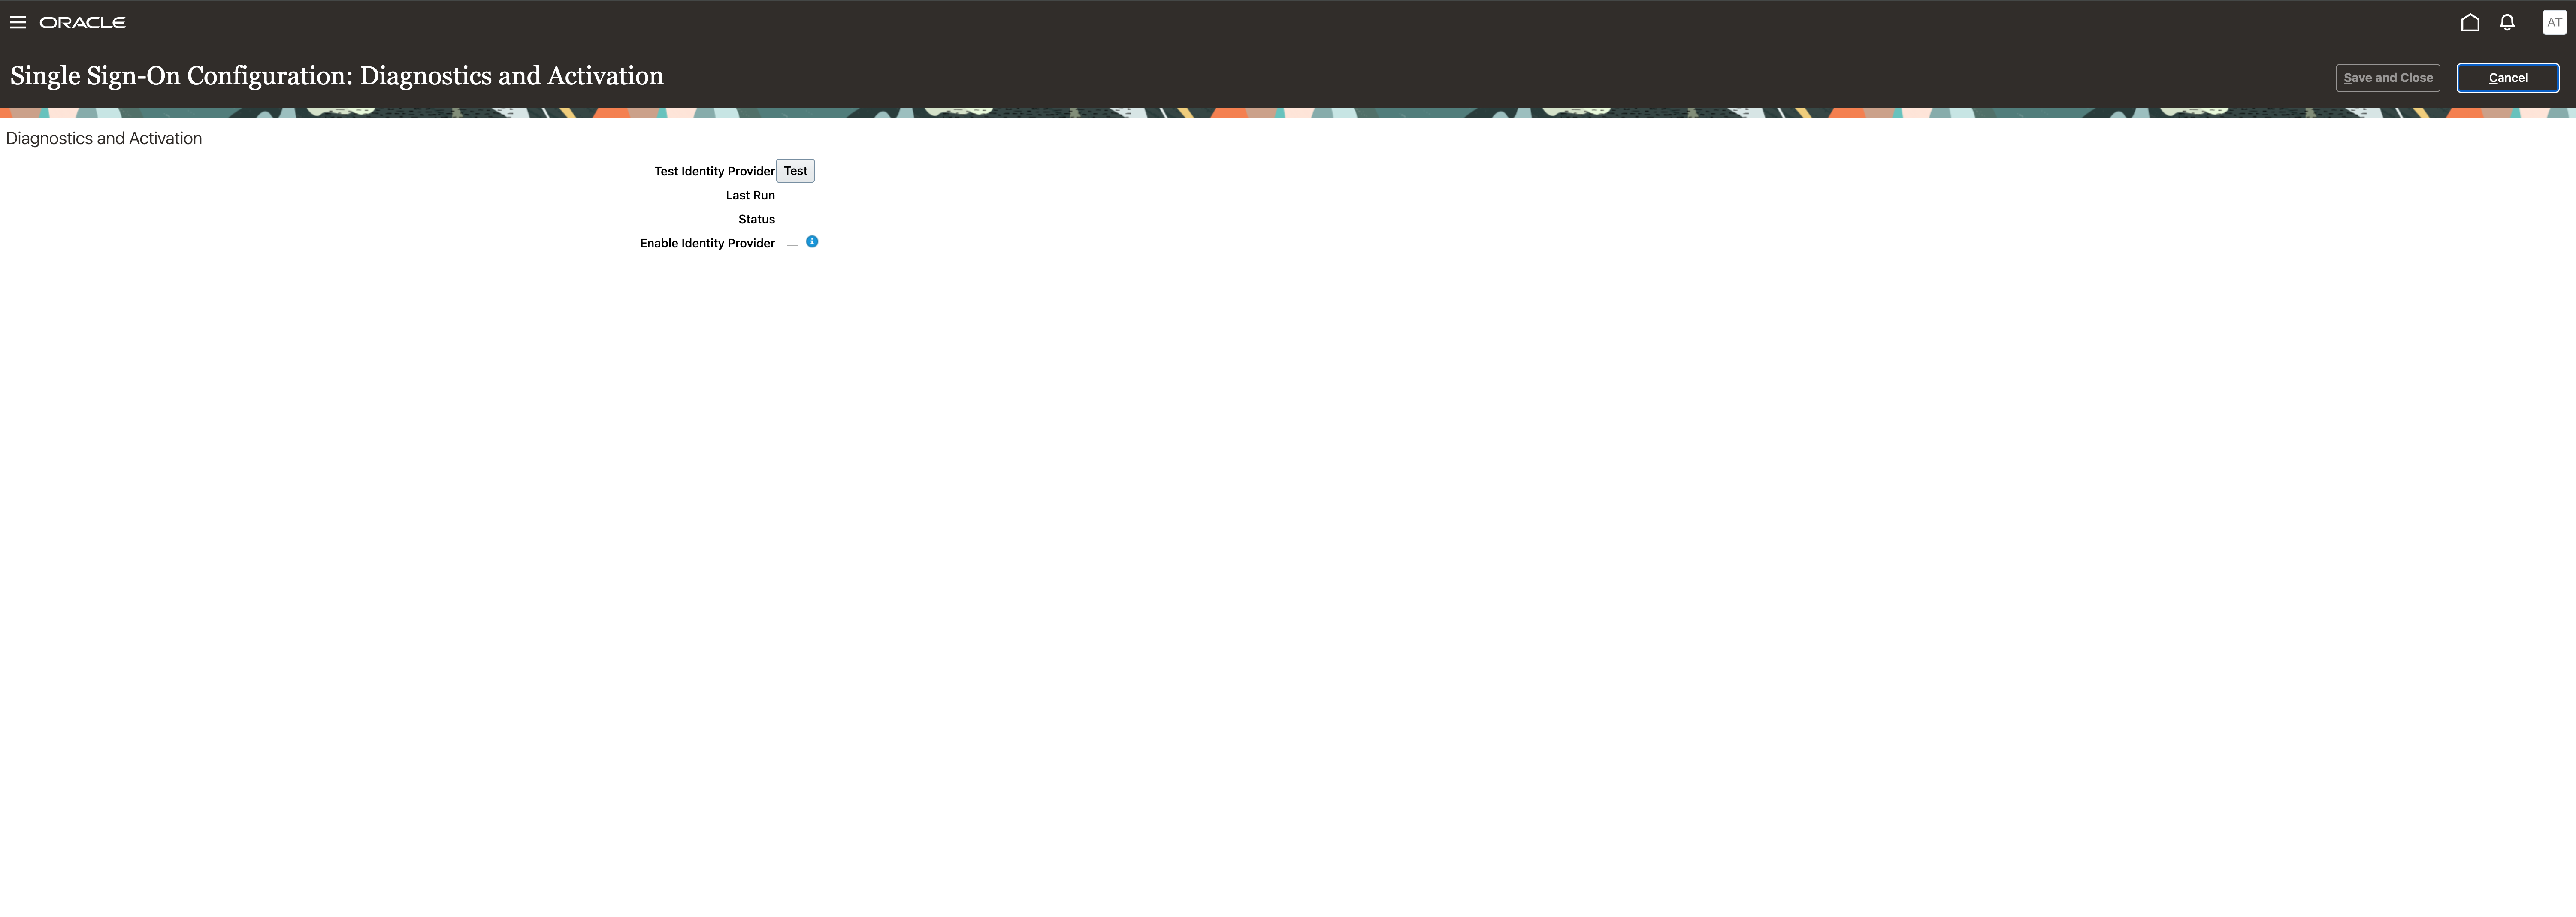
Save and close, then click on the section Diagnostics and Activation then Edit.
Click on Test, you will be advised that the operation will happen in a new browser window
Select the IdP you have created

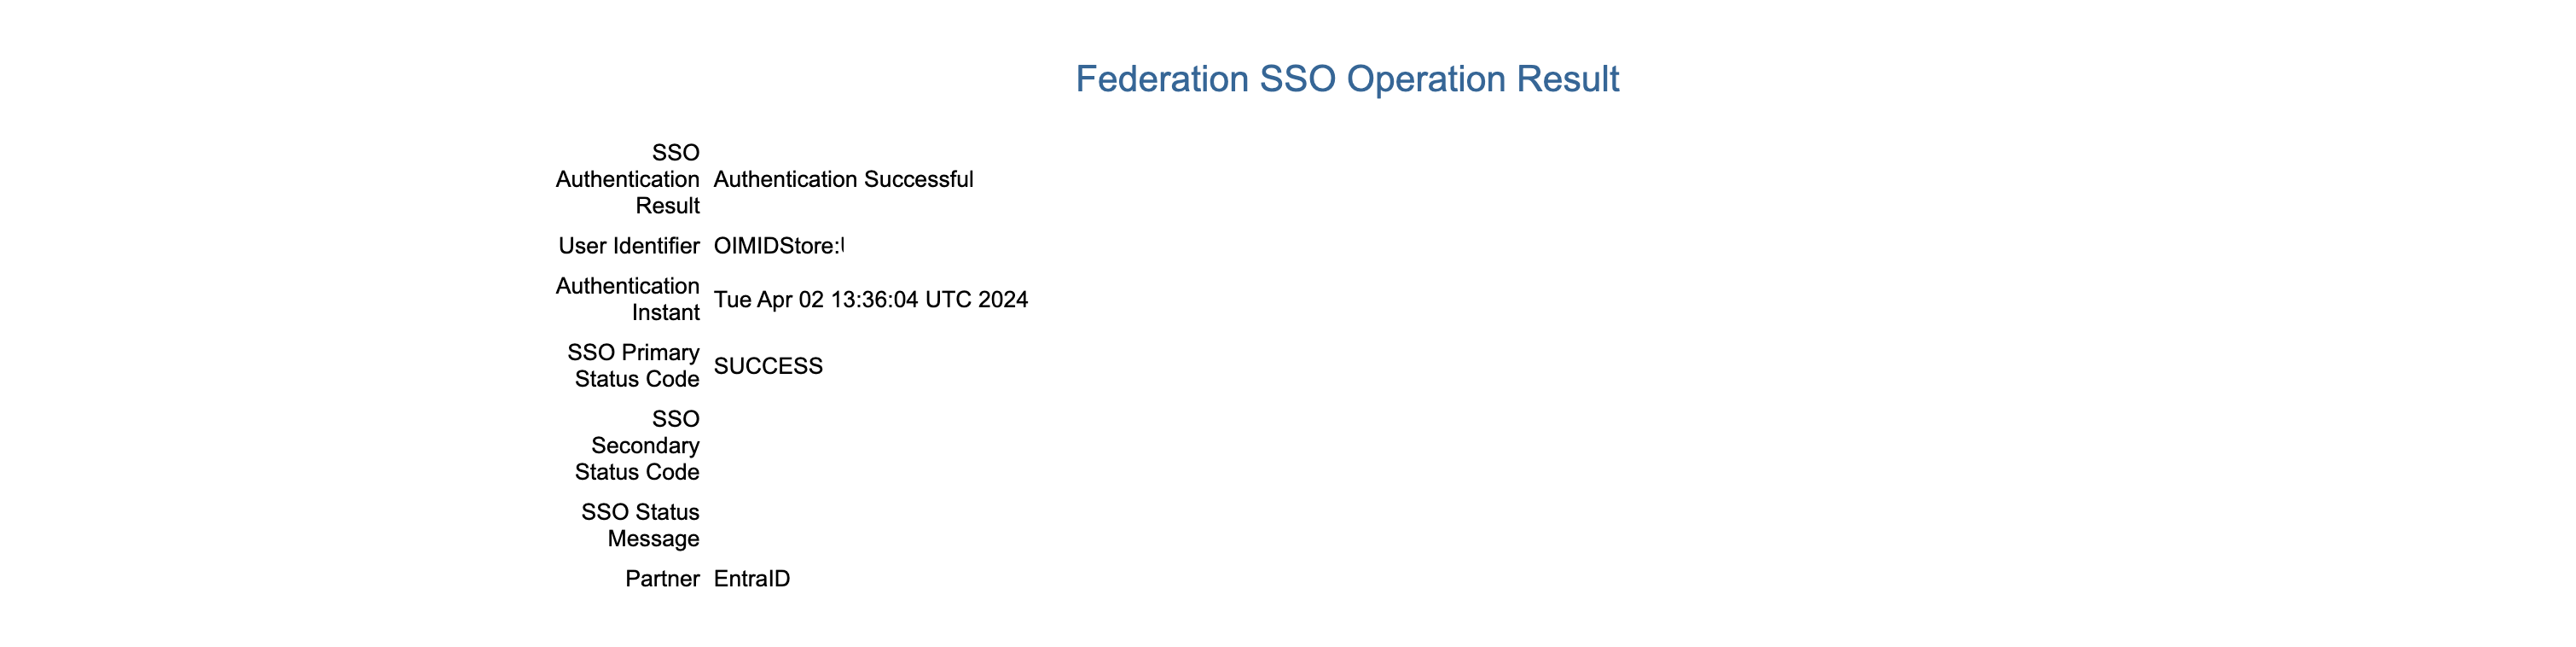
You will be redirected to the Microsoft Authentication page and after you provide the credentials you should see the successful result
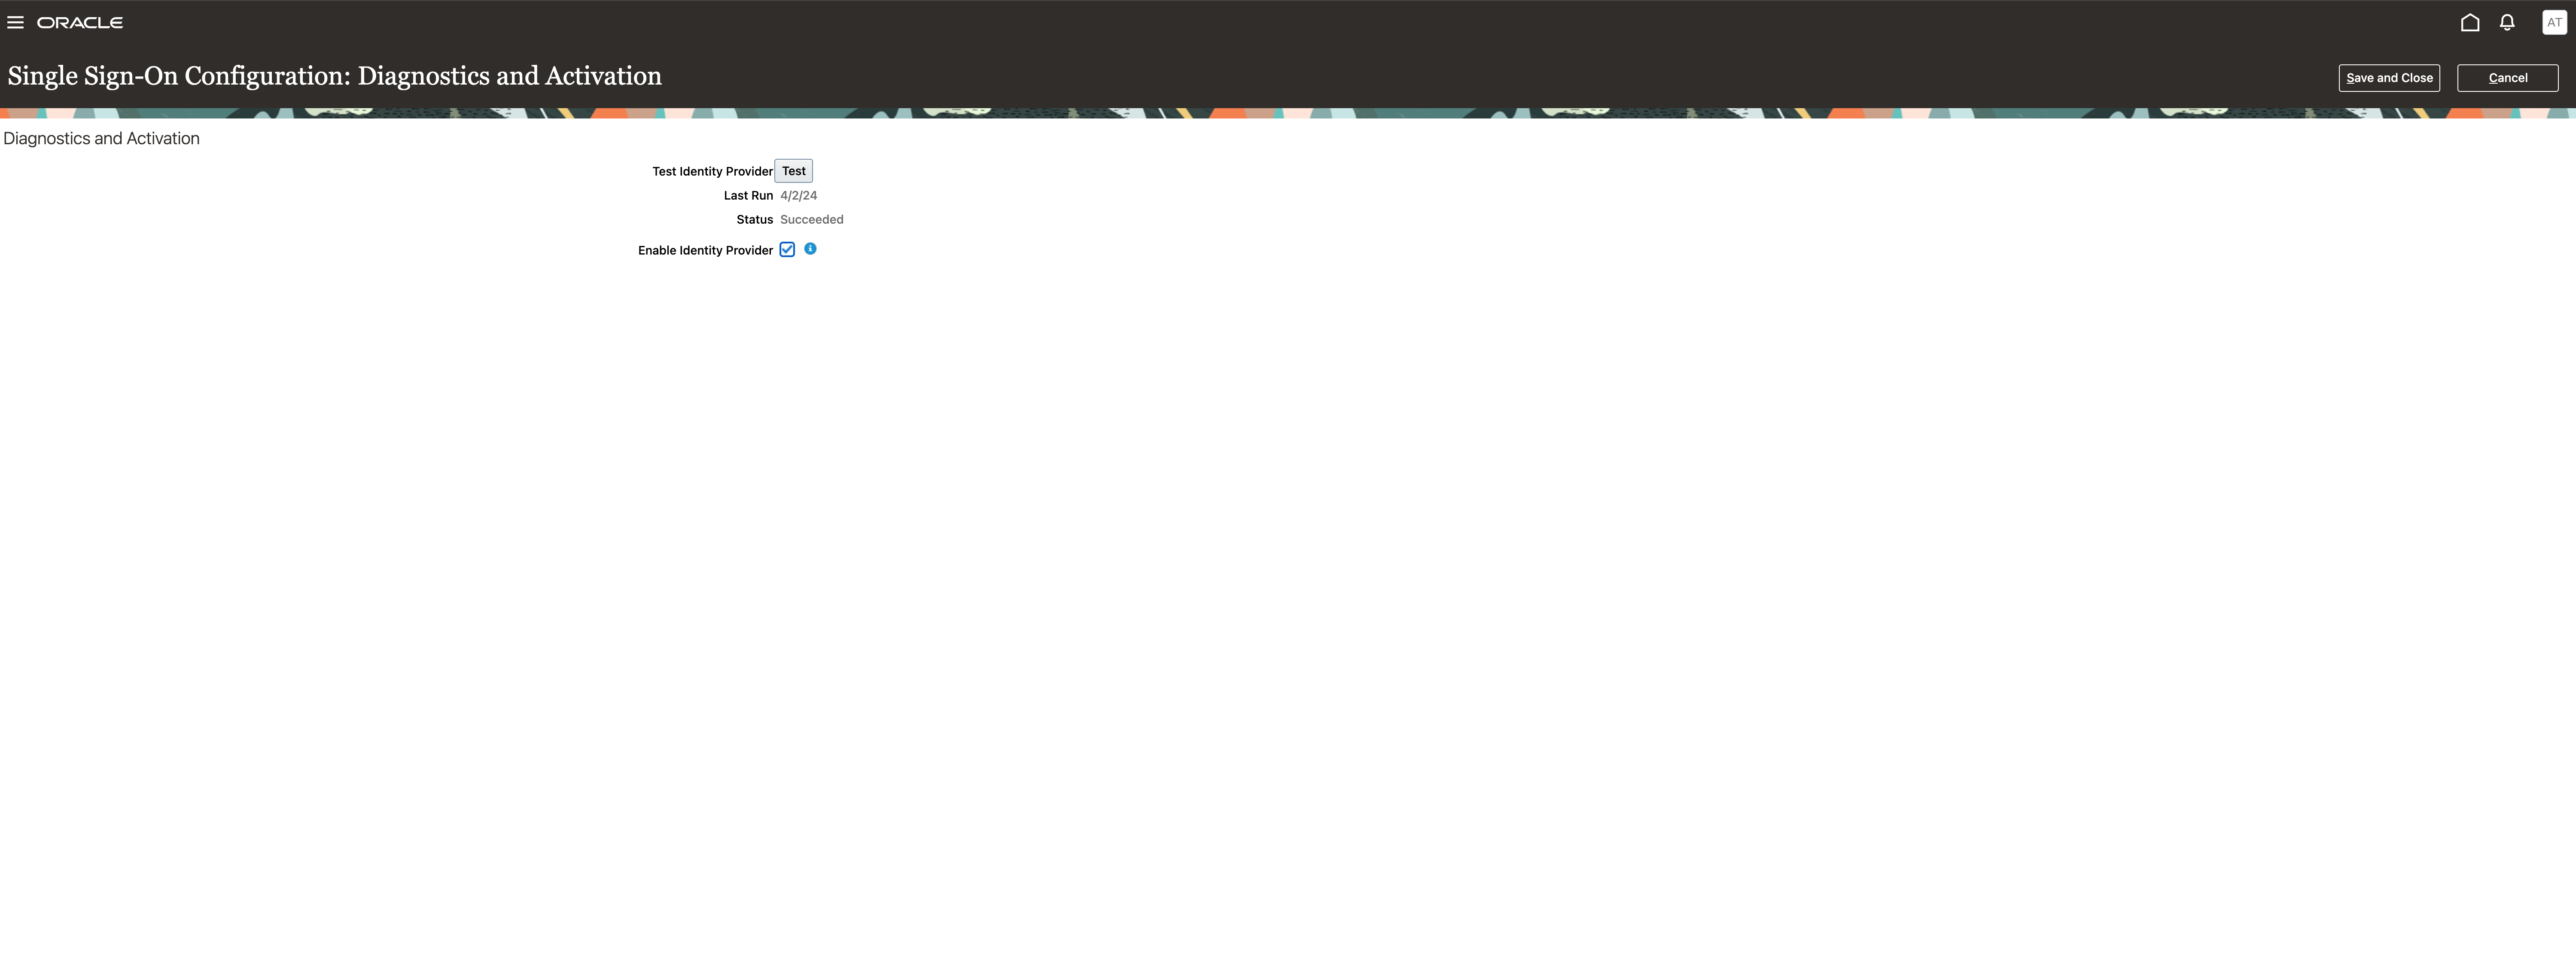
Go back to the Fusion tab, the test result will be set to Success.
Click on Enable Identity Provider then “Save and Close”.
Now, you will have the new Identity Provider activated and the SSO enabled for your Fusion instance
Go to your Fusion Welcome page and test the SSO by clicking on the Company Single Sign-On
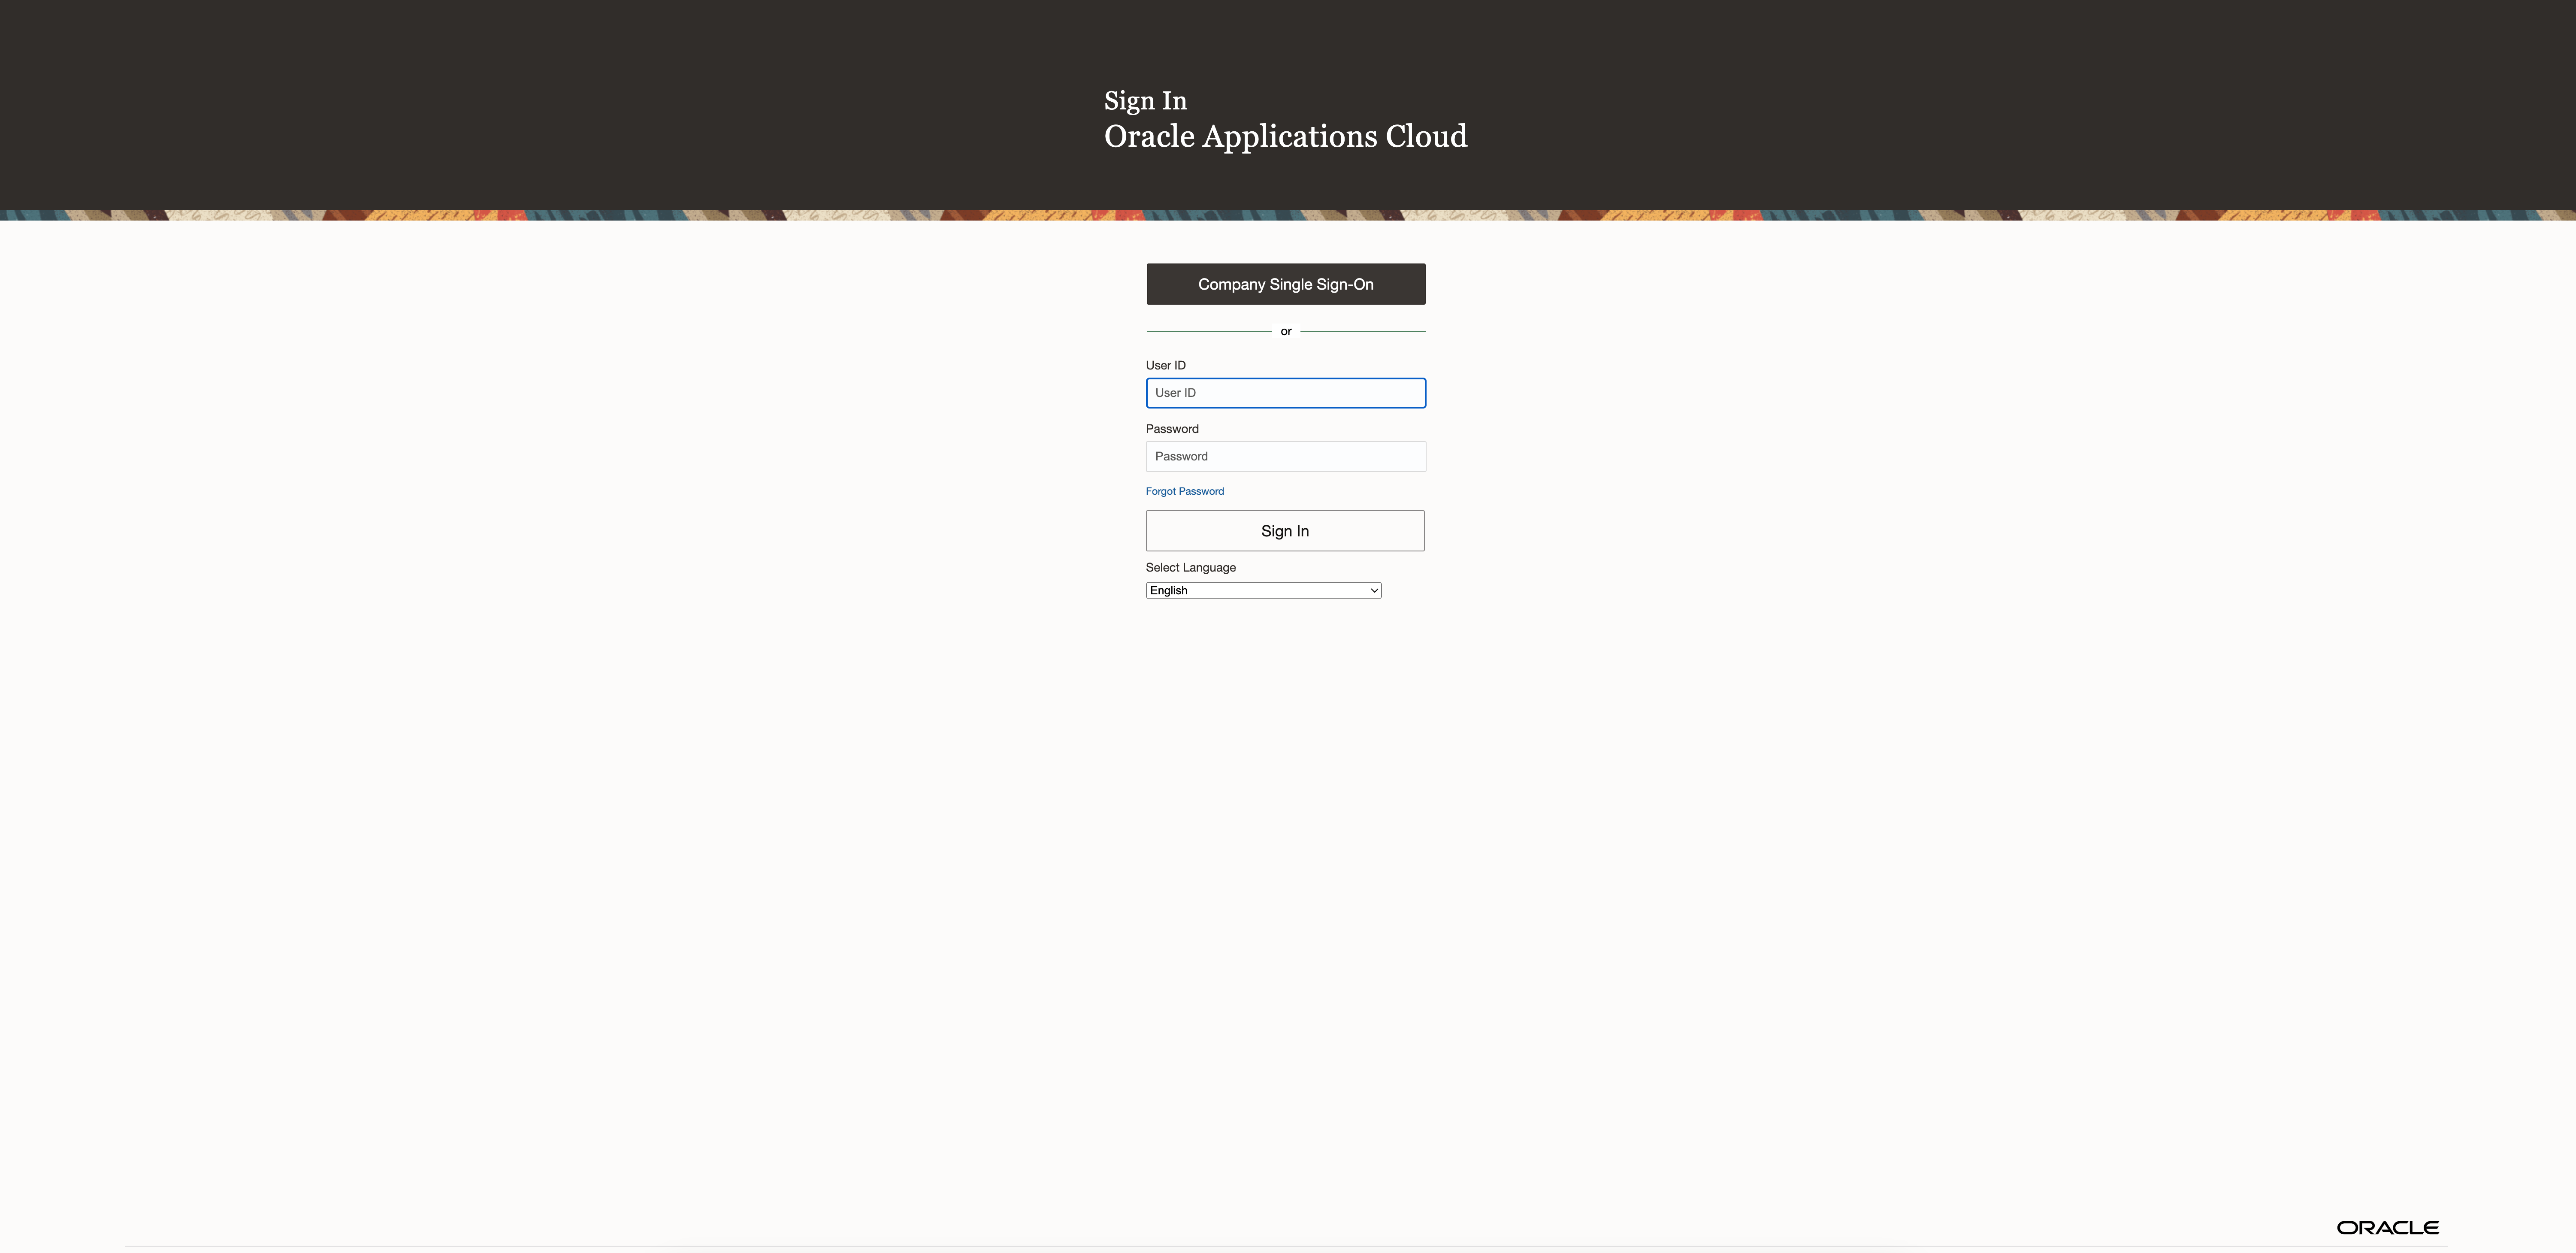
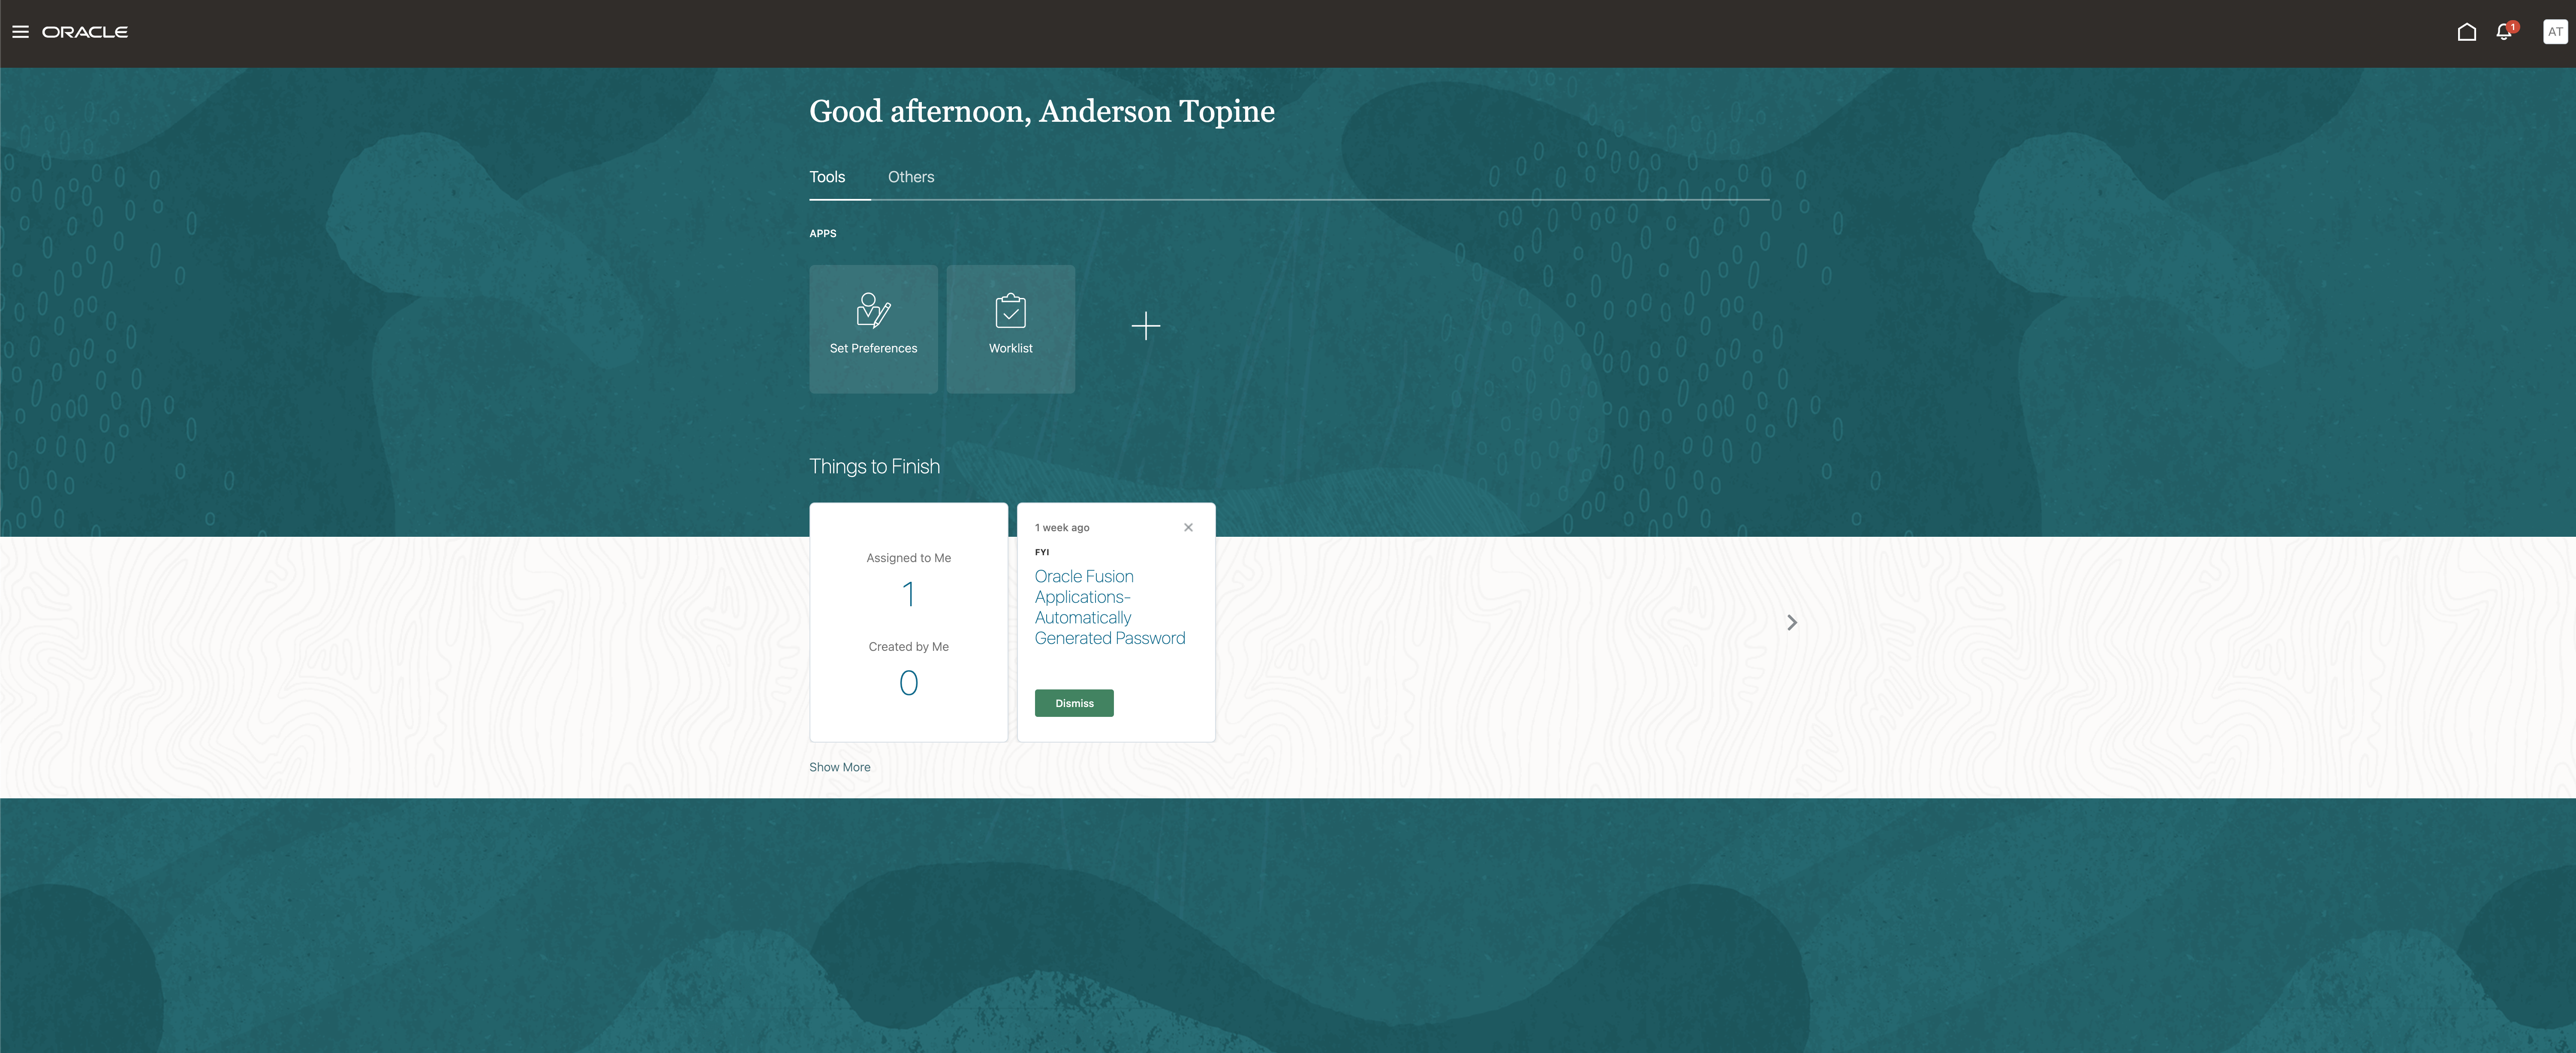
You will be redirected to the Microsoft Authentication page and after the login, you will be redirected to the welcome page configured in the Enterprise Application
Stay tuned for Part Two of this blog series which will focus on the Federation of the Fusion Identity Domain for SaaS Extensions