As the evolution of the Autonomous database continues – we are finding more and more customers that are surfacing interesting use cases that they have crafted to meet their mission critical application security needs. Moving an on-premise database to the Oracle Autonomous Database (ADB) creates the opportunity to take a look at more secure and modern means for developing applications.
For instance, when working with an Oracle database – there may be the need to interact with objects or services that live outside of the database system.
To solve this, we will demonstrate how to securely store the sensitive data as a Secret within the OCI Vault service. Then, retrieve this information using the embedded OCI PL/SQL SDK that comes with ADB. Not only does this solution promote a DevOps-centric implementation pattern for managing secrets and keys between environments; it also follows a more secure development pattern by using cloud-native services such as the OCI Vault and OCI Identity and Access Management(IAM) Policies for authorization.
As a prerequisite – let’s take a quick inventory of the OCI assets that we will need to configure prior to starting.
- Autonomous Database on Shared Infrastructure instance– this can be an Always Free instance.
- OCI Vault – you’ll need a Vault to store the Secrets and an encryption key for encrypting the secrets. If you need some more detailed informatione on the OCI vault and secrets – take a look at this blog by one of my fellow colleagues.
Policies and Dynamic Groups
Since we already have our ADB-S instance and an OCI Vault created – we can start by creating the Dynamic Groups and IAM Policies that will allow the ADB instance to use the Vault (and the Keys and Secrets that are stored within it).
First – let’s grab the OCID of the ADB-S instance that you have created from the ADB Service Console.
OCI Console => Oracle Database => Autonomous Database
Then, select the ADB instance that will be used. My example here using an ADB-Transaction Processing database. From within the service console, select Copy next to the OCID.
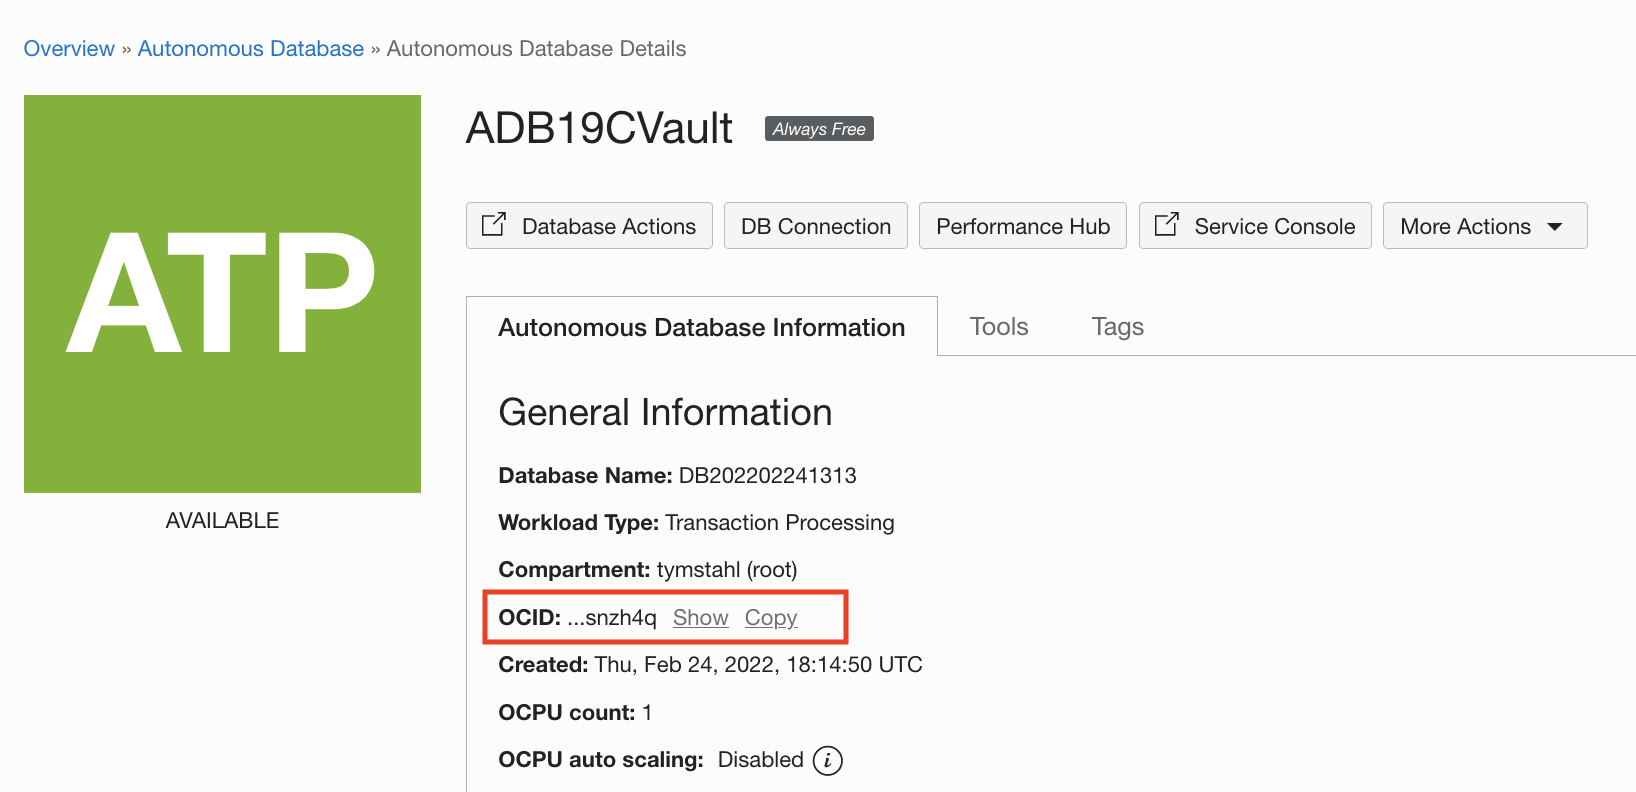
With the OCID, we can create a Dynamic Group that will allow us to leverage the Resource Principal of the ADB. For a more in-depth explanation on using on Resource Principals for ADB – take a look at the following blog – which provides the crucial understanding on how access control and authorization is enforced natively from the ADB instance.
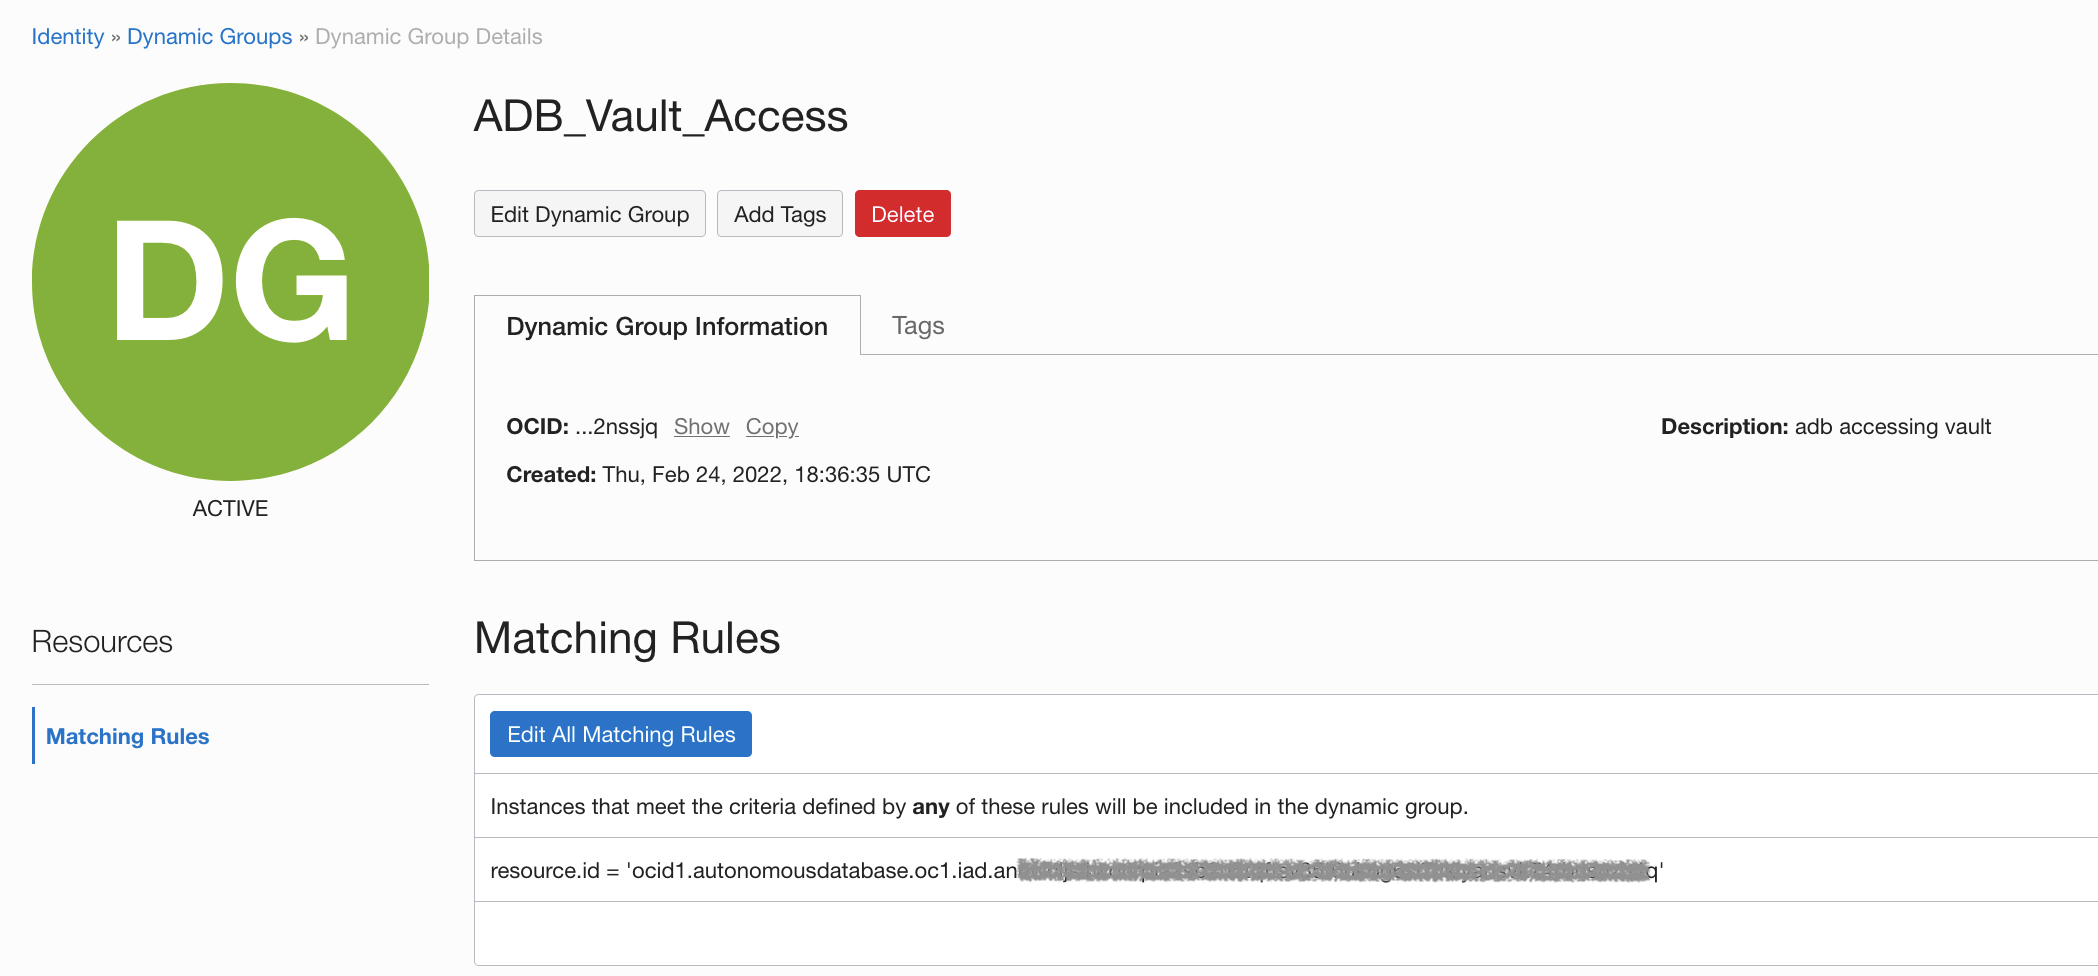
In the Console, navigate to: Identity & Security => Dynamic Groups
Create a new Dynamic Group called “ADB_Vault_Access” – and give it a brief description. Then, add a statement with the copied OCID from the ADB instance console with the following syntax:
| resource.id = ‘ocid1.autonomousdatabase.oc1.iad.xxxxxxxxxxxx’ |
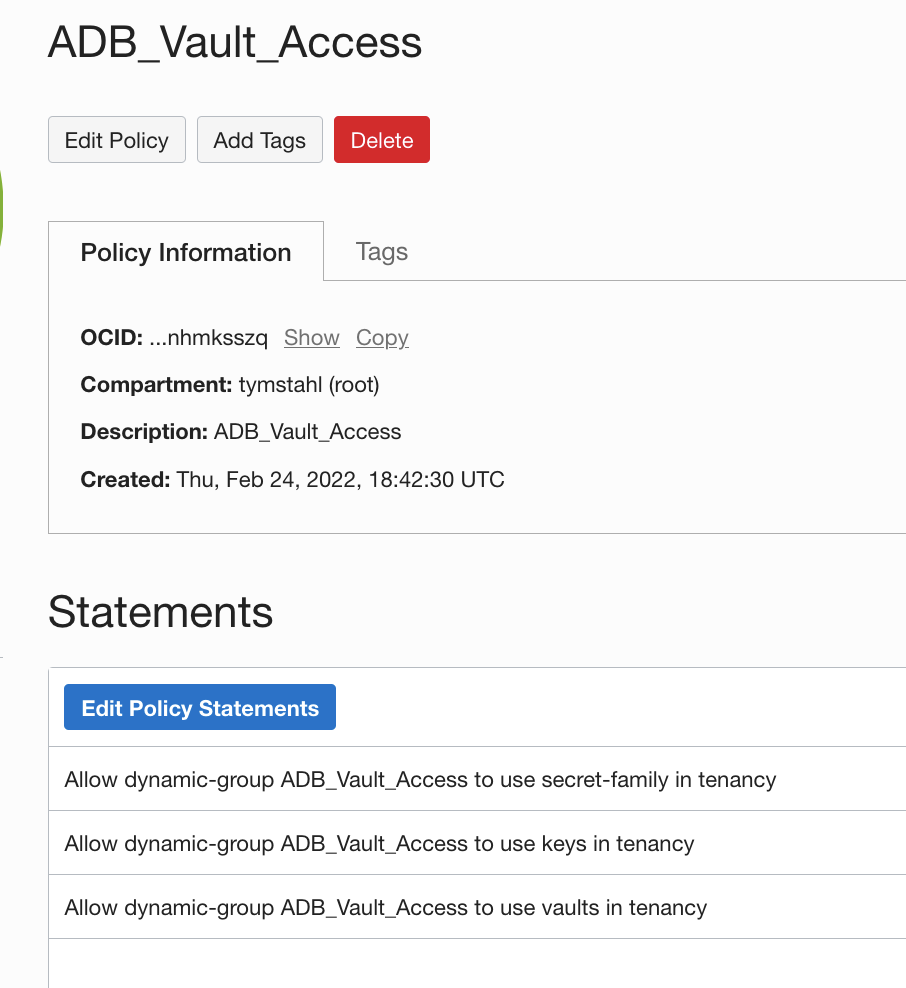
With our Dynamic Group created – we can now create policy statements that will provide access to the Vault, Keys and Secret. These policies will allow the following:
- The ability to access the Vault
- The ability to use the Master Key to decrypt the Secret
- Lastly, the ability to access the secret object
For the sake of simplicity, we will create this policy under the Root compartment and apply it tenancy wide.
Navigate to: OCI Console => Identity & Security => Policies
Create Policy, Select the Toggle for Show Manual Editor – then paste the following statements:
| Allow dynamic-group ADB_Vault_Access to use vaults in tenancy |
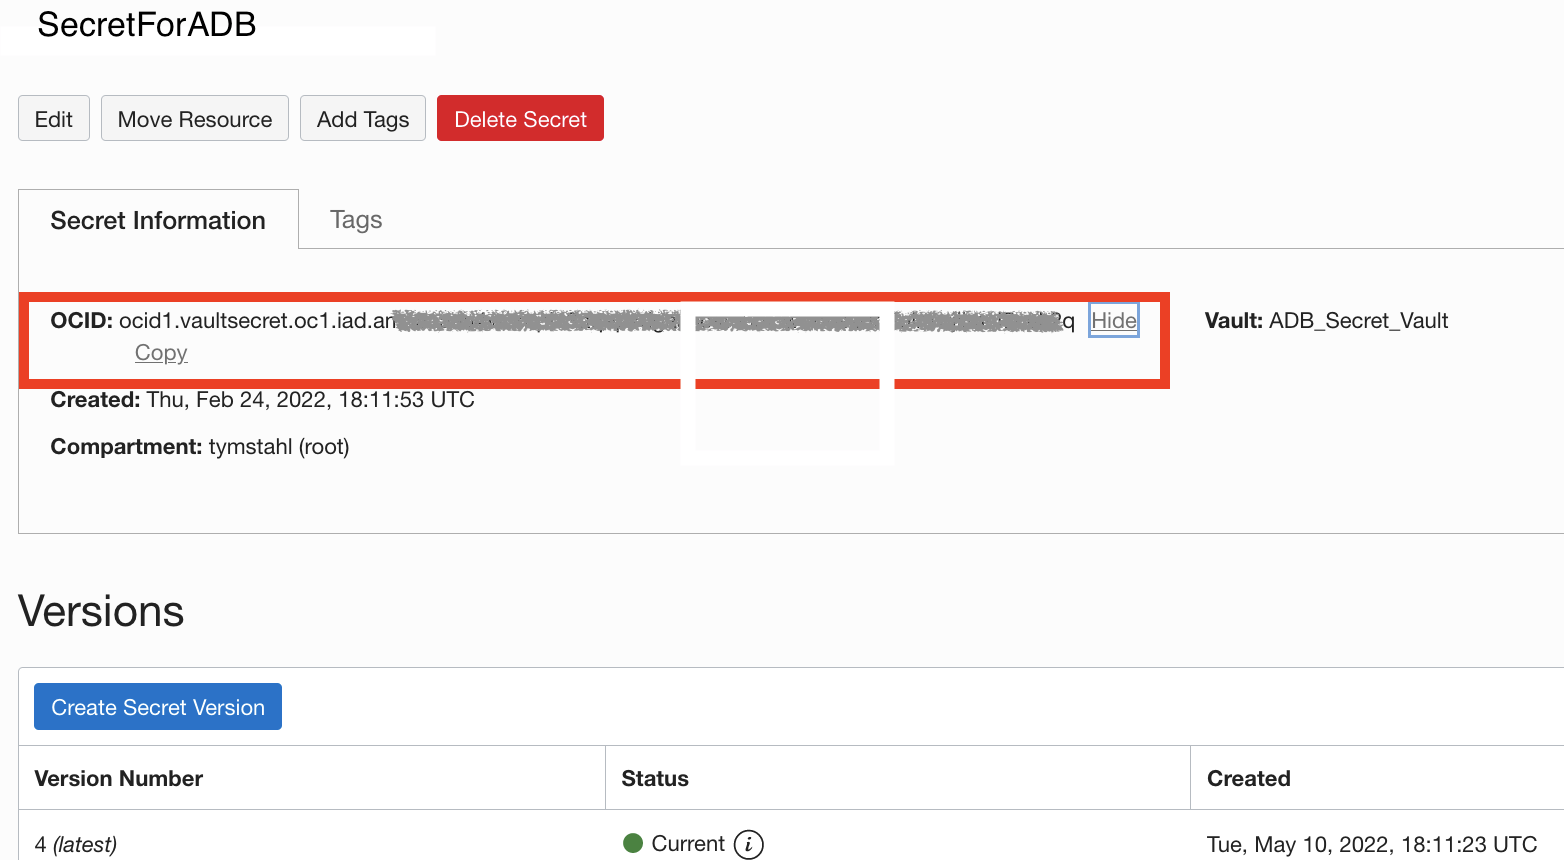
Create the Secret
Next, we will need to create the secret that we want to retrieve from the vault. You should already have a Vault created and a Master Encryption Key (MEK).
OCI Console => Identity & Security => Vault => Secrets
Create a secret, we must specify Encryption Key that was created previously – along with the PlainText value that you would like to store within the Vault.

Now, we need to capture the OCID created for the Secret that we created – and save it for use later in the ADB worksheet.
Access Database Tools
The remaining setup steps and validation will be conducted from the Autonomous Database – for that, we will need to get access to a SQL interface. For simplicity – I am going to use the Database Actions – which is a web-based version of SQLDeveloper. This assumes you have Administrator access within the OCI console which then grants you ADMIN access within the ADB.
Note: If you are executing this as another schema user from within your database and would like to use a OCI web-based interface – I recommend taking a look at this blog regarding Database Tools and SQL Worksheet.
Within the ADB instance – select Database Actions which will open a new tab and bring you into the Database Actions Launchpad. Then, you’ll select the first tool – which is the SQL interface.

Generate Resource Principal within ADB
You should now have an empty SQL Worksheet. Next, we will create our Resource Principal and validate.
EXEC DBMS_CLOUD_ADMIN.ENABLE_RESOURCE_PRINCIPAL();PL/SQL procedure successfully completed.We can verify that the Resource Principal was created by executing the following:
SELECT owner, credential_name FROM  dba_credentials

WHERE credential_name = 'OCI$RESOURCE_PRINCIPAL'

AND owner = 'ADMIN';
OWNER  CREDENTIAL_NAME
-----  ----------------------
ADMIN  OCI$RESOURCE_PRINCIPAL
Lastly – we will substitute in our Secret OCID identified by the secret_id variable which we gathered right after we created the secret in the vault and then execute the statement.
PL/SQL Statement to get the Secret from Vault
|
|
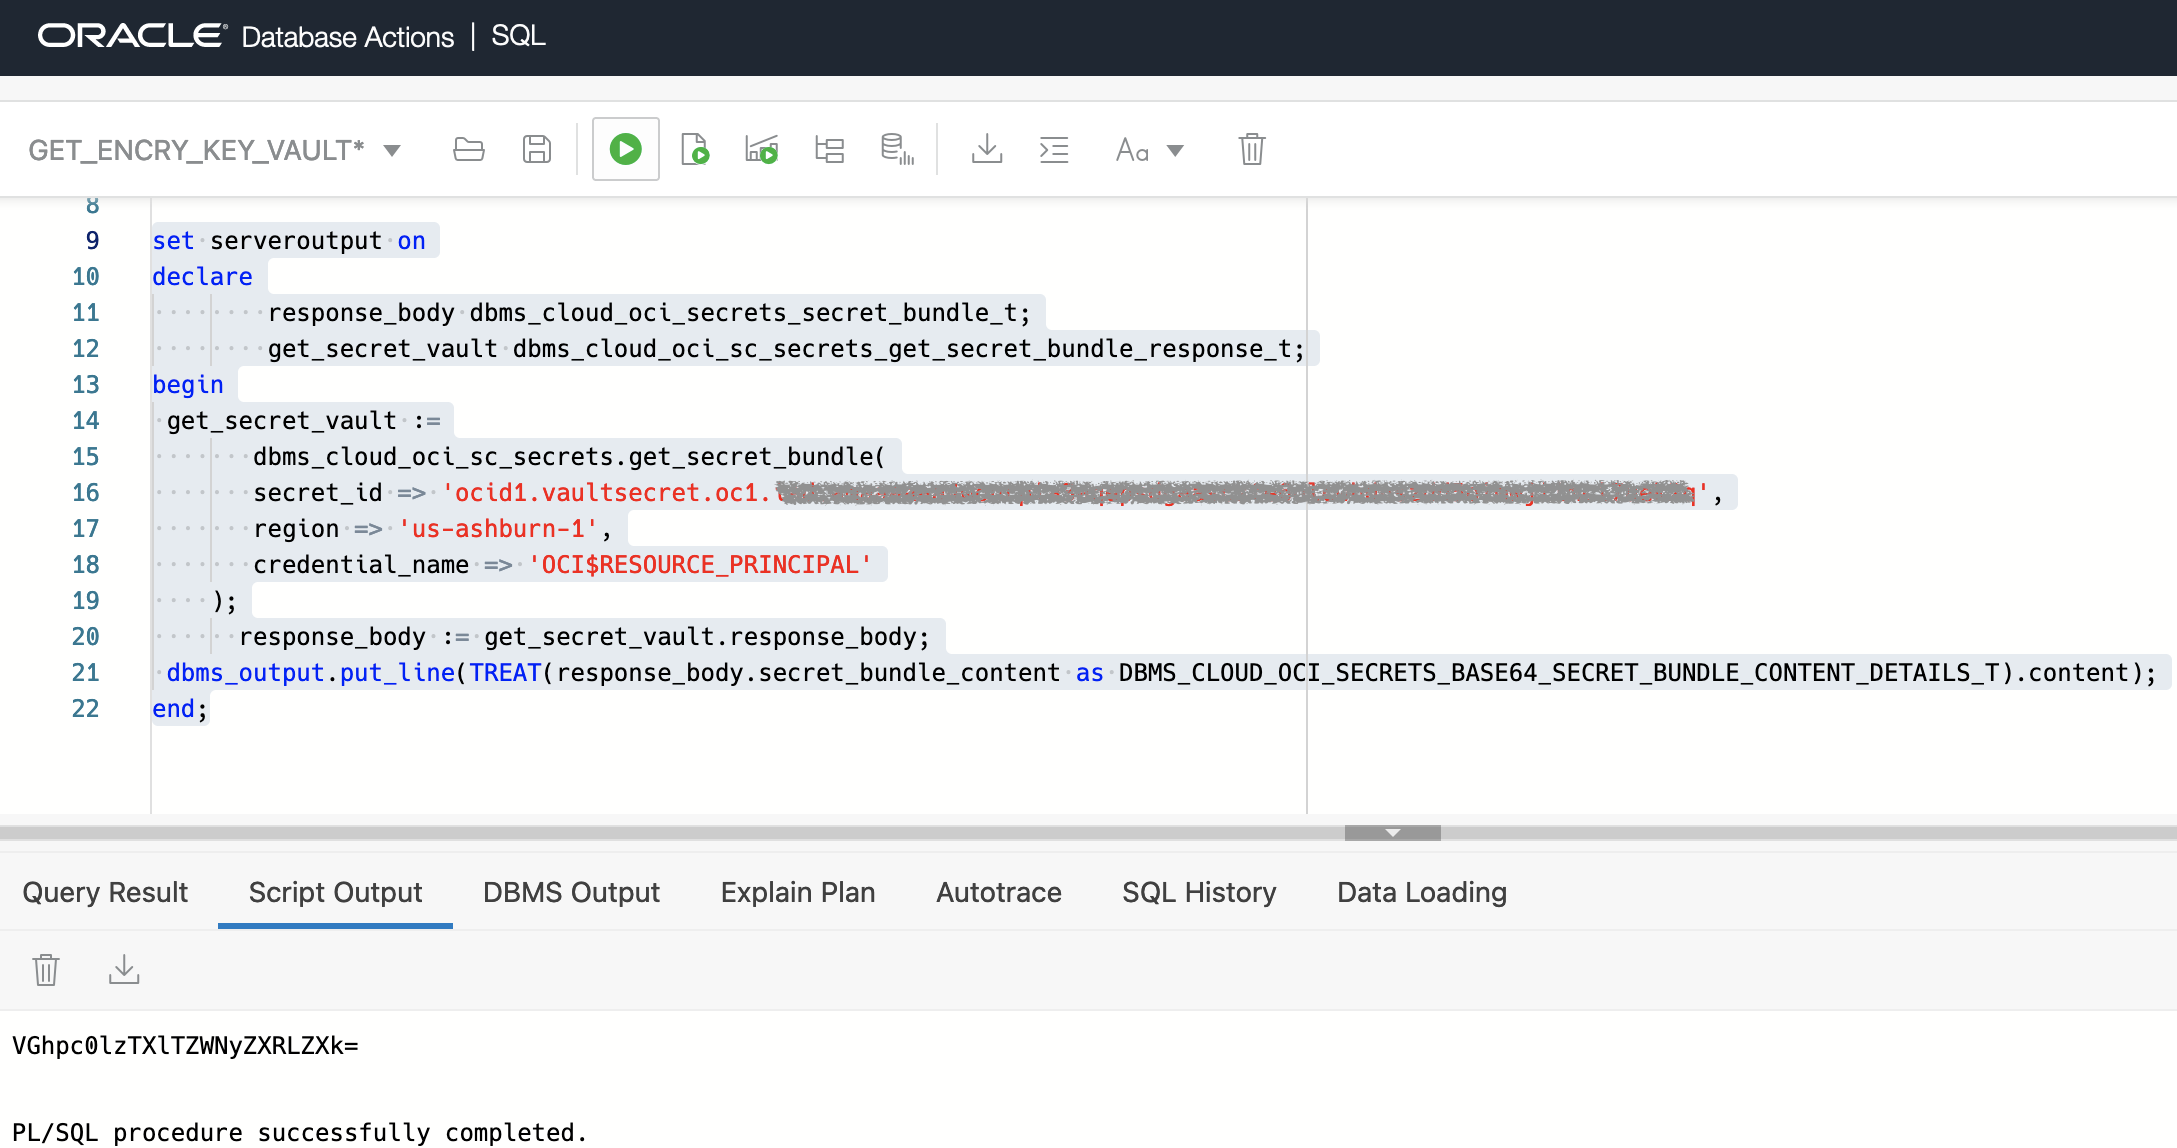
The response is returned as a base64 encoded value which is the encoding method that the secret is returned from the Vault. For good measure, we will decode the value to see that it is equivalent to the value stored originally during the creation.

Summary
In the end – this implementation is a great example of how a developer can take advantage of cloud-native features that OCI offers and continues to build upon – Autonomous Database, OCI PL/SQL SDK’s, OCI Vault and more. Then, with some simple configurations we can develop an out-of-the-box, secure and DevOps friendly solution for an integration challenge that has existed over the years.
Addtional Documentation: