With OAuth 2 becoming a security requirement for most companies and a best practice for Oracle Integration Cloud (OIC), more use cases are surfacing for customers. One such use case involves configuring OIC for OAuth and front OIC with an API Gateway (APIGW). The APIGW needs to be responsible for validating the API call with OAuth before routing the request to OIC with the same JSON Web Token (JWT), basically a passthrough call. Without leveraging the benefits of using an APIGW, this may seem unnecessary. However, this sets the foundation for taking advantage of APIGW features like rejecting invalid requests before routing to OIC, hiding the OIC URL from the consumer, and vanity URLs (to mention a few).
This blog post will provide the aspects of configuring an API in the gateway for JWT authentication. The details come from an IDCS JWT obtained from the associated OIC environment that the APIGW fronts. Once everything is set up, the steps look like Figure 1 – Use Case Flow:
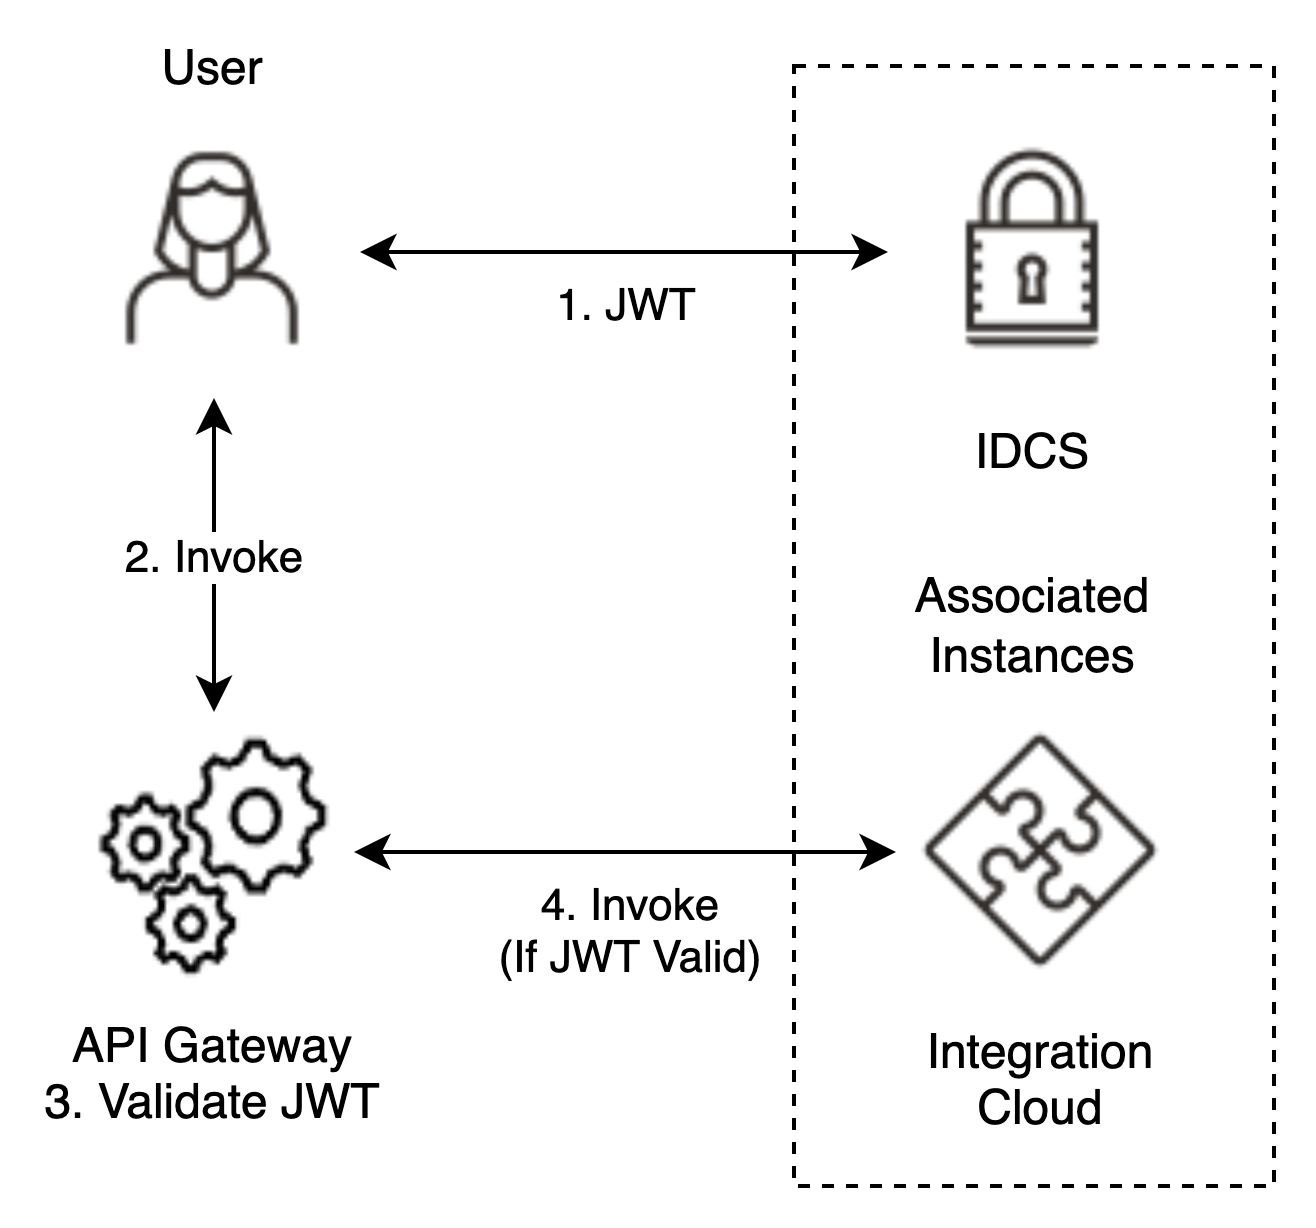
Figure 1 – Use Case Flow
NOTE: There are various OAuth use cases with the APIGW, and this scenario is the most straightforward. We plan to blog about other flows soon (e.g., JWT token exchange).
Prerequisites
- The IDCS instance associated with OIC has the necessary OAuth configurations. Since this blog post focuses on the API Gateway, we assume that Integration Cloud (IC) orchestrations are ready to be directly invoked using OAuth. If you need to set up your OIC instance, please refer to the online documentation and start with About OAuth 2.0 Grants under the Authentication Support section.
- A JWT from the IDCS instance for prerequisite #1, where we will examine this JWT using https://jwt.io. The JWT can be retrieved using Postman, curl, or simply downloading from the OIC console.
- The API gateway contains an API with a route to an IC integration that’s activated and ready to accept requests.
Optional
The OIC February 2021 release introduced an ease-of-use configuration between an API Gateway instance and OIC. This new feature allows the IC developer to deploy an API on an APIGW from the IC console for an IC integration. The specifics are available in the OIC & OCI API Gateway Integration: Quick and Easy blog post.
Setup OAuth Validation for API Gateway
Before configuring the API in the gateway, we will collect the necessary details from the JWT (prerequisite #2) and the openid-configuration from the OIC IDCS instance. These items include:
- JWT Issuer
- JWT Allowed audiences
- The remote JWKS URI
JWT Values
The first two items we will be collecting come from an actual JWT we inspect using https://jwt.io. With your browser open at jwt.io, copy and paste your JWT into the Encoded text field (left-hand side). Once you have done this, you should see something like Figure 2 – View JWT in jwt.io:
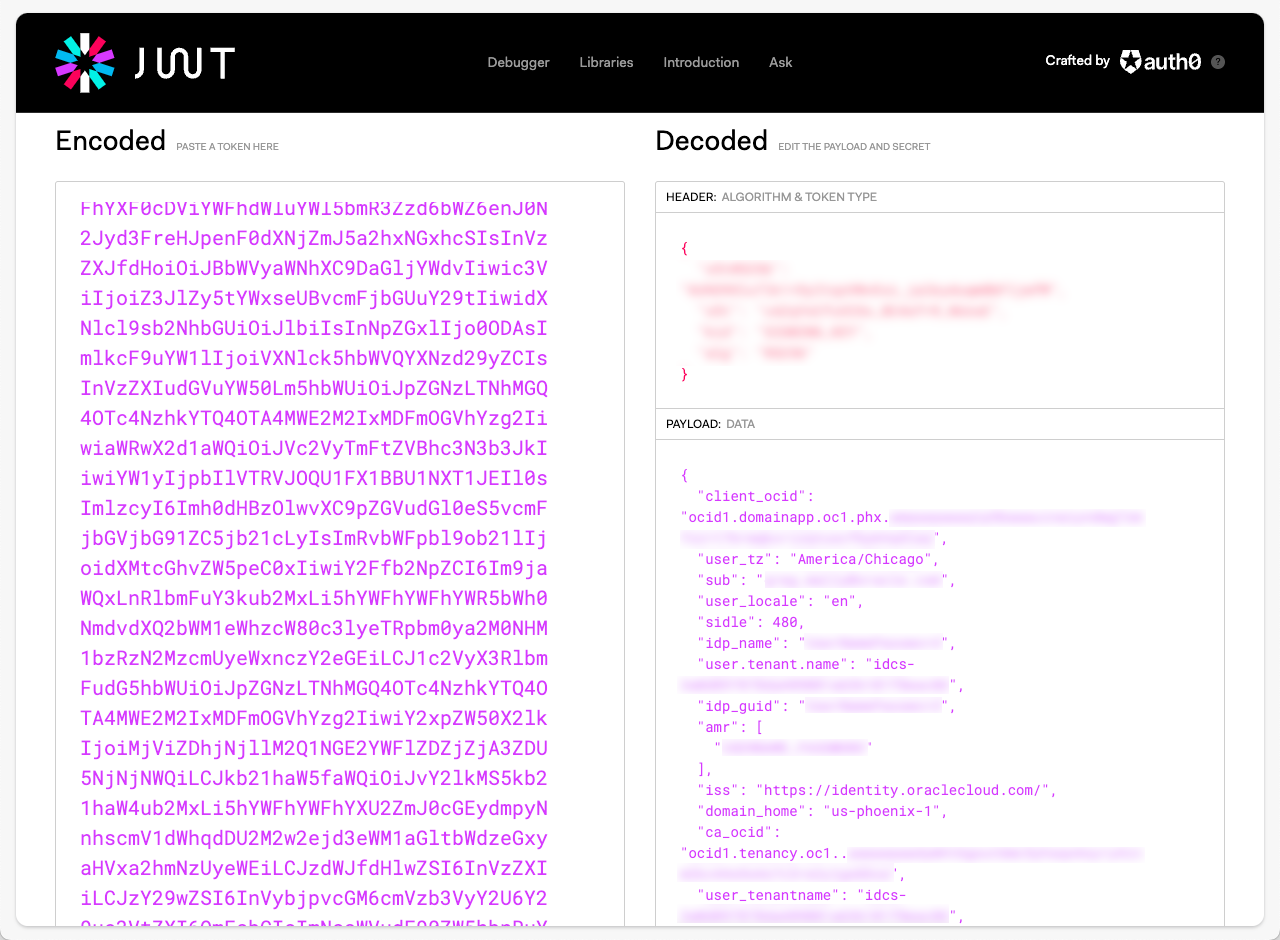
Figure 2 – View JWT in jwt.io
The first value we are looking for is the issuer or the “iss” JSON key in the decoded payload data:
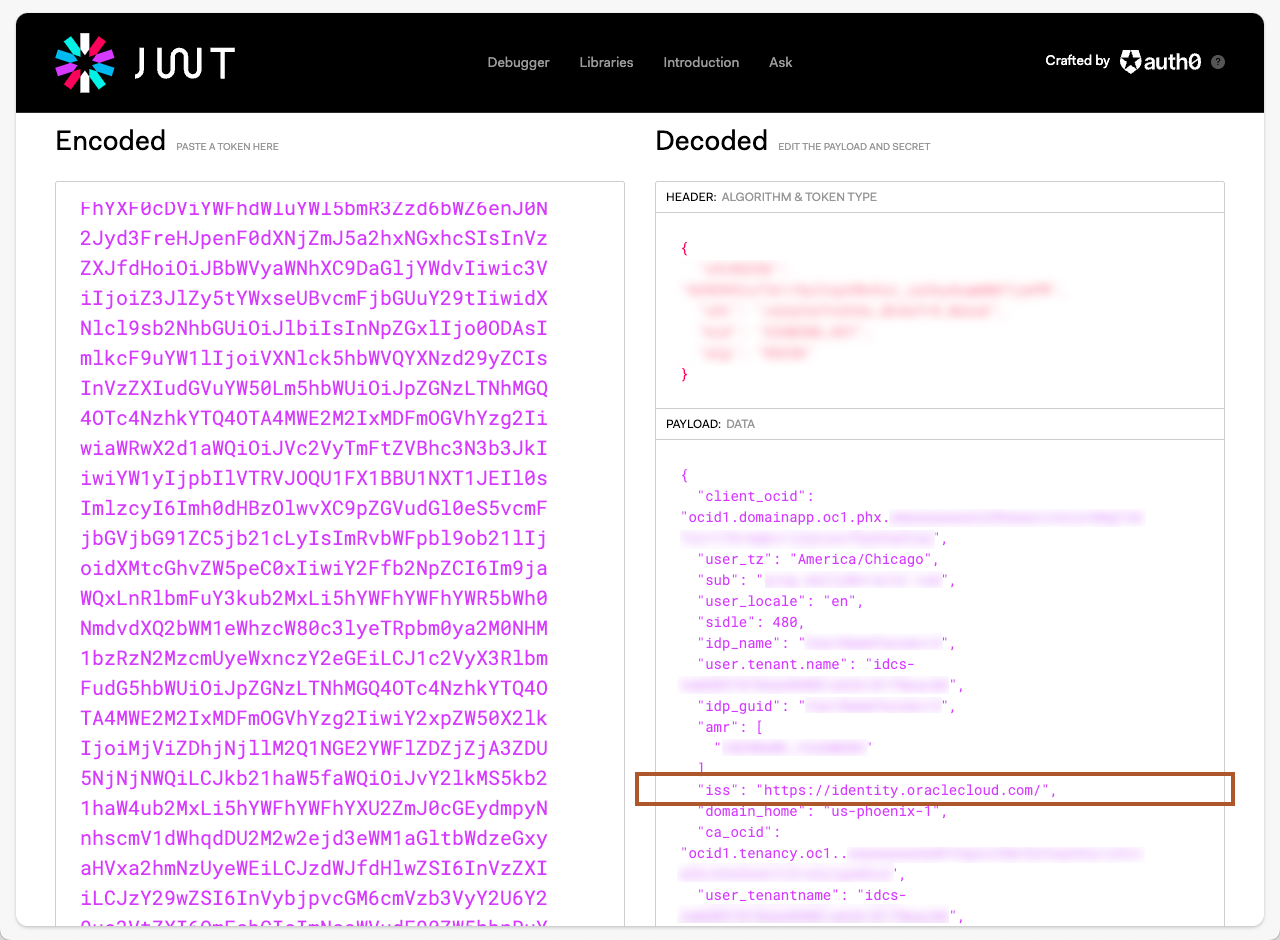
Figure 3 – JWT Issuer
The next piece of information we need in the JWT is the audiences (“aud” JSON key). This value is an array, and we will need all the values in that array:
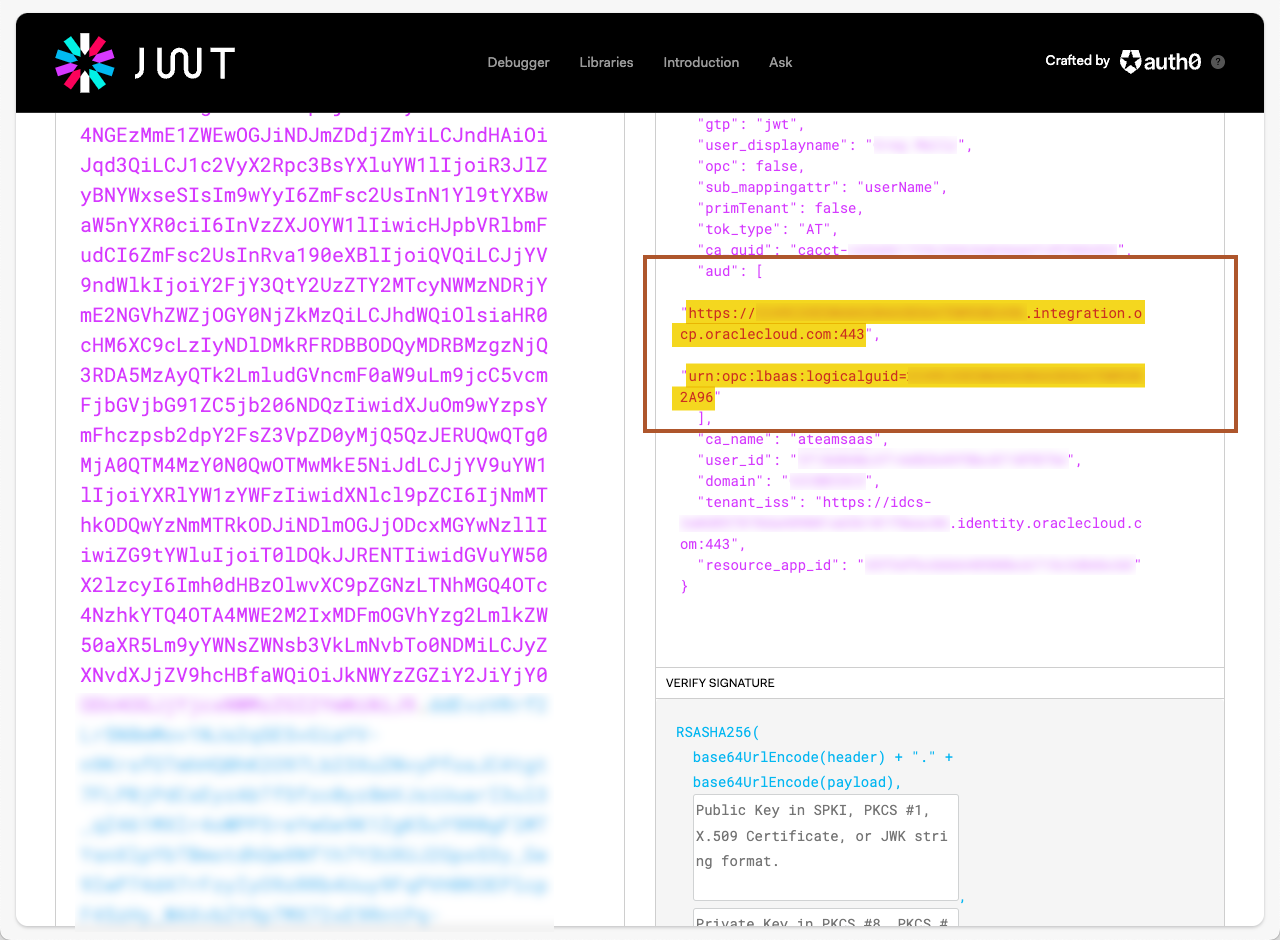
Figure 4 – JWT Audiences
We now have all the data needed from the JWT. If you haven’t looked at a decoded JWT before, this is an opportunity to see all the other things that are part of your JWT.
Remote JWKS URI
The final piece needed to complete the APIGW configuration is the URI that provides access to the public signing certificate in the IDCS instance. Using your browser and the IDCS URL for the well-known URI registry, you can locate the value under the jwks_uri JSON key: https://idcs-xxxx.identity.oraclecloud.com/.well-known/openid-configuration (the idcs-xxxx is your IDCS instance associated with the OIC environment). You should see something like the following:
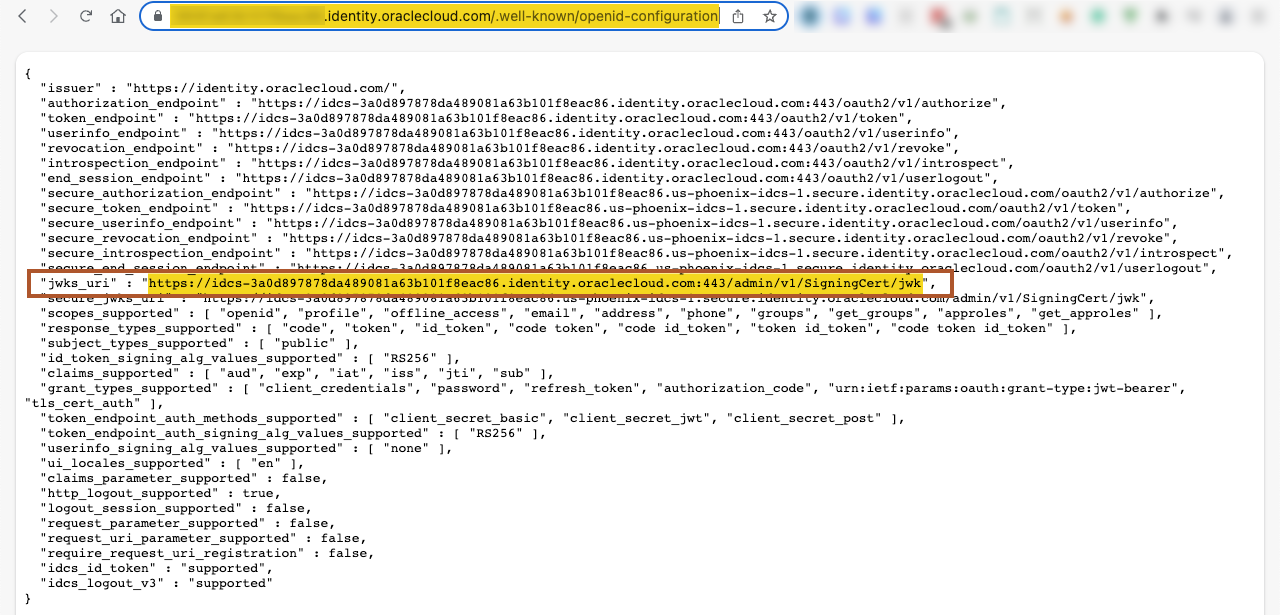
Figure 5 – Well-Known URI Registry
Once you have located the jwks_uri, open it in your browser to validate that it is accessible:

Figure 6 – View Payload from jwks_uri
 If you get an error.common.exception.unauthorizedAccess when attempting to view the jwks_uri in your browser, you will need to allow access via the IDCS console. To enable access to the URI, open your IDCS console and navigate to Settings > Default Settings. Toggle the switch under Access Signing Certificate:
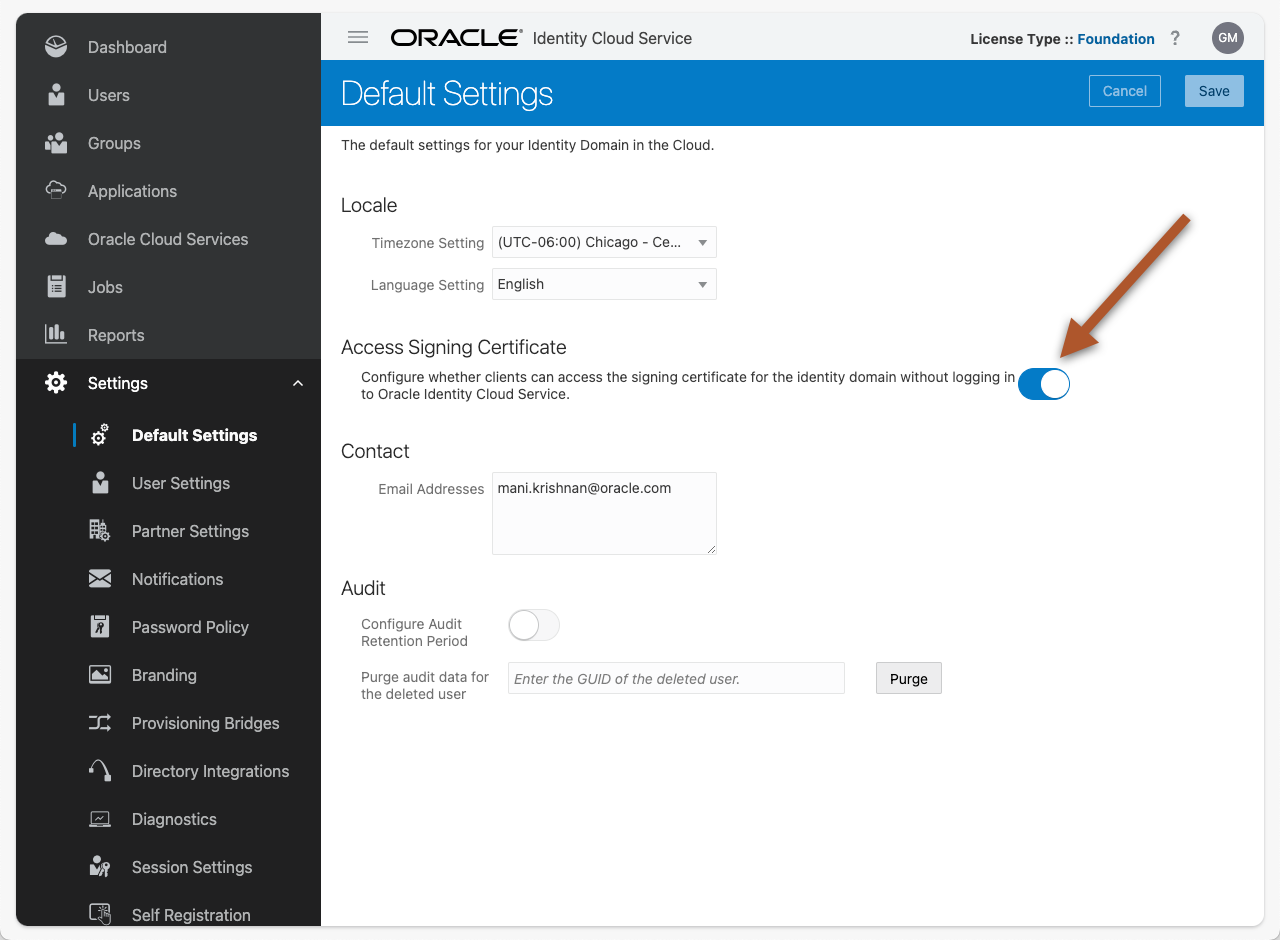
Figure 7 – Access Signing Certificate Toggle
Configure API Deployment
Now that we have all the necessary data, we can add the authentication to the existing deployment. In the OCI console, Navigate to your Gateway and Deployment details:
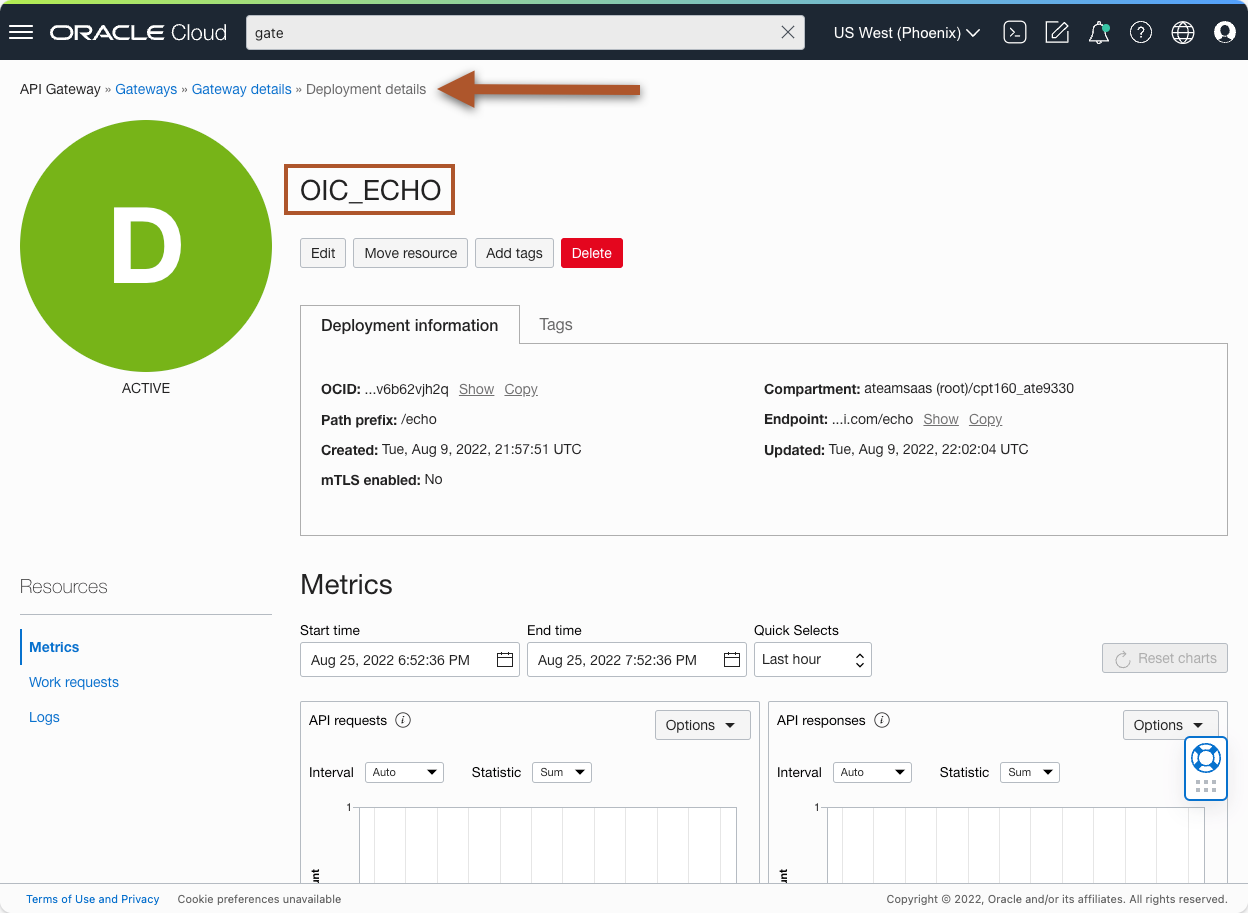
Figure 8 – API Gateway Deployment Details
Edit the deployment and Add an Authentication API request policy. Set the following values for the Authentication:
| Policy Field Name |
Value |
| Authentication type |
JWT |
| Authentication token |
Header |
| Header name |
Authorization |
| Authentication scheme |
Bearer |
| Allowed issuers |
Value from JWT key “iss” |
| Allowed audiences |
Value from JWT key “aud” array item #1 |
|
|
Value from JWT key “aud” array item #n |
| Public keys |
|
| Type |
Remote JWKS |
| JWKS URI |
Value from jwks_uri |
Table 1 – JWT Authentication Policy Details
Your Authentication policy should look something like the following:
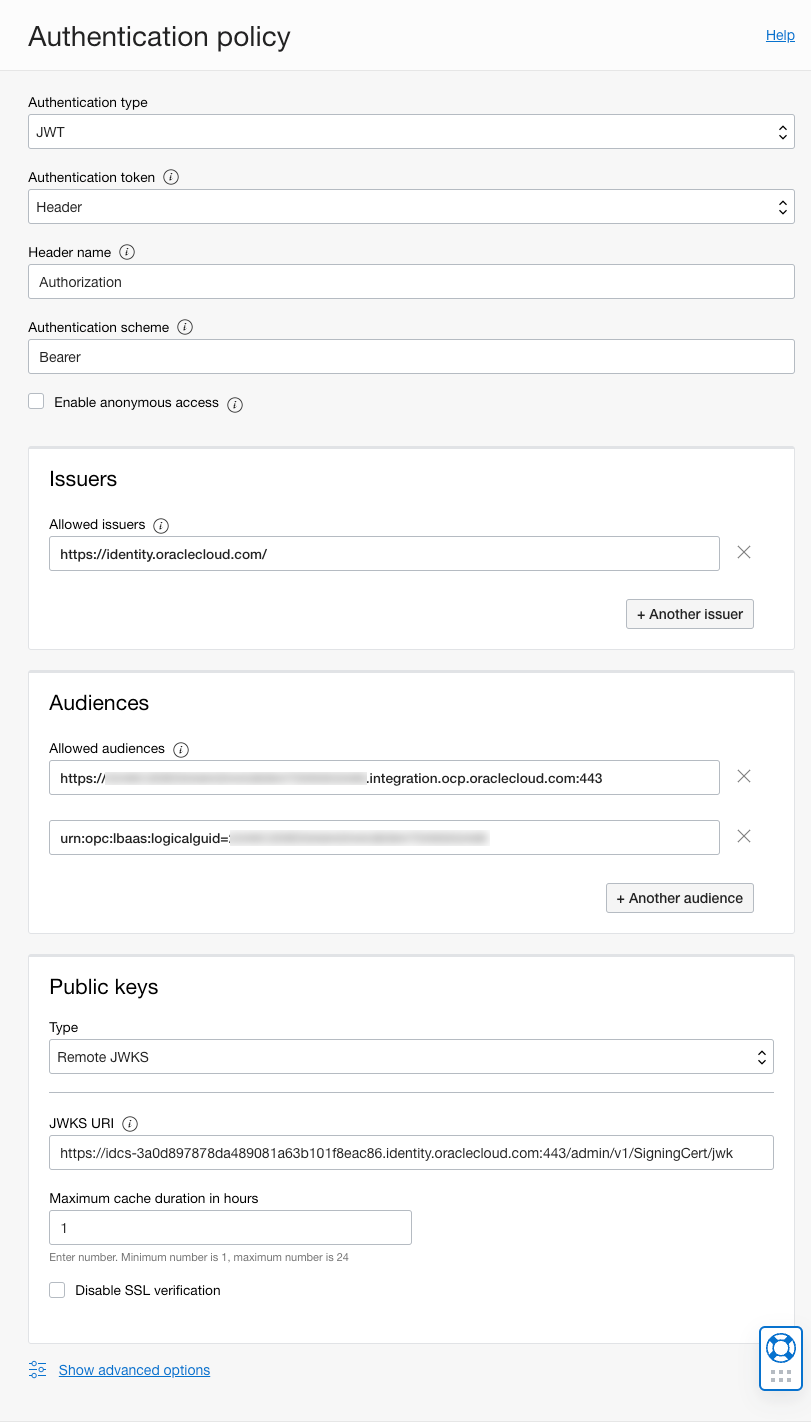
Figure 9 – JWT Authentication Policy Configuration
Now “Apply changes” and then the “Next” button until you are at the “Review” step, where you can “Save changes”. Once the deployment becomes “ACTIVE” (green), you can now test the API using your choice of clients (e.g., curl, Postman).
Test Your Configuration
There are several clients available to test our configuration, but I will use curl for simplicity’s sake. In Figure 10 – Test Results via curl, you will see two commands: 1. A request directly against the IC instance, and 2. A request through the APIGW …
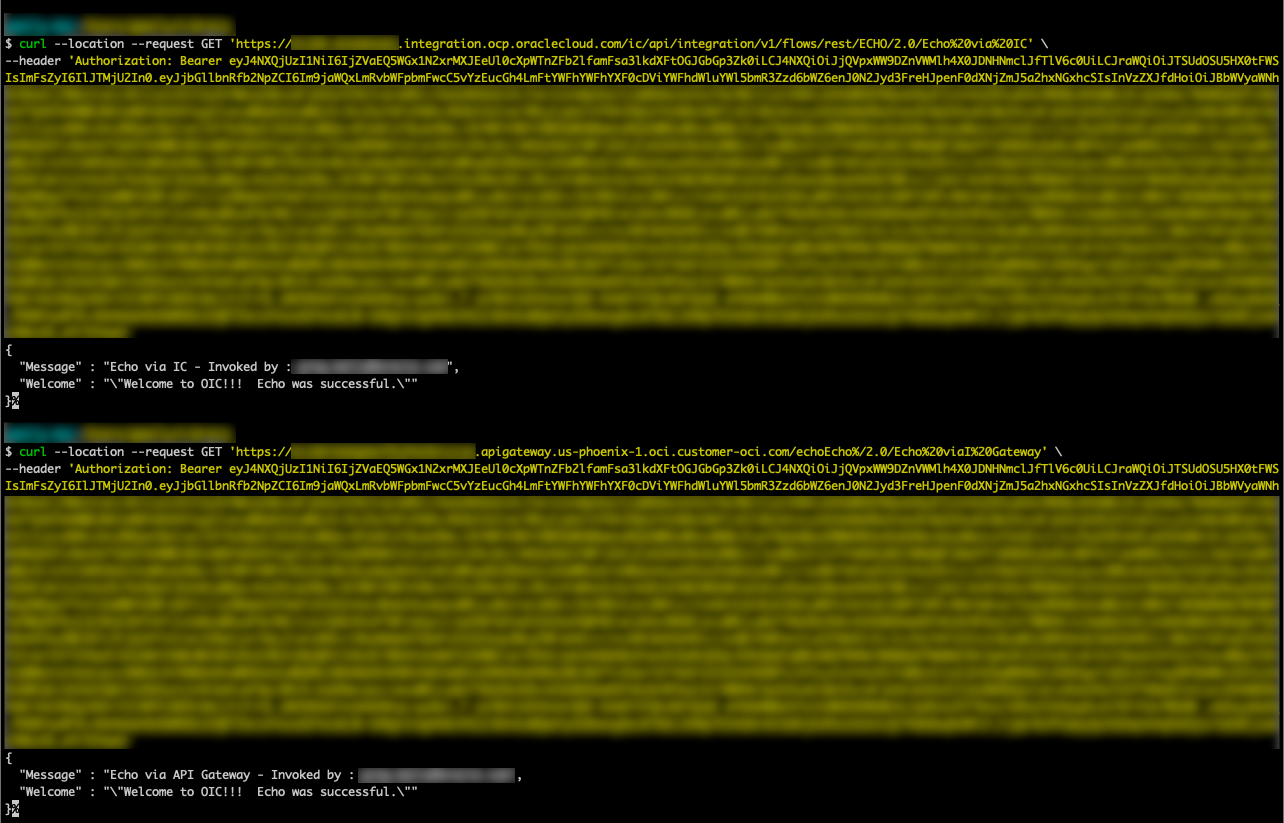
Figure 10 – Test Results via curl
Now we will change the request to the APIGW by removing the very first character of the Bearer token. You can see the result in Figure 11 – Negative Test Results via curl:

Figure 11 – Negative Test Results via curl
I hope you find this post helpful in setting up your API Gateway with the JWT Authentication policy.