The Oracle Linux Storage Appliance (OLSA) allows you to easily build NFS and Samba shared file system storage with attached NVMe devices or block volumes on Oracle Cloud Infrastructure (OCI). It enables you to export files by using the protocols Network File System (NFS) v3 and v4, and Windows Server Message Block (SMB) v3 (Samba).
As mentioned here , the latest version of the product supports Microsoft Active Directory integration. Customers can now manage user authentication and access authorization using Active Directory to Samba shared file system directories created using Oracle Linux Storage Appliance. As we know OLSA provides a fast and easy way to build a shared storage system on Oracle Cloud Infrastructure. If you are using an older version of OLSA, please refer to the blog mentioned before, on how to upgrade to the latest version and take advantage of Active Directory (AD). Active Directory support is enabled in the Samba Global Settings option in the web console’s Administration page. Please keep in mind that OLSA is intended for use on Oracle Cloud Infrastructure only and can run on all Oracle Cloud Infrastructure shapes.
Note:
- Architectural design considerations to keep in mind when considering OLSA as shared storage solution: it doesn’t provide High Availability or data redundancy solution.
- We are going to edit the configuration manually i.e., Samba Global Settings, the OLSA interface will throw errors because it will not be able to parse the manual changes.
Pre-requisites:
For this integration, you need to have a running instance of
- Oracle Linux Storage Appliance (check documentation here to set up an instance if needed)
- Microsoft Active Directory
- Need a domain administrator account to make the OLSA instance join the Domain Controller (DC).
- The Domain Controller should have Read Write access to join the OLSA instance
- Make sure there is network setup between OLSA and AD instances.
Set-up:
- Log in to the OLSA instance.
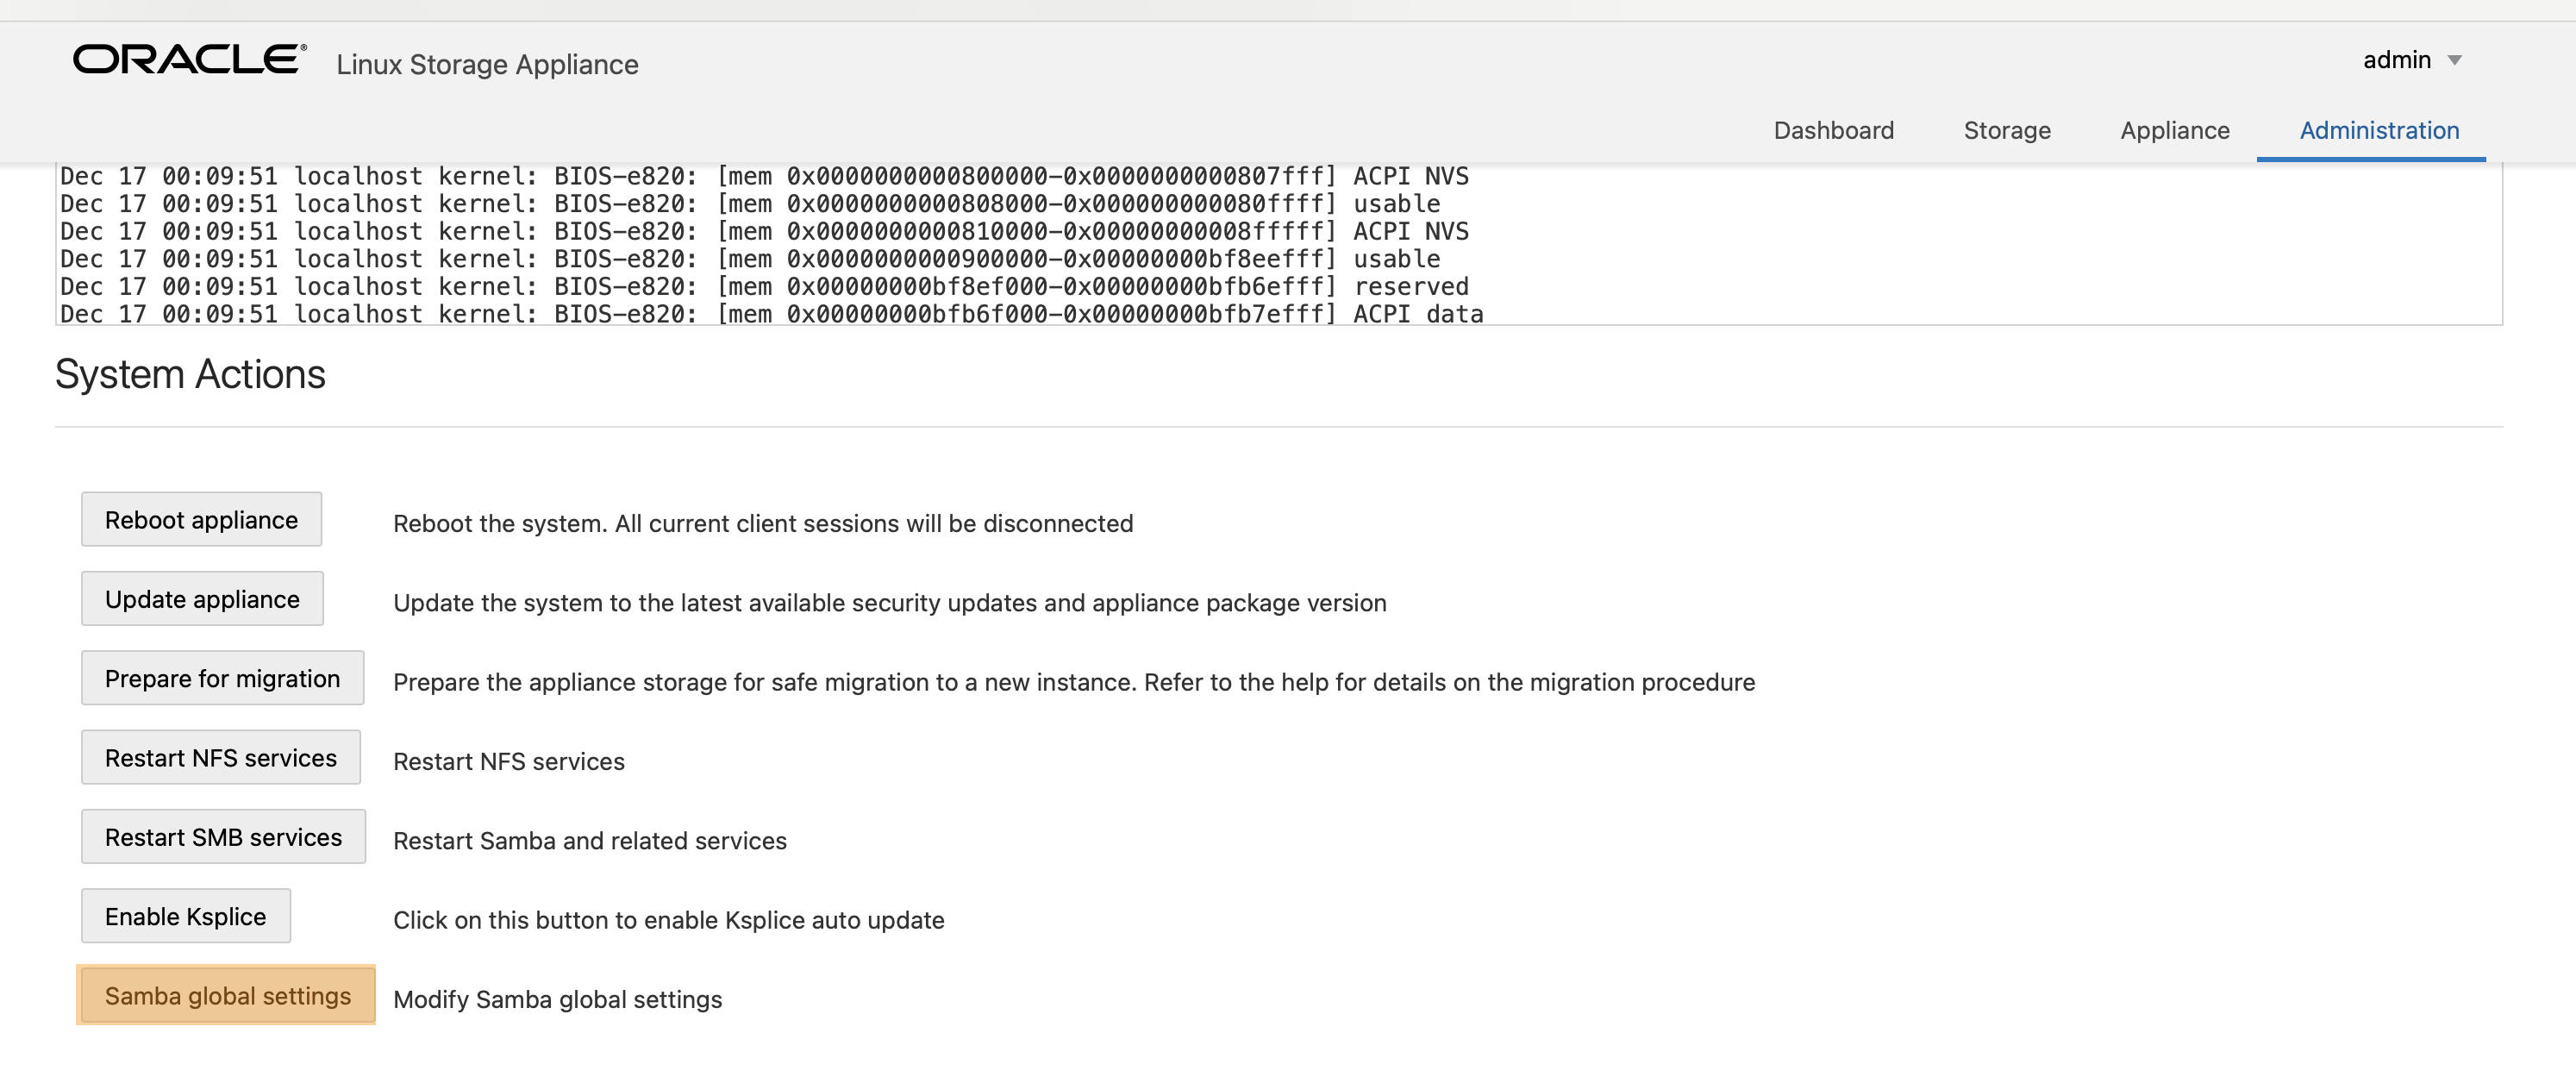
- Go to Administration and go to Samba global settings.
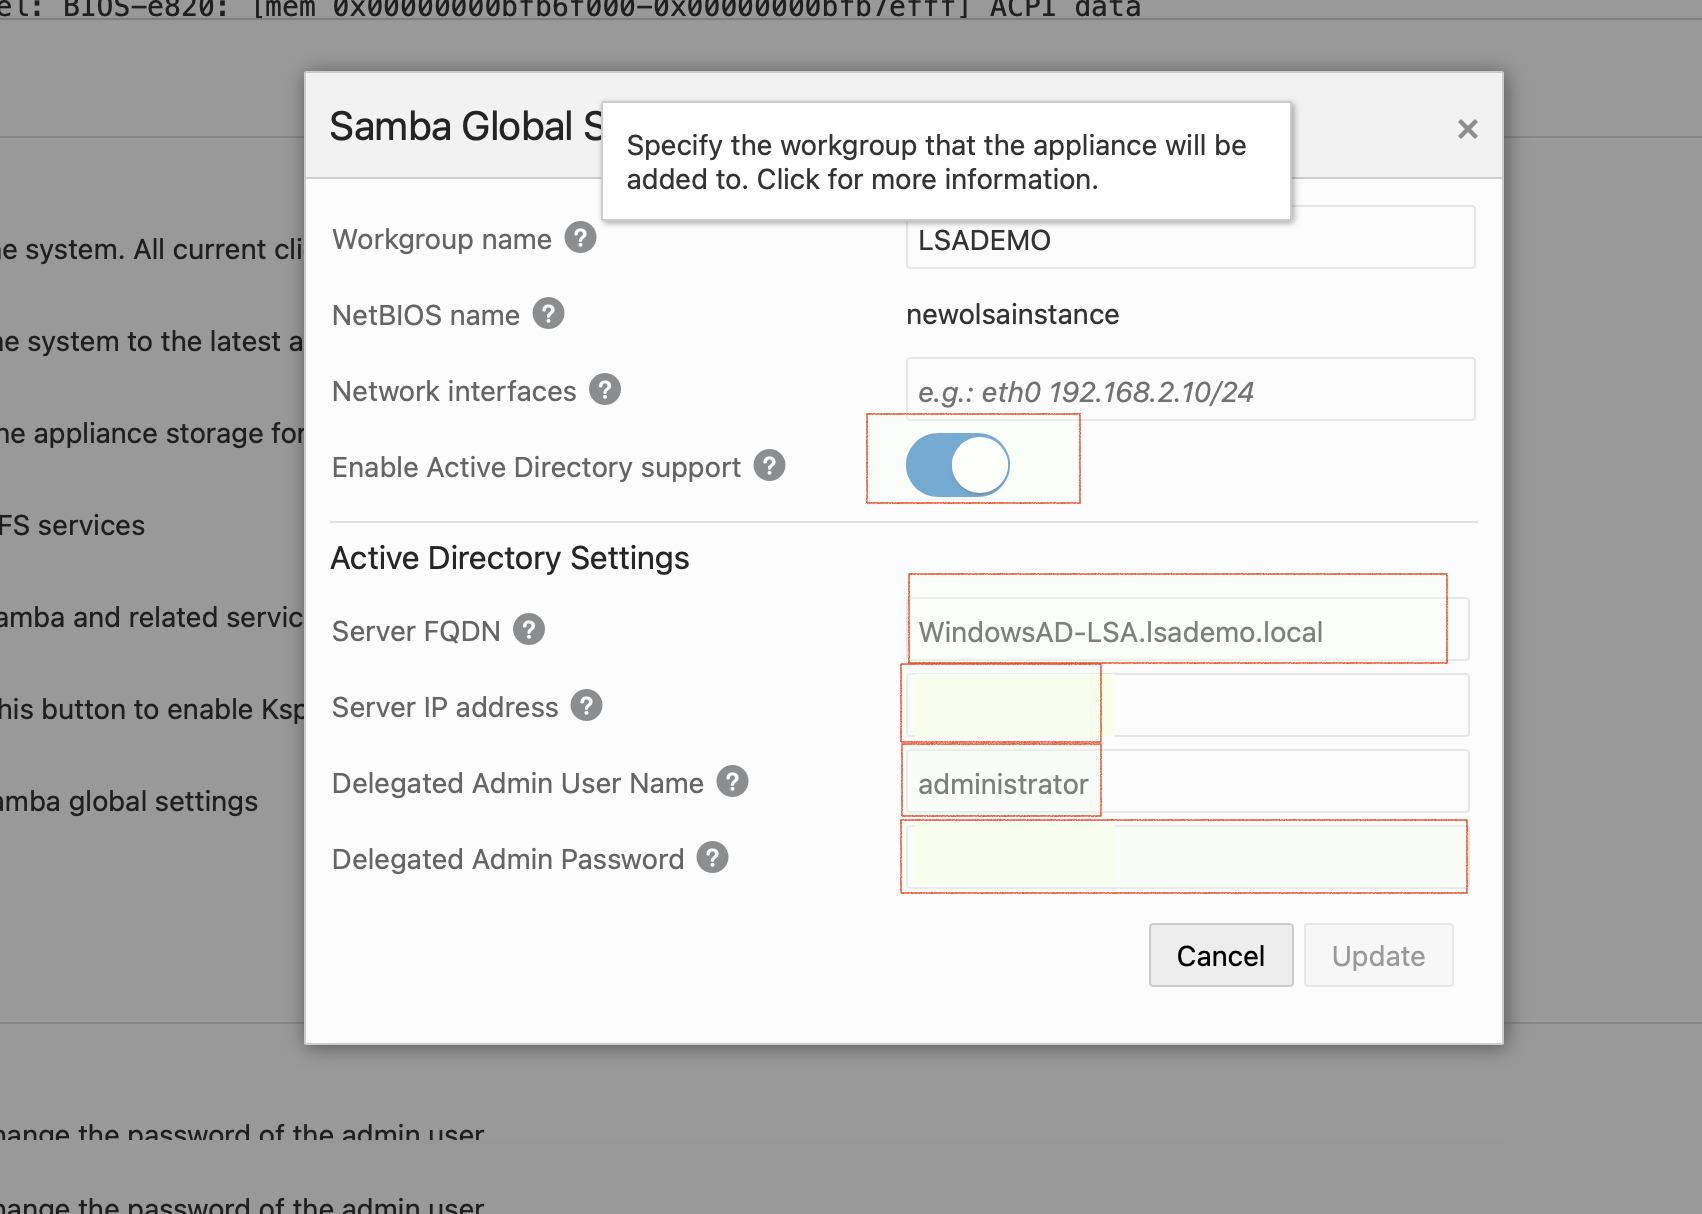
- Edit the Samba global settings, Enable Active Directory support as shown below and provide the connection details.
- Provide a Workgroup name
- The server FQDN is the hostname (as found in the OCI console) + the domain name. In this example it is WindowsAD-LSA + lsademo.local which would be windowsad-lsa.lsademo.local
- Provide the ip-address of the LSA instance
- Username and password for the Domain Administrator
- Click update! There will be pop-up asking to confirm if you want to update the global settings.
- If the network is setup and if the provided details are correct, the connection will be established and success pop-up would come up.
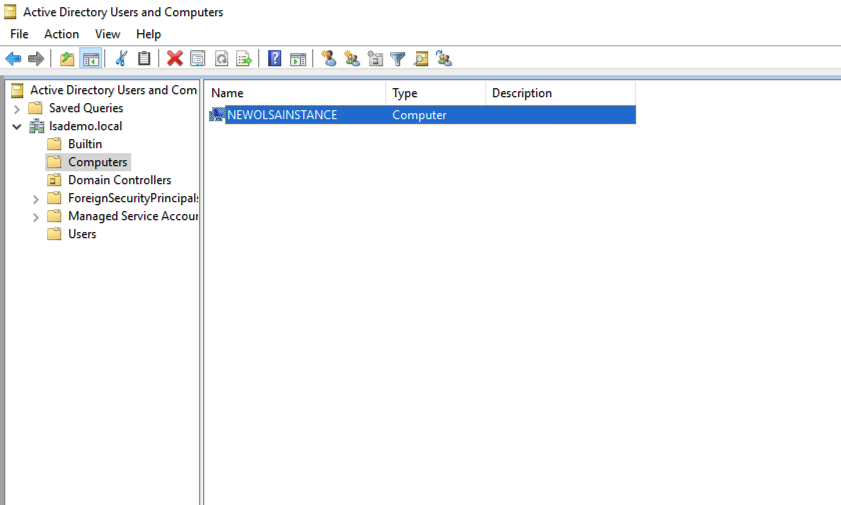
- On the AD instance check to see if the join happened. As seen below the screenshot, we see that the OLSA instance has joined the DC.
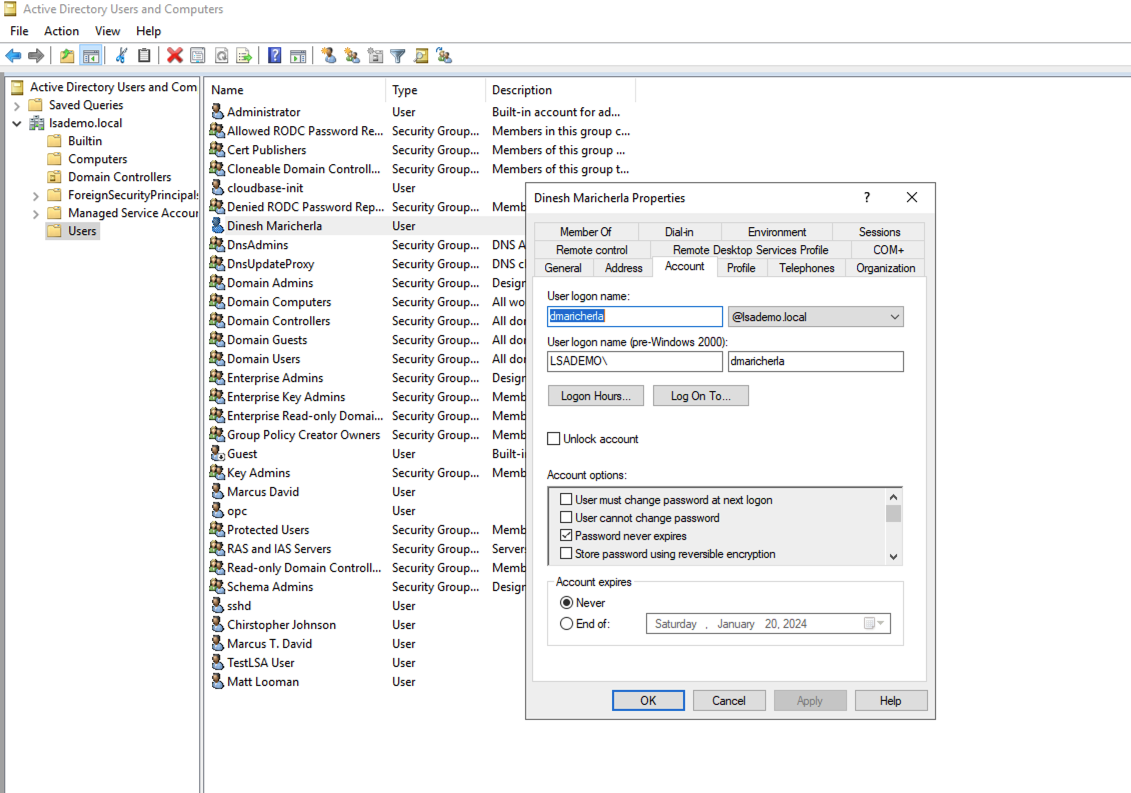
- Create a user at AD, for this setup I created an Account: dmaricherla
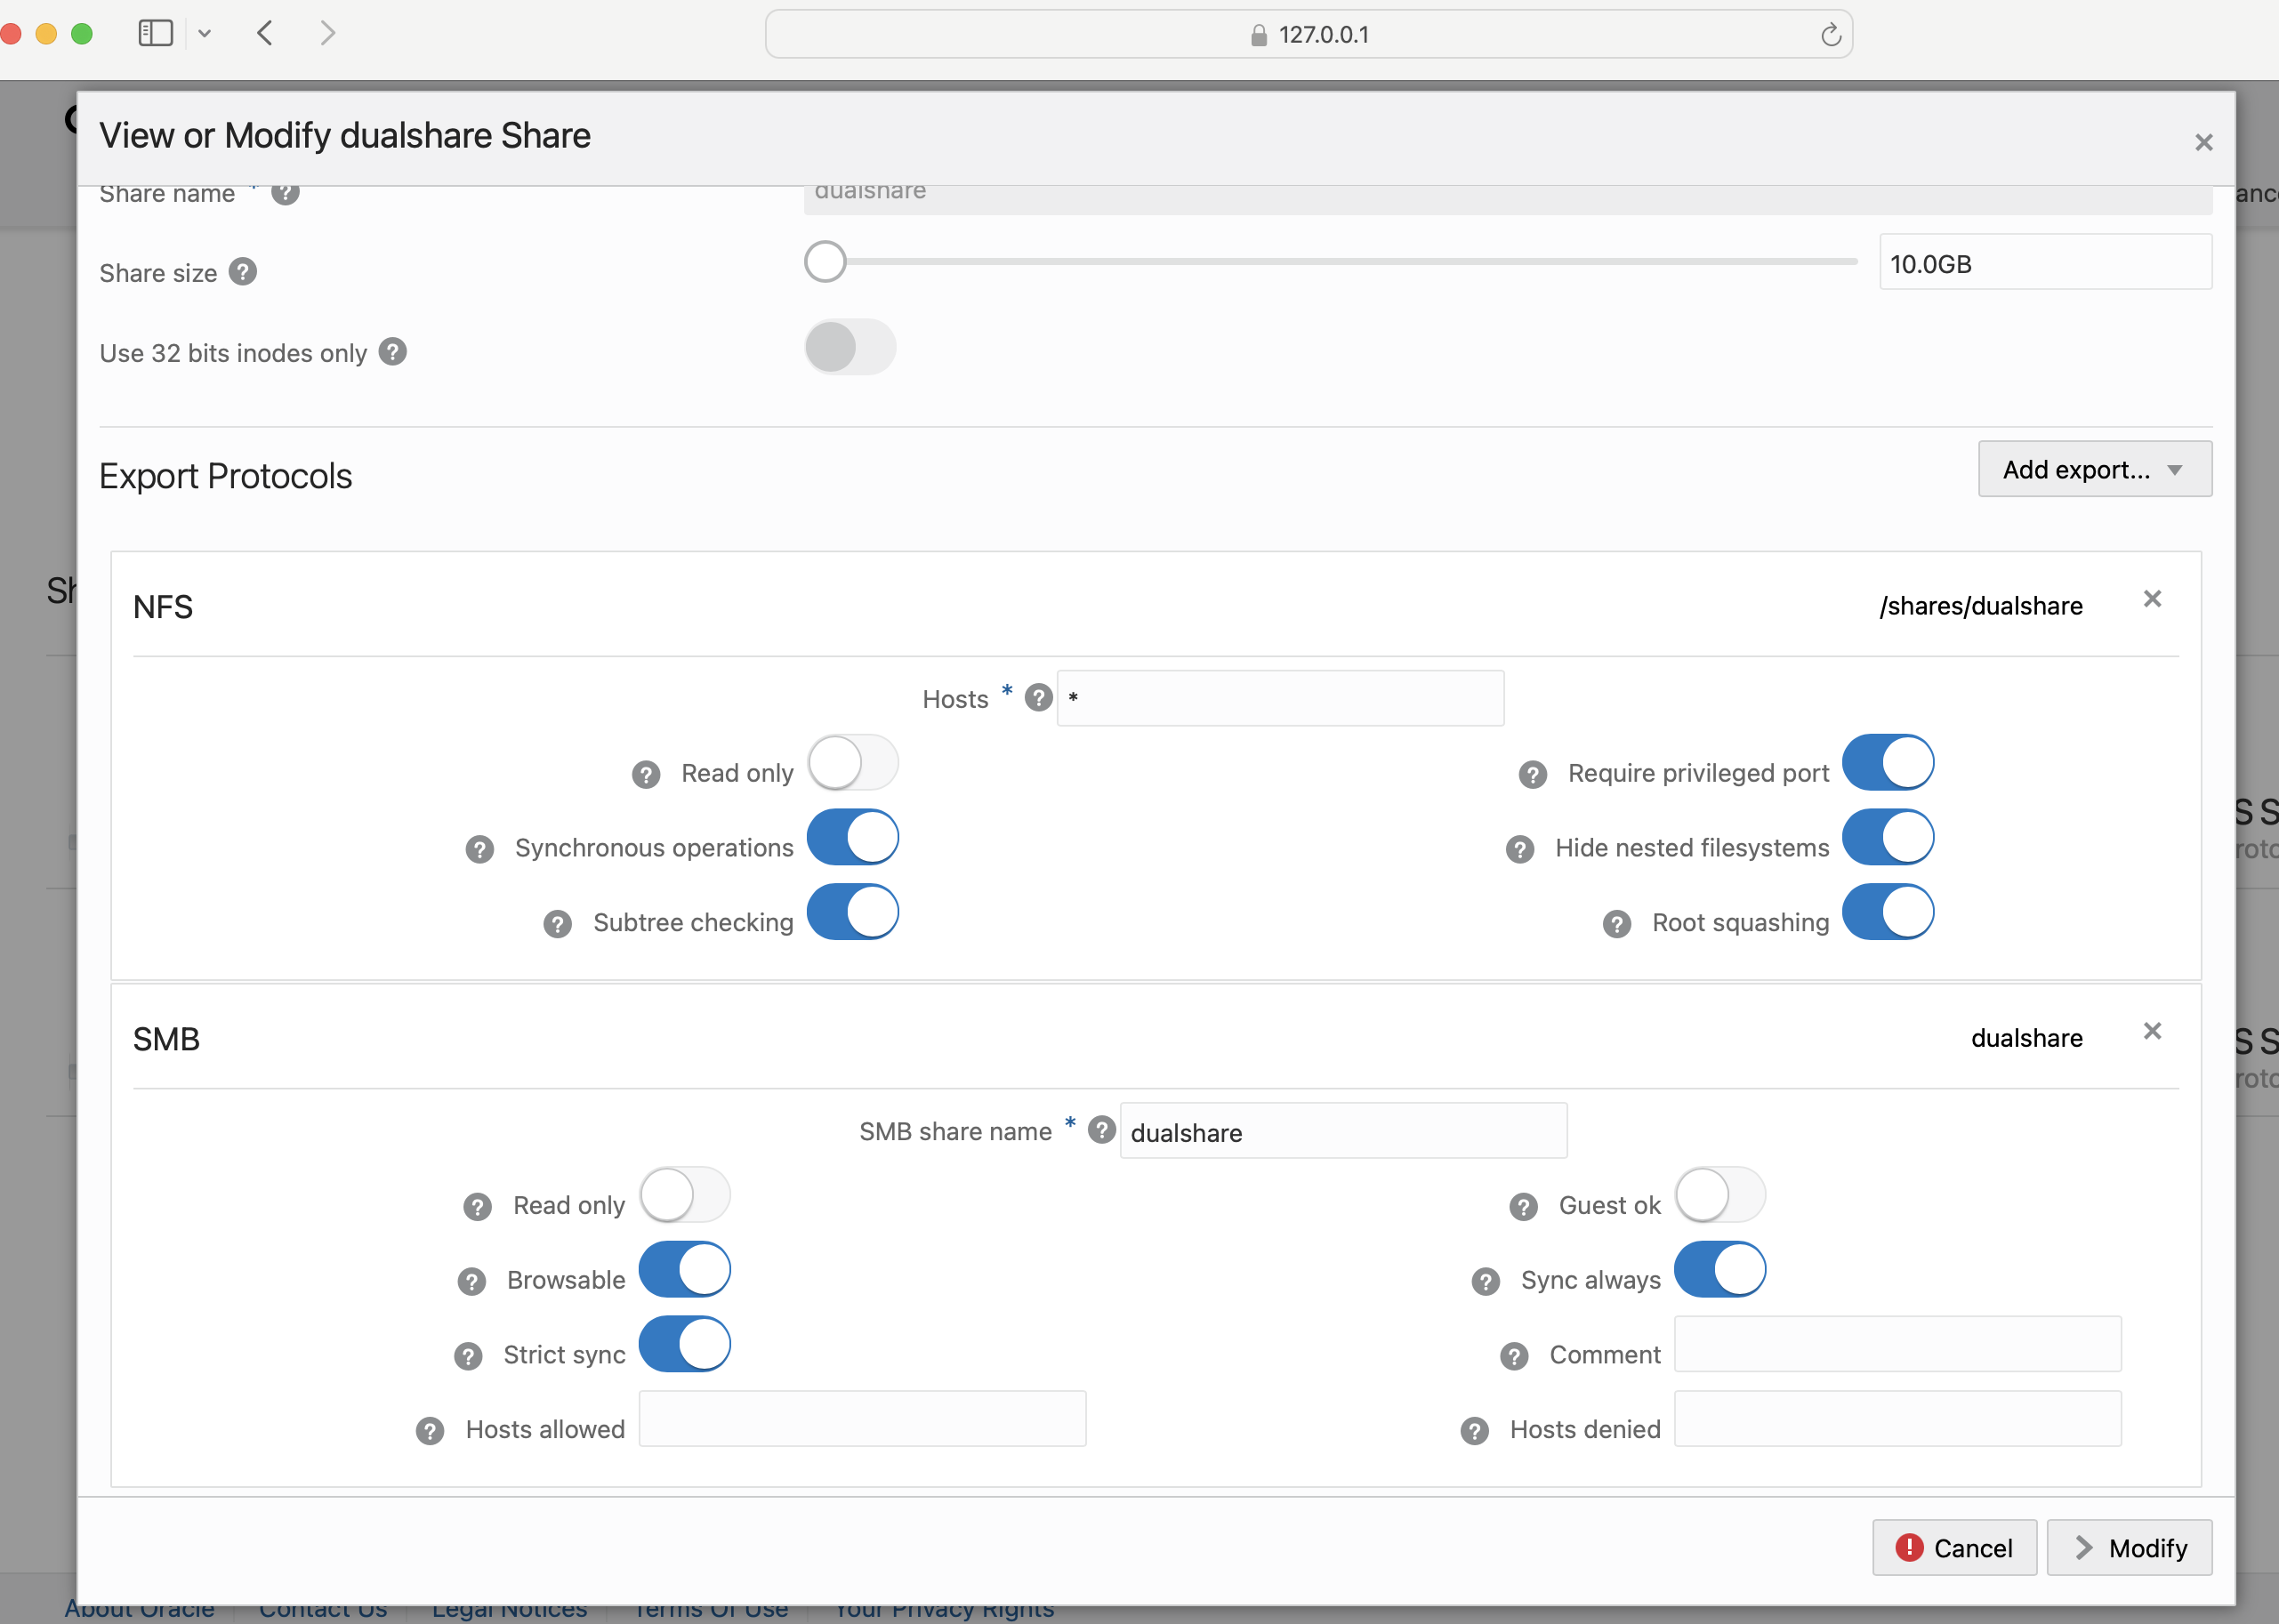
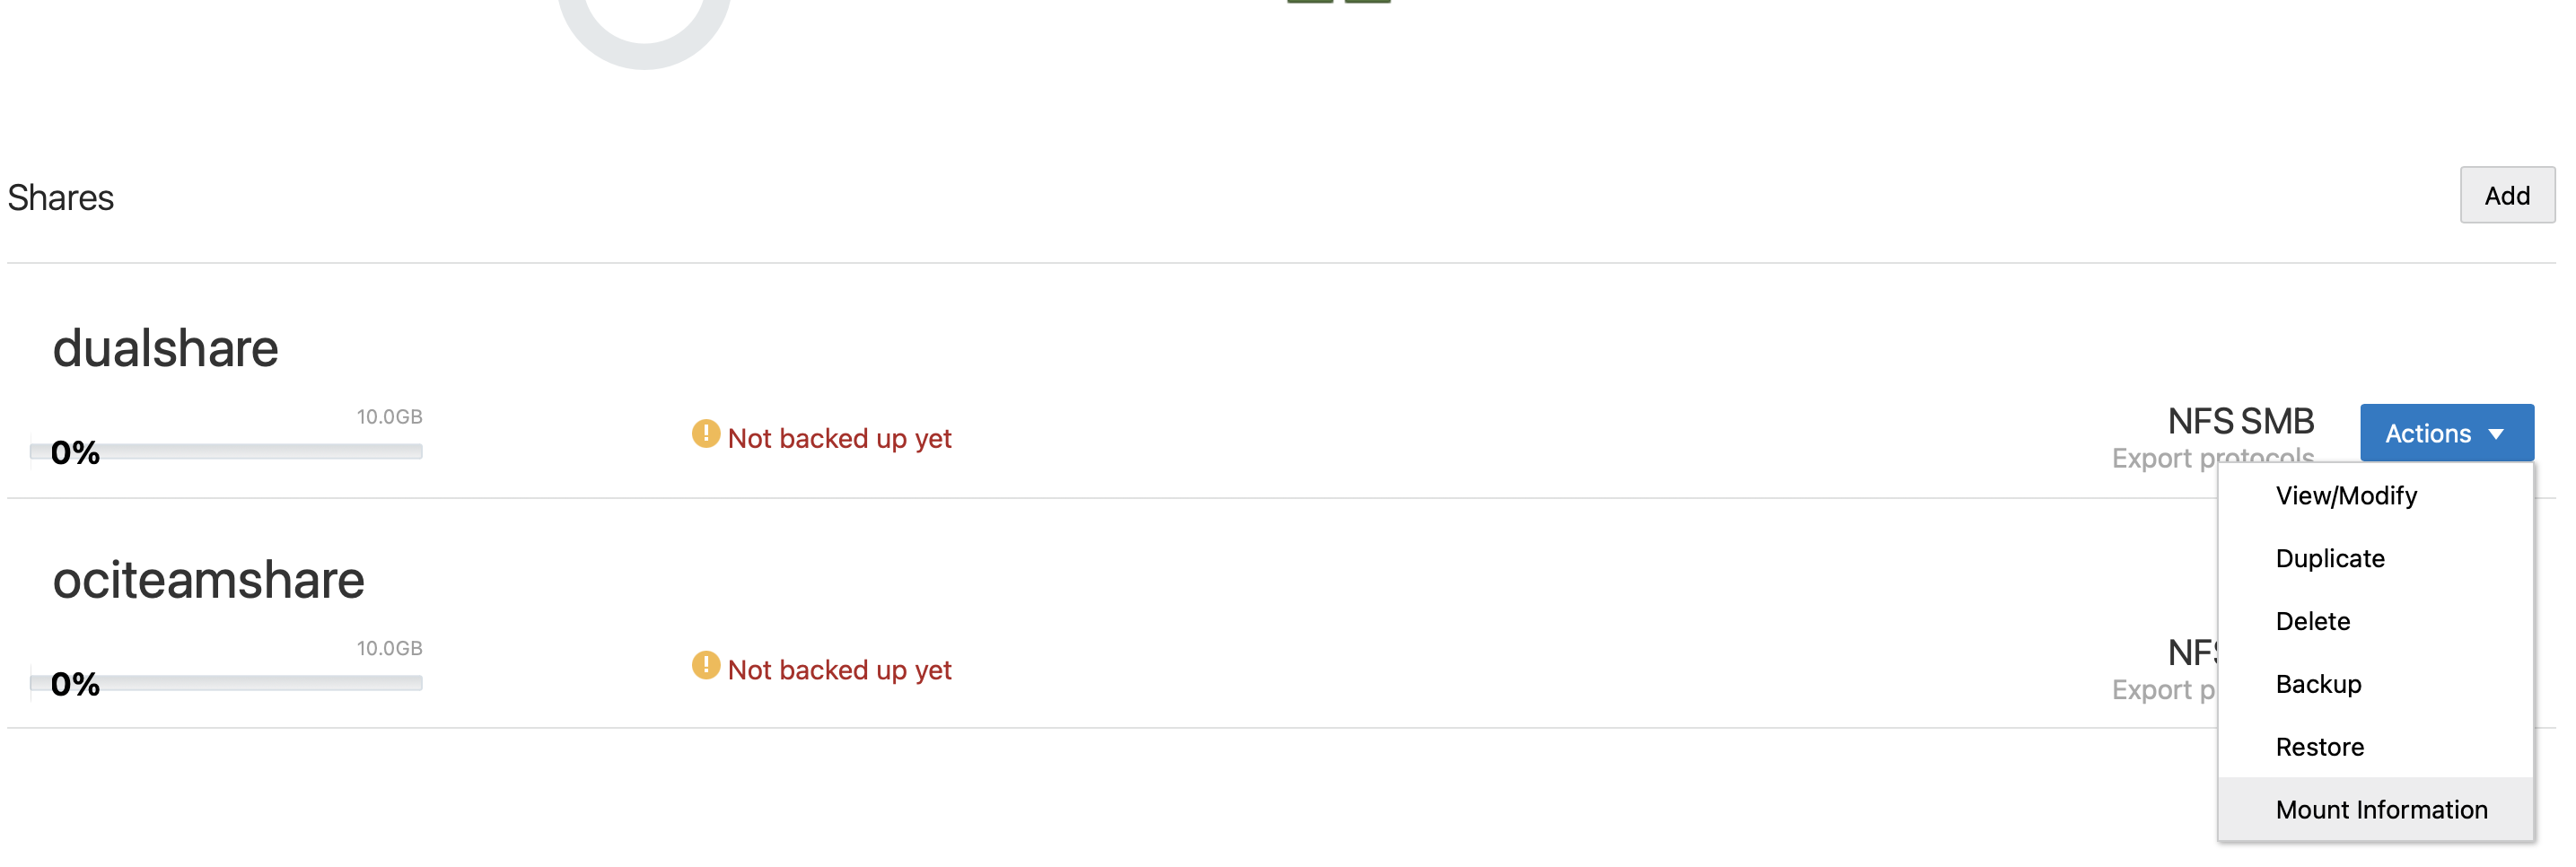
- Go to Shares screen to gather information about the SMB share.
- Information about how to mount the share is available from the Actions drop down.
- Let’s try to mount the share on a new instance with AD authentication. (We are going to use smbclient to check if the authentication is successful or not)
[root@instance-to-mount-olsa etc]# smbclient -U=dmaricherla@lsademo.local –password=’xxxxxxxx’ ‘//10.x.x.xxx/ociteamshare’
tree connect failed: NT_STATUS_ACCESS_DENIED
- As seen above, the authentication has not worked, and we are getting an access denied. The issue is with OLSA instance settings, idmap range is required to successfully connect to the AD in some cases, the /etc/samba/smb.conf file needs to be edited manually to add the required settings.
Current smb.conf:
[global]
kerberos method = secrets and keytab
template homedir = /home/%U@%D
workgroup = LSADEMO
password server = windowsad-lsa.lsademo.local
template shell = /bin/bash
security = ads
realm = LSADEMO.LOCAL
idmap config lsademo = backend = rid
idmap config * = backend = tdb
winbind use default domain = no
winbind refresh tickets = yes
winbind offline logon = yes
winbind enum groups = no
winbind enum users = no
vfs objects = acl_xattr
map acl inherit = yes
store dos attributes = yes
netbios name = newolsainstance
interfaces =
map to guest = Bad User
include = /.lsa/etc/smb/lsa.conf
bind interfaces only = no
- Edit the smb.conf to include idmap range (We edited the configuration manually i.e. /etc/samba/smb.conf file. When we click on Samba Global Settings, the OLSA interface will throw errors because it will not be able to parse these manual changes.)
idmap config * : range = 2000-17999
idmap config <domain> : schema_mode = rfc2307
idmap config <domain> : range = 100000-999999 \
Edited smb.conf
[global]
kerberos method = secrets and keytab
template homedir = /home/%U@%D
workgroup = LSADEMO
password server = windowsad-lsa.lsademo.local
template shell = /bin/bash
security = ads
realm = LSADEMO.LOCAL
idmap config * : range = 2000-17999
idmap config lsademo : schema_mode = rfc2307
idmap config lsademo : range = 100000-999999
idmap config lsademo : backend = rid
idmap config * : backend = tdb
winbind use default domain = no
winbind refresh tickets = yes
winbind offline logon = yes
winbind enum groups = no
winbind enum users = no
vfs objects = acl_xattr
map acl inherit = yes
store dos attributes = yes
netbios name = newolsainstance
interfaces =
map to guest = Bad User
include = /.lsa/etc/smb/lsa.conf
bind interfaces only = no
- Restart the smb service either from the OLSA ui or at the host.
[root@newolsainstance samba]# systemctl status smb
● smb.service – Samba SMB Daemon
Loaded: loaded (/usr/lib/systemd/system/smb.service; enabled; vendor preset: enabled)
Active: active (running) since Thu 2023-12-21 20:48:47 GMT; 5s ago
Docs: man:smbd(8)
man:samba(7)
man:smb.conf(5)
Main PID: 26853 (smbd)
Status: “smbd: ready to serve connections…”
Tasks: 5
Memory: 9.6M
CGroup: /system.slice/smb.service
├─26853 /usr/sbin/smbd –foreground –no-process-group
├─26855 /usr/sbin/smbd –foreground –no-process-group
├─26856 /usr/sbin/smbd –foreground –no-process-group
├─26857 /usr/sbin/smbd –foreground –no-process-group
└─26884 /usr/sbin/smbd –foreground –no-process-group
Dec 21 20:48:47 newolsainstance systemd[1]: Stopped Samba SMB Daemon.
Dec 21 20:48:47 newolsainstance systemd[1]: Starting Samba SMB Daemon…
Dec 21 20:48:47 newolsainstance smbd[26853]: [2023/12/21 20:48:47.394475, 0] ../../lib/param/loadparm.c:1861(lpcfg_do_service_parameter)
Dec 21 20:48:47 newolsainstance smbd[26853]: Global parameter bind interfaces only found in service section!
Dec 21 20:48:47 newolsainstance smbd[26853]: [2023/12/21 20:48:47.414001, 0] ../../lib/util/become_daemon.c:136(daemon_ready)
Dec 21 20:48:47 newolsainstance systemd[1]: Started Samba SMB Daemon.
Dec 21 20:48:47 newolsainstance smbd[26853]: daemon_ready: daemon ‘smbd’ finished starting up and ready to serve connections
[root@newolsainstance samba]#
- Retry the authentication of the share now.
[root@instance-to-mount-olsa ~]# smbclient -U=dmaricherla@lsademo.local –password=’xxxxxxxx’ ‘//10.x.x.xxx/ociteamshare’
Try “help” to get a list of possible commands.
smb: \>
- Now that the authentication is successful, lets mount the share using fstab
Edit the fstab file (/etc/fstab) add the mount information as below:
//10.x.x.xxx/ociteamshare /storage/LSA_Share1 cifs username=dmaricherla@lsademo.local,password=xxxxxxxx,vers=3.0,iocharset=utf8,file_mode=0777,dir_mode=0777 0 0
//10.x.x.xxx/dualshare /storage/LSA_Share2 cifs username=dmaricherla@lsademo.local,password=xxxxxxx,vers=3.0,iocharset=utf8,file_mode=0777,dir_mode=0777 0 0
[root@instance-to-mount-olsa etc]# vi fstab
[root@instance-to-mount-olsa etc]# systemctl daemon-reload
[root@instance-to-mount-olsa etc]# mount -a
[root@instance-to-mount-olsa etc]# df -h
Filesystem Size Used Avail Use% Mounted on
devtmpfs 2.8G 0 2.8G 0% /dev
tmpfs 2.8G 0 2.8G 0% /dev/shm
tmpfs 2.8G 9.1M 2.8G 1% /run
tmpfs 2.8G 0 2.8G 0% /sys/fs/cgroup
/dev/mapper/ocivolume-root 36G 10G 26G 29% /
/dev/sda2 924M 319M 606M 35% /boot
/dev/mapper/ocivolume-oled 10G 740M 9.2G 8% /var/oled
/dev/sda1 100M 6.2M 94M 7% /boot/efi
//10.x.x.xxx /ociteamshare 10G 33M 10G 1% /storage/LSA_Share1
tmpfs 565M 0 565M 0% /run/user/0
tmpfs 565M 0 565M 0% /run/user/987
tmpfs 565M 0 565M 0% /run/user/1000
//10.x.x.xxx/dualshare 10G 39M 10G 1% /storage/LSA_Share2
Similarly if we want to mount the share on a windows machine, we can do it as shown below: