When running a secure platform in the cloud, isolating your core infrastructure from end-customer environments is critical. Customers may need access to certain services or APIs, but that doesn’t mean they should see your internal network. One SaaS provider using Oracle Cloud Infrastructure (OCI) needed to do exactly that, secure backend services while allowing limited connectivity to customer environments.
This blog walks through how they achieved this using OCI Network Firewall and Private – Source Network Address Translation (SNAT).
The Challenge: Secure Customer Connectivity Without Exposing Internal Networks
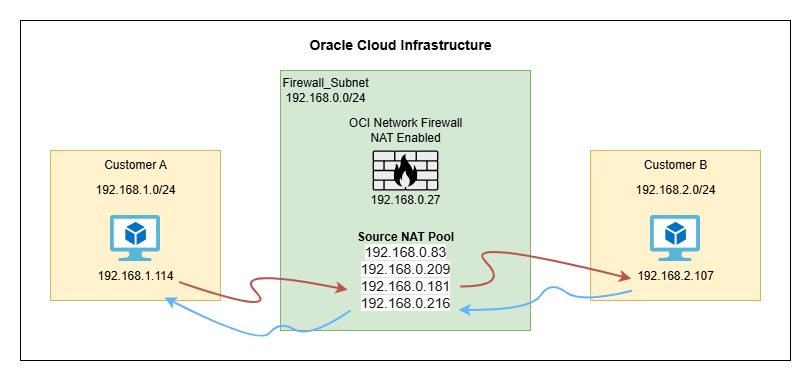
The SaaS provider hosts its backend in OCI and allows enterprise customers to connect securely via Remote Peering Connections (RPC). While RPC offers private connectivity over OCI’s backbone, it also meant the potential for exposing internal IPs to customer networks.
The provider had the following security and compliance needs:
- Hide internal (private) IP addresses from customers
- Control and restrict what traffic is allowed
- Inspect all traffic entering or leaving their backend services
The Solution: New Private SNAT Capability in OCI Network Firewall
OCI Network Firewall has long offered deep packet inspection and policy-based traffic control. With the recent introduction of Private – Source Network Address Translation (SNAT), it now also supports dynamic IP masking, a major win for many multi-tenant or integrated environments.
Using this new Private SNAT capability, the provider was able to:
- Automatically translate internal IPs to NAT IPs before traffic reached customer VCNs
- Enforce access controls while preserving anonymity of the backend network
- Route all customer-bound traffic through a centralized inspection point
This significantly reduced risk without requiring changes in customer configurations.
Implementing the Solution
1. Create a Network Firewall Policy with NAT and Security Rules
- Navigate to OCI Console > Identity & Security > Network Firewall Policies
- Click Create Network Firewall Policy, provide a name and compartment
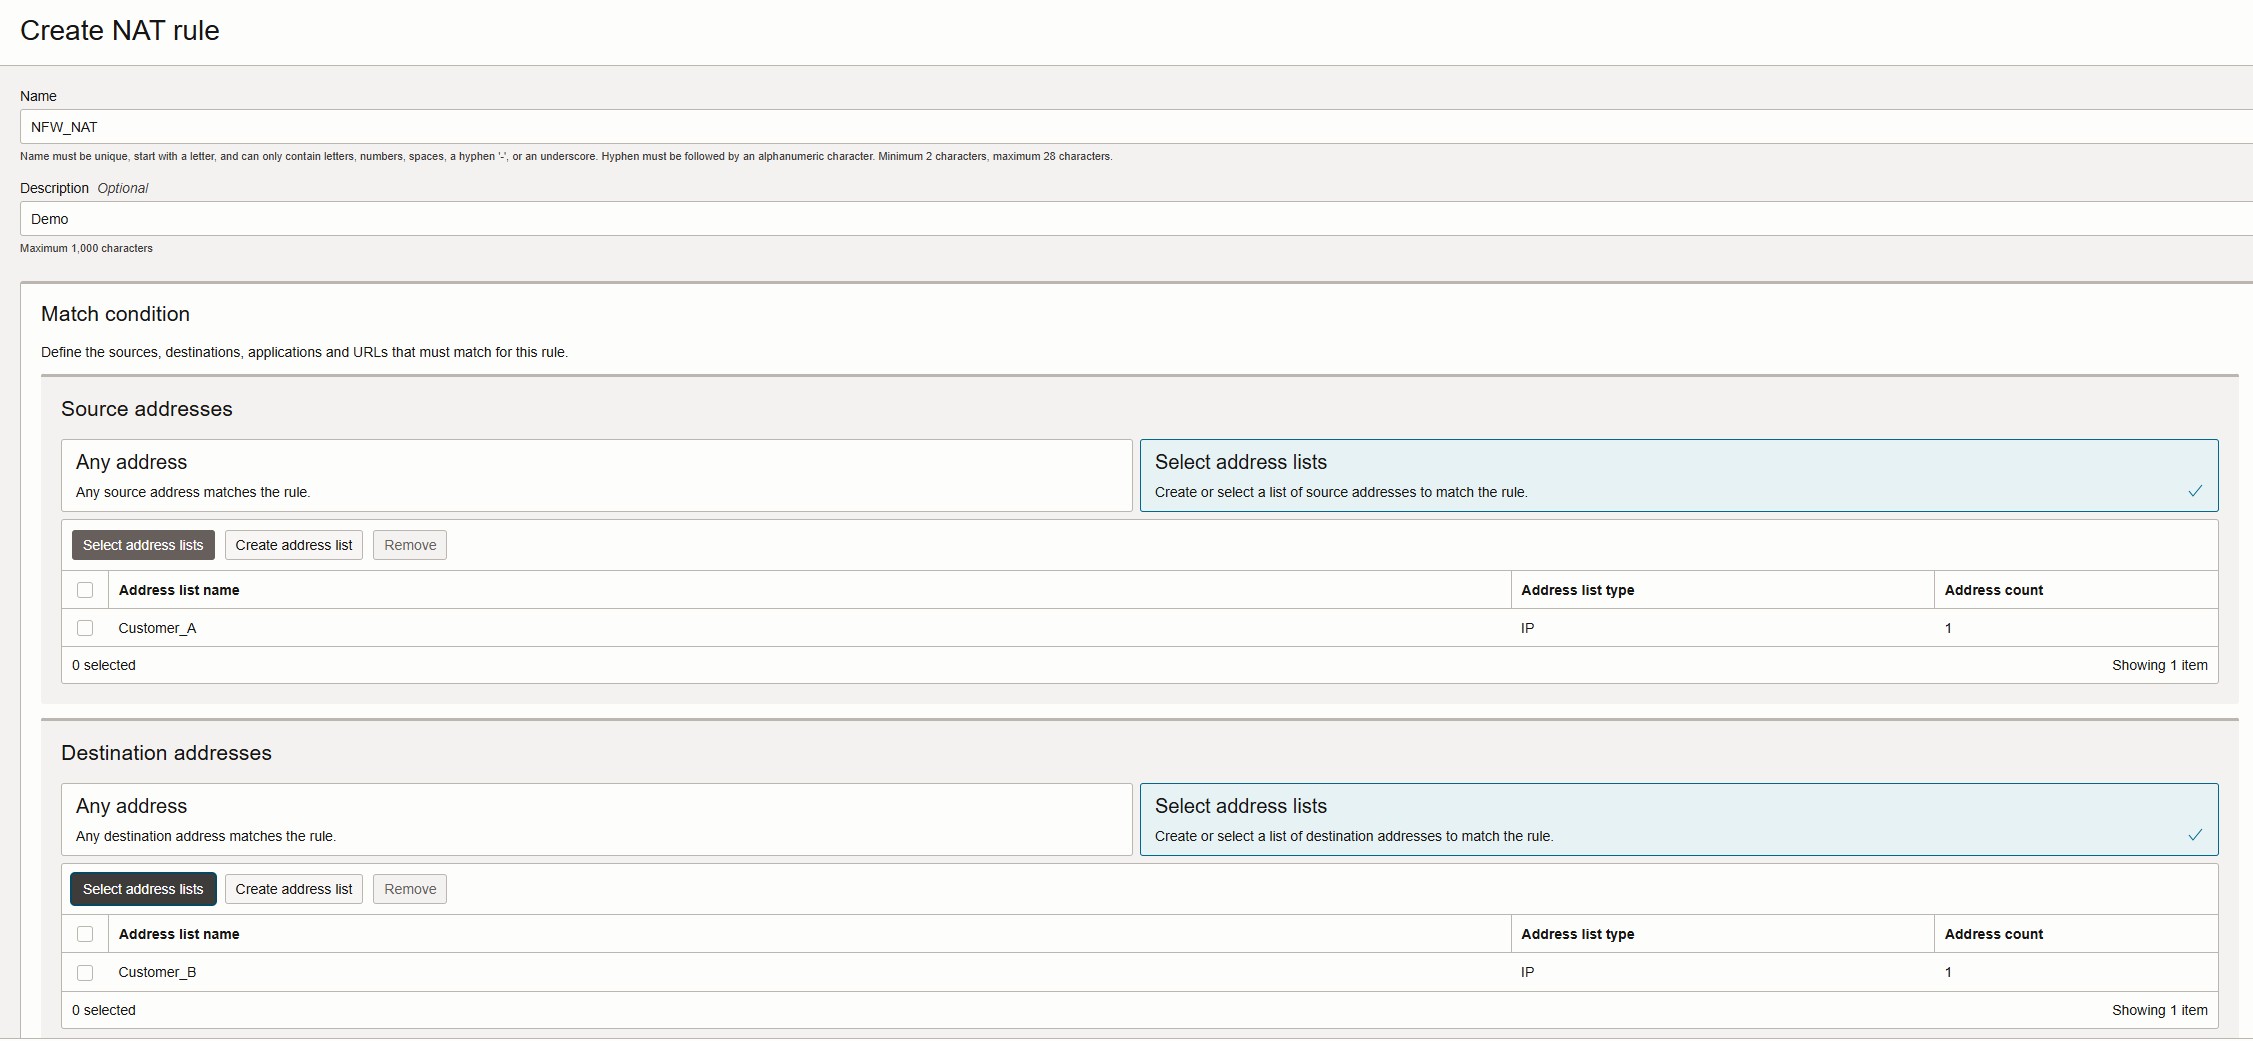
- Under Policy Resources, click NAT Rules > Create NAT Rule
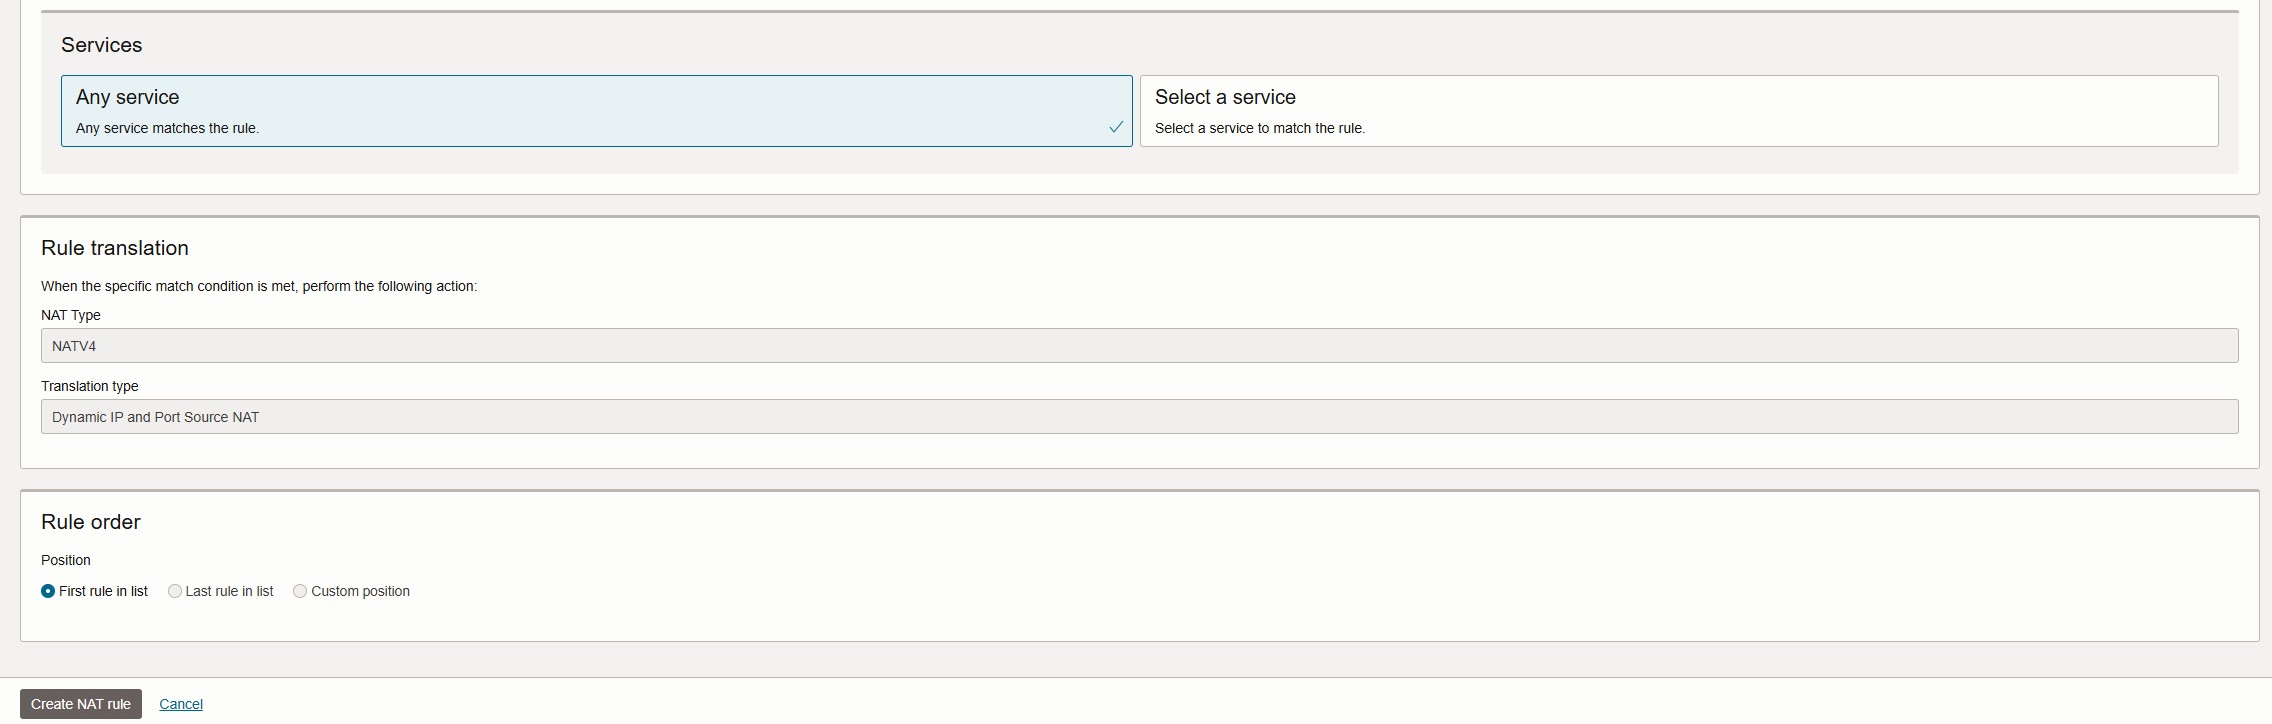
- Provide a name, description, match condition (source, destination, and services), and click Create NAT rule
2. Provision the Network Firewall
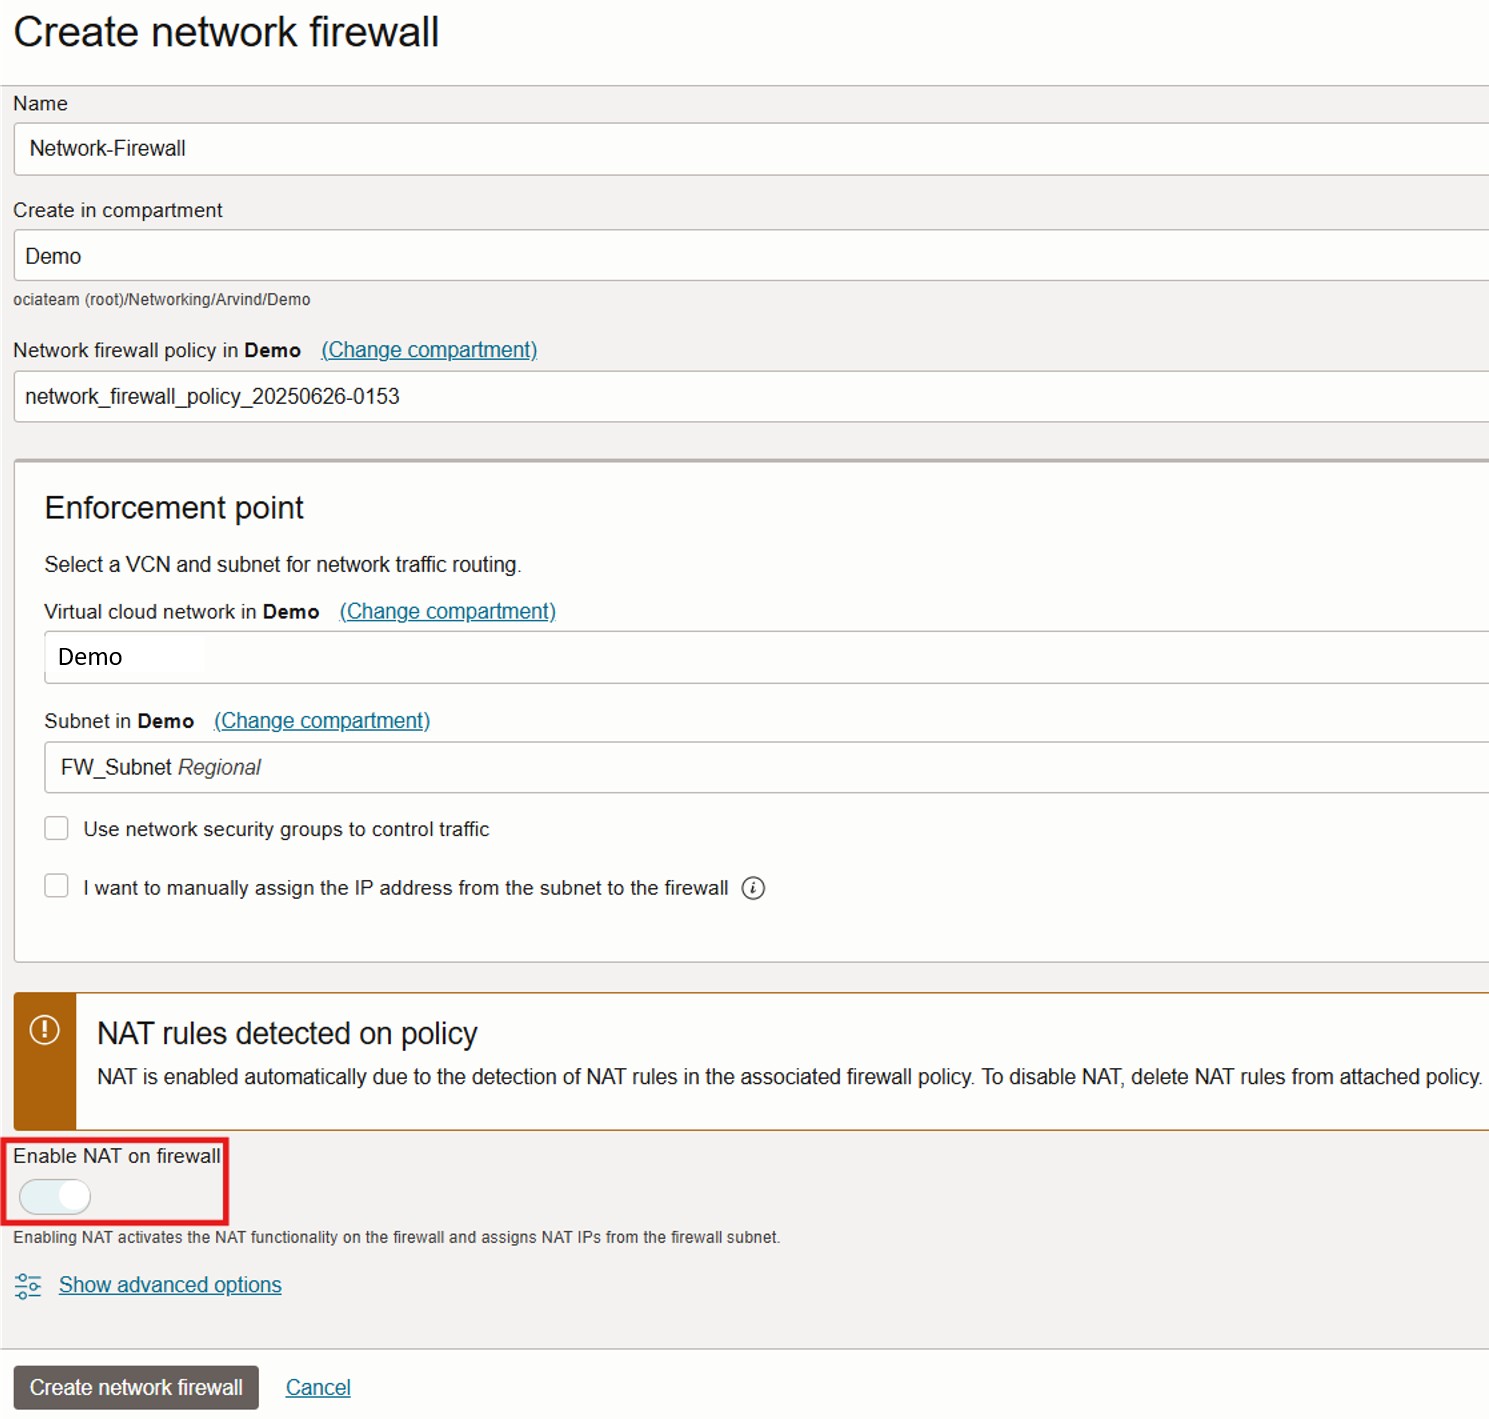
- Navigate to OCI Console > Identity & Security > Network Firewalls
- Click Create Network Firewall, specify the name, compartment, and select the policy created earlier
- Choose the VCN and subnet (non-overlapping) to deploy the firewall
- The NAT rules are automatically detected and NAT gets enabled upon creation
3. Verify NAT IP Pool Allocation
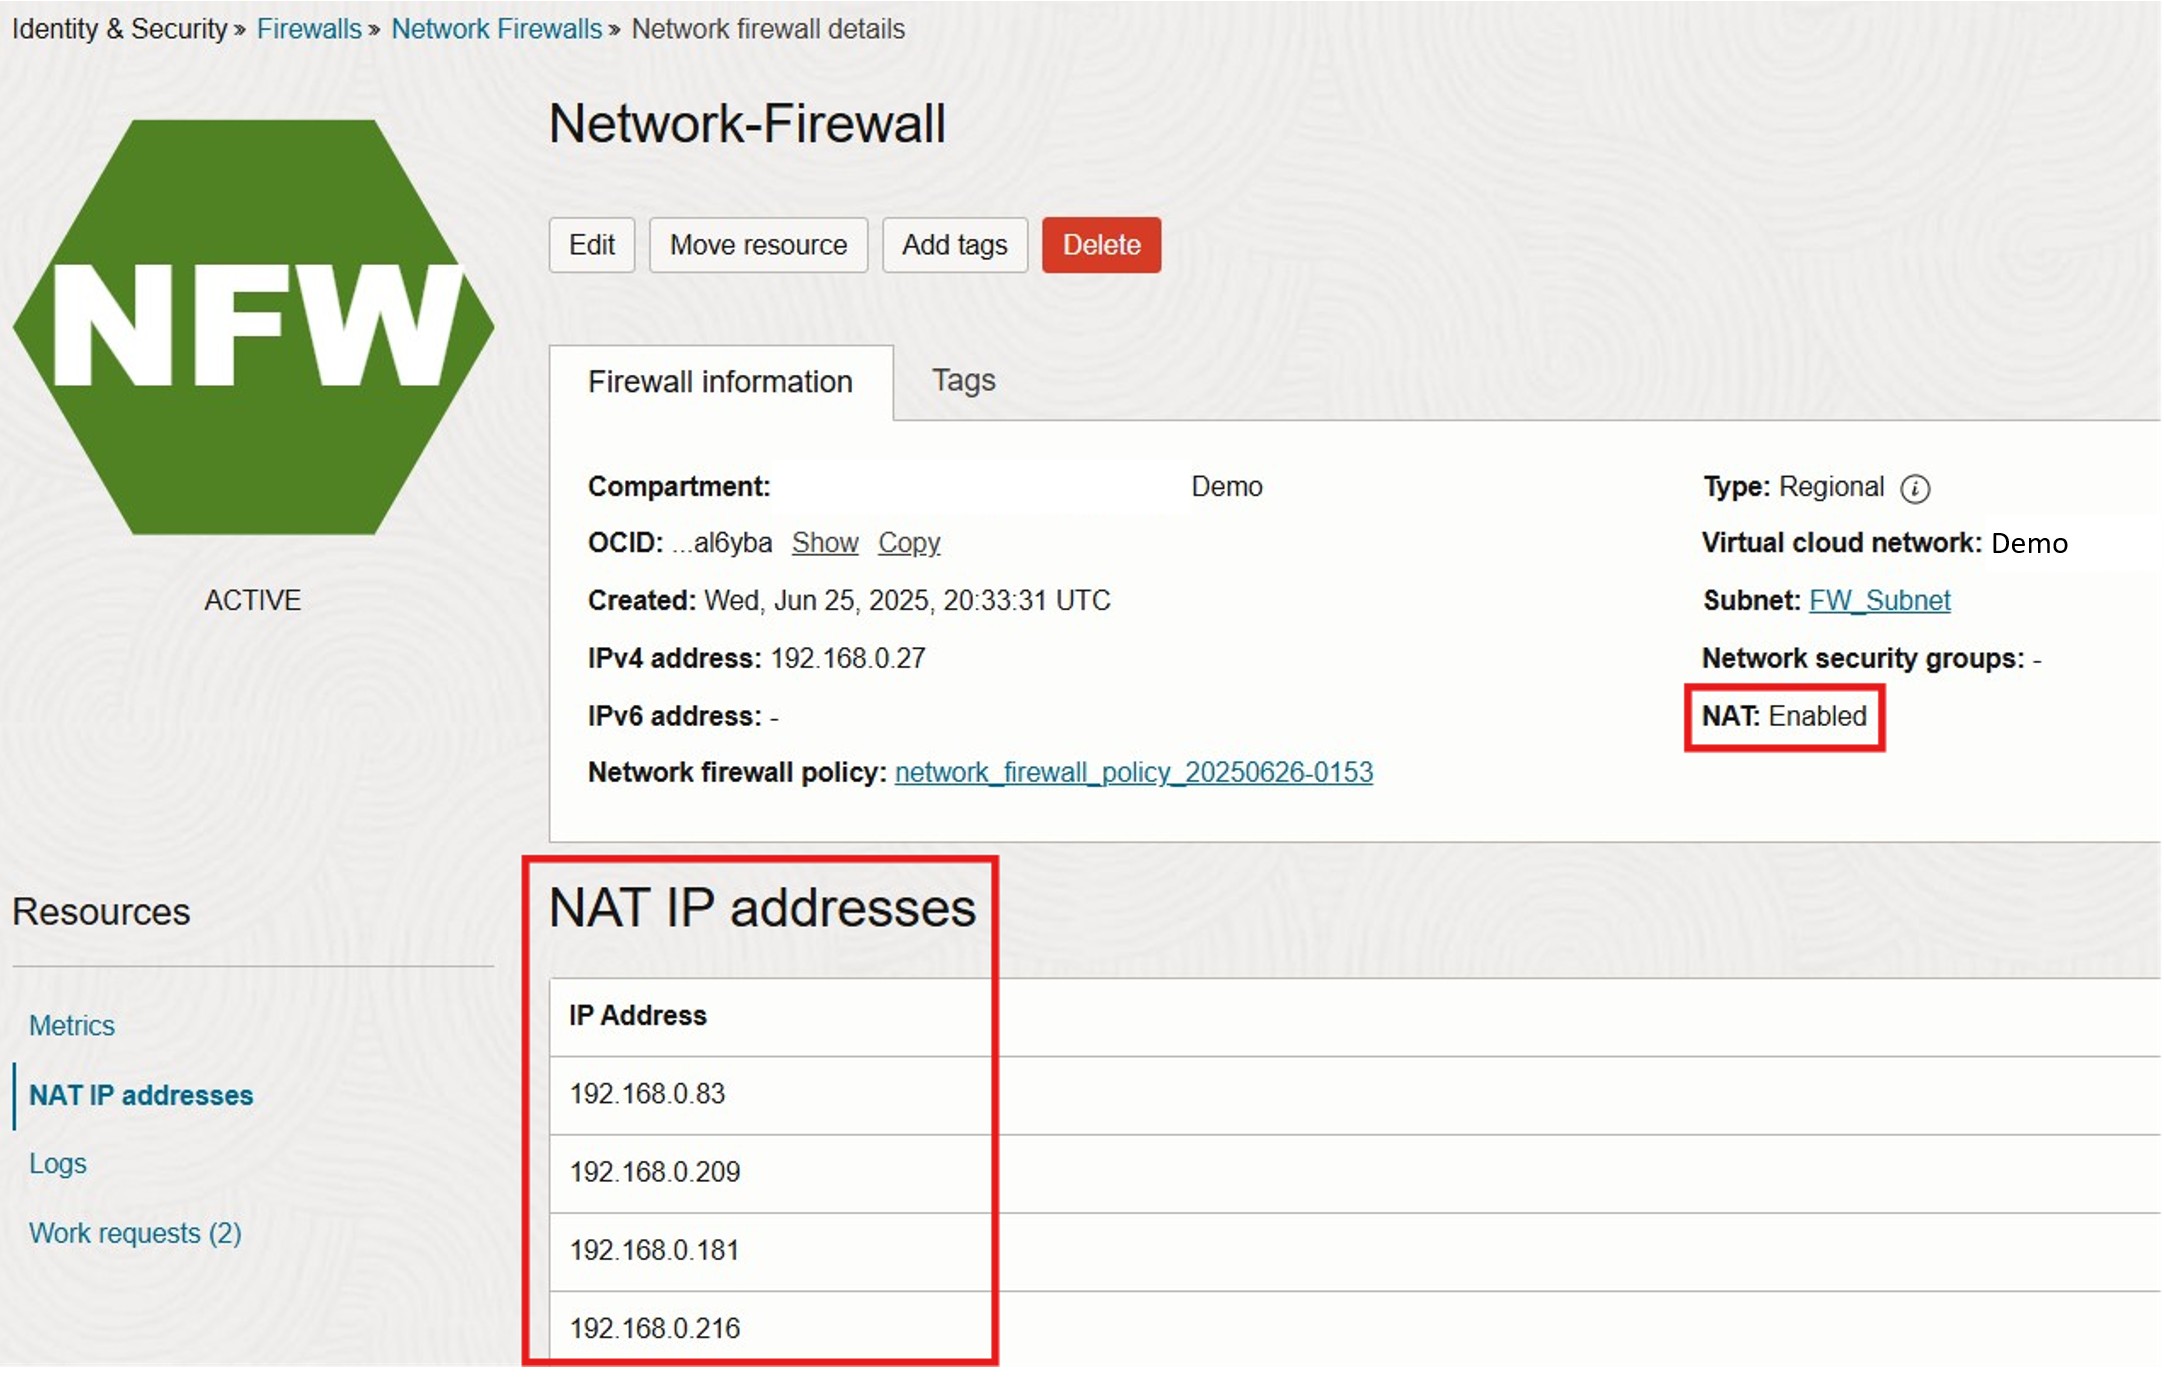
- In the same console section, open the newly created Network Firewall
- Under Policy Resources, check NAT IP Addresses
- OCI will automatically allocate four NAT IPs for a 4 Gbps firewall and at least five for a 25 Gbps firewall
4. Configure Transit Routing
- Add transit routing with Target Type set to Firewall Private IP
- This ensures all traffic between the two environments flows through the OCI Network Firewall
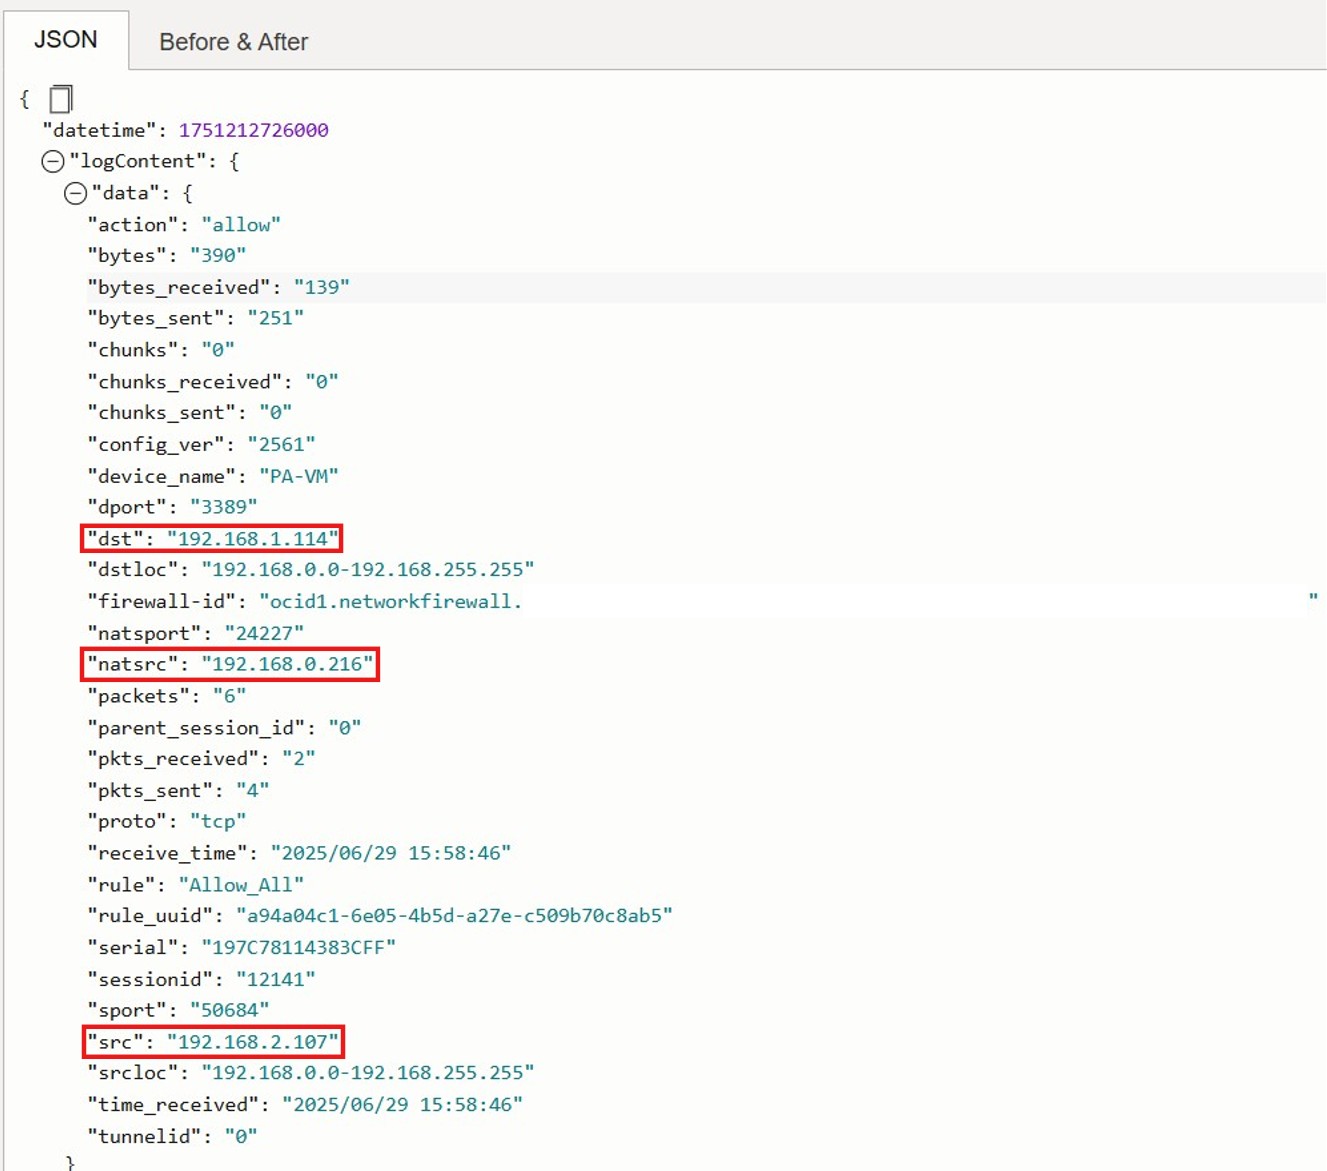
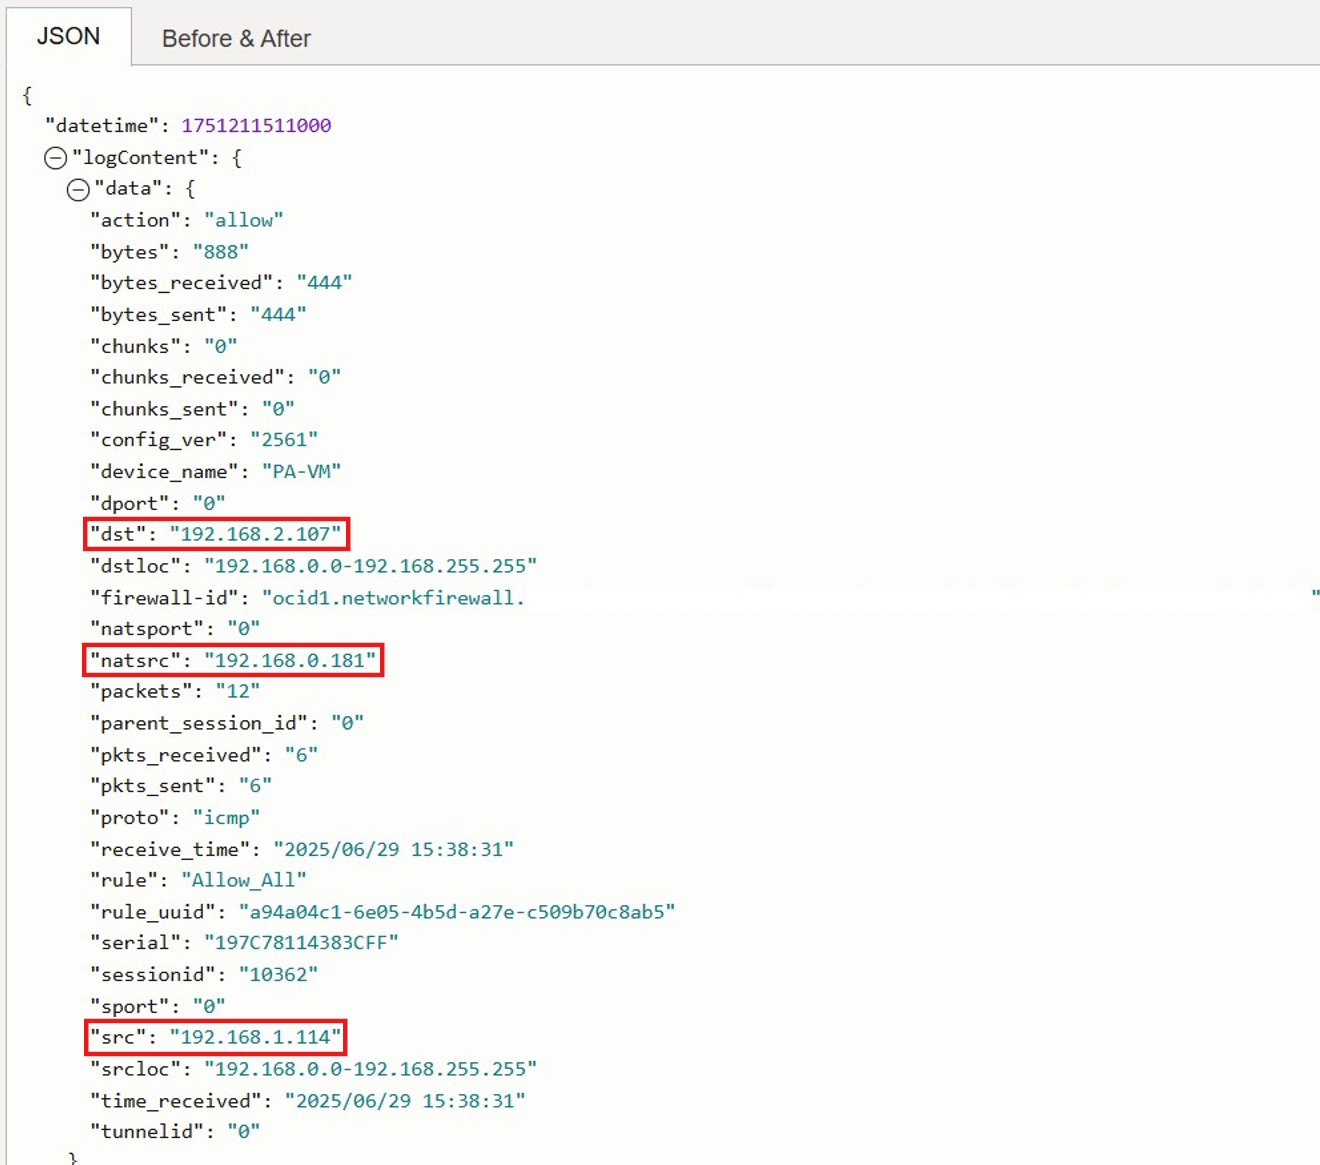
Testing and Verification
We generated traffic between the two customer environments using TCP (port 3389) and ICMP. Upon reviewing the OCI Network Firewall traffic logs, we observed that SNAT/PAT was successfully applied using the allocated NAT IP pool.
Conclusion
With the new Private SNAT support in OCI Network Firewall, customers can now take a major step forward in securing their backend environments.
This enhancement simplifies IP masking, strengthens compliance, and enables clean separation between internal services and external-facing traffic flows, all without additional infrastructure or complexity.
If you’re a SaaS provider on OCI, this is a powerful capability to consider as part of your security and network design strategy.