Oracle Cloud Infrastructure Container Engine for Kubernetes is a fully-managed, scalable, and highly available service that you can use to deploy your containerized applications to the cloud. Use Container Engine for Kubernetes (sometimes abbreviated to just OKE) when your development team wants to reliably build, deploy, and manage cloud-native applications. You specify the compute resources that your applications require, and Container Engine for Kubernetes provisions them on Oracle Cloud Infrastructure in an existing OCI tenancy.
Interesting, isn’t it? In this new blog post we will explore the OCI Networking and Security configuration for deploying a functional OKE cluster. We will verify if the cluser is correctly configured and if we can access the worker nodes.
If all of the above are in place and if our OKE cluser is in the Active state, we are at a glance to have our containerized applications deployed.
Key Concepts
Kubernetes Cluster Control Plane and Kubernetes API
The Kubernetes Cluster Control Plane implements core Kubernetes functionality. It runs on compute instances (known as ‘control plane nodes’) in the Container Engine for Kubernetes service tenancy. The cluster control plane is fully managed by Oracle.
The cluster control plane runs a number of processes, including the kube-apiserver to support Kubernetes API operations requested from the Kubernetes command line tool (kubectl) and other command line tools, as well as from direct REST calls.
Some other processes maintained by the control plane are: kube-controller-manager, kube-scheduler, etcd, cloud-controller-manager.
The Kubernetes API enables end users to query and manipulate Kubernetes resources (such as pods, namespaces, configmaps, and events).
Kubernetes Worker Nodes and Node Pools
Worker nodes constitute the cluster data plane. Worker nodes are where you run the applications that you deploy in a cluster. Each worker node runs a number of processes, including:
- kubelet – to communicate with the cluster control plane;
- kube-proxy – to maintain networking rules;
The cluster control plane processes monitor and record the state of the worker nodes and distribute requested operations between them. A node pool is a subset of worker nodes within a cluster that all have the same configuration. Node pools enable you to create pools of machines within a cluster that have different configurations.
For example, you might create one pool of nodes in a cluster as virtual machines, and another pool of nodes as bare metal machines. A cluster must have a minimum of one node pool, but a node pool need not contain any worker nodes.
Network Resource Configurations
The OKE cluster can be deployed in two ways from the OCI WebUI: using the “Quick Create” workflow and “Custom Create” workflow for a better control on the configuration process. In this blog I will show you the “Custom Create” workflow with step-by-step configuration process.
We have many ways to define the placement, a public or private subnet for Kubernetes API, Worker and Load Balancer. As an example, I will present the case with Public Kubernetes API Endpoint, Private Worker Nodes and Public Load Balancer. Some other examples can be analyzed by following our public documentation at this link.
That being said, three subnets are necessary, one public subnet for Public Kubernetes API Endpoint, one private subnet for Private Worker Nodes and a public subnet for Public Load Balancer.
Each subnet will use its own Routing Table and Security List or NSG. All the routing and security entries are described at the link above and the below picture is summarizing the configuration:
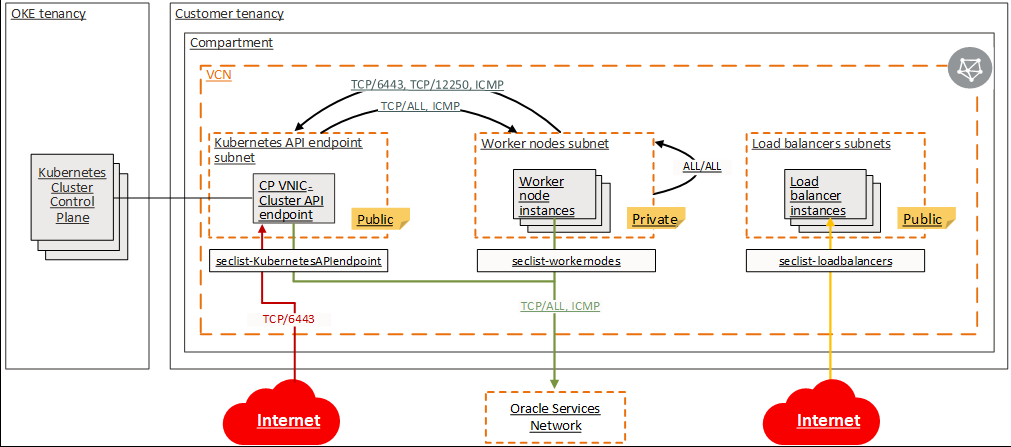
It is very important that the traffic between the worker nodes and between worker nodes and Kubernetes API subnet to be permitted to avoid any DNS problems and signaling issues.
The subnets used are defined as follow:

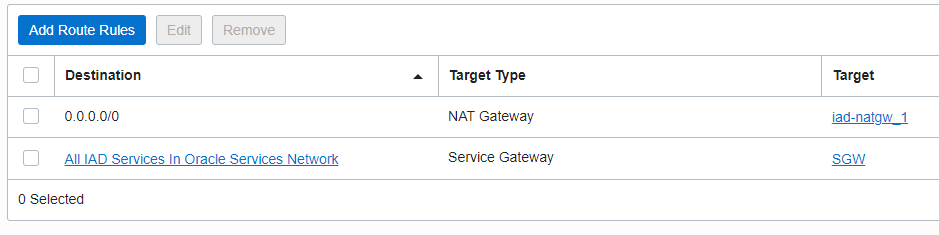
The Route Table associated with each subnet contains the following entries:
OKE_API and OKE_LB:

OKE_Worker:
Creating the Kubernetes Cluster
Under Developer Services -> Kubernetes Clusters (OKE) -> Create Cluster -> Custom Create -> Launch Workflow
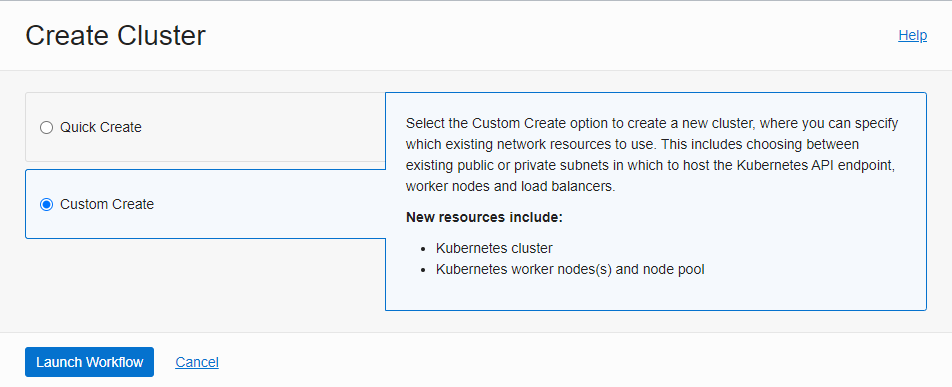
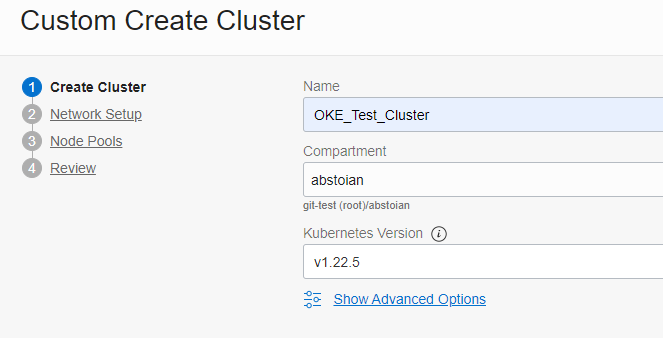
Once the creation process is launched, four steps are neccessary to complete the cluster configuration:
Step 1 – Create Cluster:
Step 2 – Network Setup:
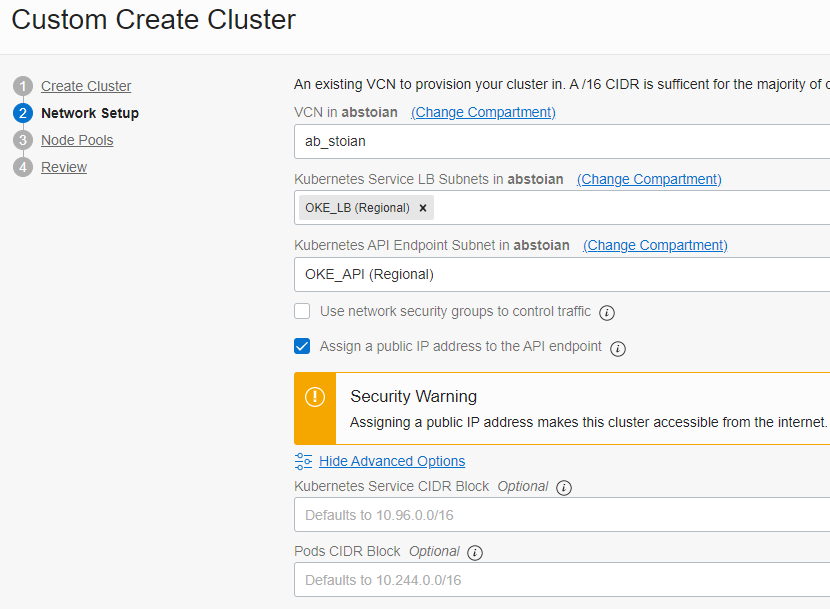
Note the Kubernetes Service CIDR Block and Pods CIDR Block. The Kubernetes Service CIDR Block range is used by exposed Kubernetes services (ClusterIPs). This CIDR should not overlap with the VCN CIDR range. The Pods CIDR Block is the CIDR range used for IP addresses in the pods. This CIDR should not overlap with any subnet range in the VCN (it can also be outside the VCN CIDR range).
We have specified the public subnet for the Load Balancer. As the end of the process we will observe that the Load Balancer is not created. We need to instruct the OKE Cluster to create the Load Balancer, it is not created by default. We will analyze it more carefully in the last section of the blog – Exposing a Public Web Site hosted on our Kubernetes Cluster.
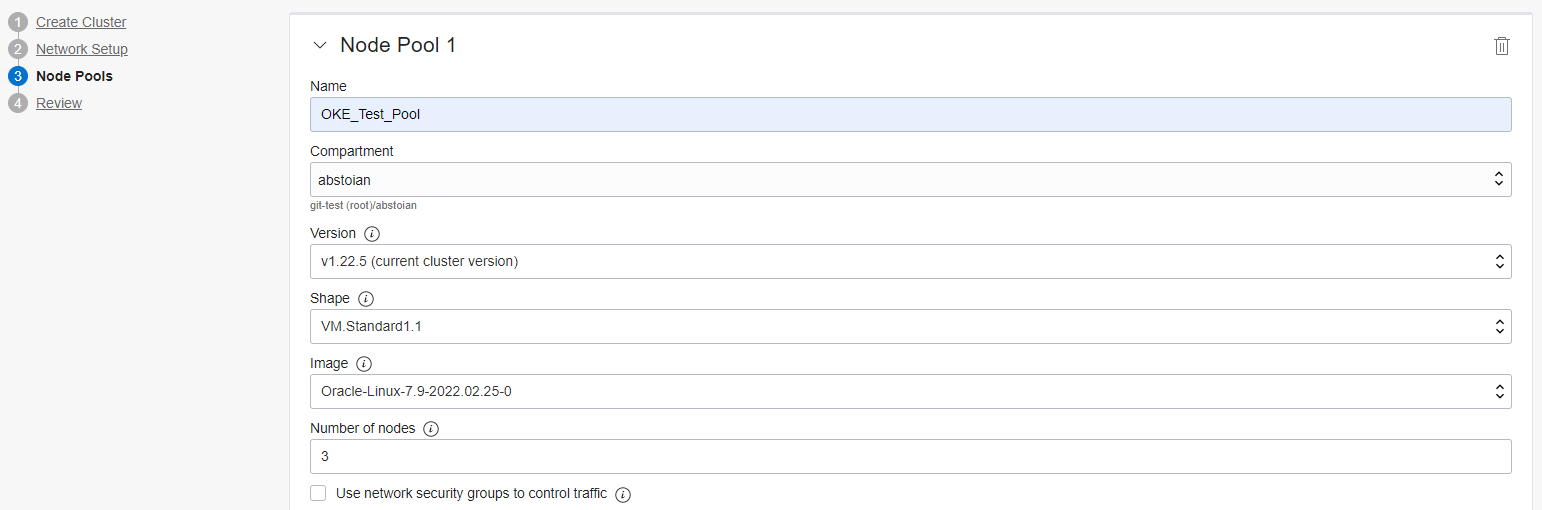
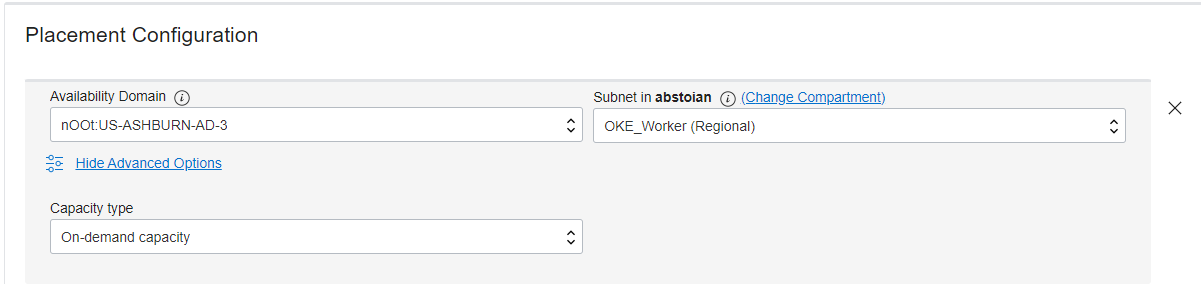
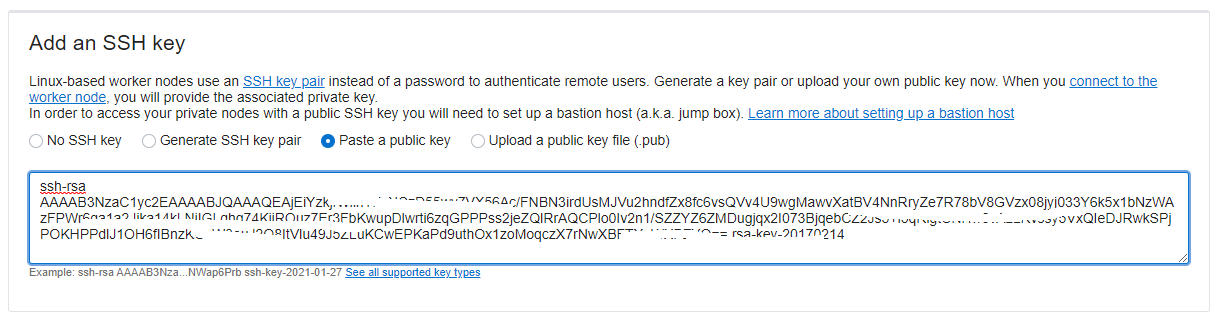
Step 3 – Node Pools:
Step 4 – Review:
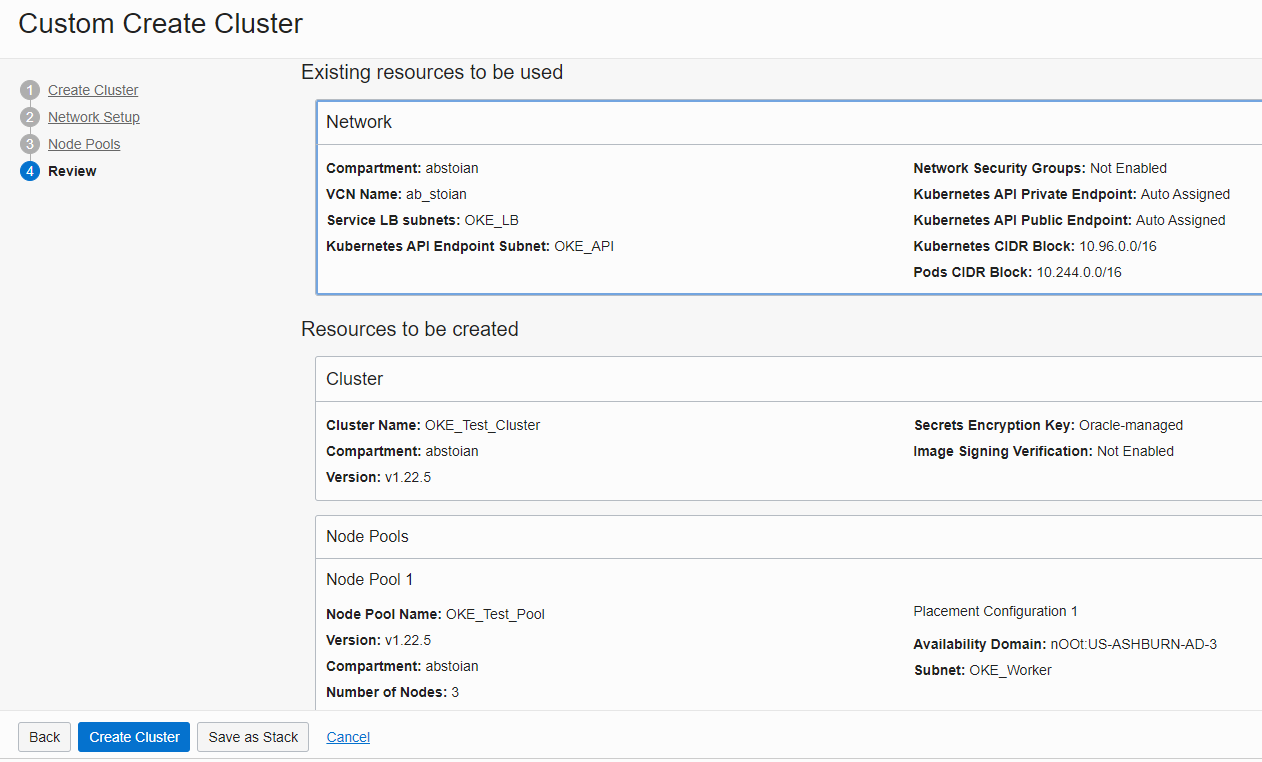
We are ready now to create our OKE Cluster. After Create Cluster button is pushed, it will take some time for the cluster to be created and turned into the Active state.
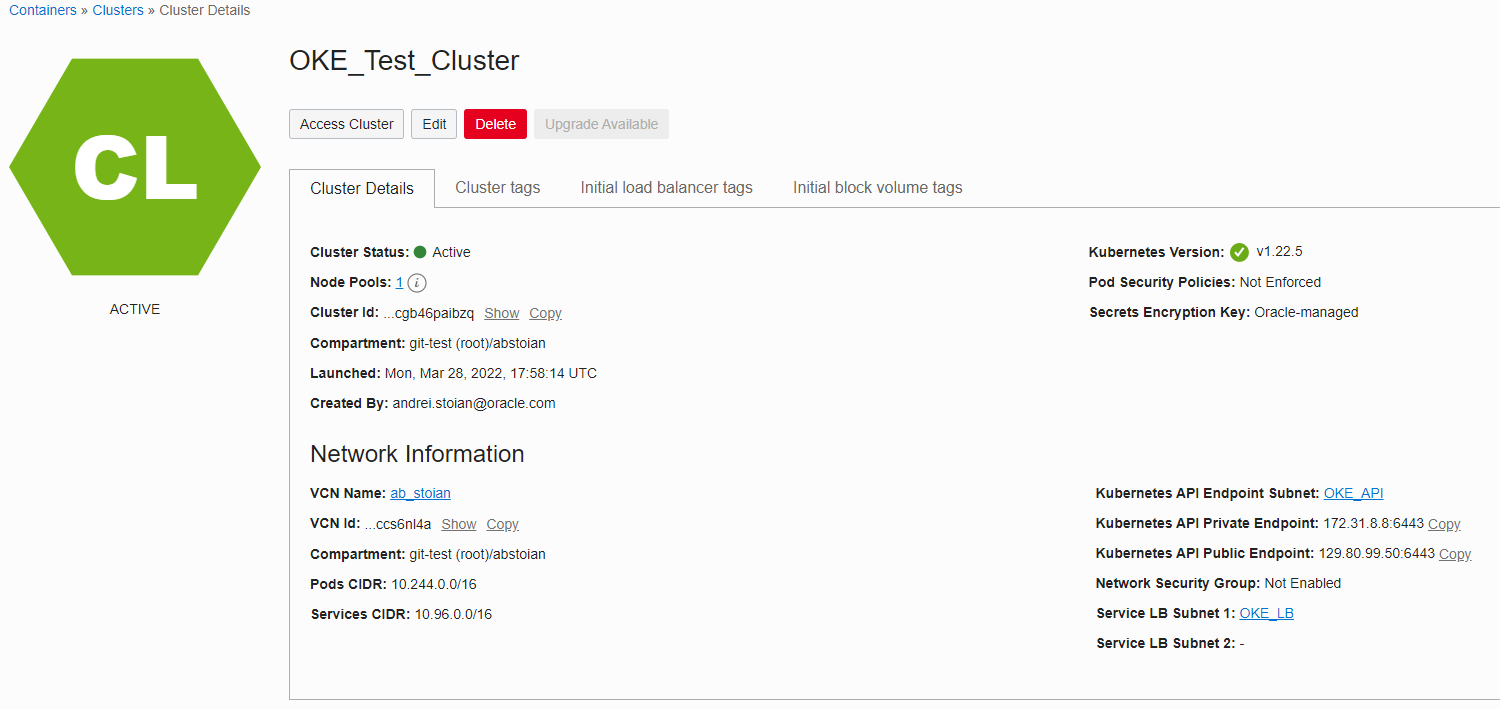
Note the public endpoint for the Kubernetes API.
Let’s verify the status of the three worker nodes created:

We can conclude that the OKE Cluster is in the Active state.
Accessing the OKE Cluster
Once the OKE Cluster is provisioned, in this particular example when the Kubernetes API is deployed in a public subnet, we have two ways of accessing the Cluster. The two ways are listed in the WebUI once you access the OKE Cluster created:
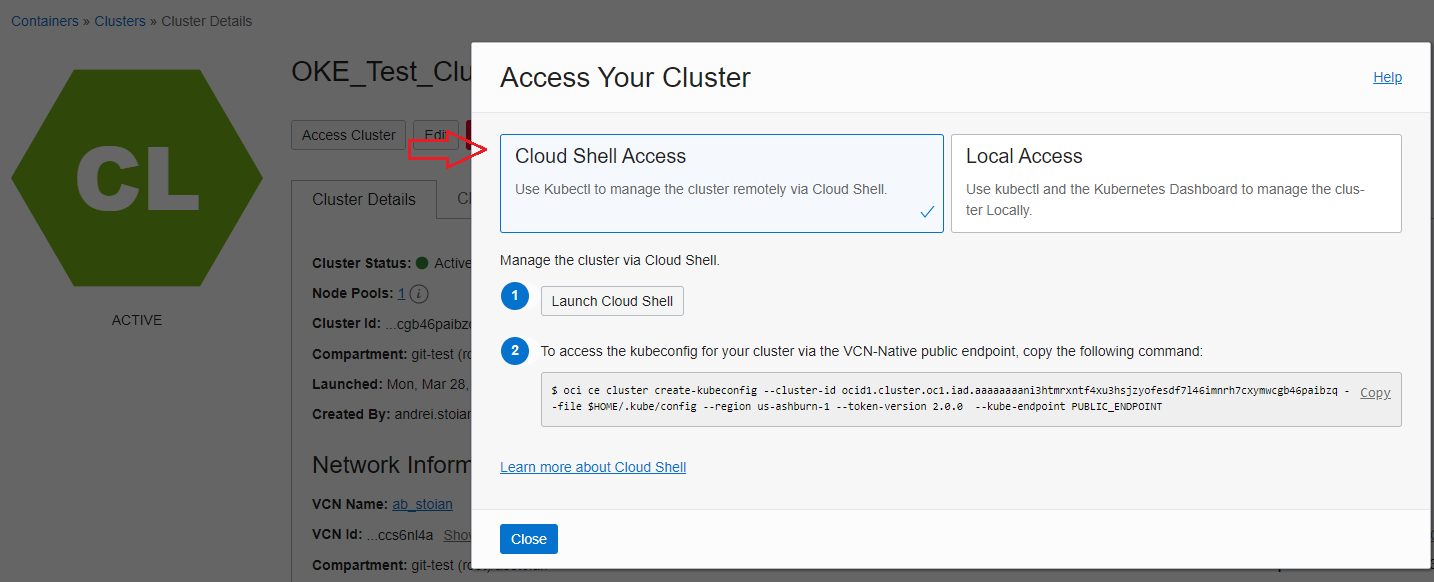
We will use the Cloud Shell for accessing the OKE Cluster and Kubernetes command-line tool, kubectl. The Local Access can also be implemented. The Local Access can use a VM with OCI CLI installed together with the Kubernetes command-line tool, kubectl. Note that, if the Kubernetes API is deployed in a private subnet only the Local Access is available and will use the private endpoint of the Kubernetes API. More details can be found using our public documentation at the link.
The OKE Cluster can be accessed also by using Kubernetes Dashboard.
The Local Access to either Kubernetes API or Worker Nodes can be implemented by using the OCI Bastion Service. For more details about the OCI Bastion Service please use this blog post and our public documentation at this link.
In the Cloud Shell we will paste the above command to create the kubeconfig (it is using the public endpoint allocated to the Kubernetes API):

Let’s verify using the kubectl command-line if the Kubernetes control plane has access to the worker nodes created, the command is kubectl get nodes:
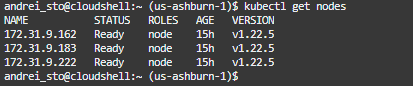
This is good news! We can see the three worker nodes with the private IP addresses assigned, the status, role and version. For a full list of commands available using the kubectl use kubectl –help.
The version of kubectl you use must be compatible with the version of Kubernetes running on clusters created by Container Engine for Kubernetes. In the case of Cloud Shell, kubectl is regularly updated so it is always compatible with the versions of Kubernetes currently supported by Container Engine for Kubernetes. In the case of a local installation of kubectl, it is your responsibility to update kubectl regularly.
Exposing a Public Web Site
The public facing web site will be hosted on our Kubernetes Cluster. The web site will be deployed using the Control Plane to the Worker Nodes but only after the load balancing service is enabled on the cluster and the cluster is triggering the OCI public Load Balancer creation. Remember that the OCI LB is not created by default.
The Oracle Cloud Infrastructure load balancers and network load balancers that Container Engine for Kubernetes provisions for Kubernetes services of type LoadBalancer appear in the Console.
However, do not use the Console (or the Oracle Cloud Infrastructure CLI or API) to modify these load balancers and network load balancers. Any changes you make will either be reverted by Container Engine for Kubernetes or will conflict with its operation and possibly result in service interruption.
Step 1 – Install the controller in the ingress-nginx namespace and creates the namespace is it doesn’t exist – run the command from the Cloud Shell:
kubectl apply -f https://raw.githubusercontent.com/kubernetes/ingress-nginx/controller-v1.1.2/deploy/static/provider/cloud/deploy.yaml
Once the command is ran, the OCI public LB is being created in the allocated subnet:
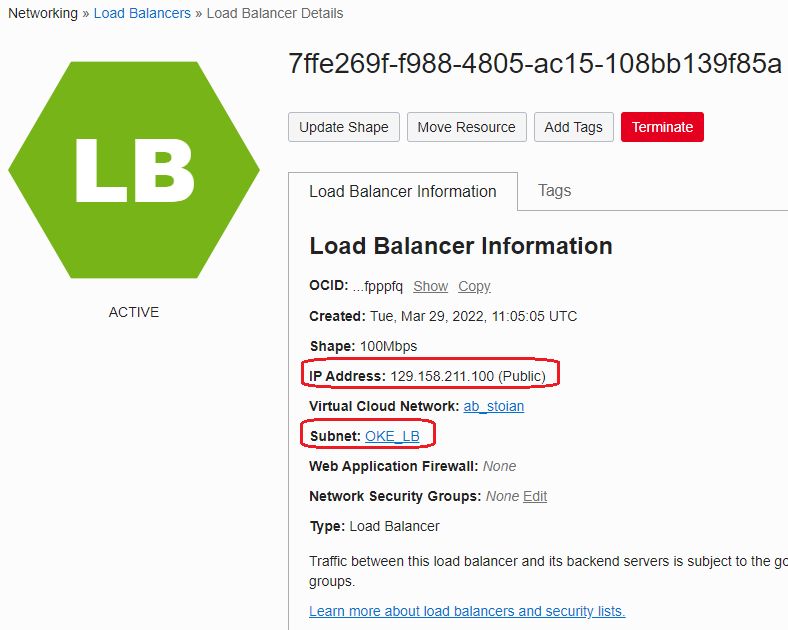
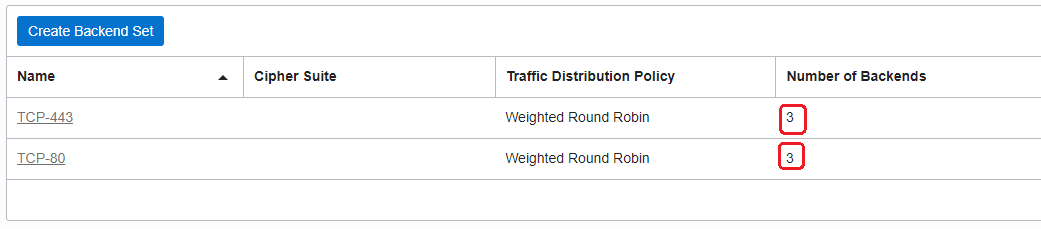
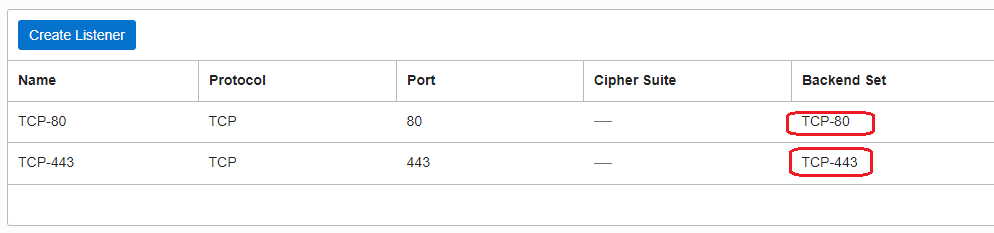
The LB by default has 2 Backend Sets, each having as backend servers the three worker nodes we have specified to be created and two Listeners, each using one Backend Set.
We can verify from the cluster if the public IP address of the OCI LB is recognized:
kubectl get service ingress-nginx-controller –namespace=ingress-nginx

Step 2 – Verify if the PODs for nginx have been started in the ingress-nginx namespace:
kubectl get pods –namespace=ingress-nginx

Step 3 – Create a simple web server:
kubectl create deployment demo –image=httpd –port=80
kubectl expose deployment demo

Step 4 – Test the application:
4.1 First we need to create a DNS entry for www.demo.io to point to 129.158.211.100;
4.2 Create an ingress resource that will be served by internal nginx:
kubectl create ingress demo –class=nginx \
–rule=”www.demo.io/*=demo:80″
4.3 The result from a Linux VM using cURL:
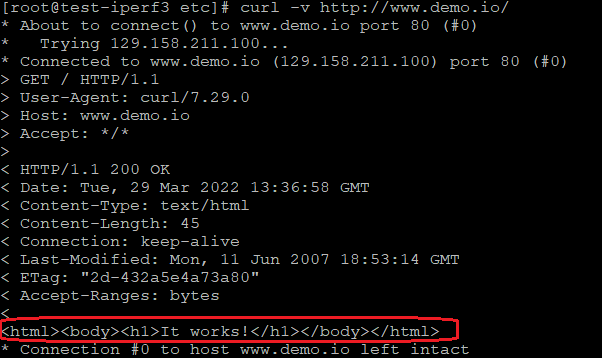
The above message shows the web site hosted on our Kubernetes Cluster is working as expected!
Reference
https://docs.oracle.com/en-us/iaas/Content/ContEng/Concepts/contengoverview.htm