Kubernetes Clients
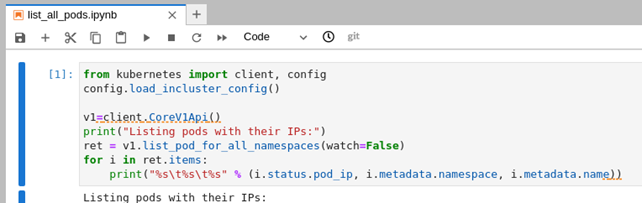
There are client libraries available to facilitate access to the Kubernetes API from code (C, Go, JavaScript, Python, etc.). The Python client can be directly used in code run external to the cluster as described in the client documentation. Example code, given in the documentation to list all pods looks like:
from kubernetes import client, config
config.load_kube_config()

v1 = client.CoreV1Api()
print("Listing pods with their IPs:")
ret = v1.list_pod_for_all_namespaces(watch=False)
for i in ret.items:
    print("%s\t%s\t%s" % (i.status.pod_ip, i.metadata.namespace, i.metadata.name))
If you have cluster access setup with kubectl, the code shown above will use that configuration via config.load_kube_config(), and run without further access authorization setup.
Python Client in Jupyter Notebook
A convenient way to experiment with the Python client interactively is to use it in a Jupyter notebook. Pick a containerized build of JupyterLab and deploy it to your OKE cluster. A good example is a JupyterLab configuration from Maastricht University. Refer to https://github.com/MaastrichtU-IDS/jupyterlab for details on building a container image. There is a “pip install” layer in the Dockerfile, simply add “kubernetes” to the list of other packages in the layer to include the Python client in the build. After successfully building an image, tag and push it to OCI Container Registry to make it available for deployment. Create a deployment .yaml file similar to the following
apiVersion: apps/v1
kind: Deployment
metadata:
  name: maas-jupyterlab
spec:
  selector:
    matchLabels:
      app: maas-jupyterlab
  replicas: 1
  template:
    metadata:
      labels:
        app: maas-jupyterlab
    spec:
      containers:
      - name: maas-jupyterlab
        image: phx.ocir.io/idprle0k7dv3/maastrict-jlab:latest
        ports:
        - containerPort: 8888
        command:
          - "start-notebook.sh"
          - "--no-browser"
          - "--ip=0.0.0.0"
          - "--port=8888"
          - "--config=/etc/jupyter/jupyter_notebook_config.py"
        env:
        - name: JUPYTER_TOKEN
          value: password
and a service for ingress like,
apiVersion: v1
kind: Service
metadata:
  name: maas-jlab-single
spec:
  type: LoadBalancer
  ports:
  - port: 8888
    protocol: TCP
    targetPort: 8888
  selector:
    app: maas-jupyterlab
Use kubectl to create the deployment and the service. JupyterLab will be availabe at the EXTERNAL-IP of the service on PORT 8888.
RBAC Adjustments
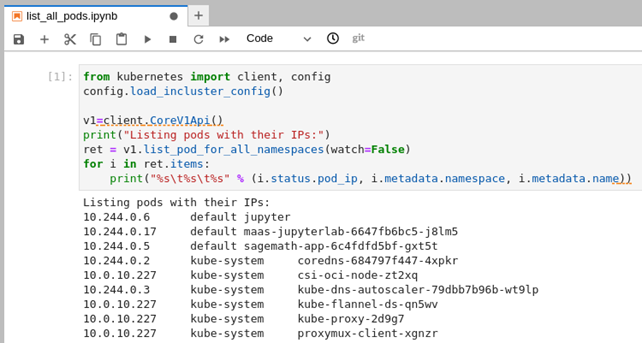
Open a new notebook and add the same code used above to list all pods. Since we are running in cluster, now use config.load_incluster_config() instead of config.load_kube_config().
Running the cell gives an error
ApiException: (403)
Reason: Forbidden

There is a ServiceAccount called default in the default namespace running the notebook that does not have API access to do anything. To allow access, Create a ClusterRole with list, create, etc. access. Insert the following in a file, clusterrole-developer.yml and apply it with kubectl to create the ClusterRole.
apiVersion: rbac.authorization.k8s.io/v1
kind: ClusterRole
metadata:
 name: developer
rules:
- apiGroups: [""]
 resources: ["pods", "services"]
 verbs: ["create", "get", "apply", "update", "patch", "list", "delete", "watch"]
- apiGroups: ["apps"]
 resources: ["deployments"]
 verbs: ["create", "get", "apply", "update", "patch", "list", "delete", "watch"]
Next, create a ClusterRoleBinding to bind the “developer” clusterRole to the “default” ServiceAccount. Insert the following in a file, clusterrolebinding-developer-default-serviceaccount.yml and apply it with kubectl to create the ClusterRoleBinding.
kind: ClusterRoleBinding
apiVersion: rbac.authorization.k8s.io/v1
metadata:
  name: developer-default-serviceaccount
subjects:
- kind: ServiceAccount
  name: default
  namespace: default
roleRef:
  kind: ClusterRole
  name: developer
  apiGroup: rbac.authorization.k8s.io
Now retry the pod list code in the notebook cell.
Explore Further
There are a number of code samples and notebook samples to explore further in the Kubernetes client github repository. A Jupyter notebook makes a nice environment to explore the Kubernetes API.