Introduction
Detector recipes are a set of rules that dictate what known sercurity vulnerabilites to search for. There are three detector types that are free of charge: Configuration, Activity and Threat. Every customer should have these three recipes attached to their root compartment at minimum. You can read my previous post that focuses on tuning the detecttor recipes. A Responder recipe is a set of actions(remediation) Cloud Guard can take when a detector identifies a problem. This post will describe how Detector/Responder recipes behave with Cloud Guard. There are some importan differences between the behavior that every admiistrator should be aware of.
Details
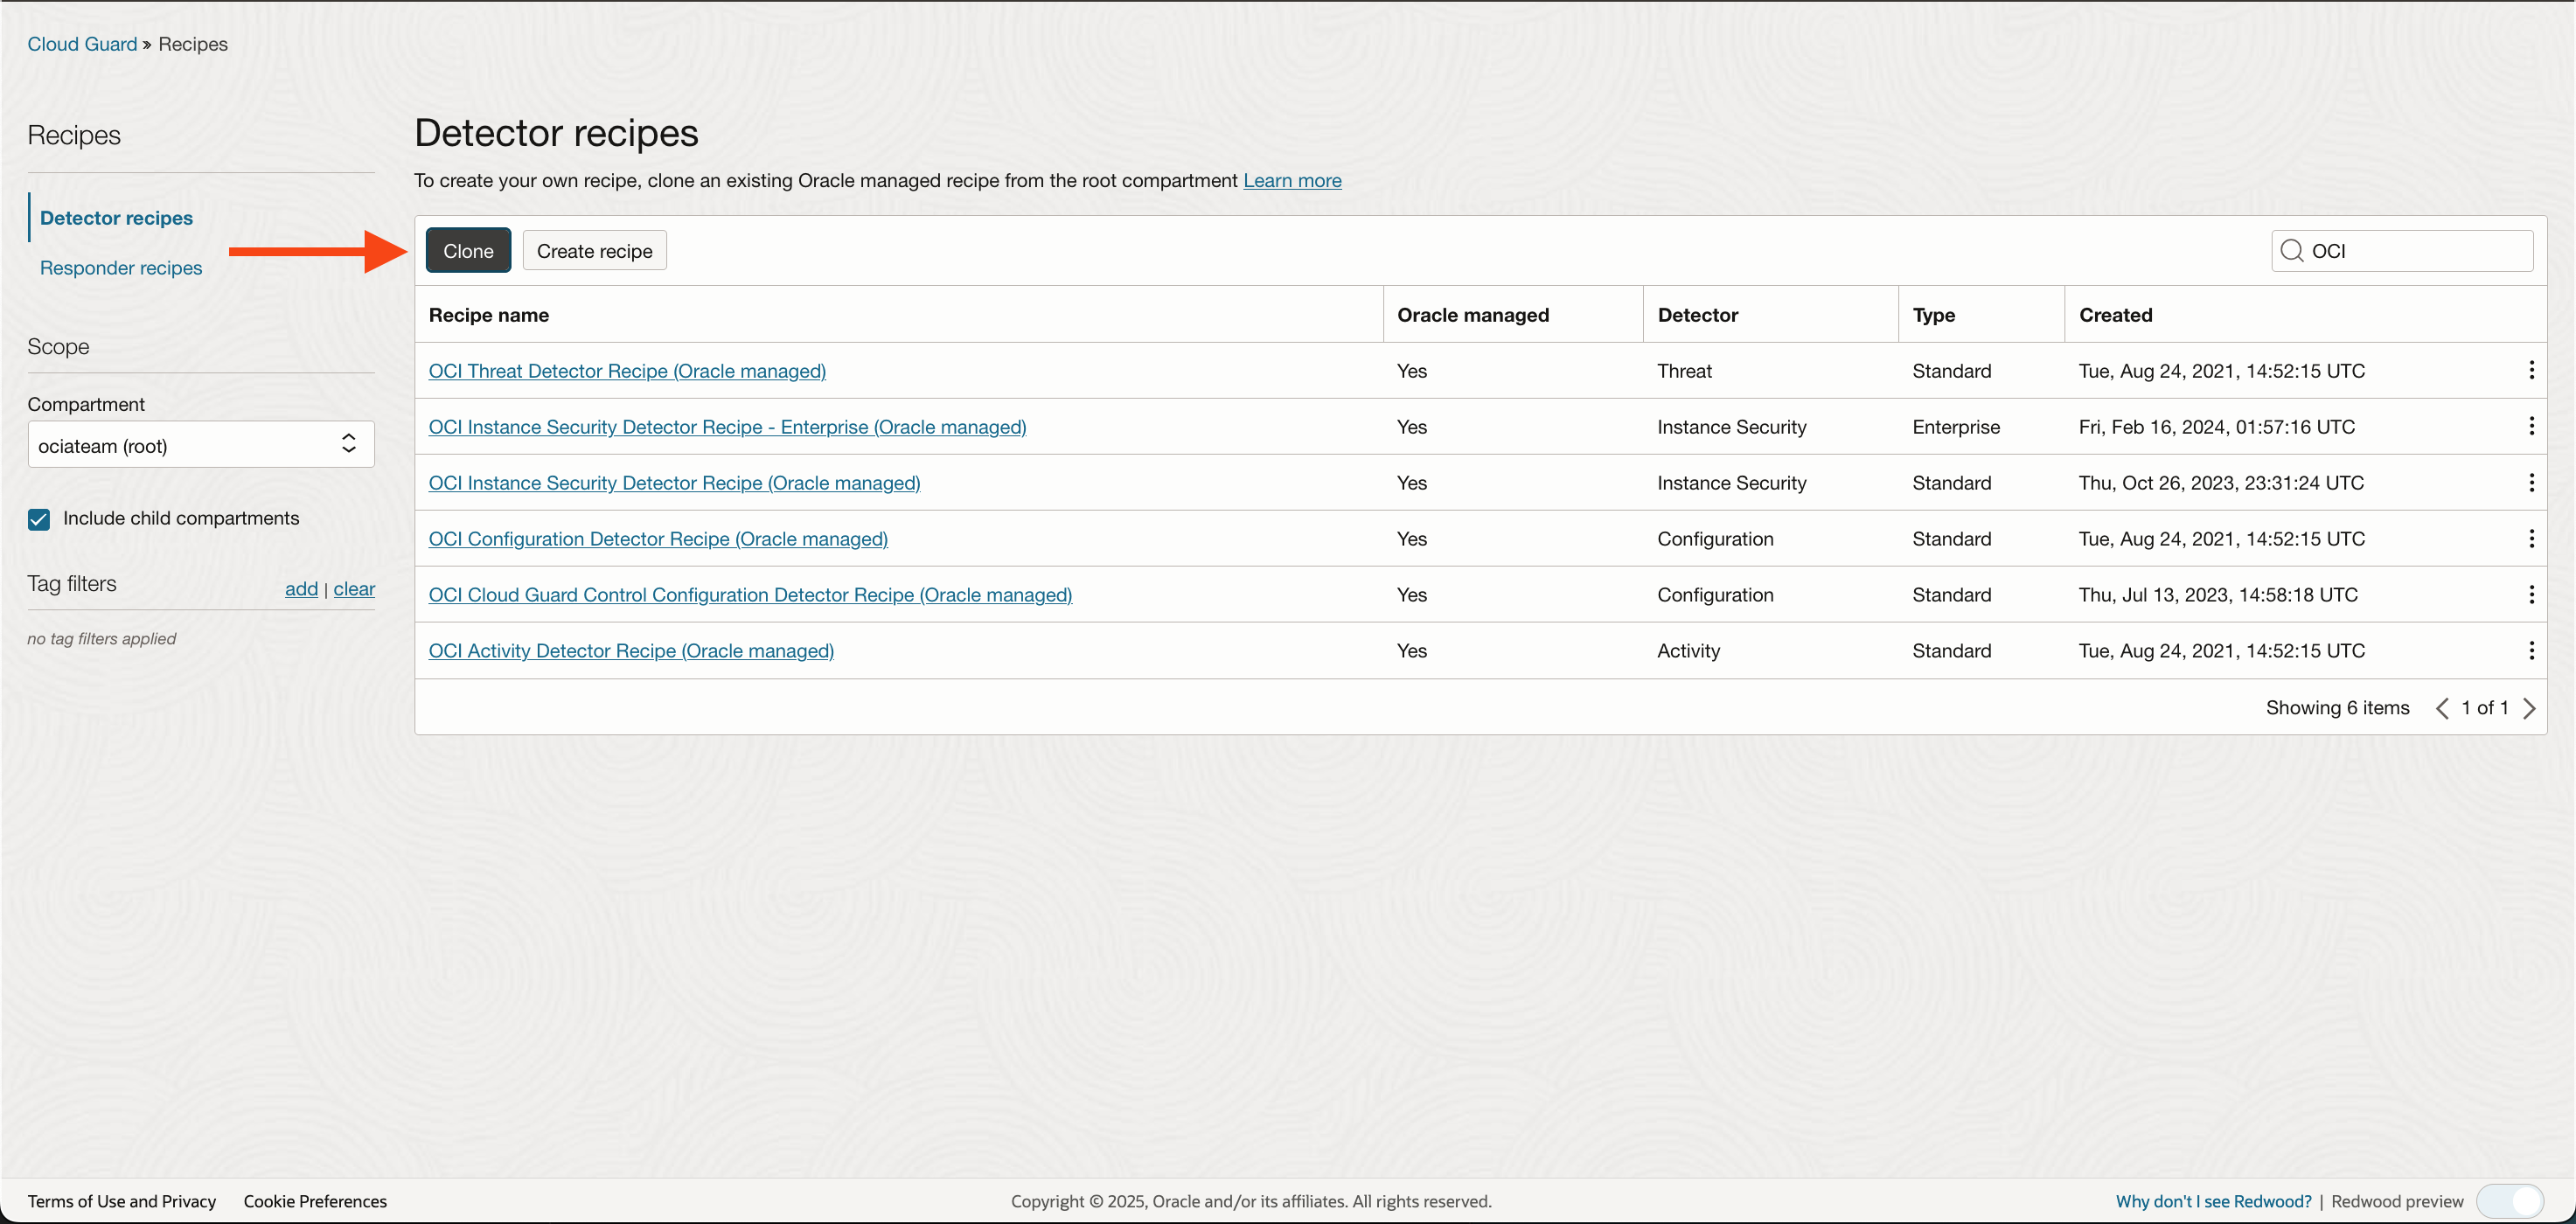
If you remember from my previous post, the recommendation for attaching detector recipes to a target is to clone the Detector recipe first. This is to allow you to customize the Detector recipes based on the target. The default Oracle Managed recipes are shown below:.
Once cloned attach the recipe to a target:
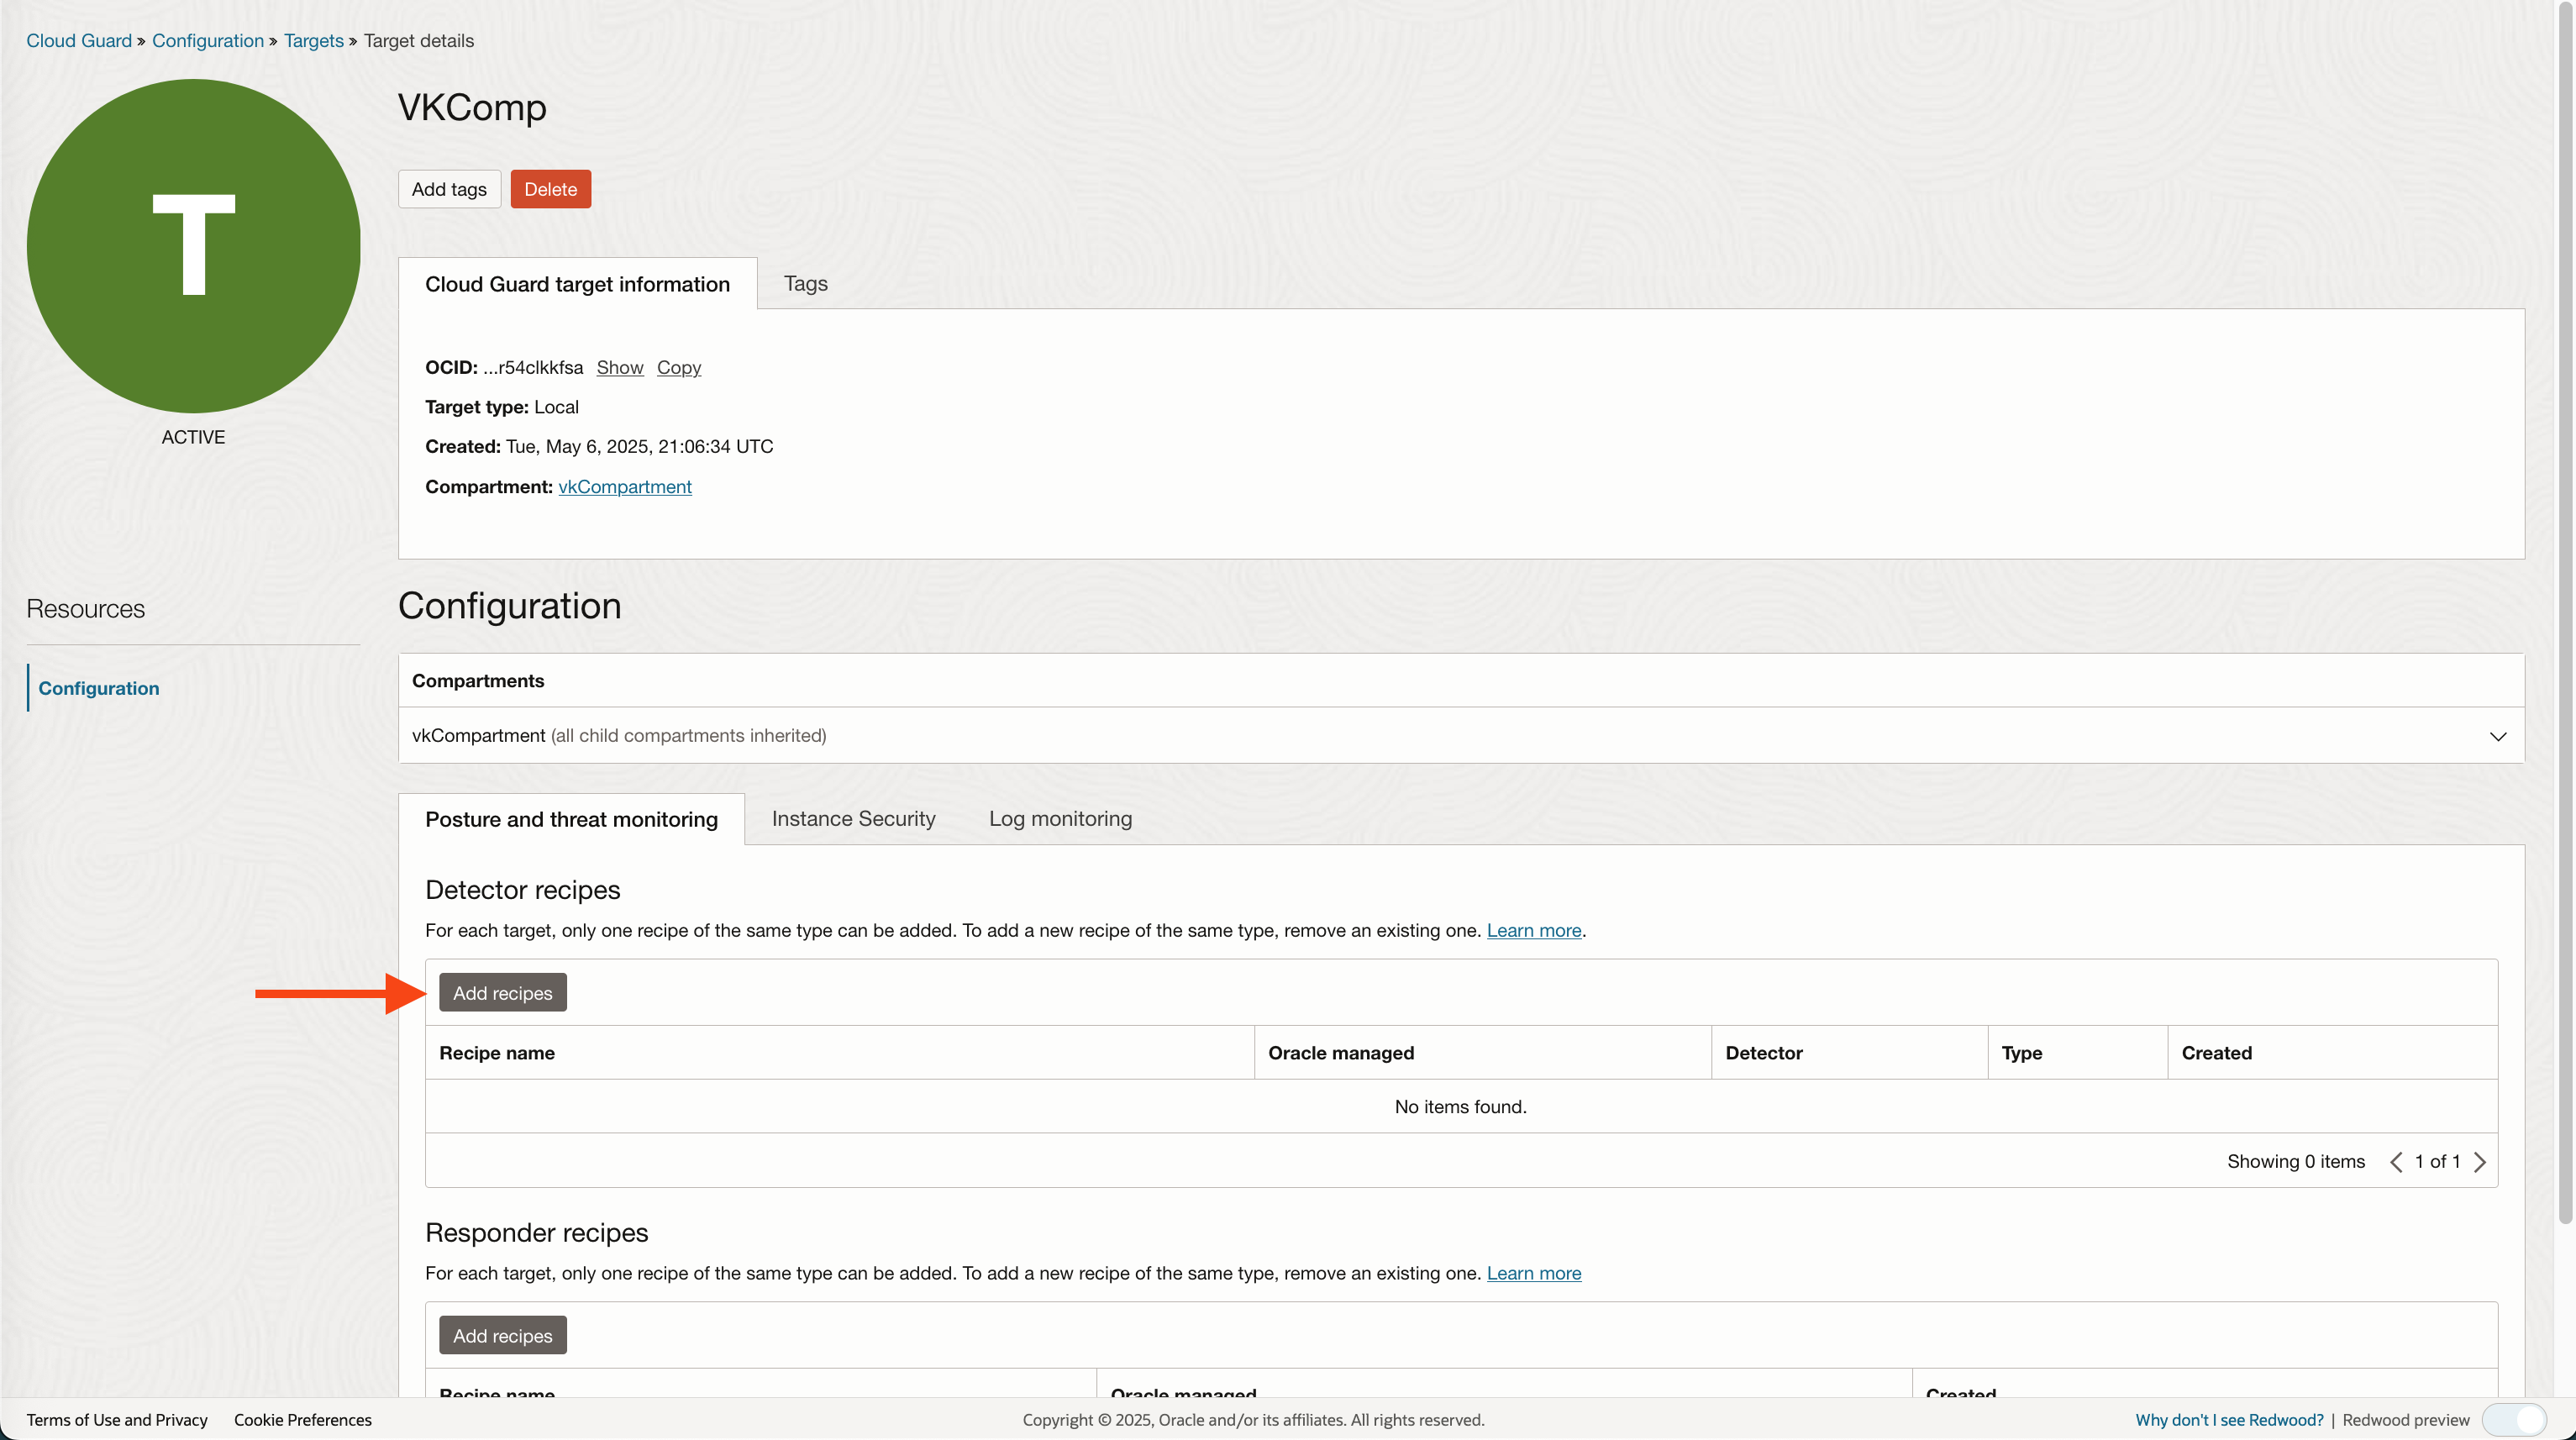
If you do not attach a Detector recipe to a target, Cloud Guard will not scan the target compartment for known security vulnerabilities defined in the recipe. If a detecttor recipe is attached, however, a specific rule or rules are diabled, Cloud Guard will ignore the rule(s) when scanning your environment.
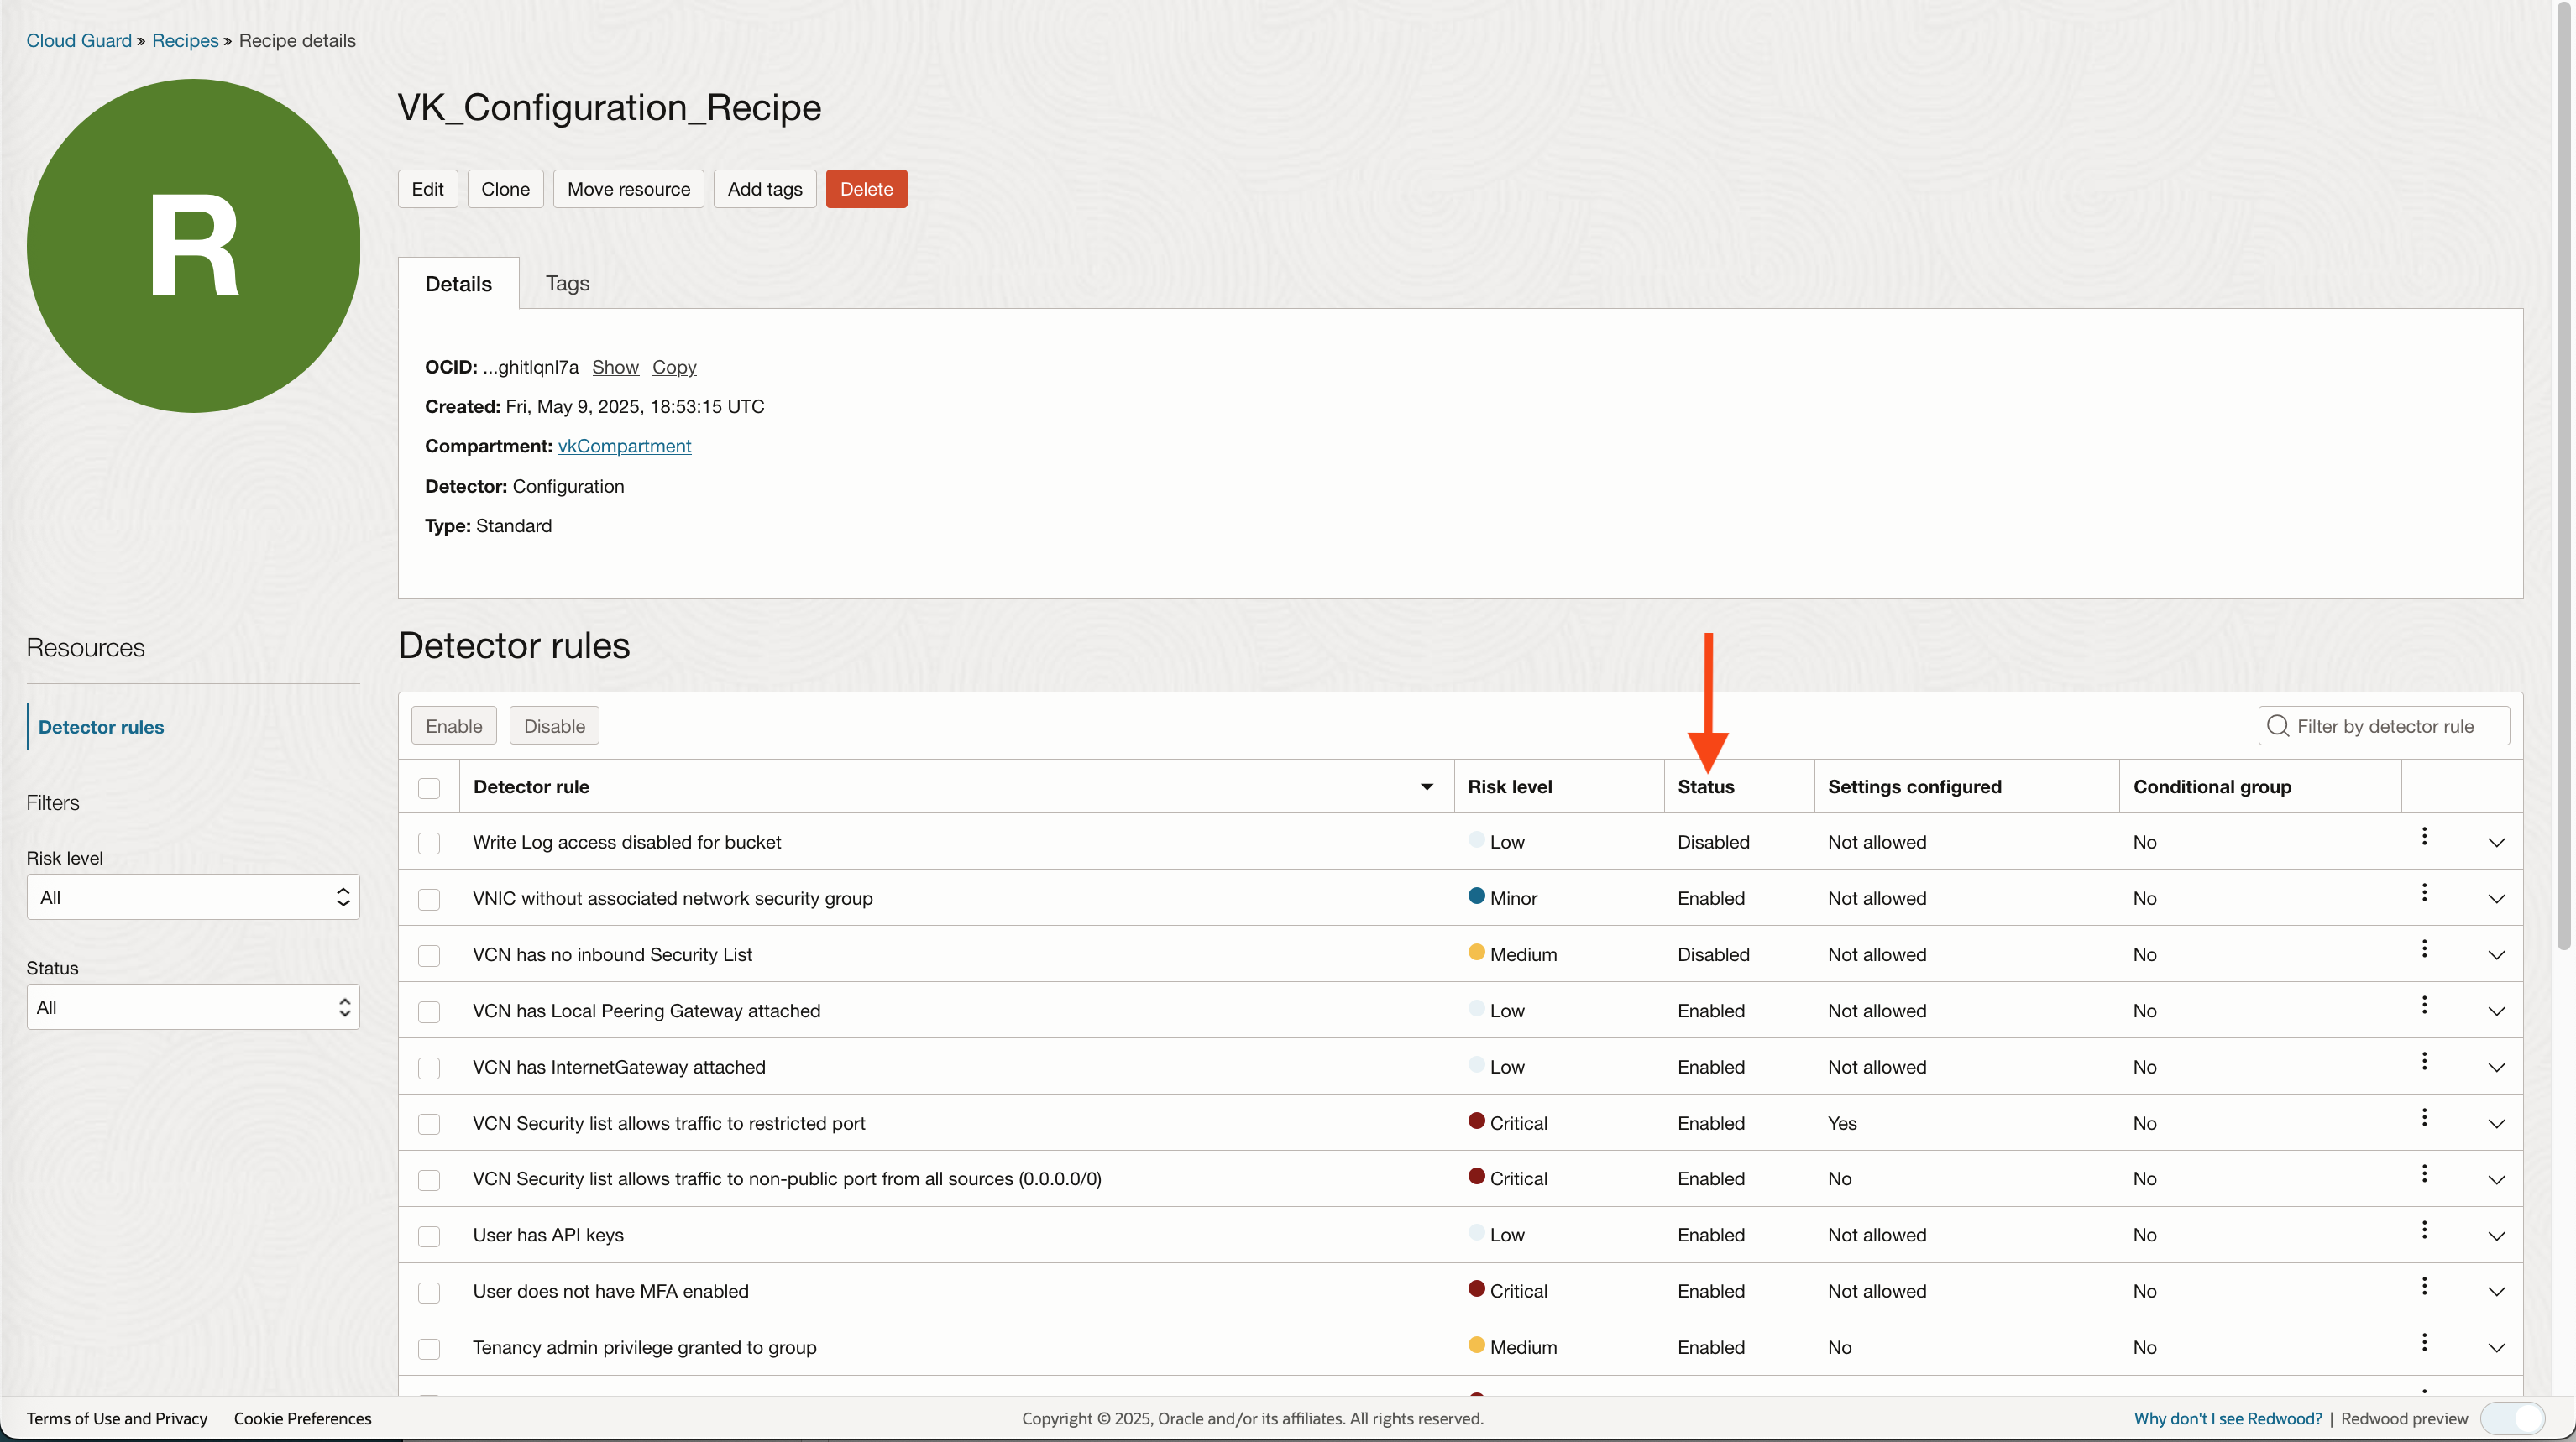
Responders behave differently. Here is the default Responder recipe:
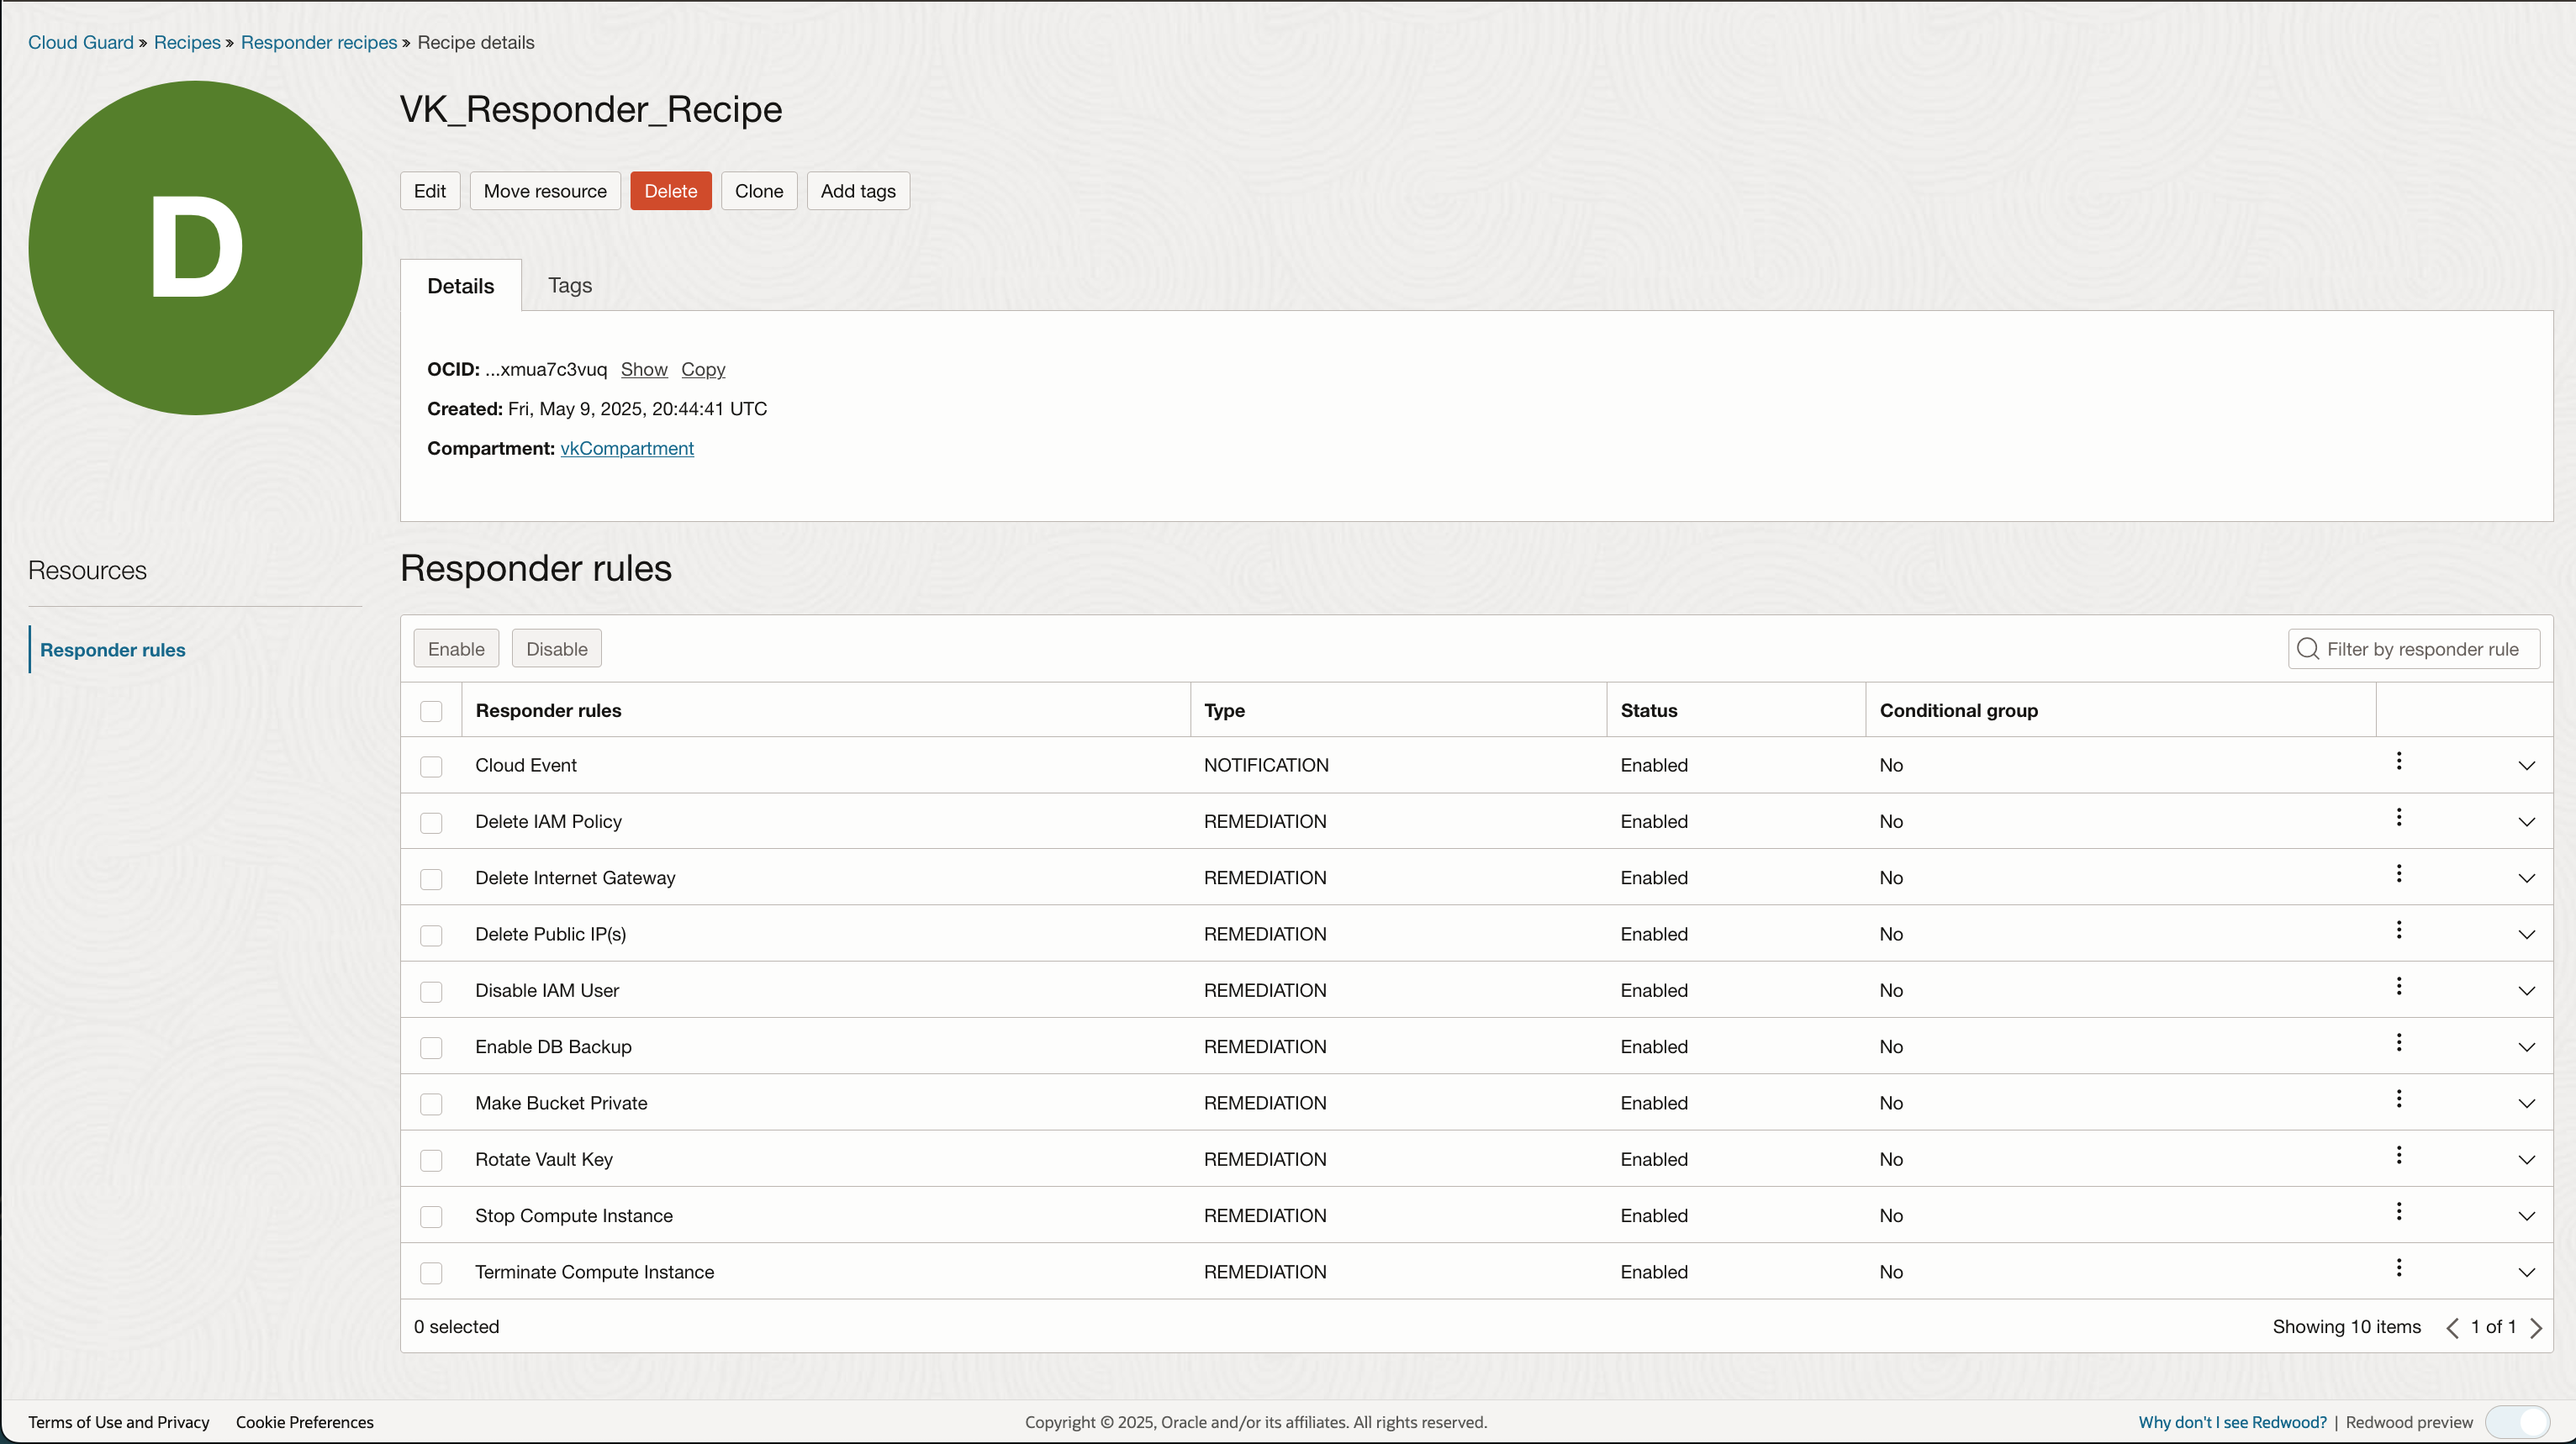
Responder types are differnt than Detecttor types. The only possibilities are: Notification and Remediation.
Now lets look at a Problem:
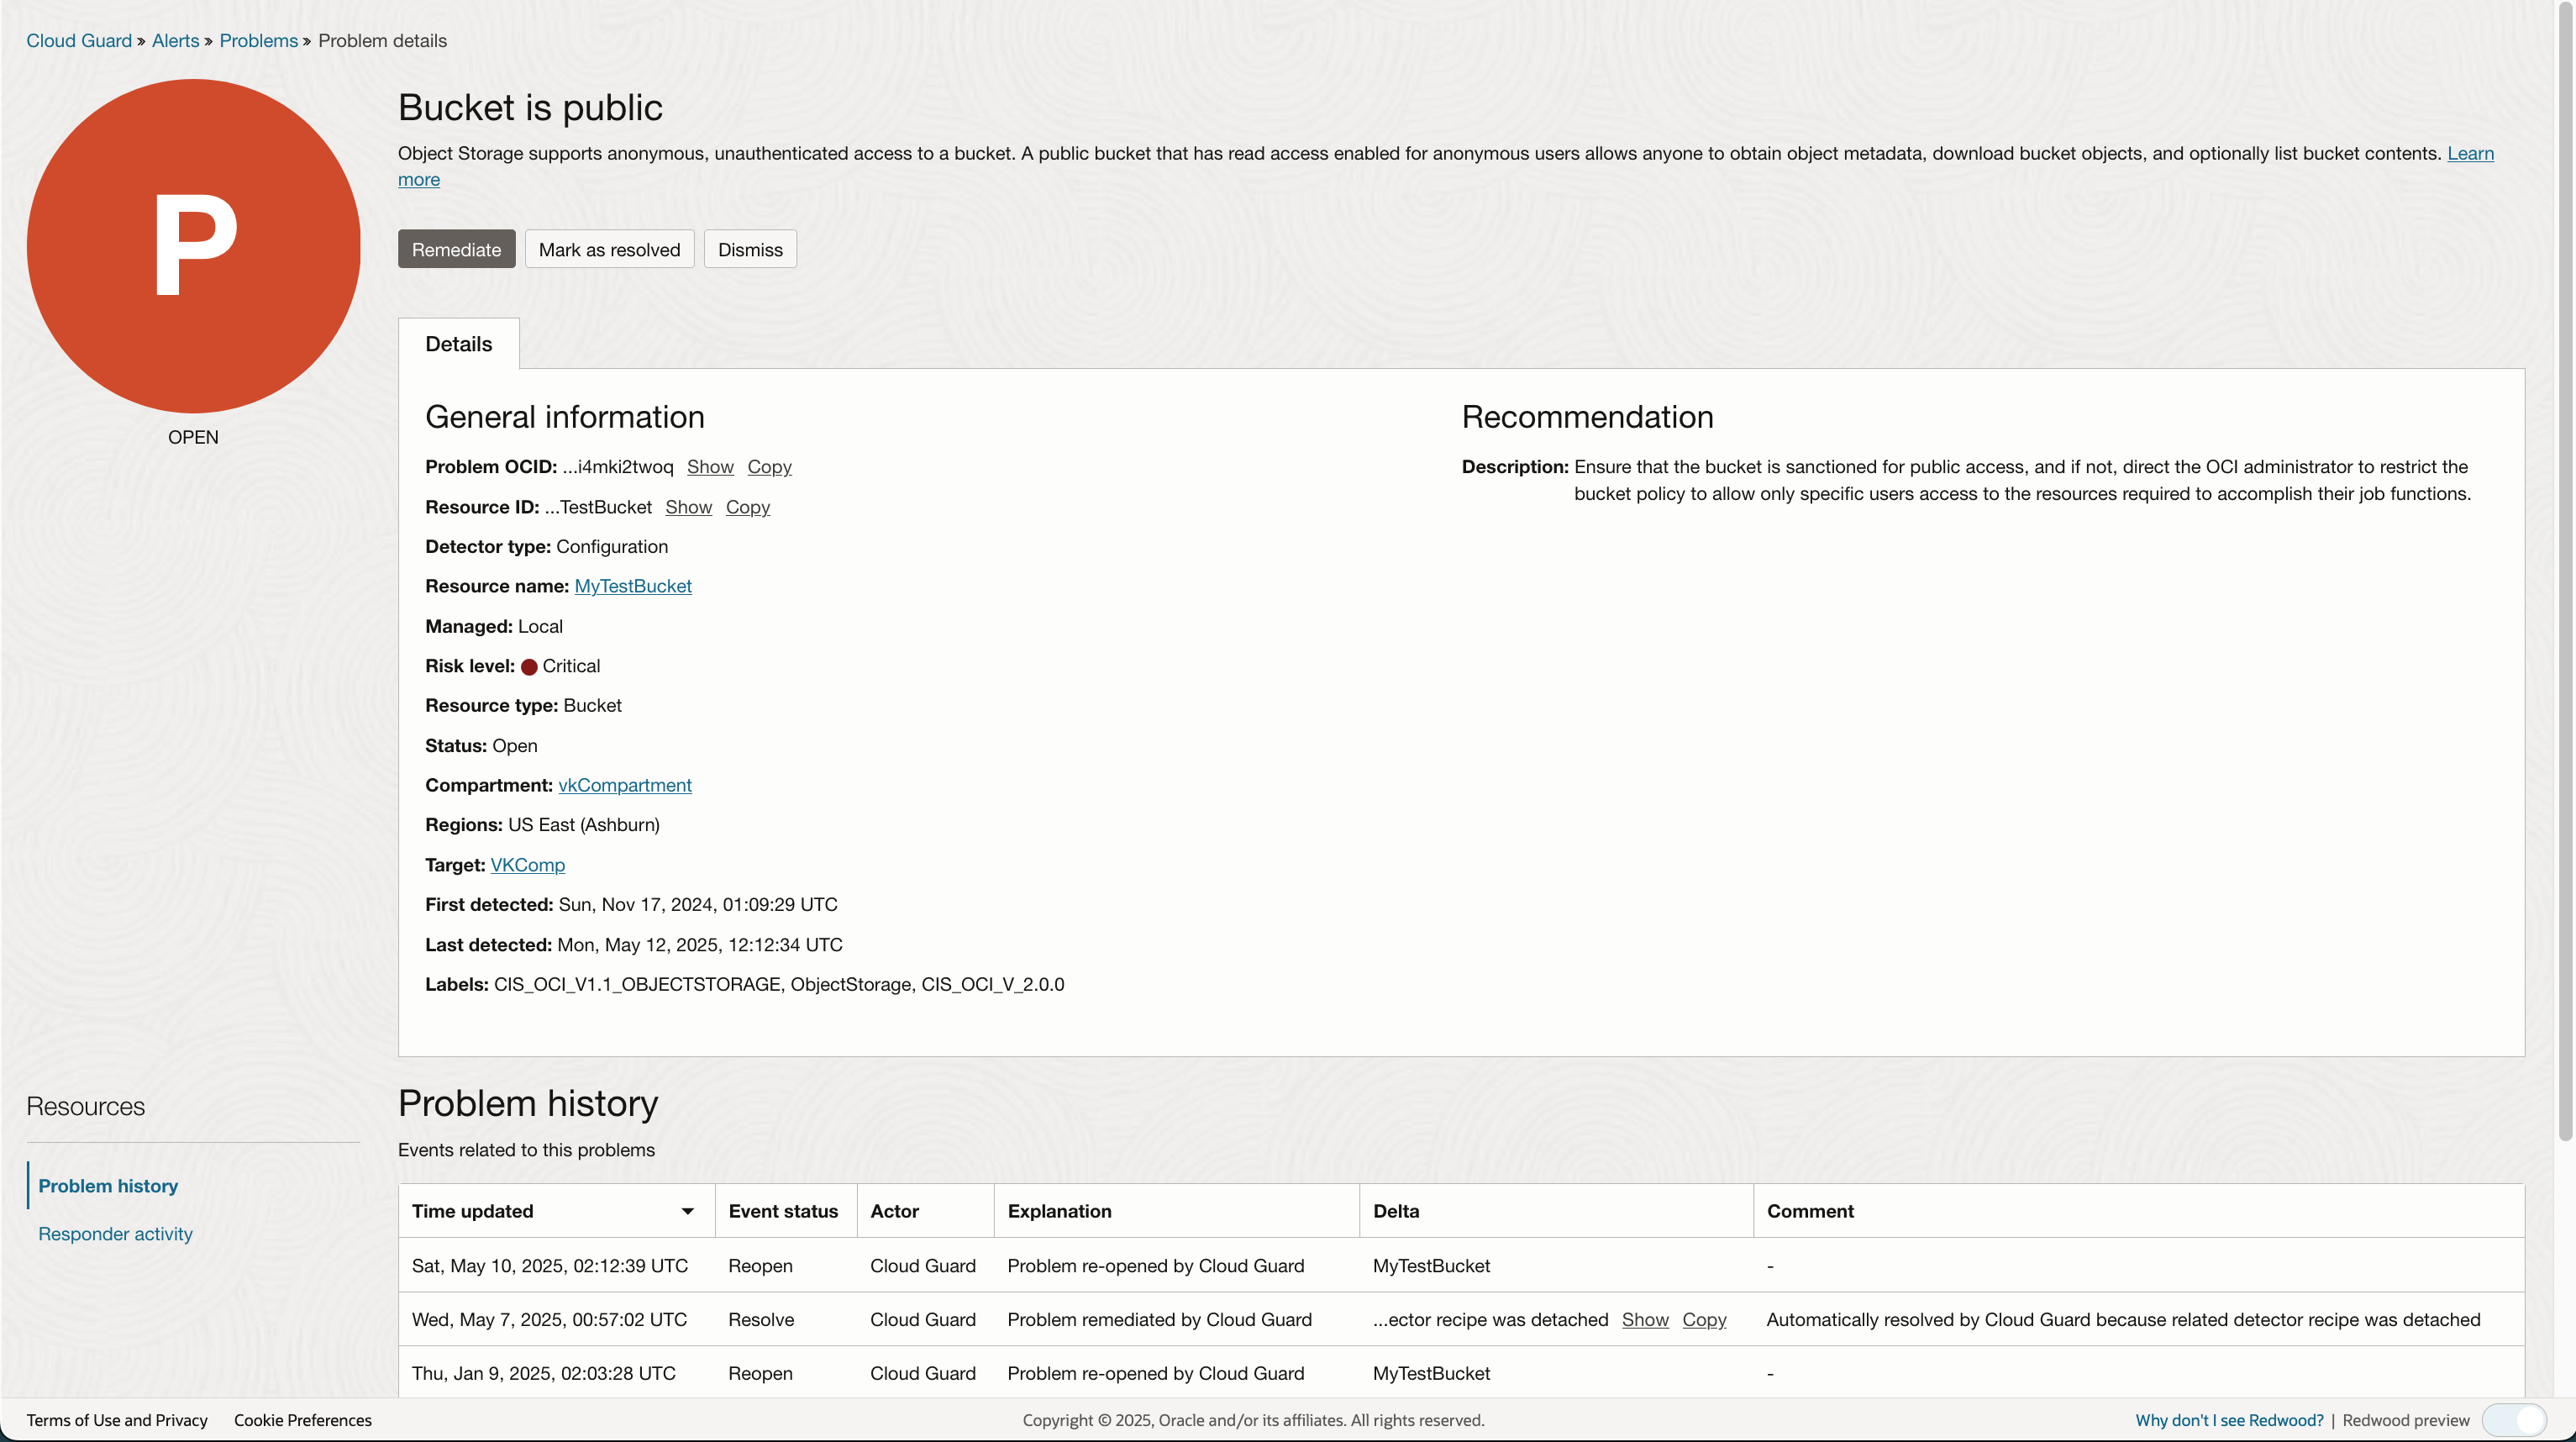
Notice that the Remediate button is active. This is because of the corresponding Responder rule, ‘Make Bucket Private’ (See Responder rules above).
The Remediate button will be active for all rules defined in the Responder recipe regardless if the responder is attached to a target or if the rule in question is disabled.
This is the key distinction between Detector recipes and Responder recipes. Cloud Guard will always give the admin user the ability to remediate a problem.
You might be asking, How do I prevent Cloud Guard admins from remediating a problem?
The answer is via IAM policies. Each remediation rule requires Cloud Guard access to a specific resource. Within the remediation rule you can view the required policy statement and allow Cloud Guard to add that statment to the root compartment.
Using the same problem example above, when clicking on the Remediate button:

If it is not required to attached a responder recipe to target or an attached recipe rule has been disabled , what is the point of attaching a responder recipe?
The answer is two-fold:
1) A disabled rule (or no attached rersponder) controls whether you can automate the remediation without approval:
When editing a responder rule that is attached to a target you can decide whether to automate the remediatoin. Let’s look at the Make Bucket Private rule:
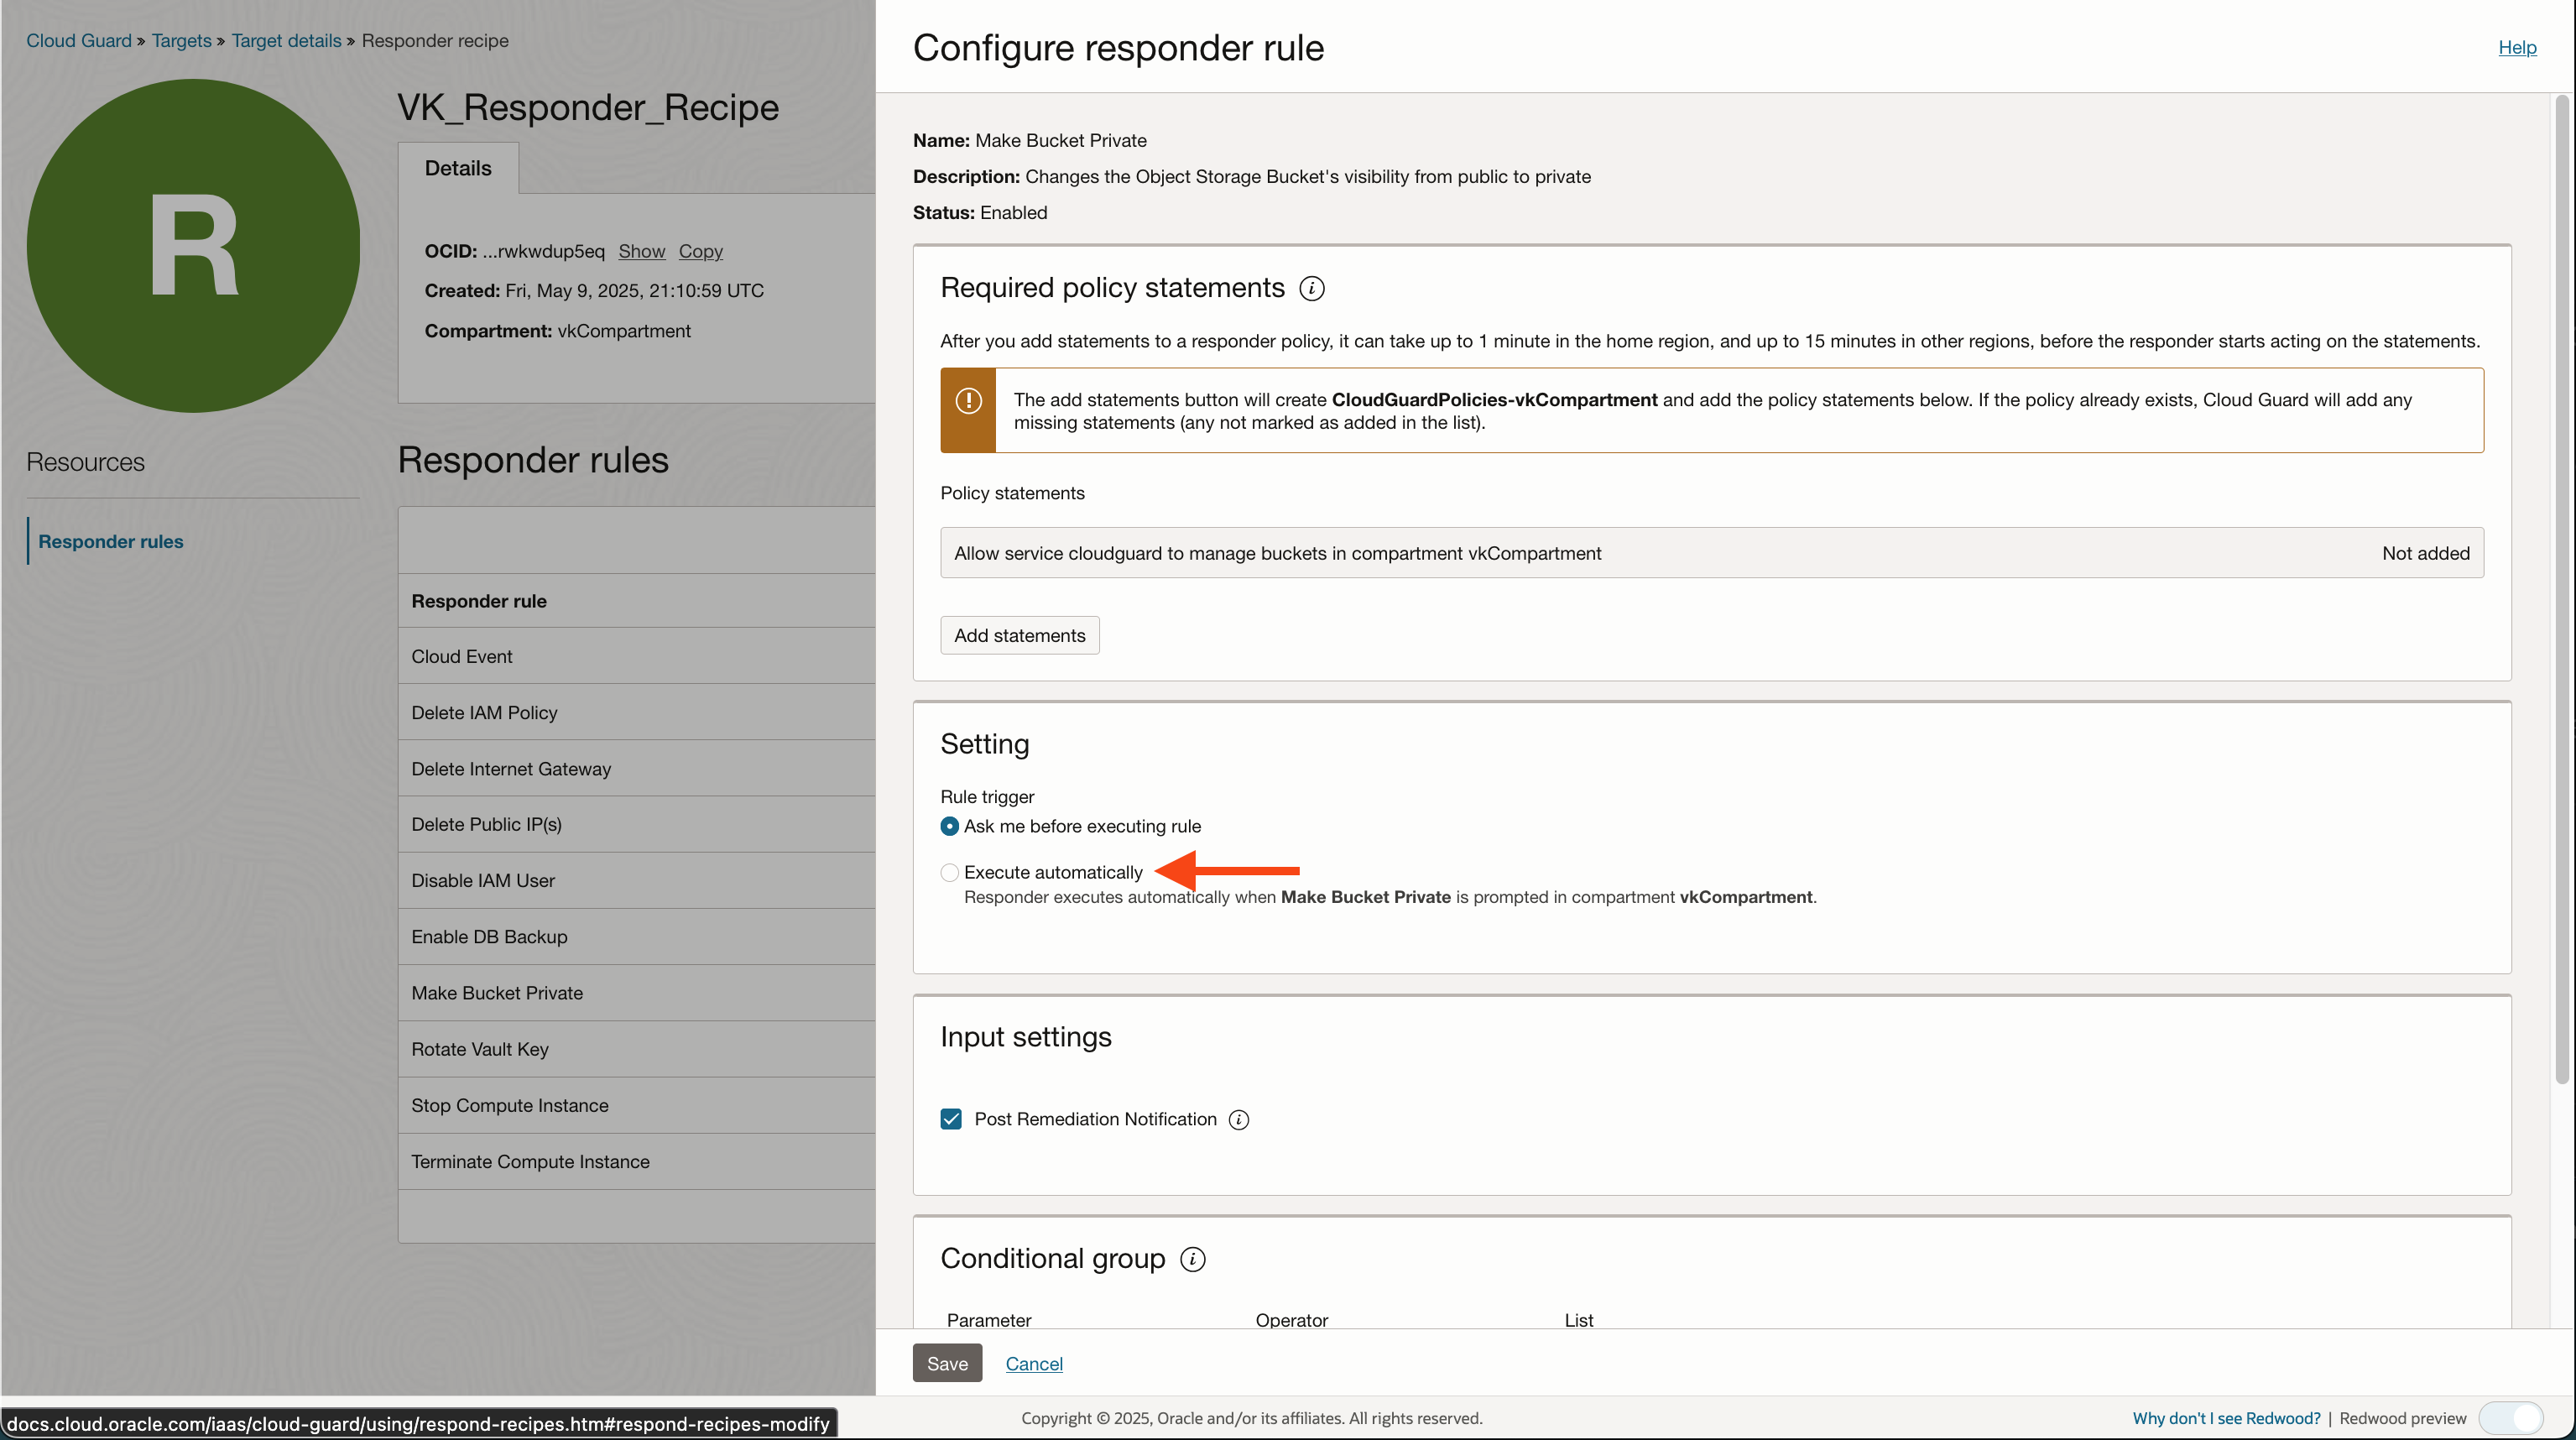
There are two rules in the responder that does not allow you to automate the remediation step: ‘Terminiate Compute Instance’ and ‘Rotate Vault Key’ .
2) If you want to send Cloud Events to the OCI Events service you.must attach the responder recipe to a target and make sure the Cloud Event rule is ‘Enabled’ (default setting).
Summary
A problem can be remediated even if there is no attached Responder recipe or a rule has been disabled. However, no action will take place unless there is a corresponding IAM policy that allows Cloud Guard to ‘manage’ the specific resource. Attaching a responder will allow you to send Cloud Guard events to OCI Event service for processing and to automate remediation for a set of rules.
Thanks for reading!