Introduction
In this last blog of the series, I will write about configuring the Equinix Connection to OCI and activating the AS Override. This solution can replace the OCI Remote Peering Connection (RPC) and has all the benefits of Equinix SLAs.
Please go here for the main page.
Please go here for Equinix FCRs and IP WAN configuration, the first part of this blog series.
Please go here for OCI FastConnect side configuration, the second part of the blog.
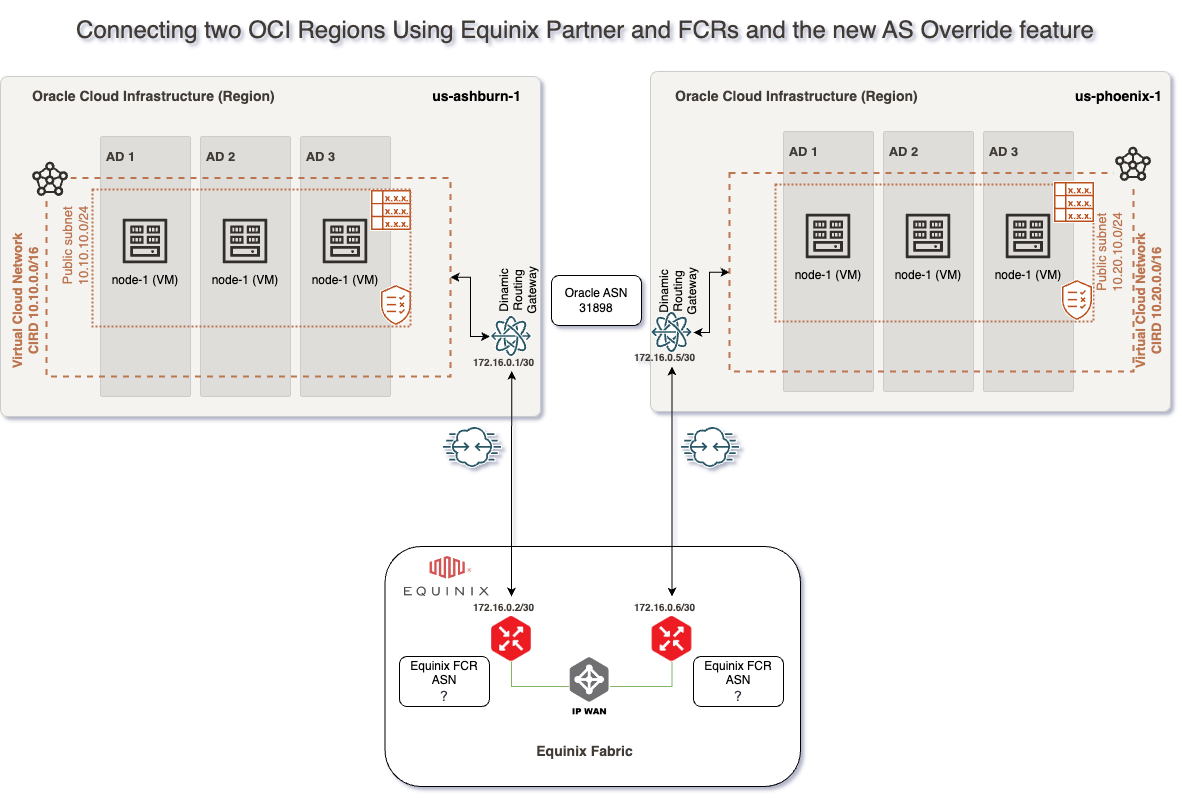
For this connectivity model, we will use two FastConnects with Equinix as a Partner, two Equinix Fabric Cloud Routers, four Equinix Connections, one IP Wan Network and the Equinix Fabric. I will not focus on redundancy options.
In this blog, we will use the following technologies:
– Equinix Connections – for more information, please access official documentation at https://docs.equinix.com/en-us/Content/Interconnection/Fabric/connections/Fabric-connections.htm
– Equinix Cloud Router – for more information, please access official documentation at https://docs.equinix.com/en-us/Content/Interconnection/FCR/FCR-intro.htm
– OCI Compute – for more information, please access official documentation at https://www.oracle.com/cloud/compute/
Prerequisites
In this blog, we will cover how to provision Equinix infrastructure. To do this, we will need the following resources already provisioned and configured:
1. Access to the OCI Console portal with the possibility to provision OCI required components
2. VCNs – in our case, we will have a VCN in the Ashburn region with 10.10.0.0/16 CIDR and another VCN in the Phoenix region with 10.20.0.0/16 CIDR with all routing and Security List / Network Security Groups to allow connectivity between Ashburn and Phoenix CIDR Blocks
3. 2 DRGs – in our case, one DRG in Ashburn and one DRG in Phoenix with VCN attachments and routing in place to allow traffic between Ashburn VCN and Phoenix VCN
4. 2 Compute VMs – in our case, one compute VM in Ashburn with IP 10.10.10.193 and one in Phoenix with IP 10.20.10.165
5. Access to the Equinix portal with the possibility to provision and Order required components.
6. Prepare and have in handy all the needed data to configure this solution. In our case, what I have prepared is:
# Ashburn Compute instance IP = 10.10.10.193
# Ashburn Fastconnect BGP subnet = 172.16.0.0/30
# Phoenix Compute instance IP = 10.20.10.165
# Phoenix Fastconnect BGP subnet = 172.16.0.4/30
# Equinix ASH BGP ASN = 13531
# Equinix PHX BGP ASN = 36641
# Oracle BGP ASN = 31898
Solution Description
This solution does not focus on redundancy, and the connectivity will be based on this network diagram:

This blog will focus on how configure Equinix Connection to OCI and activating the AS Override, which can be done by following the following steps:
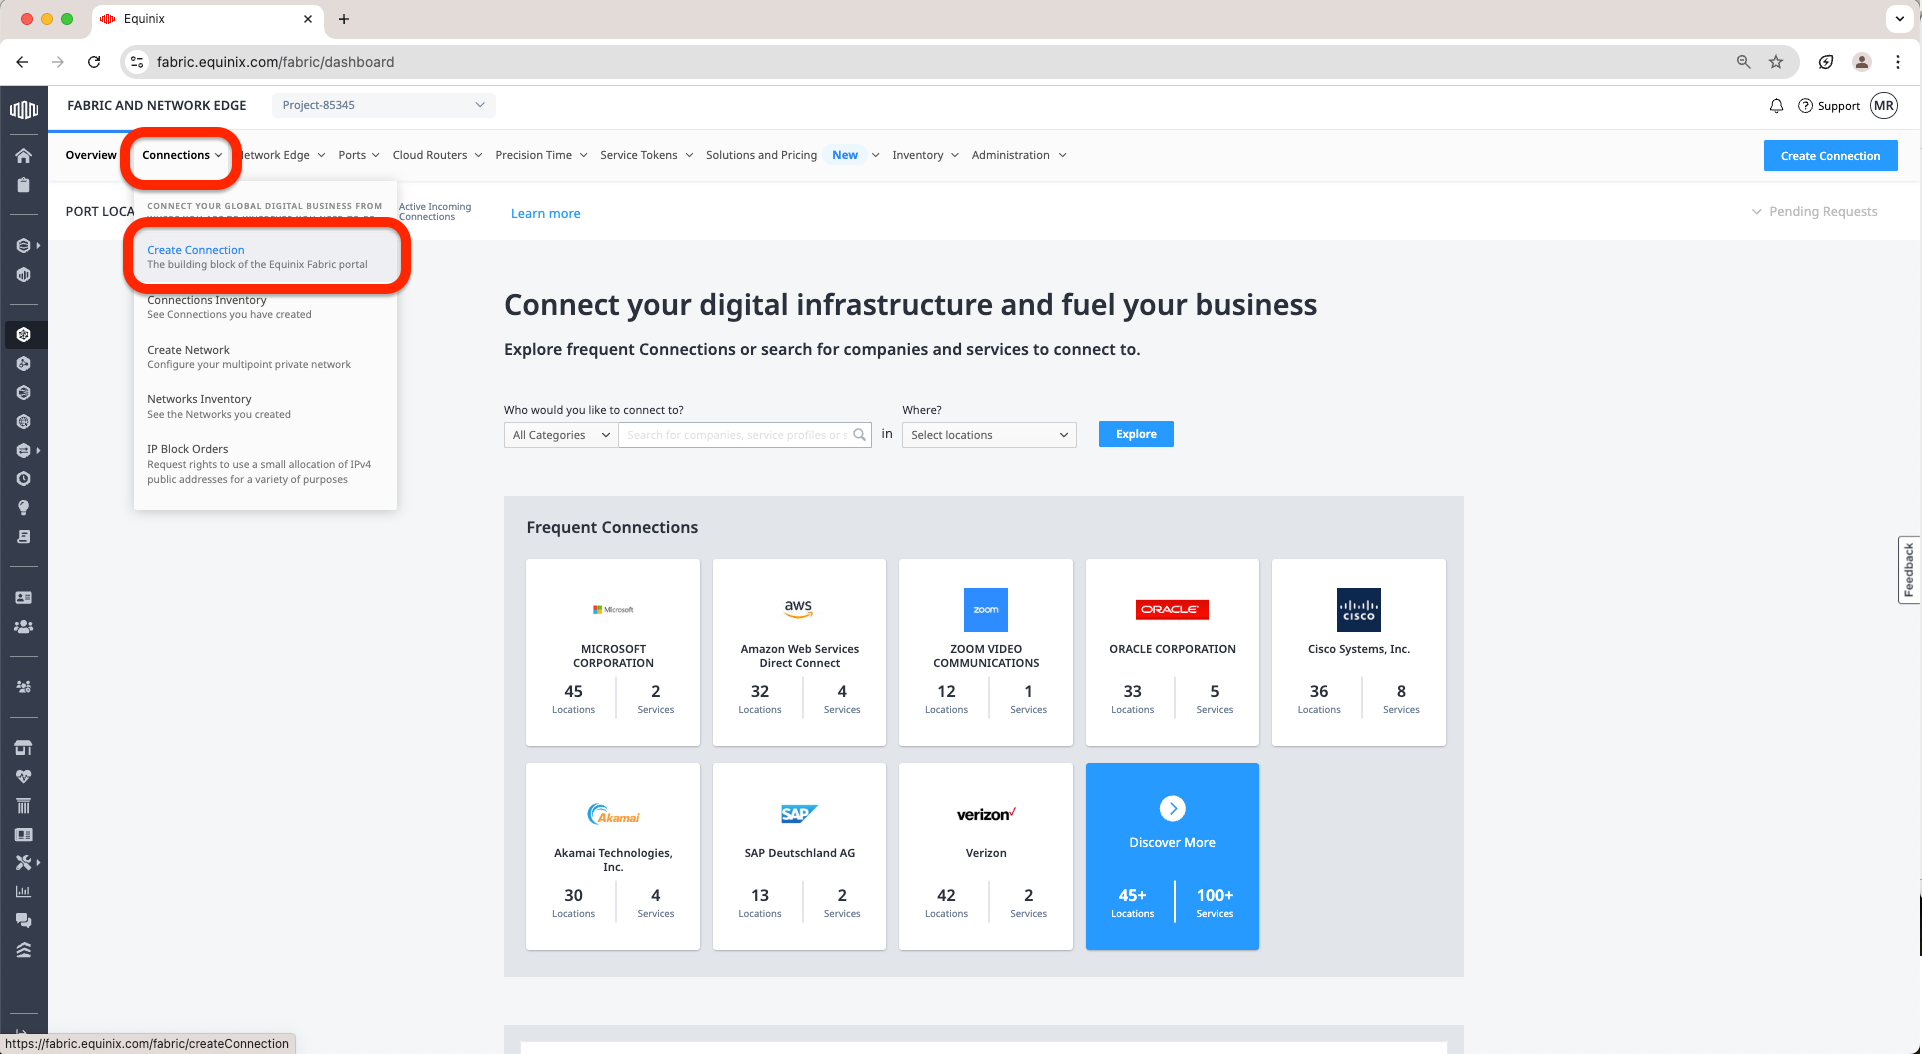
a. Access the Equinix Fabric at https://fabric.equinix.com/. Log in with your credentials, go to the Connections tab, and click Create Connection.
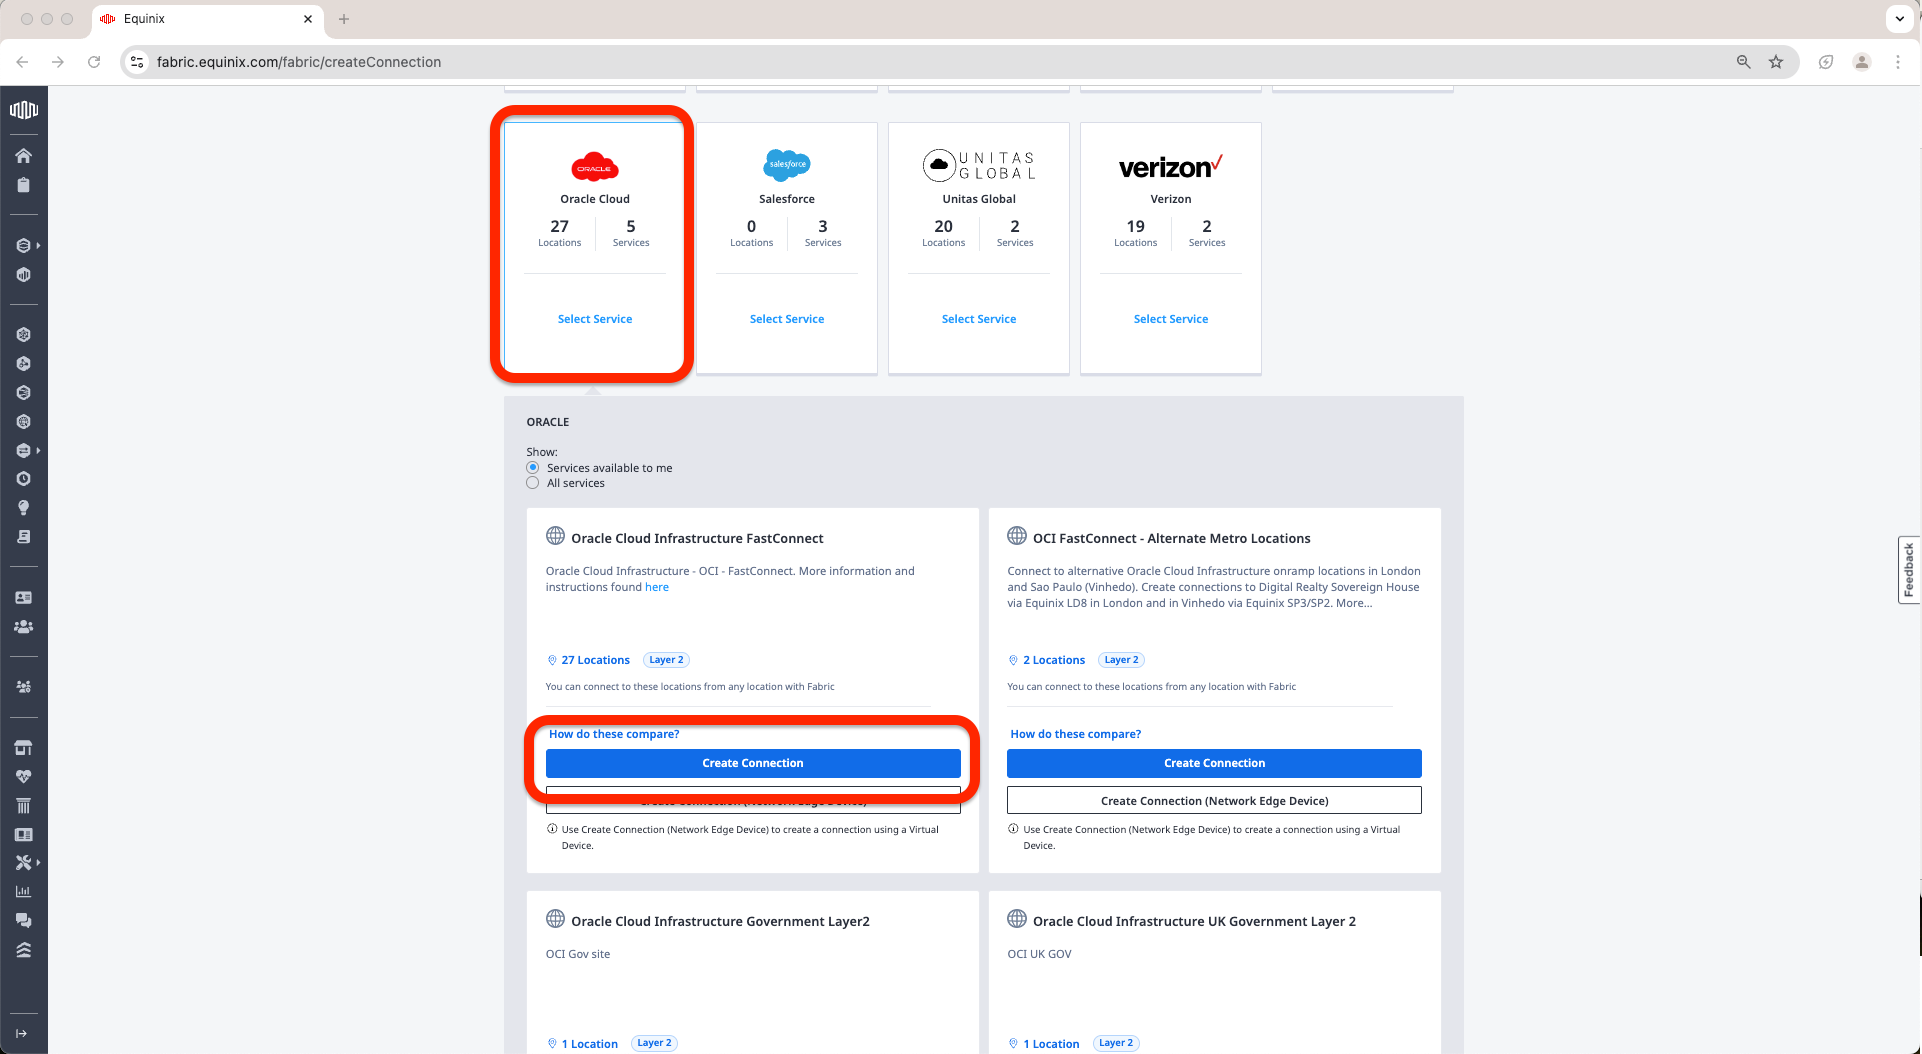
b. Select Oracle Cloud service and click on the Create Connection under Oracle Cloud Infrastructure FastConnect.
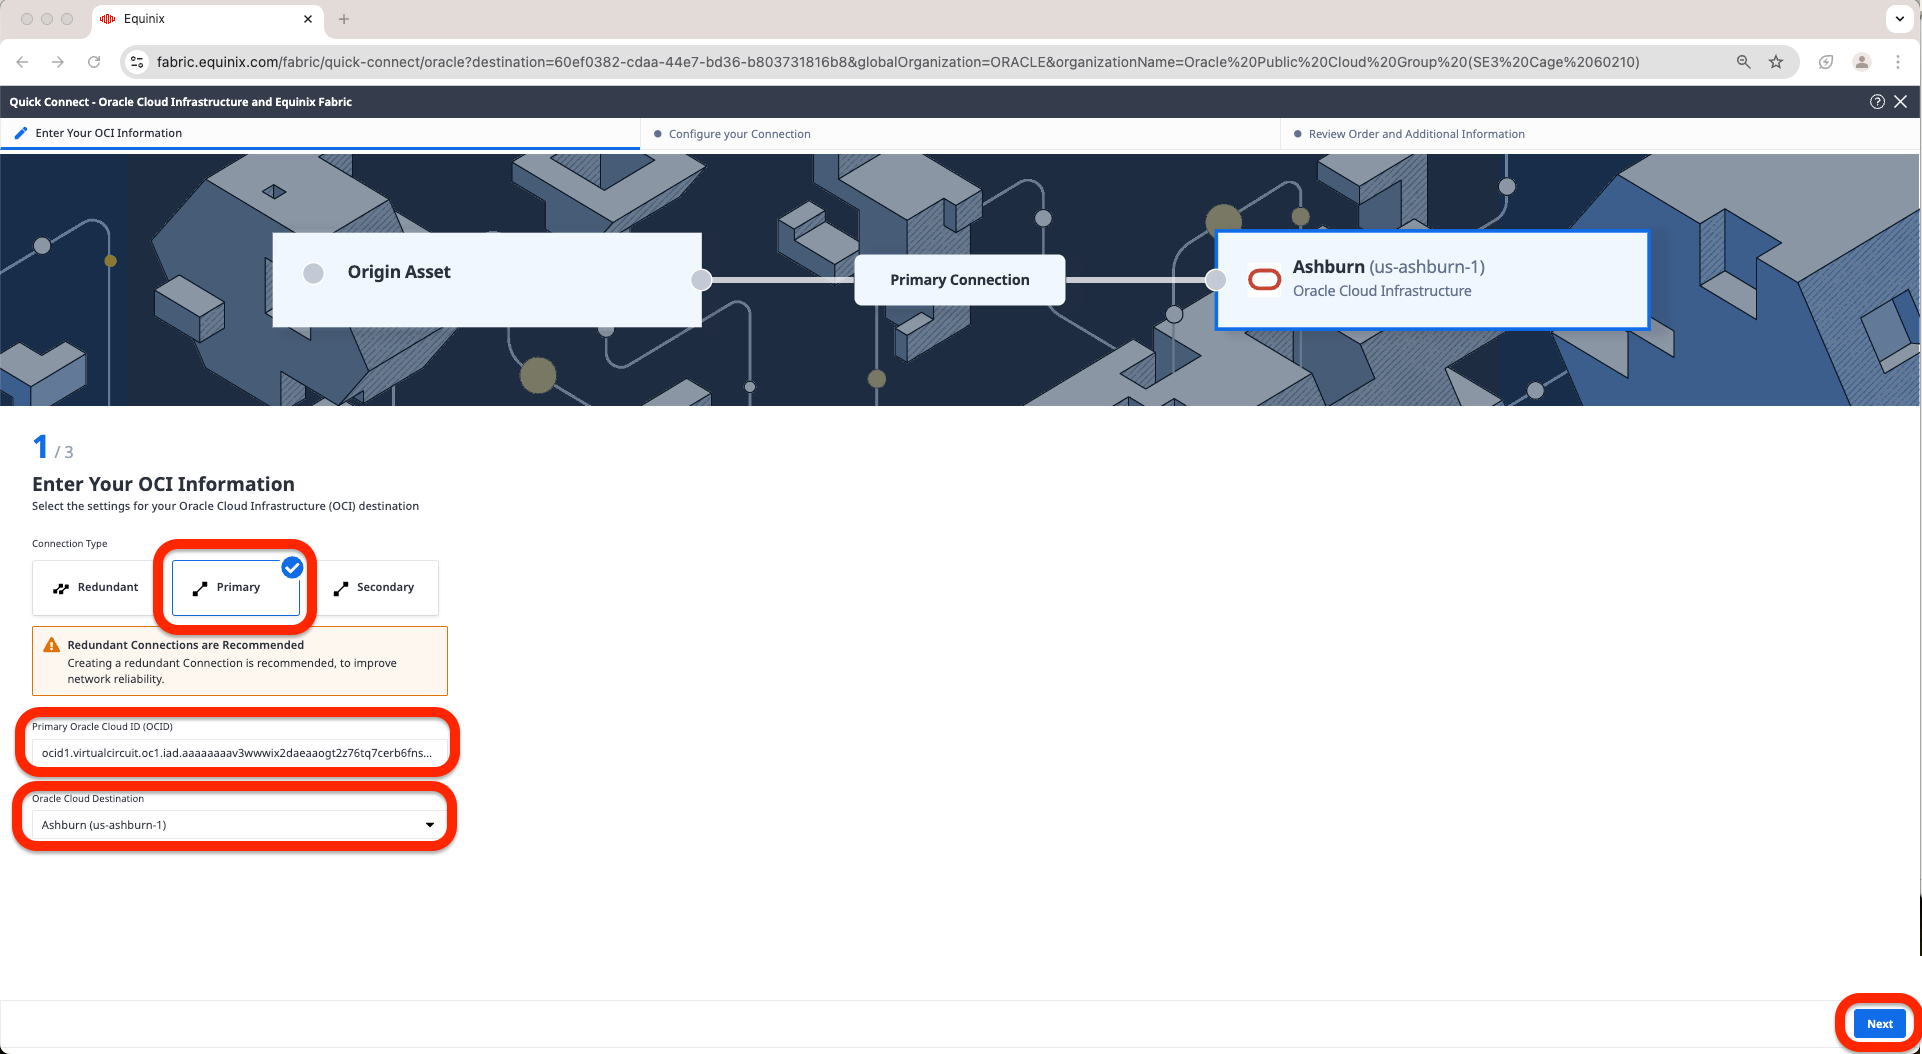
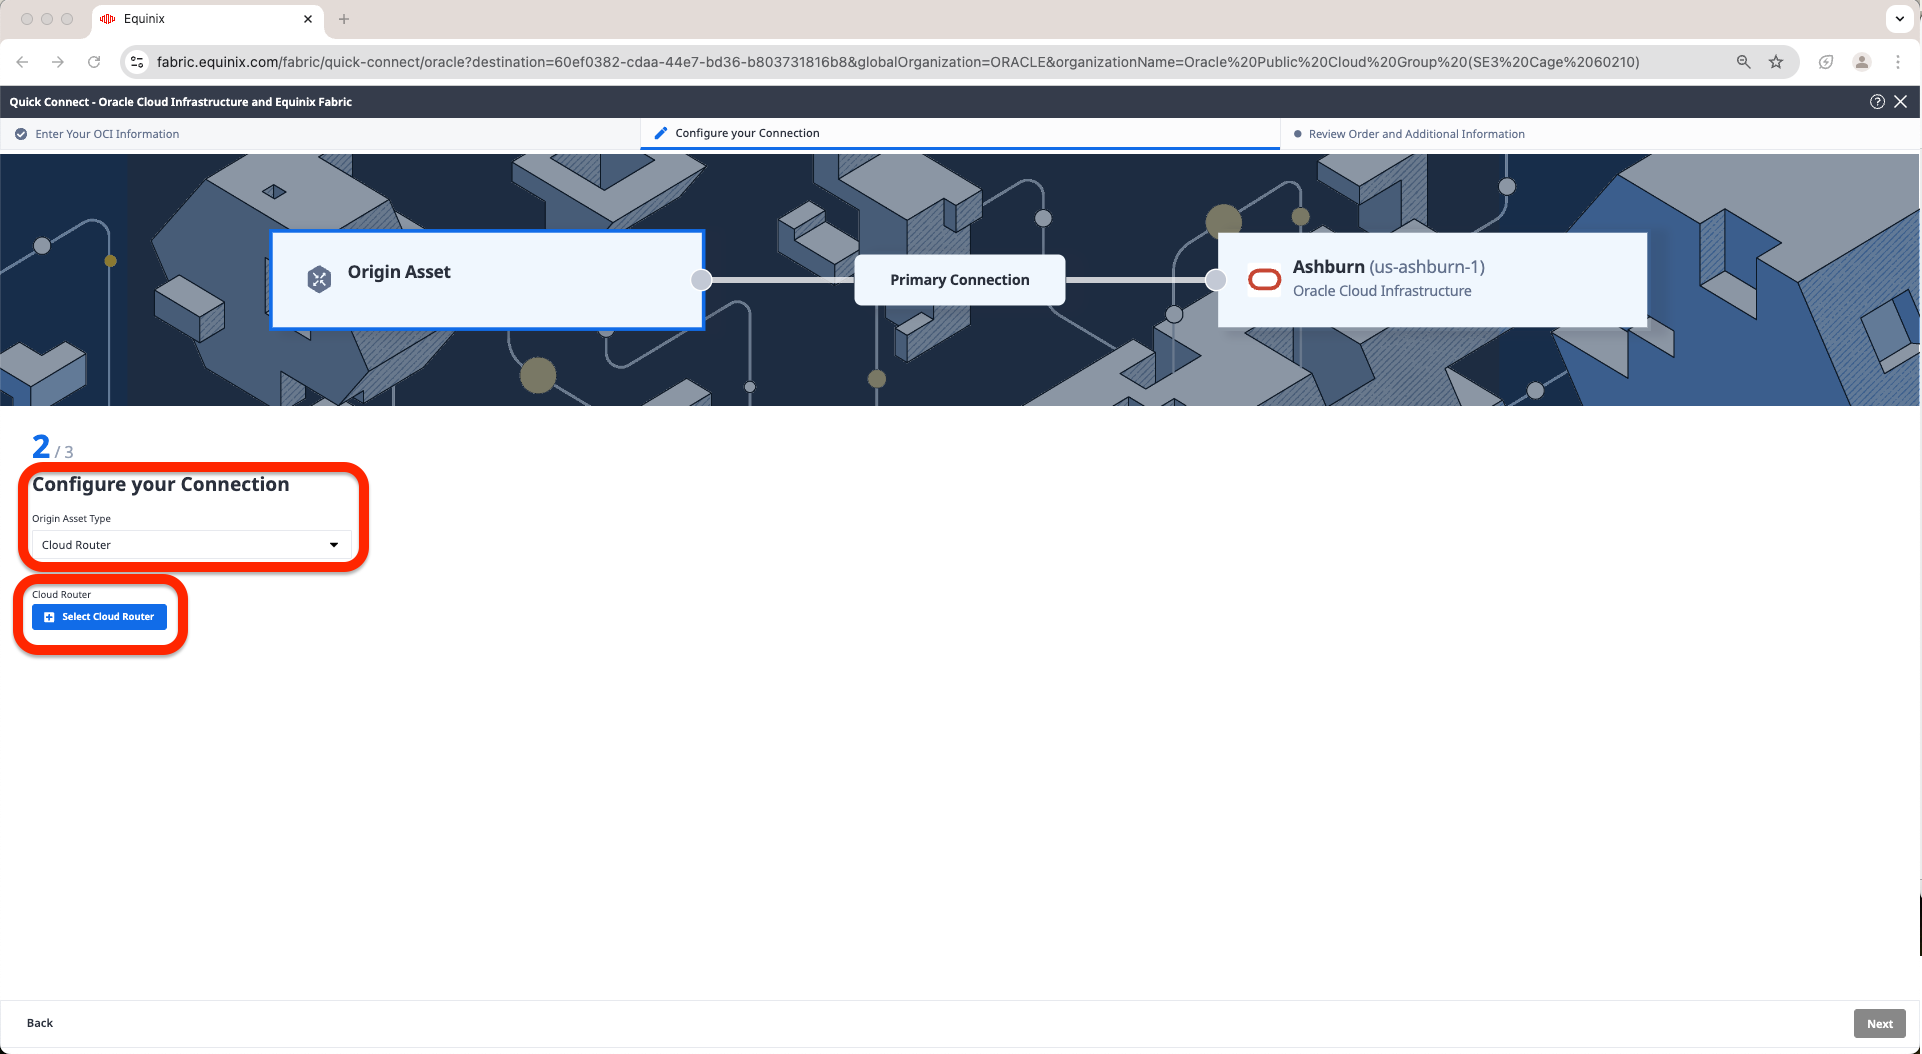
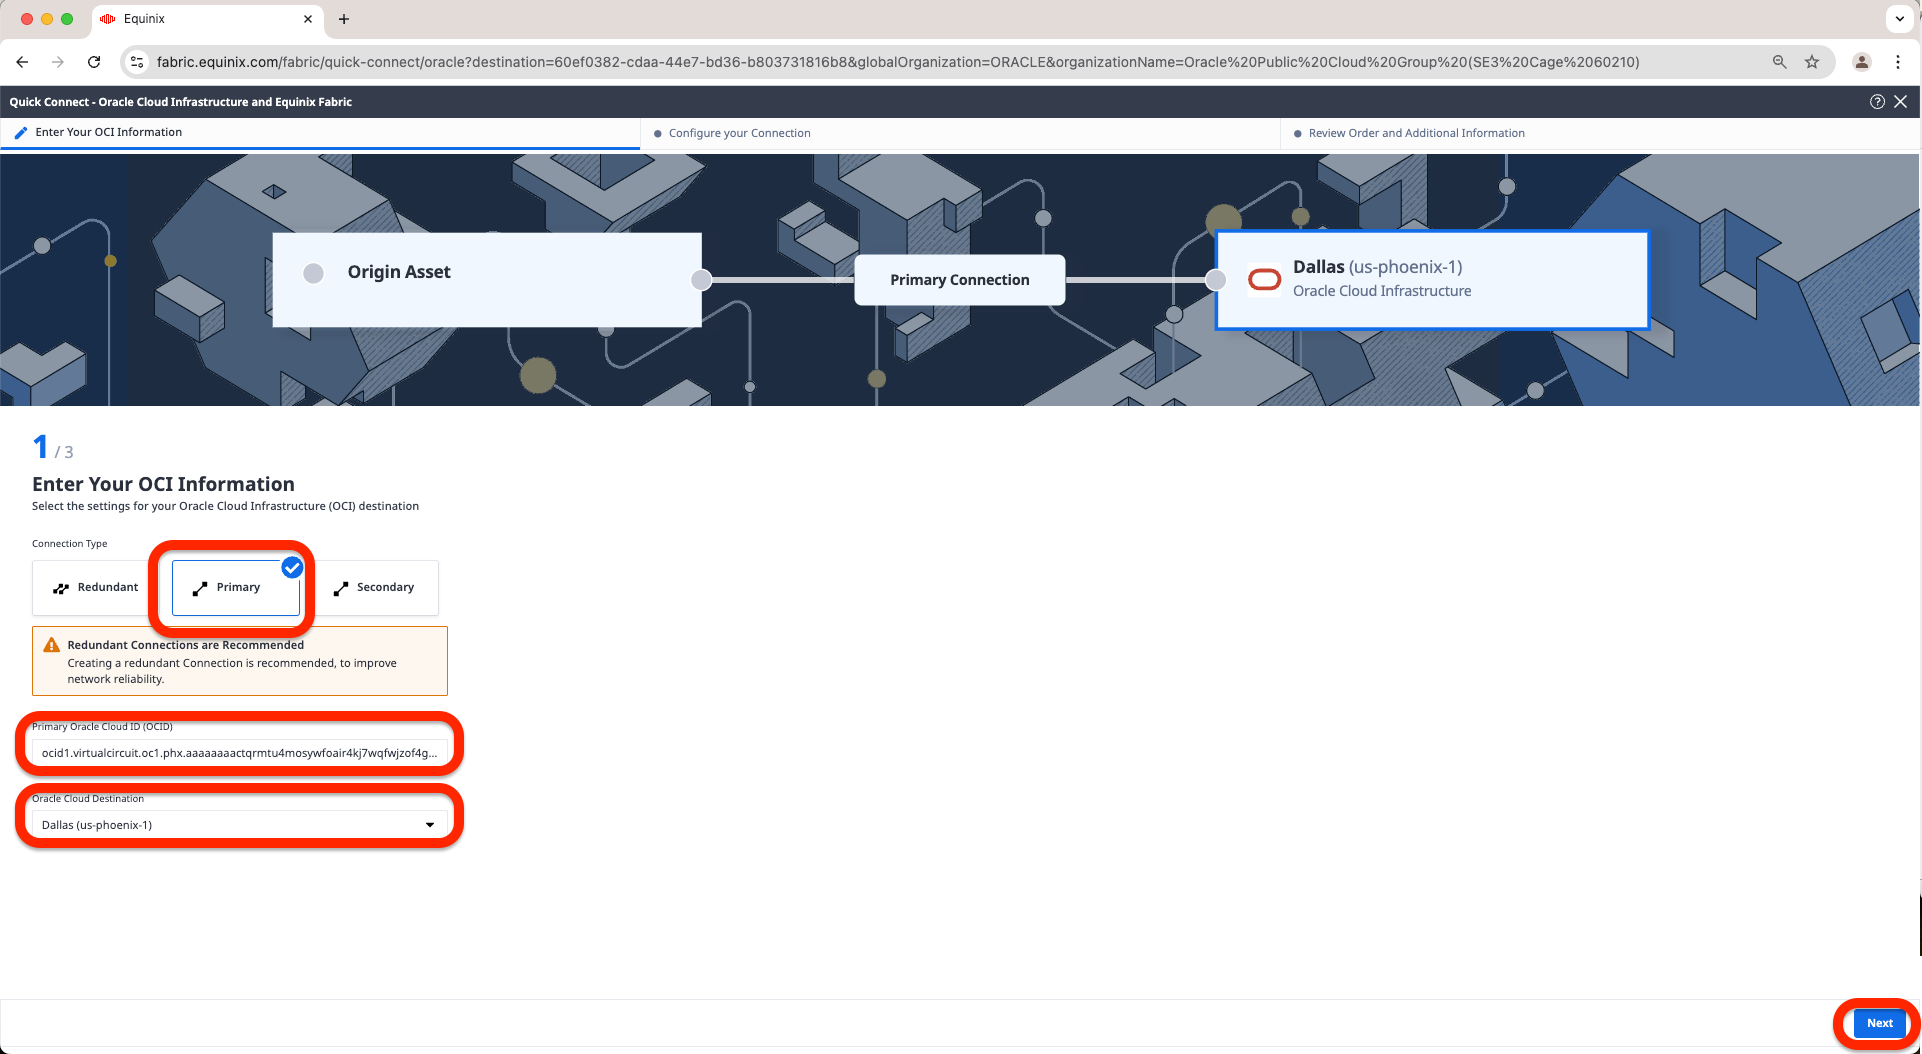
c. Select Connection Type; in this case, I will select Primary since I will not have redundancy, add the FastConnect OCID in the “Primary Oracle Cloud ID (OCID)” field, add Ashburn OCID, and select correct Oracle Cloud Destination, in this case Ashburn Location.
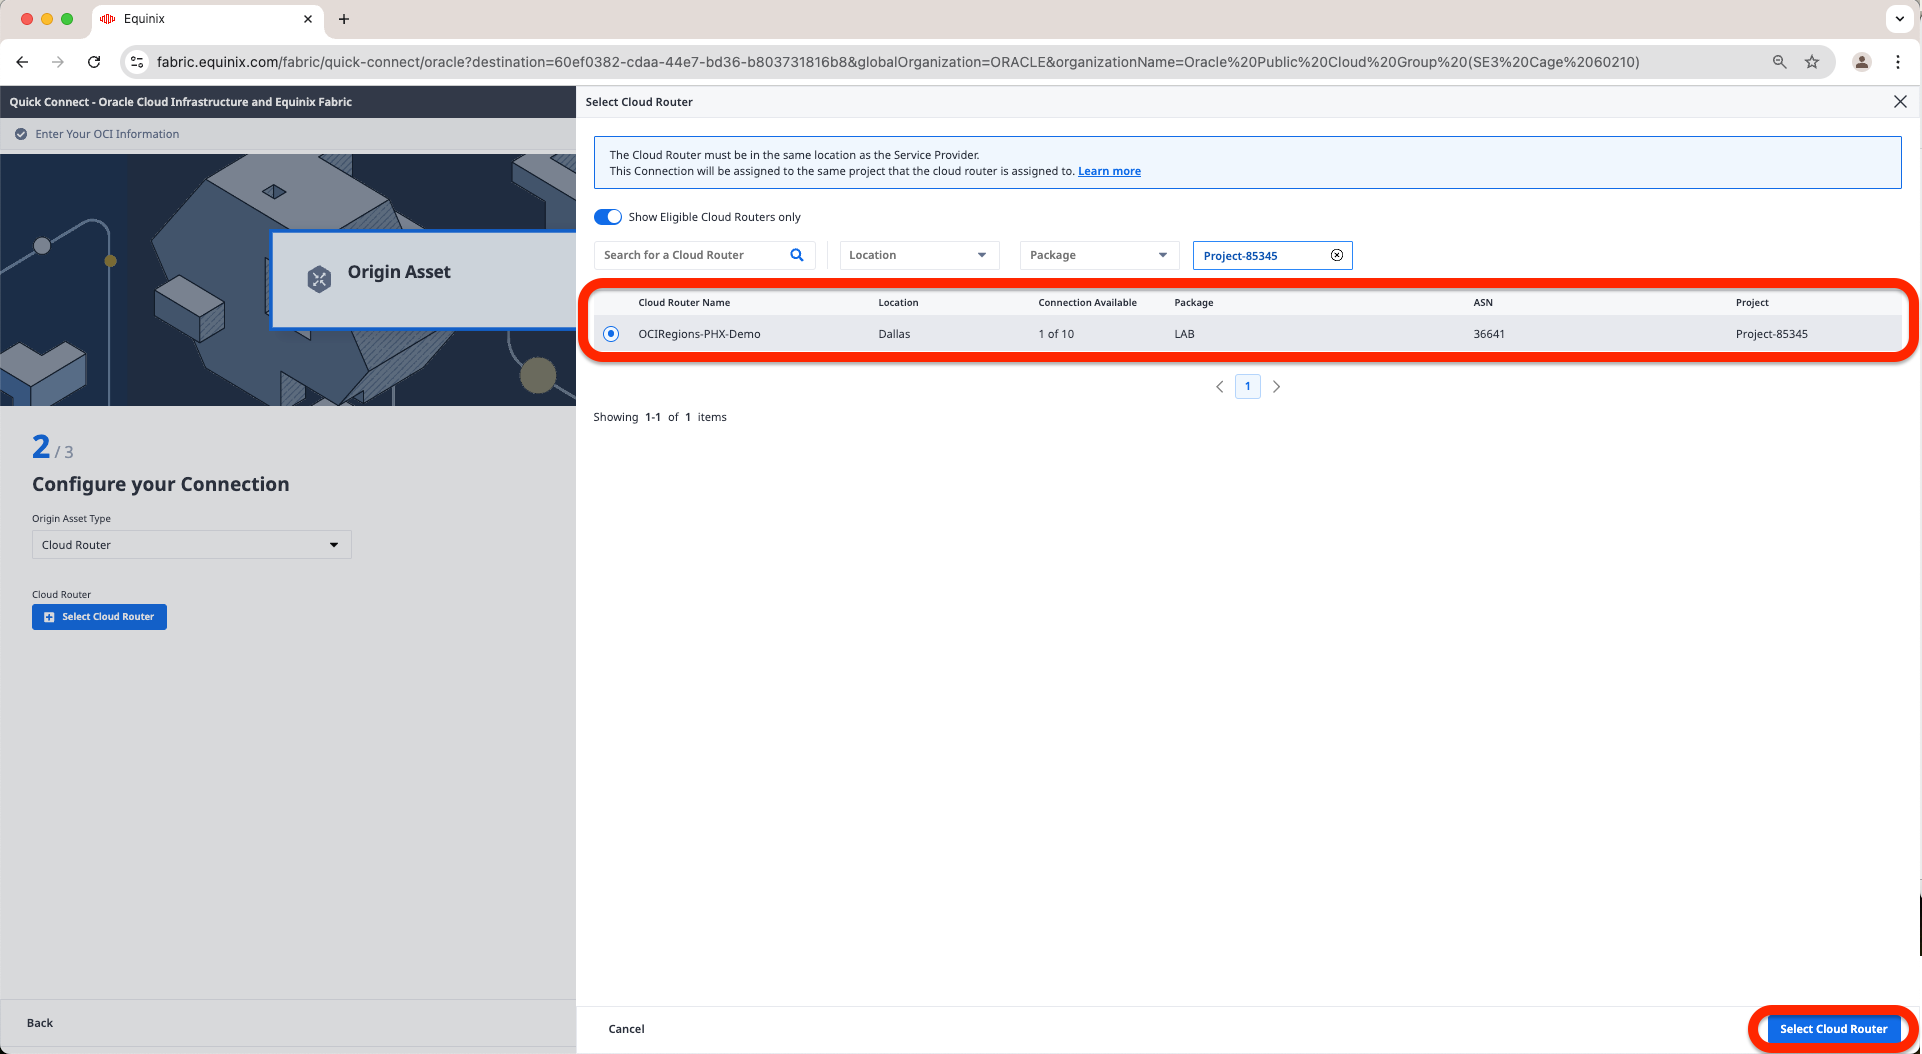
d. On the next page, select Origin Asset Type as Cloud Router and click on Select Cloud Router Button
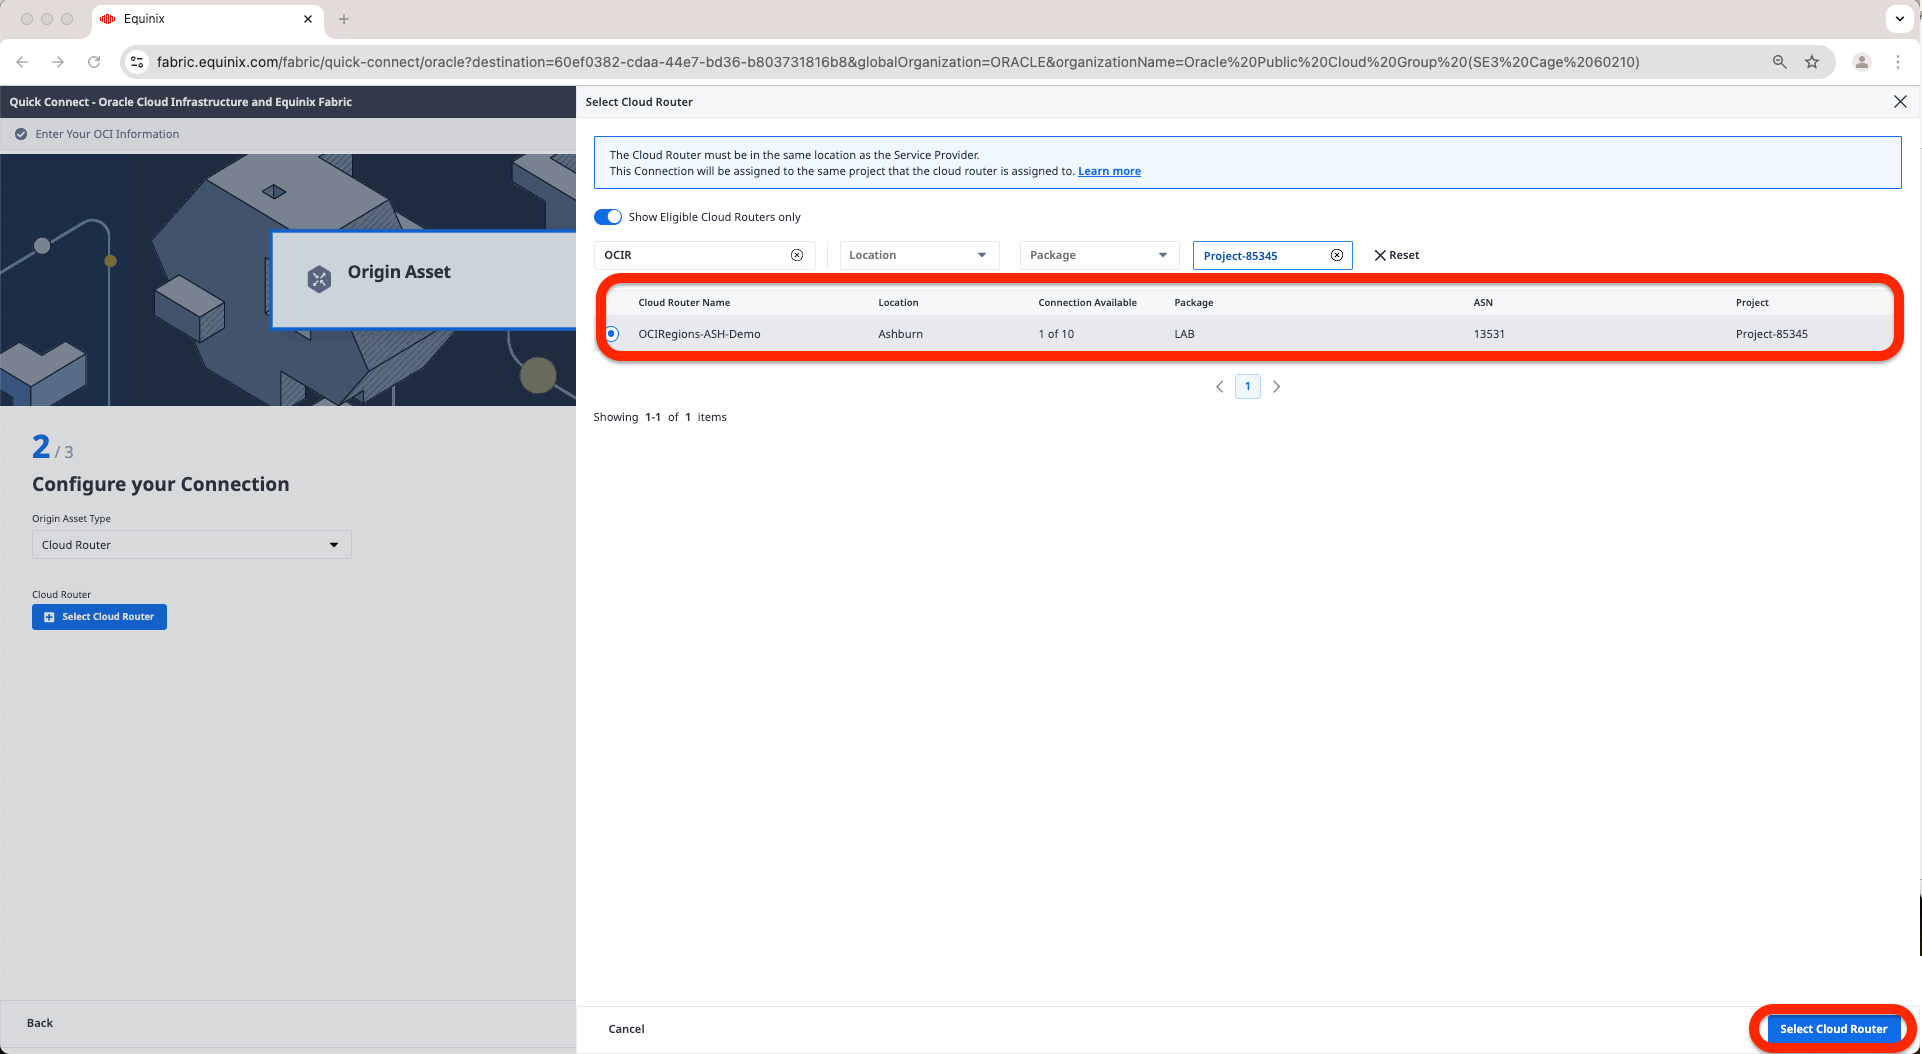
e. Now select the Fabric Cloud Router we have created in the first part of this blog and click Select Cloud Router
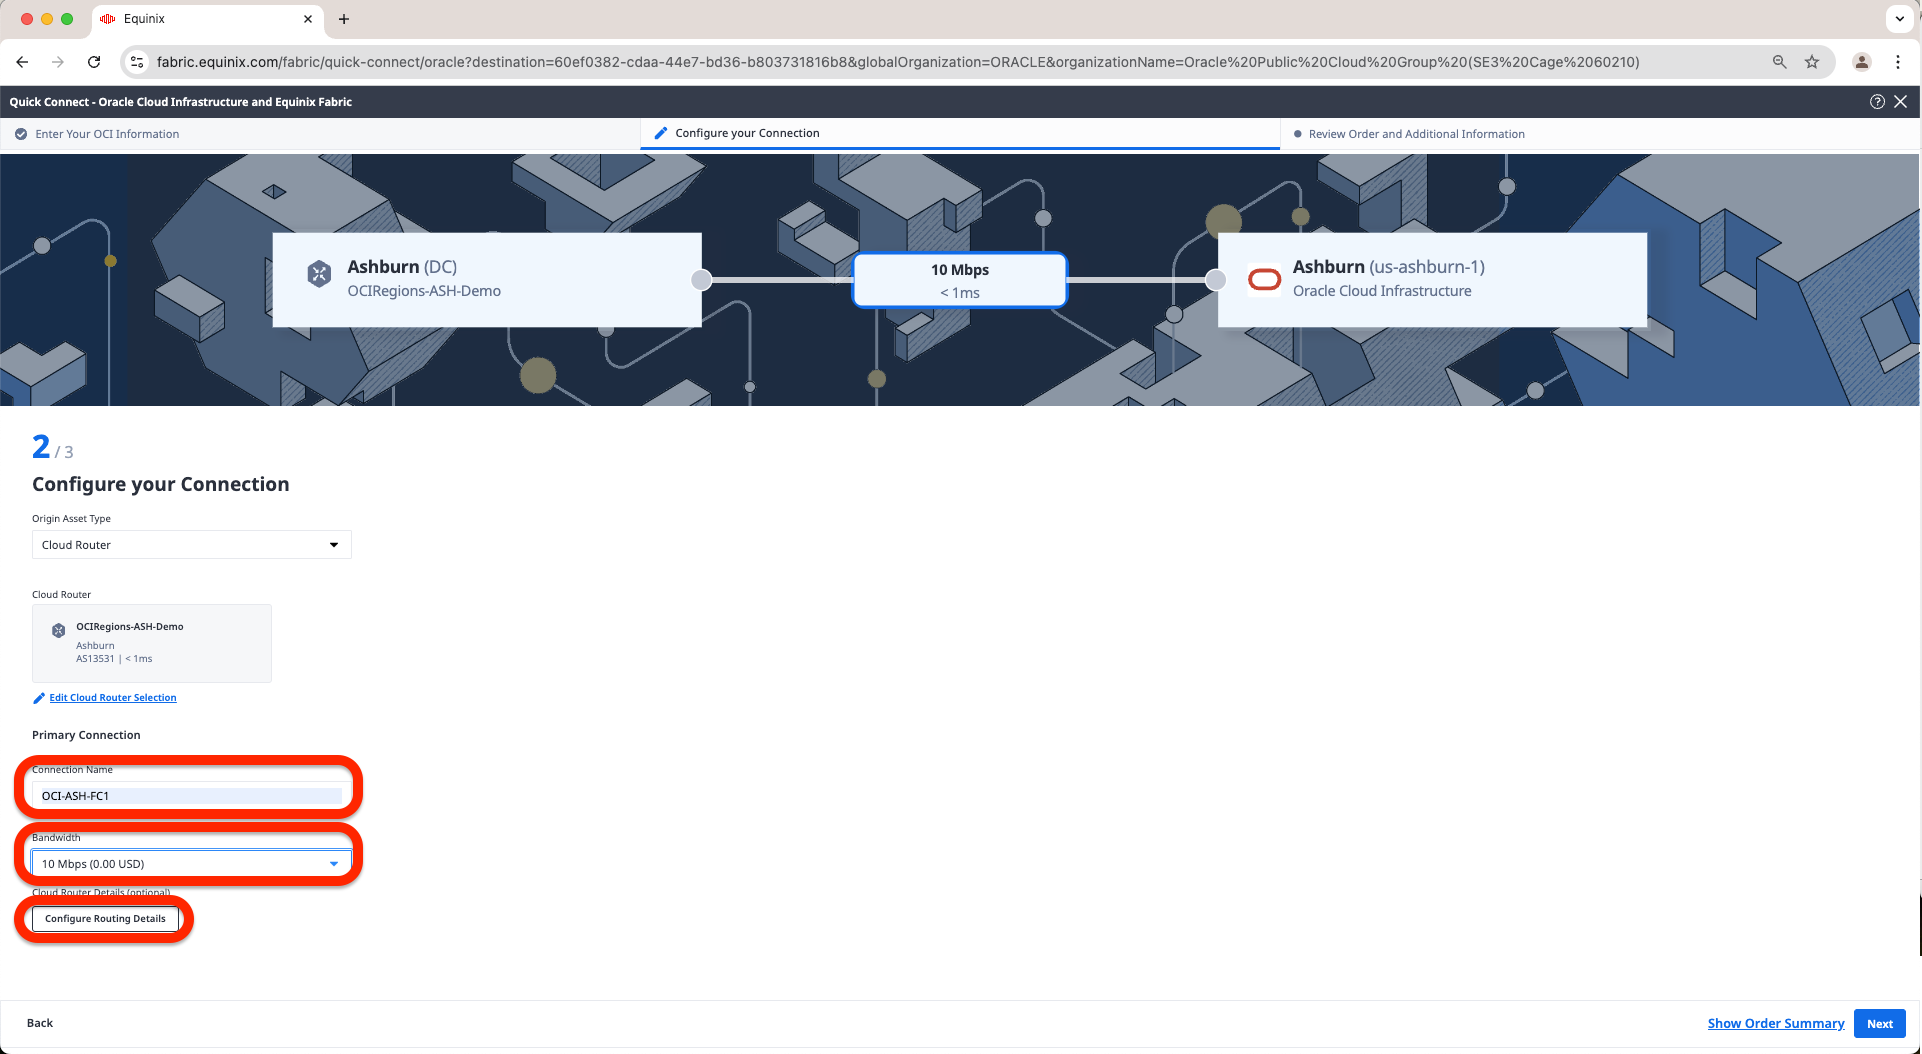
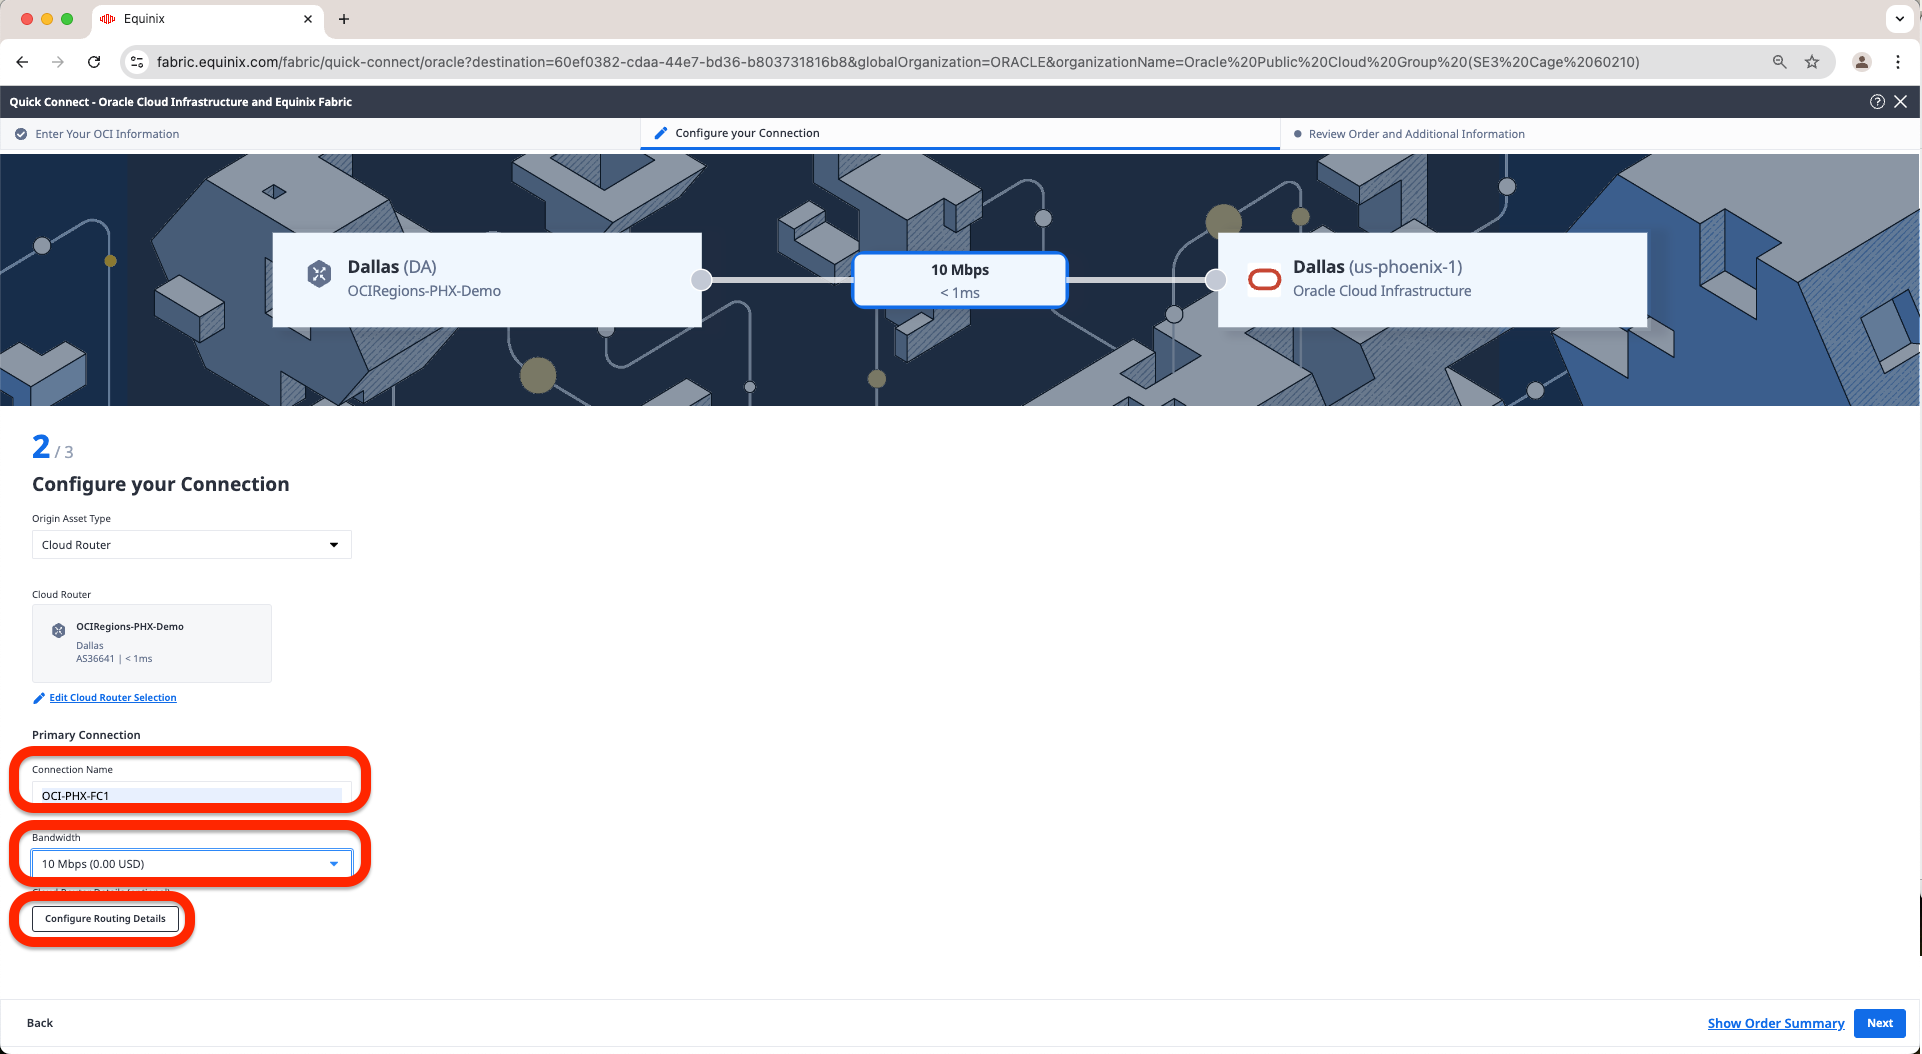
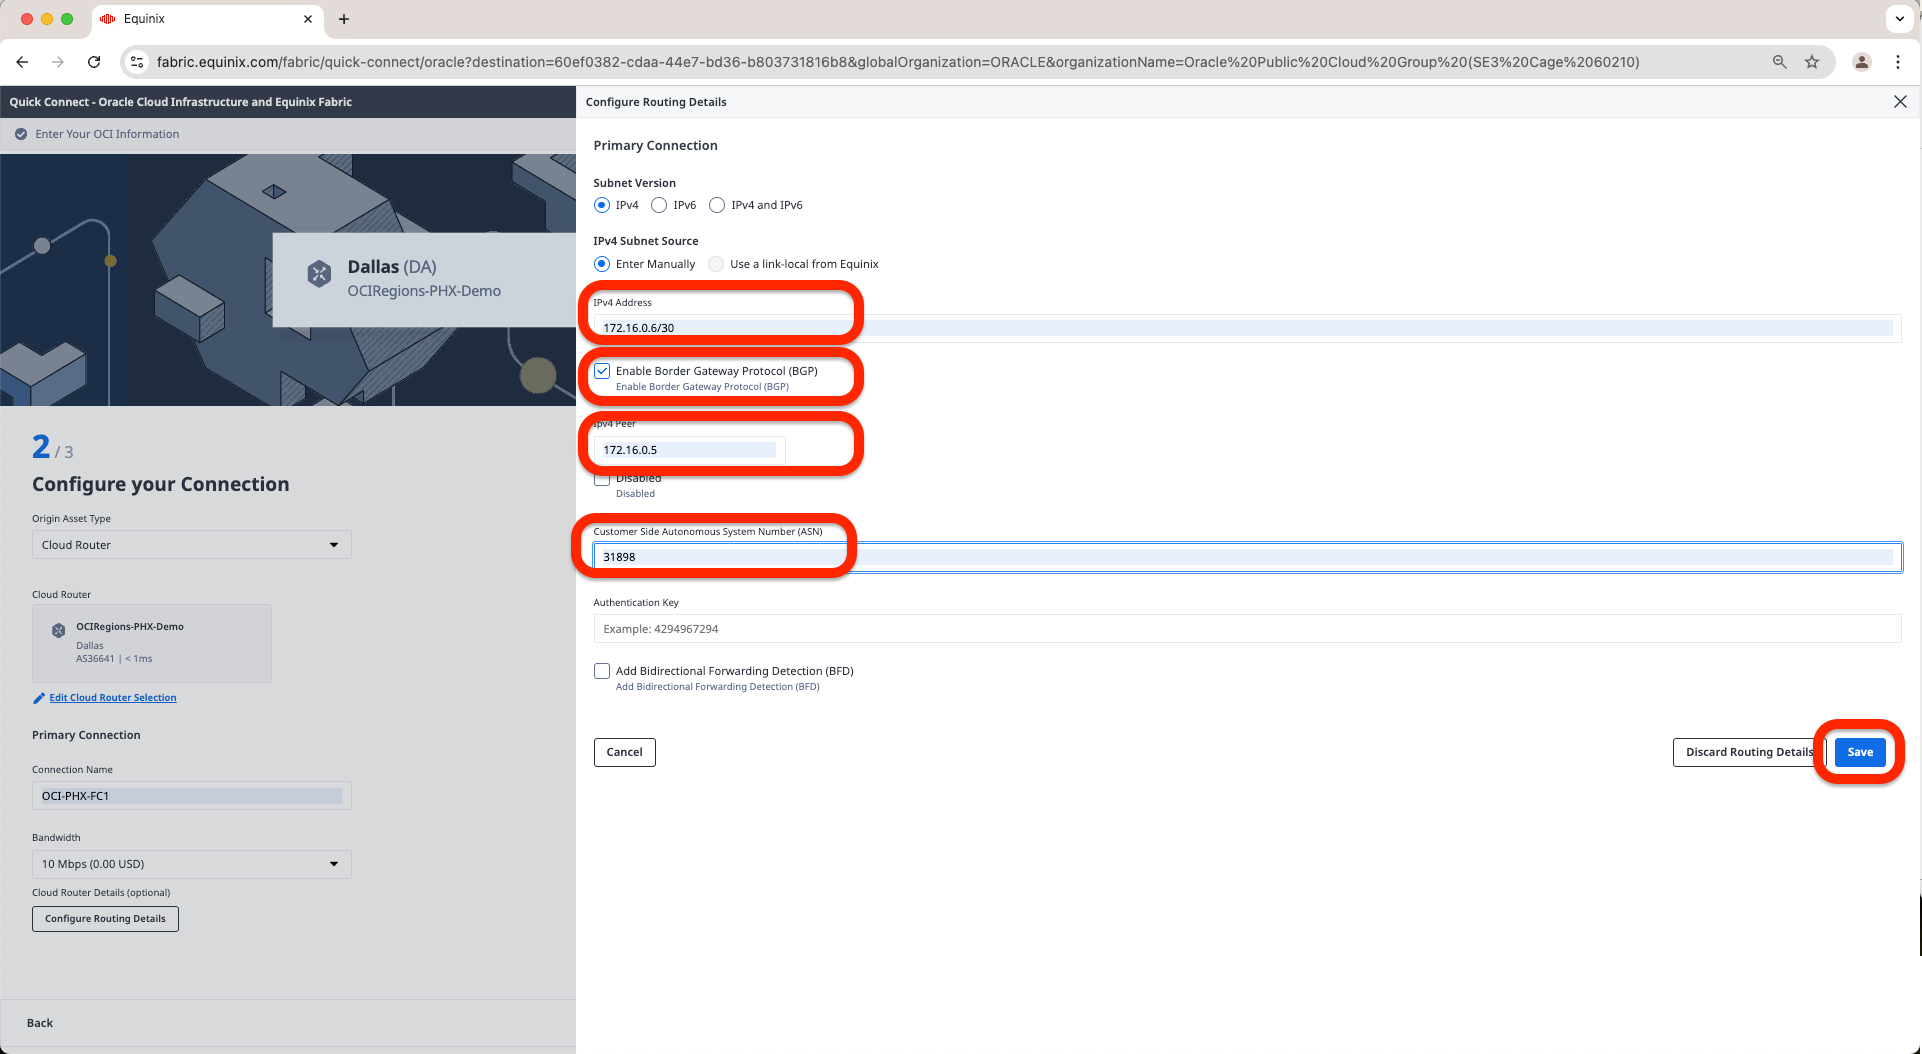
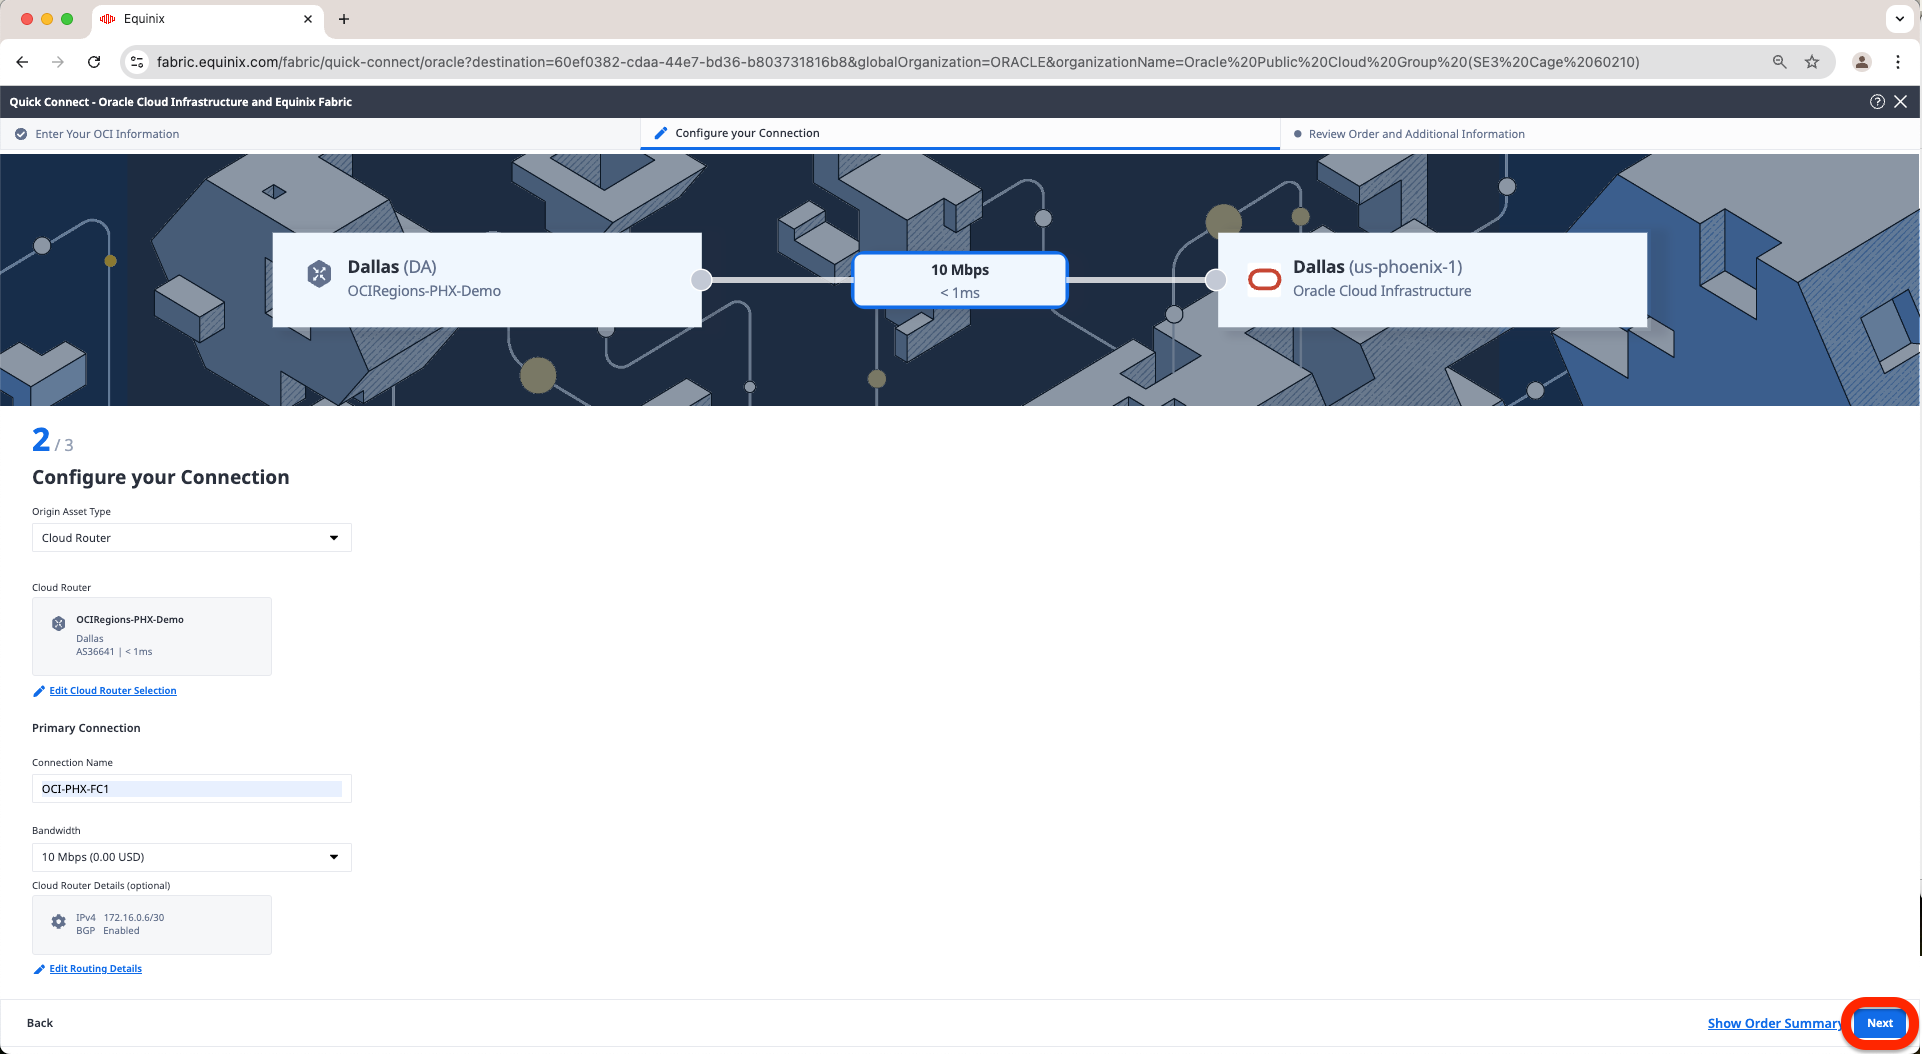
f. Now provide a Connection Name, select a Bandwidth and click on the Configure Routing Details under Cloud Router Details field
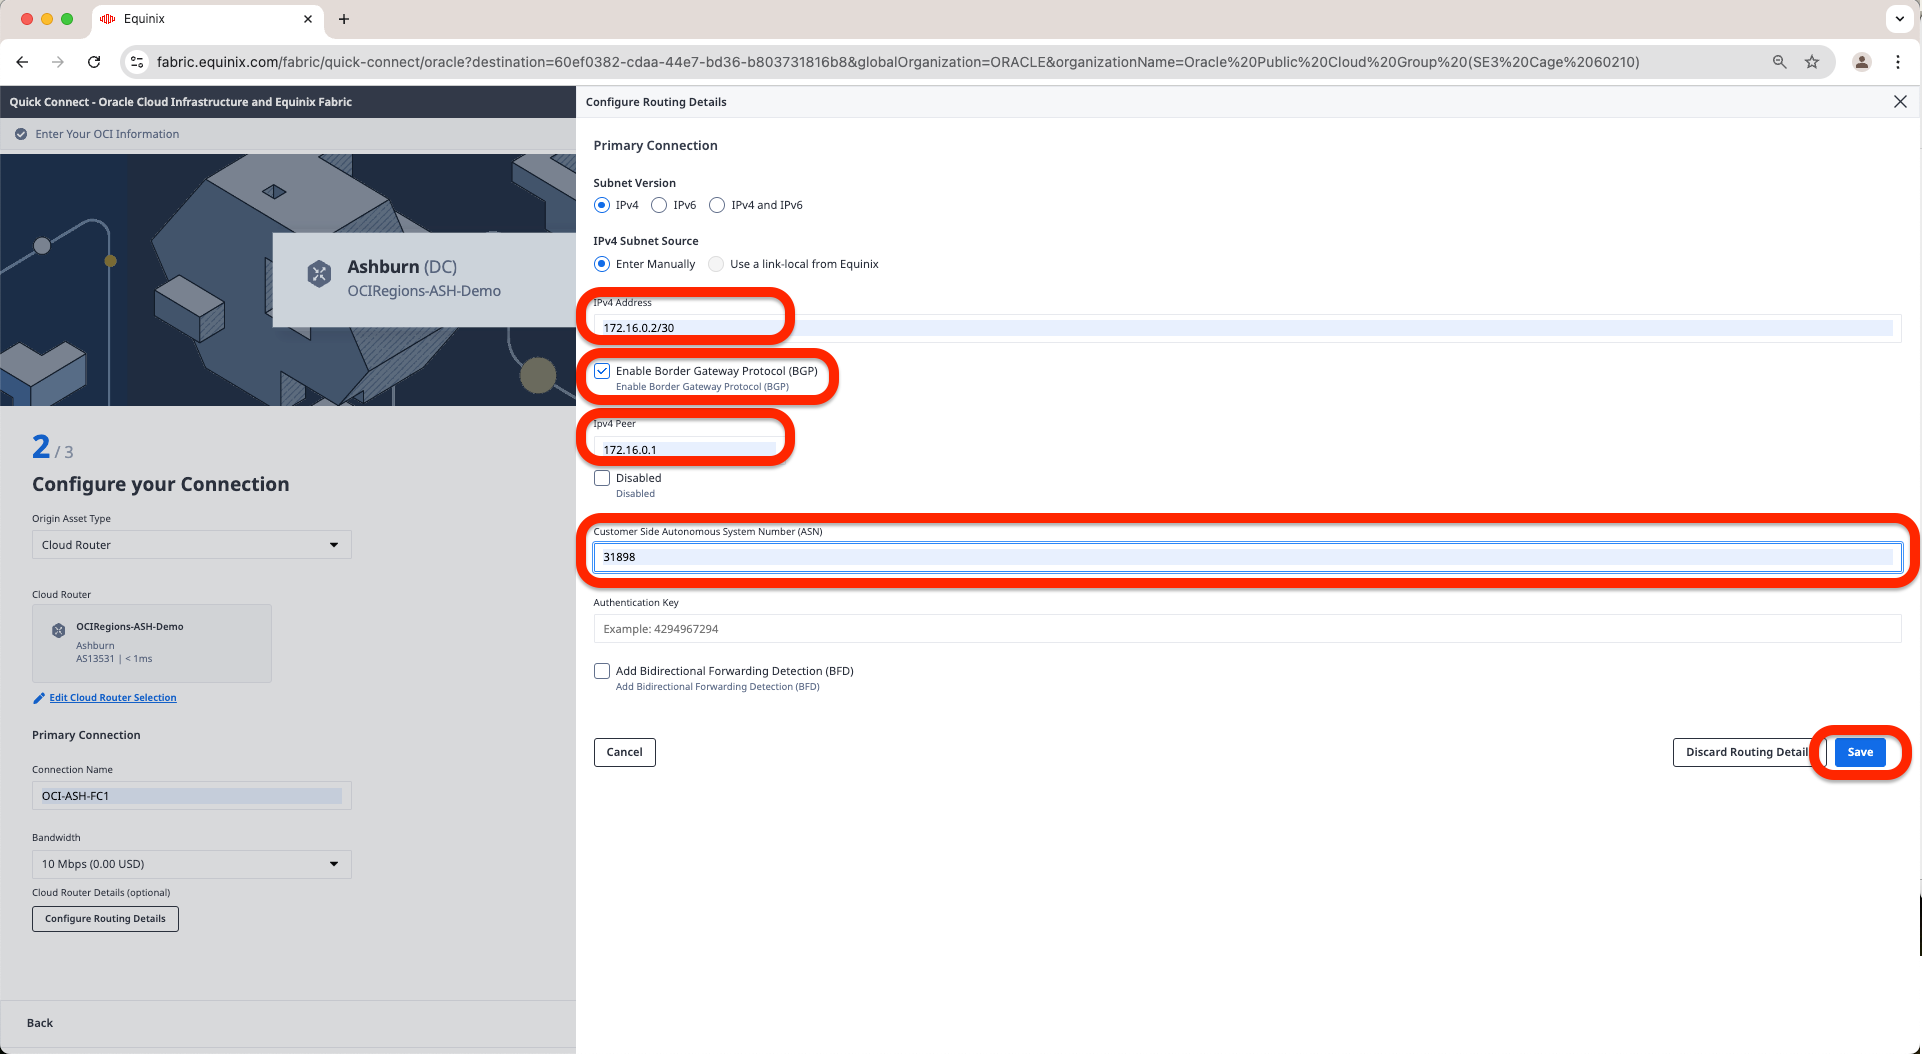
g. Now add the IP Address of the FCR in the IPv4 Address, click on Enable Border Gateway Protocol (BGP) and fill in IPv4 Peer and Customer Side Autonomous System Number with OCI IPv4 Address and ASN and click Save
h. Click Next.

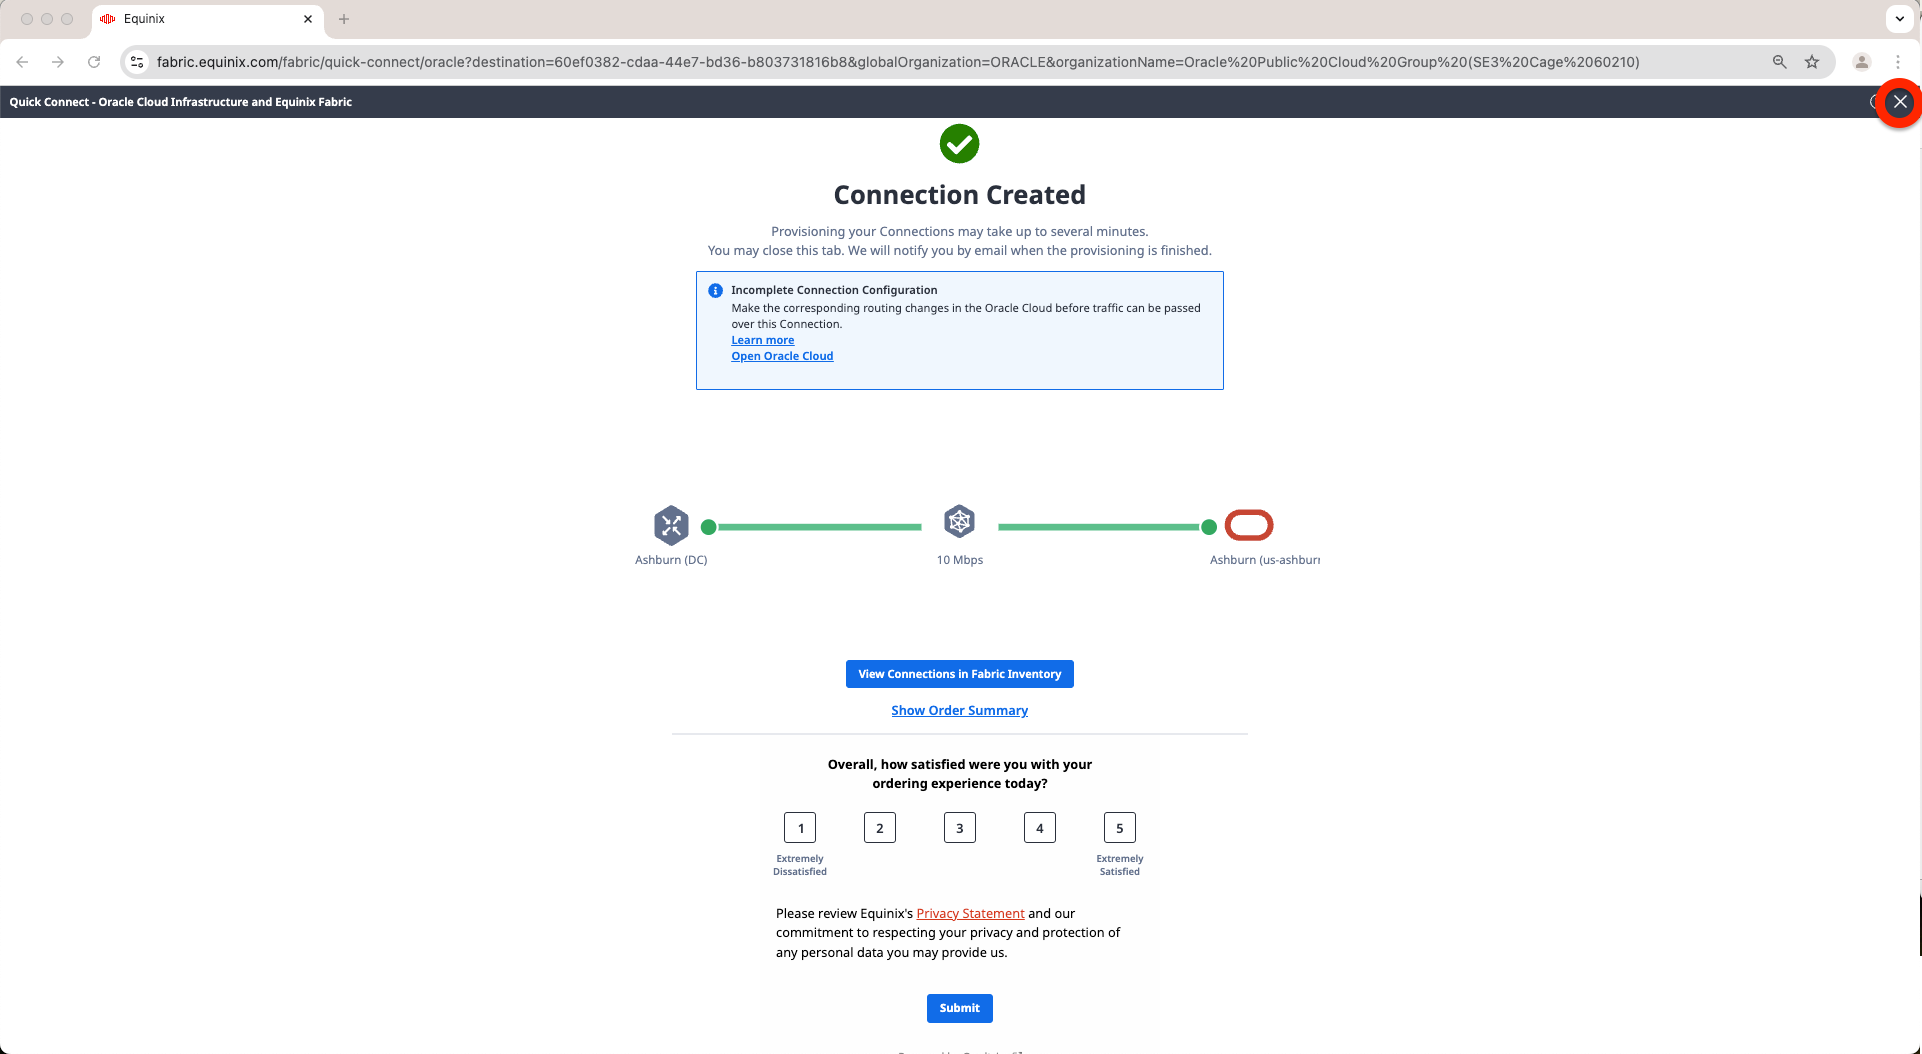
i. Review Order and Additional Information and click Create Connection.
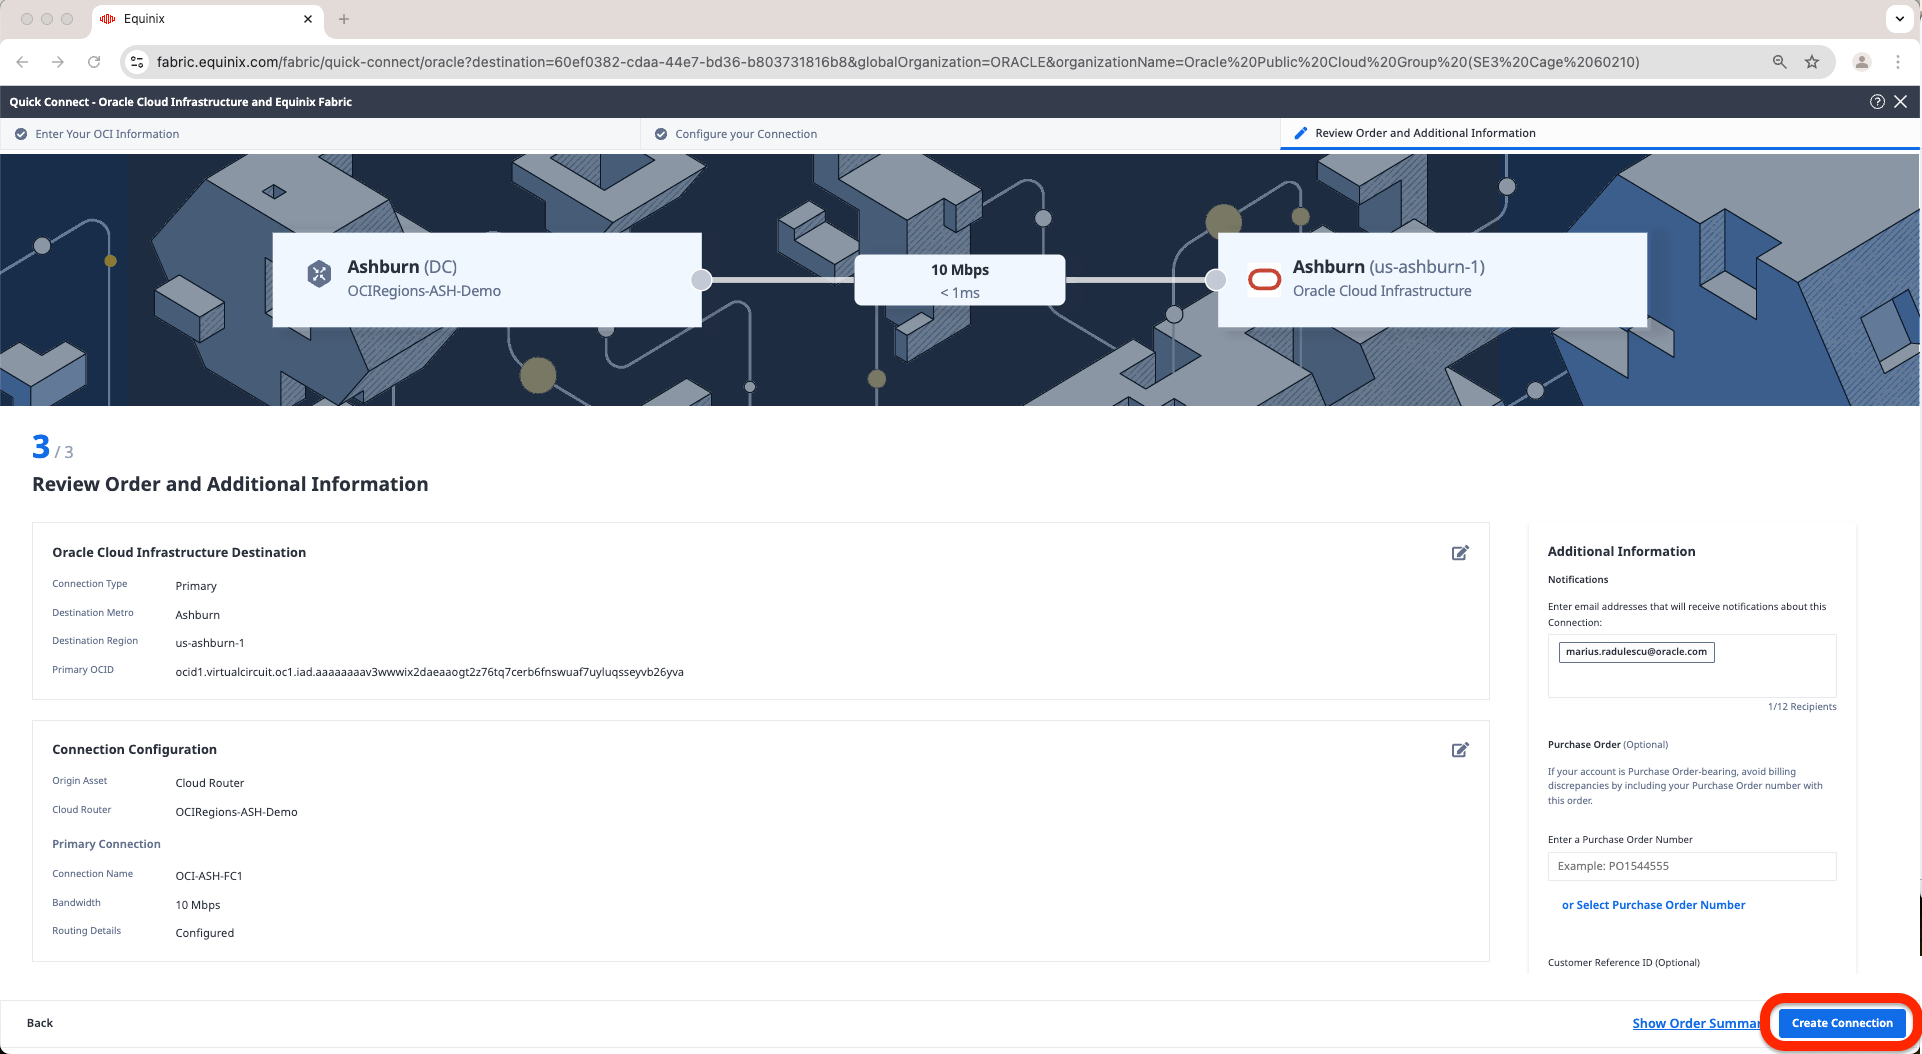
j. Once Connection Creatted screen appears we can click the X button in the top right corner and start the process from step b. to create the connection to Phoenix.


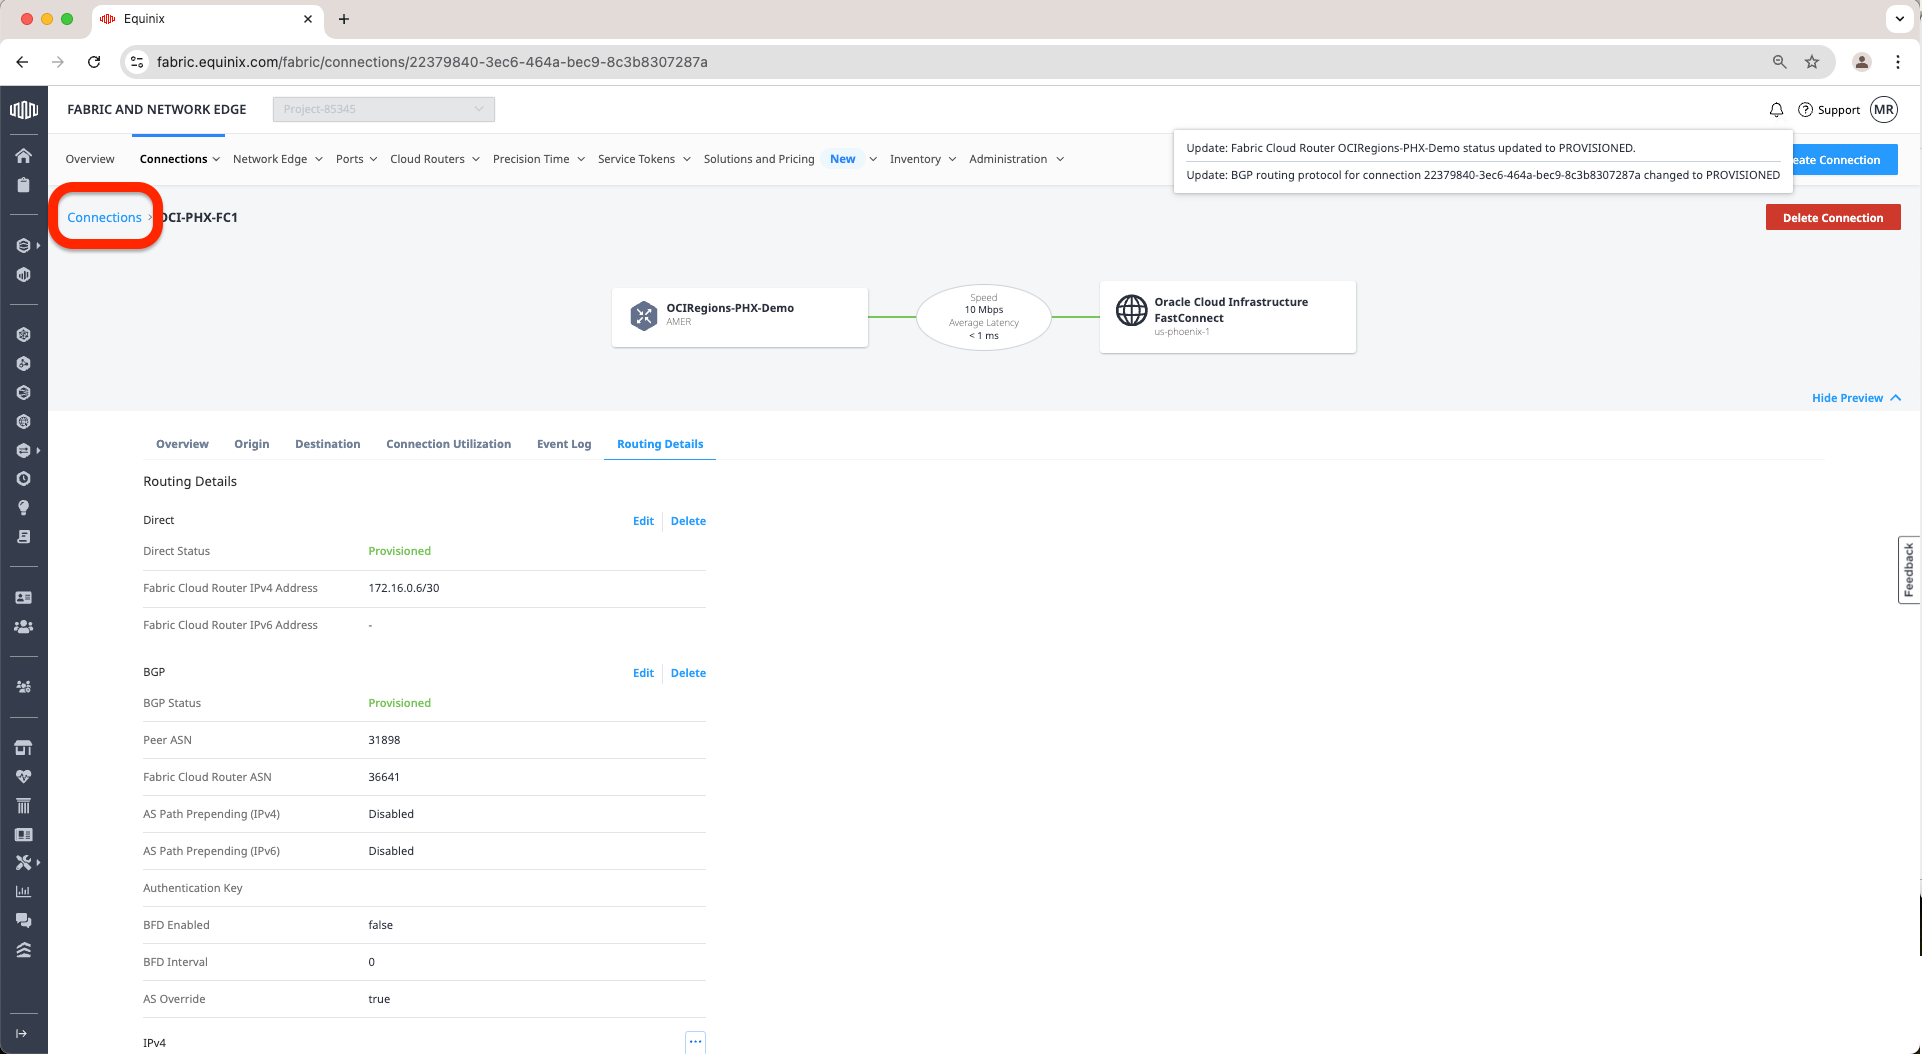
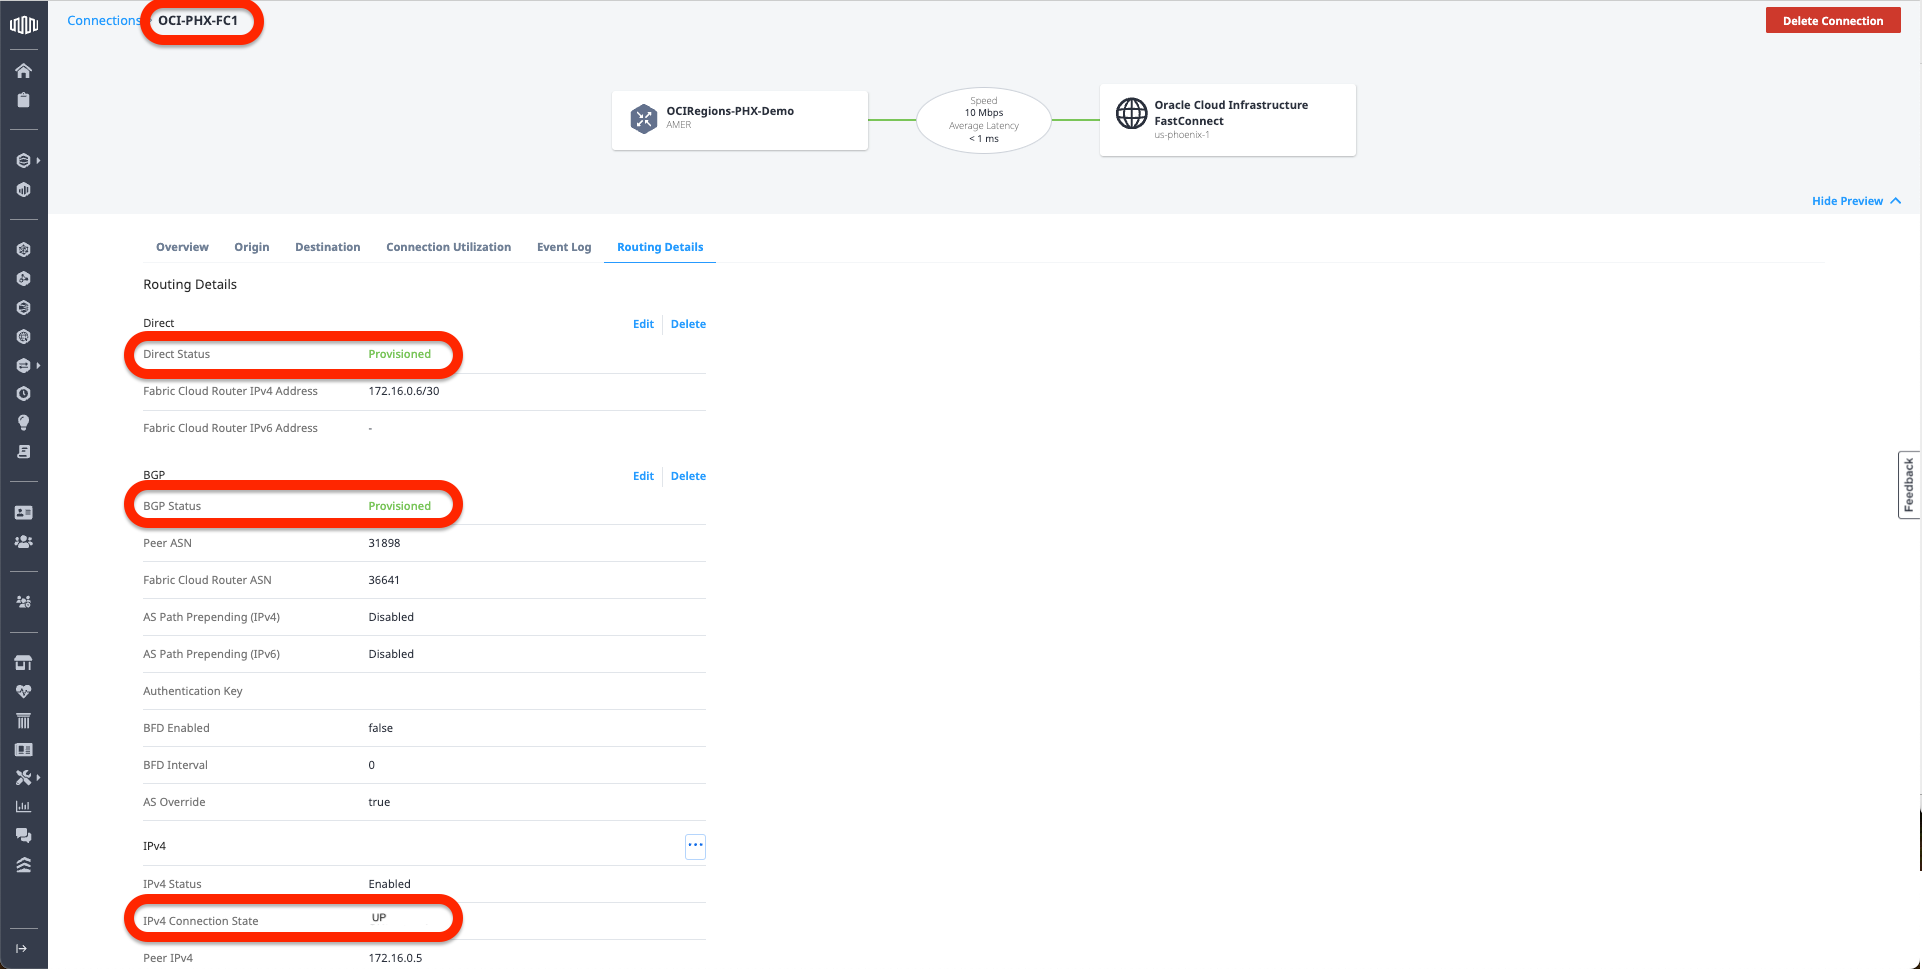
k. Once we have confirmation the Phoenix Connection is created we can click on the View Connections in Fabric Inventory.

l. Go to Routing Details Tab.

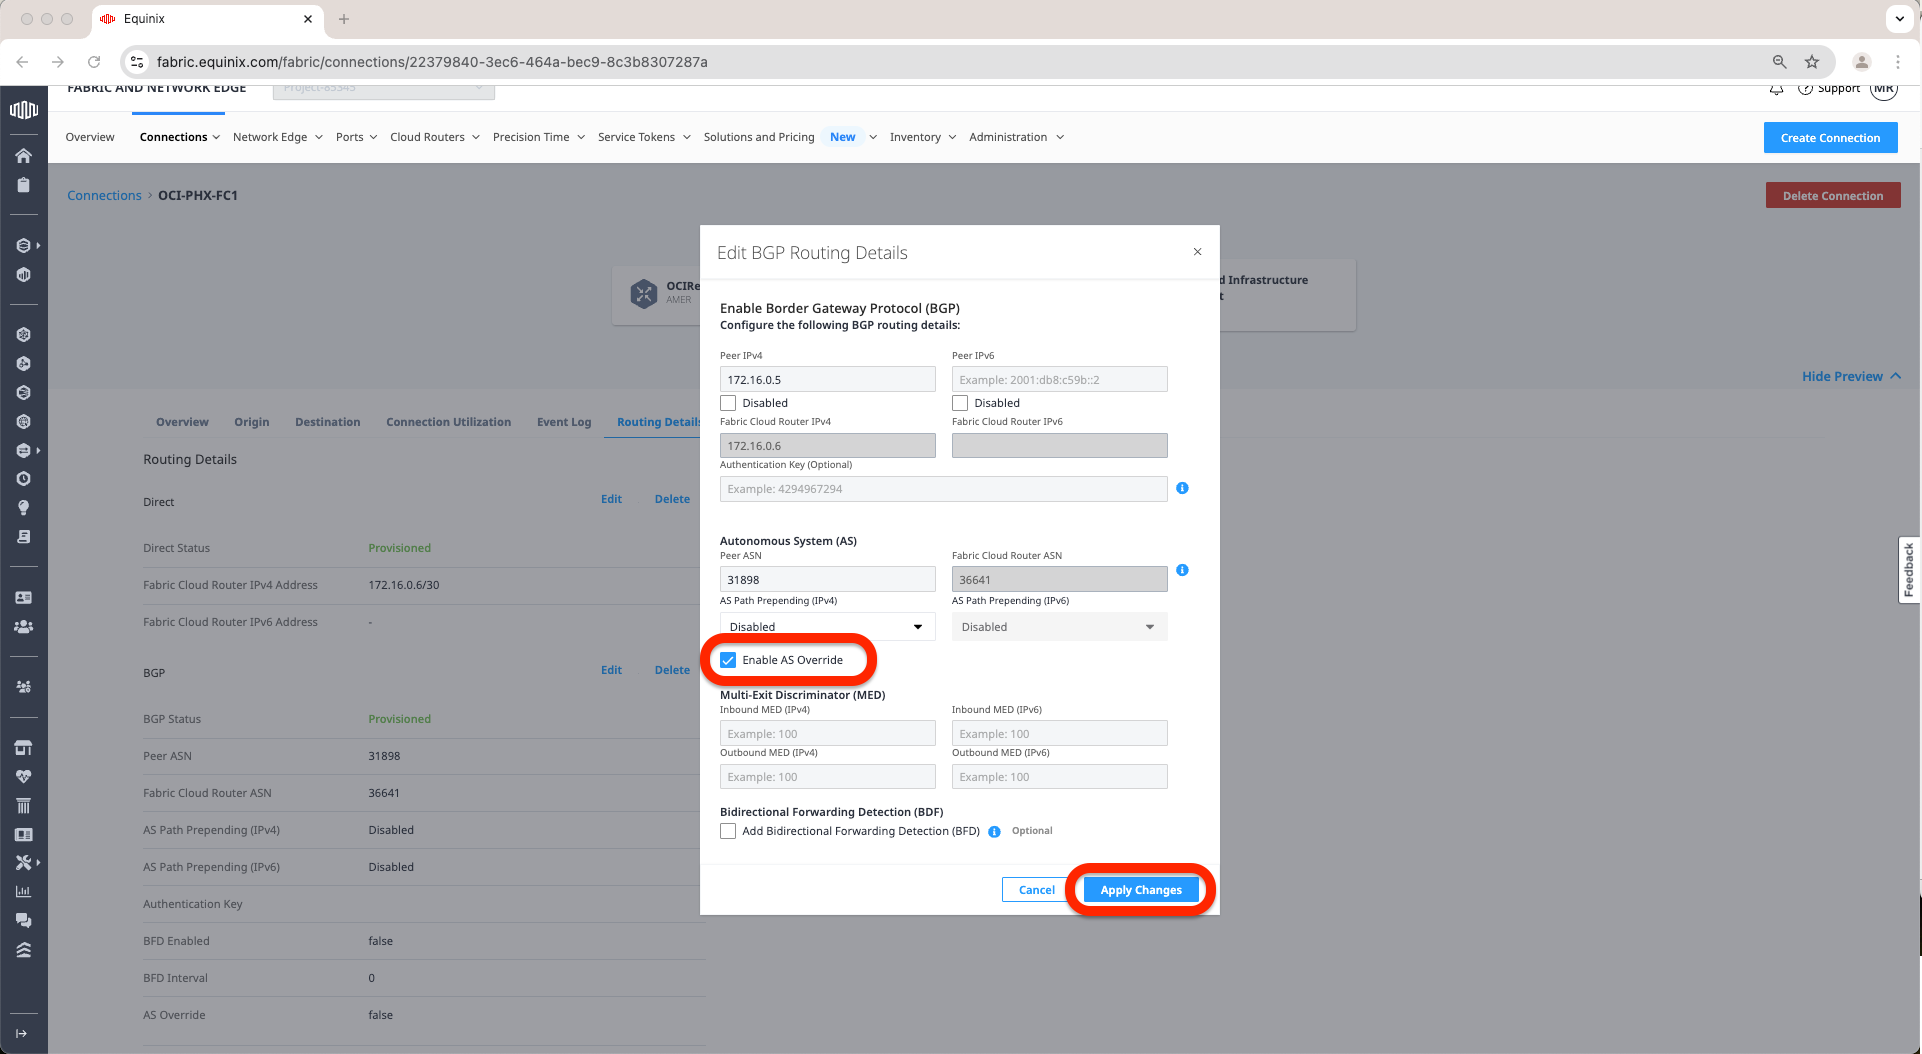
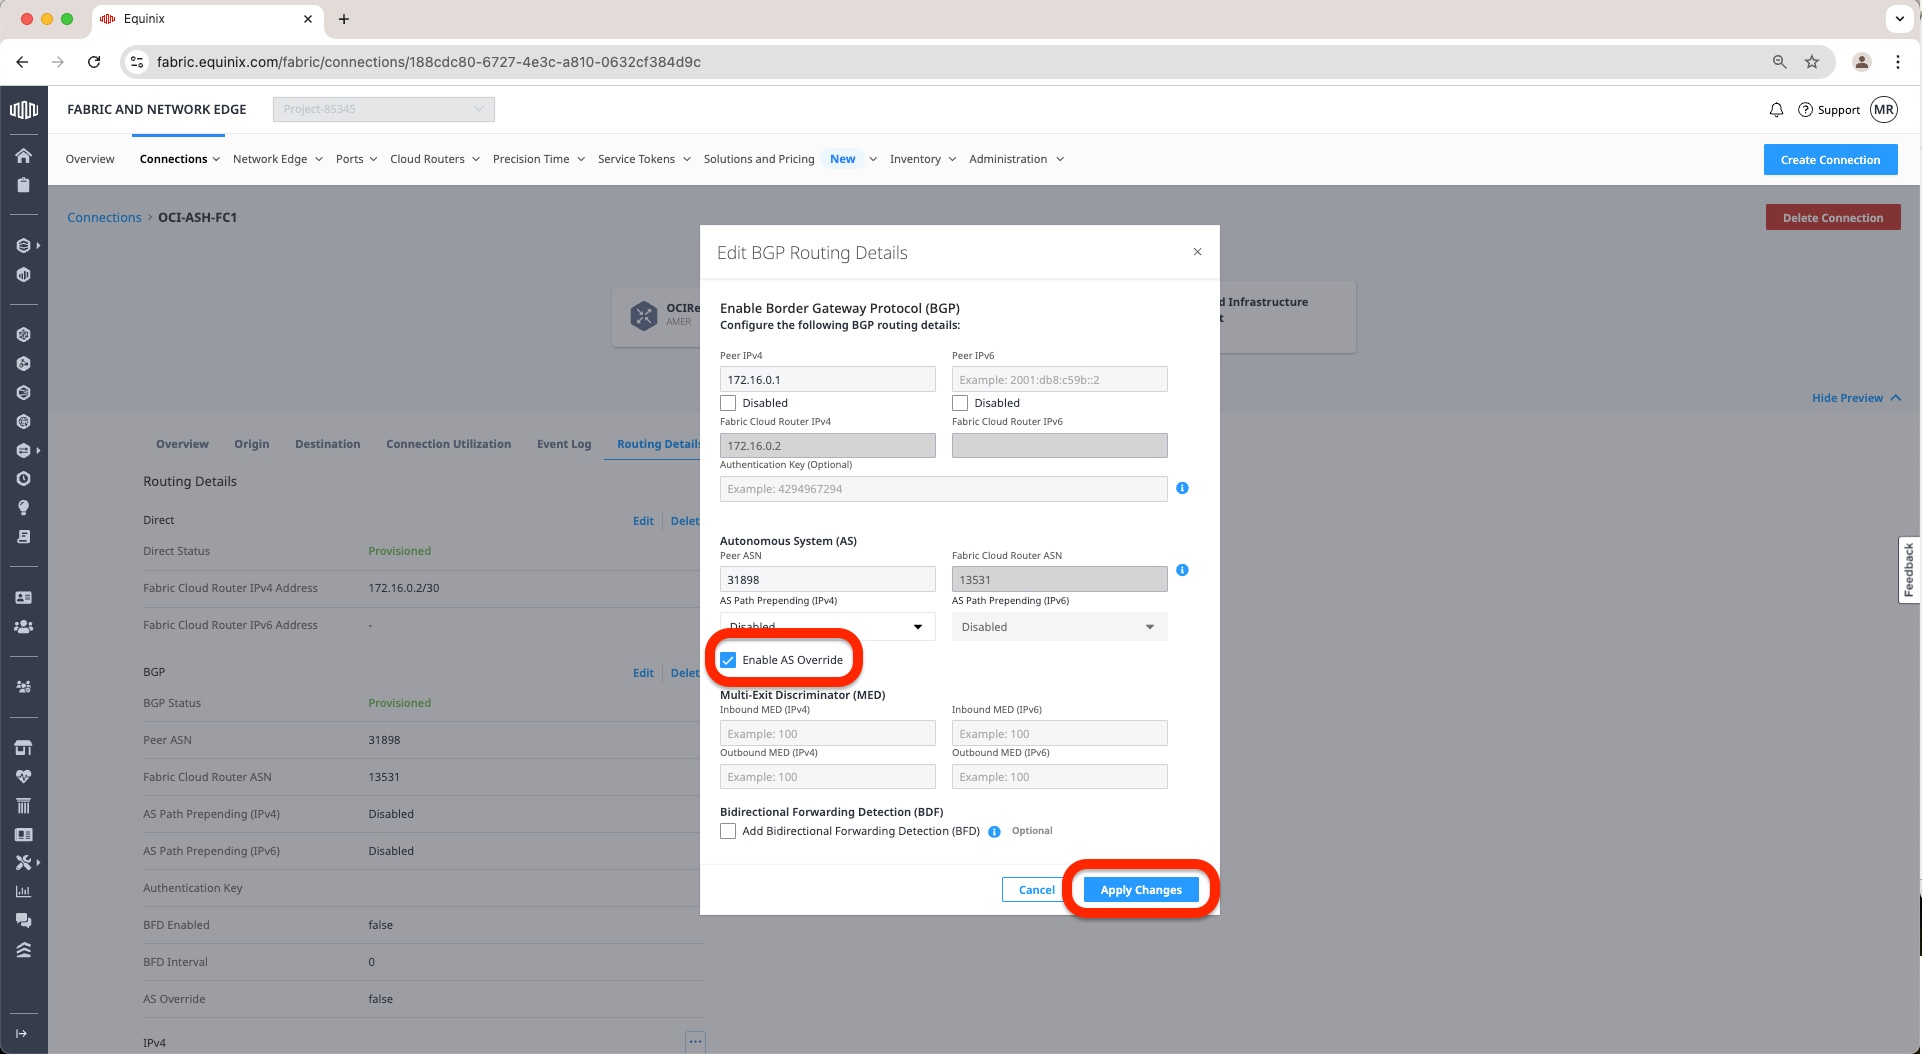
m. Click on Edit button under BGP.
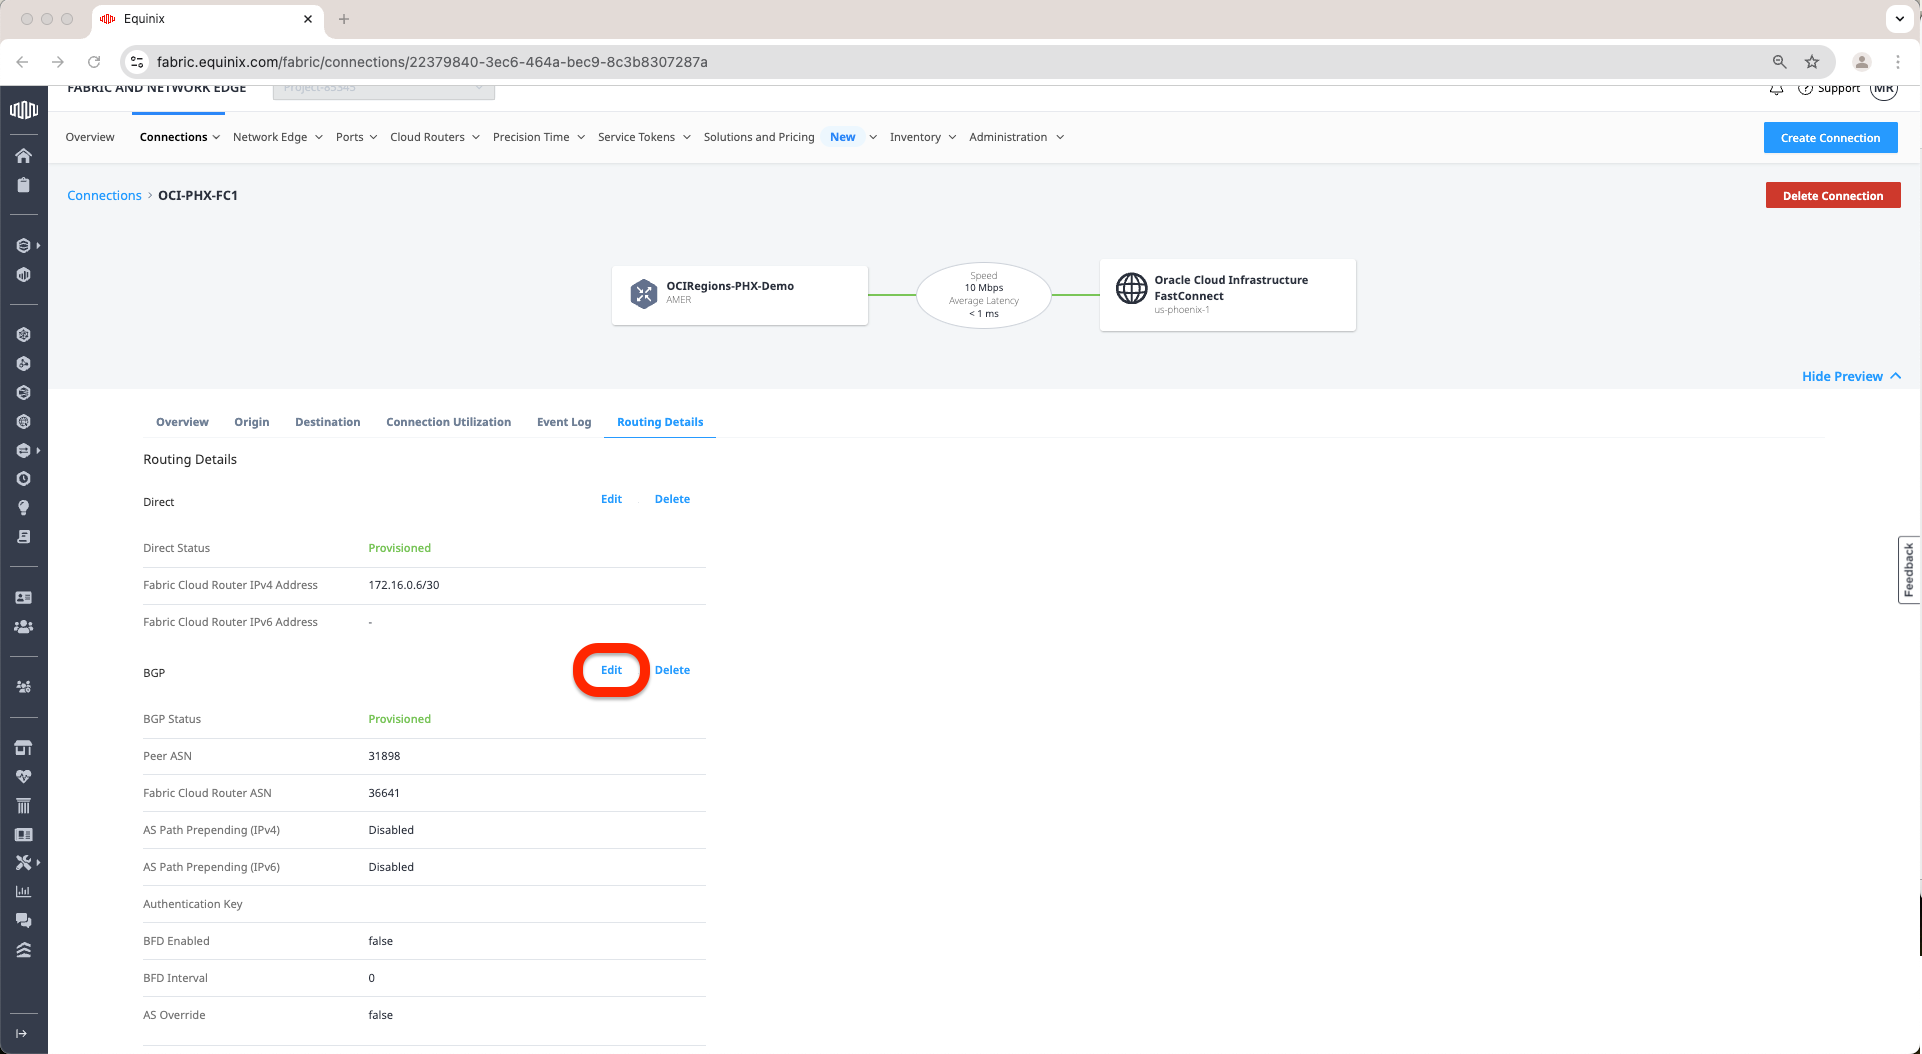
n. And now click on Enable AS Override and click on Apply Changes.
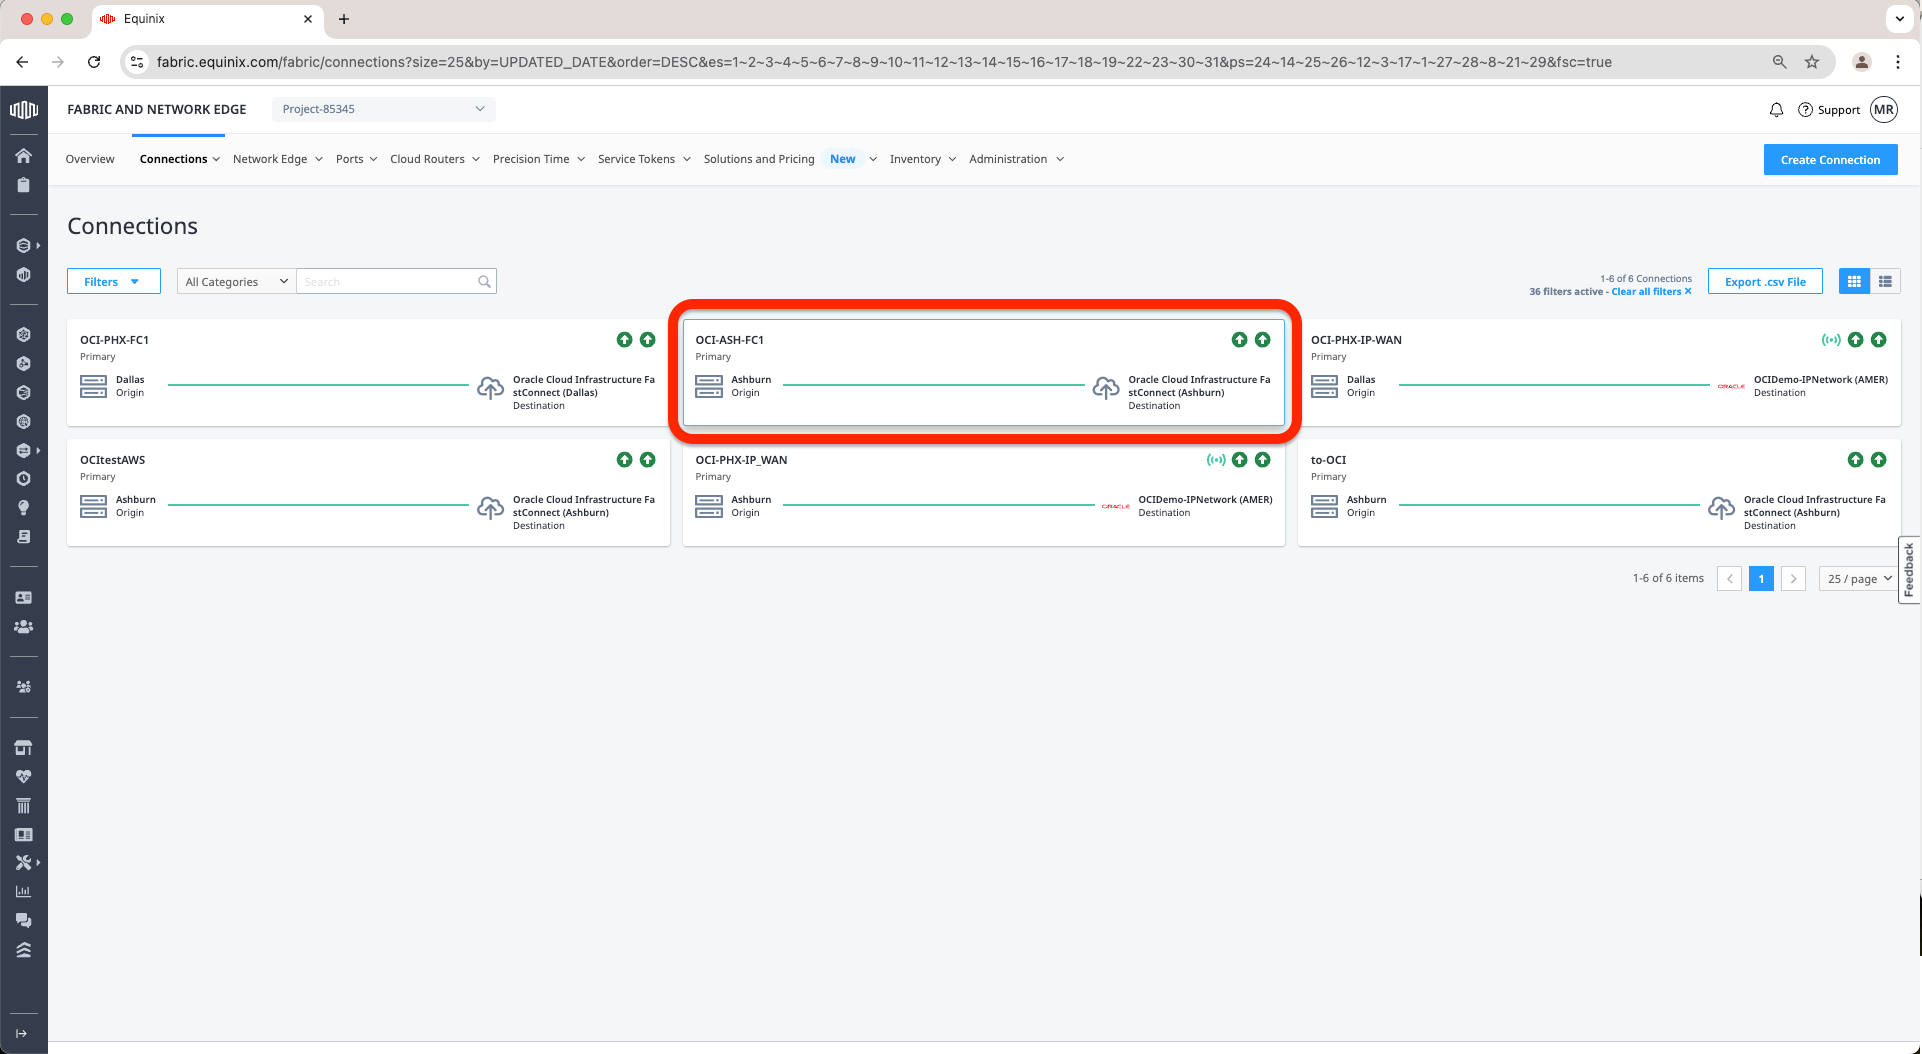
o. Next, click on the Connections button on top left so we can go enable the Ashburn Connection the AS Override feature.
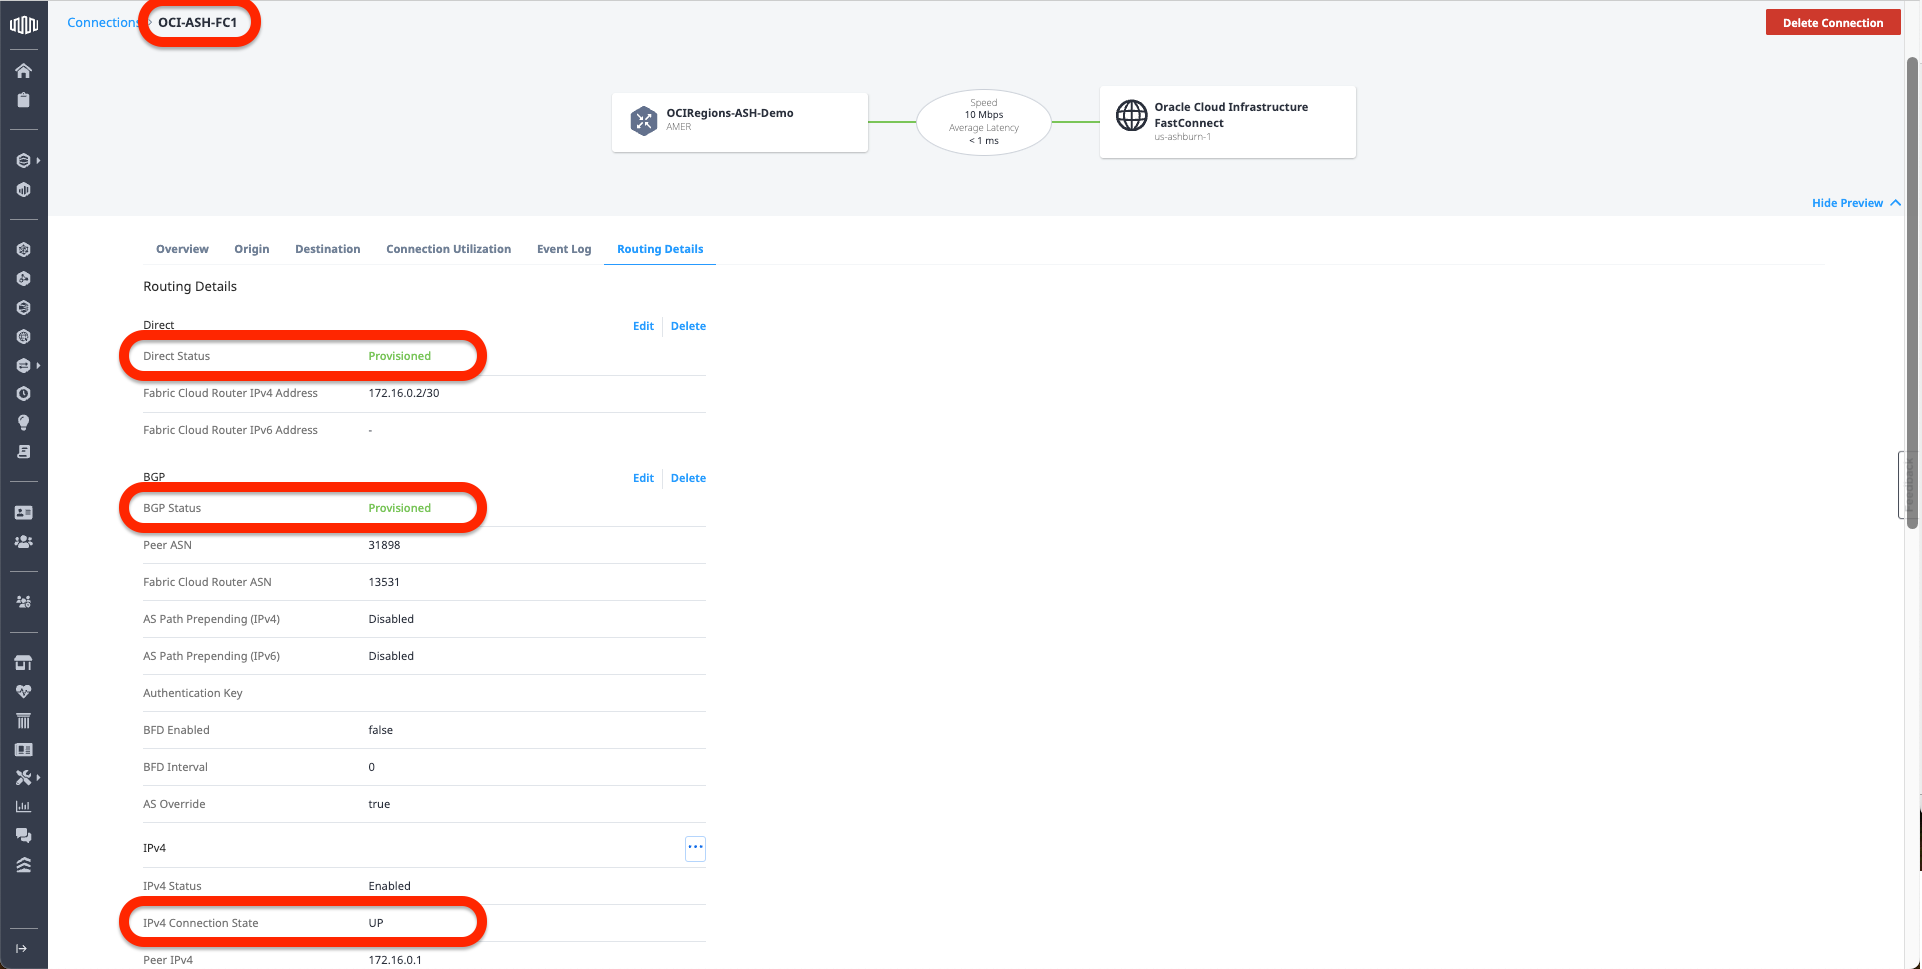
p. Click on the Connection, on our case is OCI-ASH-FC1
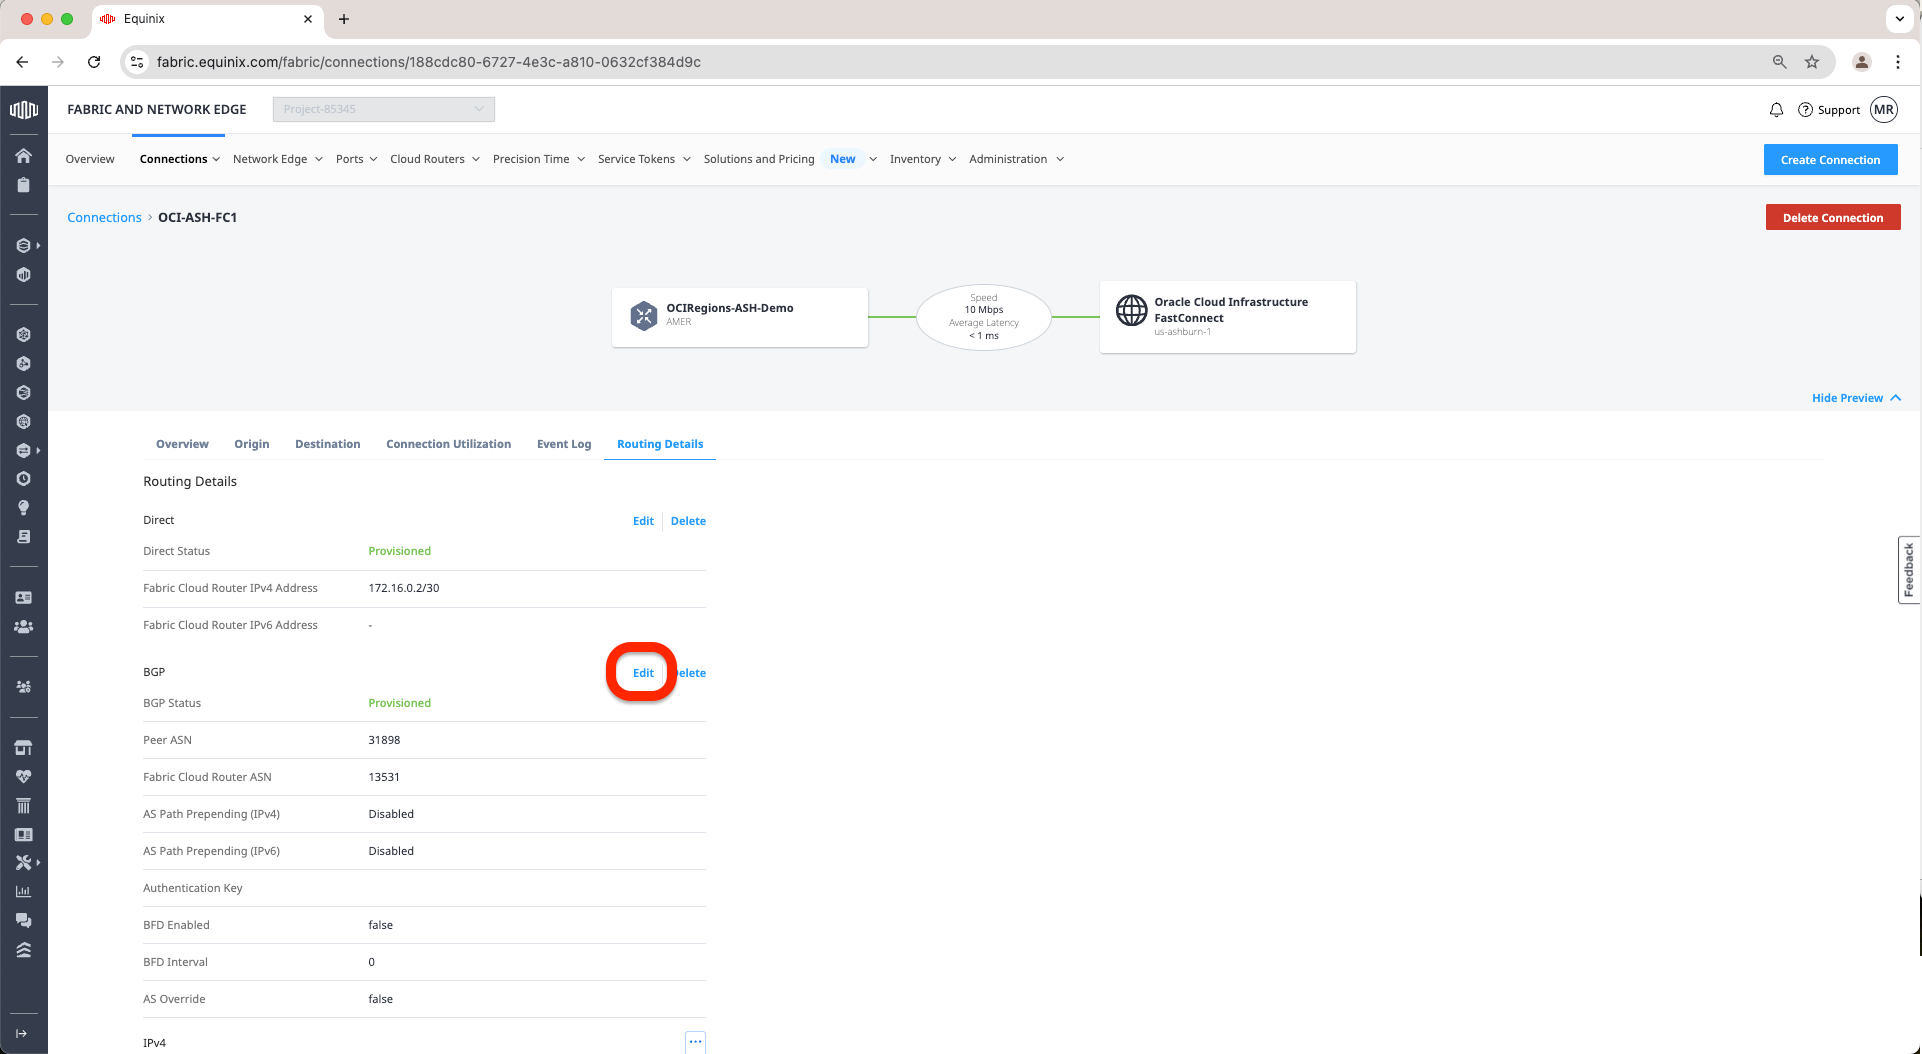
q. Go to Routing Details tab and as we did on the Phoenix connection we will enable the AS Override feature.

The Equinix Connection to OCI and activating the AS Override is now complete.
Validation
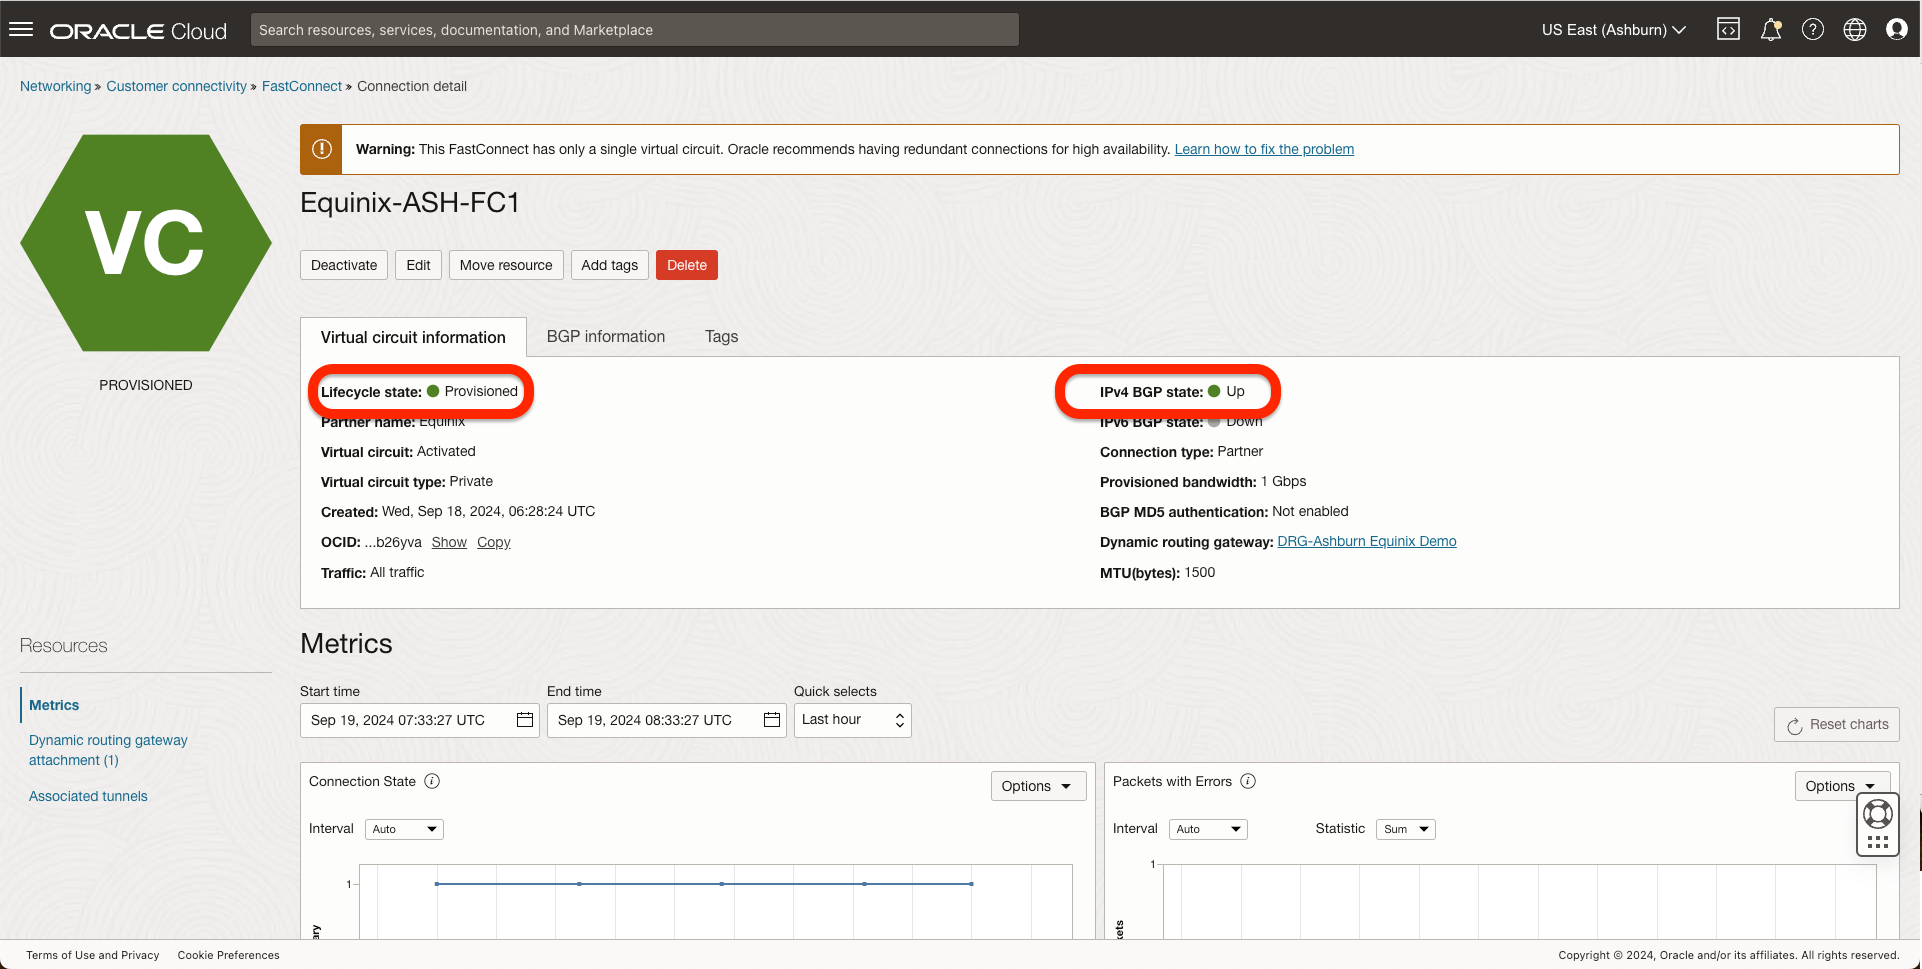
1. First, I should check the BGP connection to ensure it is UP. I can do it from 2 locations:
– From OCI console under FastConnect

– From the Equinix Connection, under routing details
2. Received Routes in both ends:
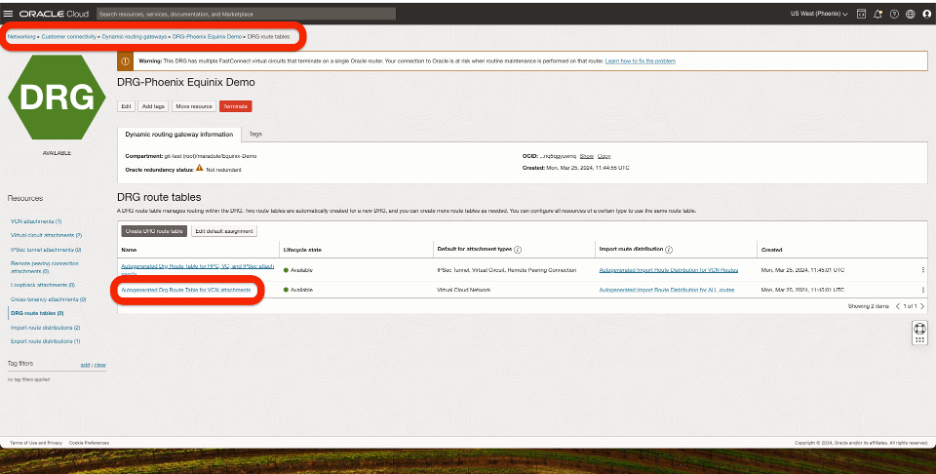
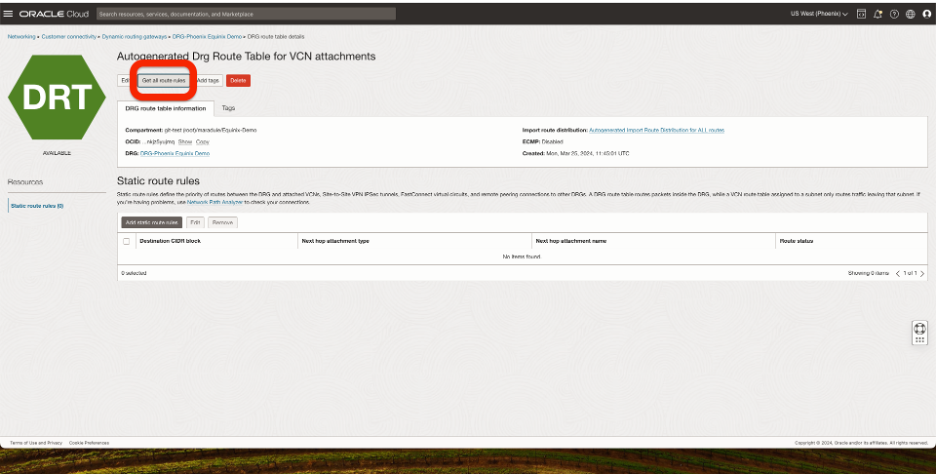
– On OCI, go to The DRG -> DRG Routing Tables -> Select the routing table that is attached to a VCN that should receive the routes from the FastConnect and click Get all routes:
In the OCI Ashburn Region, I should see the Phoenix VCN CIDR coming from FastConnect.
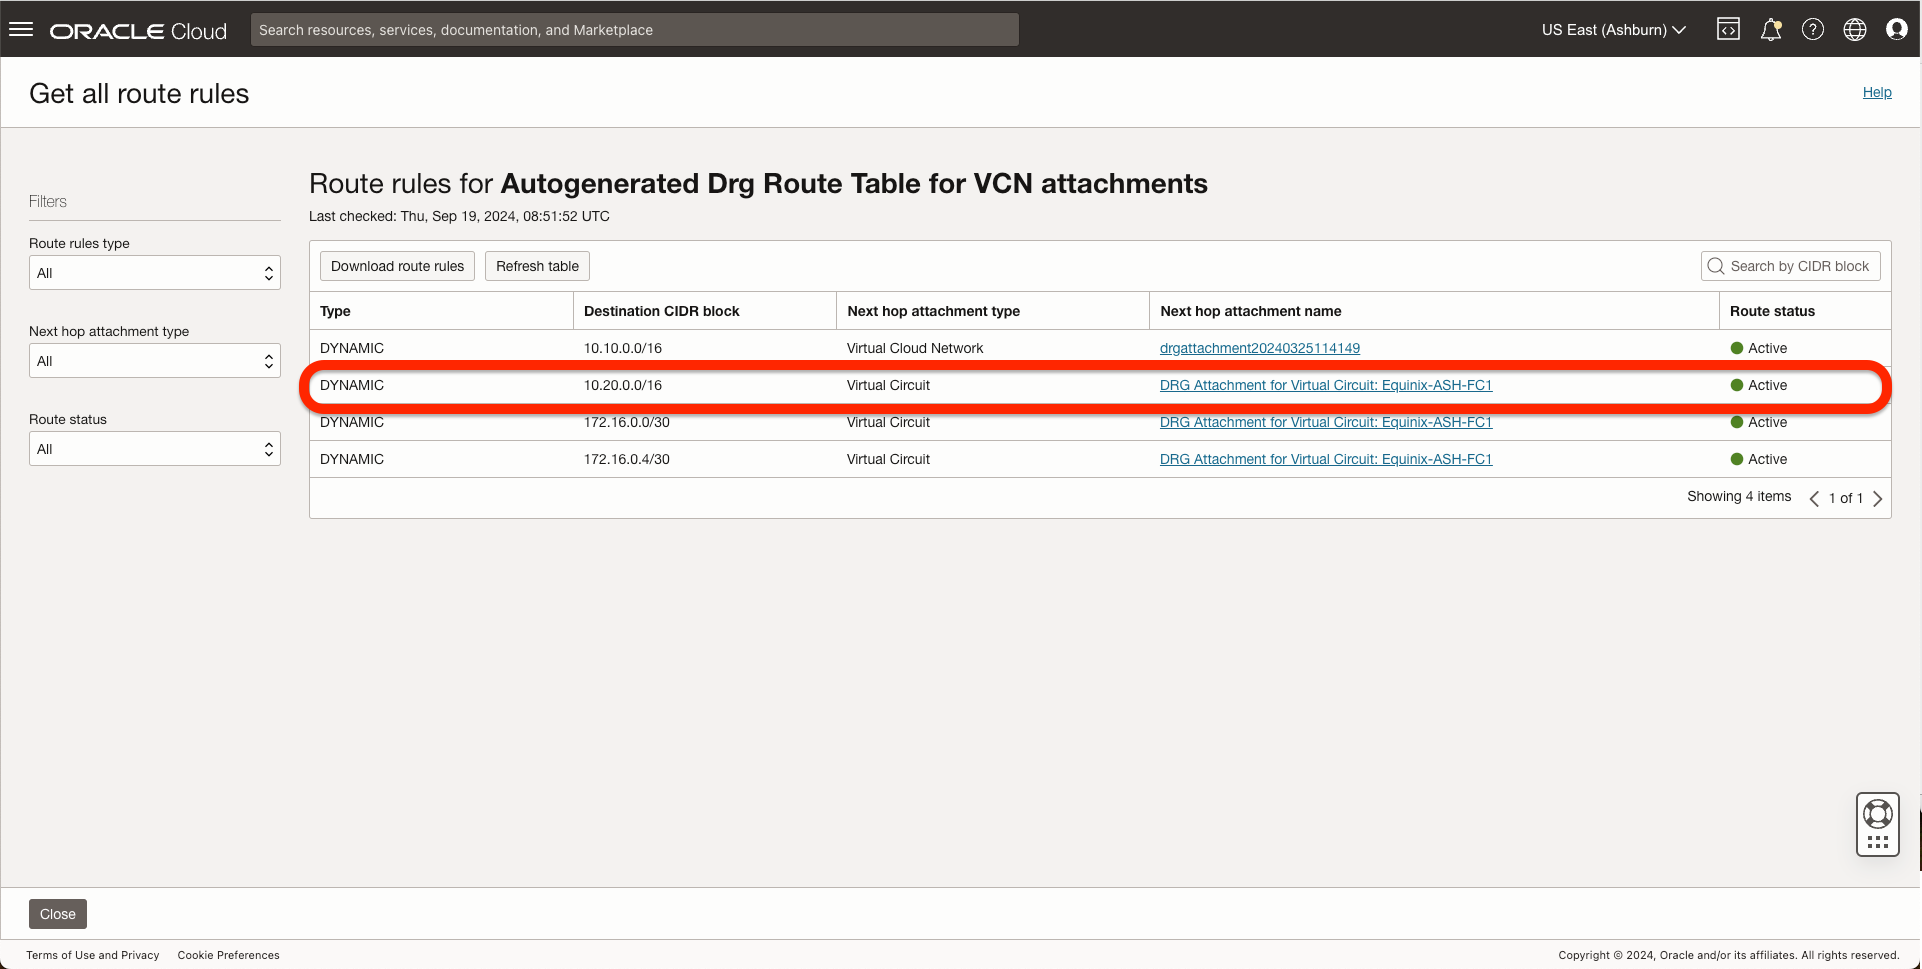
In the OCI Phoenix Region, I should see the Ashburn VCN CIDR coming from FastConnect.

3. Now, I should have end-to-end connectivity between my two OCI Compute Instances. For this, I did a ping, a tracepath, and a traceroute.

With this concludes our configuration and validation of the connectivity tests.
I hope you enjoyed this blog series. Thank you for reading!