1. Introduction
Domain filtering is a good way to secure your environment and protect against security attacks. There are various ways to implement domain filtering but one of the simplest is with the help of a proxy. The proxy will use data from the HTTP header to understand what domain the client is trying to connect to and it can block or allow the connection based on a list of either allowed domains or blocked domains.
A small recap on proxies
Proxies have been around for a long time as they are great tools to enhance network security when we are discussing Internet traffic, mostly HTTP and HTTPS. There are two types of proxies:
- Forward proxies – the forward proxies (also named explicit proxies) need to be configured in the client either at the OS level or at the application level such as a web browser. After the configuration is done the client will send HTTP(S) requests to the proxy which will try to resolve the request and then send the data back to the client.
- Transparent proxies – transparent proxies act the same way but they are “transparent” to the client meaning they will use a method of hijacking the traffic, evaluate if it should be allowed or not, and then take an action. The client has no configuration or knowledge of the proxy.
The issue with TLS and proxies
Proxies act like a “man-in-the-middle” and it makes TLS traffic an issue. For a proxy to work, it will need to decrypt the client traffic which brakes the whole idea of encryption between the source (client) and target (destination server). To go around it, proxies will participate in the exchange of keys and certificates meaning they will present their certificates to the endpoints. This brings extra configuration to the proxy and management of certificates.
SNI and Squid
Some time ago there was an extension to the TLS protocol which adds a Server Name Indication (SNI) field to the header. The SNI field contains the actual Internet host that the client requested access to and it is not encrypted. So, a proxy could look into that field and evaluate if the target host is allowed or not without decrypting the traffic.
Note: in TLS 1.3 the option to encrypt the SNI was introduced which, if used, will prevent the proxy to work in a non-invasive manner.
Squid is one of the most used applications for building proxies. It is available on all major Operating Systems. Furthermore, starting in version 3.5, Squid introduced the concept of Peek and Splice which allows a Squid proxy to simply look at the SNI, compare it to a list of allowed or blocked targets and take action. The value add is that Squid does this in a non-intrusive way which allows the clients and the Internet servers to exchange certificates directly as if the proxy was not there.
The official Squid documentation is here: https://wiki.squid-cache.org/Features/SslPeekAndSplice#Peek_at_SNI_and_Splice
2. LAB
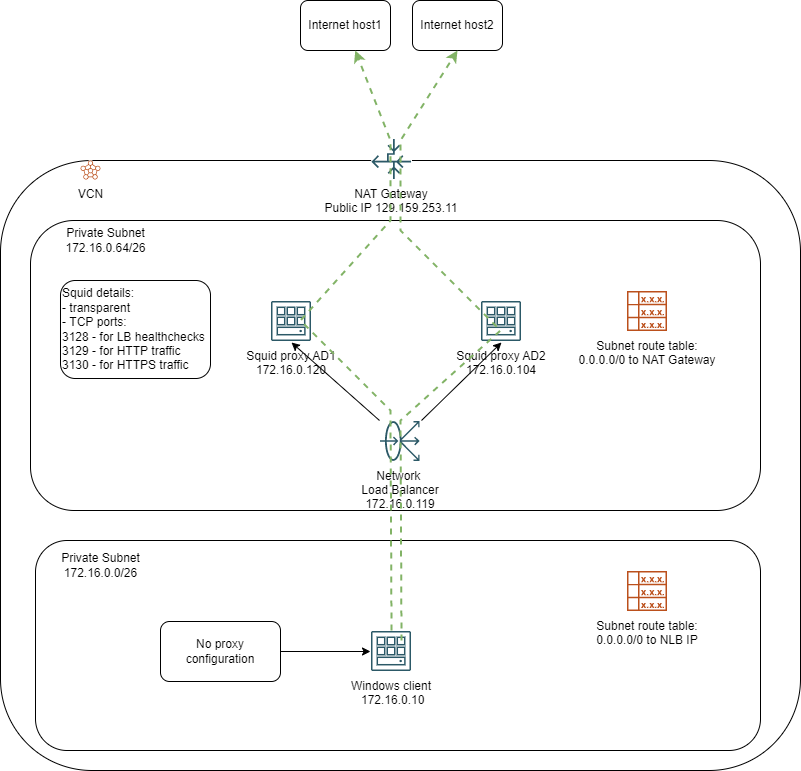
We will build a pair of Squid proxies in the OCI cloud and we will test domain whitelisting. The diagram of the lab can be seen below:
Test Setup
A. We will build a Squid proxy with the following details:
- OS: Oracle Linux 8, Compute Shape can be anything that suits your needs
- Default Squid installation
- We will build firewall policies in the OS to hijack the client traffic and reroute it to Squid ports
- TCP 80 traffic will be redirected to TCP 3129
- TCP 443 traffic will be redirected to TCP 3130
- We will use the Peek and Splice feature of Squid so the proxy will not take part in the certificate exchange between client and destination thus it will be a fully transparent proxy
B. We will duplicate the configuration on a second Squid proxy in the same subnet but a different AD.
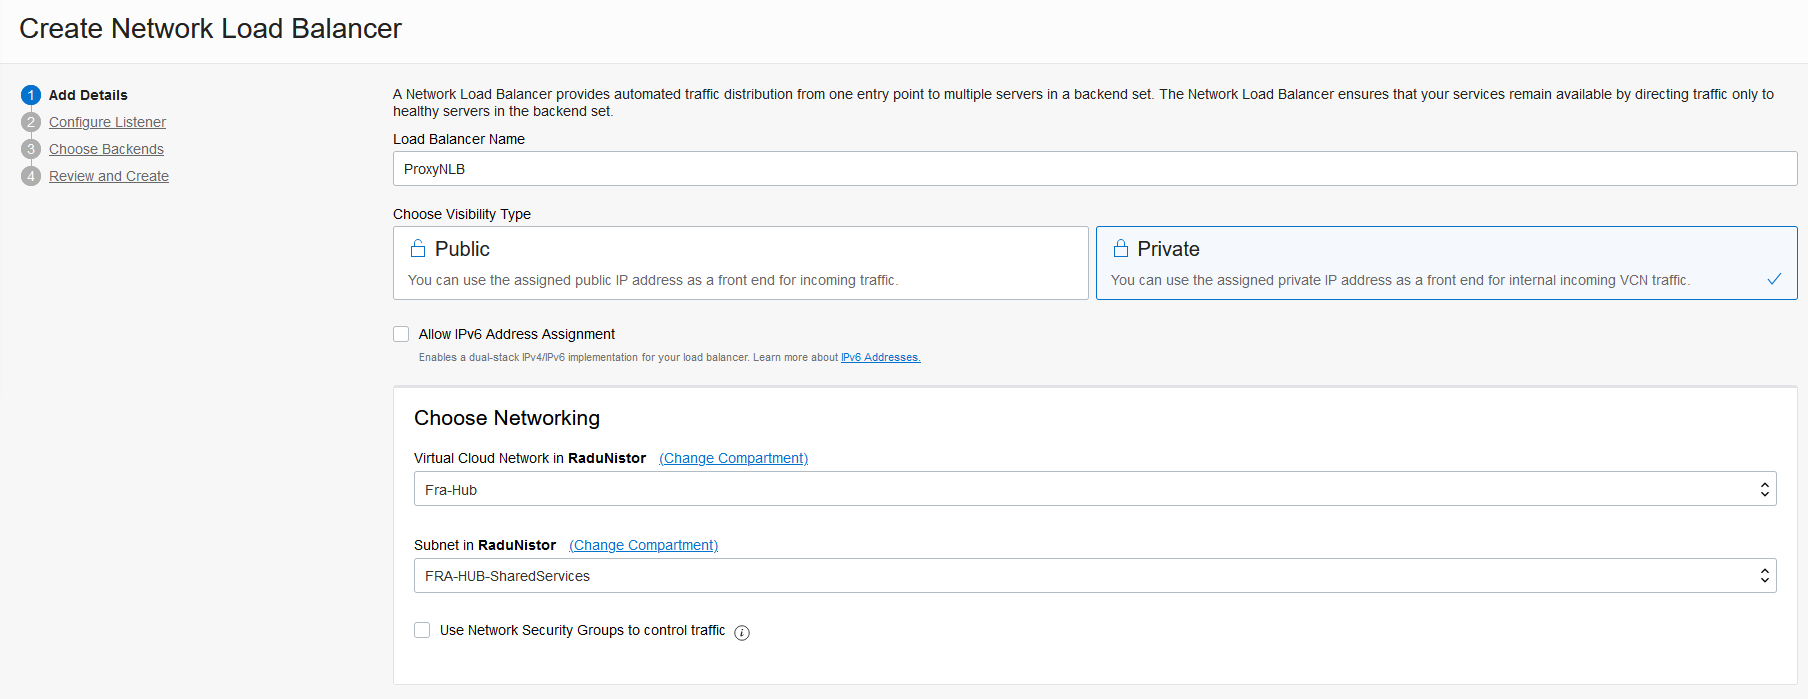
C. We will deploy a network load balancer to provide High Availability for the solution.
Note: We will not cover the deployment of the VCN and the subnets.This solution shows the two proxy servers in a PRIVATE subnet and their Internet connection is provided by a NAT Gateway. The same functionality can be achieved by deploying the proxies in a PUBLIC subnet and putting Public IPs on them, however, using the NAT gateway provides an extra layer of security as it prevents any inbound flows from the Internet.
Solution deployment
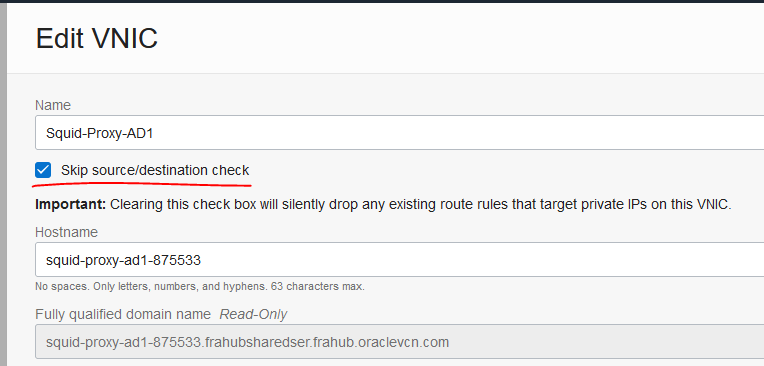
A. Deploy one compute instance in a private subnet. Make sure the private subnet has the default route to a NAT Gateway. After the Compute is UP, check
– Next, connect to the instance, switch to user root, install squid, add firewall rules and enable the service:
yum install -y squid
 firewall-cmd --add-service=squid --permanent
 firewall-cmd --reload
 systemctl enable --now squid
 systemctl status squid
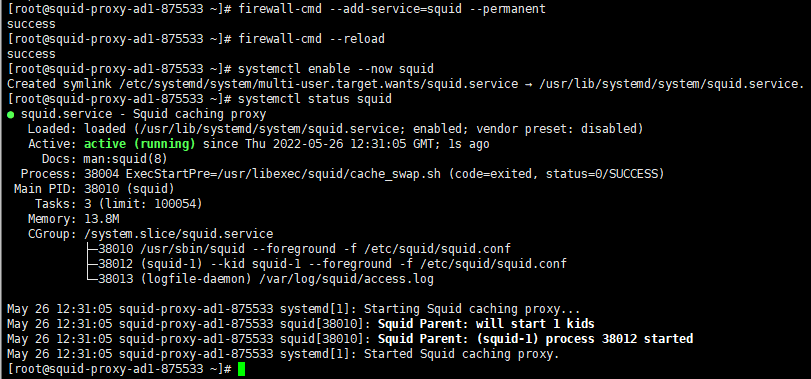
Do not move forward if the service is not active.
– Next, let’s add firewall rules for hijacking the client traffic and send it to Squid:
firewall-cmd --permanent --direct --add-rule ipv4 nat PREROUTING 0 -p tcp --dport 80 -j REDIRECT --to-ports 3129
 firewall-cmd --permanent --direct --add-rule ipv4 nat PREROUTING 0 -p tcp --dport 443 -j REDIRECT --to-ports 3130
 firewall-cmd --reload
 iptables -t nat -L

Make sure you see the rules in the PREROUTING chain.
– Even though we are using the proxy in a transparent and non-intrusive way, we will need to create a self-signed certificate so we can enable SSL specific configuration
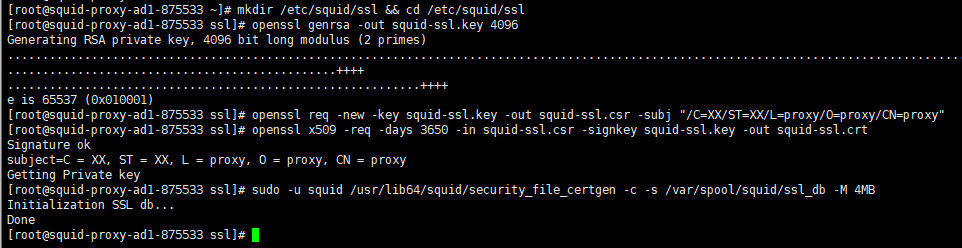
mkdir /etc/squid/ssl && cd /etc/squid/ssl
 openssl genrsa -out squid-ssl.key 4096
 openssl req -new -key squid-ssl.key -out squid-ssl.csr -subj "/C=XX/ST=XX/L=proxy/O=proxy/CN=proxy"
 openssl x509 -req -days 3650 -in squid-ssl.csr -signkey squid-ssl.key -out squid-ssl.crt
– Next, we will need to initialize the OS SSL services:
sudo -u squid /usr/lib64/squid/security_file_certgen -c -s /var/spool/squid/ssl_db -M 4MB
– Next, let’s create a file that holds the domains we will allow. Let’s allow www.oracle.com, www.wikipedia.org and www.whatismyip-address.com which means everything else will be blocked:
echo "www.oracle.com" >> /etc/squid/allowed_domains.txt
 echo "www.wikipedia.org" >> /etc/squid/allowed_domains.txt
 echo "www.whatismyip-address.com" >> /etc/squid/allowed_domains.txt
 cat /etc/squid/allowed_domains.txt

– Finally add this config to the end of /etc/squid/squid.conf:
http_port 3129 intercept
 https_port 3130 intercept ssl-bump generate-host-certificates=on dynamic_cert_mem_cache_size=16MB cert=/etc/squid/ssl/squid-ssl.crt key=/etc/squid/ssl/squid-ssl.key
# Filter HTTP requests based on the whitelist
 acl allowed_http_sites dstdomain "/etc/squid/allowed_domains.txt"
 http_access allow allowed_http_sites
# Filter HTTPS requests based on the whitelist
 acl allowed_https_sites ssl::server_name "/etc/squid/allowed_domains.txt"
acl step1 at_step SslBump1
 acl step2 at_step SslBump2
 acl step3 at_step SslBump3
 ssl_bump peek step1 all
 ssl_bump peek step2 allowed_https_sites
 ssl_bump splice step3 allowed_https_sites
 ssl_bump terminate step2 all
http_access deny all
access_log daemon:/var/log/squid/access.log squid
After saving the changes, restart the squid service and make sure it is up and running with no issues.

This concludes the deployment of Squid proxy 1.
B. Repeat the steps above and deploy a second compute instance in the same subnet but a different AD.
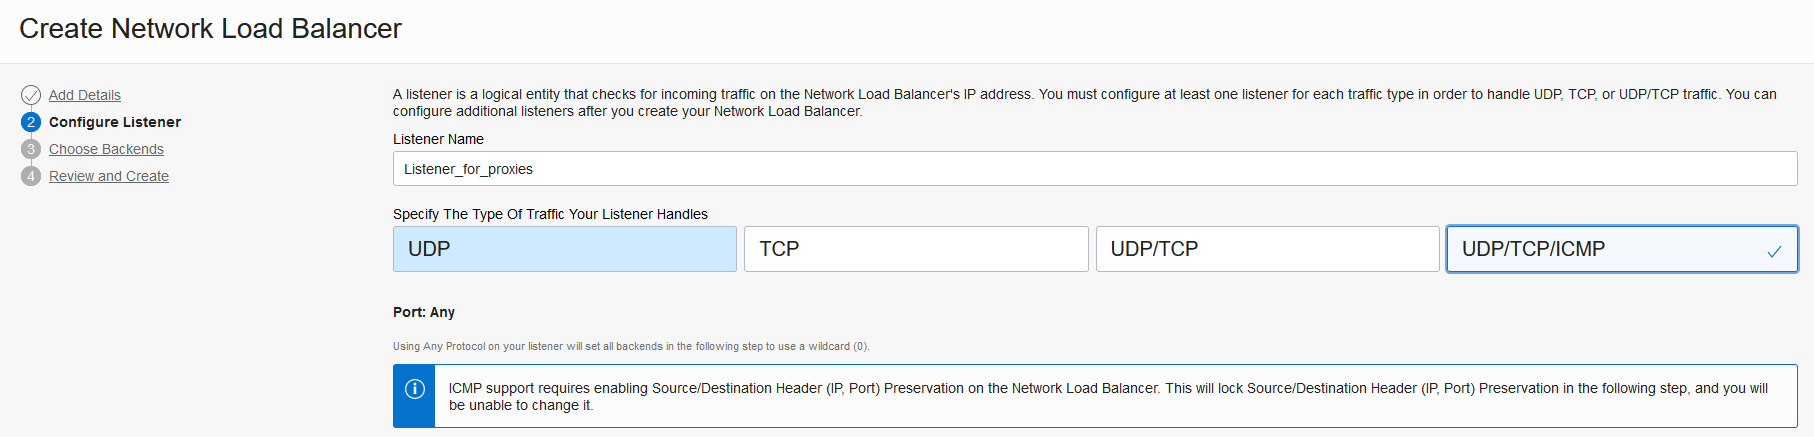
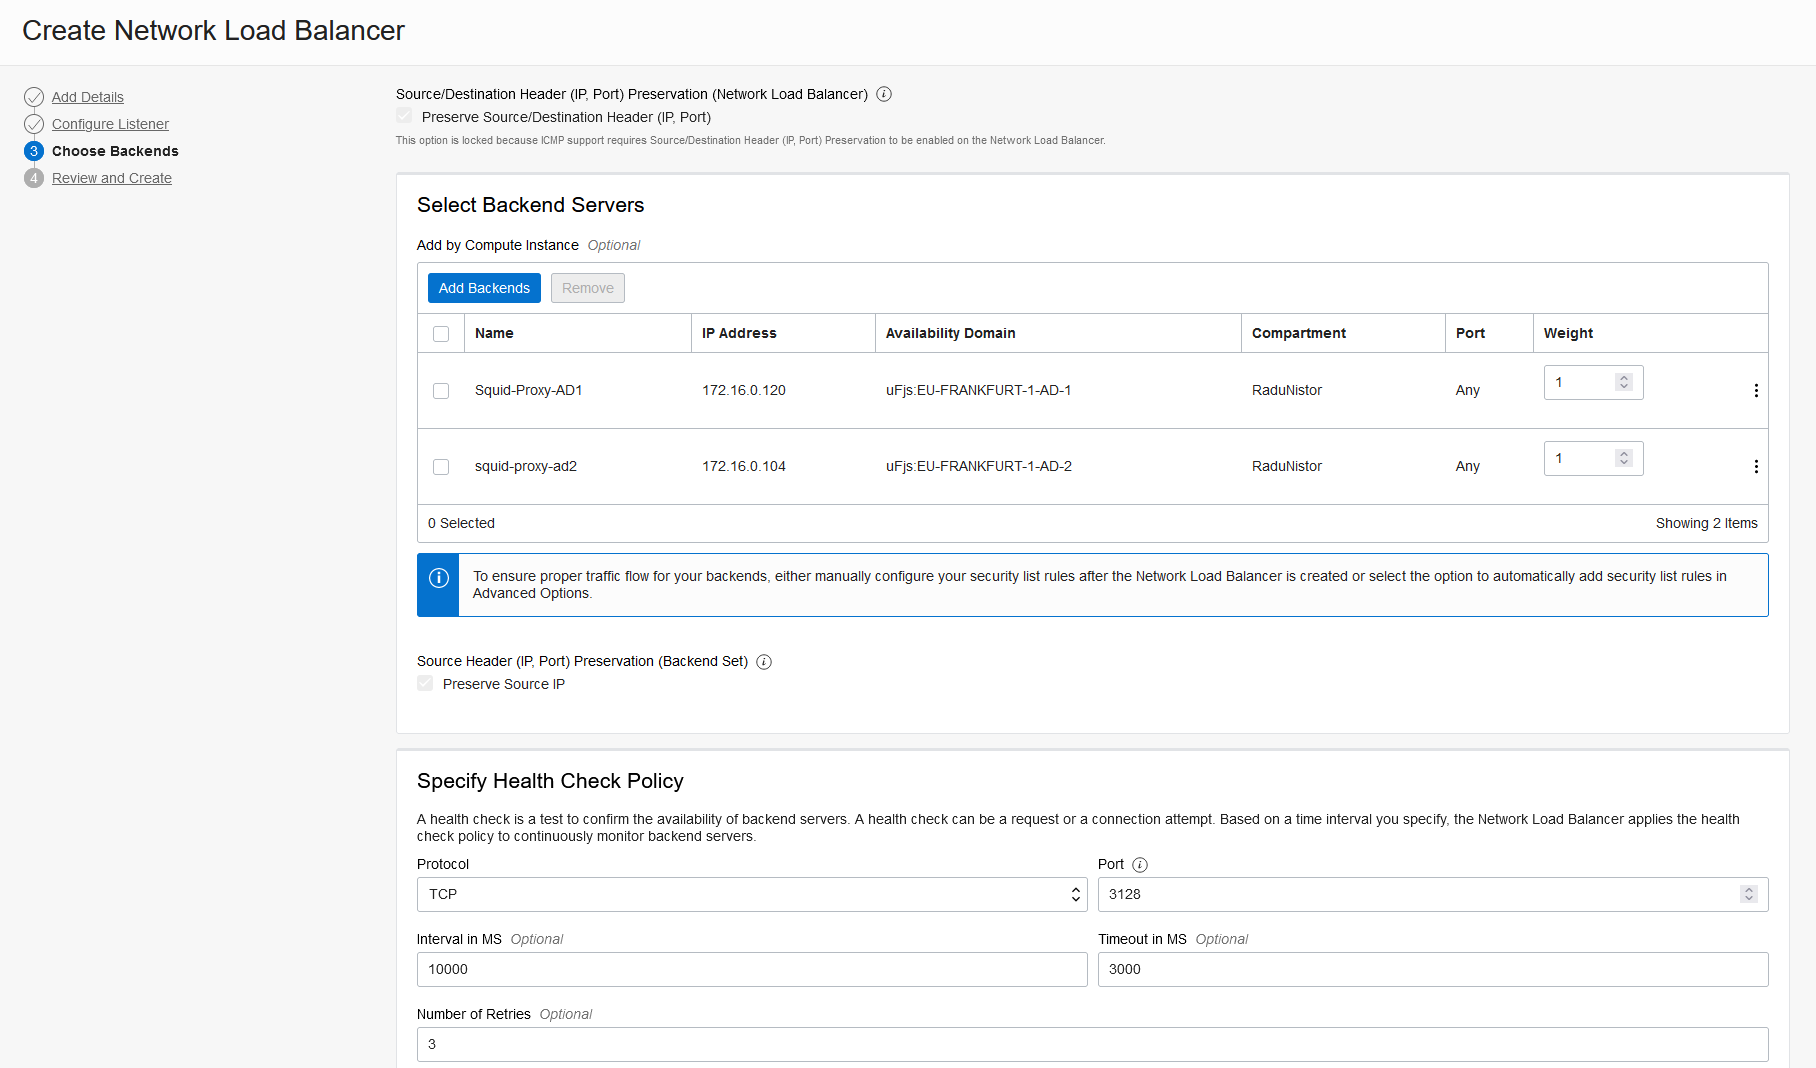
C. Deploy a network load balancer with the two Squid proxies as backends. The NLB should be (but not mandatory) in the same subnet as the proxies. The health check should go to the default Squid port (TCP 3128).
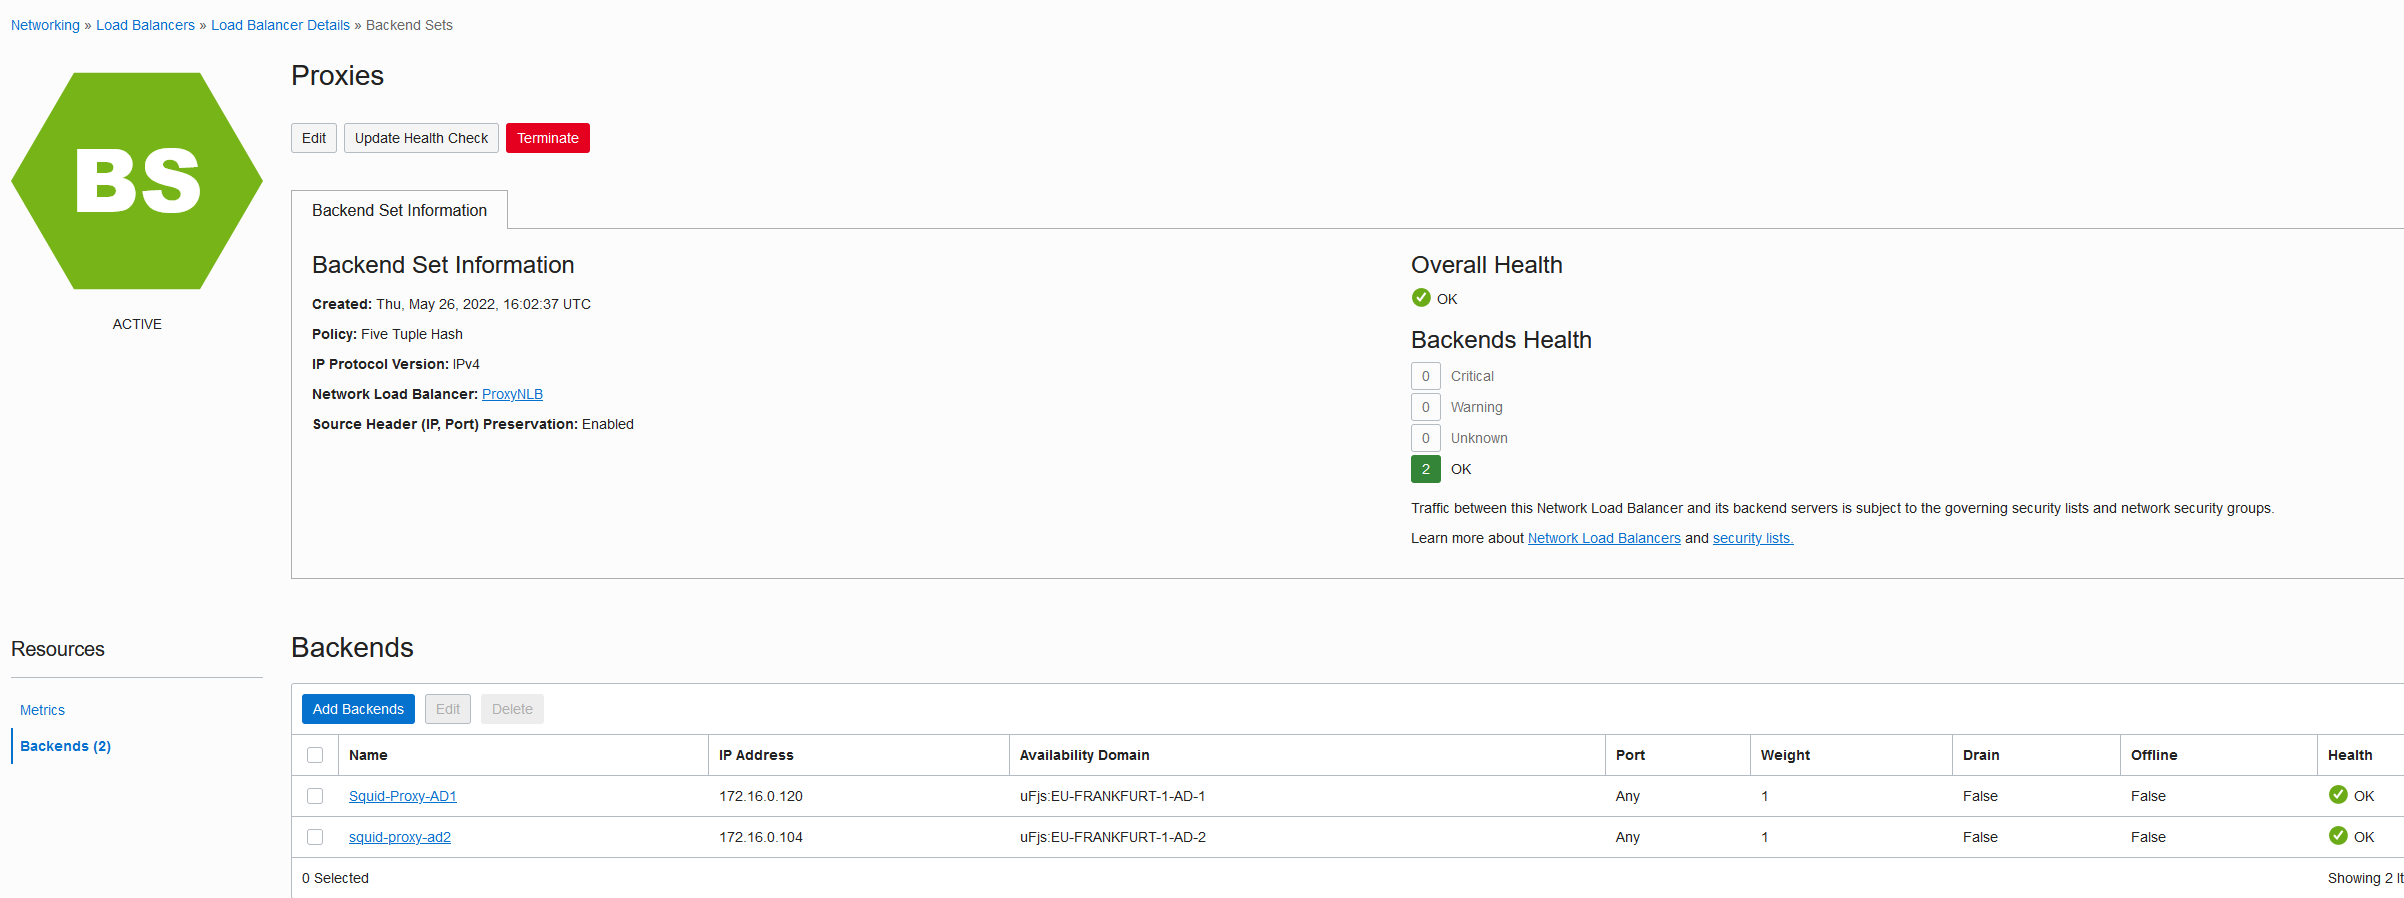
After the NLB gets deployed confirm both backend proxies are healthy before moving on.
D. Now that everything is in place, let’s see it in action.
I will use a Compute instance from the same VCN but a different subnet, running Windows, to try to connect to various Internet hosts. Make sure the client subnets have the default route towards the NLB IP.

Next, let’s access the 3 sites we whitelisted:
Oracle.com
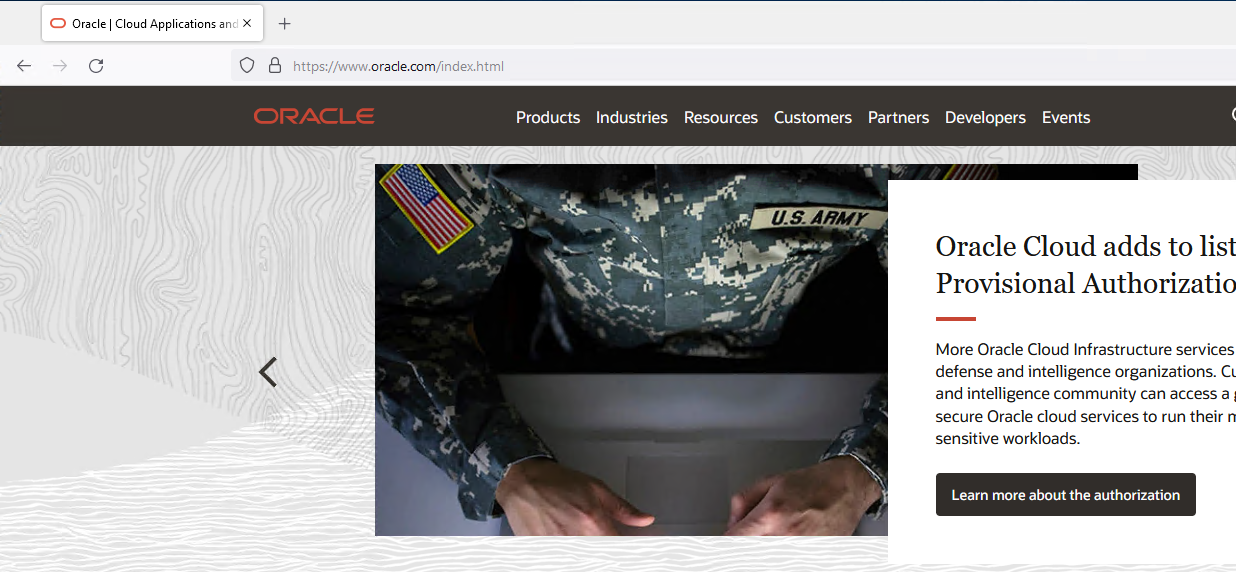
As we can see, the browser can access www.oracle.com. This host resolves to IP 23.45.98.206. Let’s see what the squid logs show:

The proxy allowed the connection and opened a TCP Tunnel. Let’s see how the certificate looks:
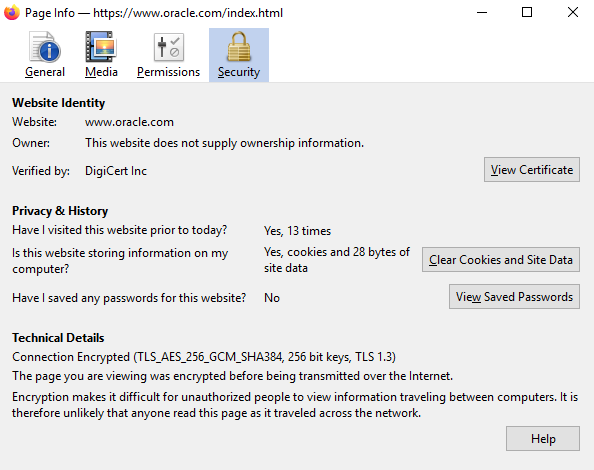
As we can see, the proxy did not come between the client and the destination.
Let’s see the other sites:
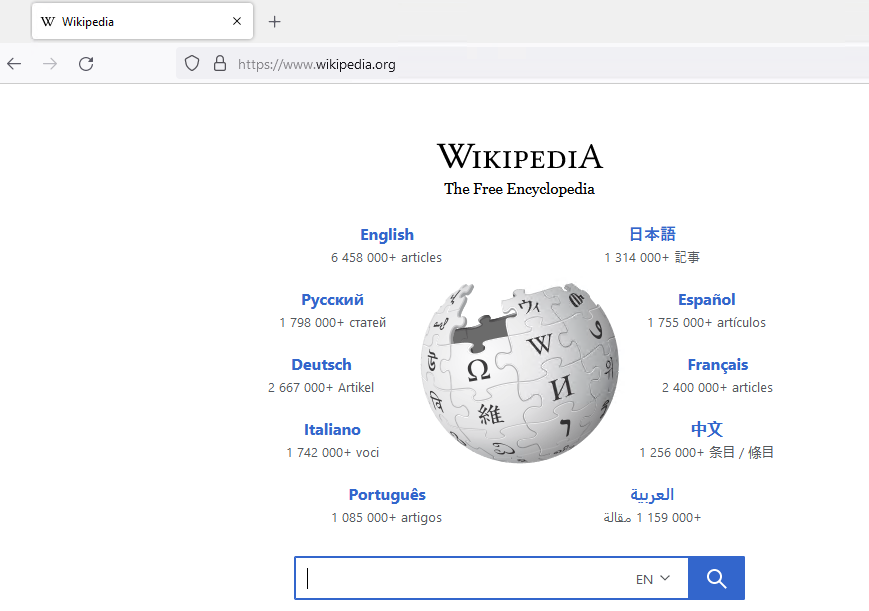
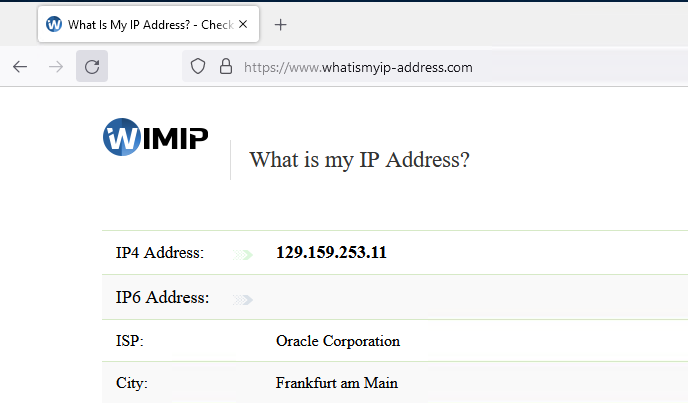
Both the other whitelisted sites work. We can see that the Public IP is that of the NAT Gateway.
Now let’s try a site that was not whitelisted, like www.yahoo.com.
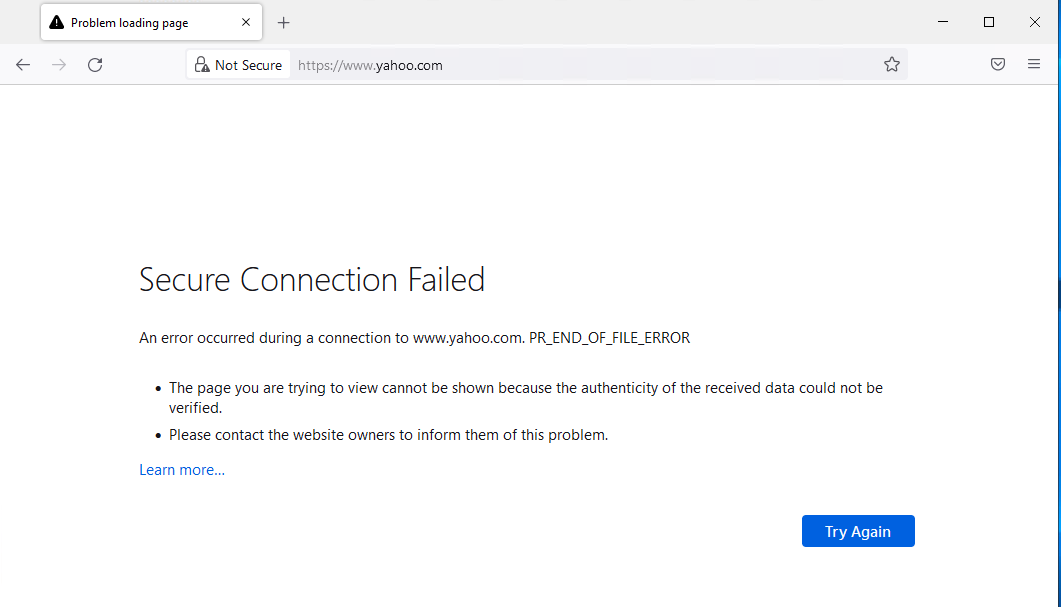
The site is not allowed by the proxies. The IP for this site is 87.248.100.216. Let’s see what the proxy log shows:

The proxy aborted the client connection.
This concludes the demo.
3. Conclusion.
The Squid proxy is a powerful tool that can enhance your cloud security. With the addition of this new feature, peek and splice, it can now work in a completely transparent, non-intrusive way for the SSL connections which make up for most of the Internet flows.
DISCLAIMER: The proxy configuration is for demo only. If you plan to create this setup in production please adjust the configuration to enhance security as most of the configuration items were left on default settings.
