Identity Domains in OCI are a natively-integrated identity provider (IdP). Using Identity Domains, you can host your user identities in OCI for enterprise or consumer use cases, or federate with another IdP to utilize your current identity systems. The most common method of federation in enterprise settings is accomplished using SAML 2.0 to assert user identity authenticated by the IdP to the Service Provider (SP). In this example, the IdP is Okta, the SP is Oracle Identity Domains, and the service is Oracle Kubernetes Engine.
Oracle Kubernetes Engine (OKE) is the managed Kubernetes service offered in OCI. The control plane is provided and maintained by Oracle, and the worker nodes, deployments, services, pods, etc. are controlled by you, the cloud administrator. OKE is an implementation of the open-source Kubernetes project, meaning it has it’s own Role-Based Access Controls (RBAC). OKE has the capability to use identities stored in Identity Domains for granting or denying access to Kubernetes APIs based on RBAC rules.
Putting all of the above together brings us to the point of this article. We’re going to leverage user identities stored in our enterprise IdP for authentication into Identity Domains to perform a task in OKE. Identity Domains will not have access to, or need, the user’s password. User lifecycles and access will be controlled via a single pane of glass at the IdP. We will minimize attack surface, increase ease of governance, and bring ourselves a step closer to a secure environment.
Pre-requisites
- An OKE cluster (Basic or Enhanced)
- Identity Domains
- Federation with External Identity Provider
- OCI Identity Domains User with “Use” Permissions on OKE Cluster
- The Kubectl Tool
- OCI CLI Tool
Note: This article was written with the intention of using a Mac or Linux shell. If you’re using Microsoft Powershell, commands and instructions will need to be tweaked before using.
OCI Command Line Interface
First, we will need to generate a config file for the OCI-CLI. Take a look at the quickstart documentation if you have not installed the OCI-CLI before. This example will assume there’s no current profile configured.
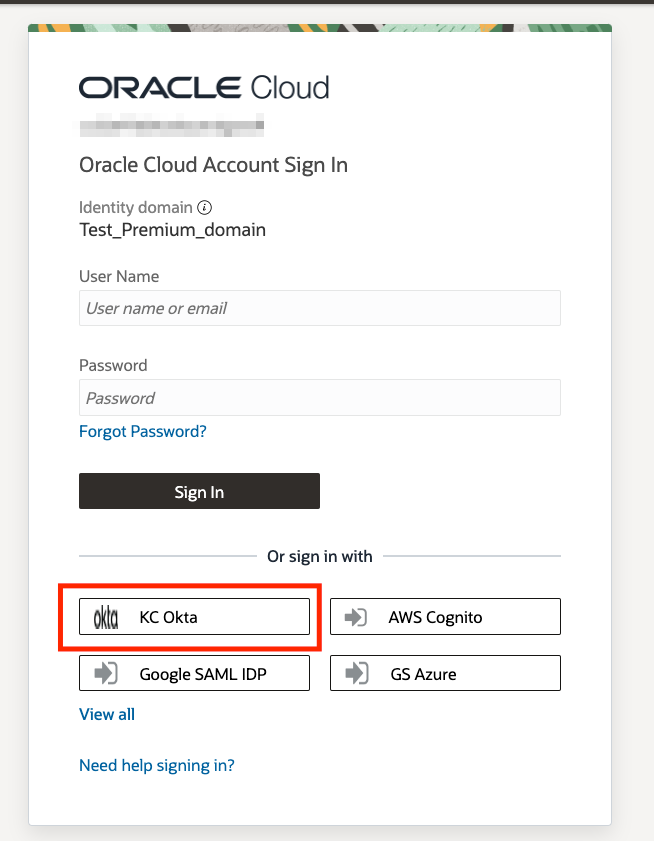
Simply enter the command oci session authenticate and select your home region (us-ashburn-1 in this case) to open a browser window for a standard authentication flow. For this example, I’m using an Okta SAML 2.0 Identity Provider to authenticate.
Once you are authenticated, there will be a config file created at ~/.oci/config that will look similar to the below image.

Once the profile is created, we are ready to generate our Kubeconfig file.
Generating the Kubeconfig
Here we will create a Kubeconfig, and then edit it for use by our federated user.
Create a Standard Kubeconfig
In the OCI console, go to the details page of your OKE cluster. Click on the Access Cluster button.

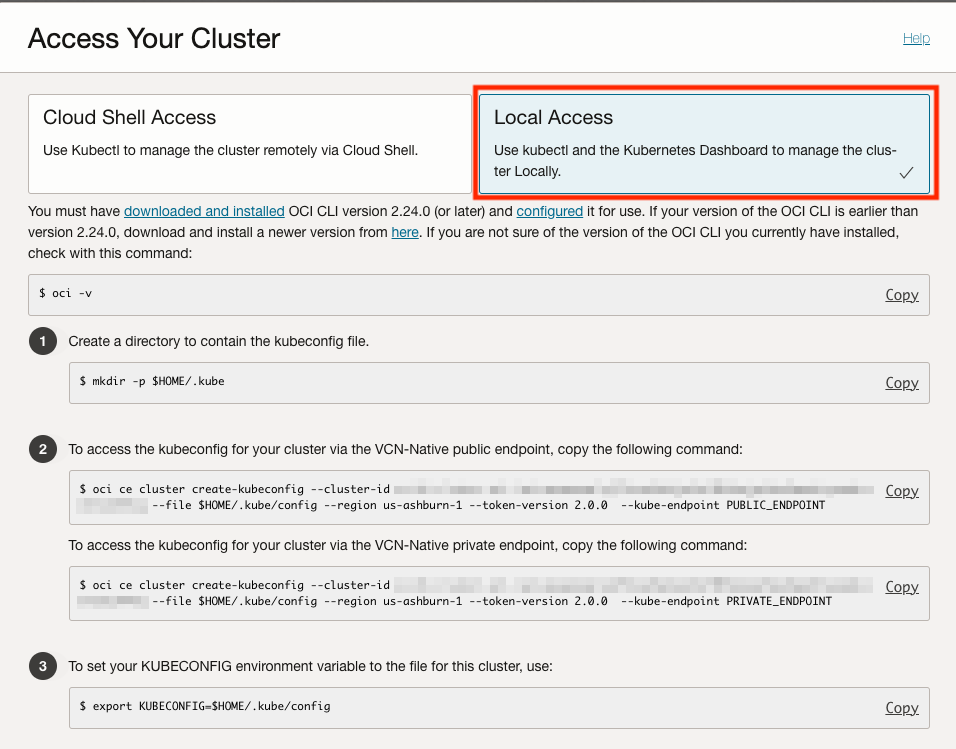
We have two options for creating the kubeconfig in step 2. Choose the appropriate one depending on if you have a public or private OKE API Server endpoint. Copy the command and enter it into your terminal. You will get an error.
Unfortunate, but luckily the fix is simple. The oci command is expecting an API key, but we used a browser login to authenticate, which gave us a security token instead. To let oci know about it, we just need to add the --auth security_token option to the command.

Correcting the Kubeconfig
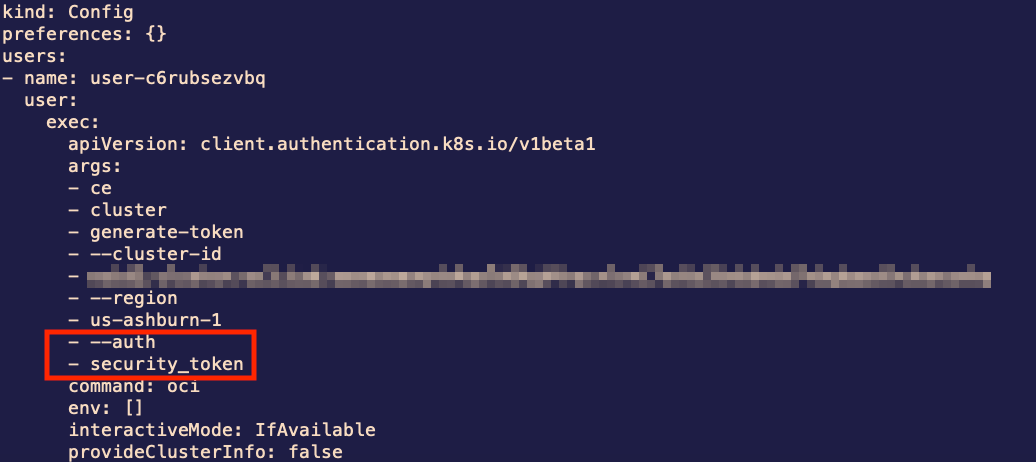
The kubeconfig will be created at $HOME/.kube/config by default, and will contain information on how to authenticate to the cluster for your user. If you read the generated file, you will see some familiar syntax in the user section. Once again, we will just need to specify the authentication method in the arguments list to use our session credentials.
Once the authentication method is specified in the arguments list, you will be able to use the kubectl command to interact with the OKE cluster. Assuming you are not a member of the Administrators group, you will be able to run kubectl get pods -n kube-system to retrieve a list of pods in the kube-system namespace. That is, if you have the appropriate permissions. More than likely you will receive a message such as this:

To view the pods, we will create a role and role binding for our OCI group to grant view permission on pods in the kube-system namespace.
Example: Pod Reader Role
Note: For this example, the oke_pod_viewer group needs a policy with the use verb to the cluster in OCI. Click here for more info on policies in OCI. The resulting policy should look something like this:
Allow group oke_pod_viewer to use clusters in compartment xyz
Below we will create a role and rolebinding that will allow an OCI group to read pods in the kube-system namespace. This is intended to illustrate that using OCI IAM Identity Domains with OKE can be used to create roles for managing different resources in your OKE cluster.
Creating Pod-Reader Role & Role Binding
Now that we have access to the OKE API server, we need to apply some authorizations to perform tasks. In this example, we will apply some authorizations to an OCI group to allow members of that group to read pods in the kube-system namespace. This step requires permissions to create roles and rolebinding resources on the OKE cluster.
First, copy and save the below text to a file titled rolebinding.yaml somewhere on your file system.
kind: Role
 apiVersion: rbac.authorization.k8s.io/v1
 metadata:
   name: pod-reader-ks
   namespace: kube-system
 rules:
 - apiGroups: [""]
   resources: ["pods"]
   verbs: ["get", "watch", "list"]
 ---
 kind: RoleBinding
 apiVersion: rbac.authorization.k8s.io/v1
 metadata:
   name: pod-reader-ks-role-binding
   namespace: kube-system
 subjects:
 - kind: Group
   name: <PASTE_OCID_HERE>
   apiGroup: rbac.authorization.k8s.io
 roleRef:
   kind: Role
   name: pod-reader-ks
   apiGroup: rbac.authorization.k8s.io
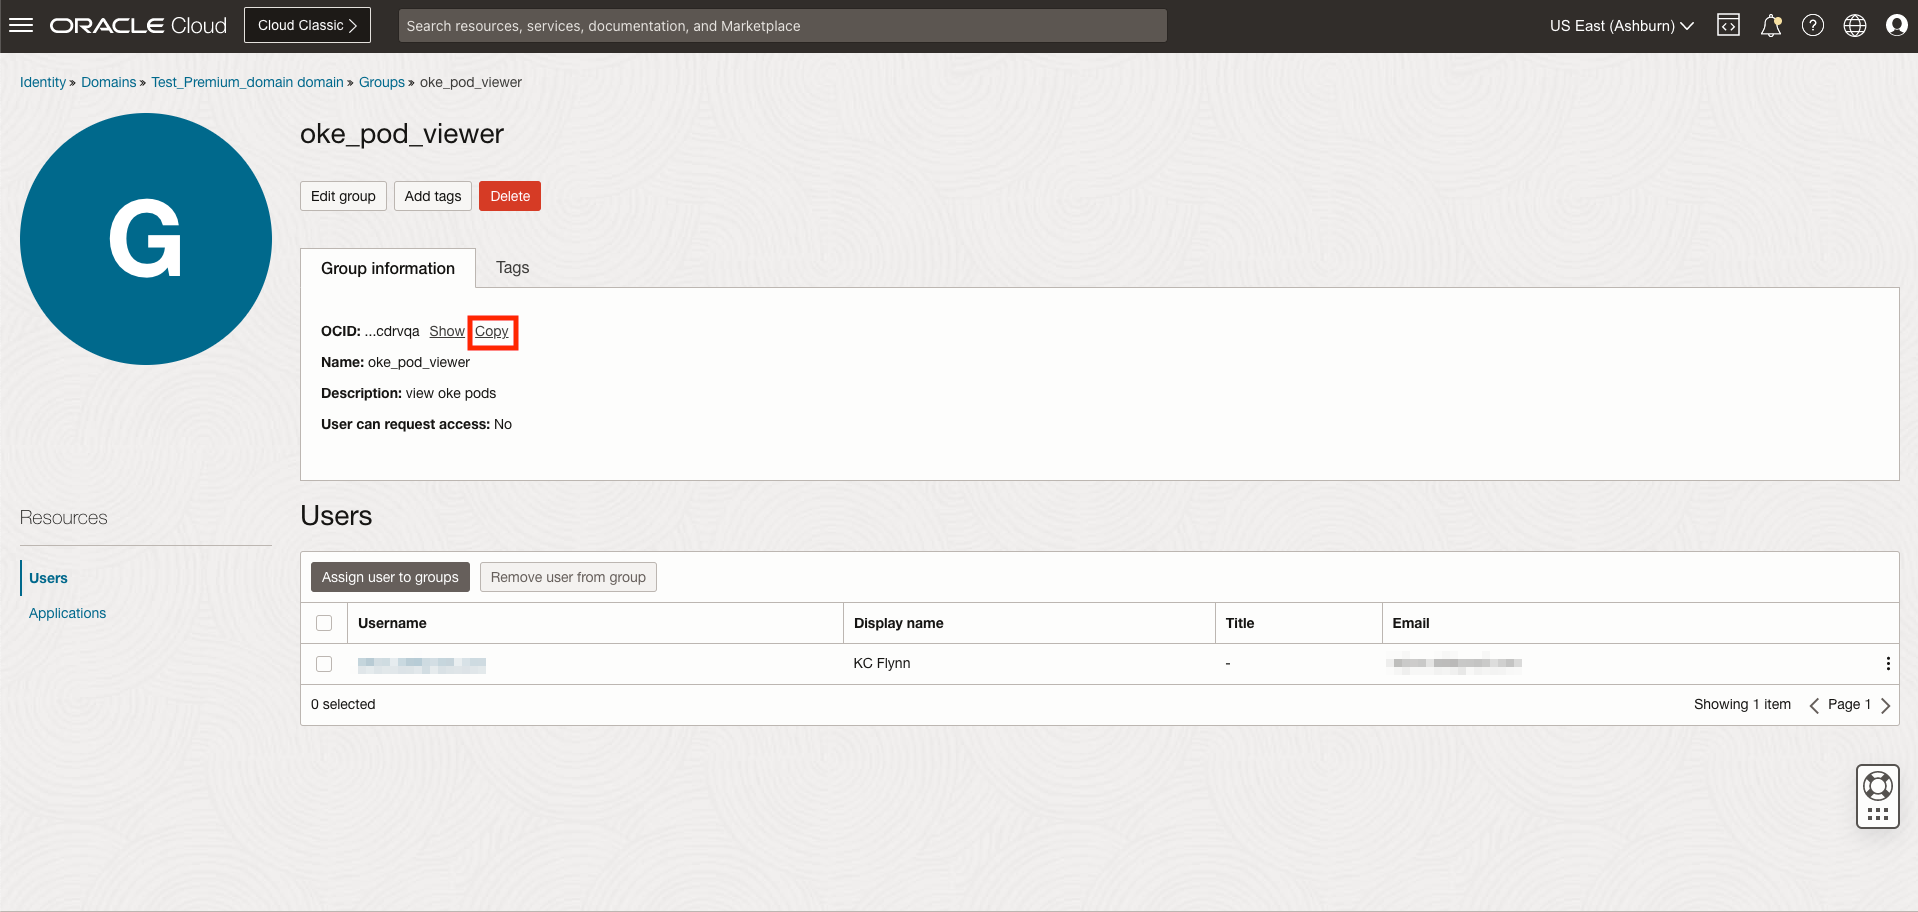
Second, we will need to get the OCID of the group we want to grant permissions to. This can be done in the Domains menu for the selected Identity Domain. In the main menu, select Domains from Identity & Security and Identity. Select the domain, and navigate to Groups which will bring up a list of groups associated with the selected Identity Domain. Click on the desired group and click Copy next to OCID under Group Information. Paste the OCID into the placeholder in rolebinding.yaml.
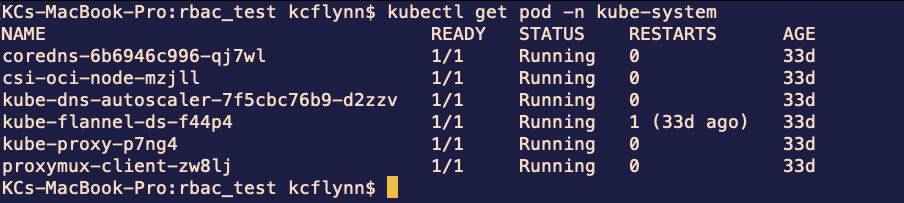
Third and finally, run kubectl apply -f rolebinding.yaml while in the directory containing the rolebinding.yaml file. You should see a success statement when the role and rolebinding are created on OKE.
Run the command kubectl get pods -n kube-system again and you should see output similar to the below screenshot:
Conclusion
In this article we looked at how to use federated identities for the tools used to manage the Oracle Kubernetes Engine. We used an enterprise Identity Provider with SAML 2.0 federation to authenticate as our user with the kubectl tool, and leveraged the RBAC systems native to Kubernetes to manage authorization. With this knowledge, you will be able to leverage existing identity systems to enhance the security and managability of your OKE clusters.