Table of Contents
Overview
The purpose of this document is to explain how to create a backup for networking objects (Subnets, Security Lists, Network Security Groups, etc.) using Terraform. Another alternative can be OCI CLI, where you can export and import in JSON format.
This document will only focus on Terraform and how the code can be used with OCI Resource Manager. We will focus more on basic concepts for Terraform. Also, the CIDRs specified are used as an example and can be changed to suit your needs.
For more details on how to use Terraform, please visit Terraform official website – https://www.terraform.io/docs/index.html. This solution was validated using Terraform version 1.0.4.
For more details on how to use the OCI Resource Manager service, please visit – https://docs.oracle.com/en-us/iaas/Content/ResourceManager/Concepts/resourcemanager.htm.
Solution description
By default, the OCI Console doesn’t have an option to create backups for networking objects, like Subnets, Security Lists or Network Security Groups. Keep in mind that using this method you can create a backup for other OCI objects, not just the networking portion, however, this can be easily accomplished using native Terraform or by using the OCI Resource Manager service.
Resource Manager is an Oracle Cloud Infrastructure service that allows you to automate the process of provisioning your Oracle Cloud Infrastructure resources. Using Terraform, Resource Manager helps you install, configure, and manage resources through the “infrastructure-as-code” model.
There are multiple options to create a backup and reuse every time there is a need:
1. Manually create the networking objects using the OCI Console and export them into Terraform code, leveraging Resource Discovery which is embedded in the OCI Resource Manager service.
2. Create all the networking objects from scratch using Terraform (Oracle Cloud Infrastructure Provider) and import them in OCI Resource Manager.
Prerequisites
We will need a valid OCI Tenancy and proper IAM access. Also, the assumption is that we already have a VCN created.
The quickest way to get started is to use a test tenancy and have your User in the “Administrators” Group, which will allow full access to inspect, read, use, and manage objects in that tenancy.
Configuration options
As mentioned earlier, there are multiple options to create a backup for network objects. In this document we will cover all below options:
1. Manually create the networking objects using the OCI Console and export them into Terraform code, leveraging Resource Discovery which is embedded in the OCI Resource Manager service.
2. Create all the networking objects from scratch using Terraform (Oracle Cloud Infrastructure Provider) and import them in OCI Resource Manager.
1. Manually create the networking objects using the OCI Console and export into Terraform code, leveraging Resource Discovery which is embedded in the OCI Resource Manager service
Another option to create a backup using OCI Resource Manager, assuming you already have an entire environment created, is to inspect all resources created in a specific compartment and convert that into Terraform code.
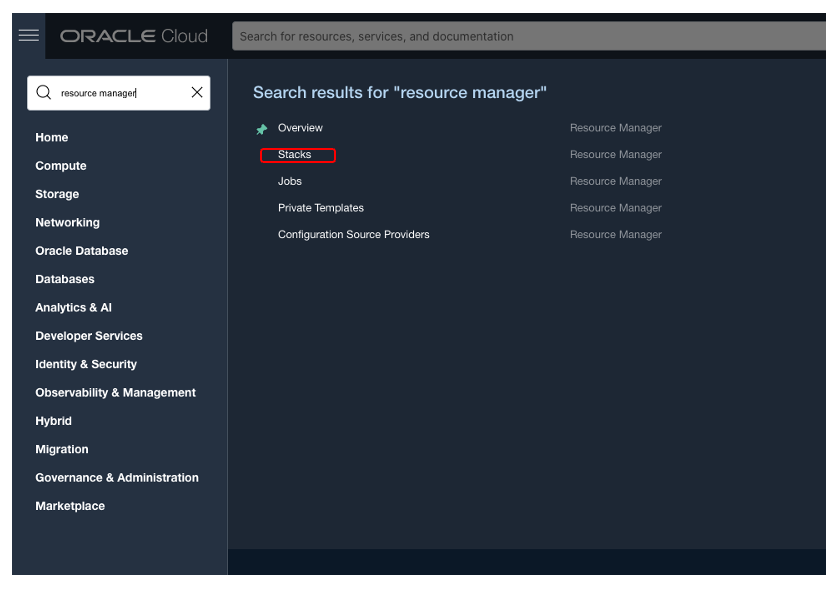
Open the OCI Console and search for “Resource Manager” and from the right select “Stacks”. To learn more about Stacks, please go here.
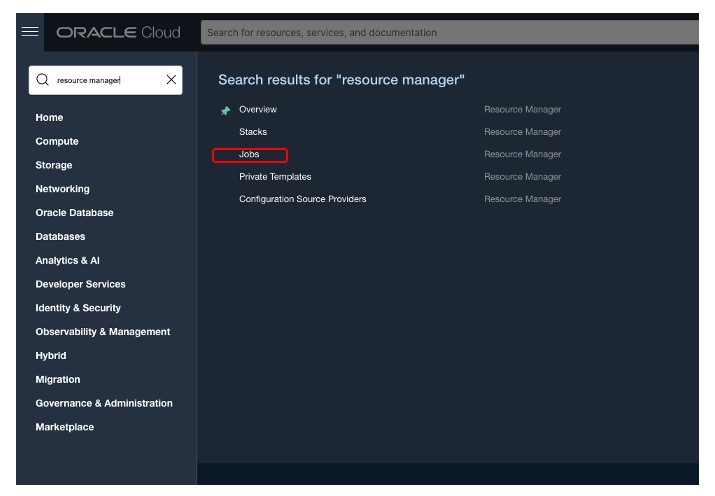
Create a new Stack by clicking on the “Create Stack” button.

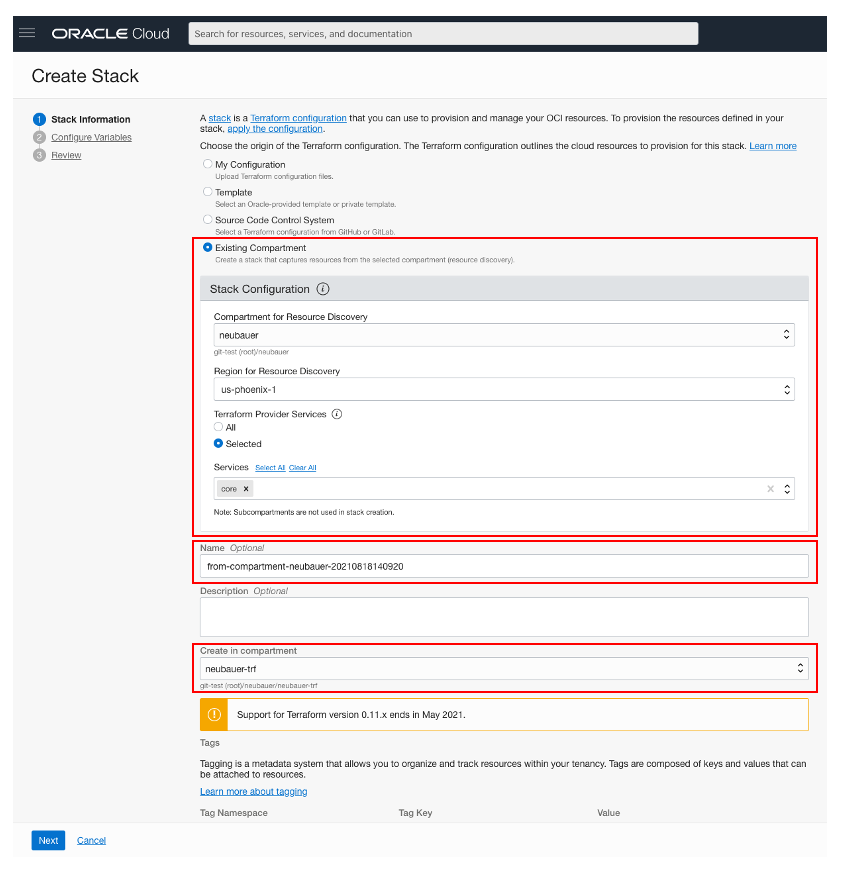
A screenshot example is provided below. There are 3 steps we need to complete:
Step 1 – “Stack Information”: From the “Create Stack” page, select “Existing Compartment” option. In the “Stack Configuration” section, select Compartment and Region where resources are already created. For “Terraform Provider Services” click on the “Selected” radio button and chose “core” from the list. Core service contains the following resources. More details can be found here:
- compute
- block storage
- networking
Provide a custom name (if needed) for this stack in the “Name” field. Select the Compartment where you want to export.
Click on the “Next” button at the bottom of the page.
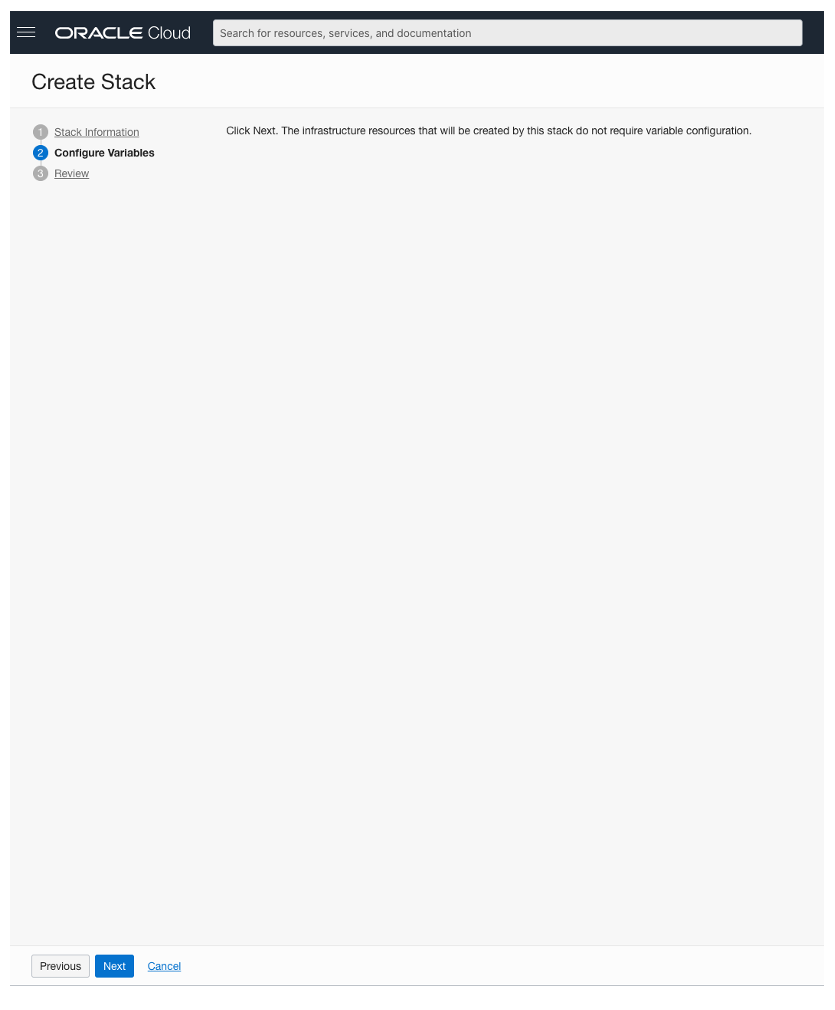
Step 2 – “Configure Variables” will not contain anything. Click on the “Next” button at the bottom of the page.
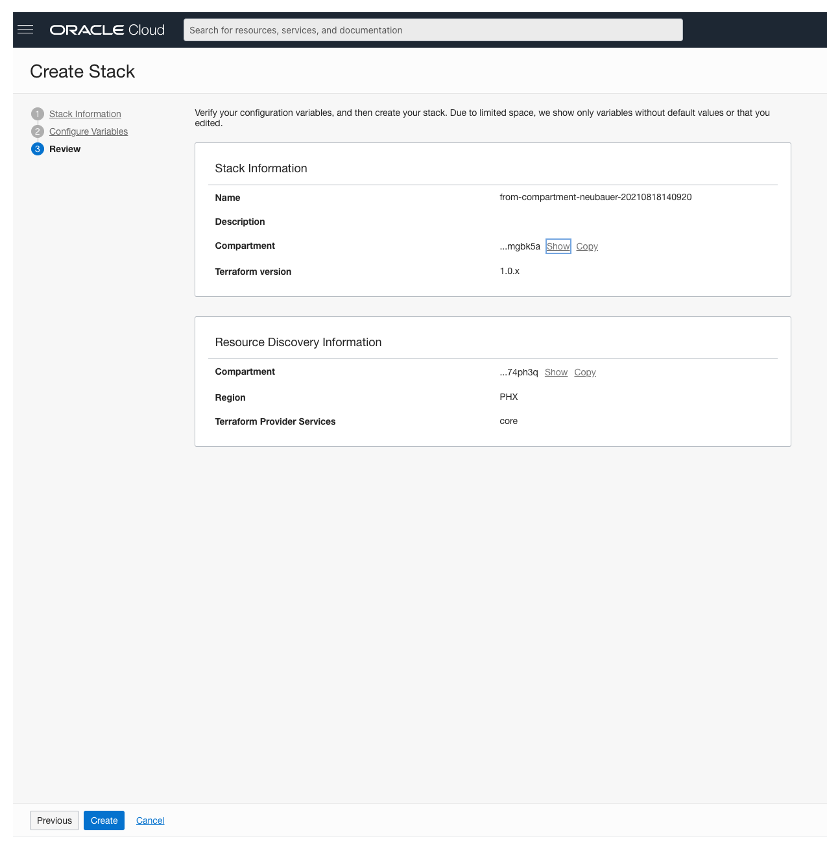
Step 3 – “Review”: Create Stack by clicking on the create button at the bottom of the page.
After this process, it will take approximately 5 minutes to complete all operations and get all the networking objects.
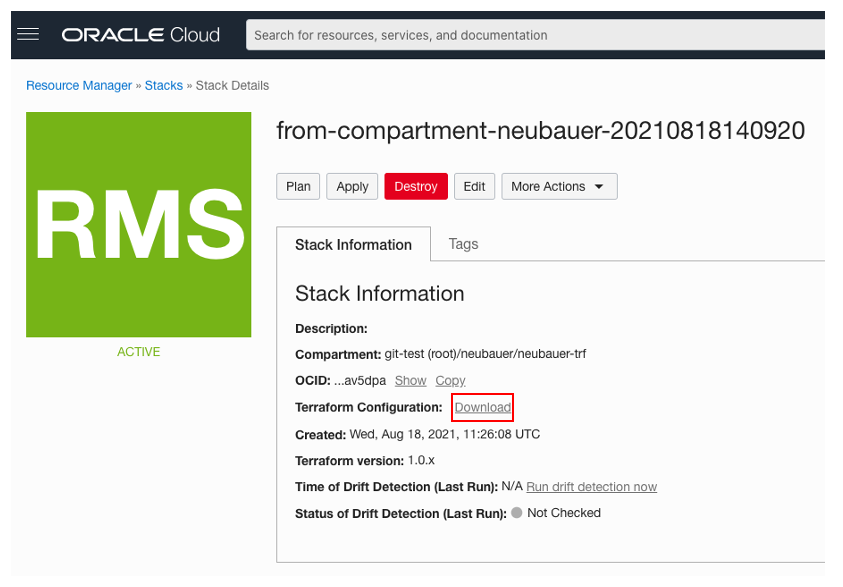
Now we can download the code from the main stack page. Click on “Download” and save the zip archive locally on your computer.
The zip archive download will contain 3 files like what we created manually in the previous section:
- core.tf – This file contains all the Security Rules and Network Security Groups as a Terraform code. Keep in mind that the Core service mentioned above, contains compute and storage, in addition to networking. We will need to remove the unneeded code.
- provider.tf – This file will contain the code needed to use OCI as Terraform Provide.
- vars.tf – This file will contain the variables needed for creating objects in a specific Region, Compartment and VCN.
In “core.tf” we will need only the following resources. Each object starts with “resource”:
- oci_core_network_security_group
- oci_core_network_security_group_security_rule
- oci_core_security_list
Modify the “core.tf” file as needed and re-create a zip archive containing the 3 needed files. When needed to restore a backup, import the Terraform code as in the next section.
2. Create all the networking objects from scratch using Terraform (Oracle Cloud Infrastructure Provider)
To get started, we will need 3 files with the following names and extensions:
- core.tf – This file will contain all the code needed to create one Security Rule and one Network Security Group. Both objects will have 2 Ingress rules (permit source 0.0.0.0/0 on TCP port 443, permit source 192.168.121.0/24 on ALL protocols) and 1 Egress rule (permit source 0.0.0.0/0 on ALL protocols).
- provider.tf – This file will contain the code needed to use OCI as Terraform Provide.
- vars.tf – This file will contain the code needed for creating objects in a specific Region, Compartmentand VCN. In our case, it will not have empty variables.
Content example of “core.tf”:
resource oci_core_network_security_group export_test-nsg {
compartment_id = var.compartment_ocid
defined_tags = {
}
display_name = “test-nsg”
freeform_tags = {
}
vcn_id = var.vcn_id
}
resource oci_core_network_security_group_security_rule export_test-nsg_network_security_group_security_rule_1 {
#description = <<Optional value not found in discovery>>
#destination = <<Optional value not found in discovery>>
destination_type = “”
direction = “INGRESS”
network_security_group_id = oci_core_network_security_group.export_test-nsg.id
protocol = “6”
source = “0.0.0.0/0”
source_type = “CIDR_BLOCK”
stateless = “false”
tcp_options {
destination_port_range {
max = “443”
min = “443”
}
#source_port_range = <<Optional value not found in discovery>>
}
}
resource oci_core_network_security_group_security_rule export_test-nsg_network_security_group_security_rule_2 {
#description = <<Optional value not found in discovery>>
#destination = <<Optional value not found in discovery>>
destination_type = “”
direction = “INGRESS”
network_security_group_id = oci_core_network_security_group.export_test-nsg.id
protocol = “all”
source = “192.168.121.0/24”
source_type = “CIDR_BLOCK”
stateless = “false”
}
resource oci_core_network_security_group_security_rule export_test-nsg_network_security_group_security_rule_3 {
#description = <<Optional value not found in discovery>>
destination = “0.0.0.0/0”
destination_type = “CIDR_BLOCK”
direction = “EGRESS”
network_security_group_id = oci_core_network_security_group.export_test-nsg.id
protocol = “all”
#source = <<Optional value not found in discovery>>
source_type = “”
stateless = “false”
}
resource oci_core_security_list export_test-sec-list {
compartment_id = var.compartment_ocid
defined_tags = {
}
display_name = “test-sec-list”
egress_security_rules {
#description = <<Optional value not found in discovery>>
destination = “0.0.0.0/0”
destination_type = “CIDR_BLOCK”
#icmp_options = <<Optional value not found in discovery>>
protocol = “all”
stateless = “false”
#tcp_options = <<Optional value not found in discovery>>
#udp_options = <<Optional value not found in discovery>>
}
freeform_tags = {
}
ingress_security_rules {
#description = <<Optional value not found in discovery>>
#icmp_options = <<Optional value not found in discovery>>
protocol = “6”
source = “0.0.0.0/0”
source_type = “CIDR_BLOCK”
stateless = “false”
tcp_options {
max = “443”
min = “443”
#source_port_range = <<Optional value not found in discovery>>
}
#udp_options = <<Optional value not found in discovery>>
}
ingress_security_rules {
#description = <<Optional value not found in discovery>>
#icmp_options = <<Optional value not found in discovery>>
protocol = “all”
source = “192.168.121.0/24”
source_type = “CIDR_BLOCK”
stateless = “false”
#tcp_options = <<Optional value not found in discovery>>
#udp_options = <<Optional value not found in discovery>>
}
vcn_id = var.vcn_id
}
Content example of “provider.tf”:
provider oci {
region = var.region
}
Content example of “vars.tf”:
variable compartment_ocid { }
variable region { }
variable vcn_id { }
In “vars.tf”, “compartment_ocid” and “region” are optional parameters and will be automatically completed in the OCI Resource Manager, based on the compartment and region you are using.
These variables can also be statically defined but it’s not recommended. The “region” variable can be replaced with another region if needed. A list containing all regions can be found here. Use the “Region Identifier” column. “compartment_ocid” and “vcn_id” variables can be replaced with the variables that you can get from the OCI Console.
Example:
variable compartment_ocid { default = “ocid1.compartment.oc1…..” }
variable region { default = “us-phoenix-1” }
variable vcn_id { default = “ocid1.vcn.oc1.phx…..” }
All variables above can also be modified when we import them into OCI Resource Manager.
Now it’s time to import the newly created code into OCI Resource Manager. Create a zip archive containing the 3 files above. Open the OCI Console and search for “Resource Manager” and from the right select “Stacks”. To learn more about Stacks, please go here.
Create a new Stack by clicking on the “Create Stack” button.
A screenshot example is provided below. There are 3 steps we need to complete:
Step 1 – “Stack Information”: From the “Create Stack” page, select the “My Configuration” option and use “.Zip file” for the “Stack Configuration”. Provide a custom name (if needed) for this stack in the “Name” field. Select the latest version (1.0.x at time of writing) of Terraform from the “Terraform version” filed.
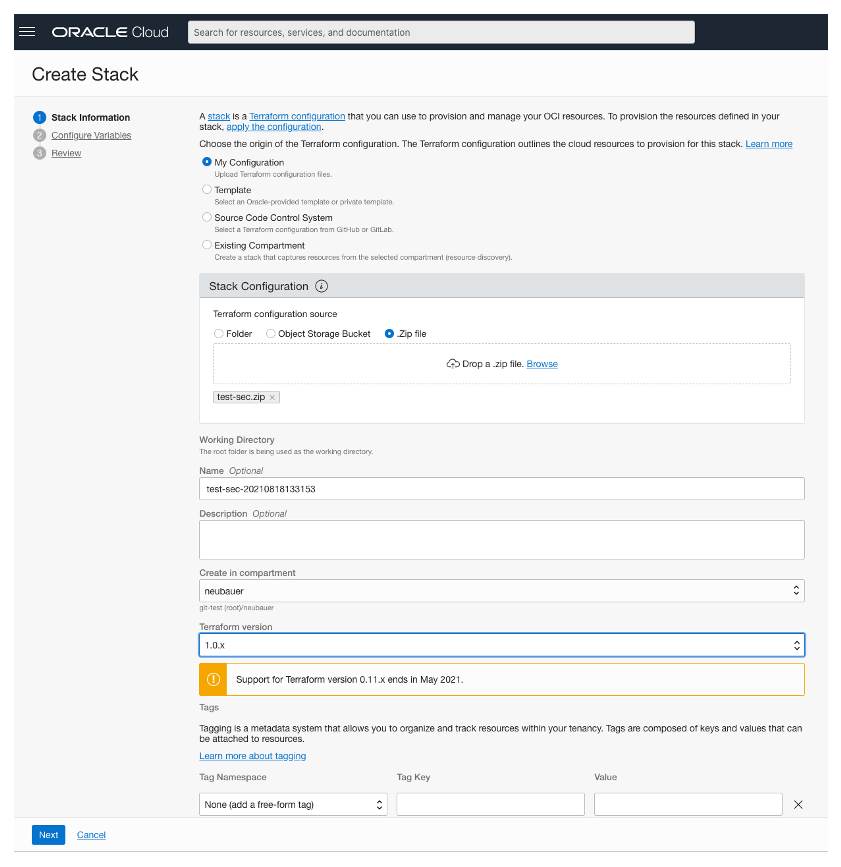
Click on the “Next” button at the bottom of the page.
Step 2 – “Configure Variables”: As mentioned above, the Compartment and Region variables are optional and will automatically add values based on the compartment and region you are using.
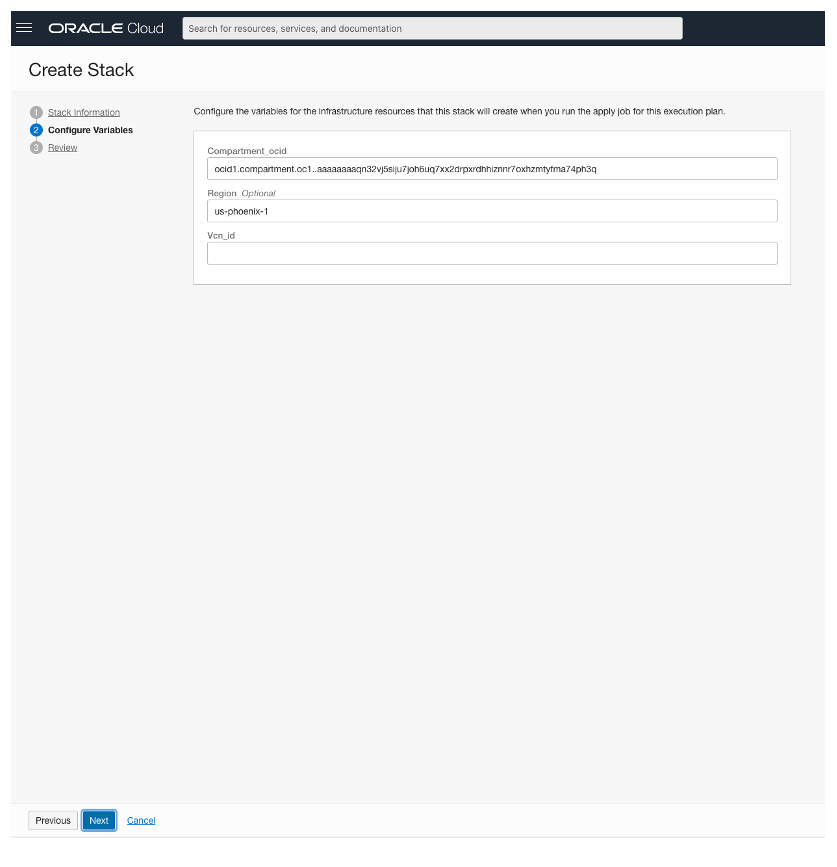
It’s mandatory to add the VCN OCID where we want to create the Security Rule and Network Security Group. You can get the value by going to the main menu and selecting “Networking” –> “Virtual Cloud Network”.
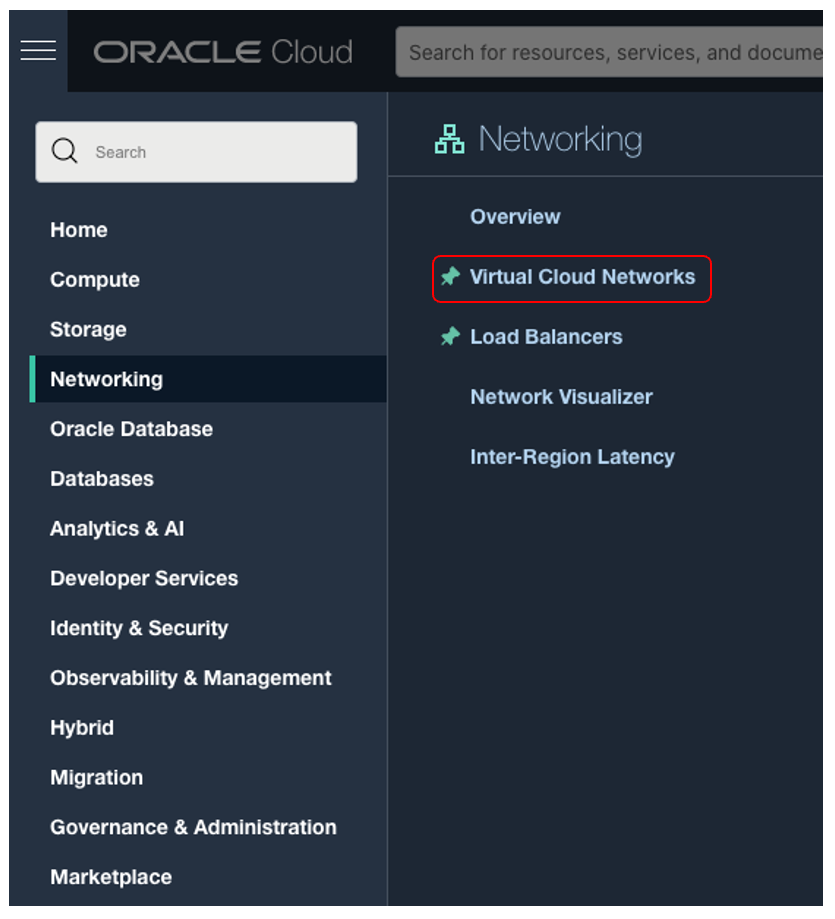
You will get a list with all VCNs created in a specific compartment. Select the VCN you want to use and click on “Copy” OCID from the VCN page, as shown below.

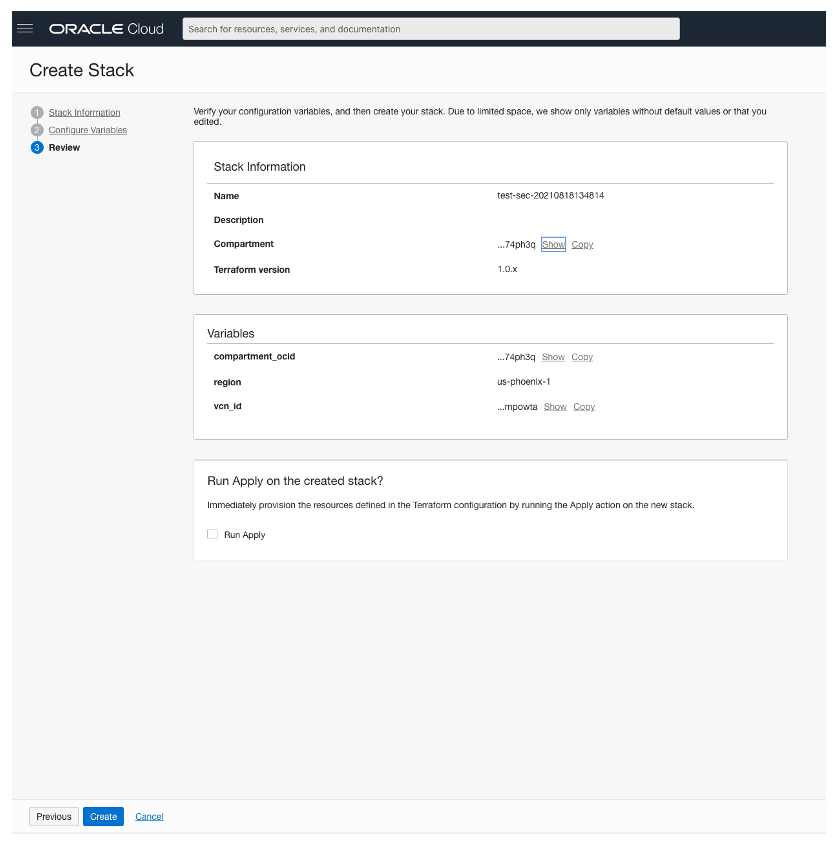
Step 3 – “Review”: Create Stack by clicking on the create button at the bottom of the page.
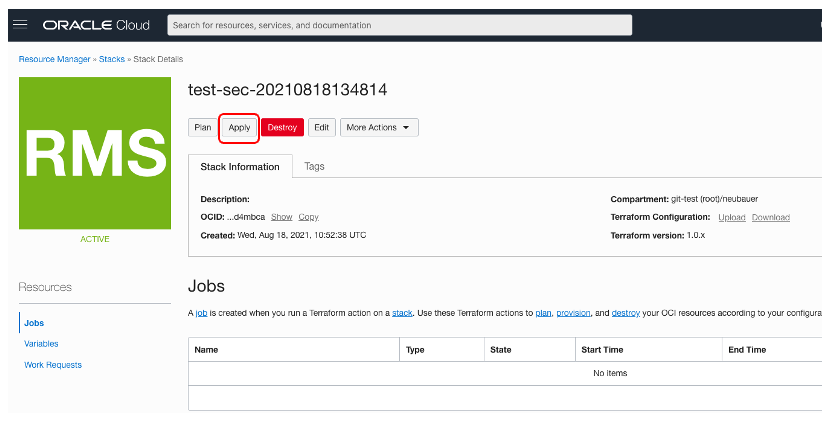
Next, we want to apply the newly created stack and allow Terraform to create the Security Rule and Network Security Group in the VCN defined by us. Select the “Apply” button as shown below.
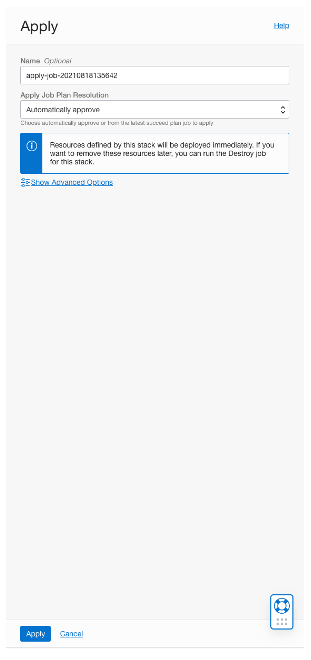
A confirmation page will be shown, here we need to click on the “Apply” button at the bottom.
After this process, it will take approximately 1 minute to complete all operations and create the networking objects. If the job submitted is successful, you will get a “SUCCEED” message in the left corner.

Now we can go to our VCN and see our new networking objects.
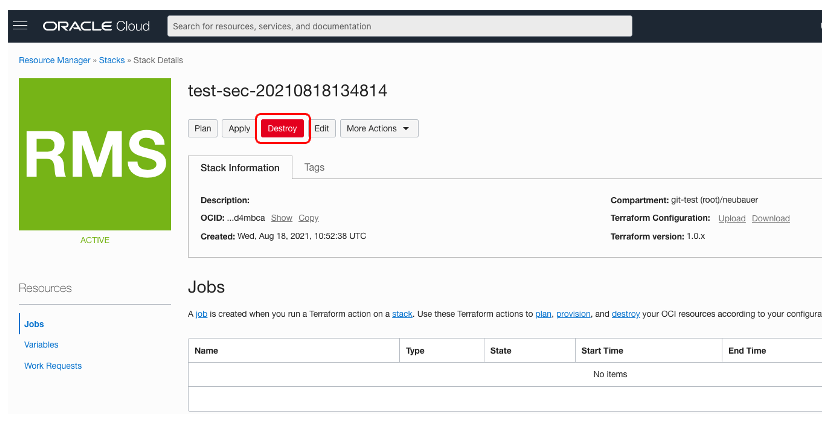
Everything that we create using OCI Resource Manager, can be automatically deleted, by clicking on the “Destroy” stack.
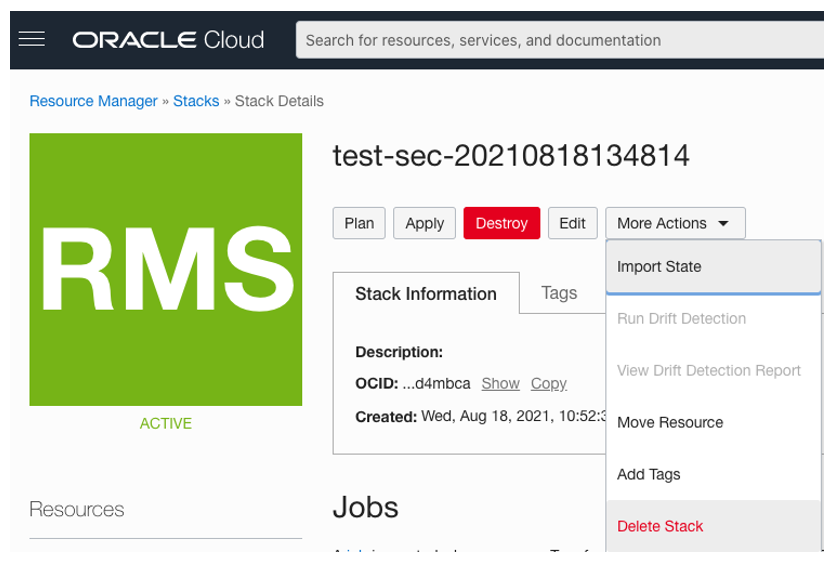
A stack can be deleted by selecting “More Actions” -> “Delete Stack”.
This concludes our test. Thank you!