Introduction
The IPsec VPN is one of encrypted connection solutions from the business’s on-prem network to the OCI cloud.
Nowadays, most customers use OCI FastConnect as their primary connection to the Oracle cloud, However, an IPSec VPN connection remains a popular solution for Disaster Recovery (DR) or small-scale data migrations scenario from physical data centers to the cloud.
In this blog, I will explain to you how you can connect your on-prem network equipment to OCI using an open-source tool, in addition to all the traditional methods that are extensively explained in our other documentations.
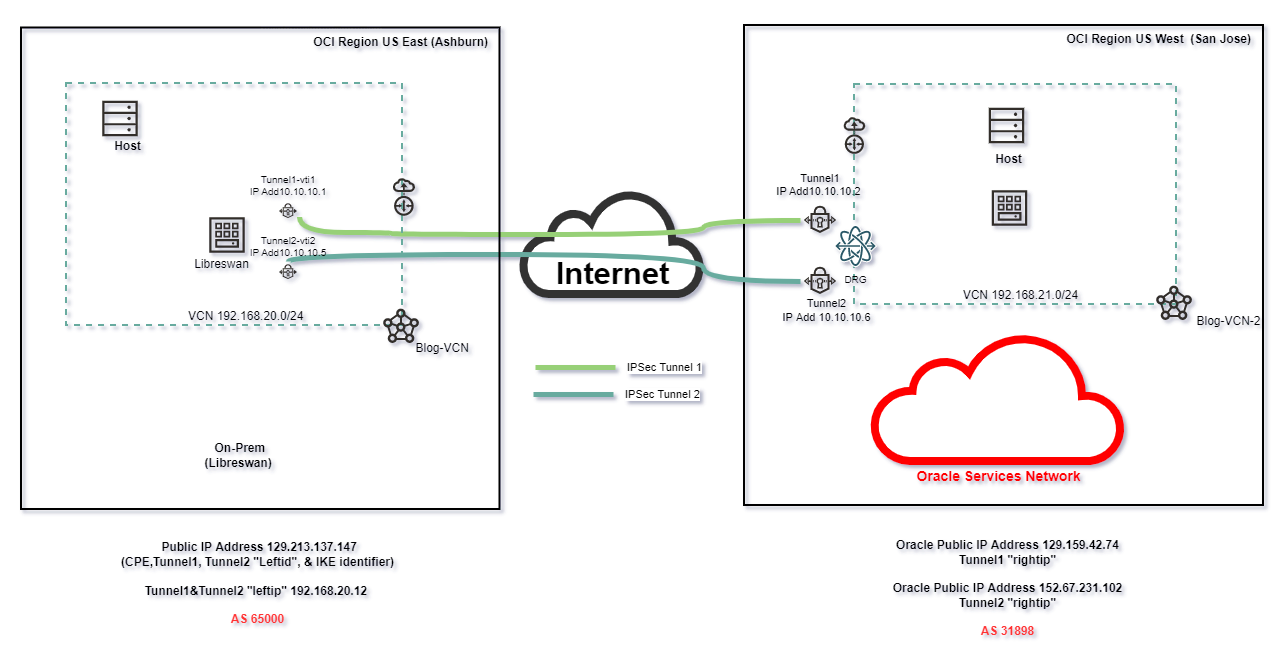
We will deploy Libreswan (Opensource VPN software) to a public Linux VM in the OCI Ashburn region and, I will create an IPSec VPN connection from the San Jose region to this Linux VM.
To set up the routing, I’ll use the FRR (Free Range Routing) an open-source network, and Internet routing protocols suite for Linux paltforms.The FRR will be used to enable BGP dynamic routing protocol between X and Y.
Prerequisites
1. Two VCNs in two different OCI regions ( I’ve chosen Ashburn for illustrated on-prem and San Jose for OCI side)
2. Linux virtual machine (VM) in the Ashburn region.
(VM info for this blog, Kernel version 5.4.17…Linux 8x86_64 x86_64 x86_64 GNU/Linux)
Launching a Linux Instance reference
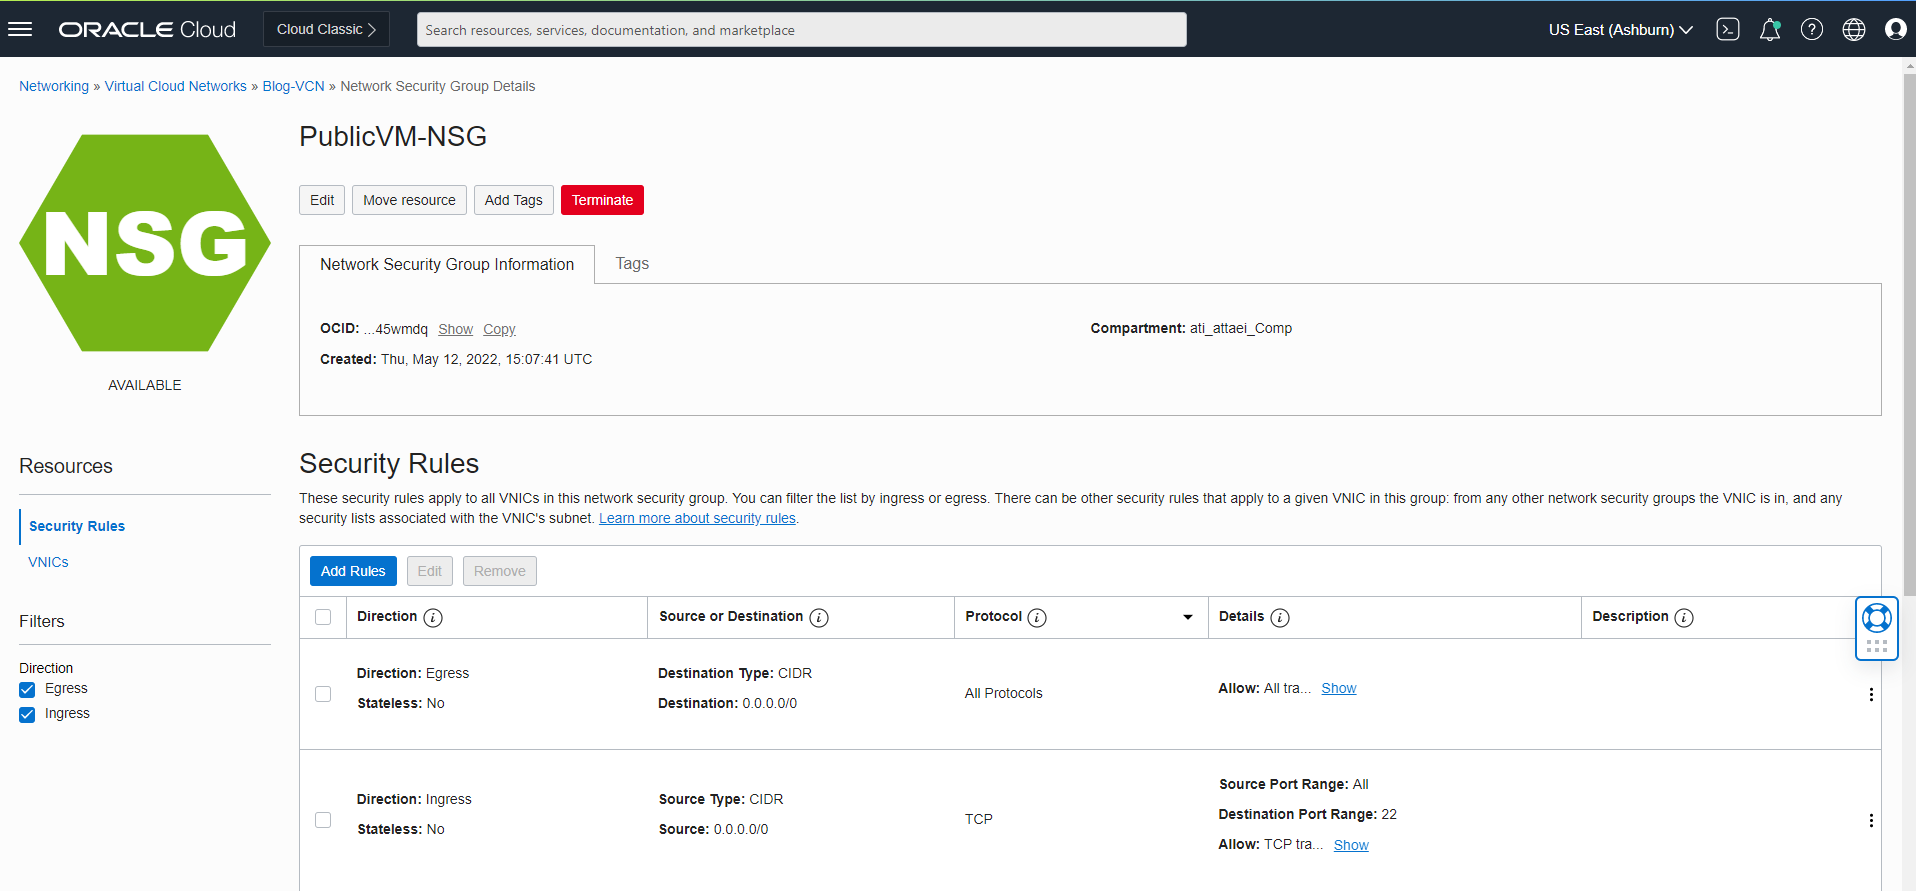
3. SSH inbound rule needs to be removed from the VCNs’ security list and added under the NSG to allow the SSH connection from outside to the VM machine.
4. Internet Gateway ( We need that for connecting to the VM in the public subnet)
5. DRGs to attach our VCNs and VPN.
IPSec VPN Connectivity process steps
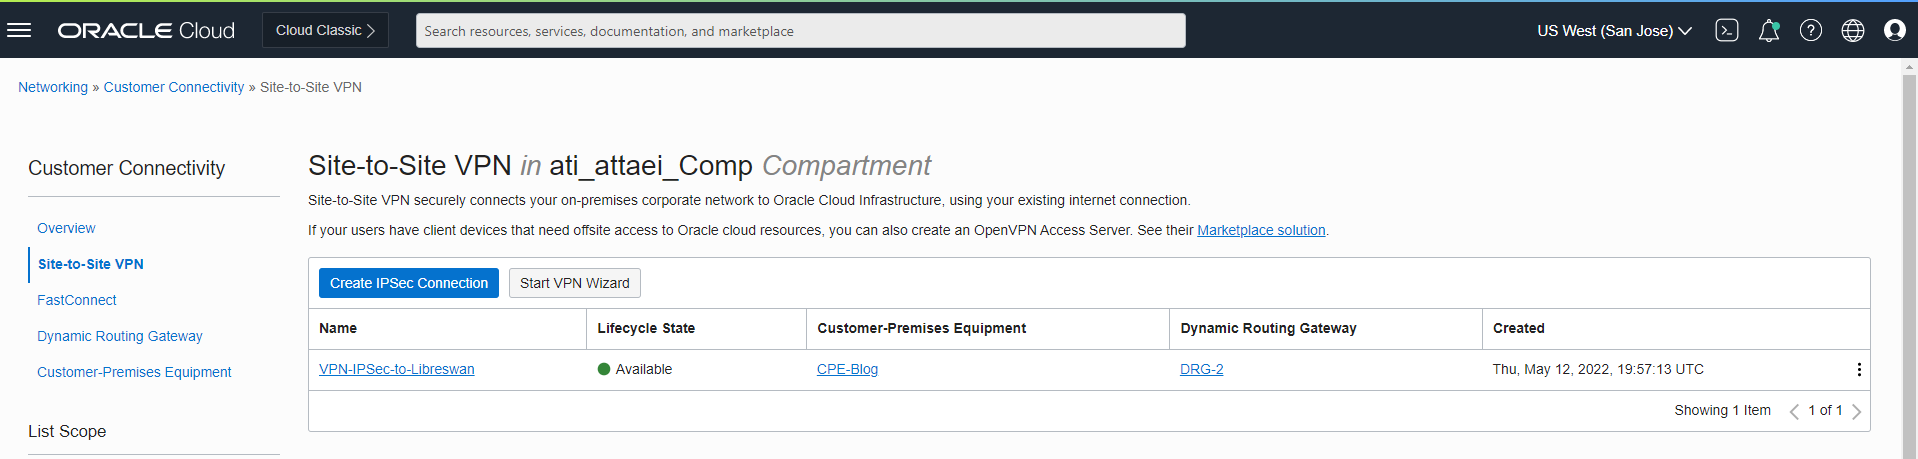
- Log in to the OCI dashboard and navigate to the Networking section on the left-hand side
- From the Customer Connectivity list click on Site-to-Site VPN
- Click “Start VPN Wizard”
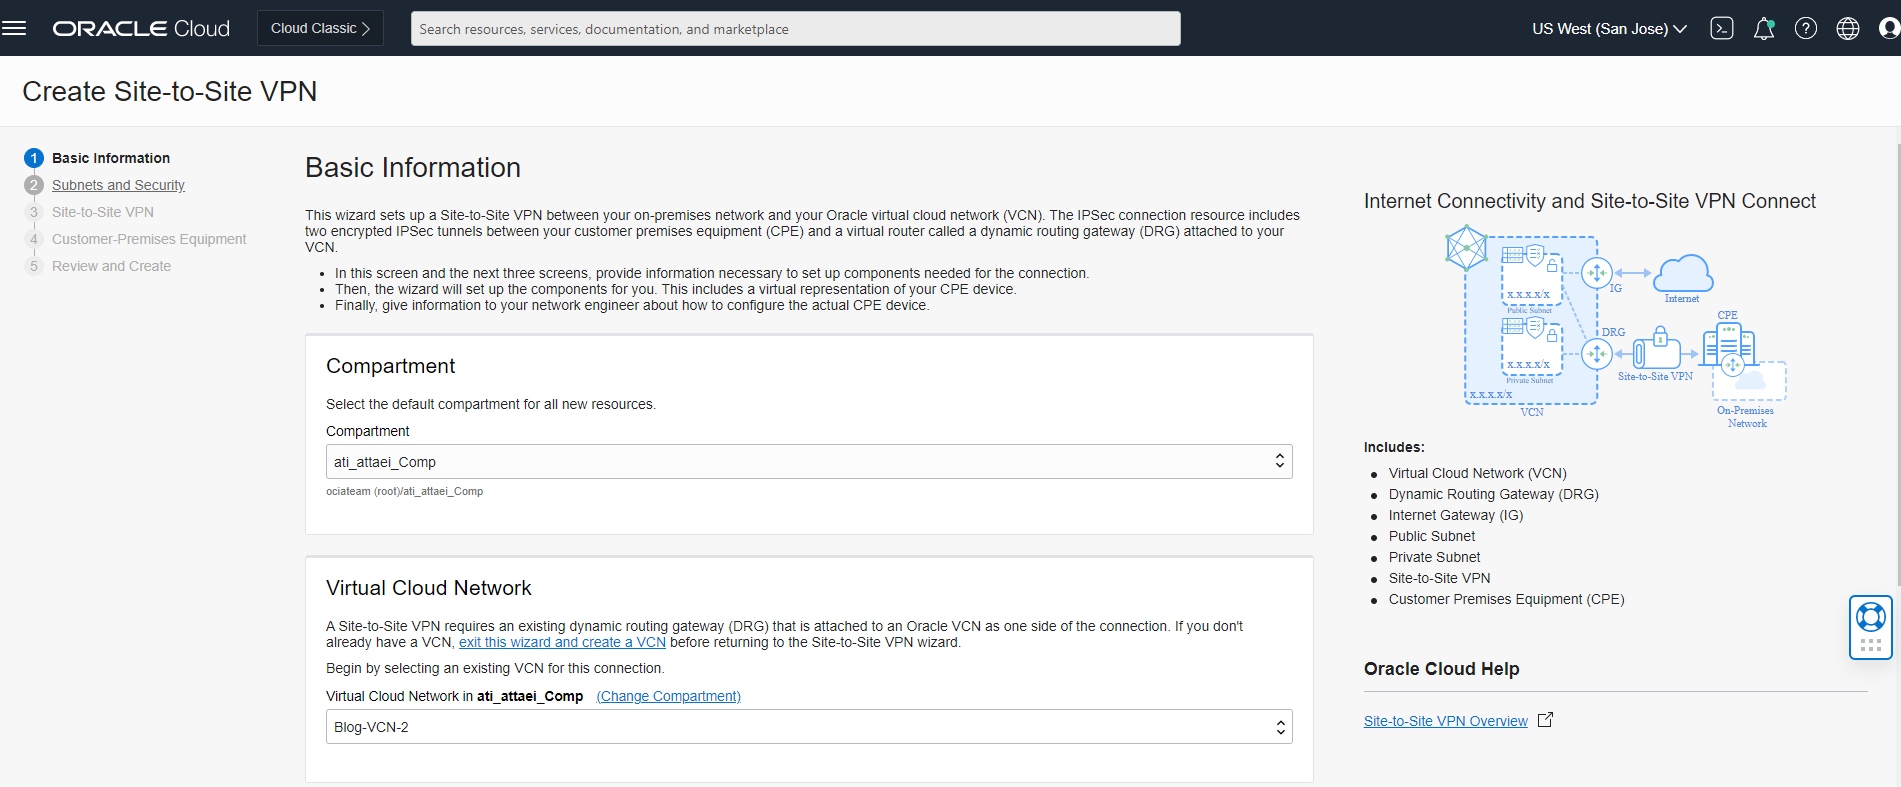
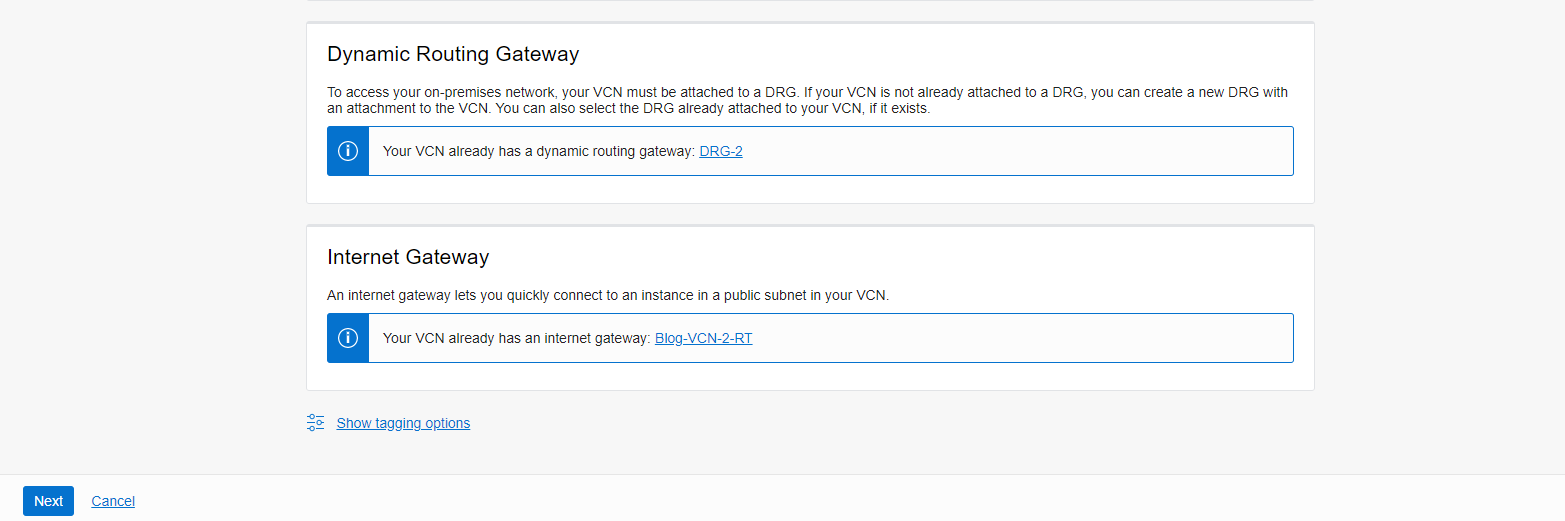
- In the Basic Information tab, select your compartment, VCN, DRG, and IGW, and click “Next”.
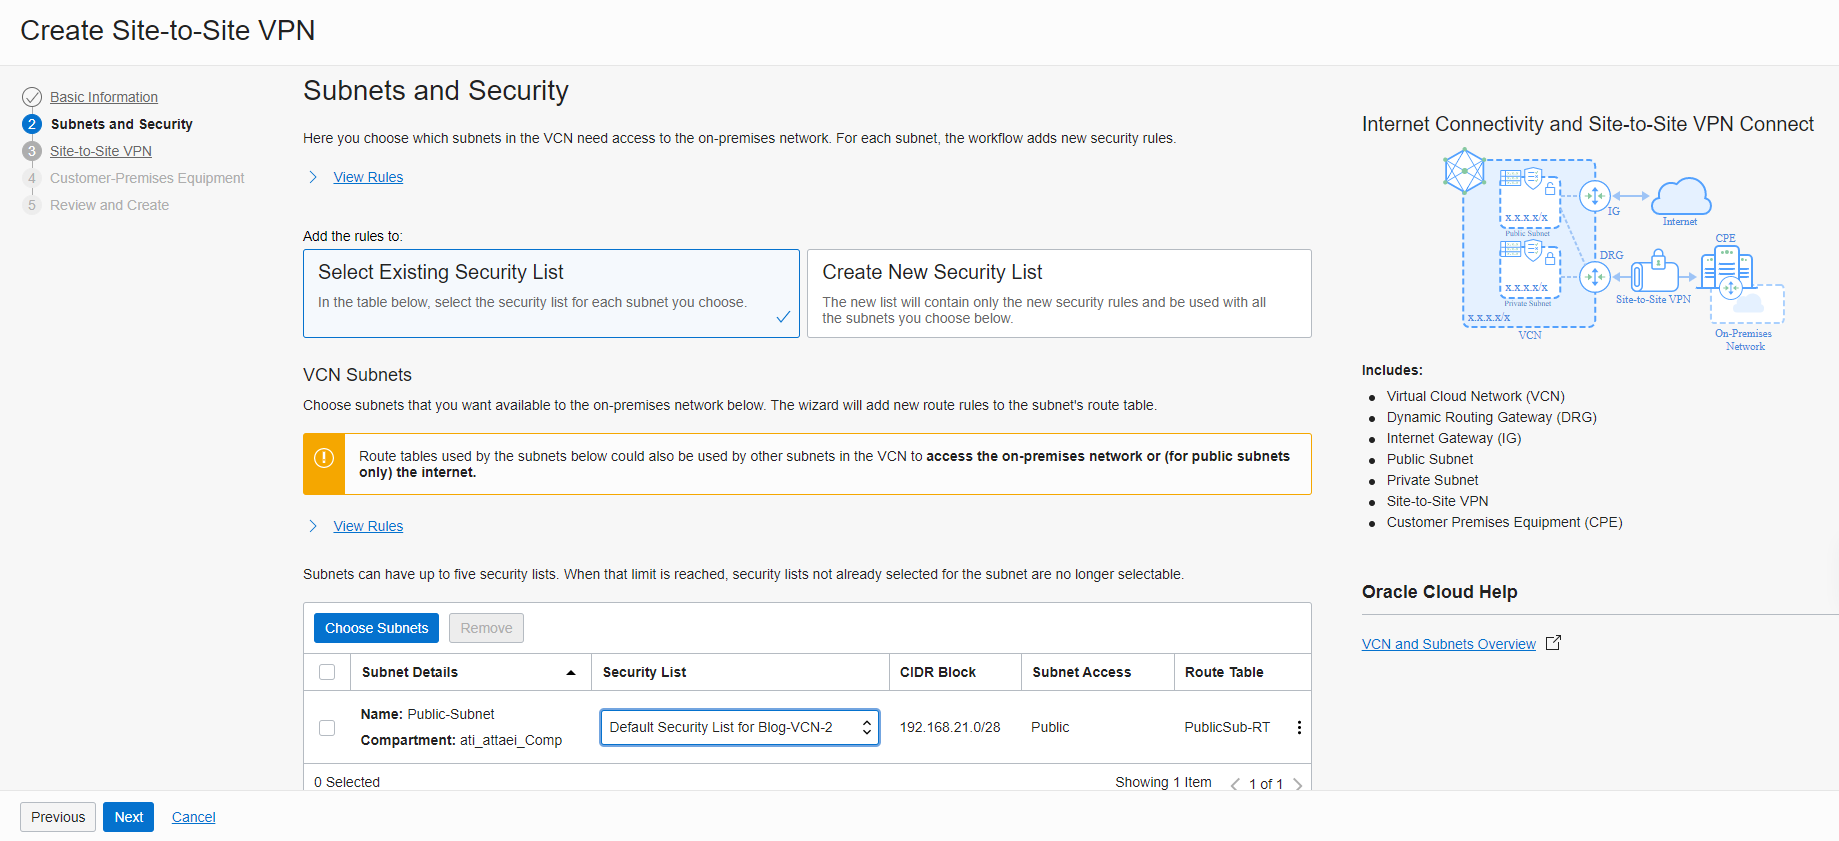
- In the Subnet and Security tab, select the existing Security list or create a new one and click “Next”.
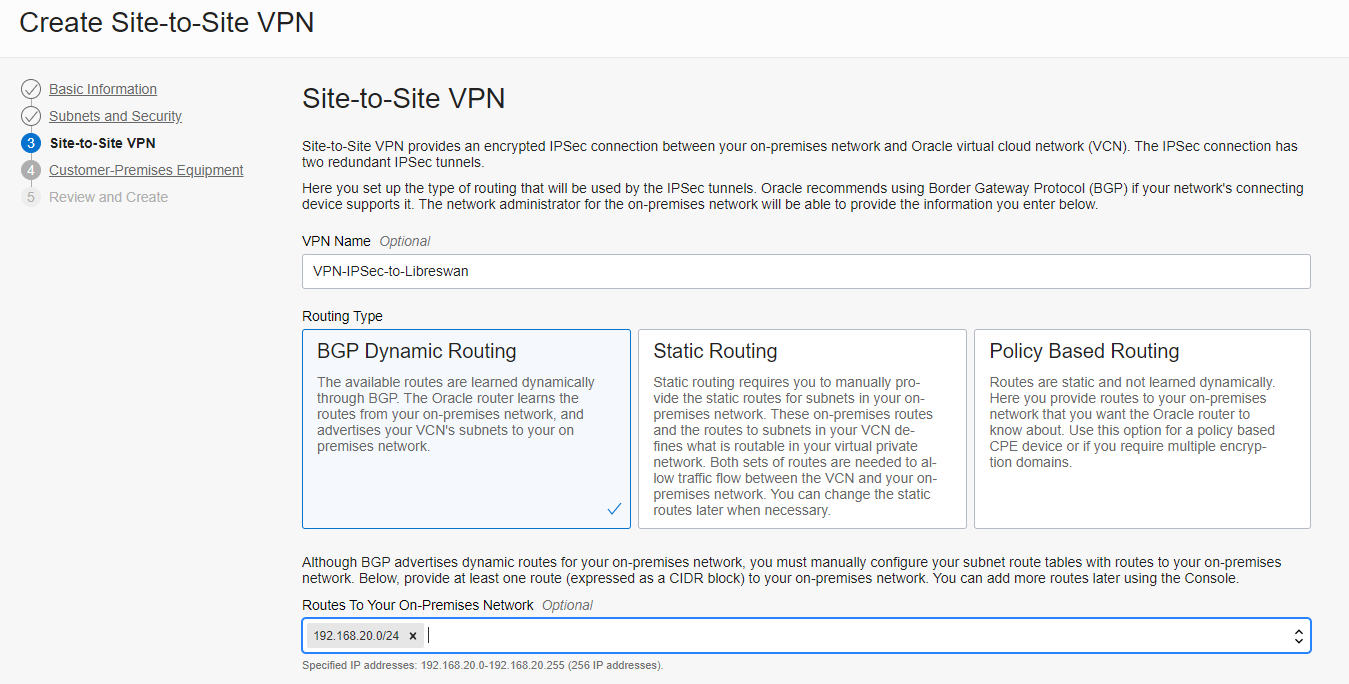
- In the site-to-Site tab, enter the VPN’s name (VPN-IPSec-to-Libreswan), select the “BGP Dynamic Routing” as a routing type, and enter the route pointing to your on-premises network that here is represented by the network behind the Libreswan tool (192.168.20.0/24)
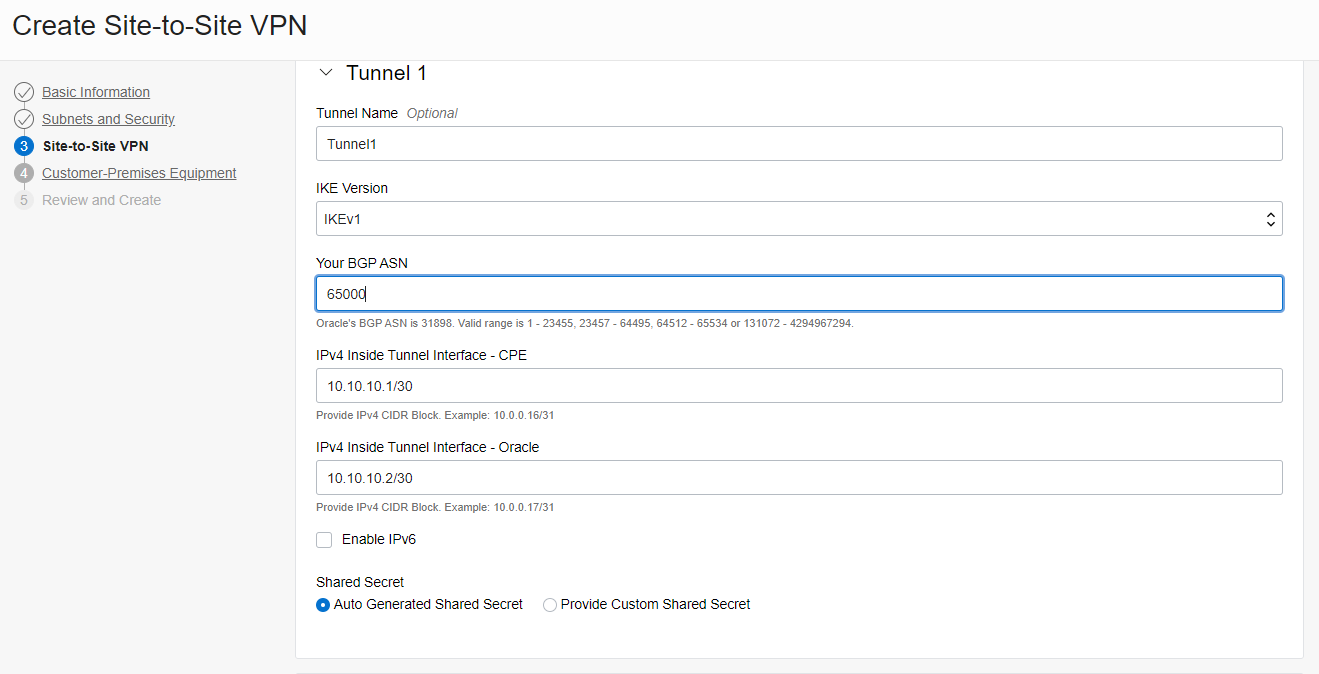
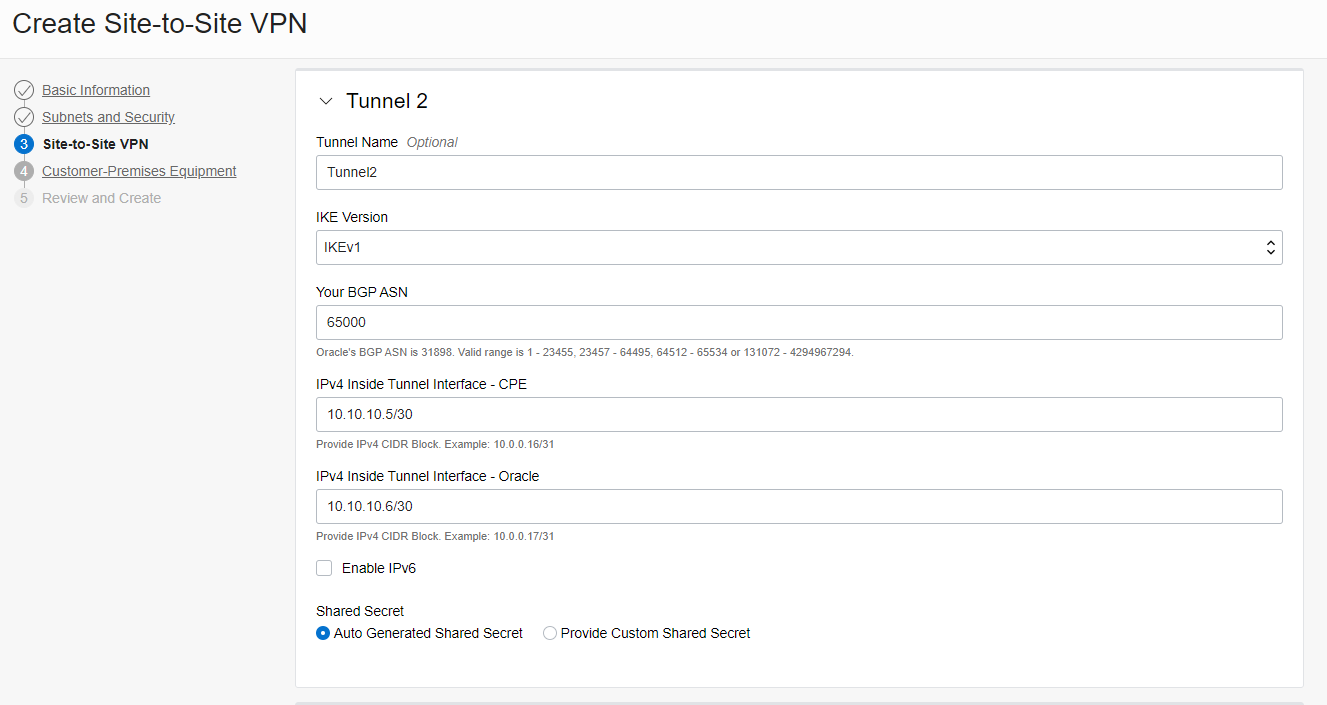
- Enter the name of the Tunnel 1 and Tunnel 2, BGP ASN, and subnets
( You can choose any range of /30 subnets)
Click “ Next”.
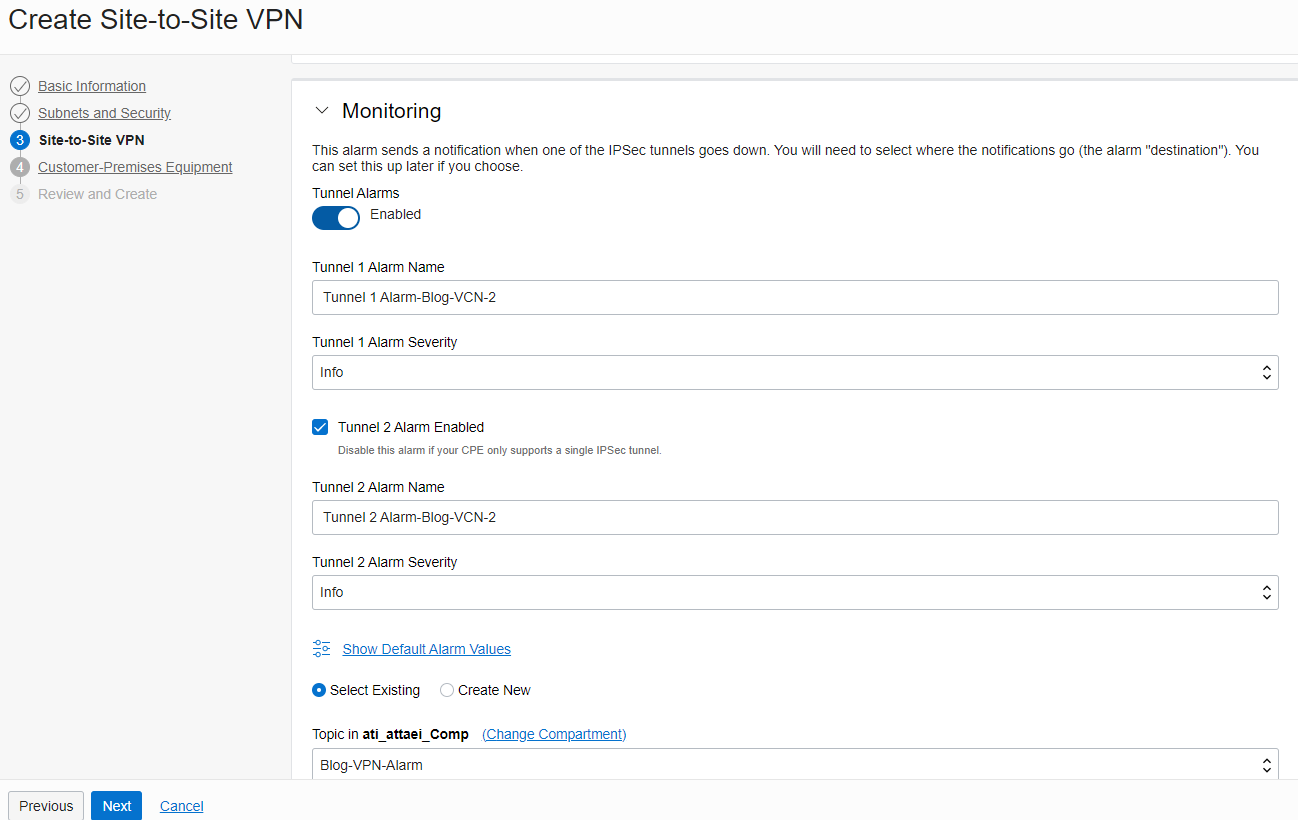
- In the monitoring section; you can enable it or leave it disabled (I enabled this option for the monitoring purposes)
And click “ Next “.
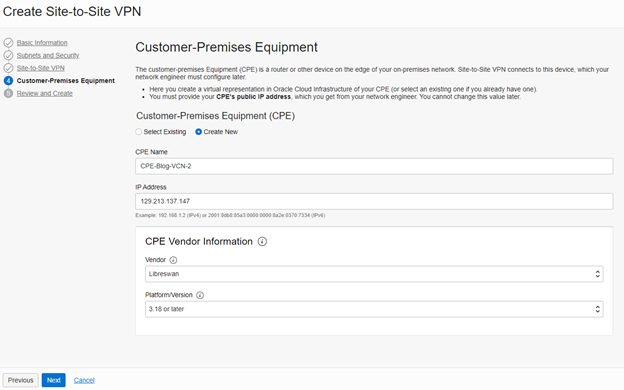
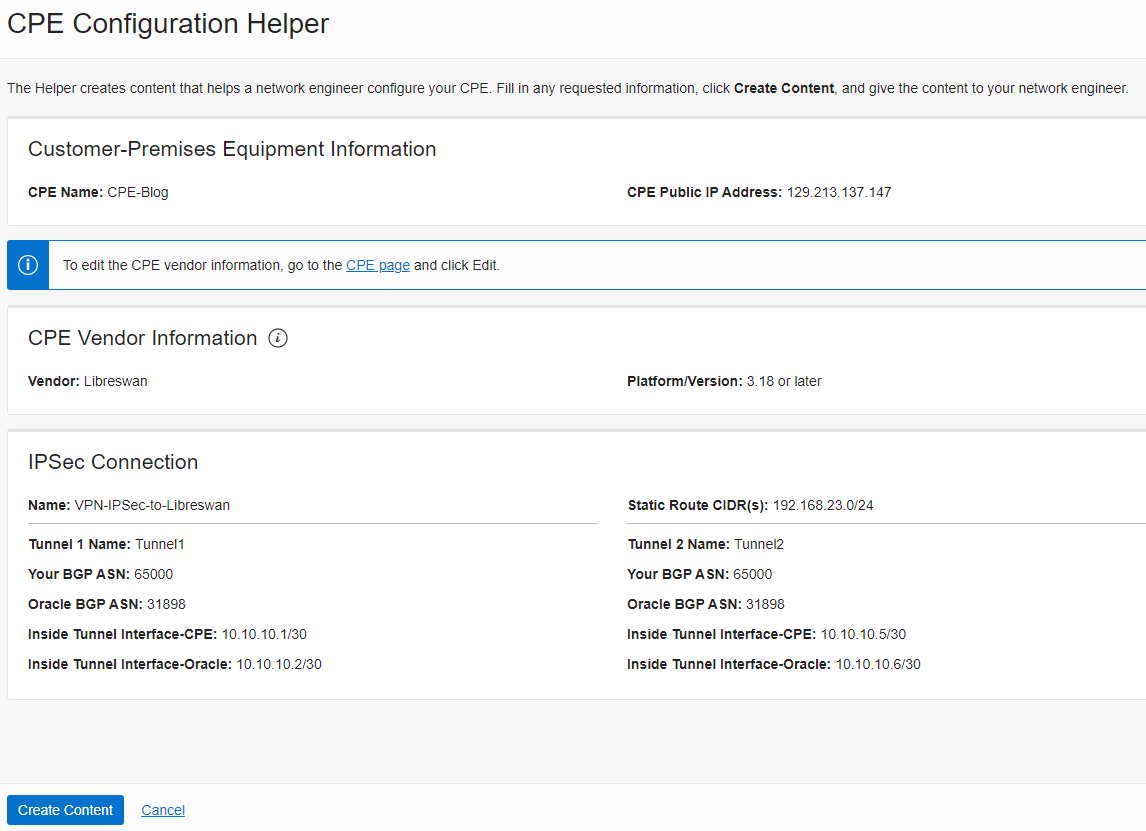
- In the customer-Premises Equipment tab, create a new CPE.
Enter the CPE’s name ; enter the public IP address of the Linux VM you created.
- CPE Vendor Information; the vendor would be Libreswan, Platform/Version 3.18 or later
And click “ Next”
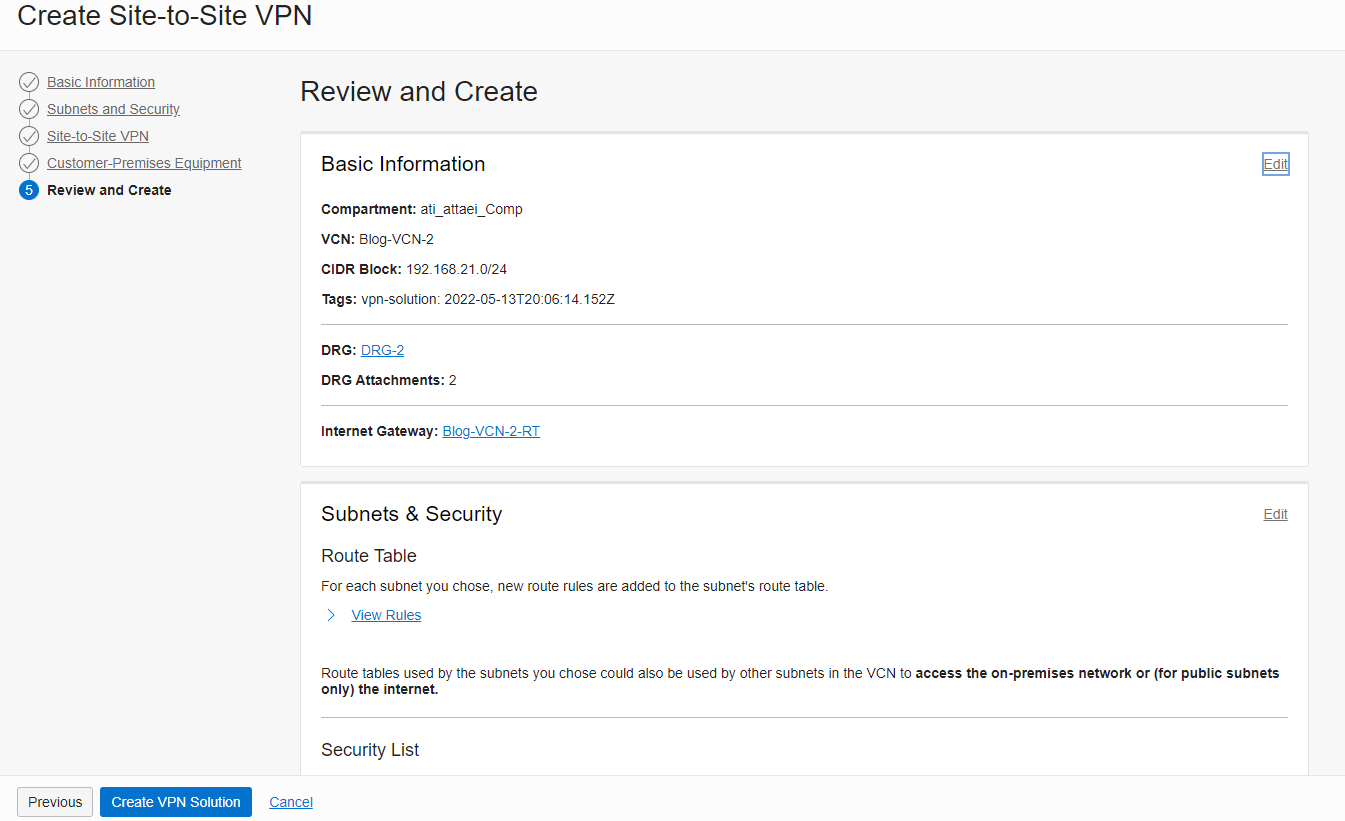
11. In the last tab; Review and click on Create VPN Solution
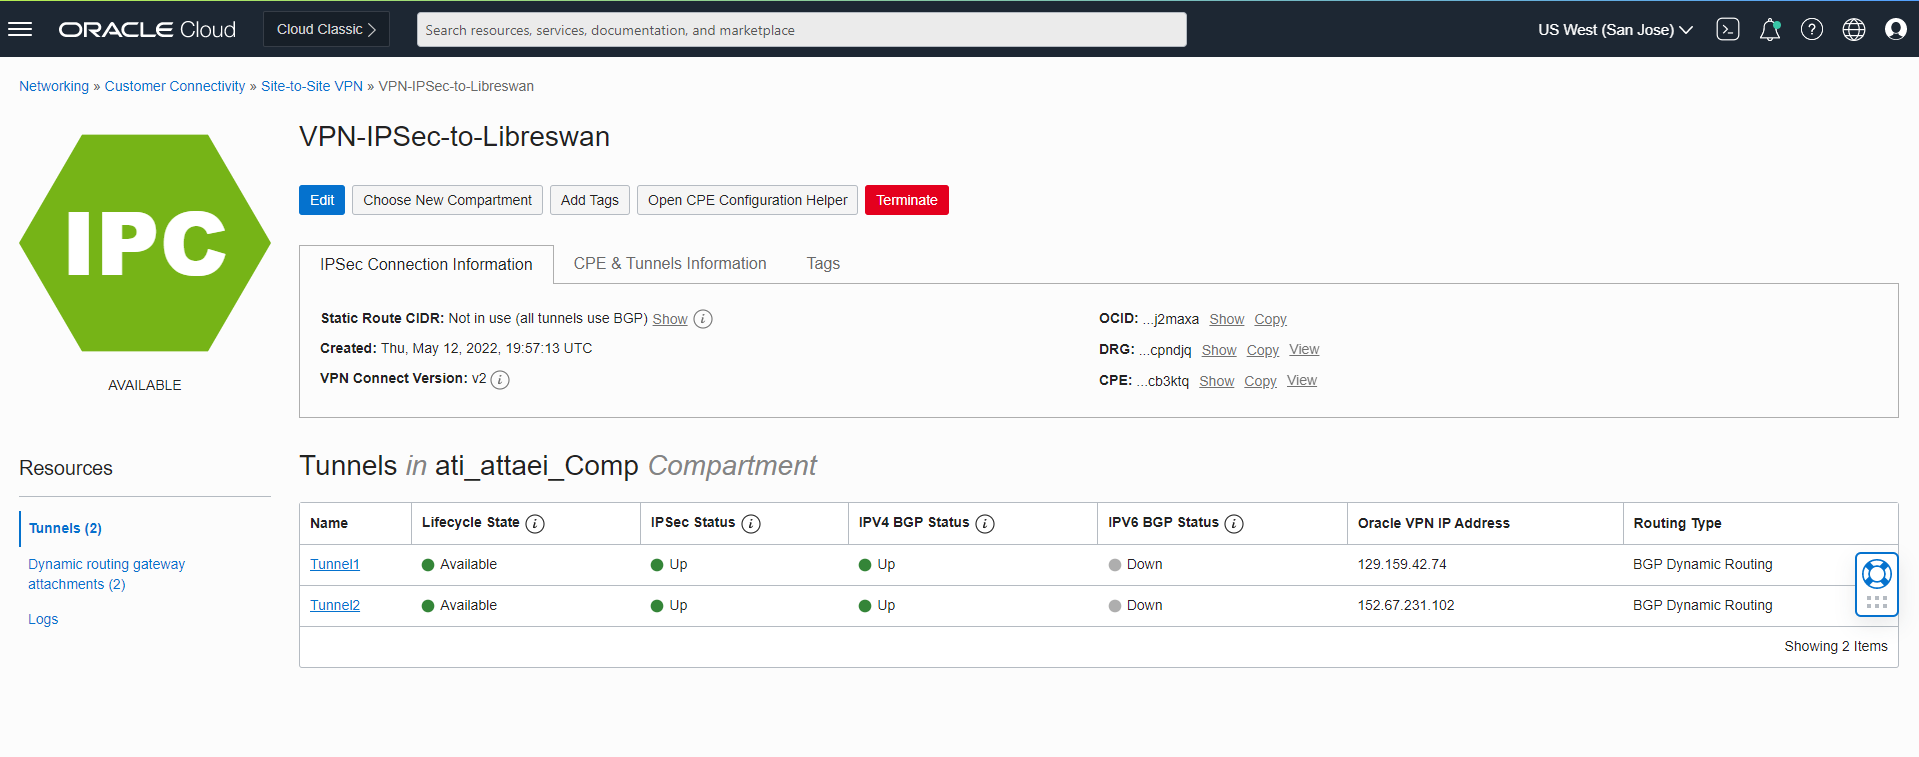
Here is how a successfully provisioned VPN connection looks like.
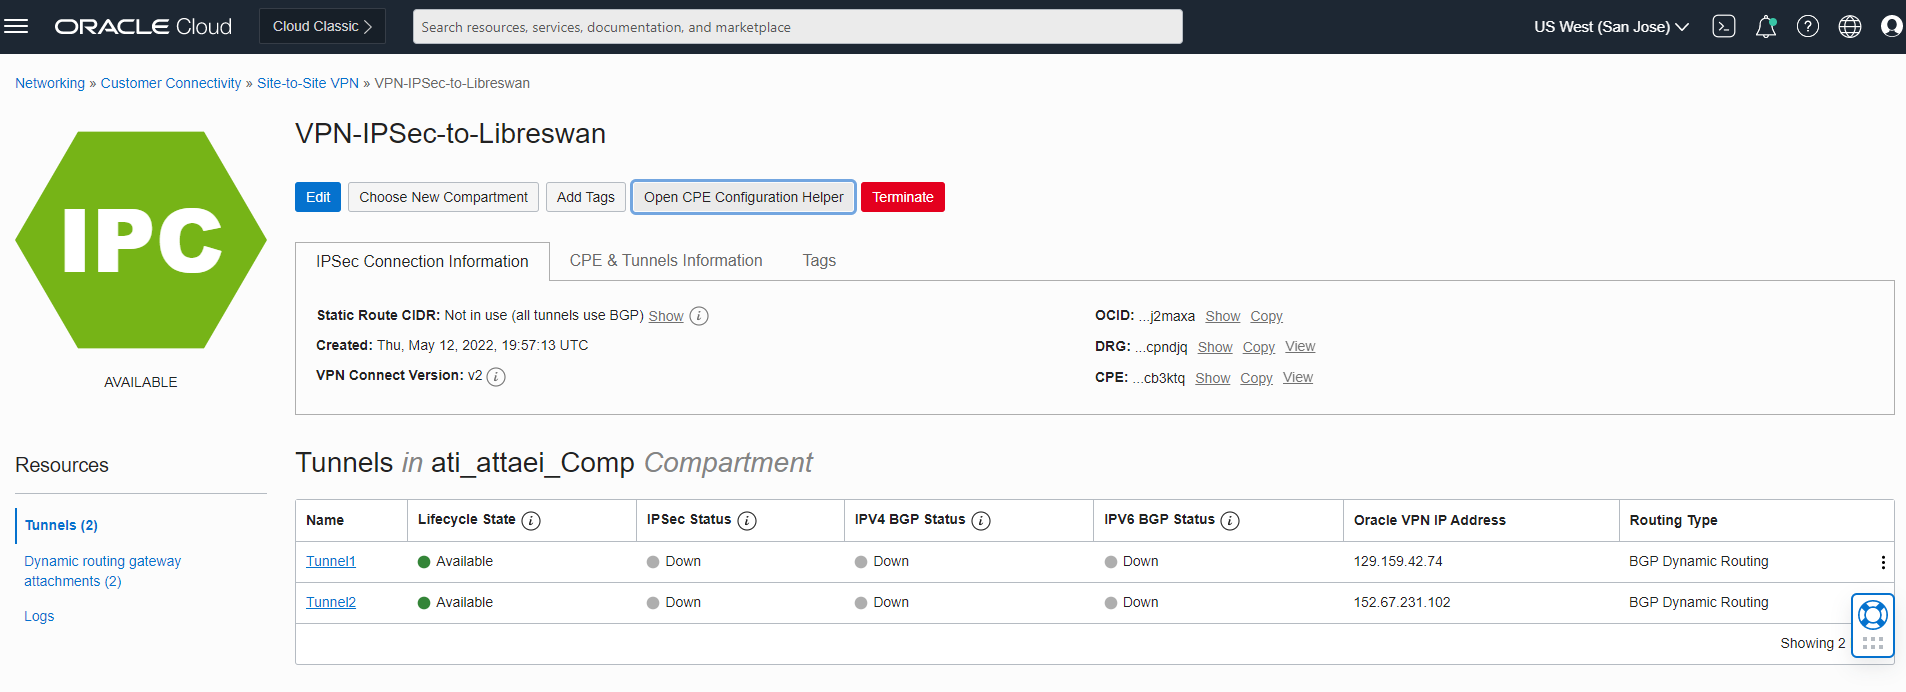
- Click on the “Open CPE Configuration Helper”
And check what we have on the OCI config side
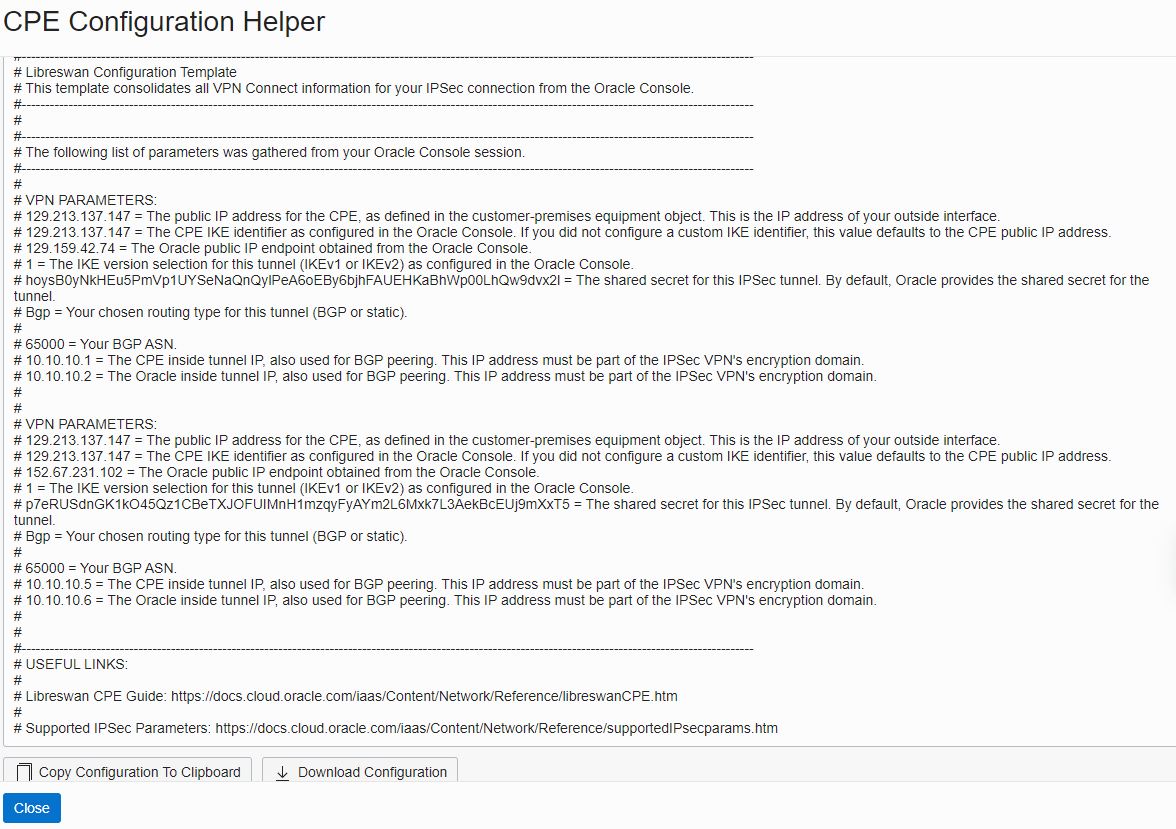
click on “Create Content” to download the configuration.
Here is what we’ll see after clicking on “Create Content”;
Now it’s a time to log in to your existing Linux VM, Install, and configure the Libreswan
Before you start, Switch the user to root
~ sudo su –

Tips:
- Click on the link below and review the configuration process published by Oracle docs
https://docs.cloud.oracle.com/iaas/Content/Network/Reference/libreswanCPE.htm
- According to the document mentioned above “You need to enable IP forwarding on your interface to allow clients to send and receive traffic through Libreswan”
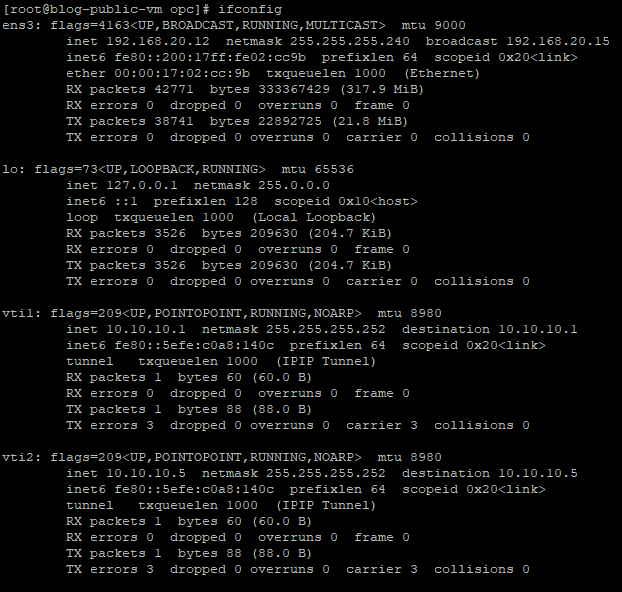
Please check your interface name by the command “ifconfig” , See below
[root@blog-public-vm opc]# ifconfig
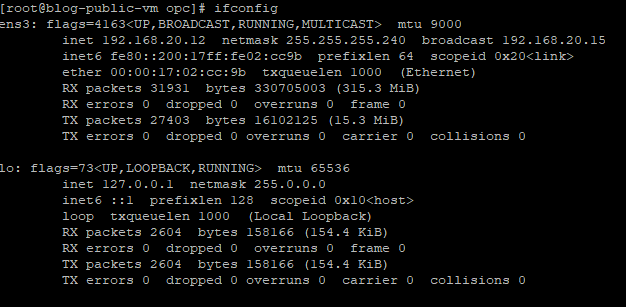
Interface name “ens3”
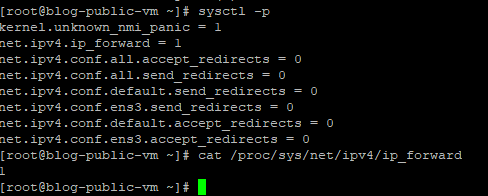
Enable IP forwarding
The “ nano /etc/sysctl.conf “ command (Hit Enter) and paste the config.
Save the config after you hit ctrl+x by typing “Y”
Now, reload/apply the config by “ sudo sysctl -p”
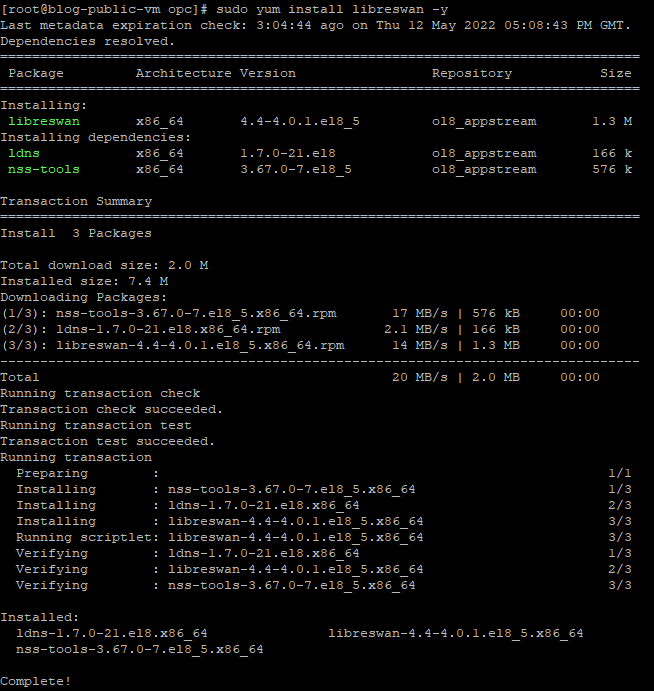
Install Libreswan (Libreswan Version 4.4)
Use the following command to install X
~sudo yum install libreswan -y
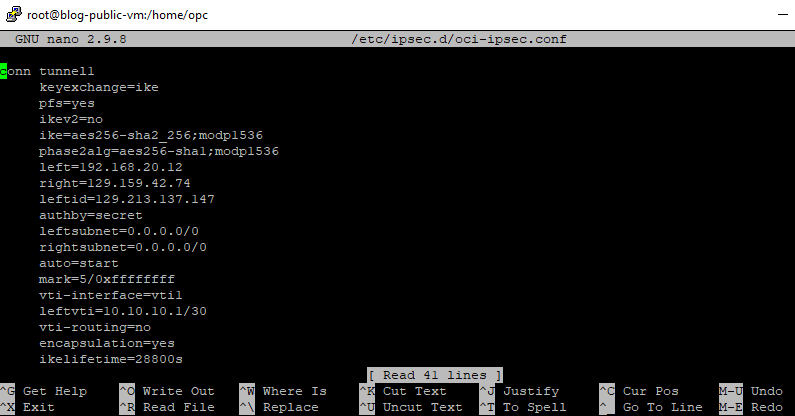
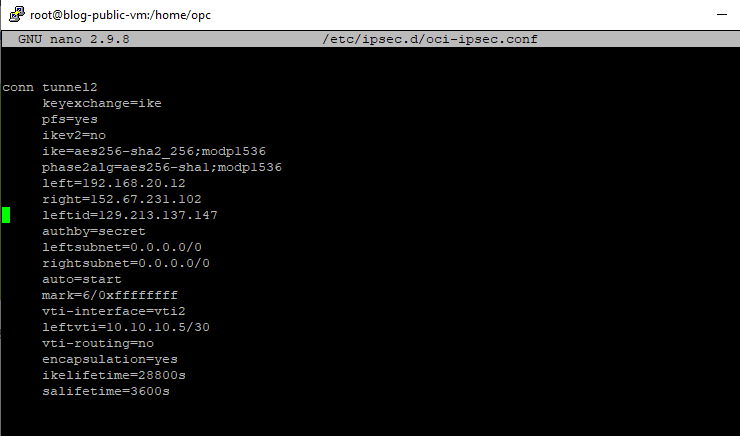
After the Libreswan install is complete we need to set up the config file by using the CPE Configuration Helper file that we downloaded earlier and then run the command below. You need to first use the editor and enter the IP addresses, copy and paste both tunnel config there
~ nano /etc/ipsec.d/oci-ipsec.conf
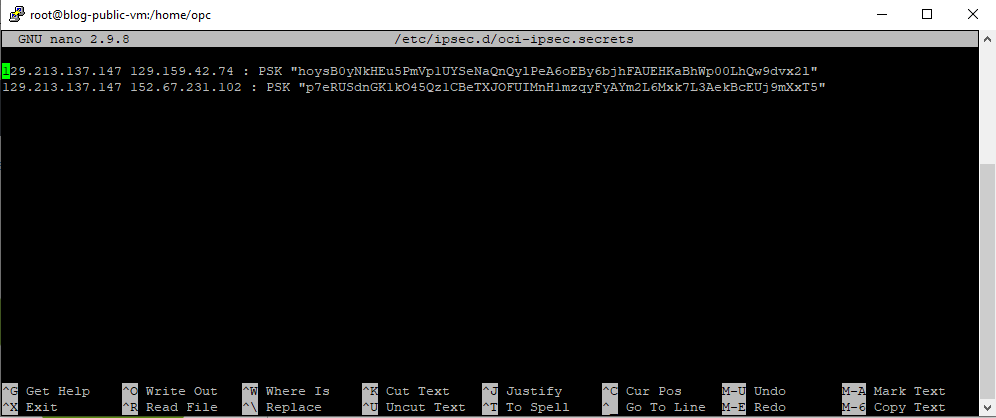
Now create the secret files . You may use the template provided by the Oracle documents to fill out the PSKs and IP addresses via CPE Configuration Helper)
And then run the following command:
“nano /etc/ipsec.d/oci-ipsec.secret”
Now it’s a time to start the IPSec Service by the command below
“ sudo systemctl start ipsec “
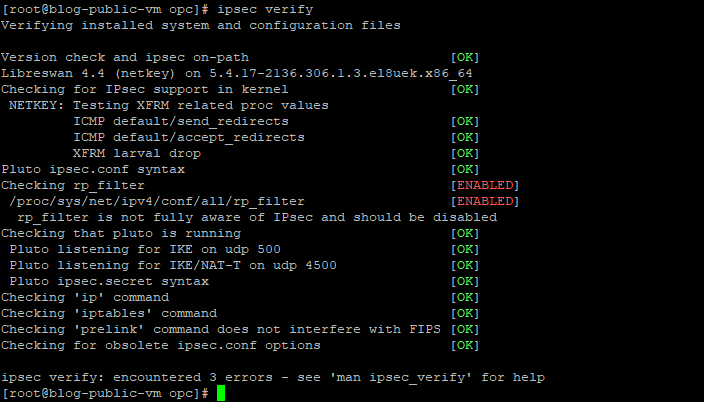
And Then Check the Status of the IPSec connection by the command “ ipsec status” and “ipsec verify”
Update the Firewall Rules
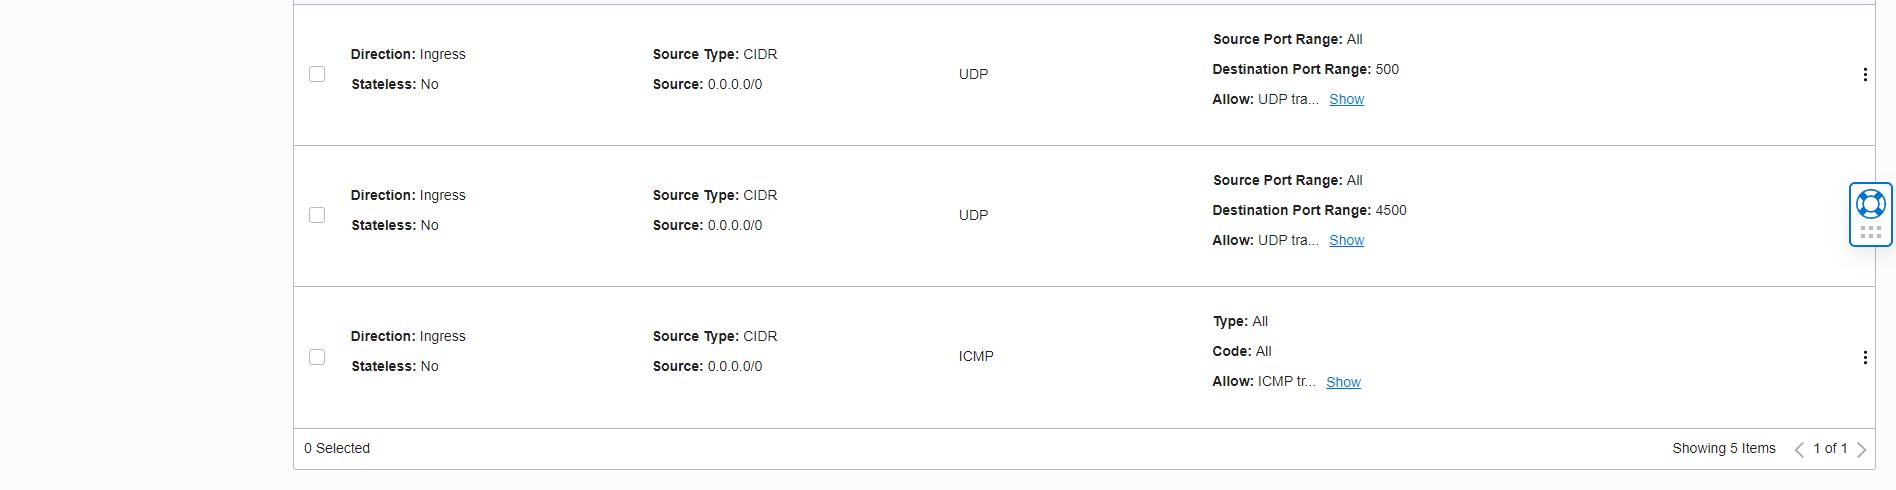
As the next step, we need to modify the NSG rules of our public Linux VM to allow IP protocols UPD 500 and 4500
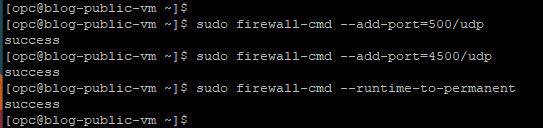

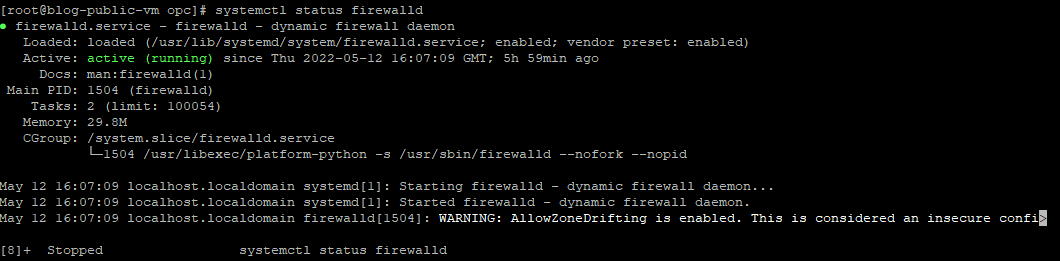
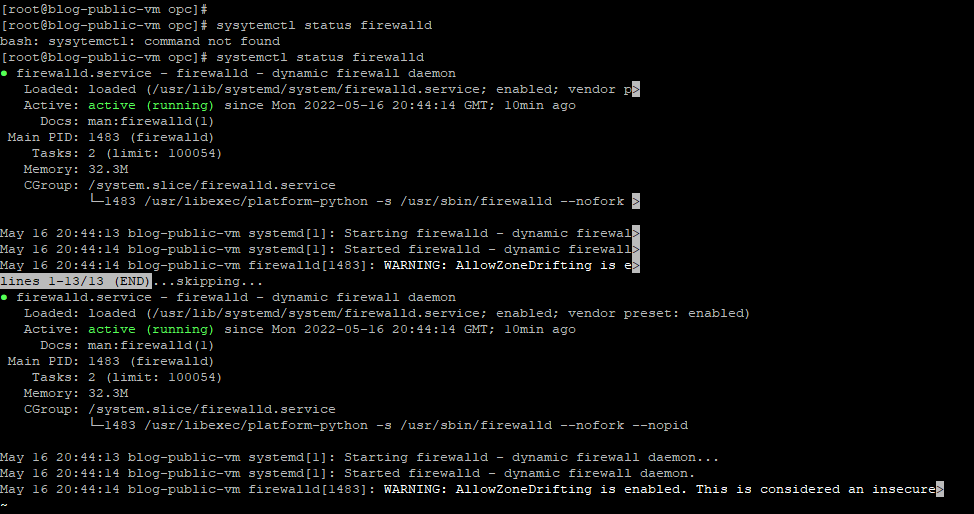
And also run the command below
systemctl status firewalld
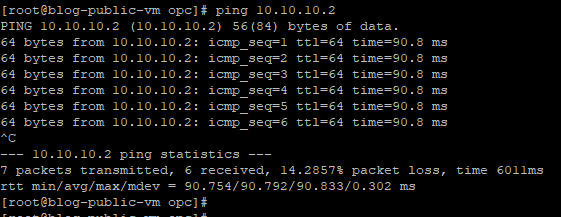
Now confirm the connectivity by pinging the private IP address of the other side of the tunnel interface.
Check the Tunnels interfaces
Check the OCI dashboard.
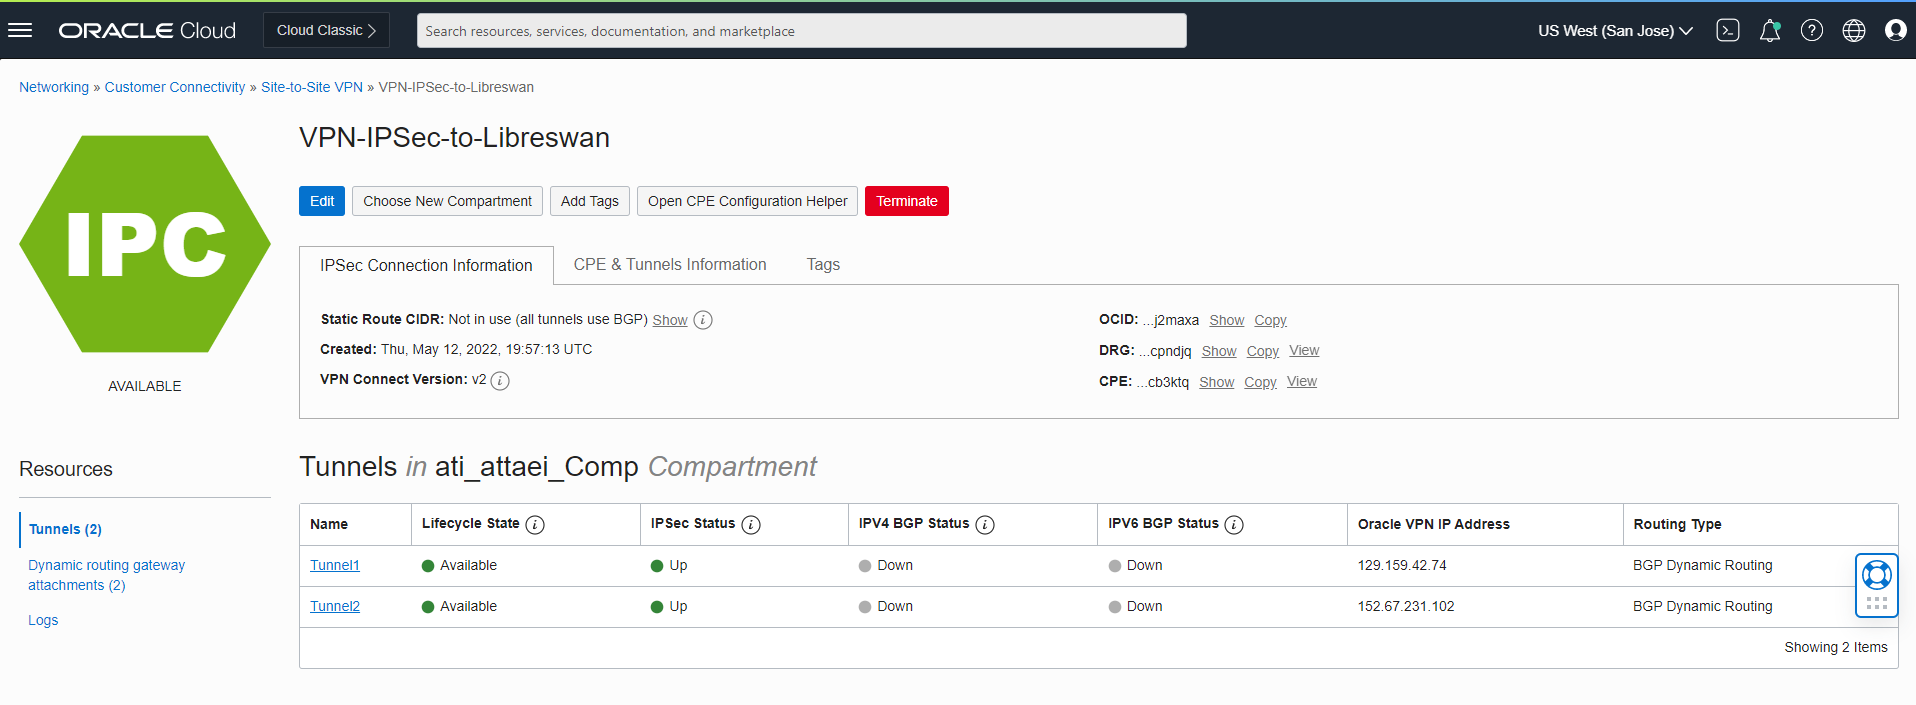
As you noticed, IPSec tunnels are up; let’s move on to the next step and install FRR to run BGP:
Install FRR (FRR version 7.5-4.e18_5.2)
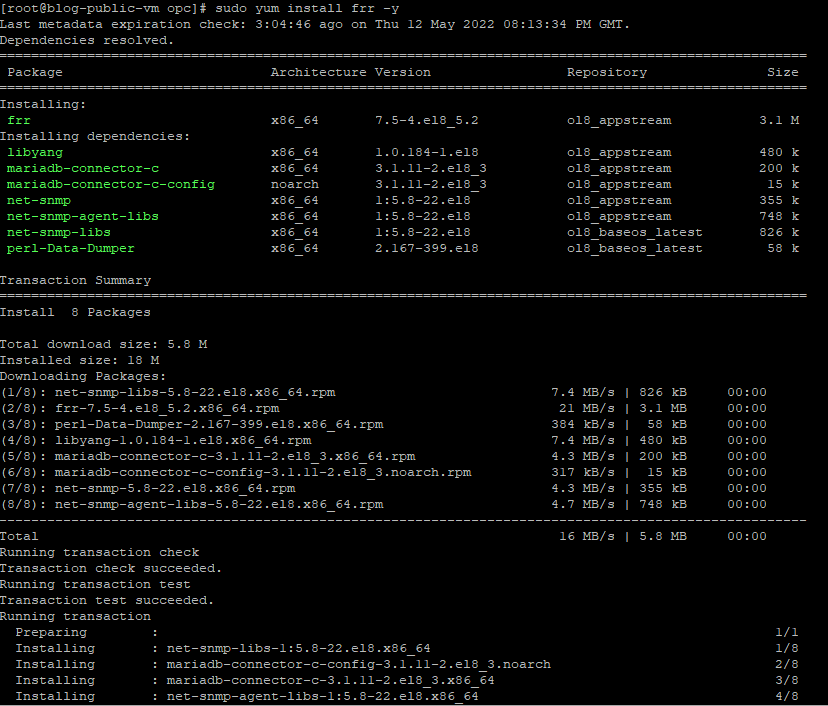
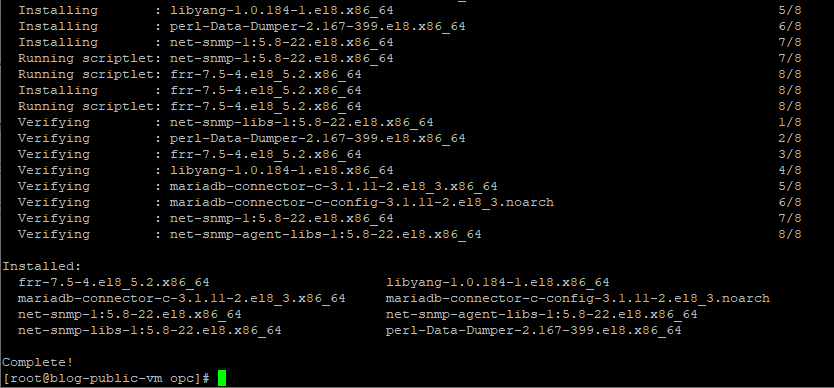
After FRR installation is completed, we need to create the bgpd config file
This can be done by using the following command:
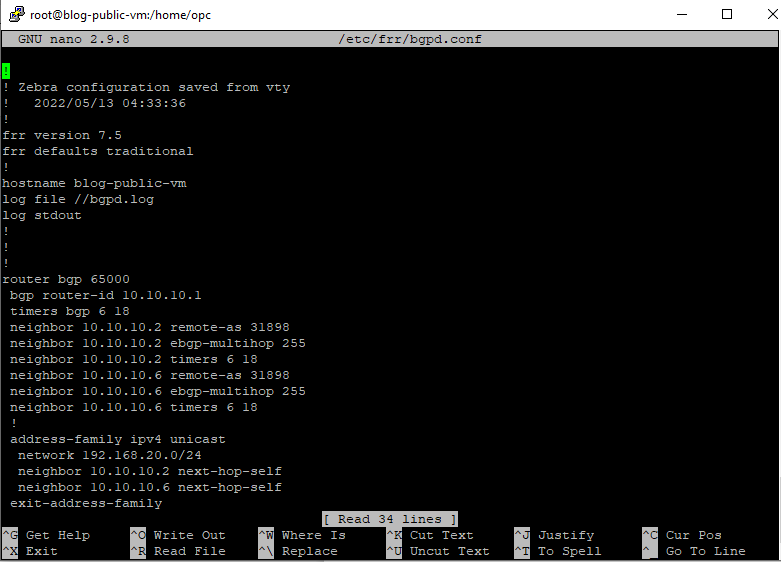
“sudo nano /etc/frr/bgpd.conf” and write down your bgp config there
See below ( Don’t forget to save, hit the ctrl+x and then type “Y” )
Tips:
- The Zebra daemon is enabled by default in FRR, and we don’t need to run the commands.
“systemctl start zebra” and “systemctl enable zebra” manually like we need to do in Quagga.
- The BGP routing protocol also won’t need to enable or started by the commands
“systemctl start bgpd “ and “systemctl enable bgpd” manually like we need to do in Quagga.
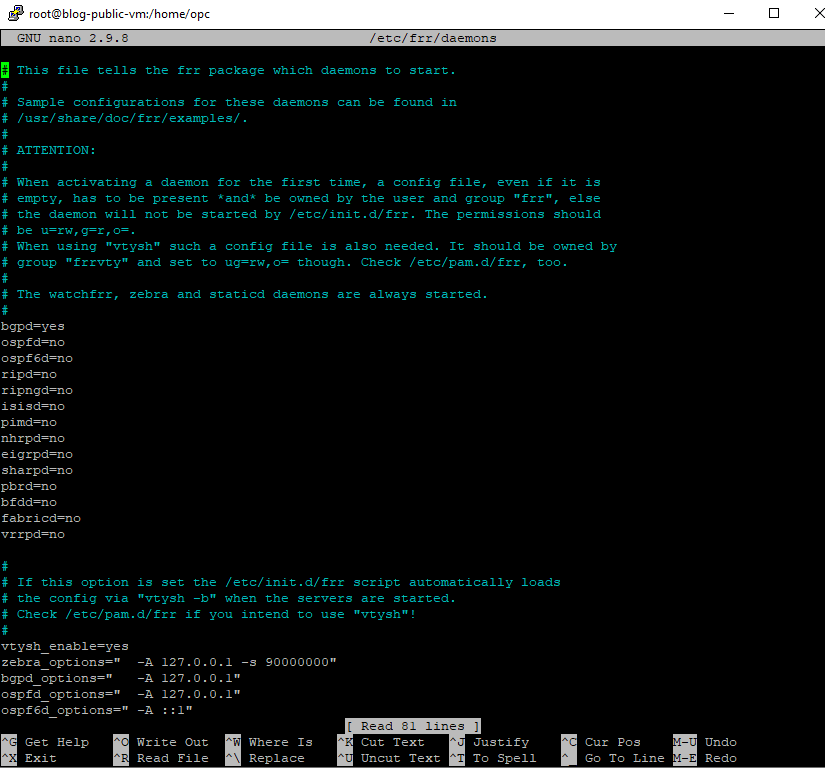
- To enable any daemons in FRR (in our case BGP ), before we start the FRR routing, we need to edit the daemons file by the command below
“ sudo nano /etc/frr/daemons”
Note : bgpd is set to No by default, as you see here I changed it to “Yes”
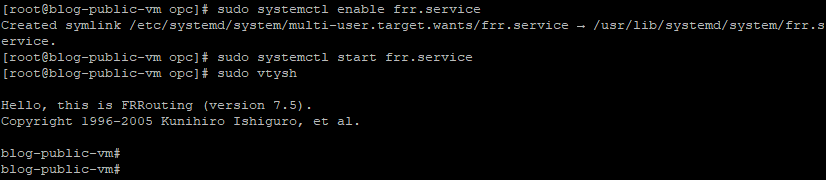
After exit and save the change , Please start the FRR by the commands below
~ sudo systemctl enable frr.service
~ sudo systemctl start frr.service
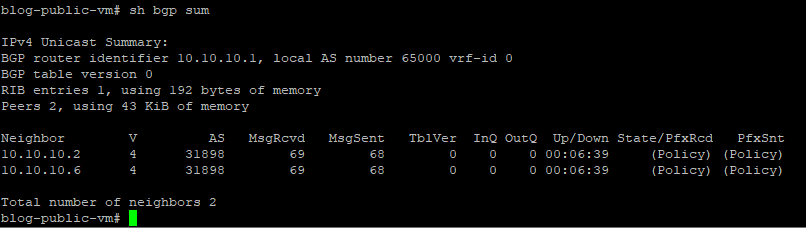
And run the vtysh command to check out the BGP neighbors and the configurations details up to this point:

As you can see here, our BGP neighbors are established
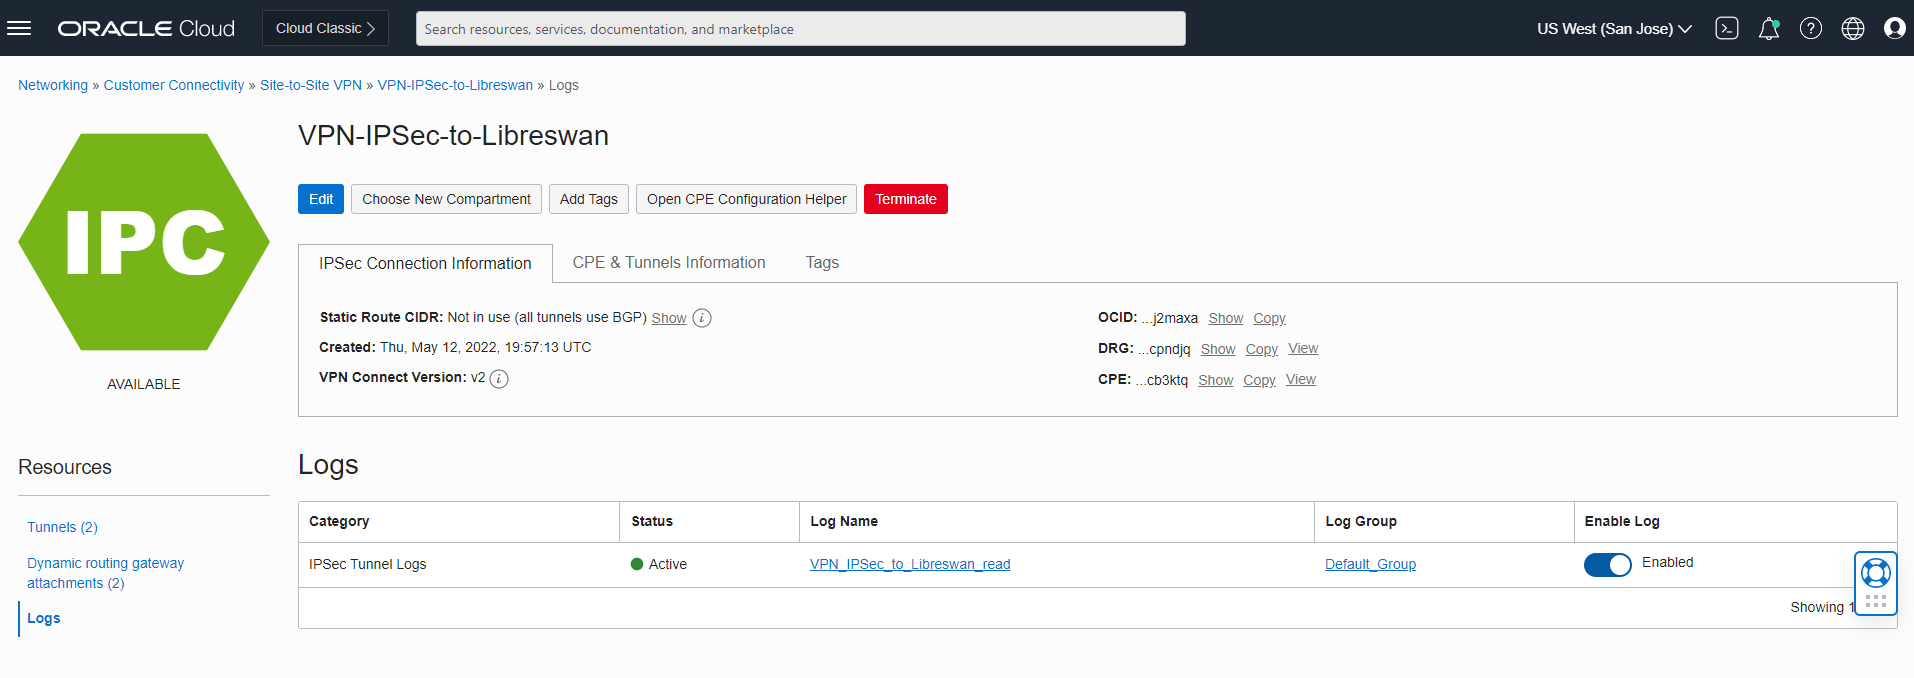
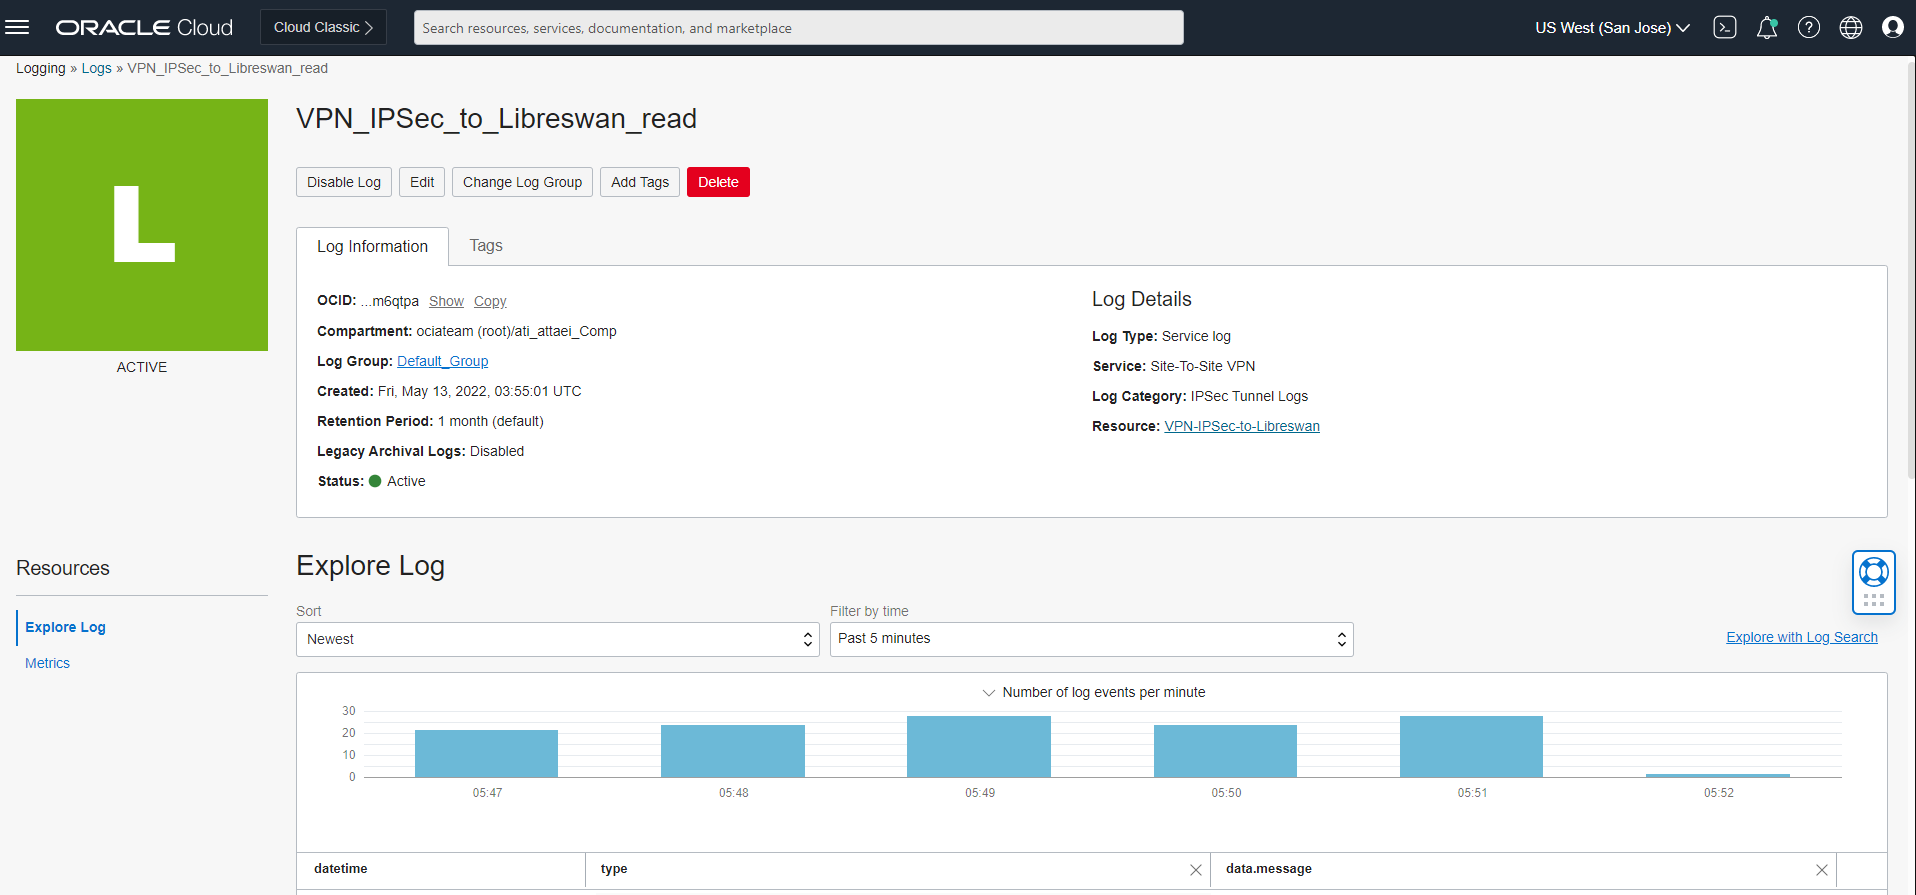
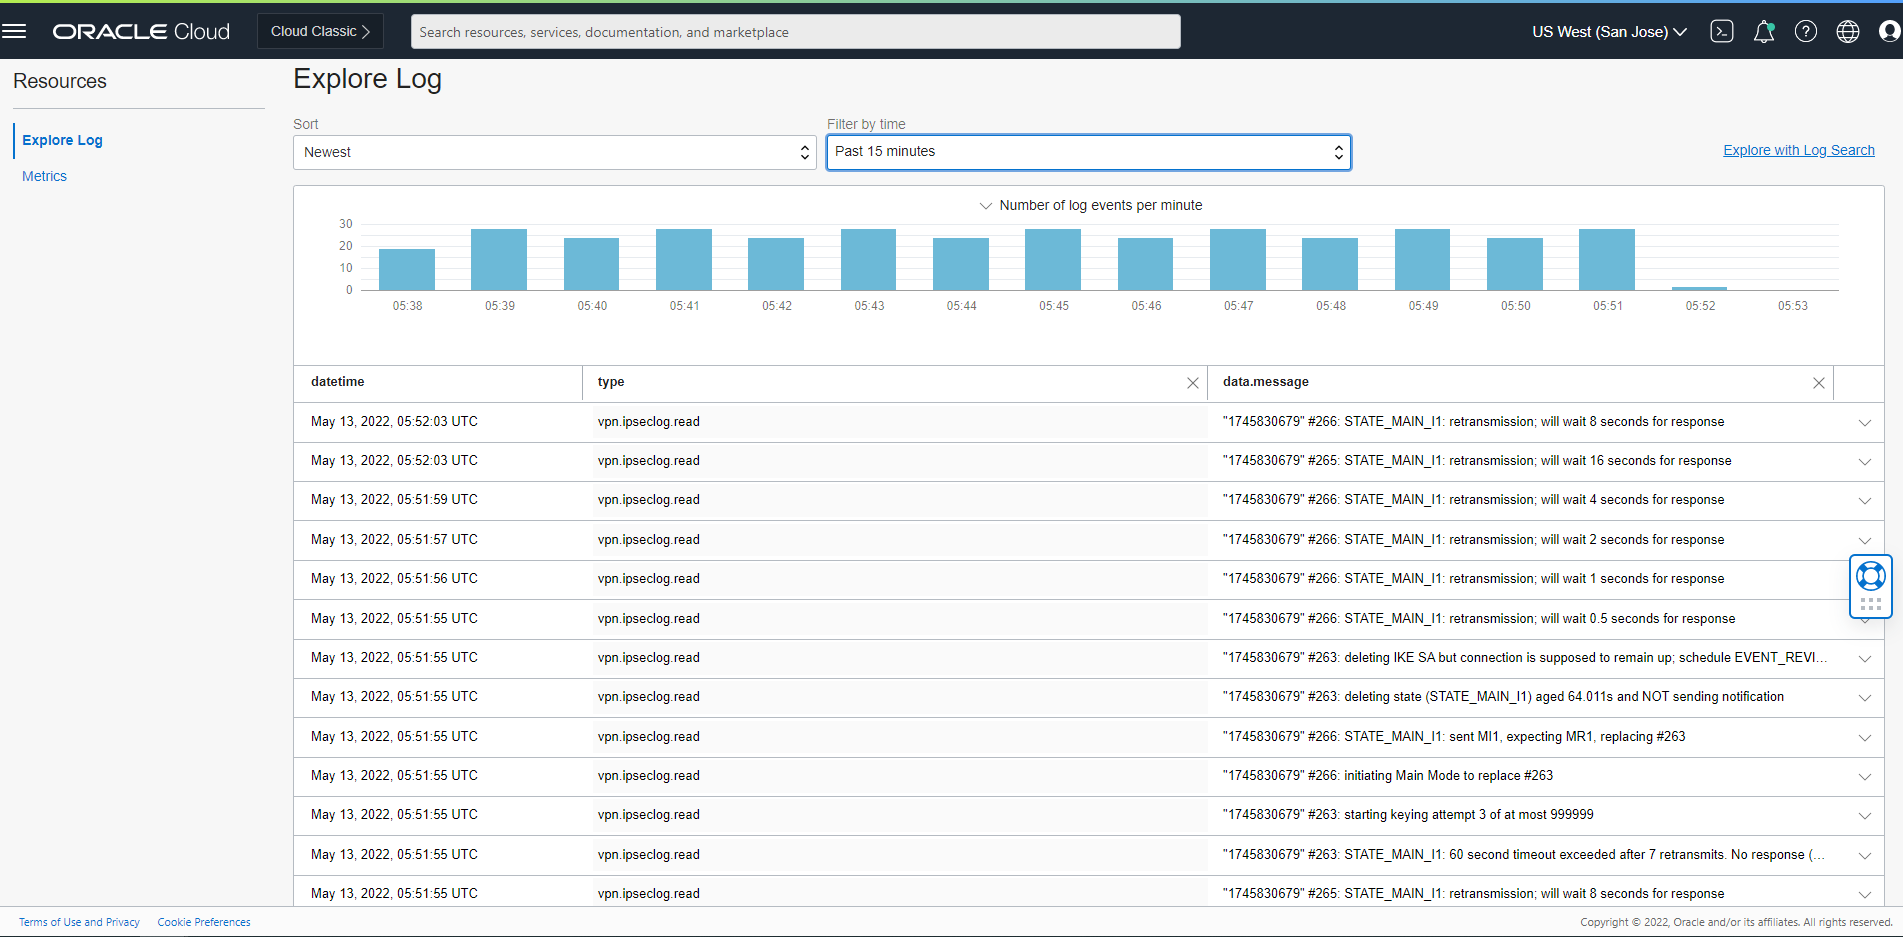
We also can use the OCI GUI and create the logs file to enable monitoring:
I hope you enjoyed it!
Atefeh (Ati) Yousefi-Attaei