Introduction
Every time a customer is created in System X, it should trigger an integration which creates the customer in System Y as well.
This is a very common requirement, and different applications address it differently. For example, Oracle Sales Cloud (OSC) and E-Business Suite (EBS) provide business events; Commerce Cloud has WebHooks. You subscribe to these events or register a webhook and a message is received, which may be used to trigger an integration. In this article, I will demonstrate how the same can be achieved in NetSuite and Oracle Integration Cloud (OIC).
Note: To follow the post, basic knowledge of NetSuite, OIC, OSC and JavaScript will be helpful, but not necessary.
Detailed Article
The high level steps involved are:
- Create an OIC Integration which exposes a REST endpoint, transforms the incoming request payload, and invokes OSC to create an Account.
- Create a UserEvent SuiteScript which gets triggered after a customer record is committed in NetSuite database. It invokes the OIC REST endpoint and passes the necessary payload
- Create a script record and associate it with the Customer. This sets the link between the customer save action and the script we created
Create an OIC Integration
In Integration Cloud, create a REST connection:
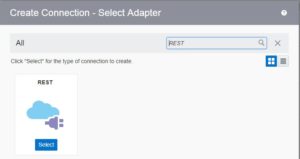
Search and Choose the REST adapter
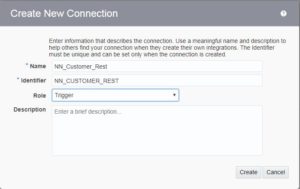
Provide a Name for the adapter and choose Role = Trigger. Click Create
OIC shows a message confirming the connection was successfully created. Click Test to complete the creation flow.
OIC shows a message confirming the connection was successfully tested. Save and Close to come out of the Create Connection wizard.
Similarly, create a connection to Oracle Sales Cloud. For details on the steps, please refer to this post.
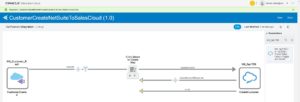
Now, we will create an integration which will expose a REST Endpoint and will transform the data received from the REST endpoint to Oracle Sales Cloud format and invoke a createAccount operation to create an Account.
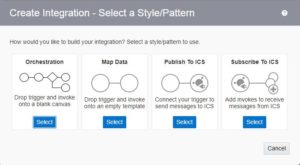
In the integrations page, click on create and select “Map Data” pattern. This pattern is useful for simple integrations. For complex integrations “Orchestration” pattern is usually more appropriate.
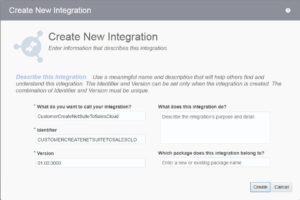
Provide a Name for the integration and click Create
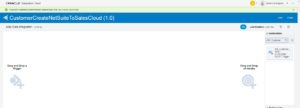
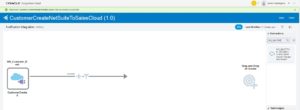
OIC shows a message confirming the integration was created. Search the REST connection we created earlier and drop it in the Trigger portion of the canvas.
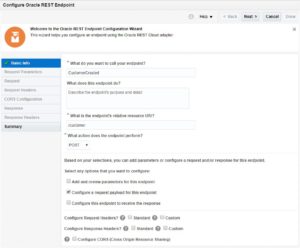
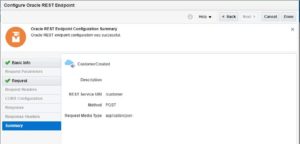
The “Configure Oracle REST Endpoint” wizard opens up. Provide a name for the endpoint. Also set the Relative Resource URI for the REST Endpoint. In this case, we set it to “/customer”. Set Action = POST and checkmark “Configure a Request Payload for this endpoint”.
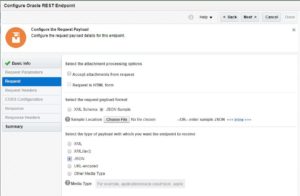
In the next screen, Under Select the request payload format, click JSON Sample. Select JSON for the type of payload. At this point, you can chose to upload a file containing sample JSON payload, or enter it inline in the wizard. Since this is a simple payload, you can click on inline
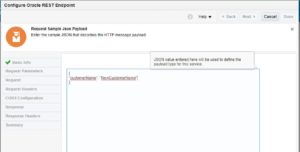
In Request Sample Json Payload screen, enter a payload. This is the payload that this endpoint will expect and the fields become available for mapping in the ICS integration.
For this example we are using only a single mandatory field, Customer Name (in NetSuite) to OrganizationName (in OSC), so you can enter the following JSON payload:
{ "customerName" : "customerName" }
Only the field names matter as they are referenced in the mapping. The value can be entered arbitrarily.
Click OK and Next to view the summary. Make sure the information is correct and click Done.
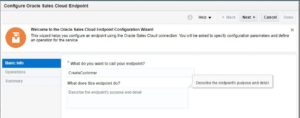
Now that we have our triggered configured, we will configure the Target. Target of this integration is Oracle Sales Cloud. Search and Select the newly create OSC connection, and drop it under Invoke
Provide an appropriate name for the endpoint.
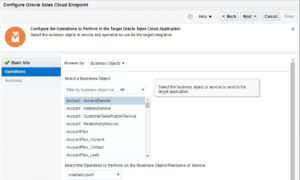
Make the following selections
Business Object = Account: Account Service
Operation = createAccount
The next step is to create a mapping which transforms the incoming payload into an OSC payload. Click on “Click Below to Create Map” and then add a mapping by clicking on the “+” icon
The mapping editor opens. Drag the customerName field from Source to OrganizationName field on the target. For address, we will use hard-coded values.
The next step is to add a tracking field. Use the only available field customerName and save the integration.
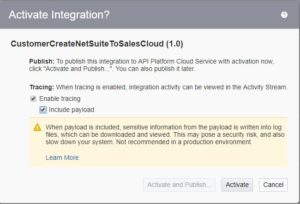
Now our integration is complete and is ready to be activated. Click on the toggle to open Activate Integration dialog.
In the activation dialog you can select Tracing options. For development, you can turn on the tracing options. However, enabling these options has a detrimental effect on performance, so chose them wisely in production.
Once the integration is activated the toggle turns green. Click on the “i” icon to get the endpoint URL.
The endpoint URL points to the REST metadata resource which provides information about the REST endpoint. To invoke the REST endpoint, we will replace the metadata resource with “/customer” resource we had used during the configuration of the REST adapter.
Create a UserEvent SuiteScript:
Now let’s create a UserEvent script using SuiteScript which will invoke this integration and pass the required payload.
Here is a sample I used for this blog. I named this file sdr_ue_customer.js by following the convention:
sdr = my company acronym
ue = type of script, i.e., UserEvent
customer = name of the entity
/** * @NScriptType UserEventScript * @NAPIVersion 2.0 */ define(['N/https'],function(https) { return { // This function is called after the record // is committed in the database afterSubmit: function(context) { // Check if this event is for a new record if (context.type == context.UserEventType.CREATE) { var customer = context.newRecord; var myCustomer = {}; // Create the object which will be the payload. // In this example, only a single field is being copied myCustomer.customerName = customer.getField('companyname'); // This is the ICS URL var url = 'h<a href="https://<ICS_Hostname>/integration/flowapi/rest/CUSTOMERCREATENETSUITETOSALESCLO/v01/">ttps://<ICS_Hostname>/integration/flowapi/rest/CUSTOMERCREATENETSUITETOSALESCLO/v01/</a>customer'; var myRequest = {}; //Set up the required headers myRequest.headers = {}; myRequest.headers["Authorization"] = 'Basic bmF2ZWVuLm5haGF0YUBvcmFjbGUuY29tOkF0ZWFtMTIzIw=='; myRequest.headers["Content-Type"] = 'application/json'; // Configure the request URL and HTTP method myRequest.method = "POST"; myRequest.url = url; //Set the request body. myRequest.body = JSON.stringify(myCustomer); // Invoke the ICS integration var myResponse = https.post(myRequest); log.debug('Response Code', myResponse.code); } } }; });
The first 2 annotation specify this is a UserEventScript and it is using SuiteScript version 2.0.
The next line is a define block which returns an object with various handlers. Each script type has various handlers. We will return only the afterSubmit handler which is a function which will get executed after the record is committed to the database and a context object is passed to this function which contains the necessary details. In this function, we will use the newRecord property of the context object to get customer details; construct a payload based on the new record; configure an HTTPS request; and use the https module to invoke the ICS integration.
Create a Script Record:
Next step is to upload this file to the file cabinet. If you have eclipse and have configured it for NetSuite using the add-on, then you can simply right click and upload the file to NetSuite. In this example, we’ll do this manually. Login to NetSuite and navigate to Documents -> Files -> SuiteScripts
Now, you can upload the file by clicking on Add File. As a best practice, you should upload files into various folders for ease of maintenance. You can create a folder by clicking on New Folder. I created a SuiteDreams folder for my files.
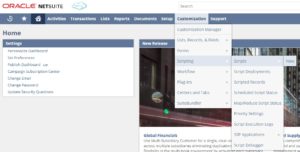
Now we will create a script record. Navigate to Customization -> Scripting -> Scripts -> New.
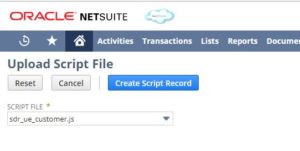
Choose the file we just uploaded and click Create Script Record
Provide the following information:
Main Section:
NAME = SuiteDreams UE Customer (A user friendly name of your choice)
ID = _sdr_ue_customer (it should start with an underscore to separate it from the prefix that NetSuite will automatically assign to this record)
DESCRIPTION = <A meaningful description>
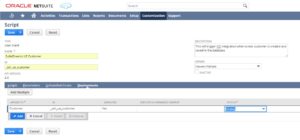
Deployments SubTab:
APPLIES TO = Customer (the entity on which this script will be attached)
ID = _sdr_ue_customer (it should start with an underscore to separate it from the prefix that NetSuite will automatically assign to this record)
STATUS = Testing (This ensures that the script only gets triggered by the current user)
Click Save
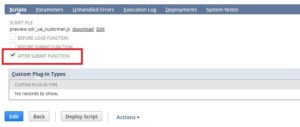
In the next screen, see the checkbox “AFTER SUBMIT FUNCTION” is automatically checked. This happened because the script had an afterSubmit handler.
This completes the setup. Now when a new customer is created and saved in the database, NetSuite will trigger the afterSubmit function and pass it the script context, which contains the customer record. The script will parse the record, construct a payload and POST a message to the ICS endpoint. ICS will received the message, transform it to an OSC payload and create an account in OSC.
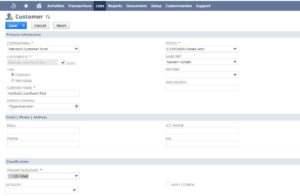
Create a new customer and Save the record
Go to Integration Cloud -> Monitoring -> Tracking. You will see an instance of the integration getting initiated.
Go to Sales Cloud, and you will see an account created there.
Voila! We can see the fruit of our labor!
