Overview
OpenID Connect (OIDC) is an authentication protocol that works on top of the OAuth 2.0 framework. It allows users to authenticate against Identity Providers, referred to as OpenID Providers, and access services hosted by the service provider referred to as a relying party. This blog is certainly not about OIDC, so I will not go into details. If you are interested, you can find more information about the OAuth standard and OIDC here.
API gateway is a serverless fully-managed service in OCI that can be used to protect API endpoints and web applications. It provides many security functionalities like rate limiting, authorization enforcement, dynamic routing, SSL enforcement, and many more. API Gateway recently added OIDC support. This blog will discuss integrating API Gateway and Identity Domain using OIDC.
OpenID Connect Flow
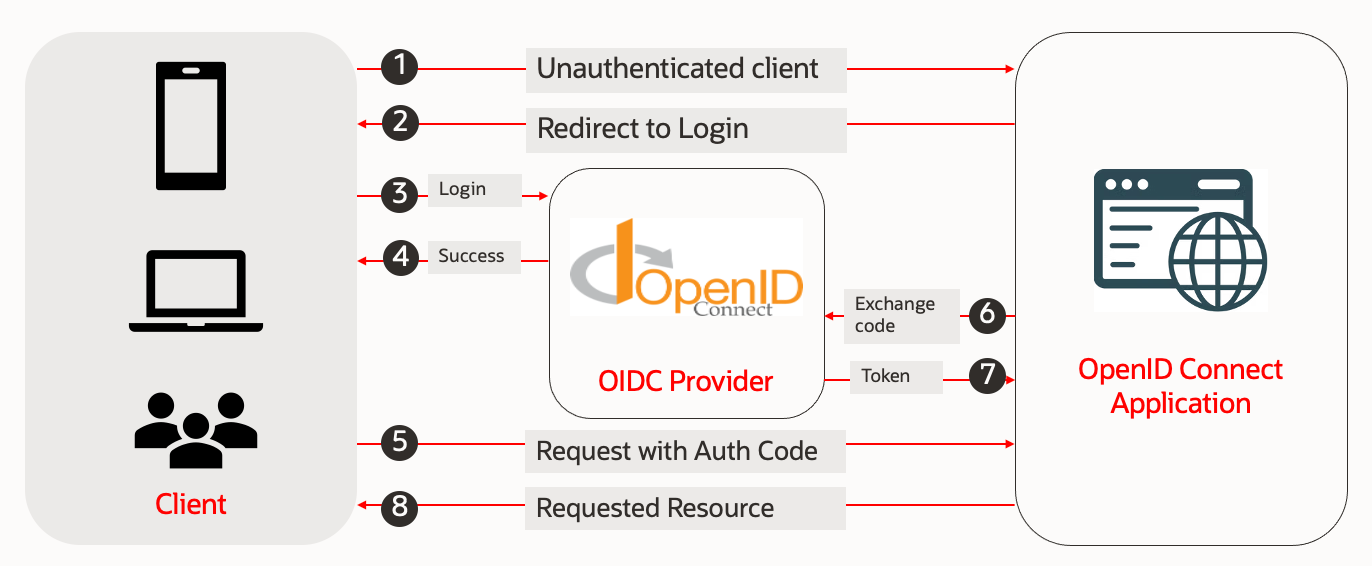
If you are not using an API gateway or proxy OIDC enabled proxy, application has to implement OIDC protocol, including exchanging authentication code, as mentioned in the below flow diagram.
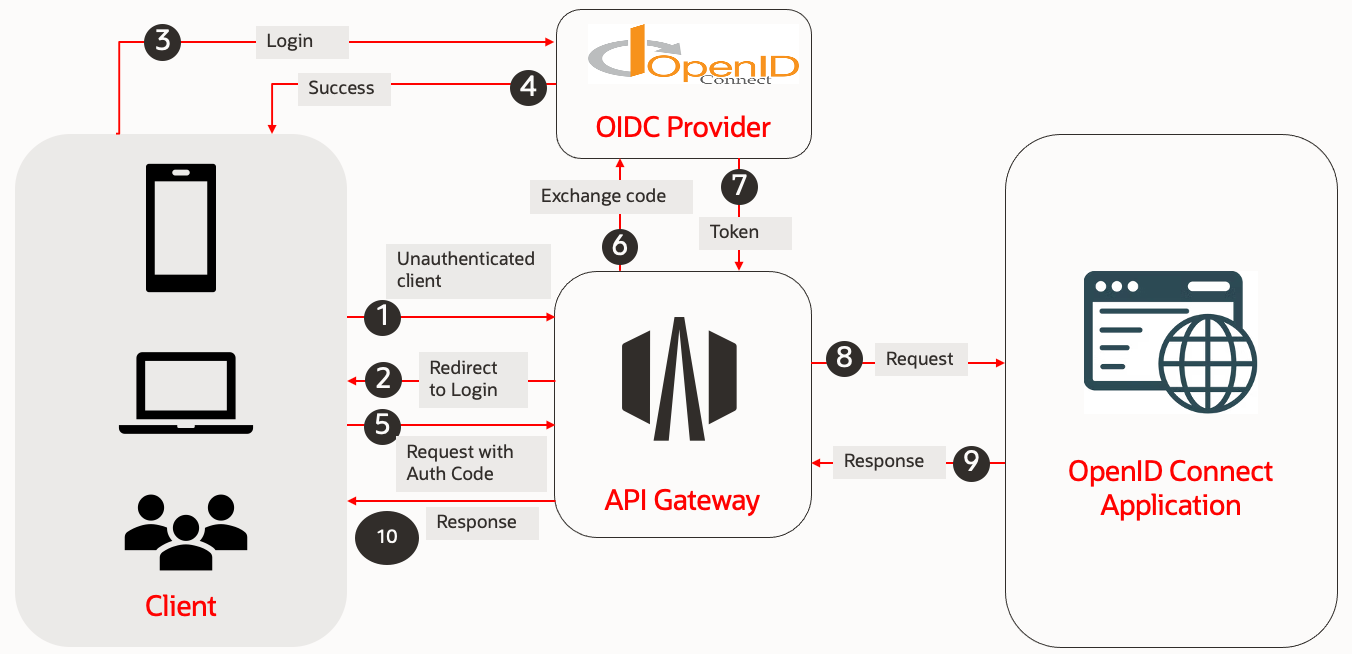
However, if you use API gateway, it can offload OIDC implementation from the application, as shown in the diagram below.
API Gateway OIDC Implementation Guide
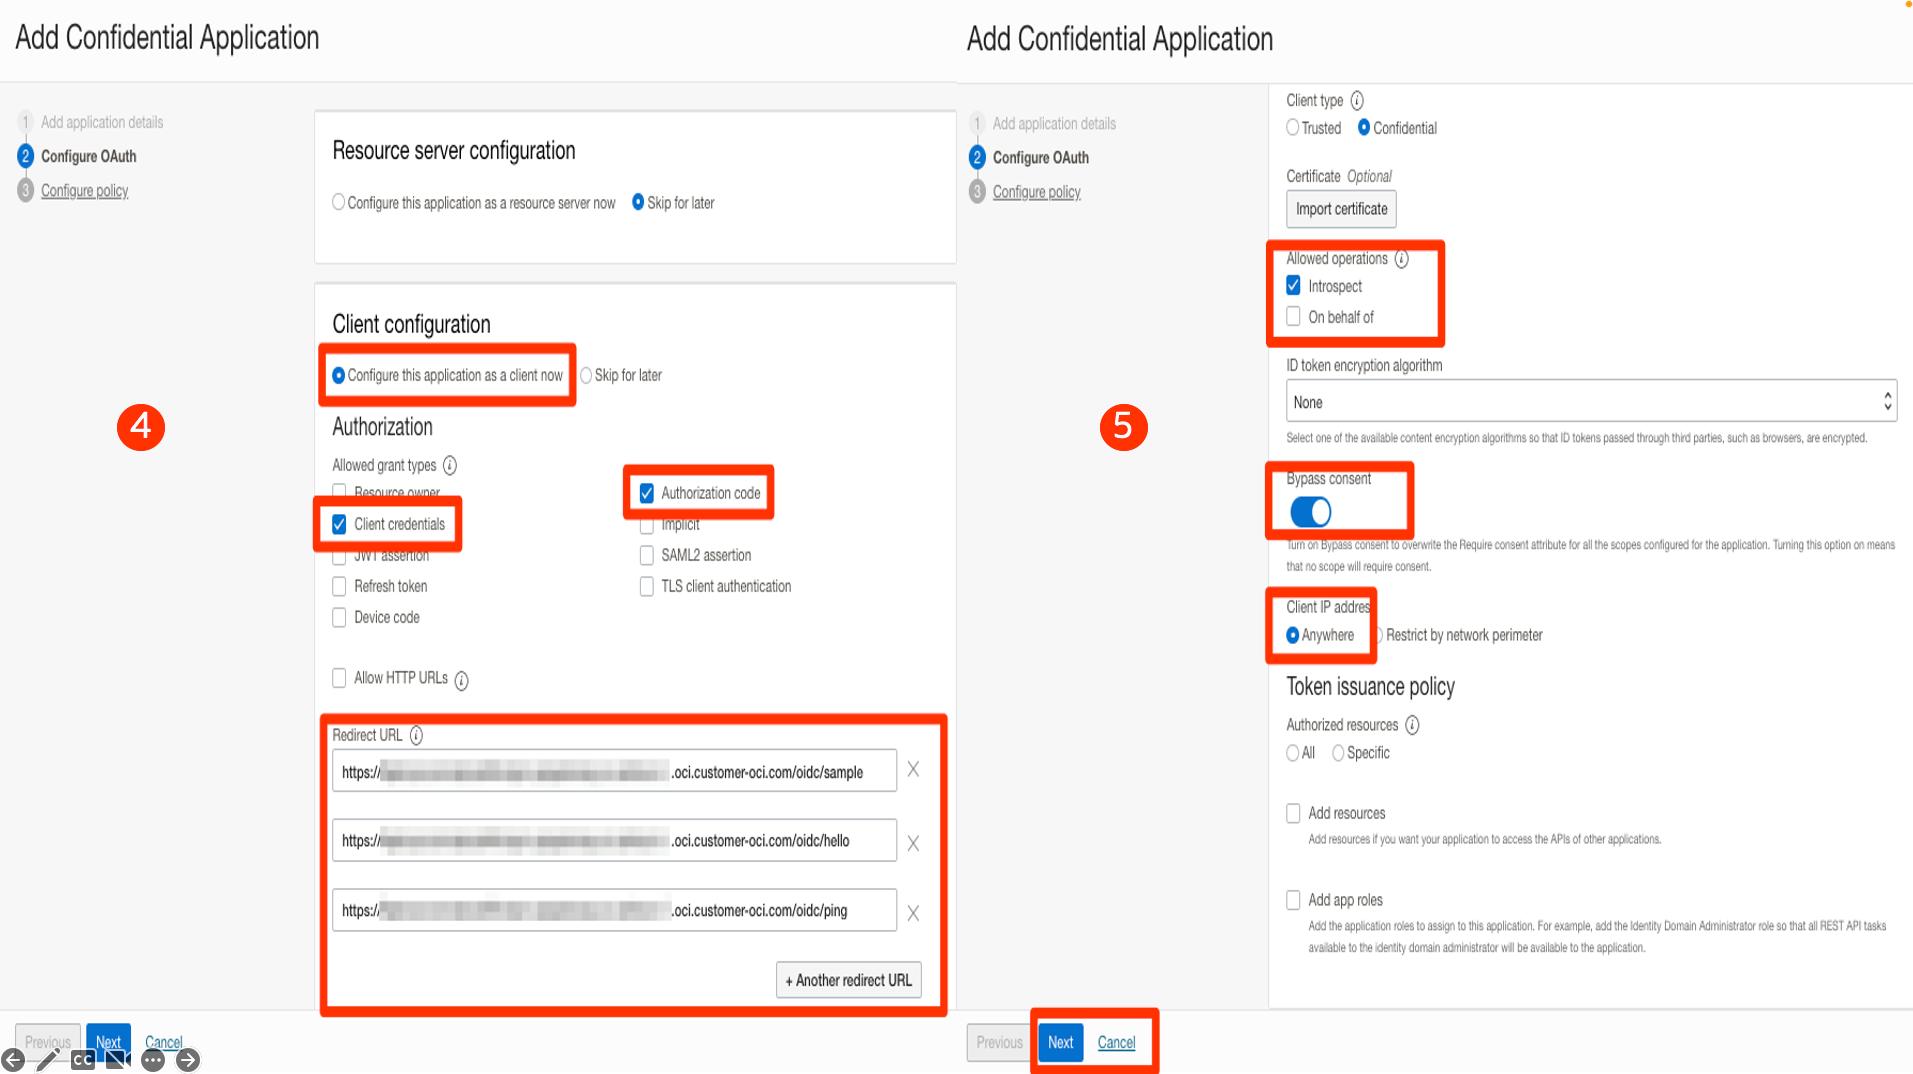
To implement the OIDC flow, we need to create an OAuth client in the OCI IAM (OIDC provider) with appropriate grant types and redirect URIs. Follow the screenshots below to configure both OCI IAM and API gateway to implement OIDC flow.
Identity Domain Configuration
Steps:
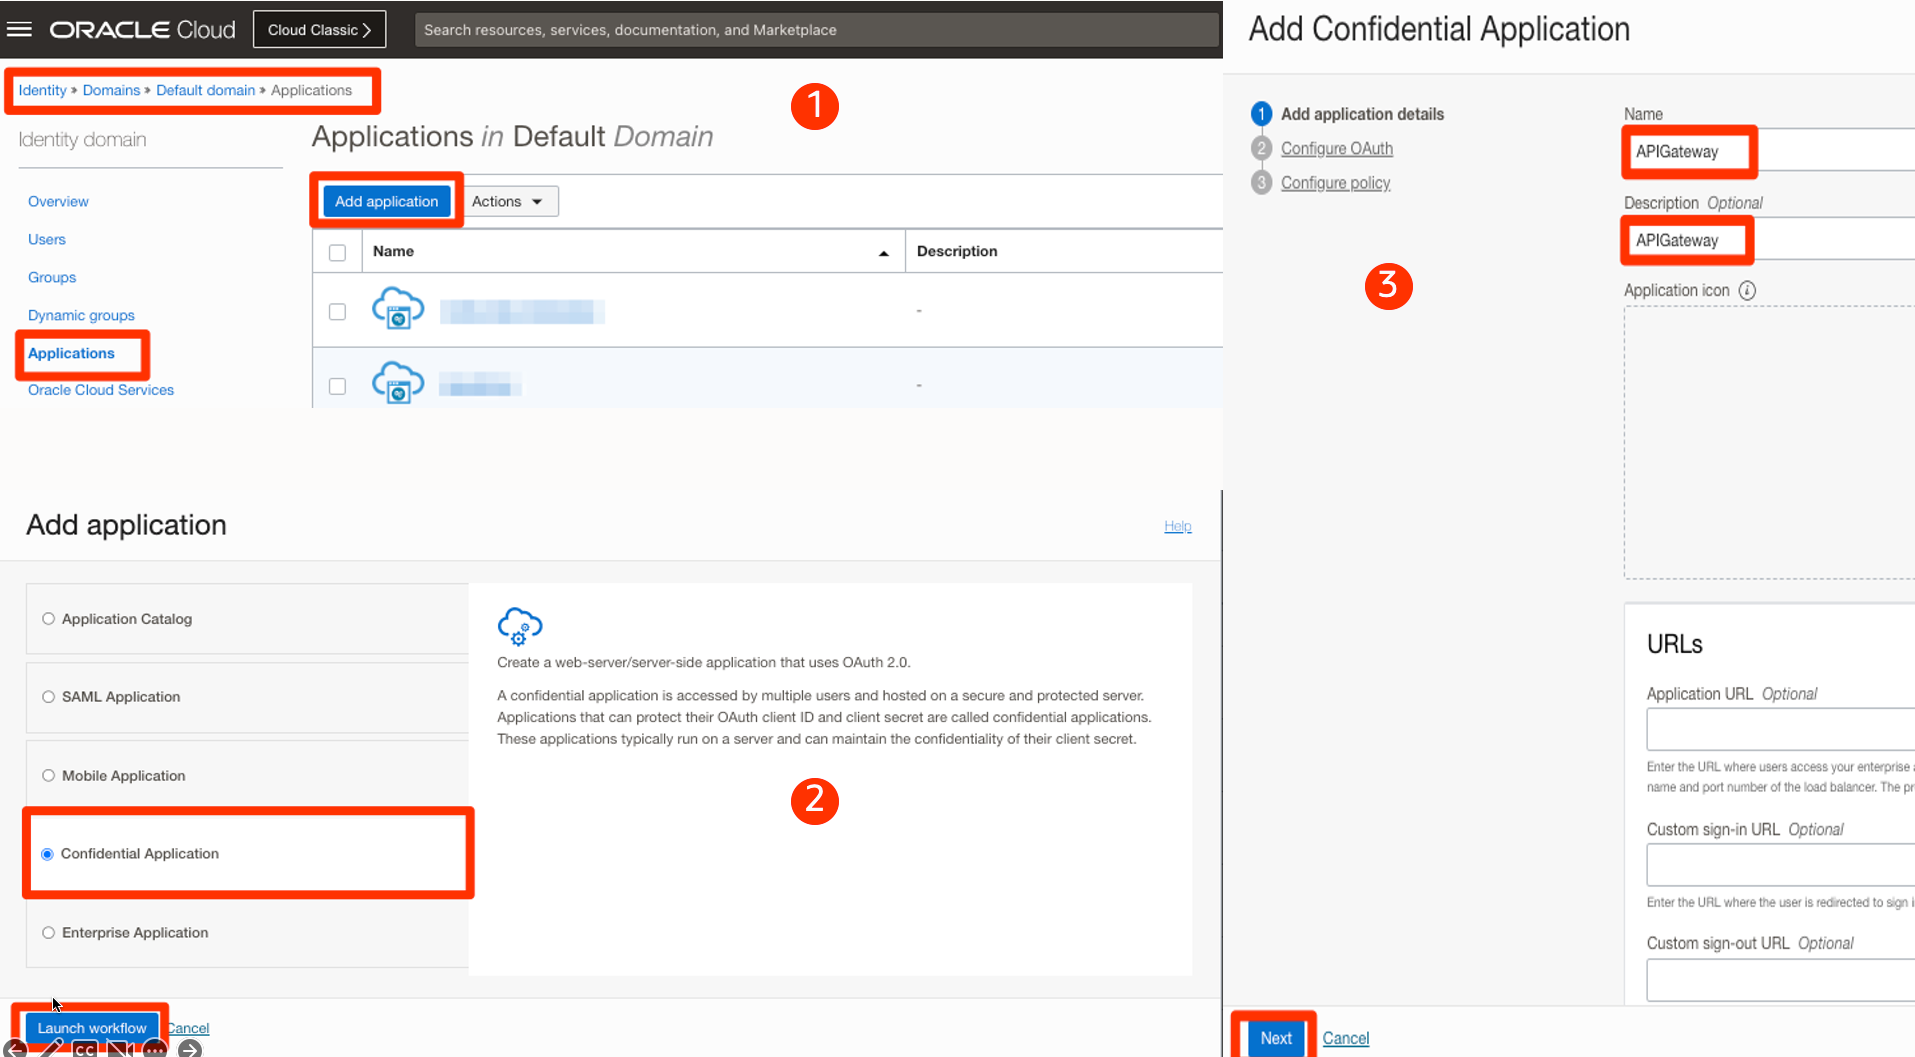
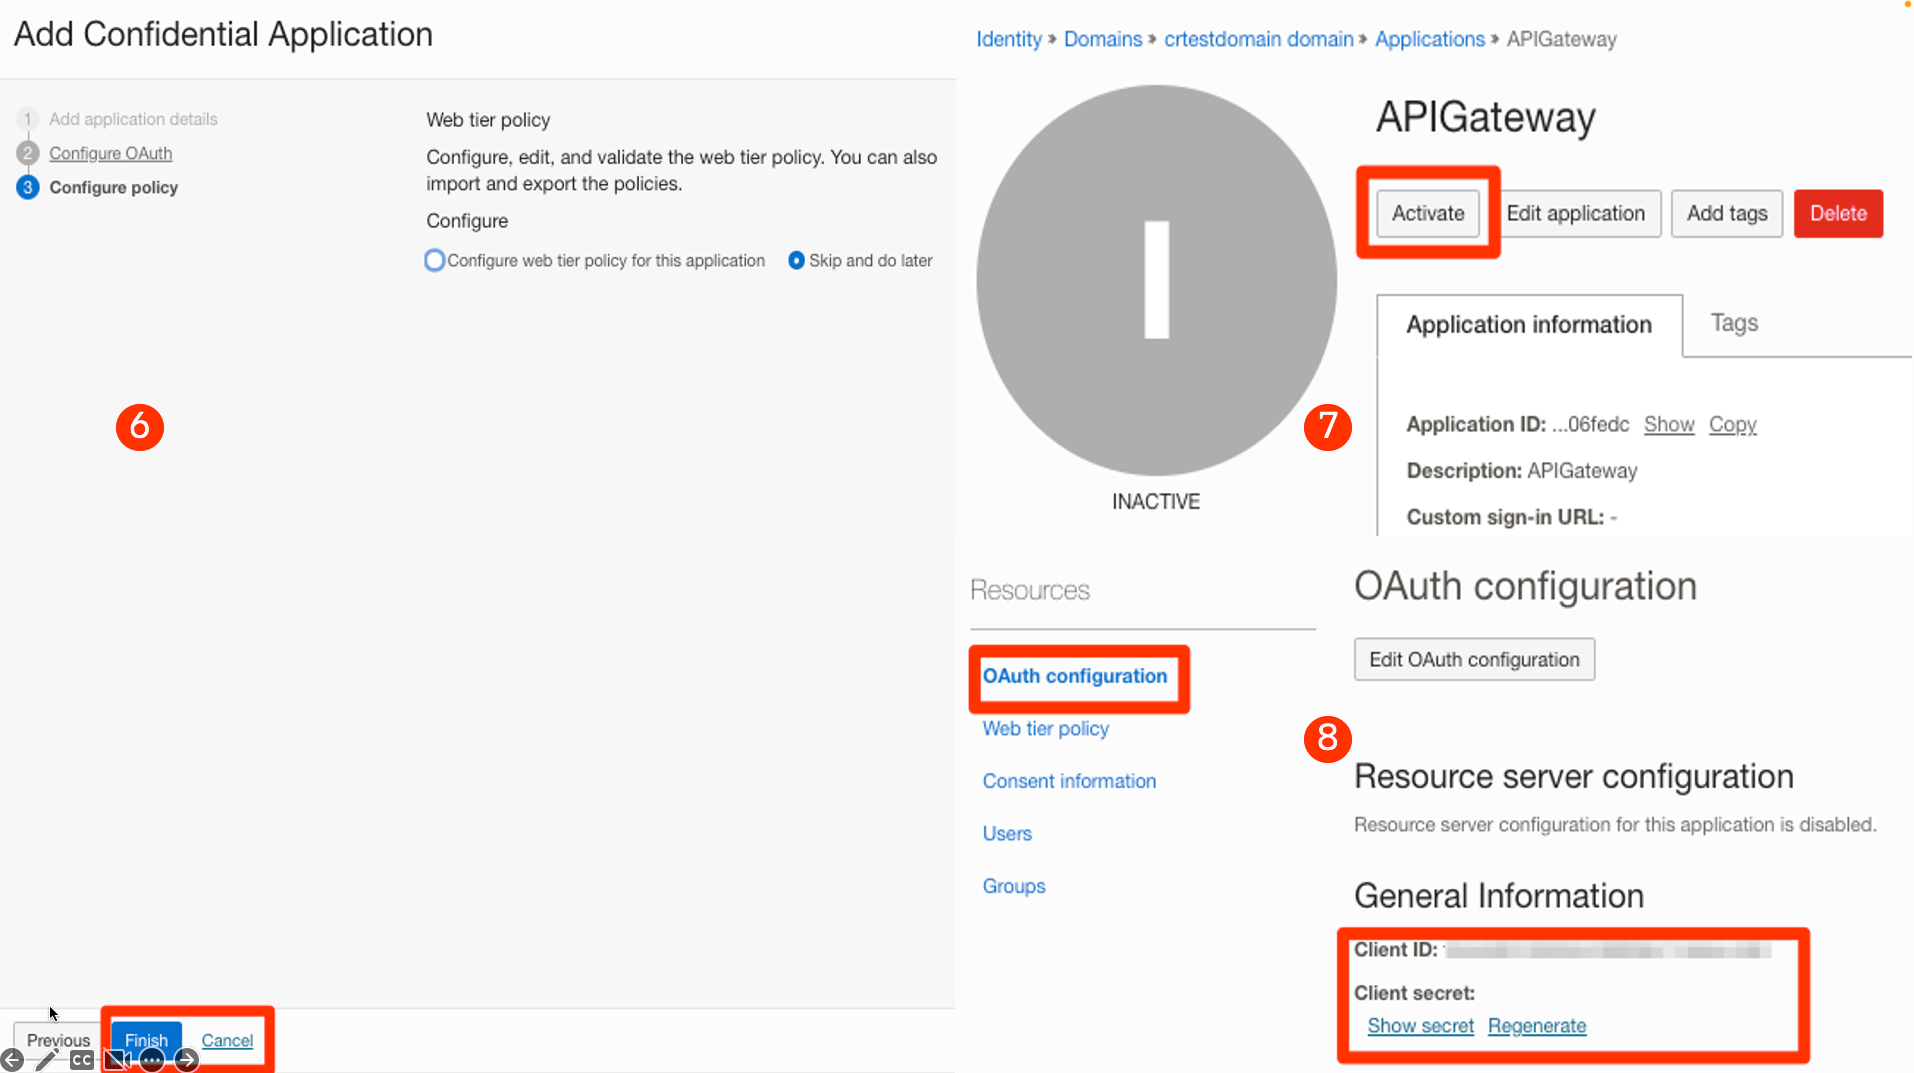
1-2-3: Login to the OCI admin console and browse the Identity domain that will authenticate users. Click on the Applications menu and add an application. Provide the Application name as shown in the screenshot below.
4-5: Select Grant Types and redirect URIs. Please note that all the API endpoints that need to implement OIDC should be added as redirect URIs. Make sure Introspect operation is allowed, as shown in the screenshot below.
6-7-8: Once the application is created, Activate it. Copy the client ID and client secret for the application. We will use that while configuring the API gateway.
API Gateway Configuration
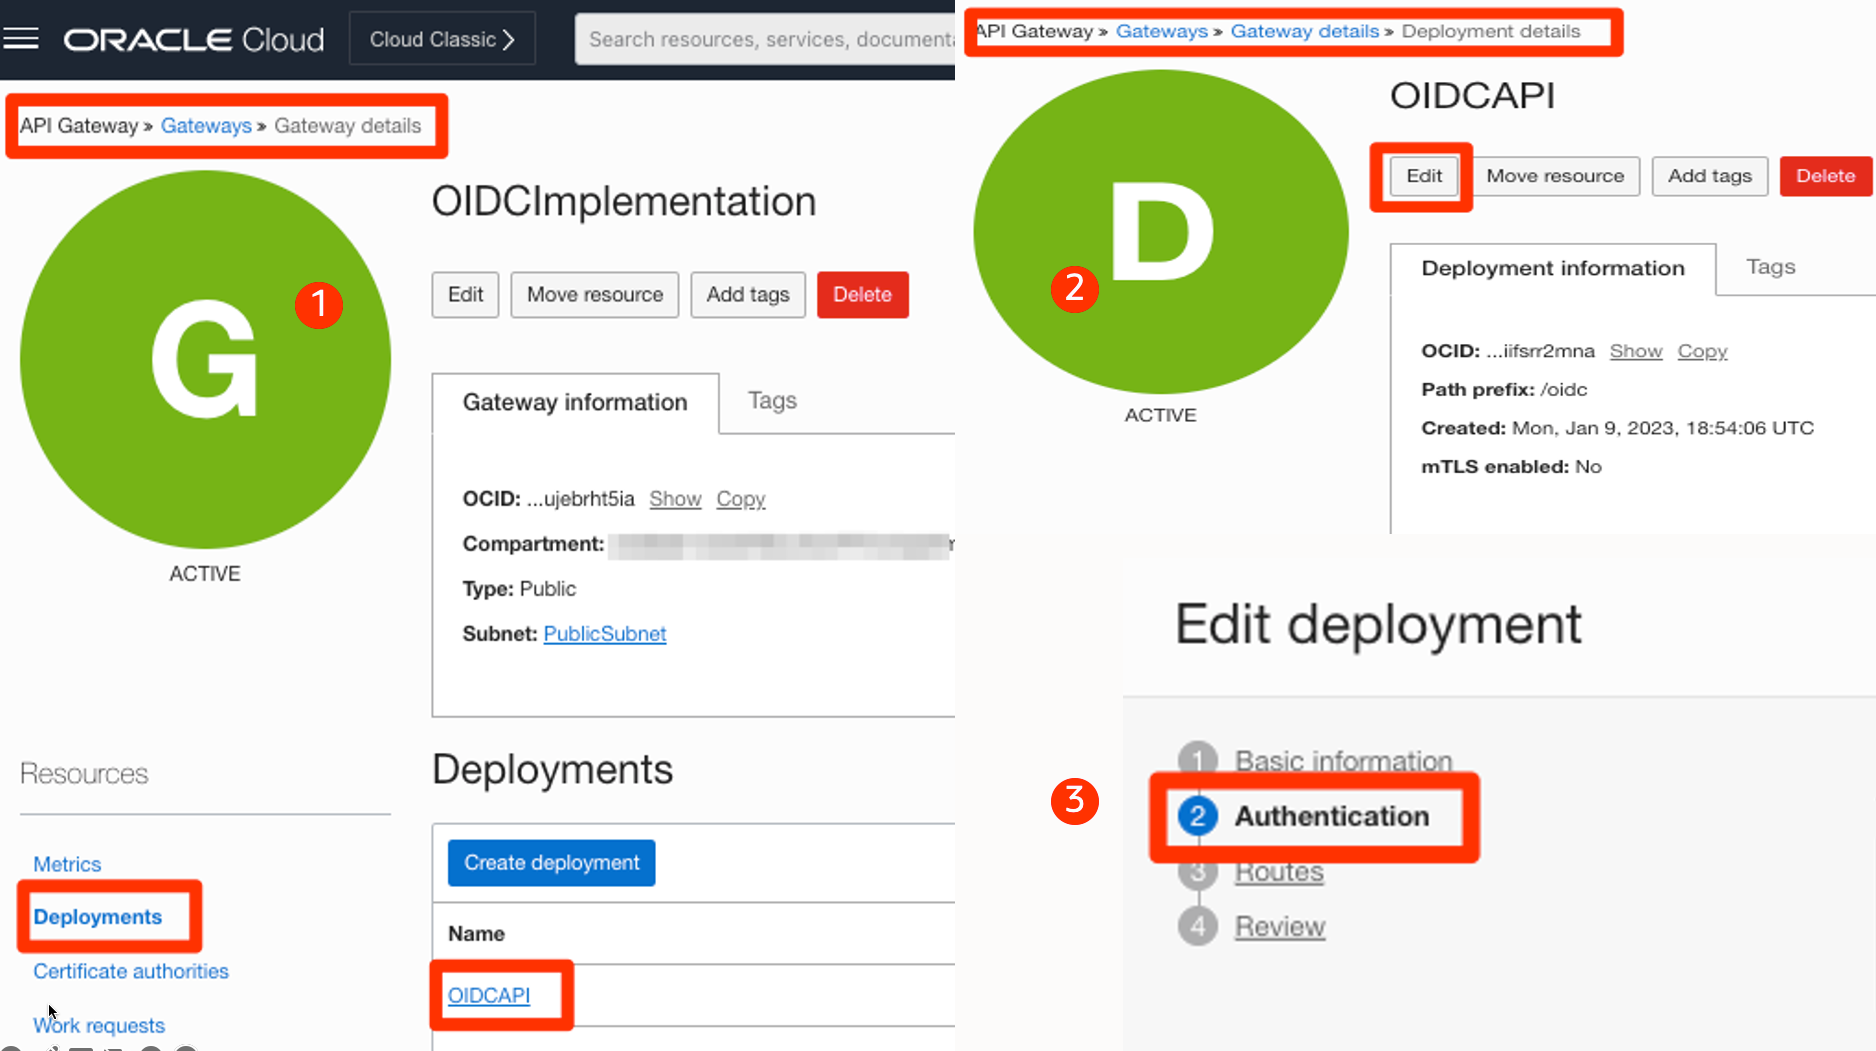
If you still need to create an API gateway deployment, you can follow the steps here. Once API gateway deployment is created, you can add authentication. Follow the steps below to add OIDC authentication for the deployment.
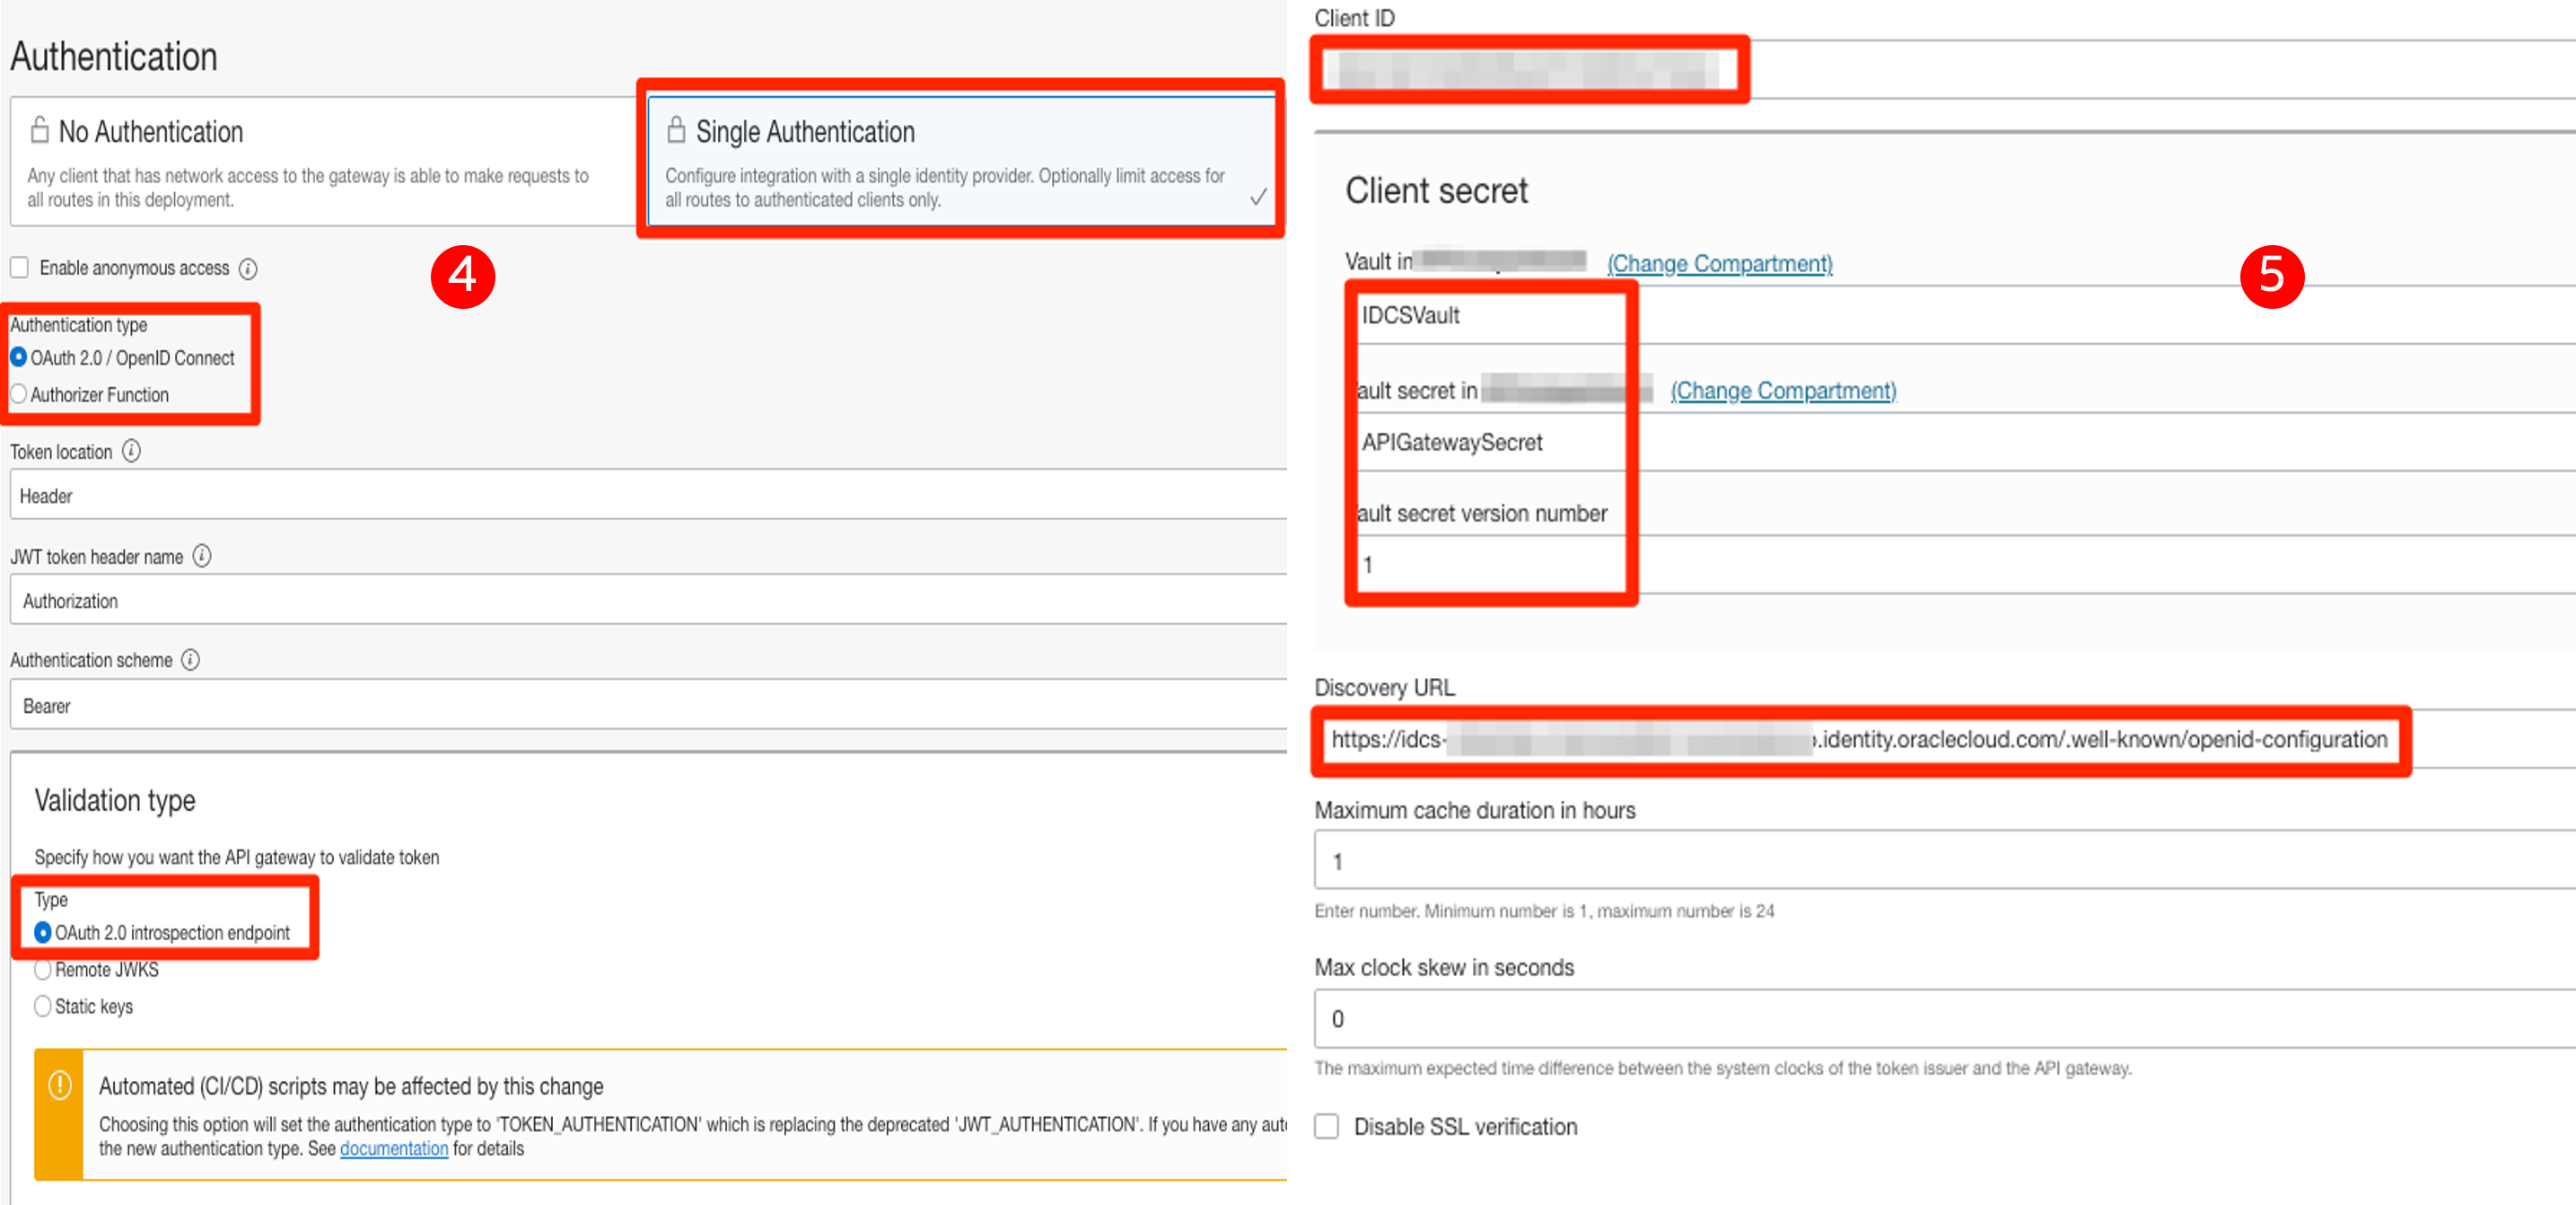
Note: API gateway requires OIDC client ID and client secret. You have to store the client secret in the OCI vault and create an IAM policy so that the API gateway can read the secret. I have a sample policy below. “ALL_APIGateways” is a dynamic group with all the API Gateway instances in a compartment. I created a secret vault on VaultCompartment under the Security parent compartment.
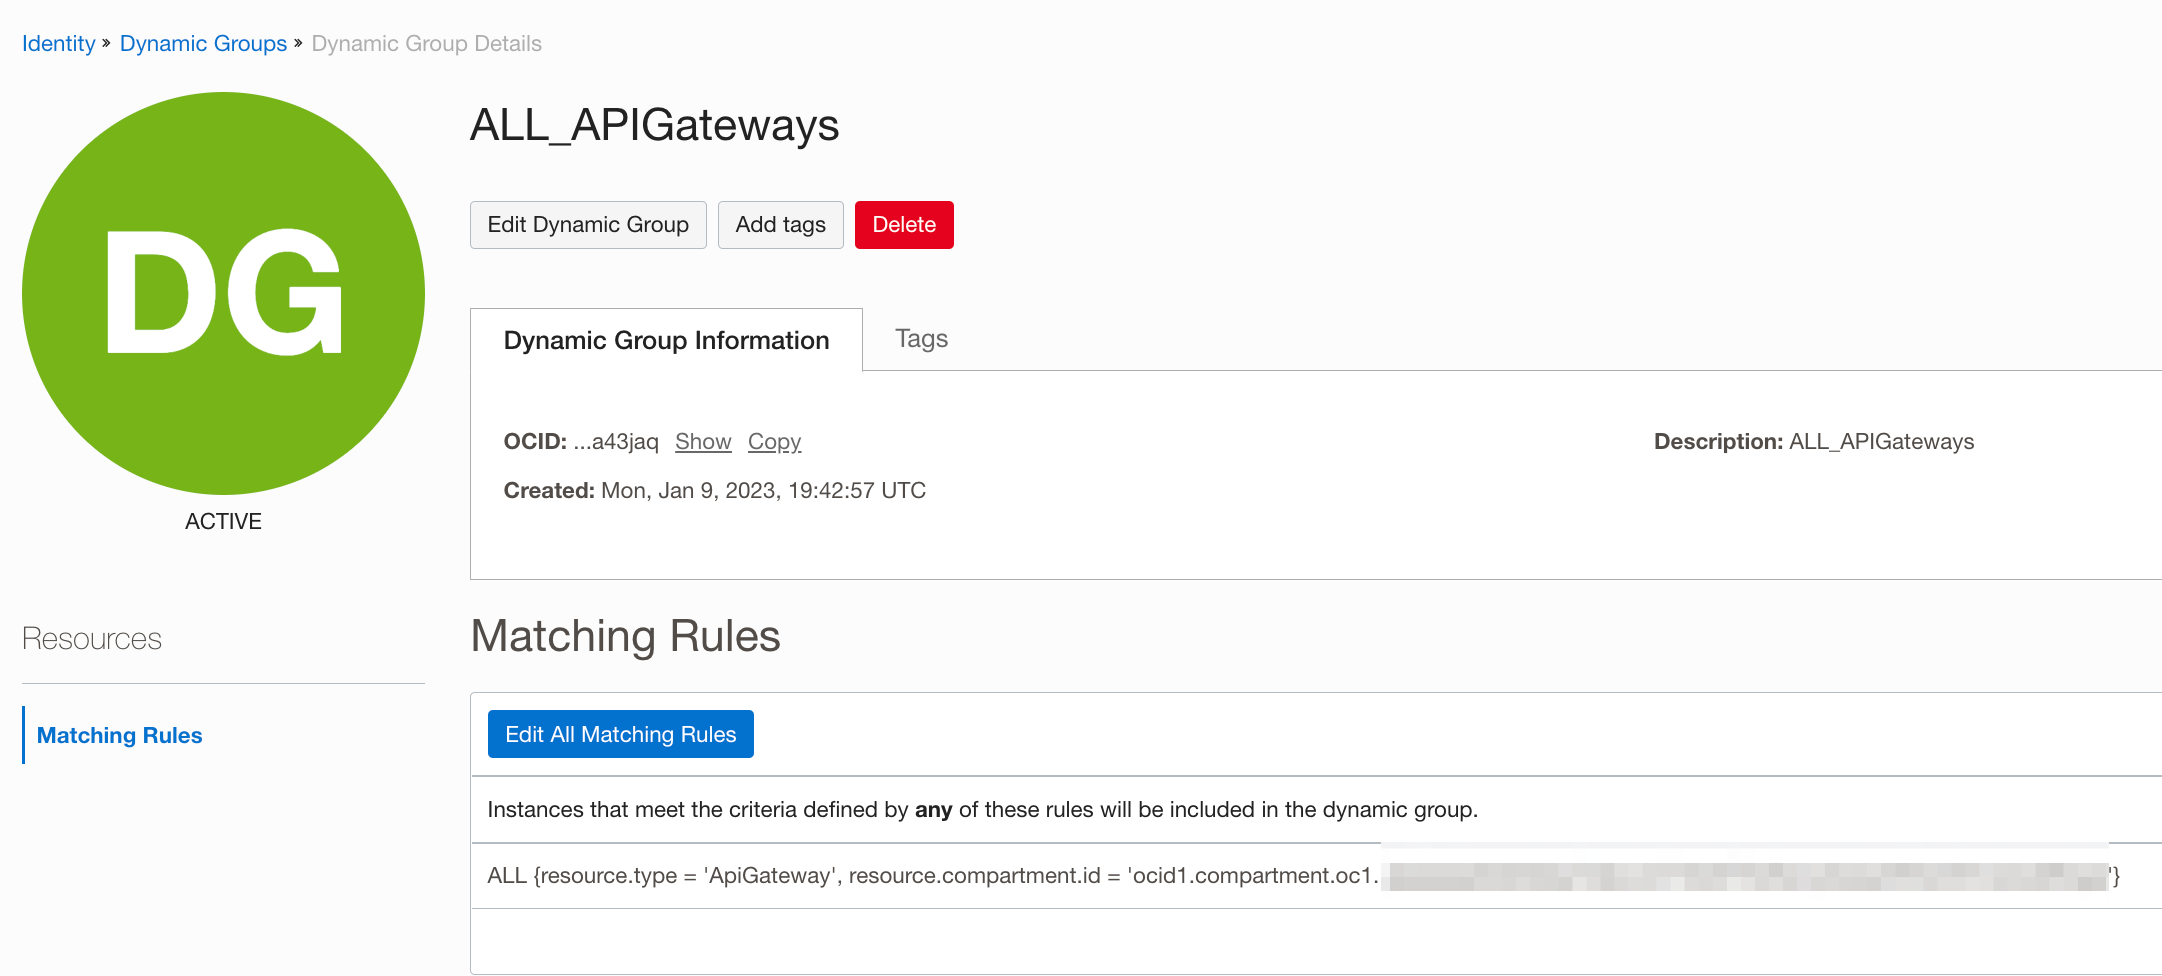
Sample Policy:
Allow dynamic-group ALL_APIGateways to use secret-bundles in compartment Security:VaultCompartment
Steps
1-2-3: Browse to the Gateway deployment from the OCI console. Edit the deployment to add OIDC authentication for the API.
4-5: Configure Authentication, including client ID, client secret, and discovery URL, as shown in the below screenshots.
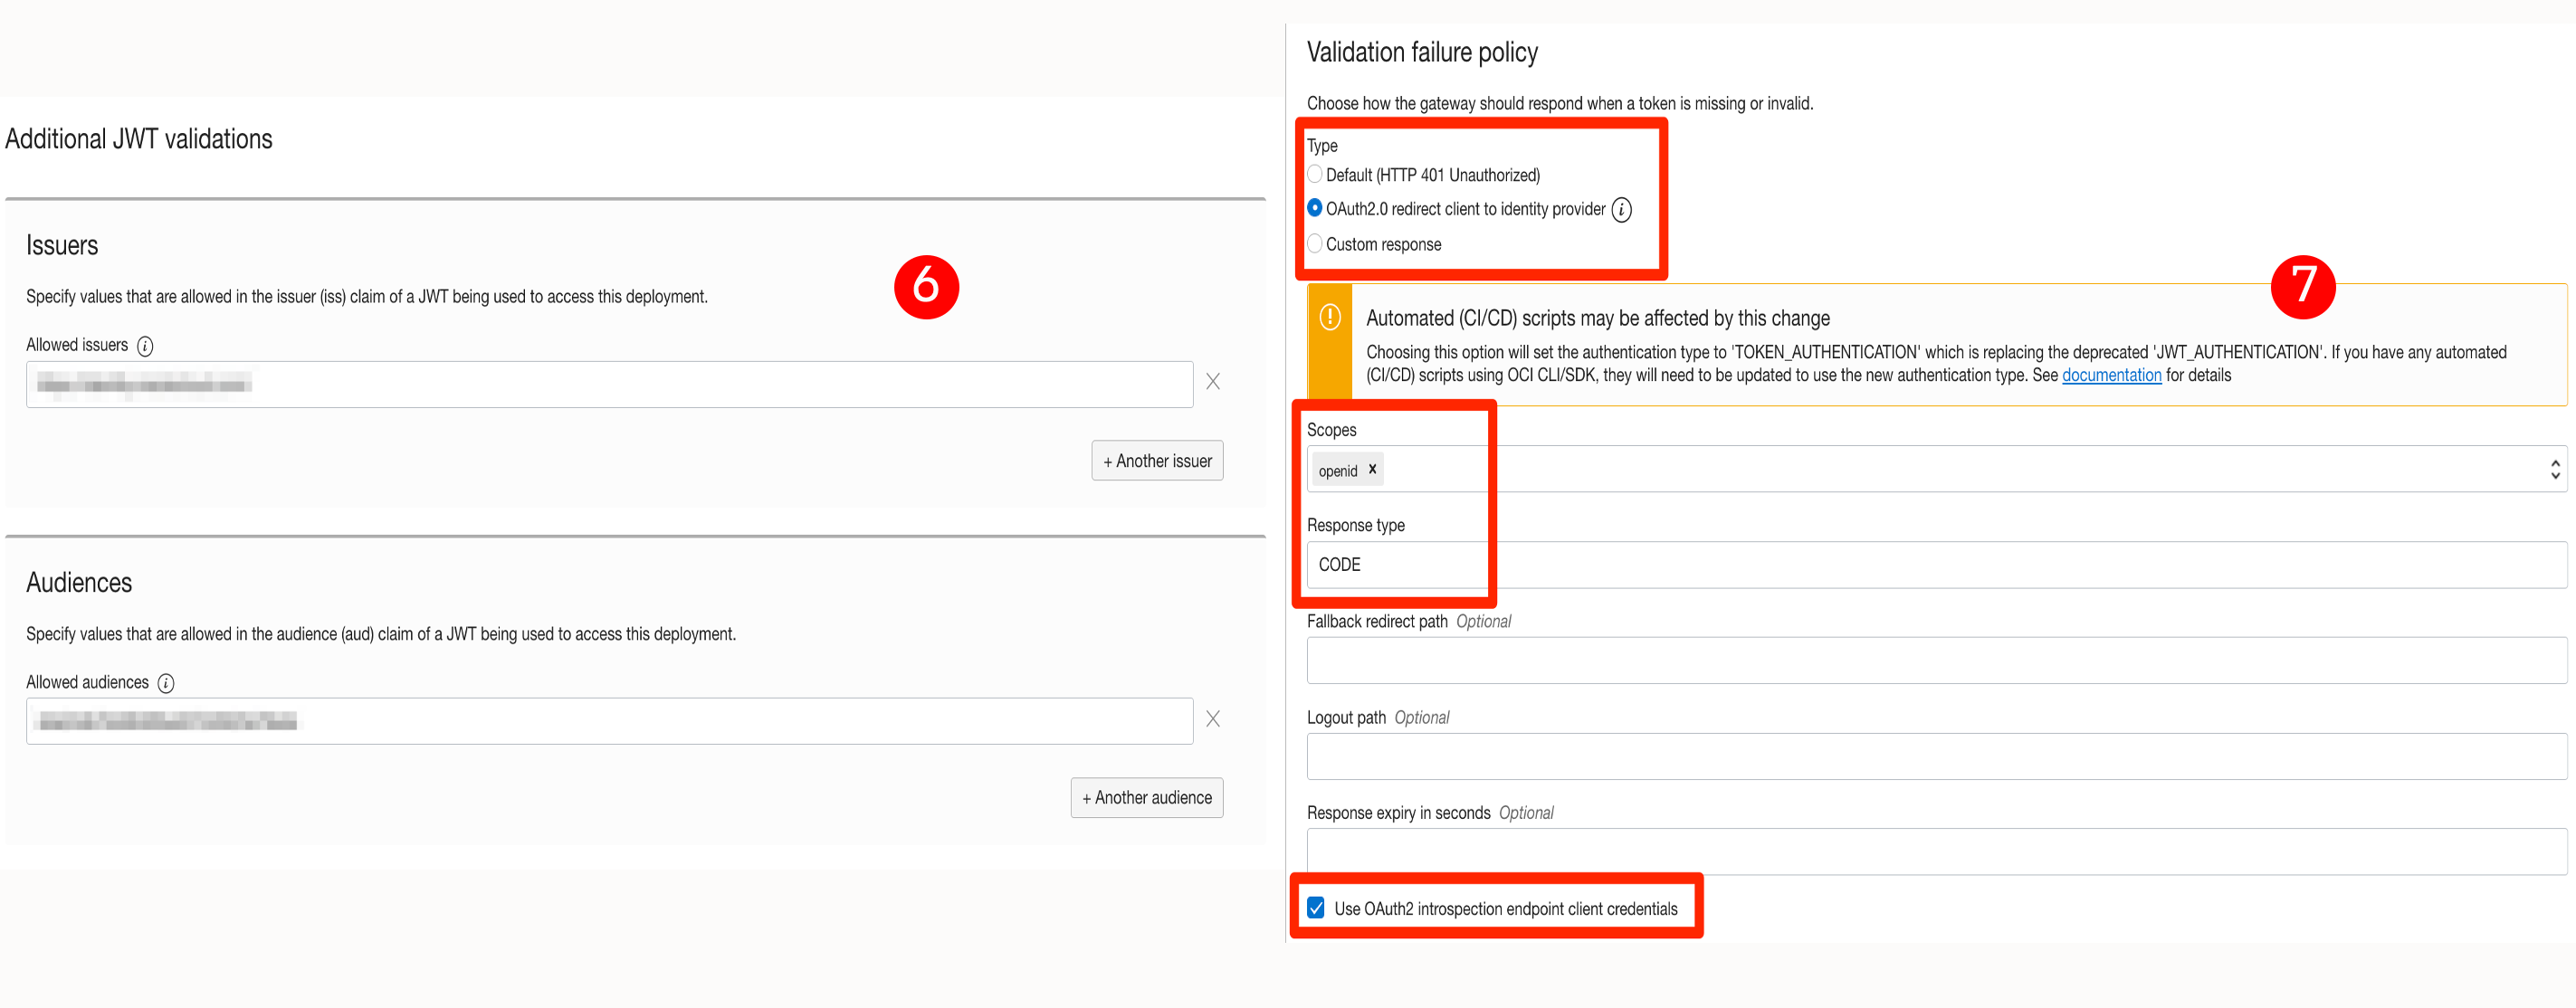
6-7: Finish the OIDC settings by configuring audience, issuer, scope, and the rest, as shown in the below screenshots.
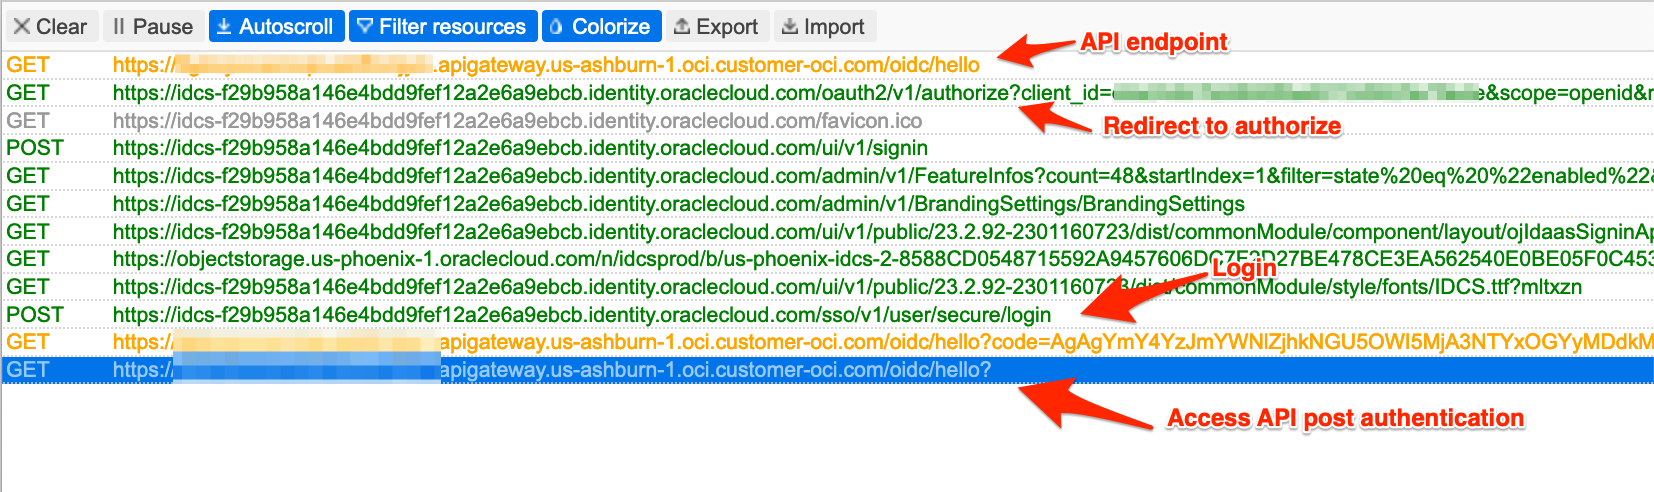
Test OIDC flow
Once the configuration is done, you can test by accessing the API endpoint from the browser. I have attached an HTTP trace screenshot from the successful test.