Overview
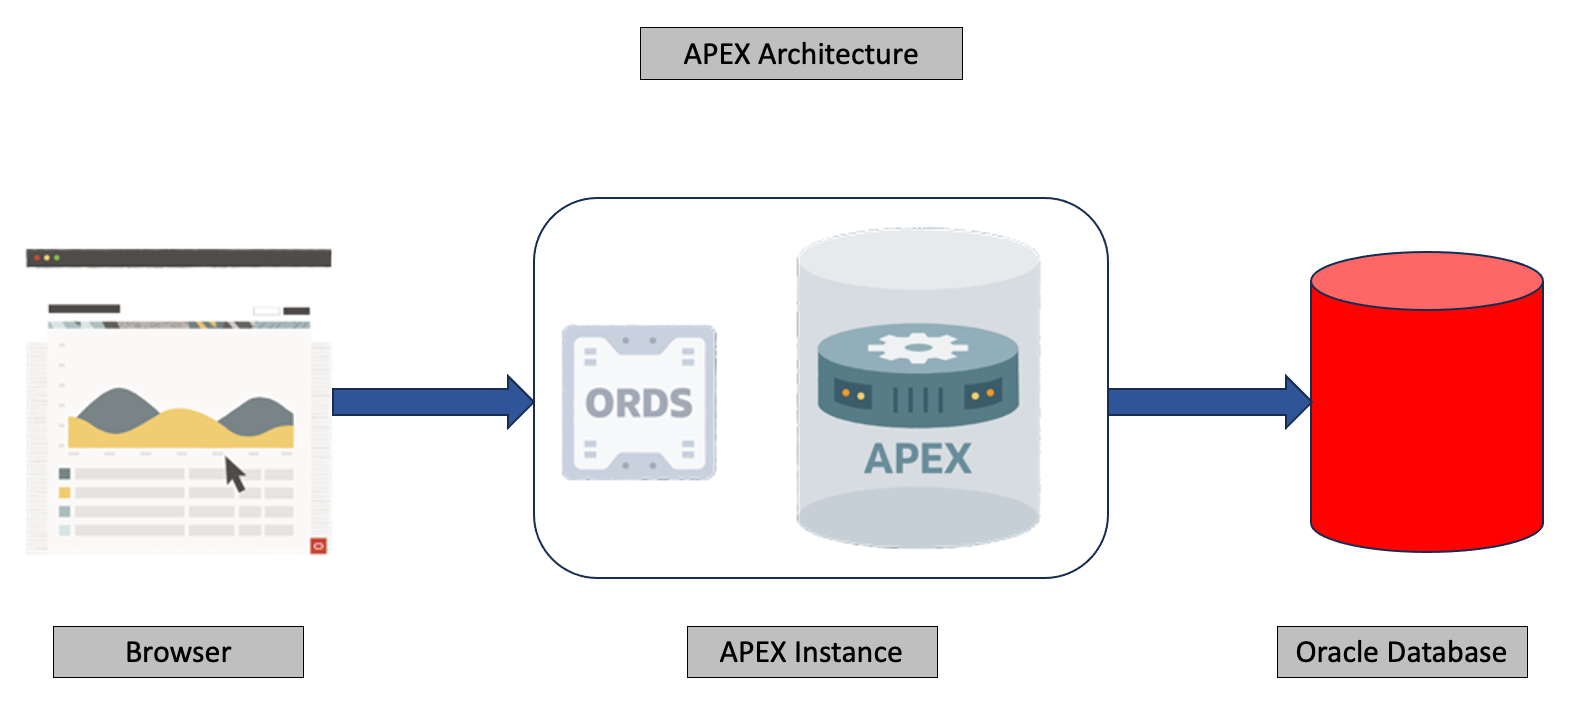
Oracle APEX is a low code application development framework from Oracle that can run on an existing Oracle Database on OCI (Both DBCS or Autonomous database). It is a three-tier application – consisting of a client tier (the browser), the middle tier (the APEX application engine) and the data tier (back-end databases and REST APIs on top of various systems and data stores). However, on OCI managed APEX instance, the middle tier is managed service, and you just use the interface to build and consume custom applications. It is also an included service as part of OCI database license.
By default, APEX authenticates users against the OCI database using database credentials. However, most customers integrate APEX with their Single Sign-On solution. In this blog, I will talk about integrating APEX instance with OCI IAM service using OpenID Connect.
APEX Setup
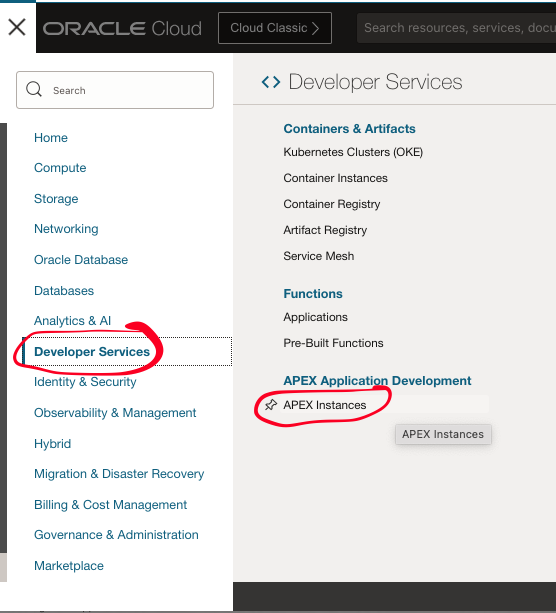
You can create an APEX instance for an existing database or create a new database along with creating an APEX instance. Login to OCI console and browse to “APEX Instances” from Developer Services menu item.
The document has step by step instructions to create an APEX instance.
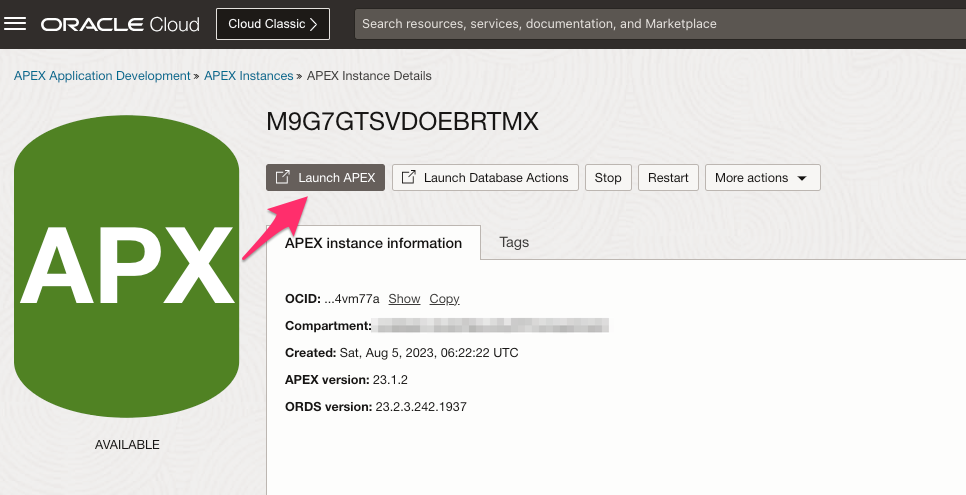
Once the APEX instance is ready, you can launch the instance from the instance page. It will open the APEX instance in a different tab in a browser. Copy the URL of the instance because we will use the URL to construct redirect URI while creating an application in OCI IAM.
OCI IAM Setup
Follow the steps below to create an OIDC confidential application in OCI IAM service for APEX integration.
- Login to OCI console and browse to OCI IAM Identity domain that you want to use for APEX Integration.
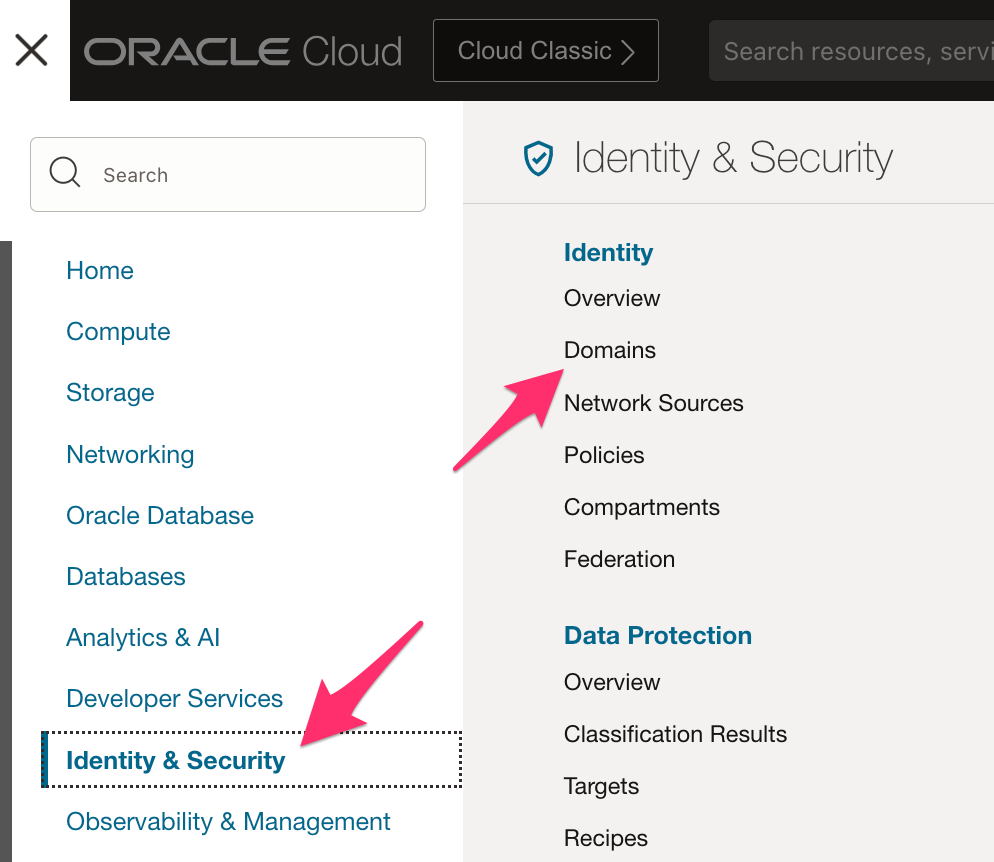
- Select the domain and click on Integrated Applications menu to add an OIDC application.
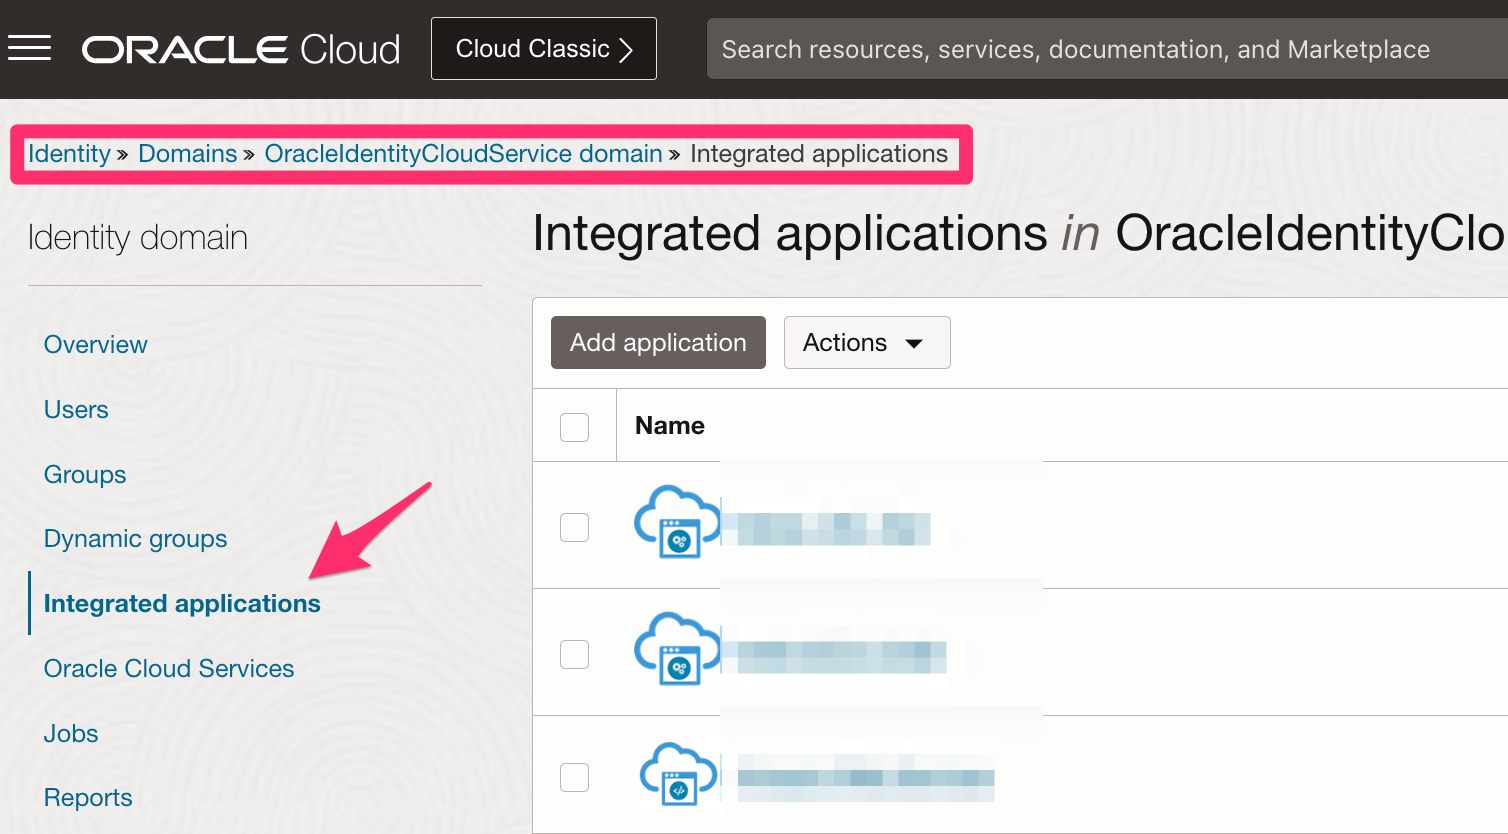
- Click “Add Application” to add an application.
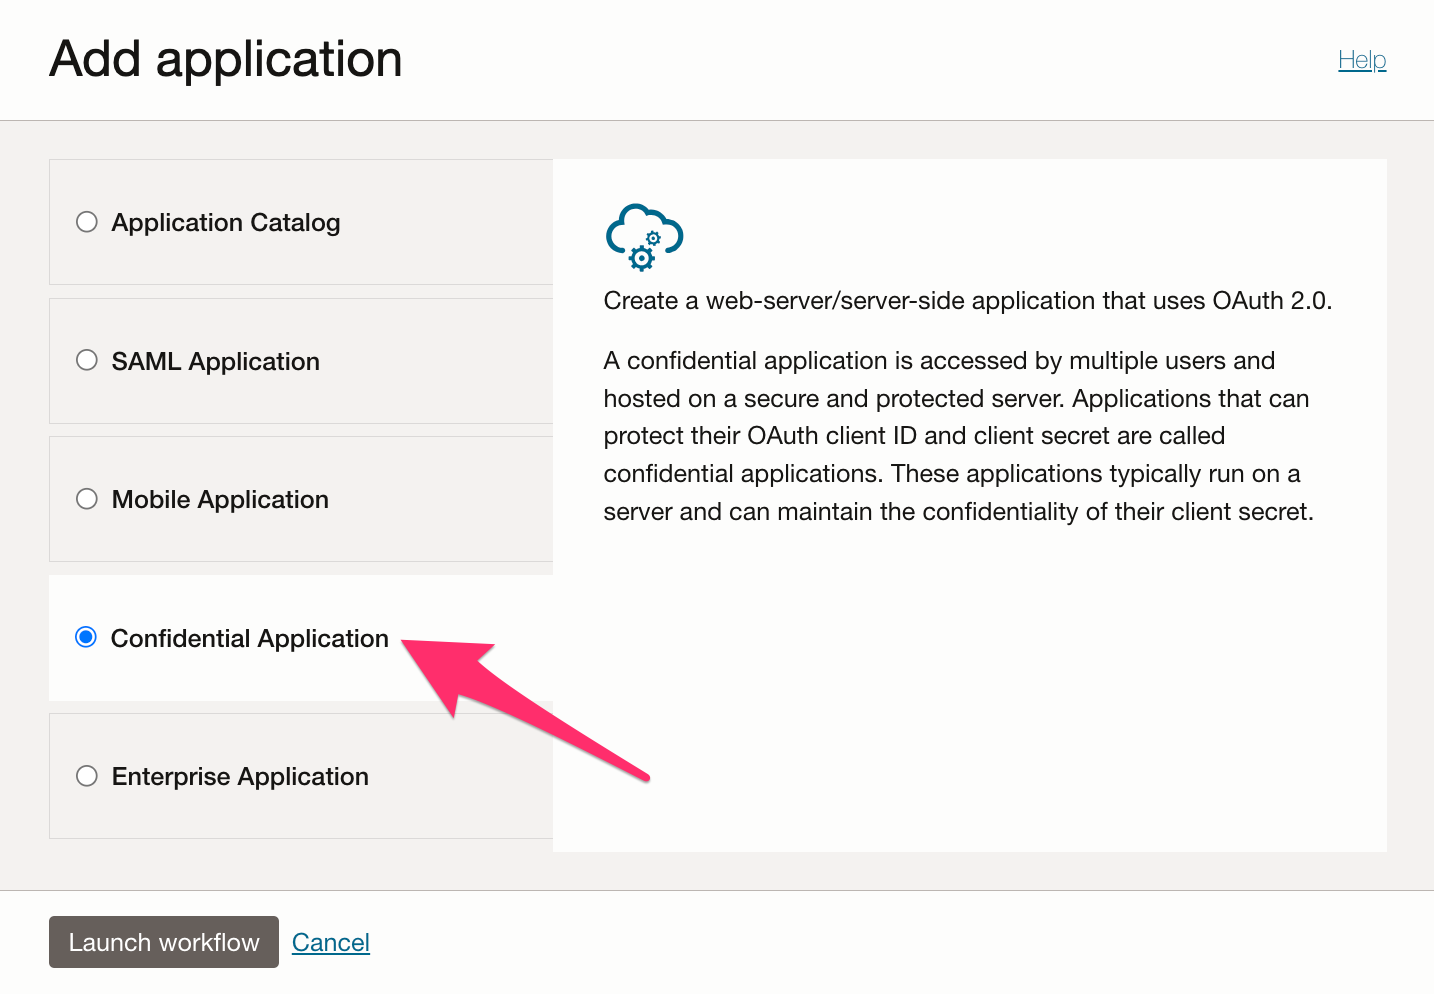
- Select Confidential application option for OIDC application.
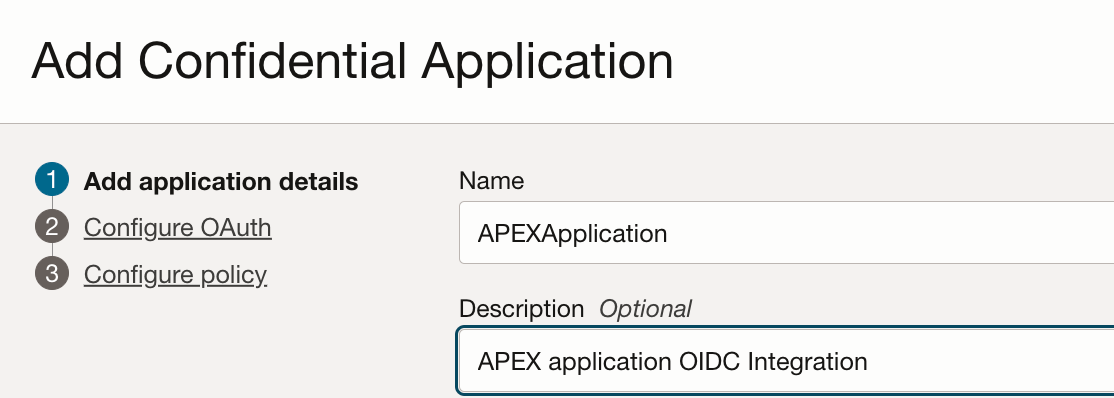
- Enter name of the application and click Next.
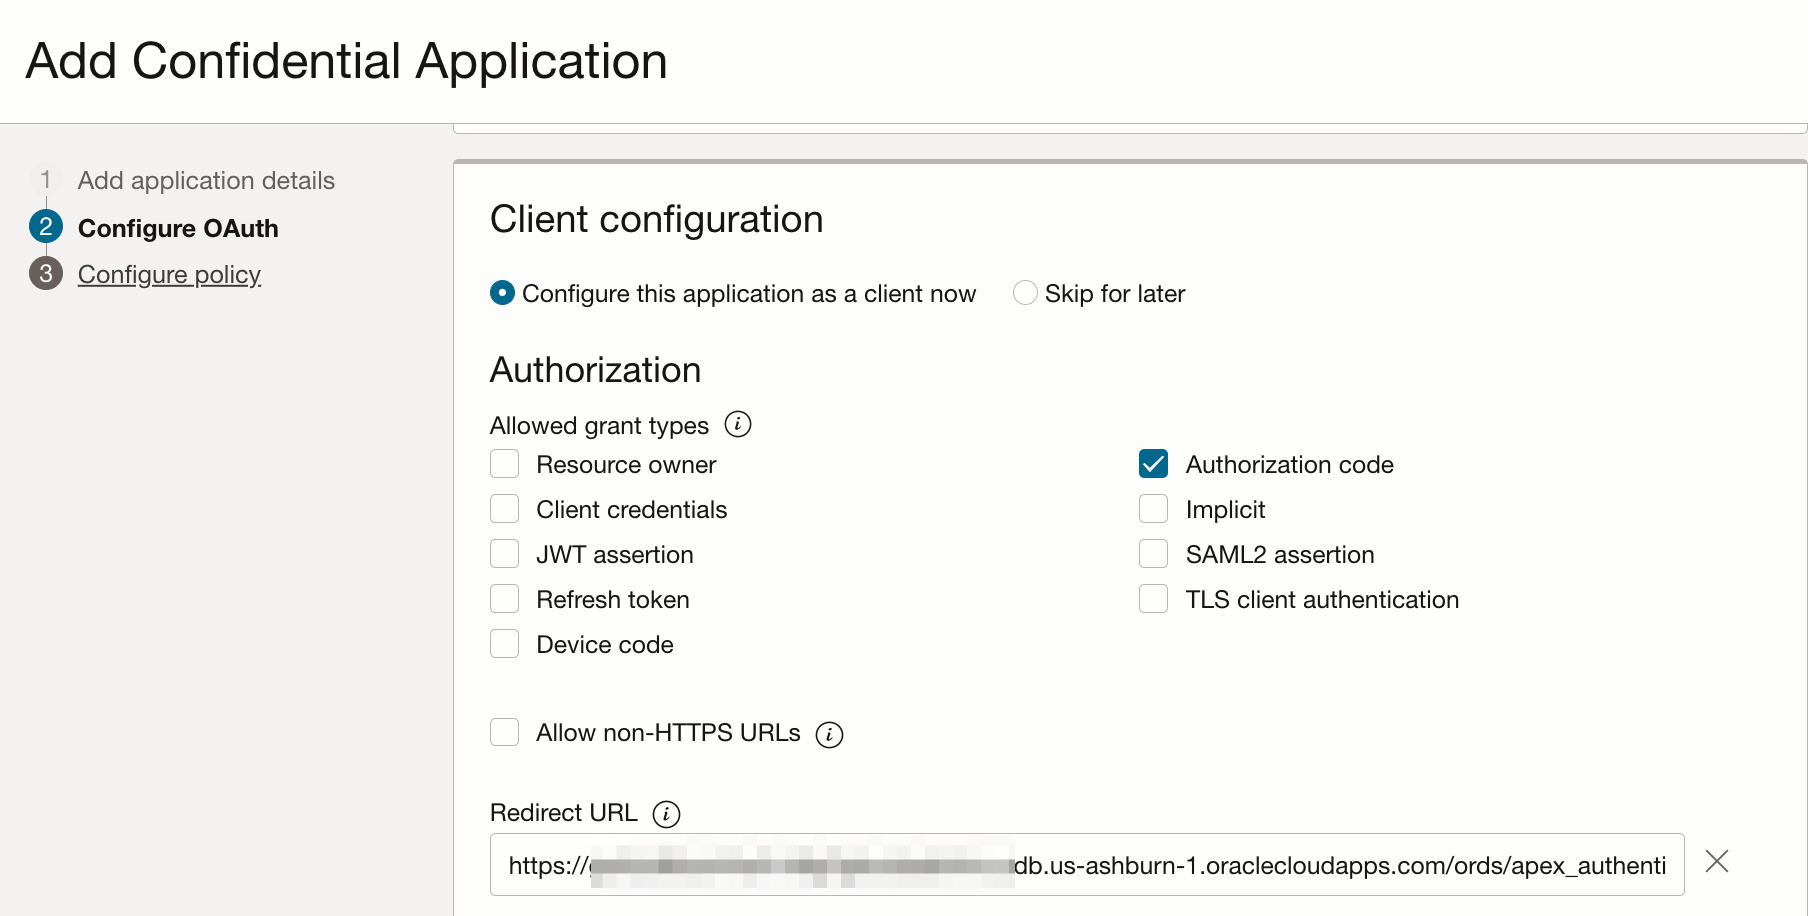
- Select “configure this application as a client now” option.
Select Authorization Code grant type for OIDC integration.
Enter the Redirect URL. The Redirect URL would be APEX instance host name followed by /ords/apex_authentication.callback
https://$APEX_HOSTNAME/ords/apex_authentication.callback
Click Next and then click Finish to complete OIDC application creation.
- Once the application is created, activate the application.
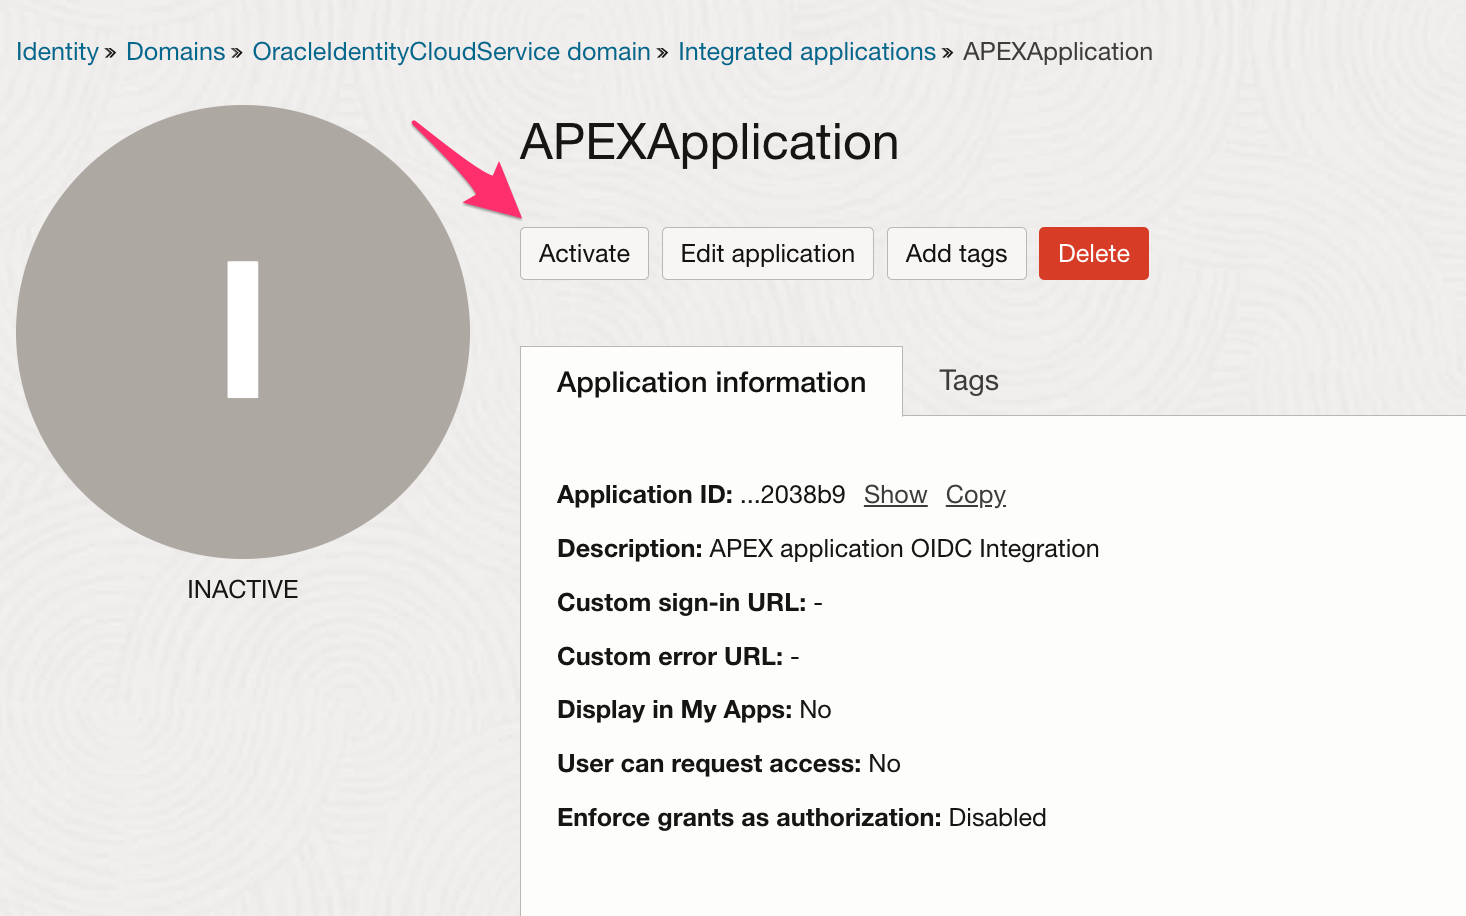
- Note down client ID and client secret for the application. We will need client ID and client secret while configuring authentication in APEX application.
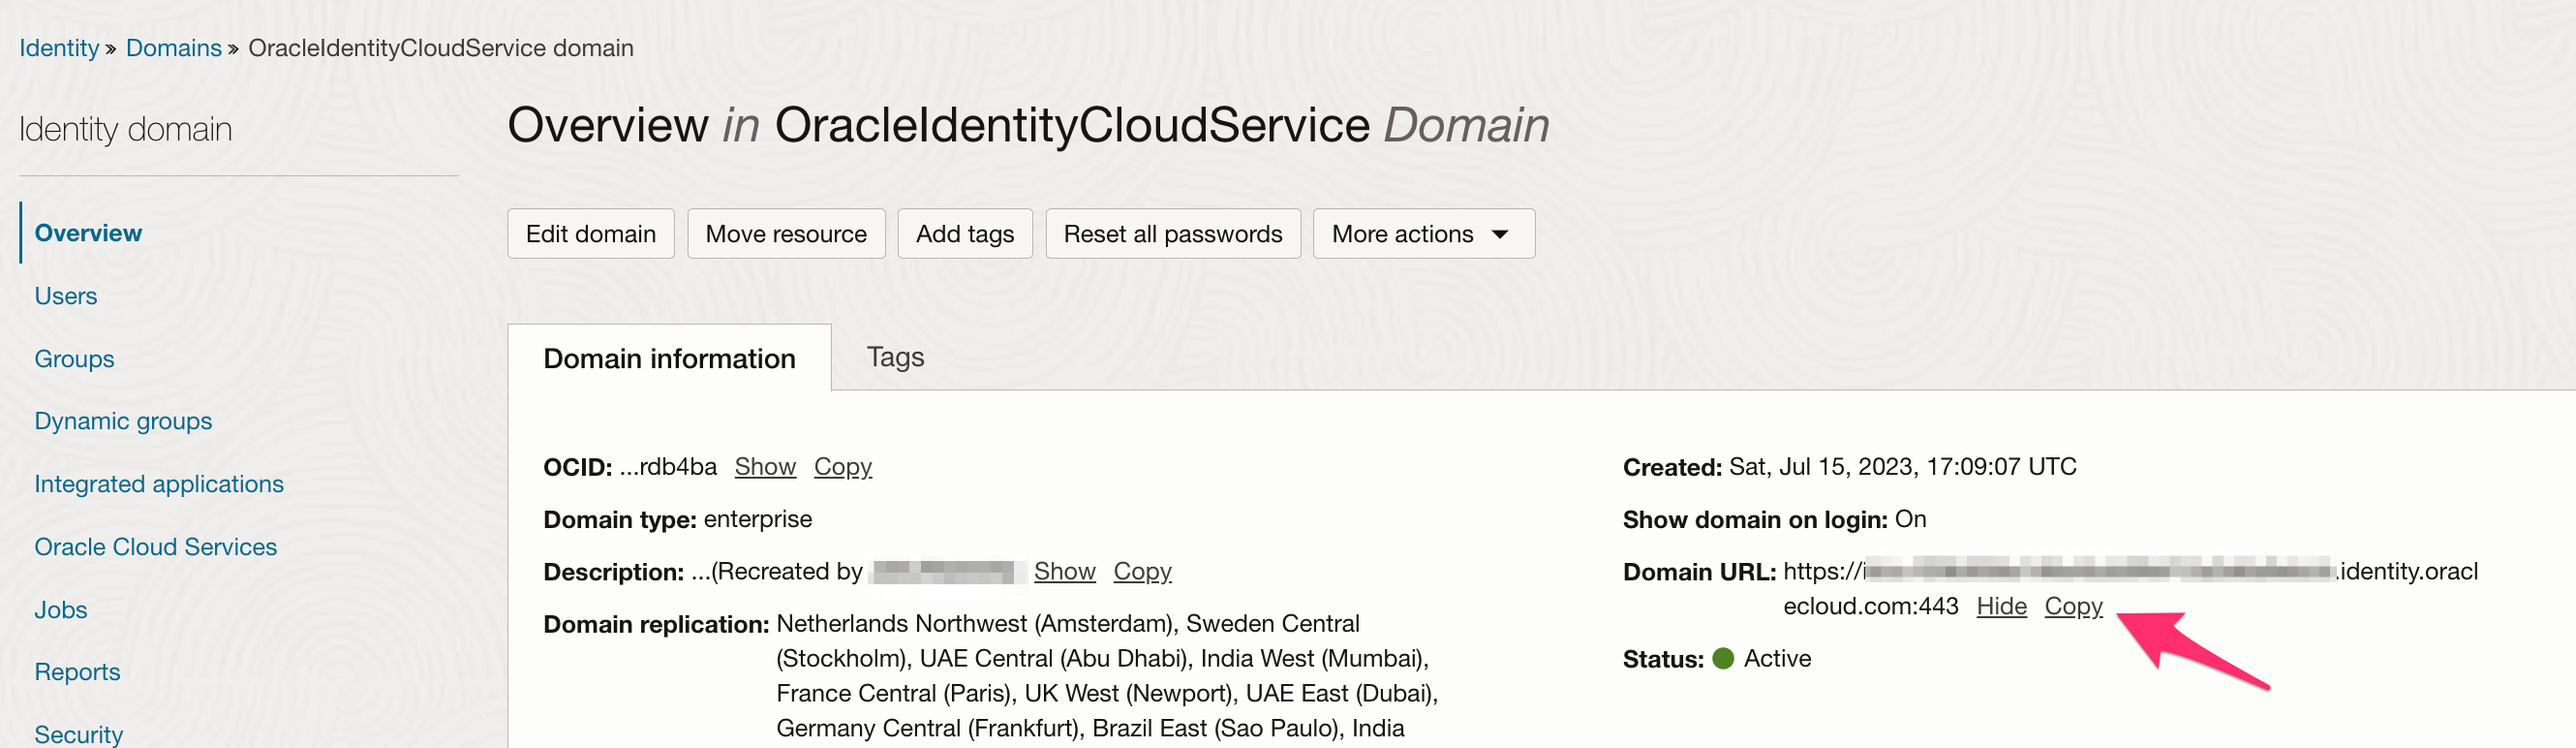
- Copy domain URL for the OCI IAM domain. We will need the URL while configuring authentication in APEX application.
APEX Authentication Configuration
- Launch APEX Instance that you created in the first step above.
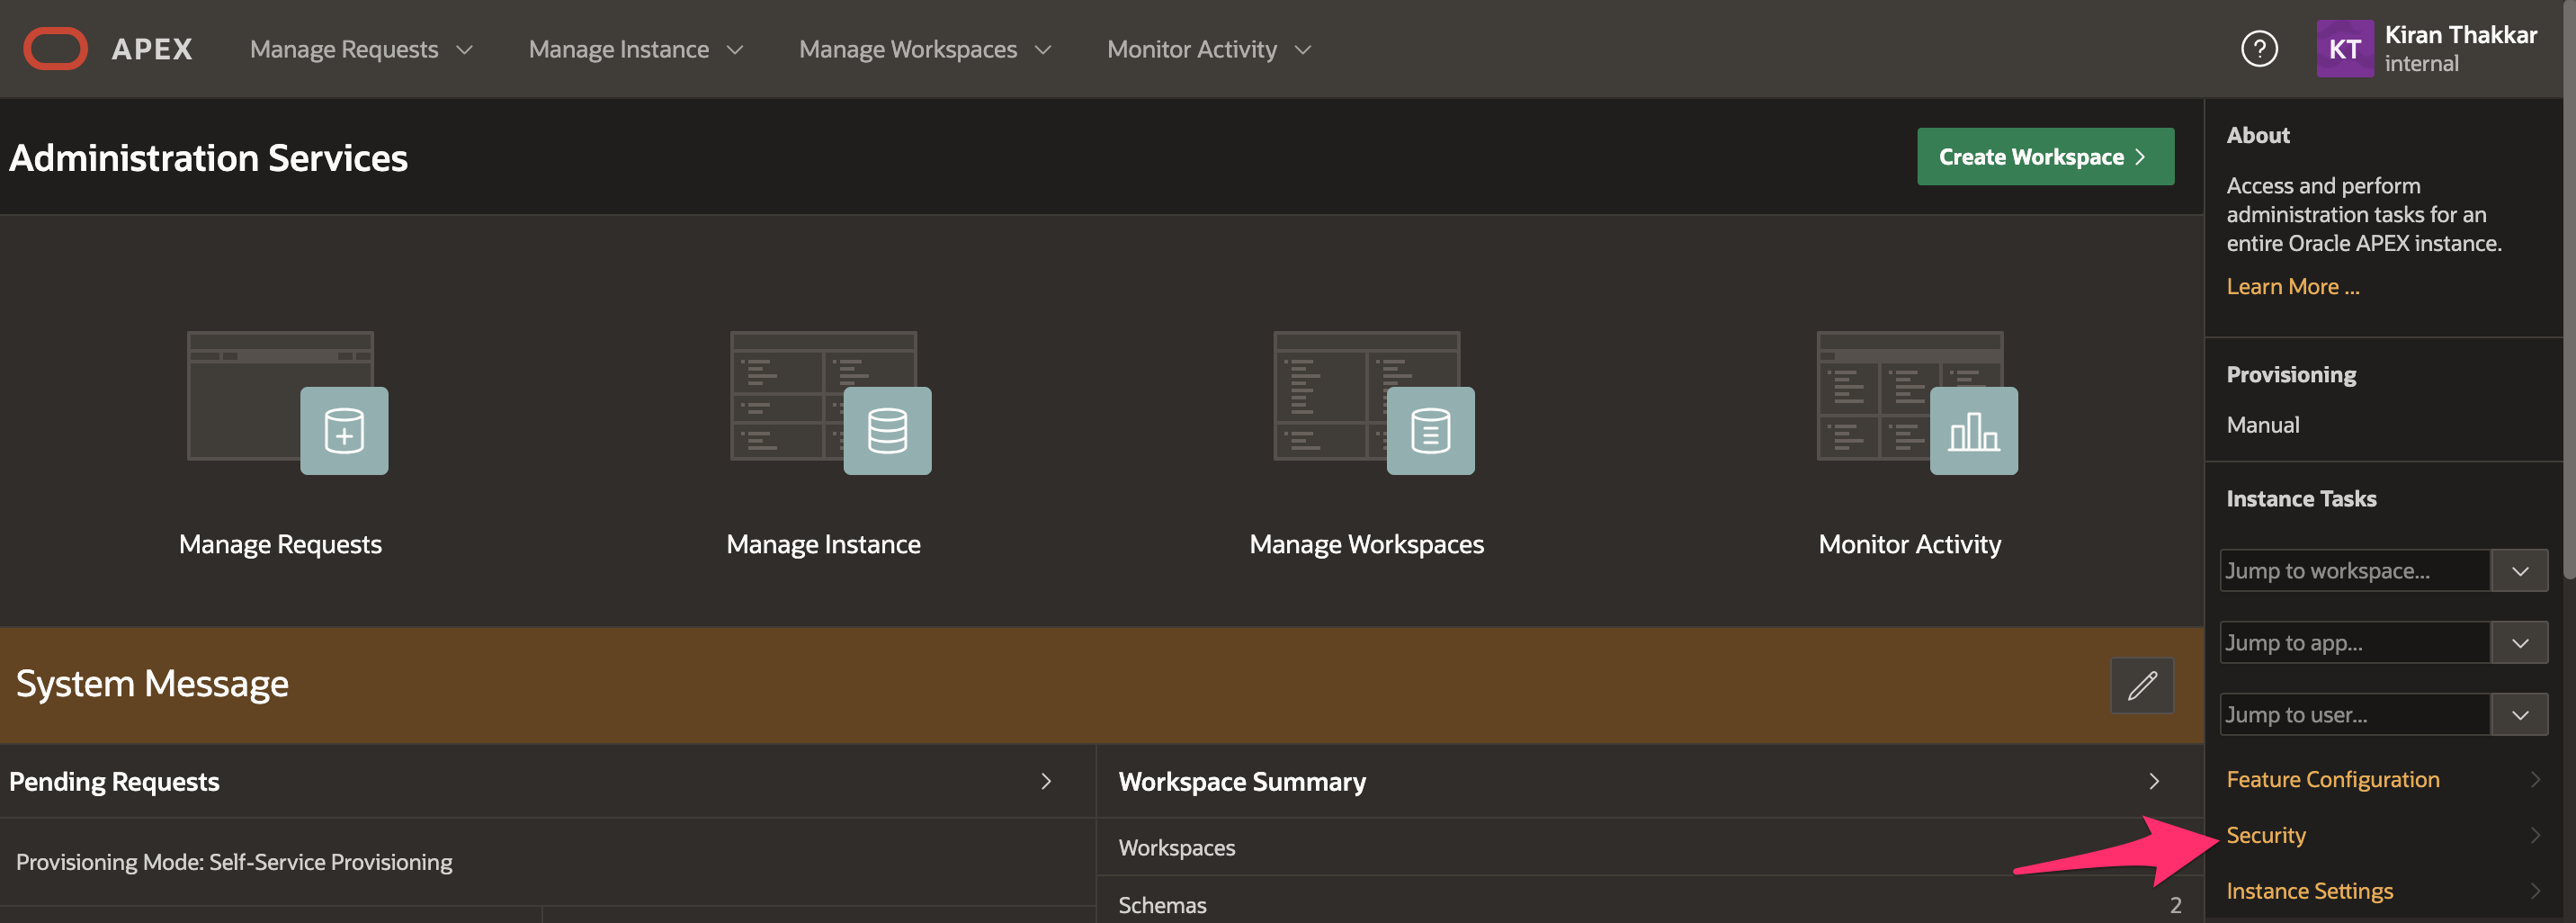
- Login to the APEX Administration workspace to enable SSO authentication. For more information on how to choose and access workspace, you can follow this document.
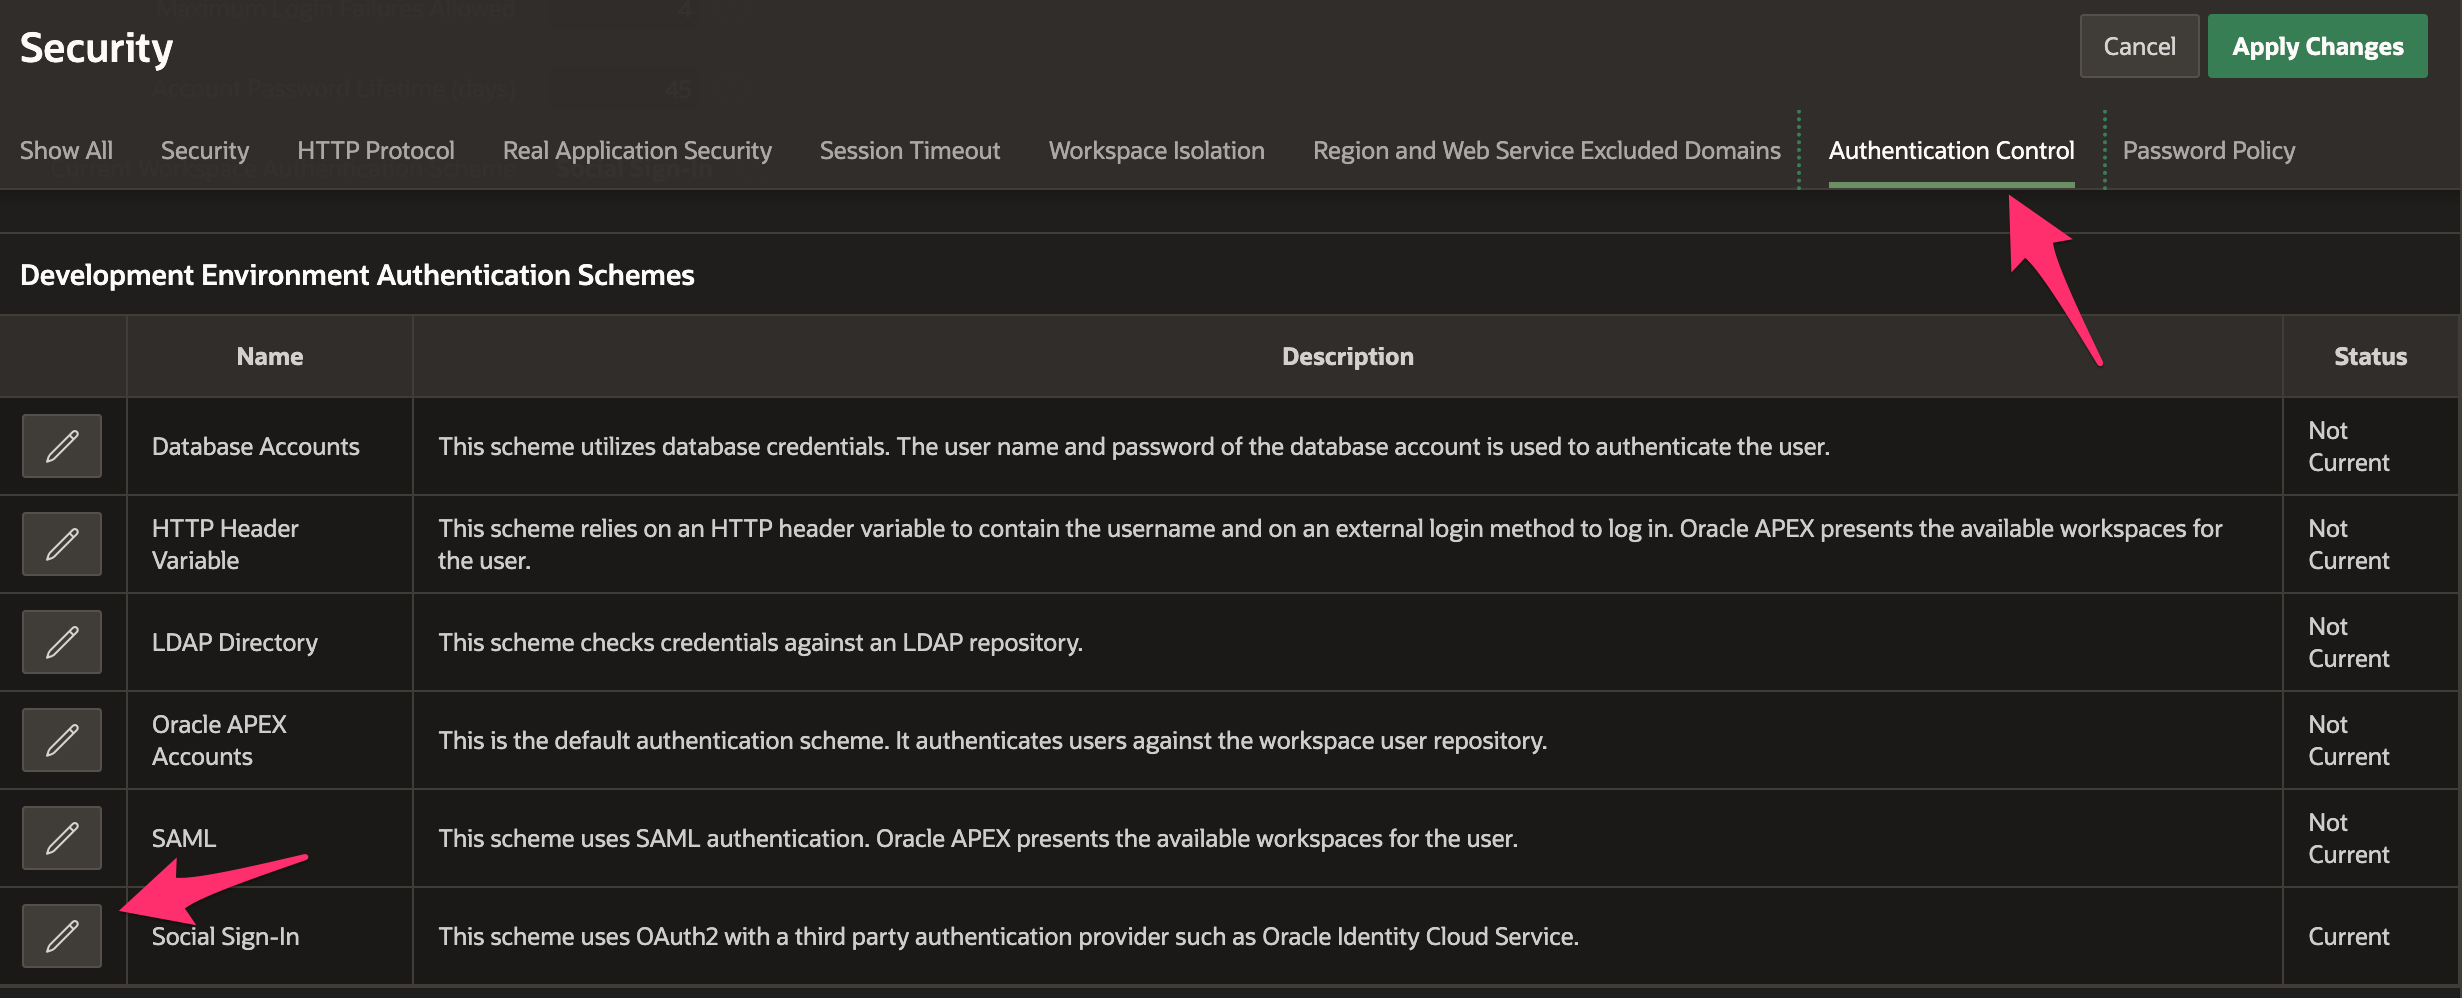
- Browse to Security configuration for the workspace to update authentication configuration.
- Browse to Authentication Control tab and click on Edit button for Social Sign-in.
- Enter client ID and client secret that was copied at the end of OIDC application creation in OCI IAM.
Select OpenID Connect Provider from the drop-down box.
For the discovery URL, use the domain URL that you copied in the last step of OCI IAM configuration. The Identity domain discovery URL is, https://$DOMAIN_URL/.well-known/openid-configuration
In my environment, user’s email address in APEX is same as user’s email address in the Identity domain. So I would configure scope and username both the attributes as email. If Identity domain username matches with APEX username then you can configure openid scope and sub as APEX username attribute.
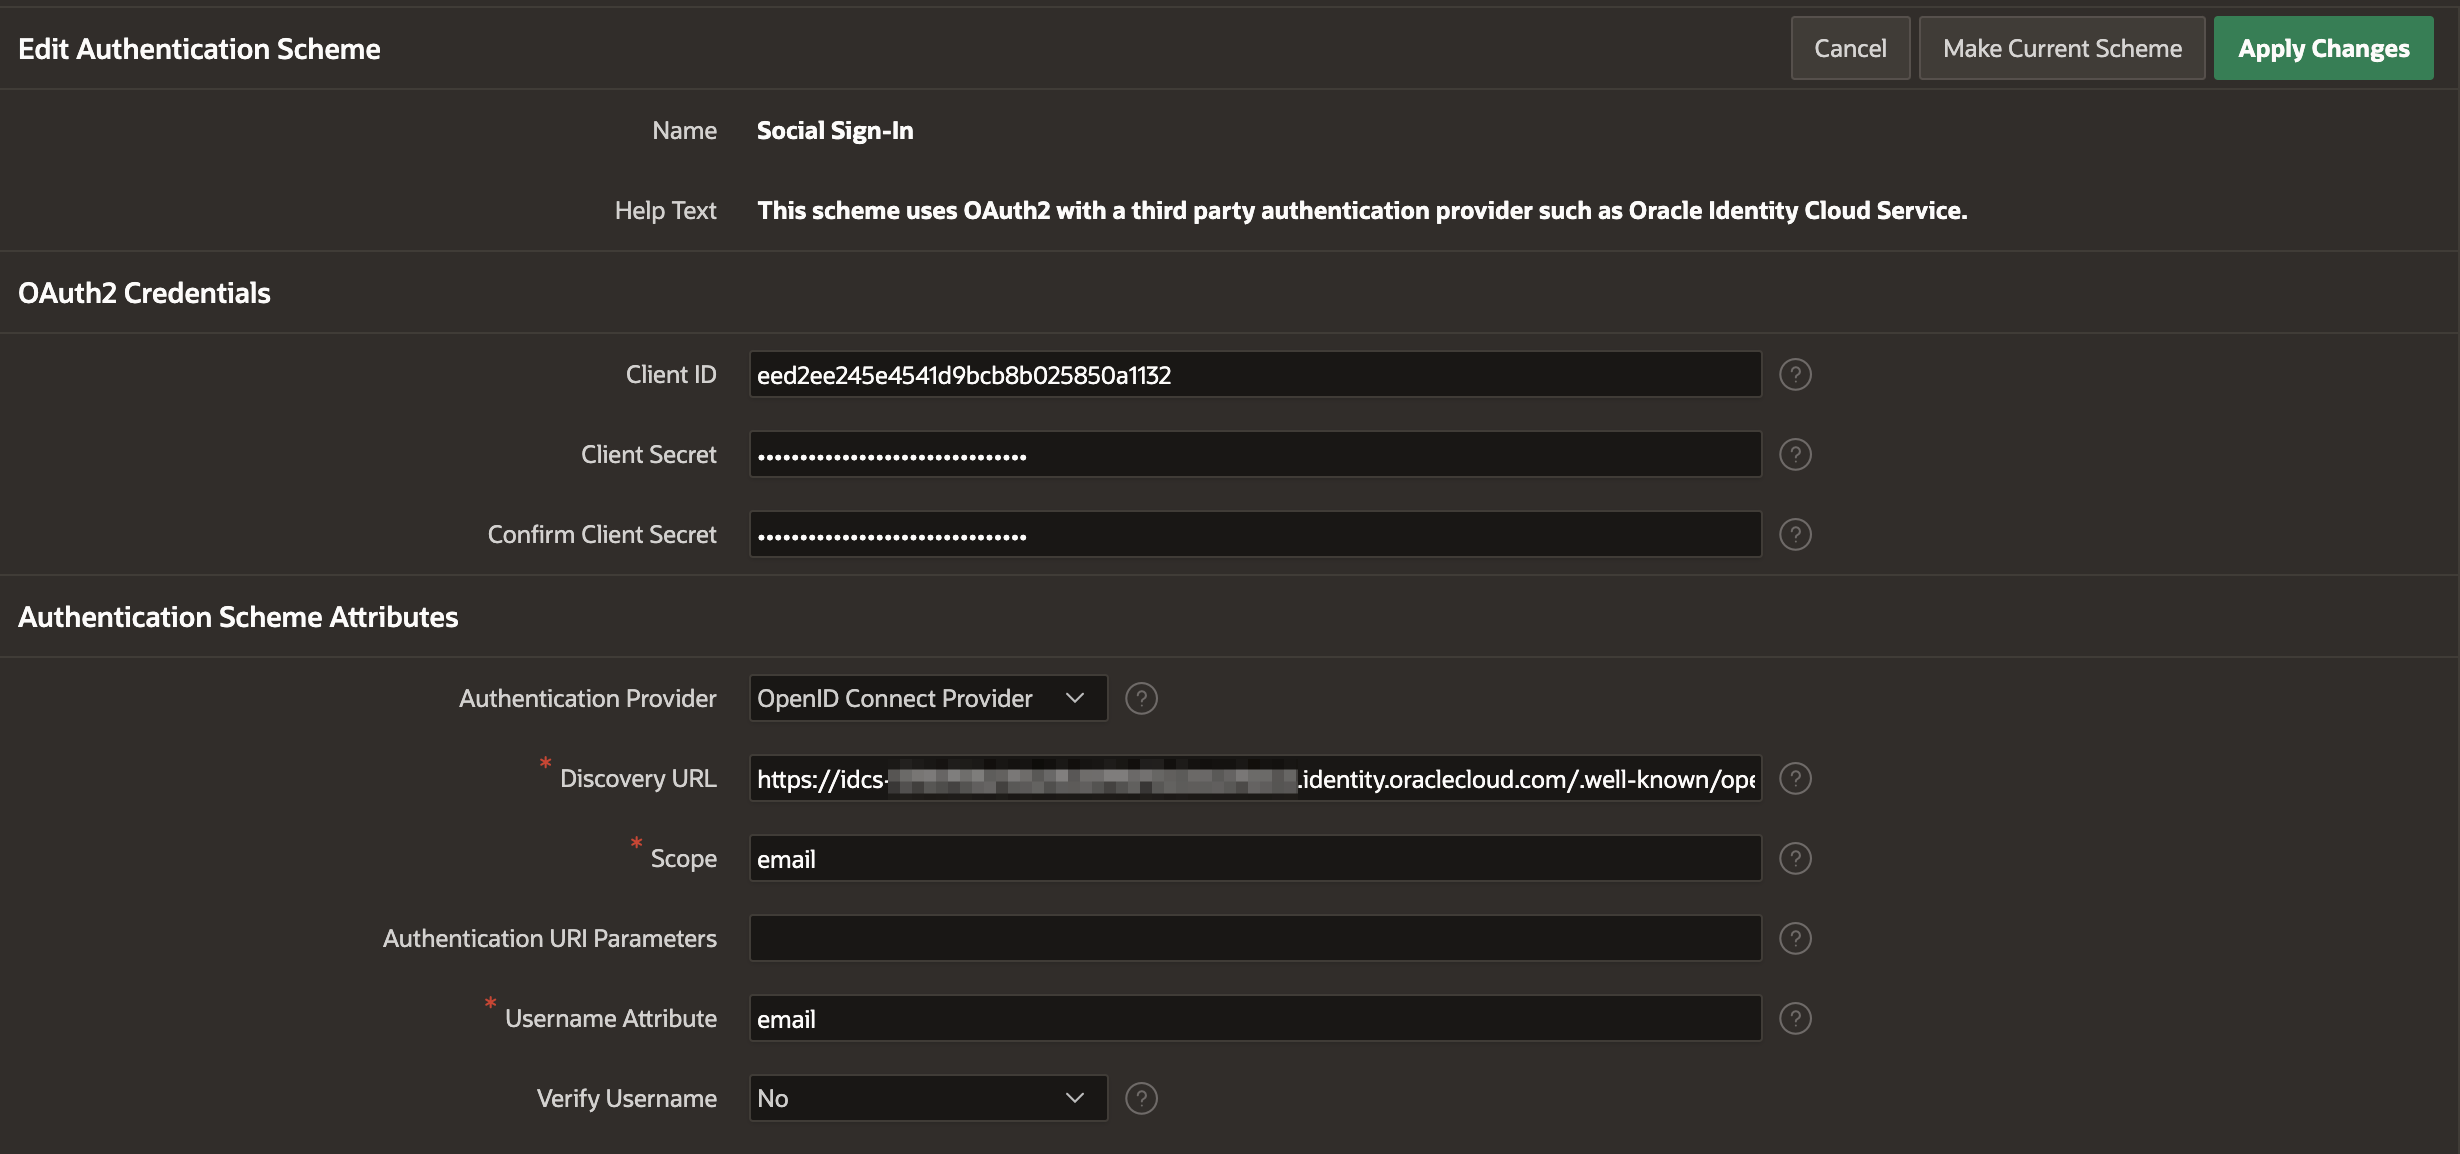
- Once you enter all the parameters, click “Apply Changes”. Please do not logout from APEX instance until you finish OIDC authentication testing.
Testing
Once OIDC authentication is enabled for APEX instance, you cannot login using local database credentials. So open a different browser or an incognito window and test OIDC authentication. To test authentication, open browser and enter APEX Instance URL.
https://$APEX_HOSTNAME/ords/apex
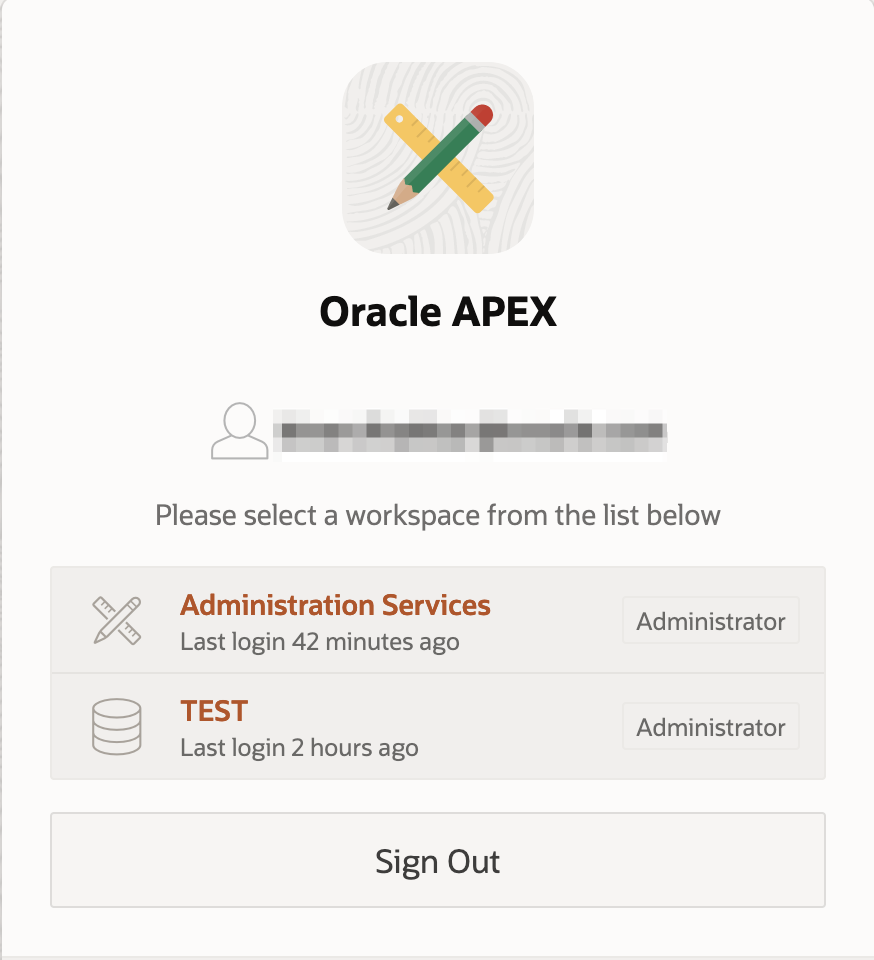
It will redirect the user to the Identity domain login page. Post login, user will be redirected to the APEX application. If the user exists in more than one workspaces then the user will be asked to choose the workspace.