Hi! Welcome to the 3rd blog of the series in which we discuss why and how you can leverage Oracle Cloud services to build your own “light” Content Delivery Network. In this part, we will do a demo on using the CDN with OCI Object Storage.
Blog list:
Build your own CDN on OCI – part 1 – Concepts
Build your own CDN on OCI – part 2 – demo 1 – Website
Build your own CDN on OCI – part 3 – demo 2 – Object Storage
Scenario
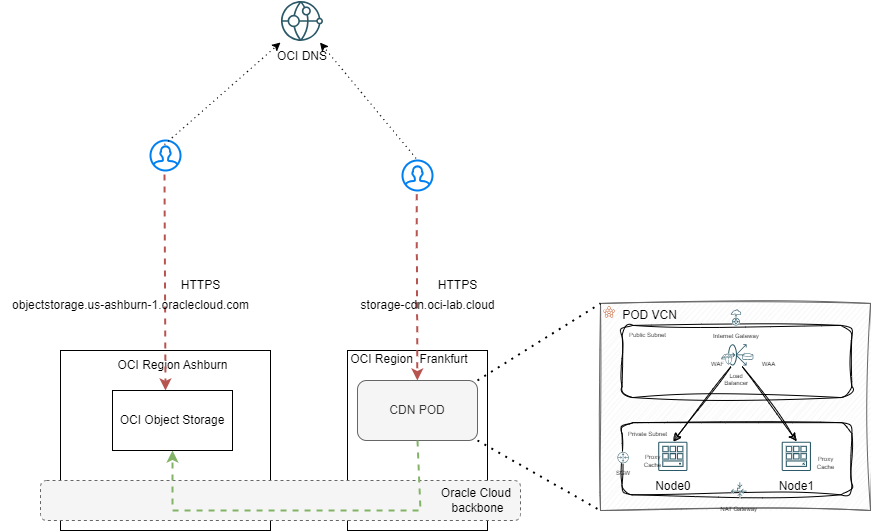
Let’s say we are hosting files in an OCI Object Storage bucket in Ashburn US. If those files are large, the transfer speed to outside US might be bad as users will connect through the Internet. However, we could use our own “lightweight CDN”, built on the Oracle Cloud Infrastructure, to increase those speeds. Furthermore, we will also transform the normal Object storage URL into a custom URL which uses my domain.
Prerequisites:
– A Public DNS Zone – I have oci-lab.cloud which I will use for this demo. From it, I will carve the hostname storage-cdn.oci-lab.cloud to point to the CDN POD.
– SSL Certificates, certificate chain and private key for all DNS hostnames that will be used. In my case, I have a wildcard certificate (*.oci-lab.cloud) which I will use, but specific certificates for each hostname will also work.
Before we start, here is a diagram of what we will build:
Demo
Let’s build all the components of the lightweight CDN.
A. Origin
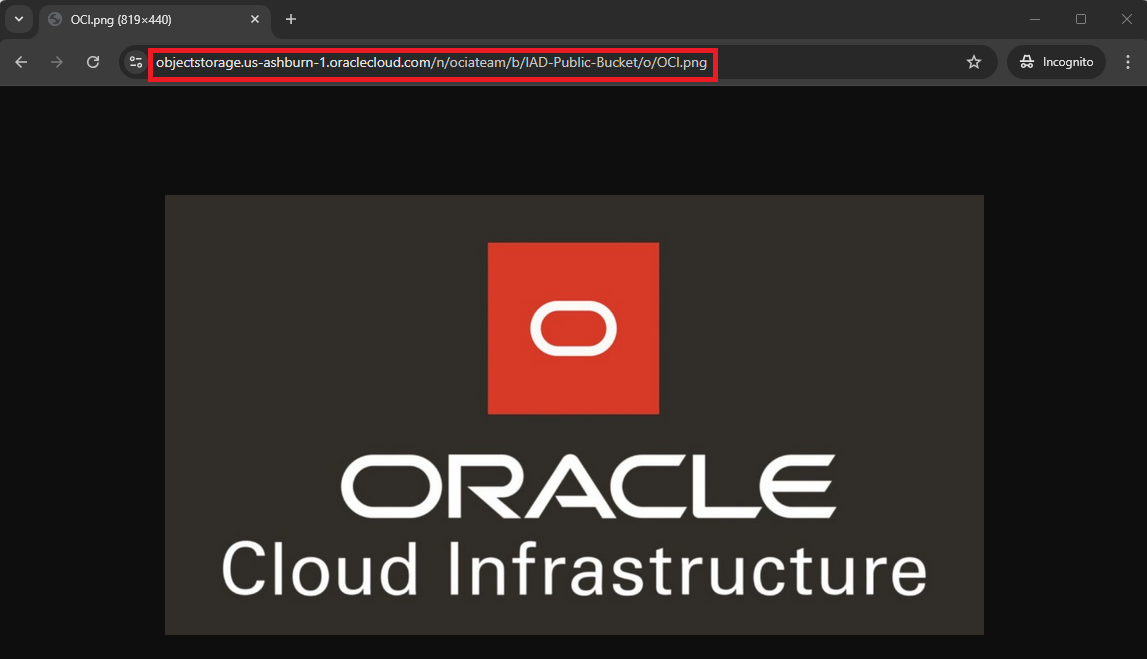
The Origin for this demo is an OCI Object Storage Public Bucket created in the US Ashburn region. Inside the bucket I have a 1GB file (called test.file) with which I will test transfer speeds with and without the CDN. An OCI Object Storage public bucket allows us to directly access the files in it, over the Internet. The URL is generated by OCI:
Note: for simplicity, in this blog I am using a public bucket, but the same principle applies to private buckets when accessing them with something like a Swift Endpoint.
B. CDN PODs
The CDN PODs are the main components. To do a step-by-step guide on the full deployment would take too much space and would make the blog boring. I will skip through some of the parts and only focus on the details that are important. Also, the previous blog showed how you can deploy multiple PODs and use OCI DNS Traffic Steering to direct users to the closest POD, based on their location. In this blog, I will deploy a single POD in Frankfurt. Also, I will not configure the POD to cache content for this particular usecase.
As per the previous blog, the POD design is pretty simple: one VCN with subnets, one public Load Balancer, two virtual machines running Oracle Linux 8 and NGINX.
In the end, it should look like this:
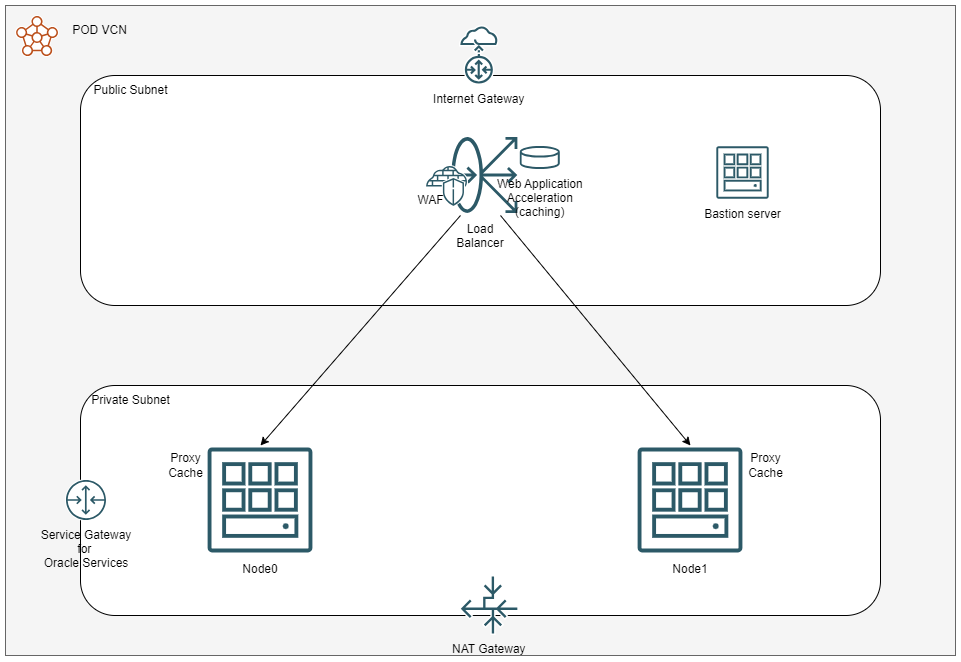
1. Deploy one VCN with:
– An Internet Gateway, a NAT Gateway and a Services Gateway
– A public subnet with a dedicated route table that points 0.0.0.0/0 to the Internet Gateway; add a dedicated Security List which allows only TCP 443 and 22 from the Internet, allowing all on egress.
– A Private subnet with a dedicated route table that points 0.0.0.0/0 to the NAT Gateway and “Services” to the Service Gateway; add a dedicated Security List which allows only TCP 80 and 22 from the Public Subnet, allowing all on egress.
2. Deploy the Bastion server on the public subnet to use it to connect to the backend NGINX servers. Alternatively, you can use OCI’s Bastion Service.
3. Deploy 2 Compute instances in the private subnet running Oracle Linux 8 with 2 OCPUs and 16 or 32 GB of RAM. Make sure they are in different Availability domains and that you assign the correct SSH keys so you can connect to them from the Bastion server.
Let’s connect to the first NGINX node and install/configure NGINX. Add these lines, one by one:
sudo yum install -y nginx
sudo systemctl enable --now nginx.service
sudo firewall-cmd --add-service=http --permanent
sudo firewall-cmd --reload
sudo systemctl status nginx
After the last line, the status should be:
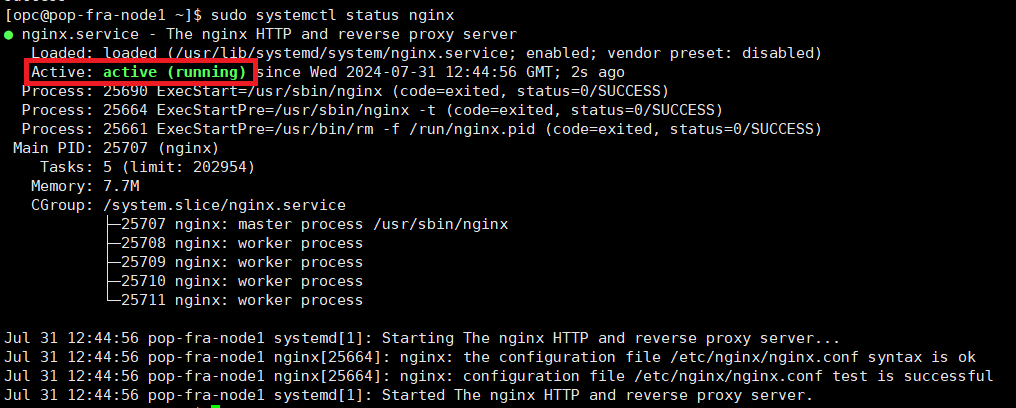
If it is not, do not move further, troubleshoot and fix the deployment.
For this scenario, we need to rewrite the HTTP “Host” Header. Let’s create a mapping:
sudo su -
echo 'map $http_host $storage_host {' >> /etc/nginx/conf.d/host.conf
echo '    default $http_host;' >> /etc/nginx/conf.d/host.conf
echo '    storage-cdn.oci-lab.cloud objectstorage.us-ashburn-1.oraclecloud.com;' >> /etc/nginx/conf.d/host.conf
echo '}' >> /etc/nginx/conf.d/host.conf
exit
Now let’s configure NGINX:
sudo vi /etc/nginx/nginx.conf
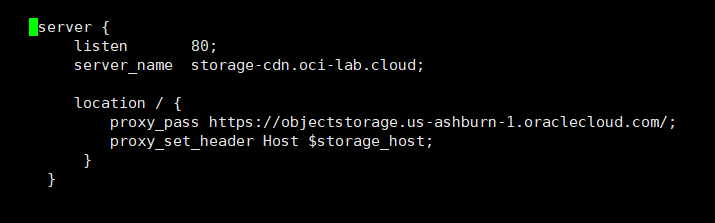
Go to the middle of the file and add a new server.
server {
        listen       80;
        server_name  storage-cdn.oci-lab.cloud;

        location / {
            proxy_pass https://objectstorage.us-ashburn-1.oraclecloud.com/;
            proxy_set_header Host $storage_host;
         }
     }
Restart nginx and make sure it comes back in a running state.
sudo systemctl restart nginx
sudo systemctl status nginx
Before moving on, disable SELinux until next reboot as, by default, SELinux will prevent NGINX from running as a proxy. While there are ways to configure SELinux to allow NGINX to proxy traffic and make that configuration stick after a reboot, for demo purposes we will just disable SELinux. For a production deployment, this topic should be tackled with more security in mind.
sudo setenforce 0
sudo systemctl restart nginx
Repeat the same procedure for the second NGINX node.
DISCLAIMER: The configuration above is for demo purposes only, to showcase the concept of caching and proxy inside NGINX. The production configuration should be a lot more complex, with settings related to cache control, http headers and cookies, logging and what not.
4. Load balancer setup
After both NGINX servers are up and running, deploy a Public Load balancer, in the public subnet.
– Shape – any values that will work for your particular application; for this demo I will go with a minimum of 50 Mbps and a maximum of 500 Mbps.
– Listener HTTPS with SSL Certificates for the hostname you will use (mine is storage-cdn.oci-lab.cloud).
– Backend set with the two NGINX servers on HTTP (port 80).
– Health check on HTTP un default settings.
– Optional: Add a Web Application Firewall Policy by following this guide.
– Optional: Add a Web Application Acceleration policy (for caching) by following this guide.
If everything is configured correctly, the load balancer should come up with OK status. Take note of the public IP as we will need it in the DNS config.
C. DNS Confguration
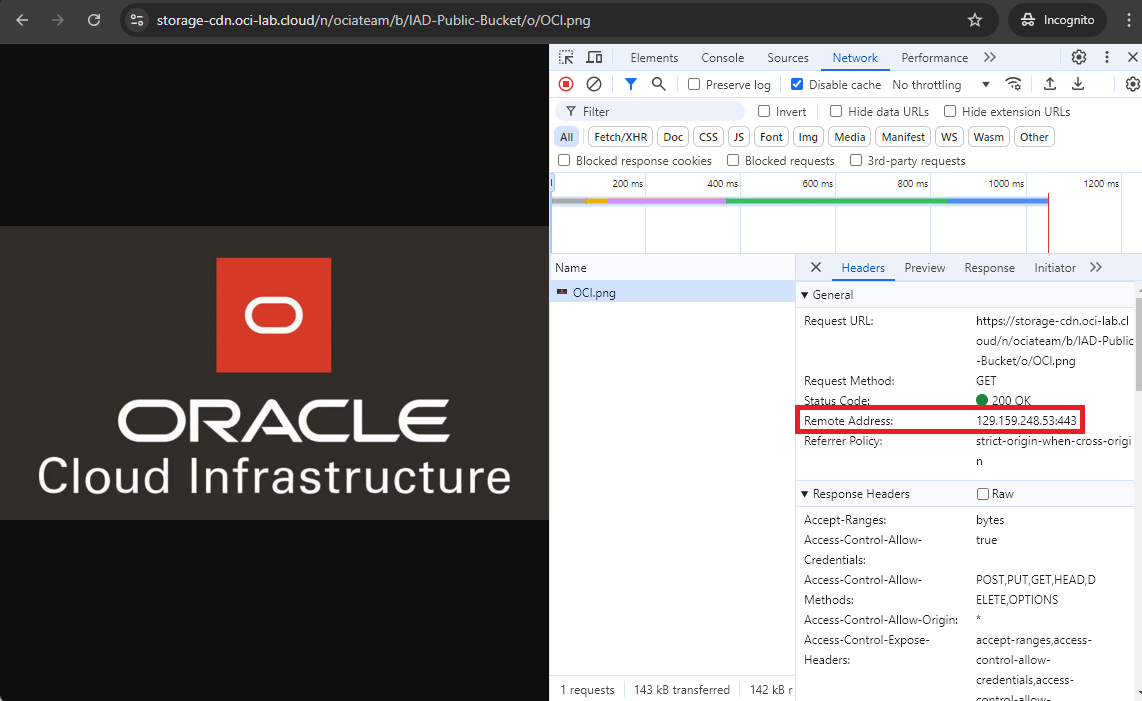
While normally we would use DNS Traffic Steering with Geolocation policies, for this demo I will simply point storage-cdn.oci-lab.cloud to the POD LB in Frankfurt which has the 129.159.248.53 IP.
After pointing the DNS hostname to the correct IP, we should be able to access the Ashburn Object Storage files with the custom domain:
Performance testing.
Besides the ability to use custom domains for OCI Object Storage, the bigger advantage is that we will use OCI’s backbone to download the files, instead of the Internet. From my computer, which is located in Europe, I will use “Curl” to test the download speed to the 1GB file in Ashburn with and without the CDN.
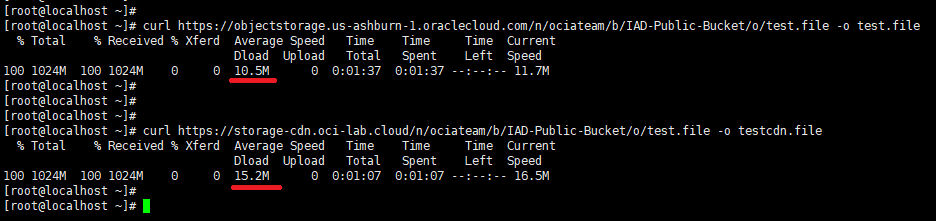
The direct test showed about 10 MBps while the throughput through the CDN increased by 50% to 15 MBps. These values will vary based on multiple variables, but when doing multiple tests, I always get a 50-60% throughput improvement with the CDN POD. The closer someone is to the POD, the bigger the improvement.
