Introduction
This blog will talk about how to change the custom DNS servers in the DHCP options, how to failover from an old DNS to a new DNS server, and how not to wait the 24-hour lease time that is a default on OCI DHCP configuration for Linux and Windows VMs.
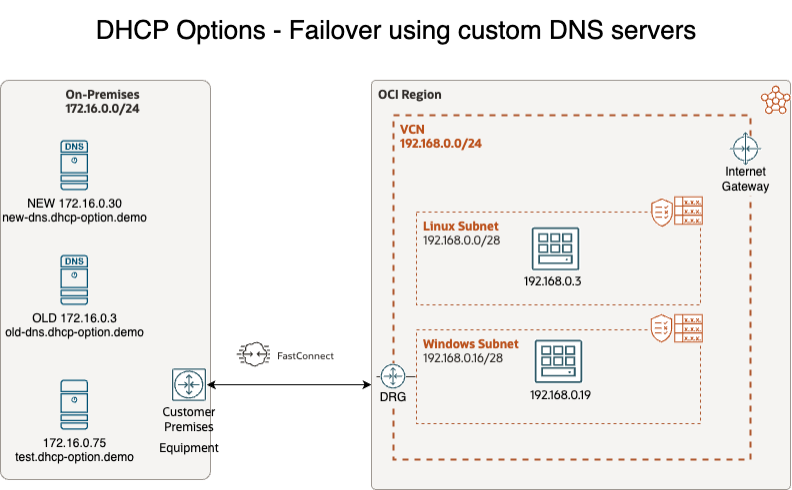
I will use a simple design as in the diagram below:
In this Blog, we will use the following technologies:
– Virtual Cloud Network (VCN) – for more information, please access official documentation at https://docs.oracle.com/en-us/iaas/Content/Network/Tasks/managingVCNs.htm
– Dynamic Routing Gateway v2 (DRGv2) – for more information, please access official documentation at https://docs.oracle.com/en-us/iaas/Content/Network/Tasks/managingDRGs.htm
– OCI Compute – for more information, please access official documentation at https://www.oracle.com/cloud/compute/
– OCI FastConnect Partner Connectivity Model – for more information, please access official documentation at https://www.oracle.com/cloud/networking/fastconnect/
– DHCP options – for more information, please access official documentation at https://docs.oracle.com/en-us/iaas/Content/Network/Tasks/managingDHCP.htm
Prerequisites
We will focus on changing the DHCP Option and doing a DHCP renewal on Linux and Windows VMs so we do not need to wait 24 hours until the DCHP lease expires. To do this, we will need the following resources already provisioned and configured:
1. VCN – in our case, we will have a VCN in the Phoenix region with 192.168.0.0/24 CIDR with all routing and Security List / Network Security Groups to allow connectivity between Phoenix CIDR Block and On-Premises CIDR for all services used (ex: ICMP, DNS, etc.);
2. On-premises network with all required routing and security access to the DNS servers (OLD with IP 172.16.0.3 and NEW with IP 172.16.0.3) and test server (IP 172.16.0.75) that will also have an FQDN test.dhcp-option.demo;
3. DRG – in our case, one DRG uses Fast Connect to connect to the On-premises datacenter. DRG and Fast Connect are built and working as they should;
4. 2 Compute VMs – in our case, one compute VM is an Oracle Linux (192.168.0.3), and one VM is a Windows (192.168.0.19);
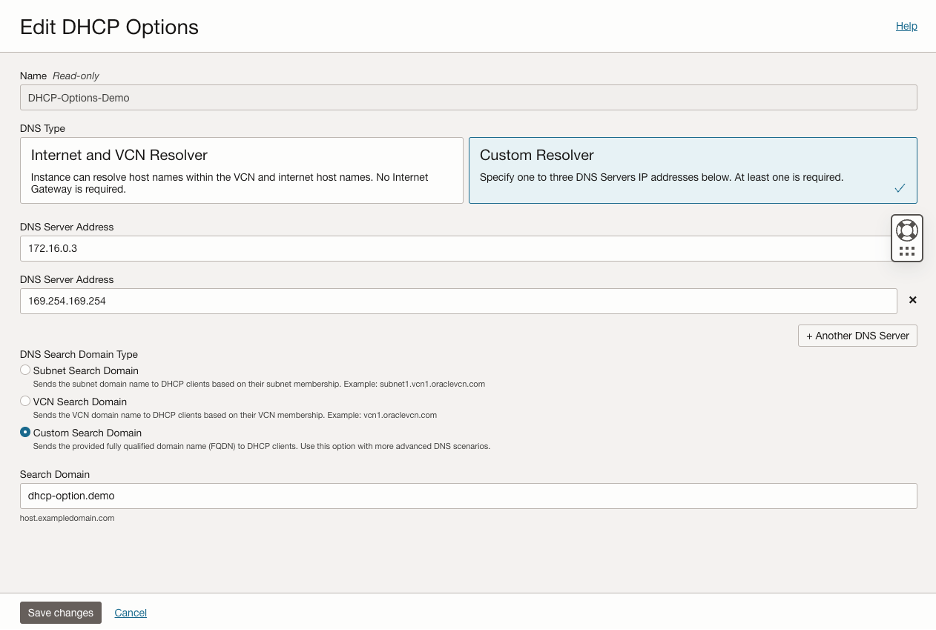
5. DHCP options for the subnets with customer resolver are configured like this:
Solution Description
This solution is not focused on anything else other than the configuration changes on the DHCP option in the VCN, and the DHCP renewal in the OCI VMs is done by following the following steps:
a. First, we will connect to Linux and Windows VMs and verify what is the DNS server configuration on each one:
First, on a Linux VM, I will use the following command “nmcli connection show <interface> | grep DNS” on my Oracle Linux test instance under super user mode. As you can see in the image below

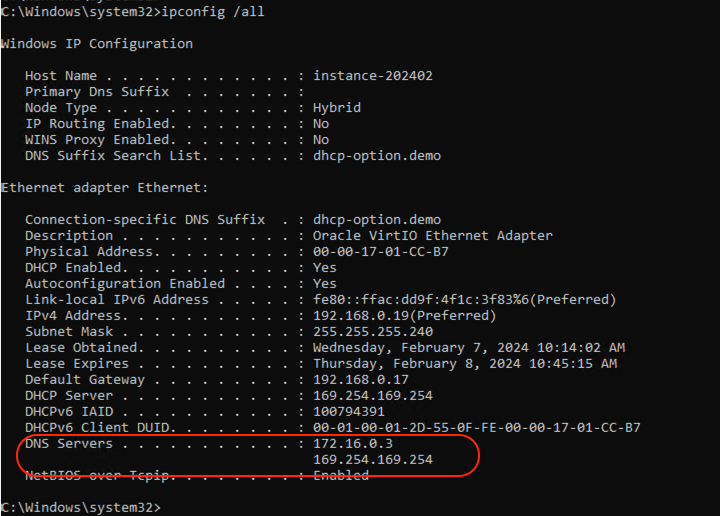
After I did the same thing on my Windows VM using the following command “ipconfig /all” in the Command Prompt, the result was the following:
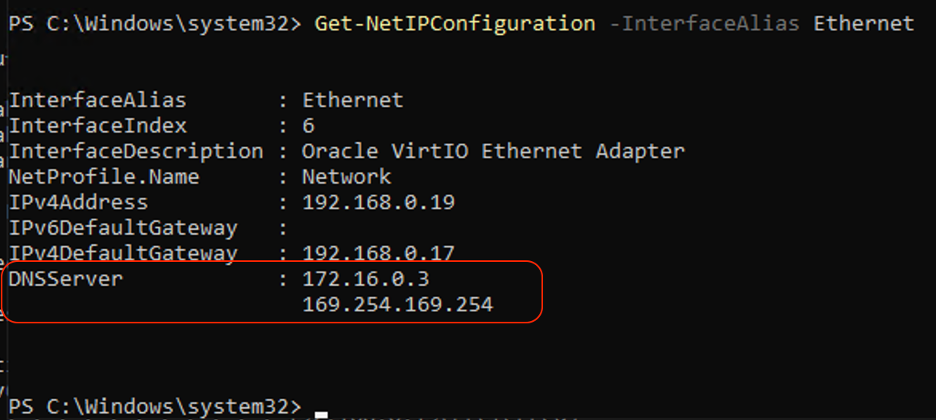
If you are using the Power Shell, then the command I used is “Get-NetIPConfiguration -InterfaceAlias <interface alias>", the result was the following:
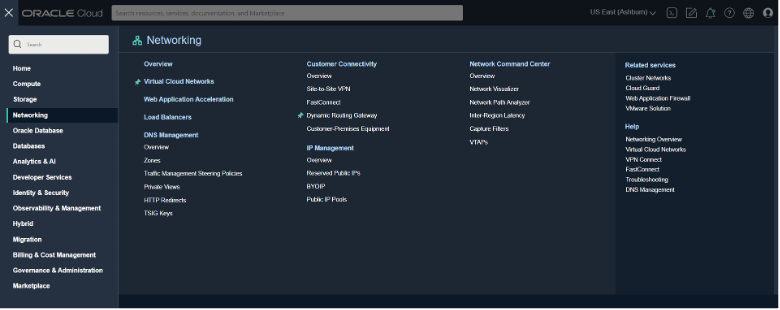
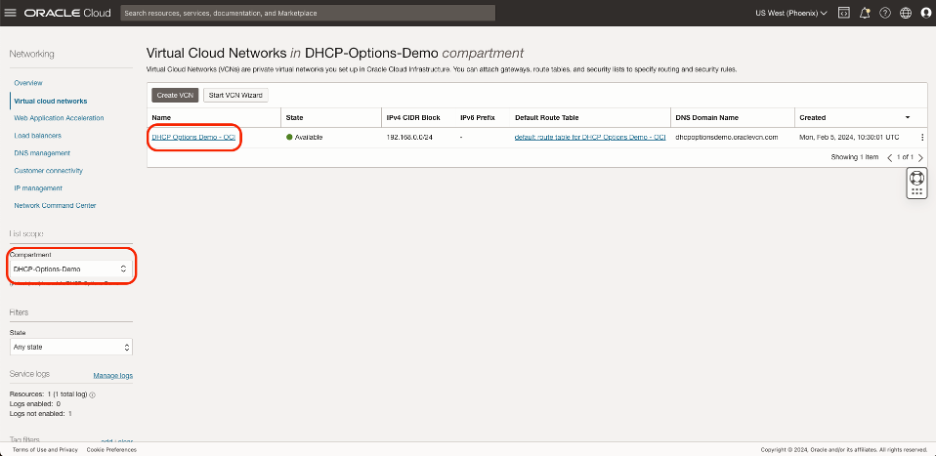
b. Please select the region we have the Virtual Cloud Networks we need to modify, in our case, Phoenix Region.

c. Go to Virtual Cloud Networks under Networking.
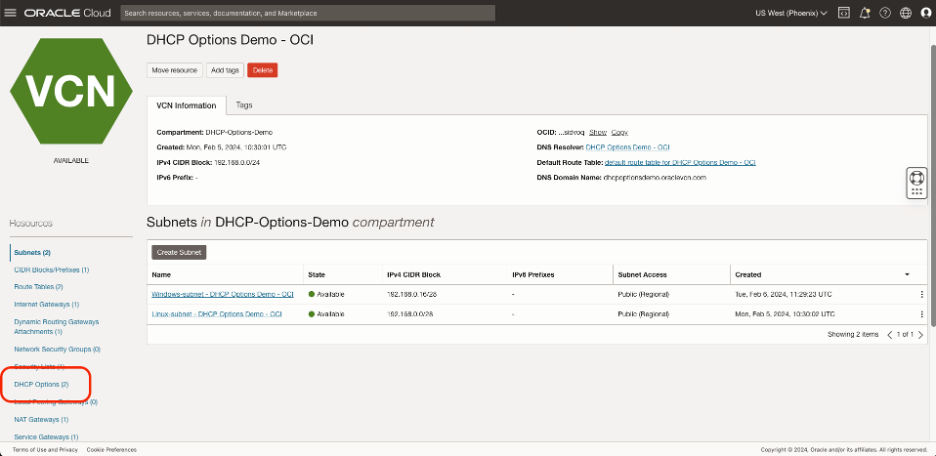
d. Select the Virtual Cloud Network, remembering to select the correct compartment for the Virtual Cloud Network.
e. Go to DHCP Options, which is on the left under Resources.
f. Click the three dots menu on the right on the required DHCP option.

g. Click on edit.
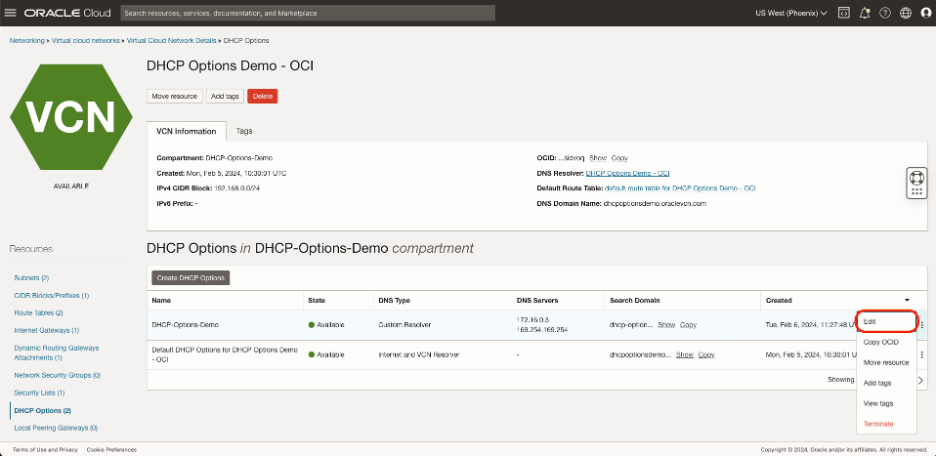
h. We see that the first “DNS Server Address” is the old DNS IP address.
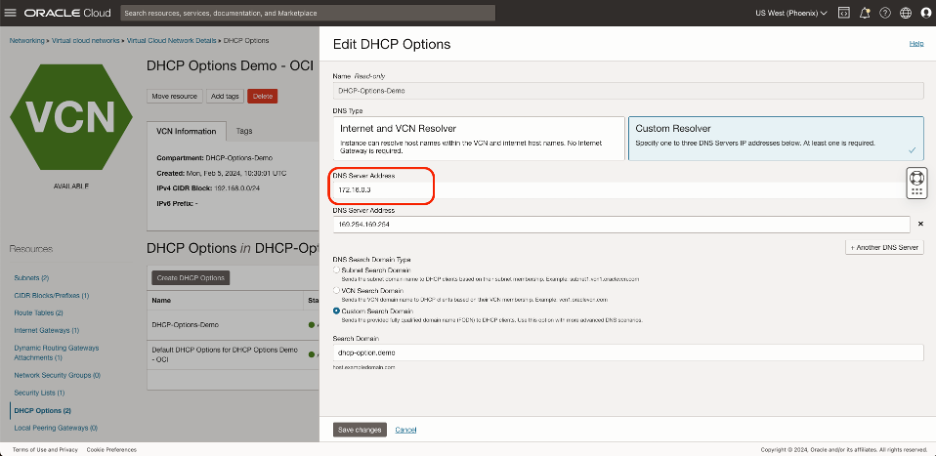
Change that to the new IP address and click “Save changes”.
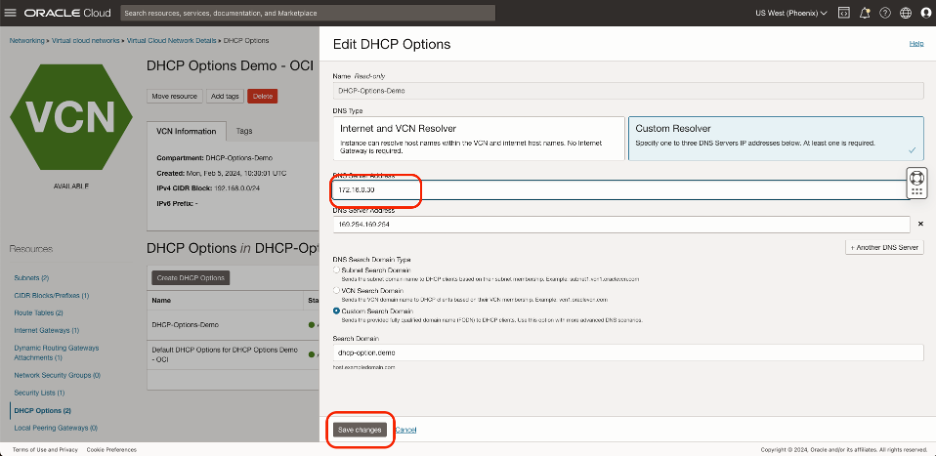
i. Now is the time to run the commands on the VMs so we can immediately change the DNS from the old DNS IP 172.16.0.3 to the new DNS IP 172.16.0.30 without waiting for the DHCP lease expiration.
On the Linux VM, I run the command “/etc/init.d/network restart” as a superuser and verify again the DNS config using the same command as in the beginning “nmcli connection show <interface> | grep DNS”:

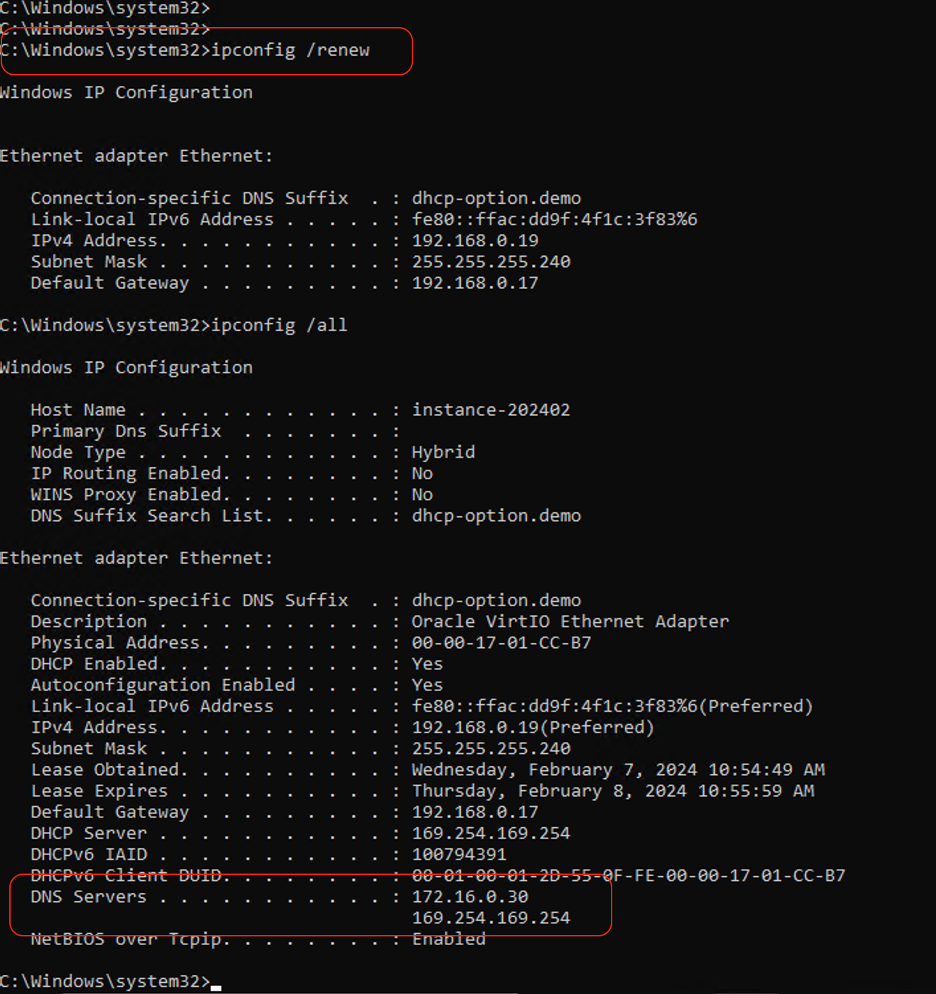
On the Windows VM, I used on Command Promt “ipconfig /renew” and after verifying the DNS configuration using “ipconfig /all”.
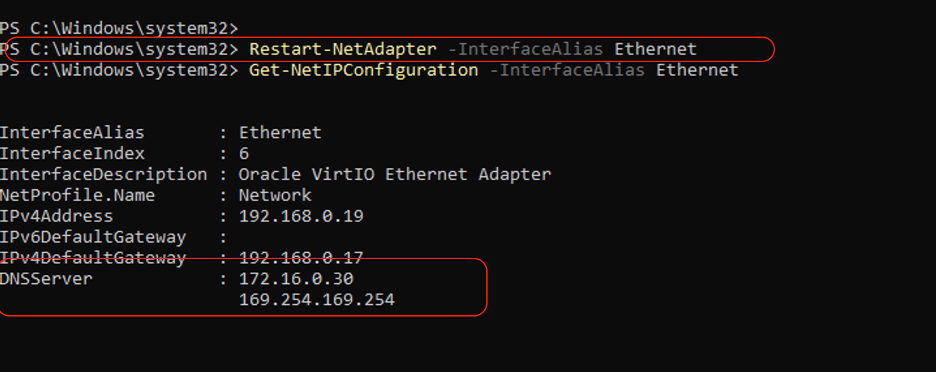
On Windows, using Power Shell, I have used “Restart-NetAdapter -InterfaceAlias Ethernet” to renew the DHCP configuration, but be aware that this command will kick out logged-in users and run the command “Get-NetIPConfiguration -InterfaceAlias <interface alias>" to verify the new DNS configuration.
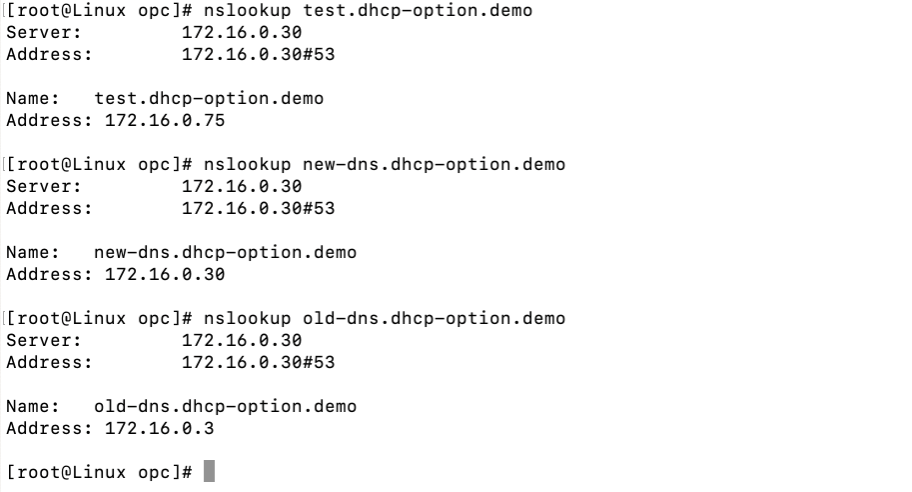
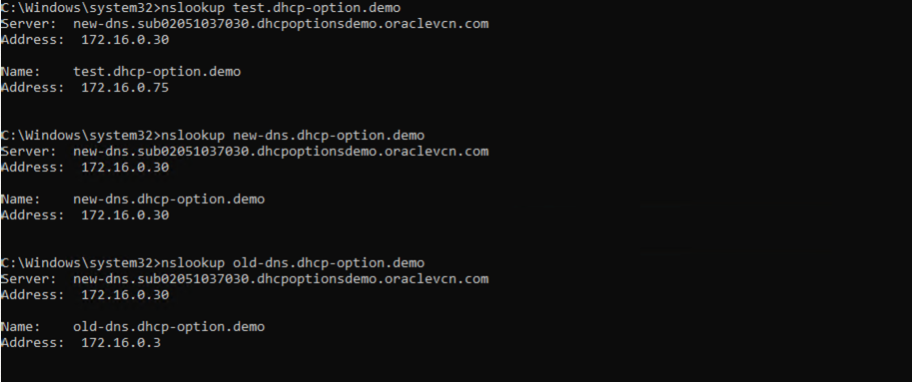
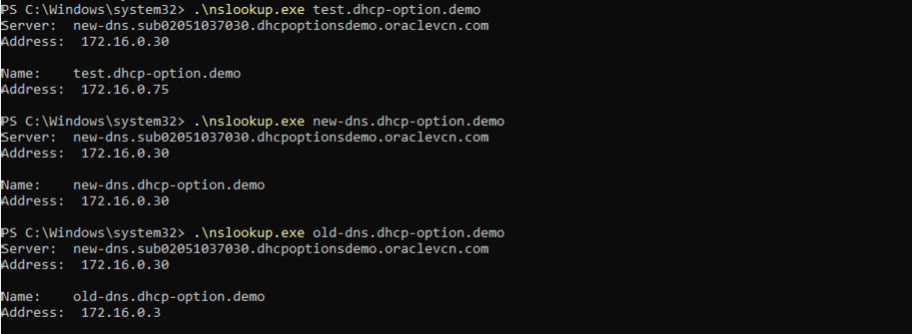
j. I can also do some DNS lookup to validate further that the DNS configuration works correctly.
On Linux:
On Windows using Comand Promt:
On Windows, using Power Shell:
I hope you enjoyed this blog. Thank you for reading!