Introduction
This blog is the last one out of the three scenarios mentioned in the “How to access OIC in a secure way” mini-series. The main page presenting all scenarios can be found here
In this scenario, we will continue adding new connectivity to OIC via a Public LBaaS using the native OIC Vanity URL feature described on our official documentation – https://docs.oracle.com/en/cloud/paas/integration-cloud/oracle-integration-oci/configure-custom-endpoint-instance.html.
In this scenario we will use the following OCI components:
– Virtual Cloud Network (VCN) – for more information please access official documentation at https://docs.oracle.com/en-us/iaas/Content/Network/Tasks/managingVCNs.htm
– Nat Gateway (NATGW) – for more information please access official documentation at https://docs.oracle.com/en-us/iaas/Content/Network/Tasks/NATgateway.htm
– Public Load Balancer (LBaaS) – for more information please access official documentation at https://docs.oracle.com/en-us/iaas/Content/Balance/Concepts/balanceoverview.htm
– Vault Service- for more information please access official documentation at https://docs.oracle.com/en-us/iaas/Content/KeyManagement/Concepts/keyoverview.htm
Prerequisites
This document covers OIC access from Internet over a Public Load Balancer. To do this, we will need the following resources already provisioned:
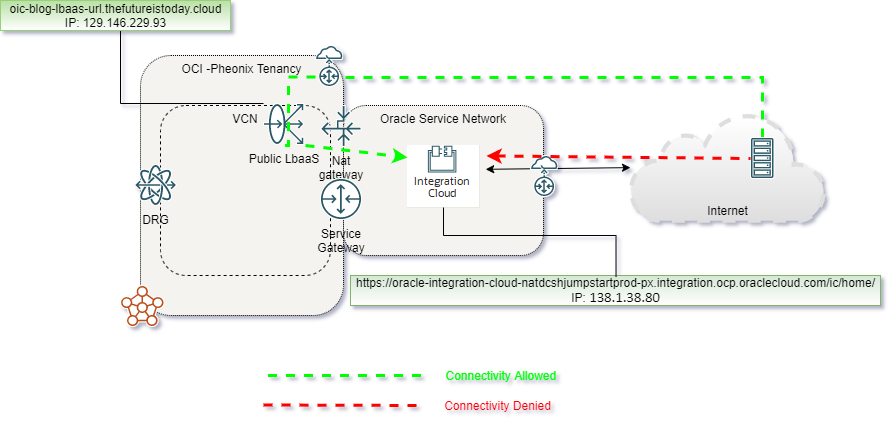
1. OIC instance – in our test, we will have an OIC instance preconfigured in the Phoenix Region that will have the following URL: https://oracle-integration-cloud-natdcshjumpstartprod-px.integration.ocp.oraclecloud.com/ic/home/.
2. VCN – in our case it’s named “WR_VCN” with a non-overlapping CIDR block “10.0.0.0/16”.
3. Internet Gateway (IGW)
4. Nat Gateway (NATGW) – in our case it’s named “NAT_Gateway-WR_VCN”.
5. DNS Domain zone – in our case it’s named “thefutureistoday.cloud”.
6. Access to update DNS zone, in our case I added a subdomain “oic-blog-lbaas-url” to the above domain.
7. A valid SSL certificate for the FQDN – in our case the FQDN is “oic-blog-lbaas-url.thefutureistoday.cloud”
8. All security and route rules are in place to allow traffic.
Solution Description
For this scenario, I have used the following network diagram:
We will start provisioning the required components:
1. We will provision a Vault, Master Encryption Key, and a Secret by doing the following things:
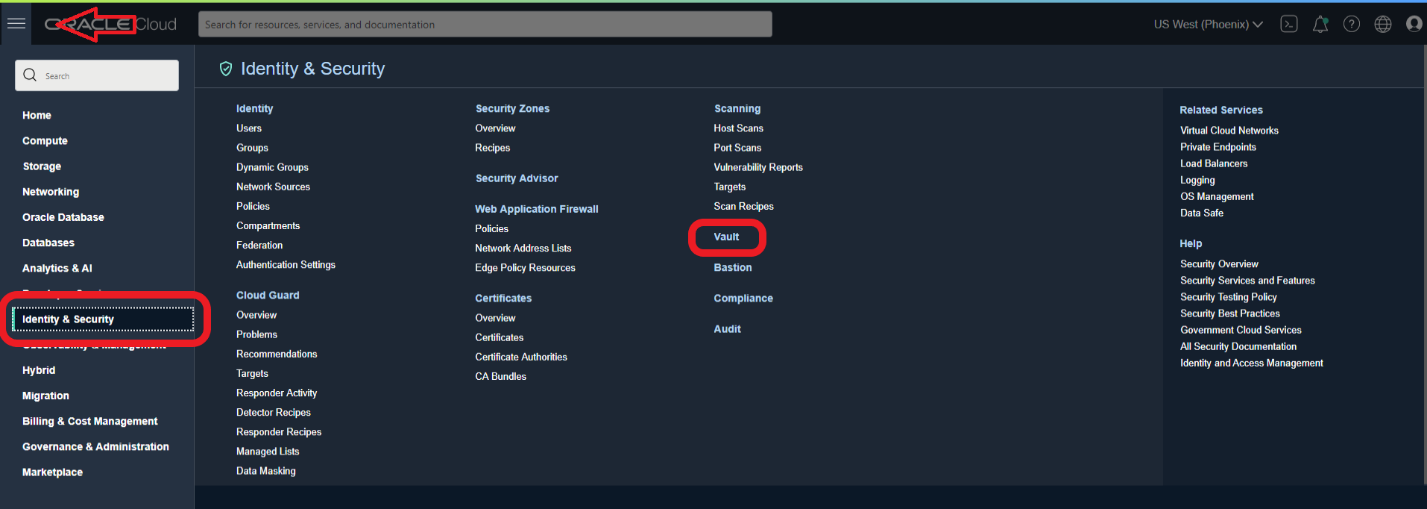
- Provision a Vault by going to Burger Menu -> Identity & Security -> Vault:
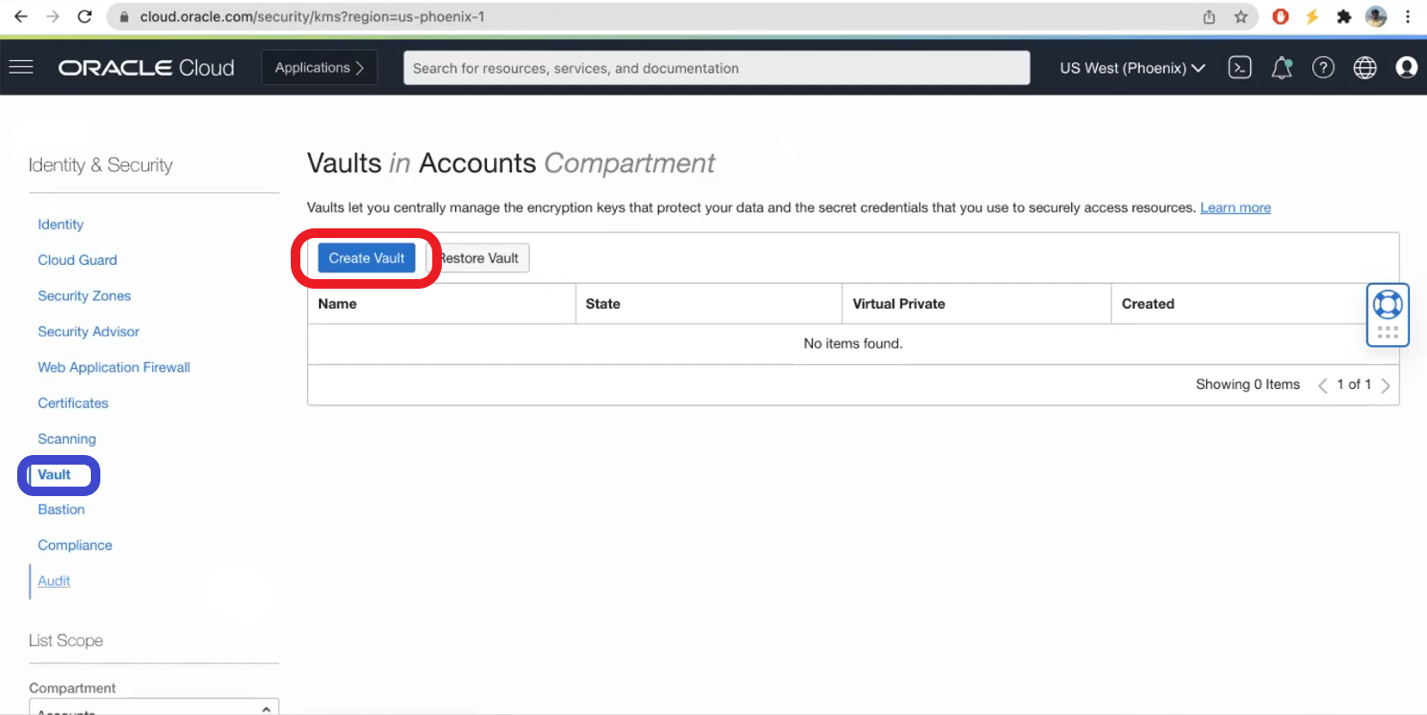
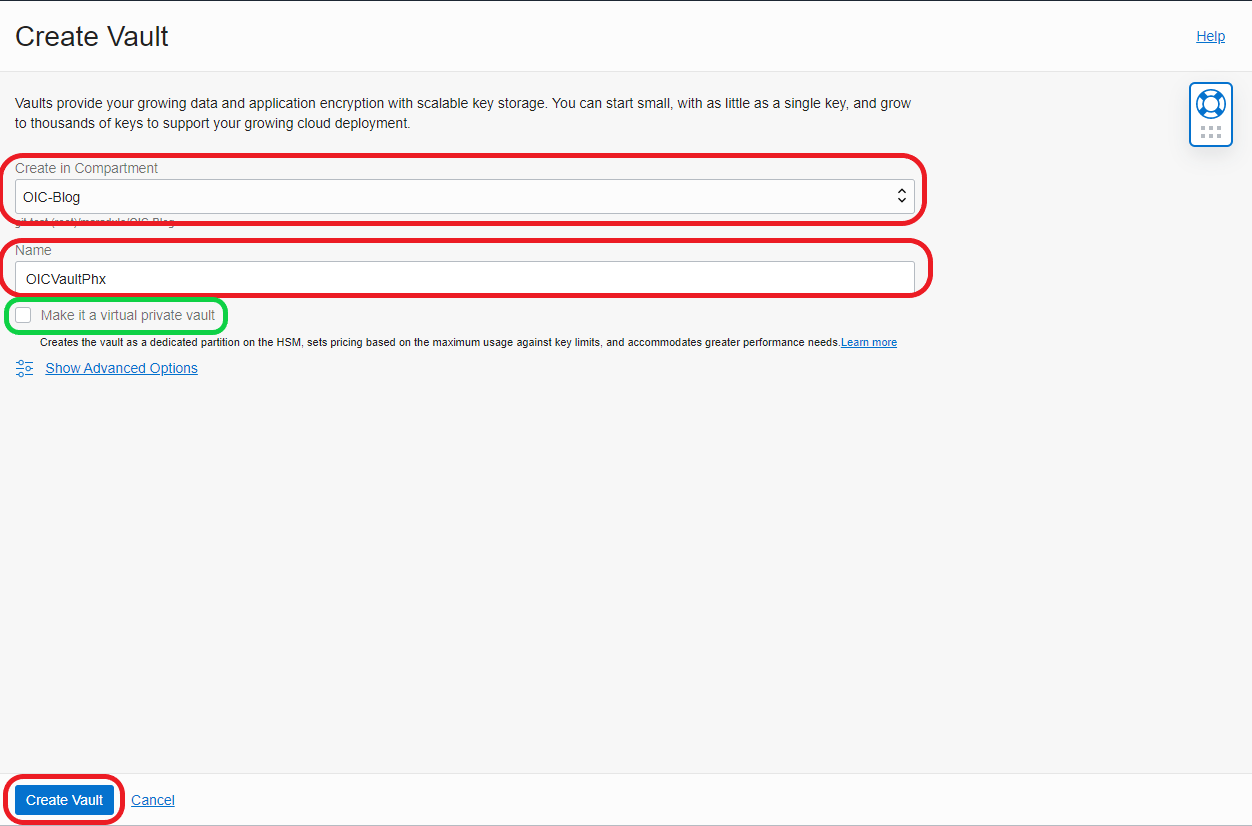
- Click on Create Vault:
- Select Compartment, add a Name, and chose to be private Vault (optional) and click Create Vault:
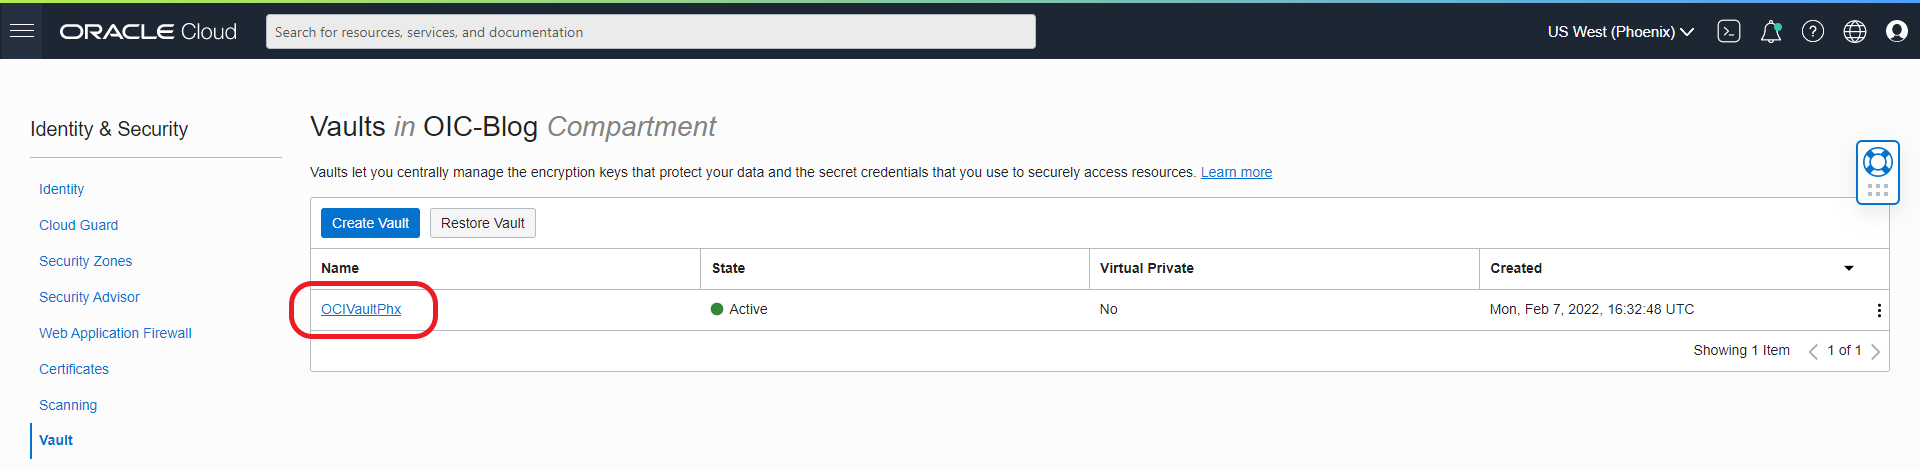
- Select Created Vault:
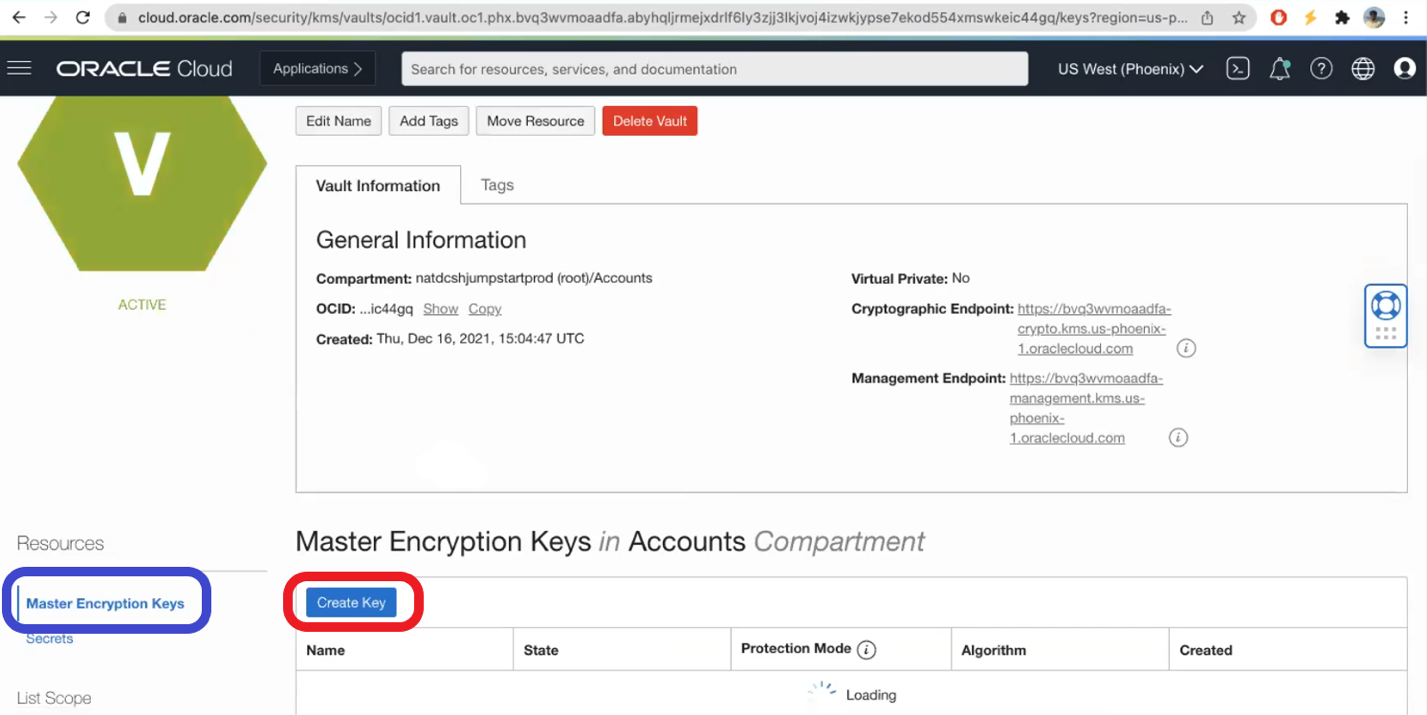
- Go to Master Key and create a Master Key:
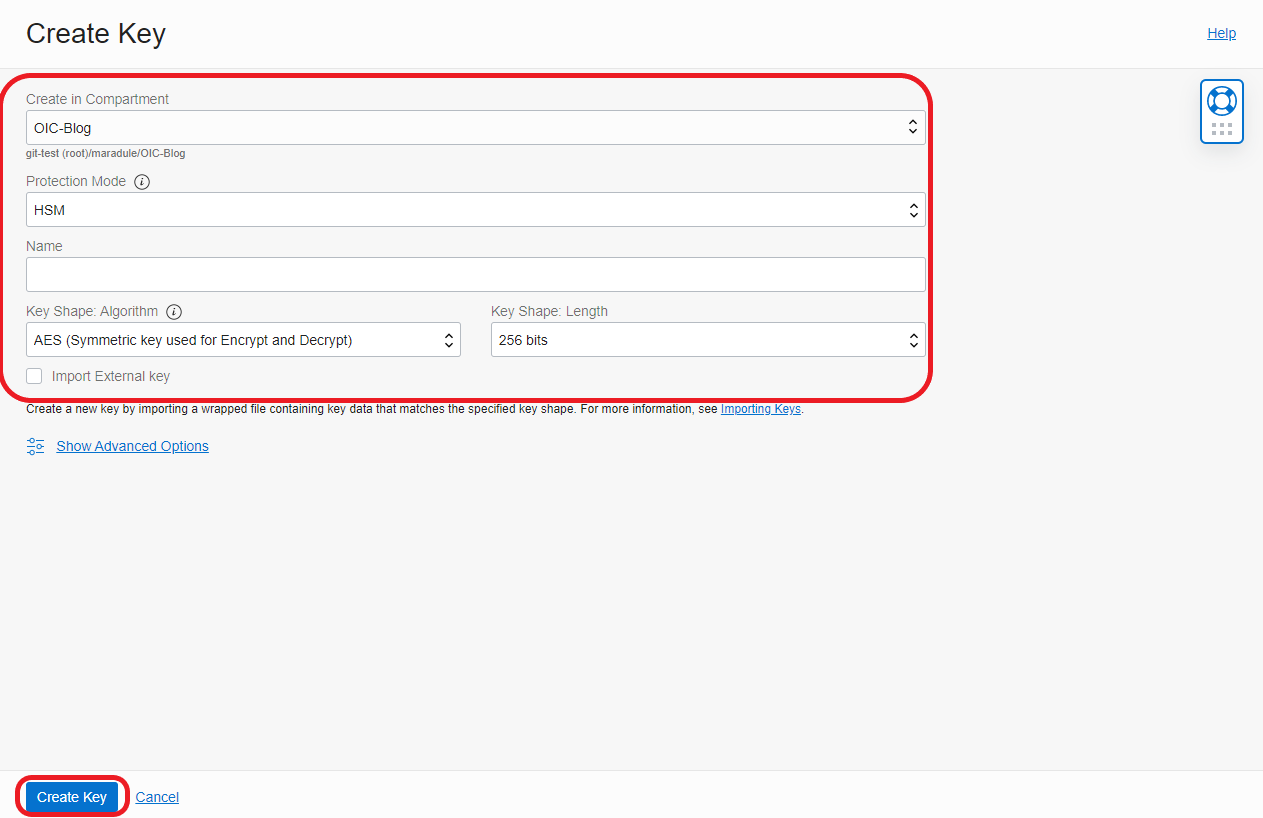
- Select Compartment, select a Protection Mode, add a name, and select Key Shape Algorithm and Key Shape Length, and click Create Key
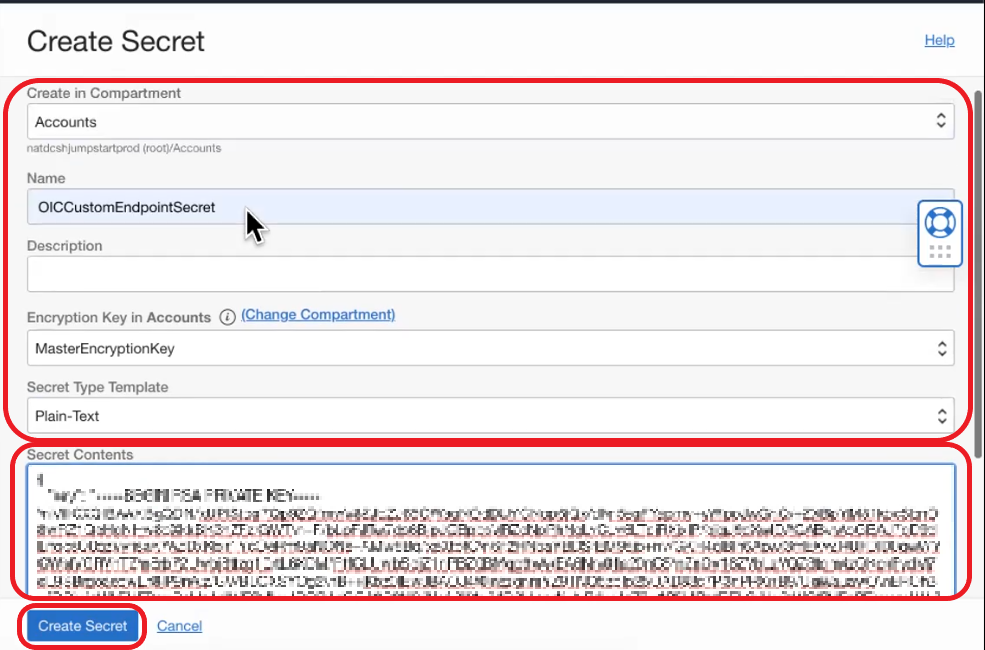
- Now go to Secrets, click Create Secret, select Compartment, add a Name, and select Master Encryption Key and Secret Type Template. Now on Secret Contents add the certificate in the format presented in this document https://docs.oracle.com/en/cloud/paas/integration-cloud/oracle-integration-oci/configure-custom-endpoint-instance.html
2. Create LBaaS that will serve the URL https://oic-blog-lbaas-url.thefutureistoday.cloud/ic/home/ by doing the following:
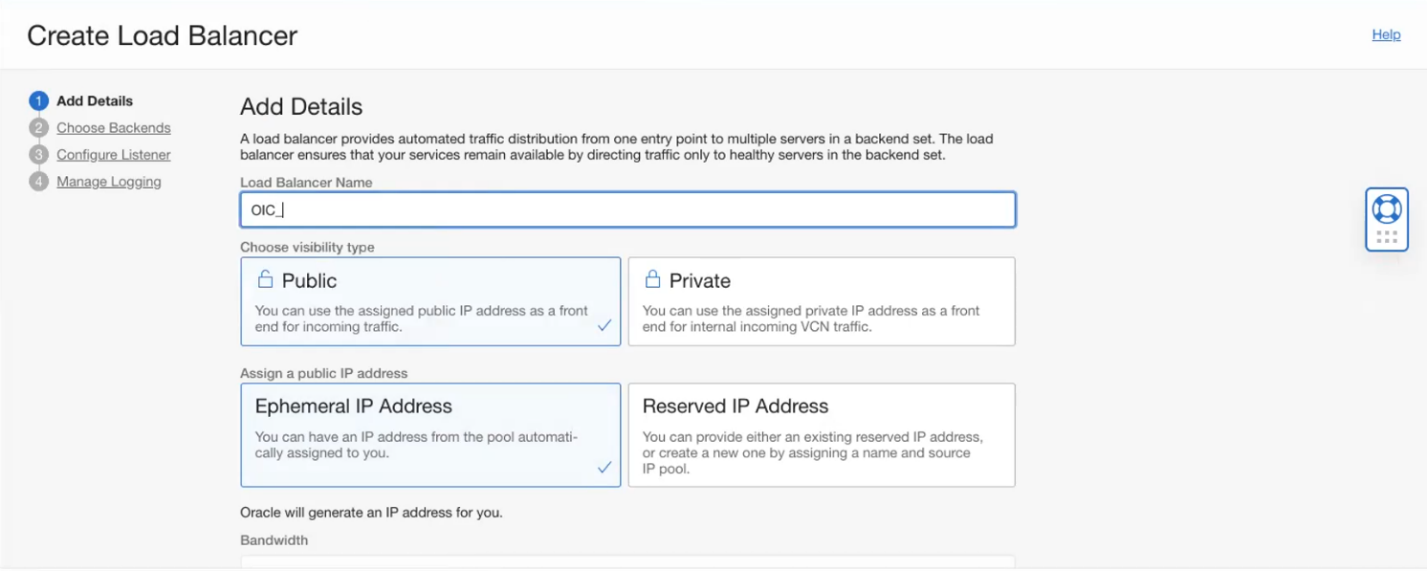
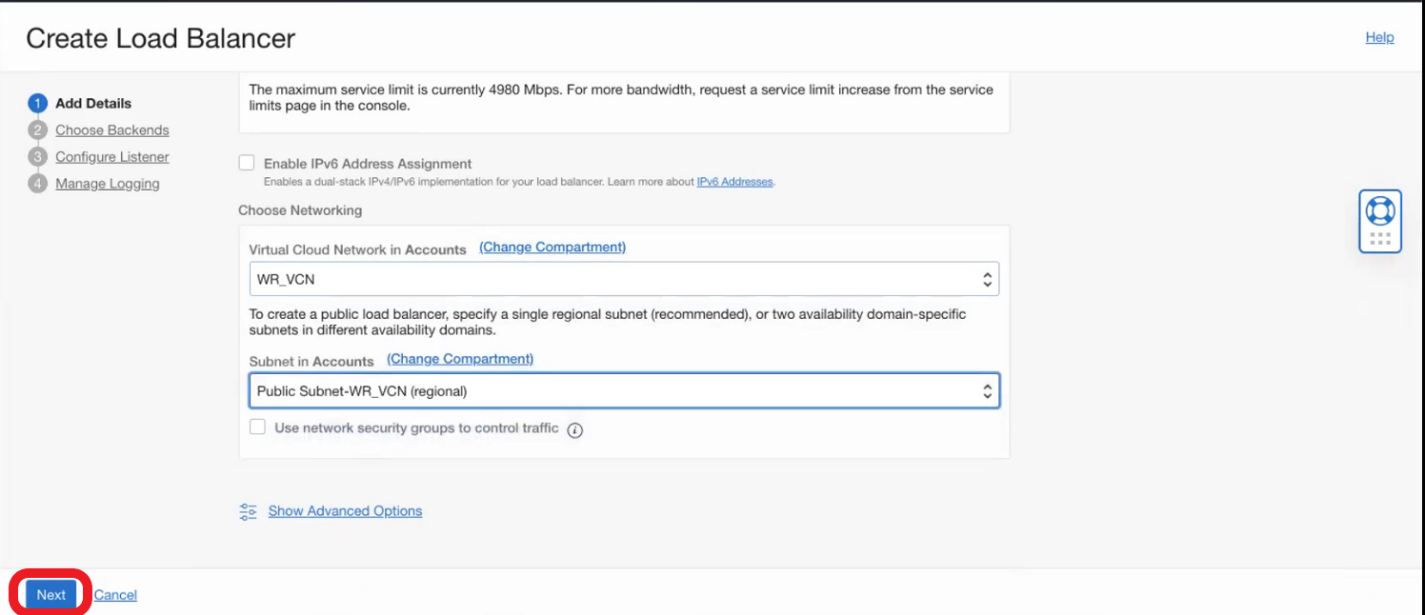
- Create the LBaaS and on Add Details page add a name, select type of visibility as Public, assign an Ephemeral or a Reserved IP address and Select the VCN to be created and the subnet from the VCN and click Next
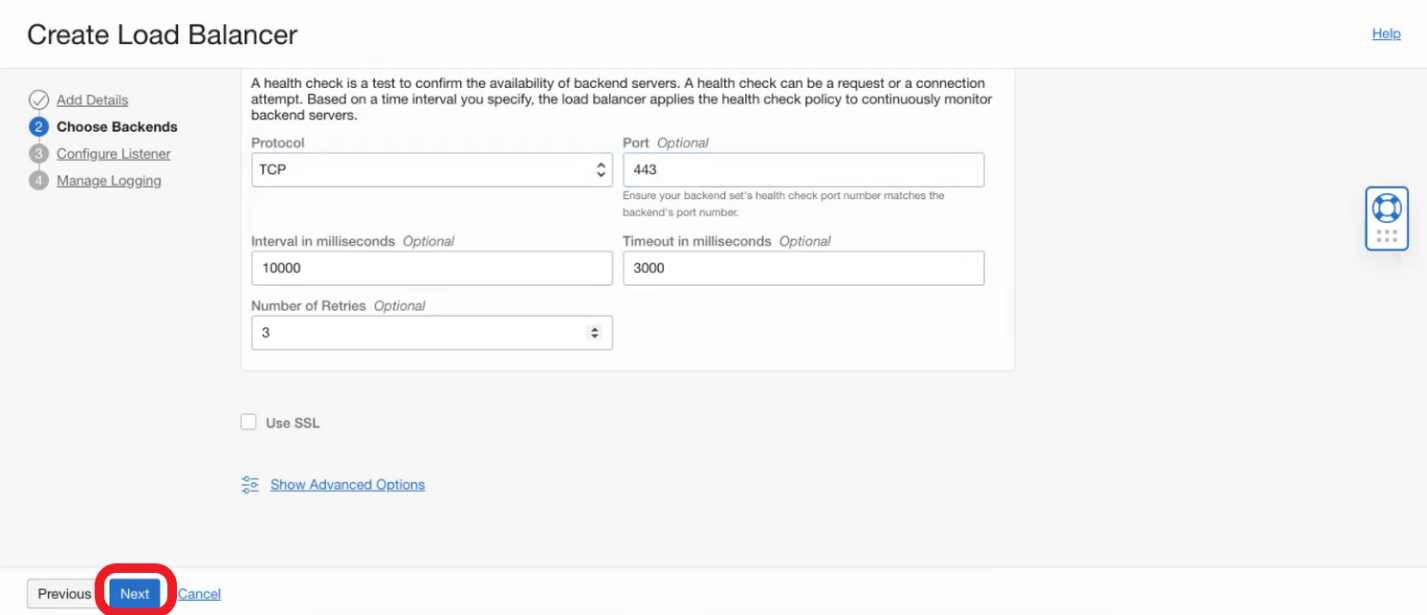
- On the Choose Backend page do not select any backend (will be selected later) and update the health check for TCP port 443 and click Next
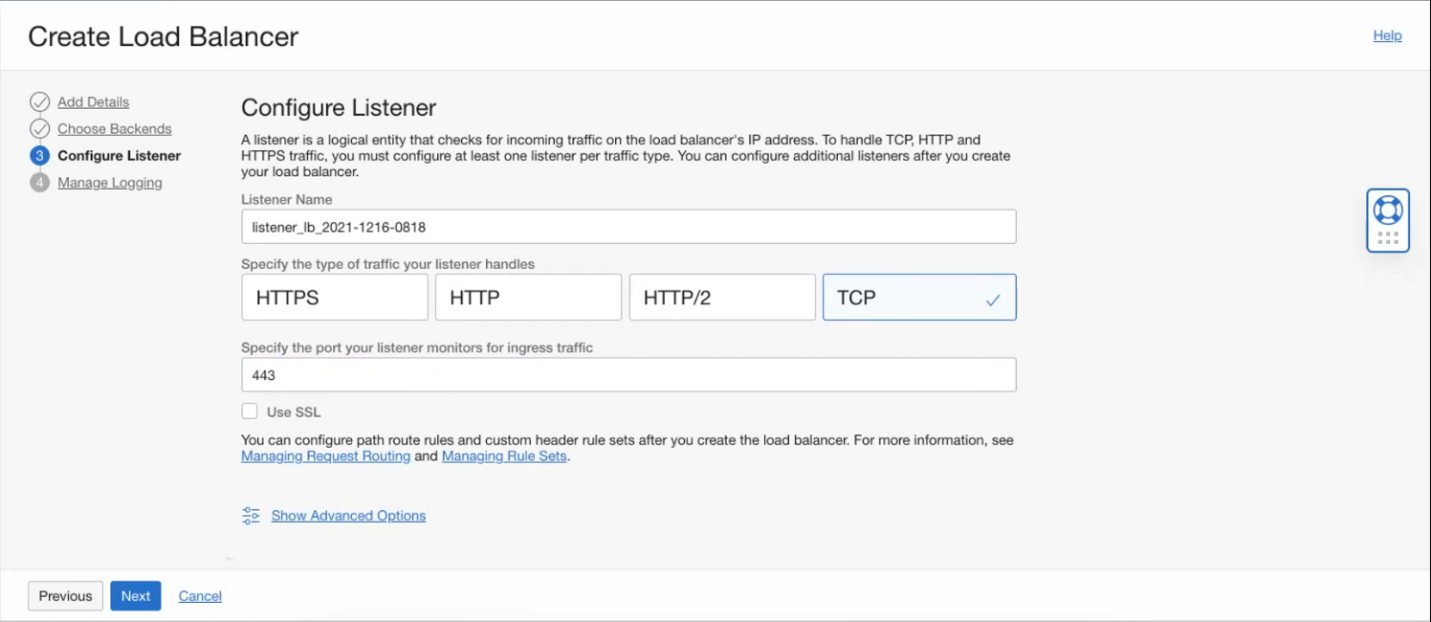
- Next on Configure Listener specify TCP and port 443
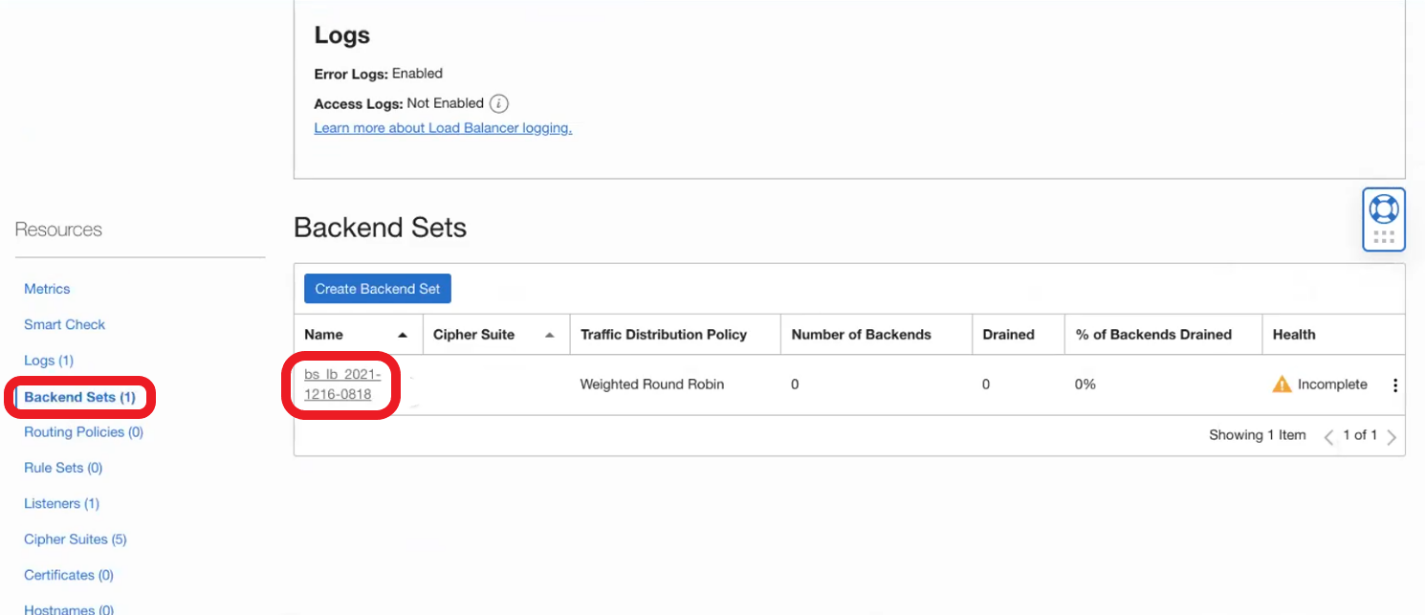
- Finish provisioning the LBaaS and after it is provisioned go to Backend Sets – > Backend
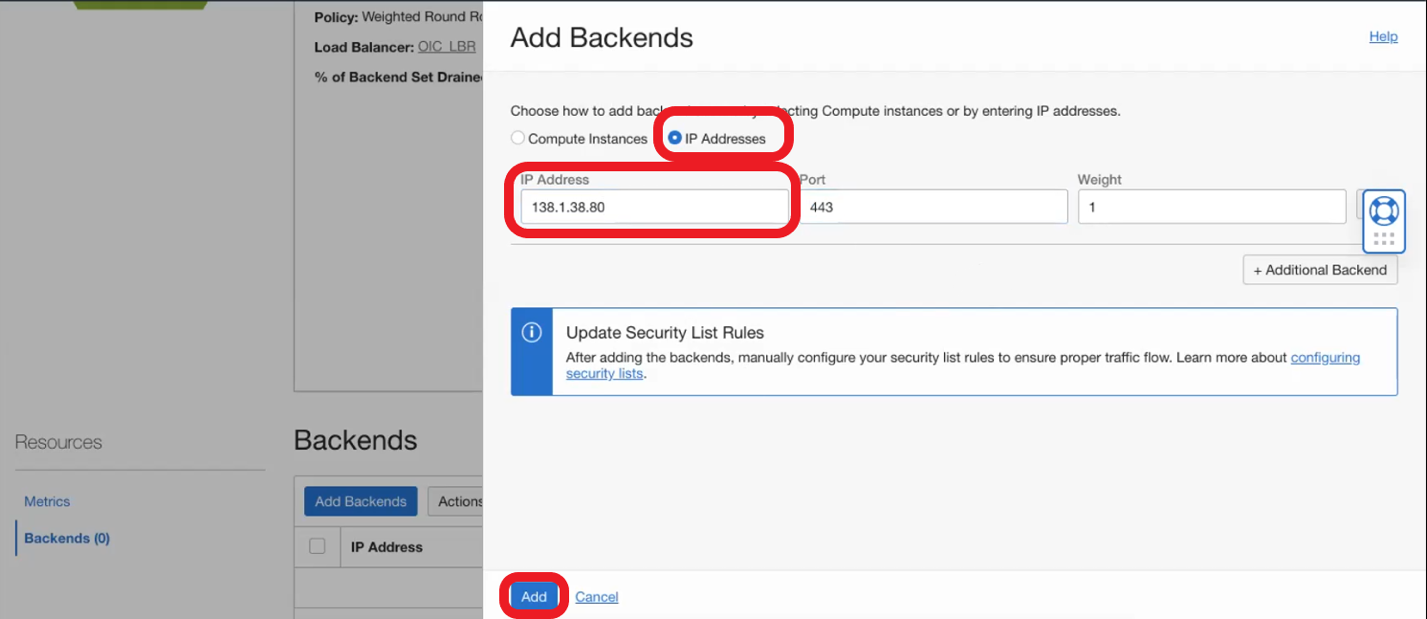
- Go to Backends and click on Add Backends. Now select IP Addresses, add the OIC instance IP, and click Add:
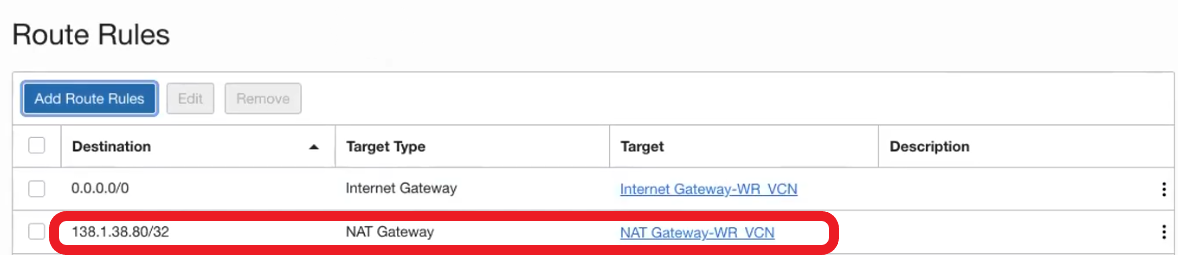
- Now is time to update the routing table of the LBaaS to route the traffic to the OIC instance via NAT Gateway.
3. Make required DNS changes by doing the following:
- Add DNS record for “oic-blog-lbaas-url” subdomain to point to LBaaS Public IP address and click Submit
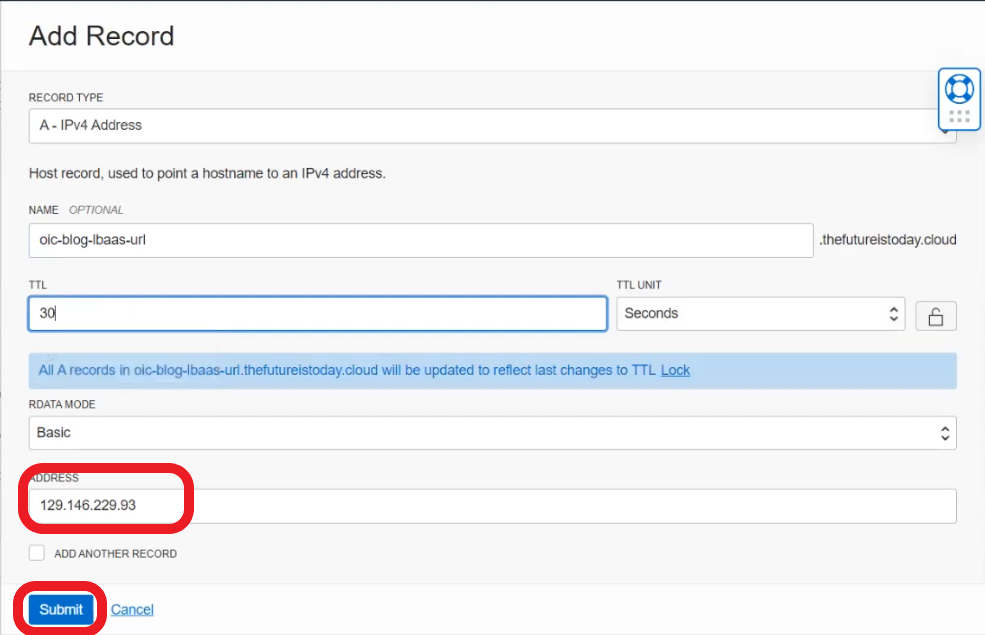
- Publish changes

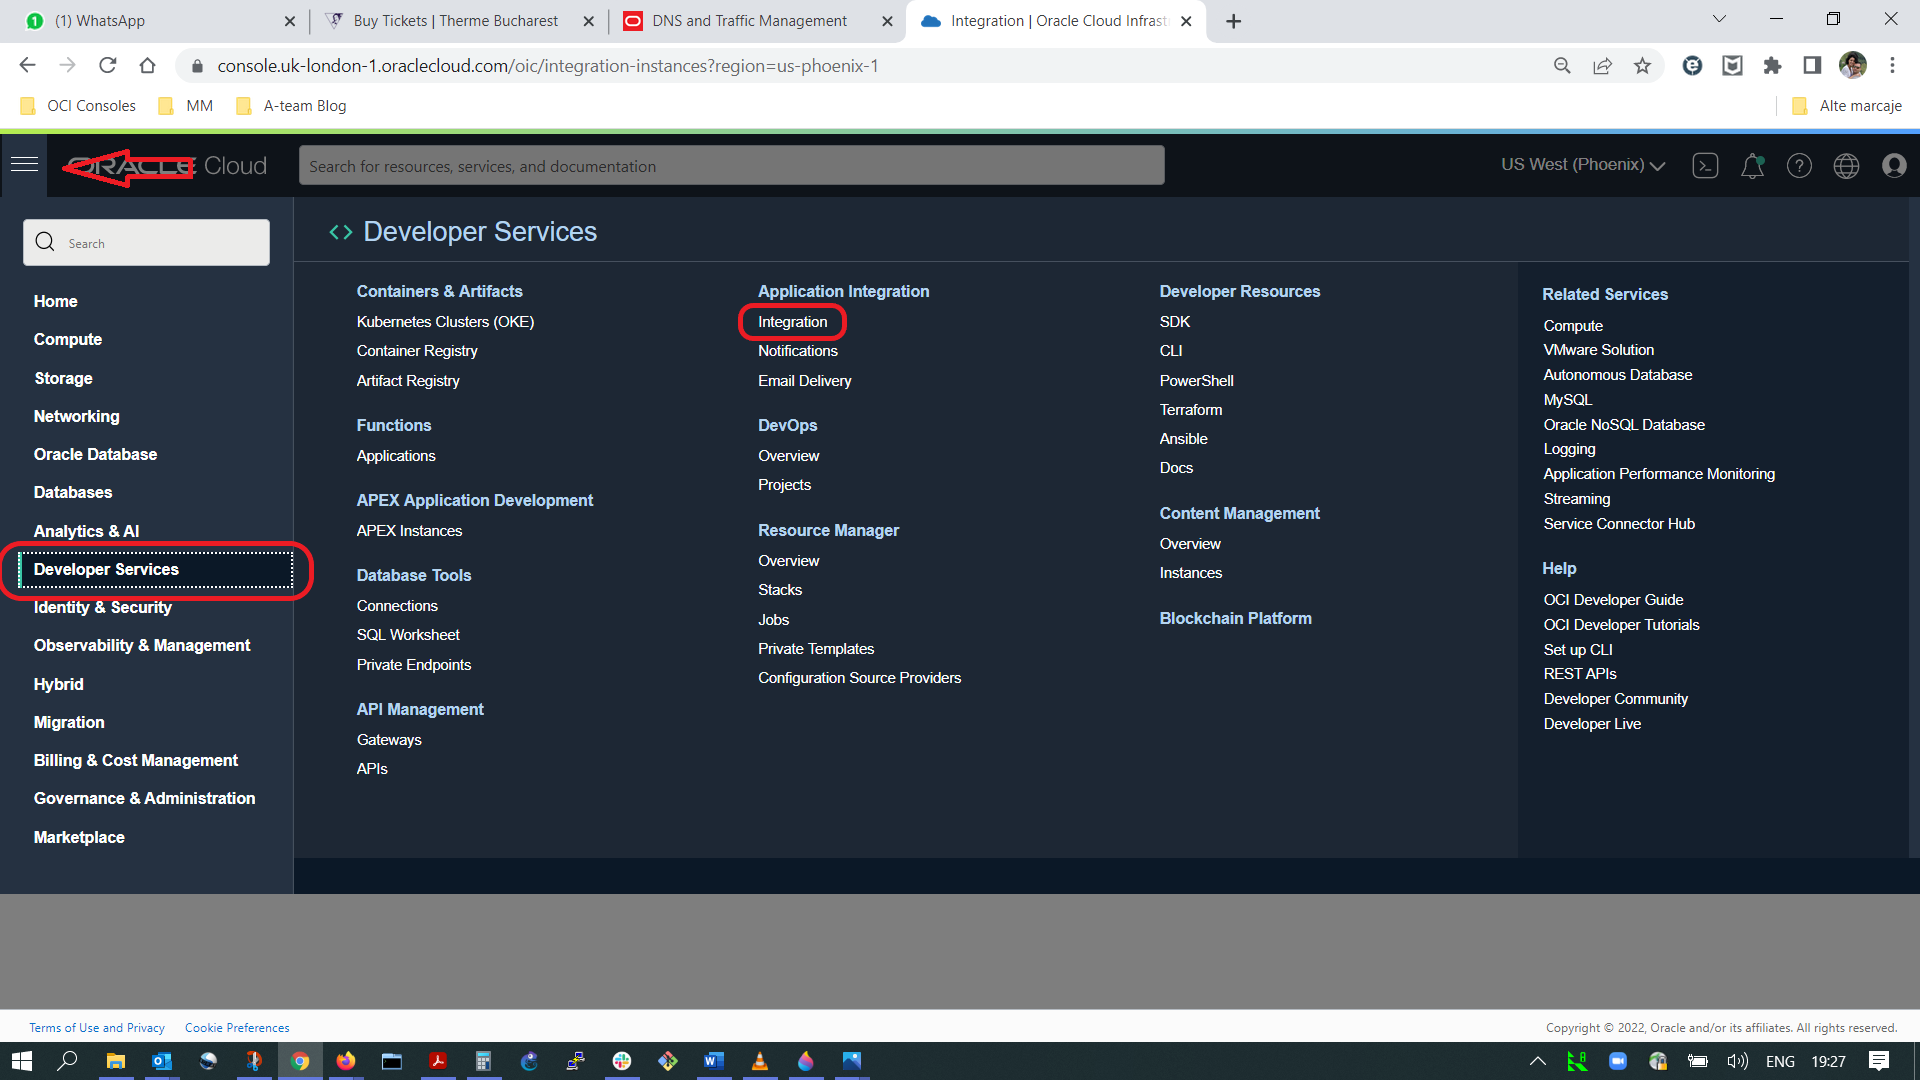
4. Now, it’s time to activate the customer endpoint on OIC and restrict network access only from NAT Gateway IP by doing the following things:
- Go to Integration meu and select your OIC instance:
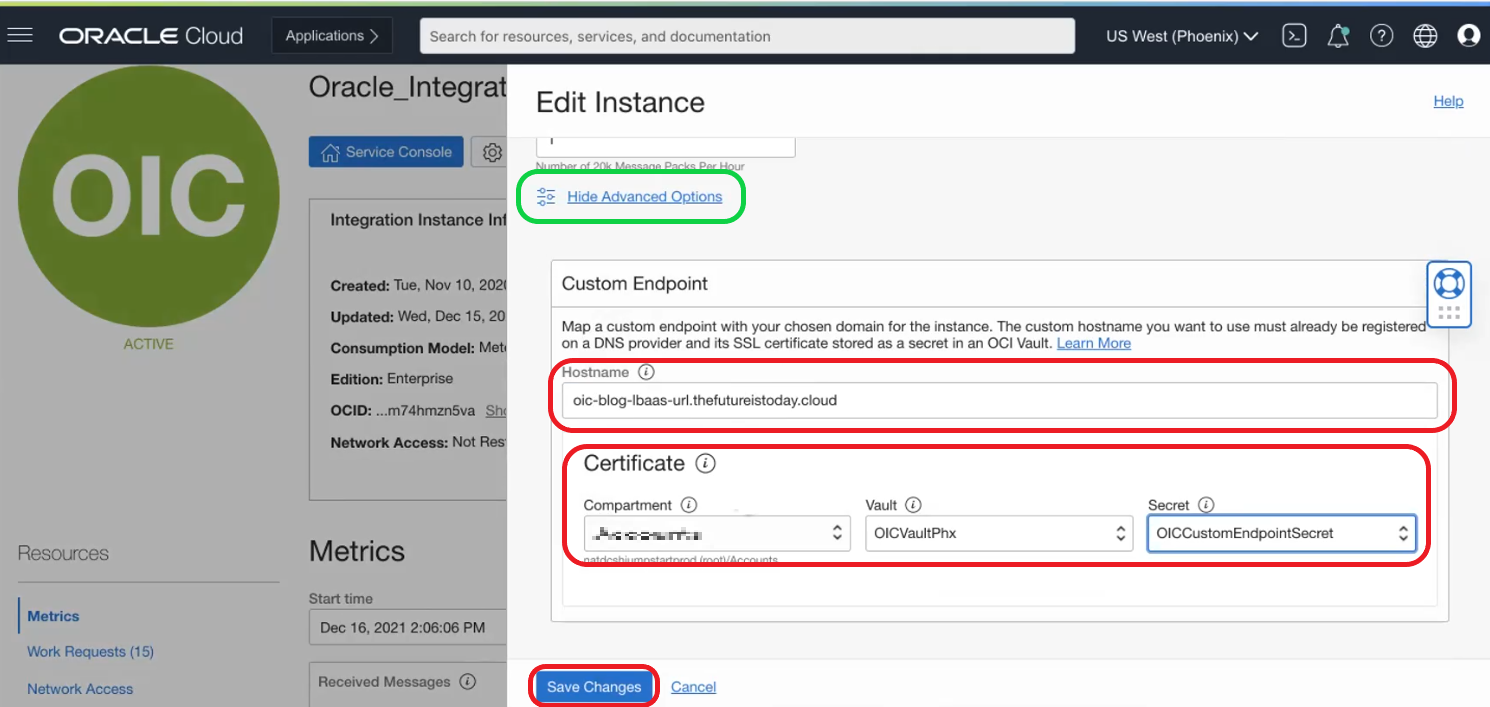
- Select Edit menu and under Advanced Options add the custom hostname and select the secret we have configured at point 1 and click on save changes:
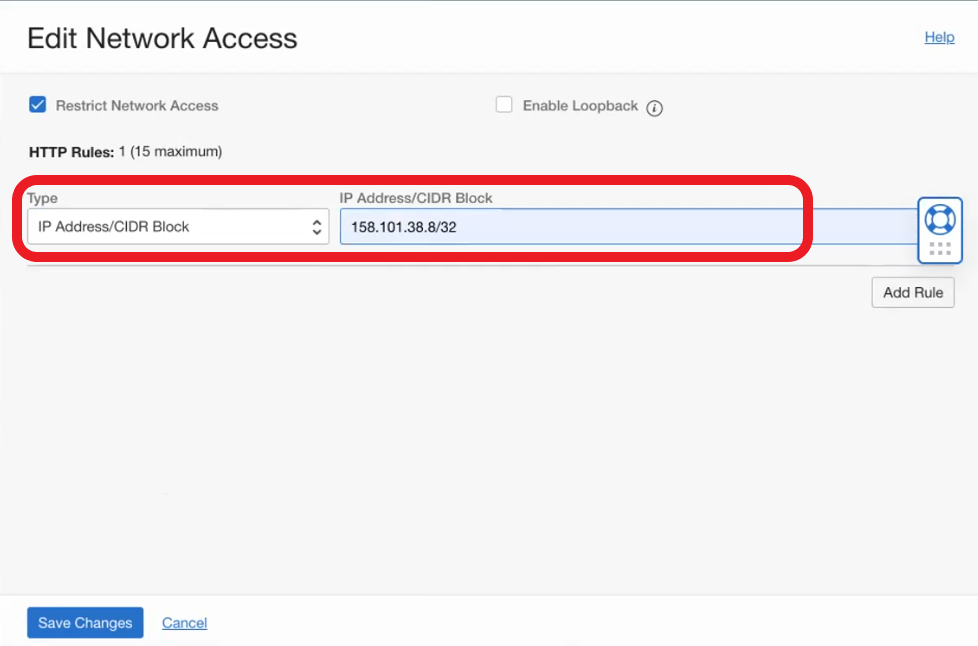
- Now go to the Network Access menu and restrict access to instance only from NAT gateway IP.
Validation
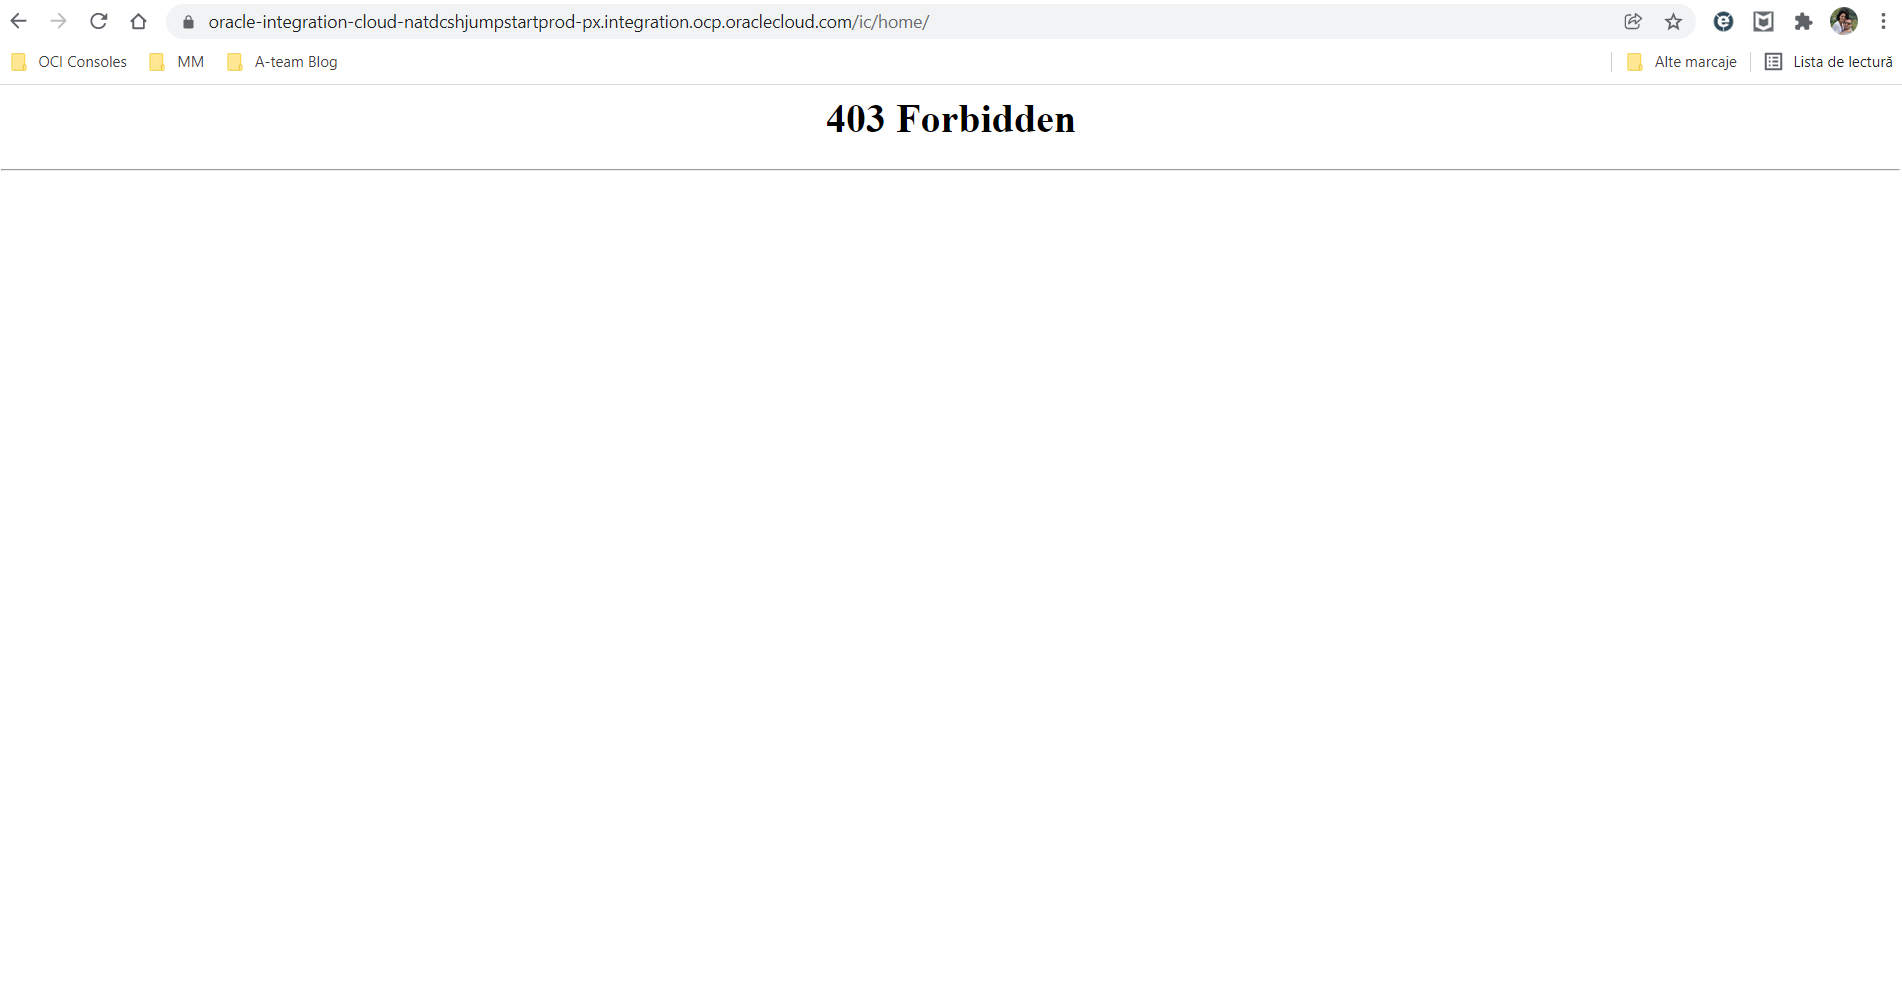
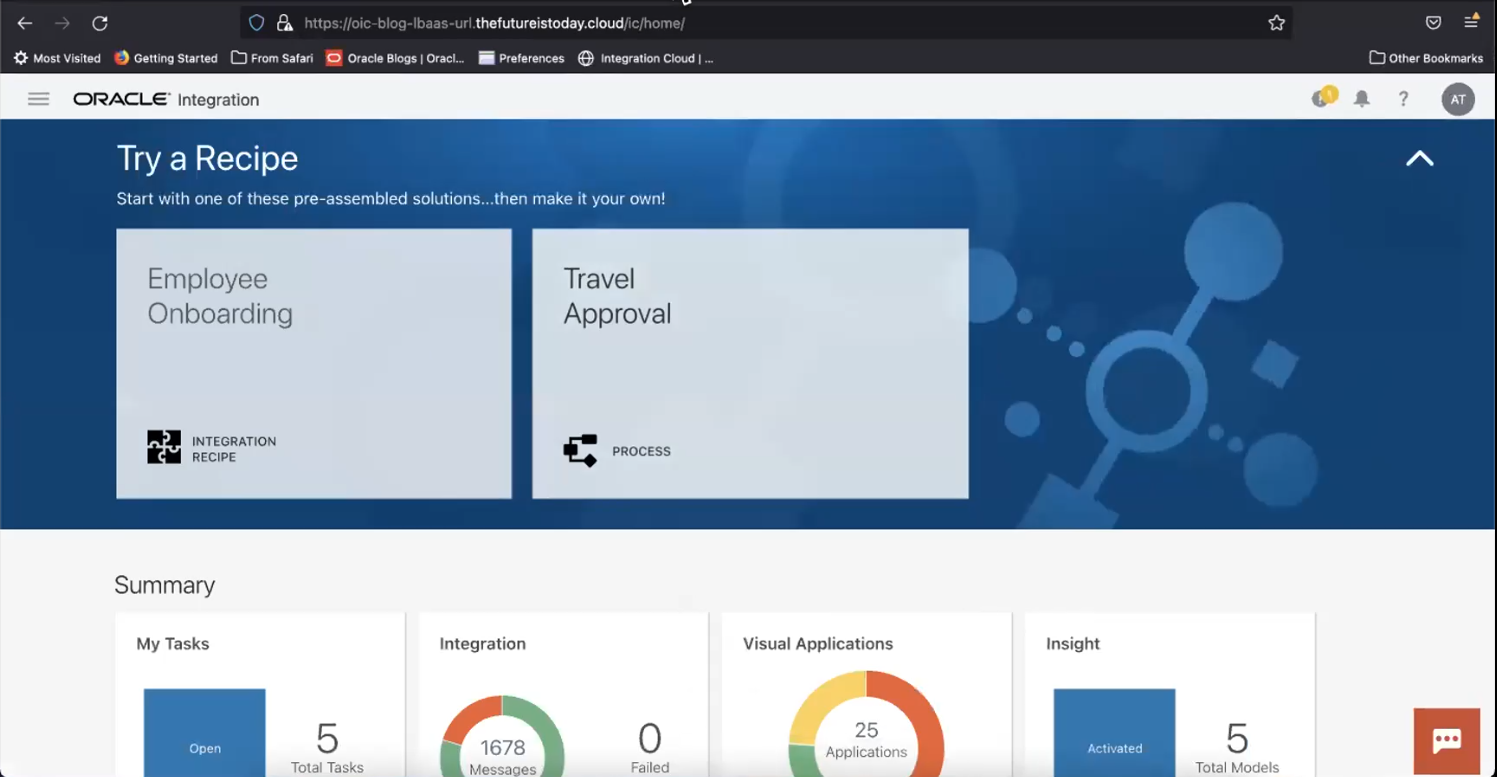
At this point, we should have access to OIC only using the custom URL.
We will get a “403 Forbidden” error using the OIC instance standard URL.