I will start this blog post by saying that I’m super excited to present you the newest OCI Network Firewall. In this blog we will discuss about general Network Firewall functions, how to deploy the Network Firewall and I will present you the very first use case of a Network Firewall. There will be multiple blogs related to the Network Firewall integration based on real use cases, so, stay tuned for our new feature, the Network Firewall.
Oracle Cloud Infrastructure Network Firewall is a Next-Generation managed Network Firewall, Intrusion Detection and Prevention service for your Oracle Cloud Infrastructure VCN, powered by Palo Alto Networks®.
The Network Firewall service offers simple setup and deployment and gives you visibility into traffic entering your cloud environment (North-South network traffic) as well traffic between subnets (East-West network traffic).
Use the Network Firewall and its advanced features together with other Oracle Cloud Infrastructure security services to create a layered network security solution.
A Network Firewall is a highly available and scalable instance that you create in the subnet of your choice. The firewall applies business logic to traffic that is specified in an attached firewall policy. Routing in the VCN is used to direct network traffic to and from the firewall.
The security features offered includes:
- Stateful Network Filtering: create stateful network filtering rules that allow or deny network traffic based on source IP (IPv4 and IPv6), destination IP (IPv4 and IPv6), port, and protocol;
- Custom URL and FQDN filtering: restrict ingress and egress traffic to a specified list of fully qualified domain names (FQDNs), including wild cards and custom URLs;
- Intrusion Detection and Prevention (IDPS): monitor your network for malicious activity. Log information, report, or block the activity;
- SSL Inspection: decrypt and inspect TLS-encrypted traffic with ESNI support for security vulnerabilities. Encrypted Server Name Indication (ESNI) is a TLSv1.3 extension that encrypts the Server Name Indication (SNI) in the TLS handshake;
- Intra-VCN subnet traffic inspection: Route traffic between two VCN subnets through a network firewall;
- Inter-VCN traffic inspection: route traffic between two VCNs through a Network Firewall;
The Network Firewall offers a complete logging system which includes: Traffic Log and Threat Log. Both logs needs to be activated, by default the logs are not activated.
Prior of the Network Firewall to be deployed, a VCN and a subnet for Network Firewall needs to be created.
1. Network Firewall Deplyoment
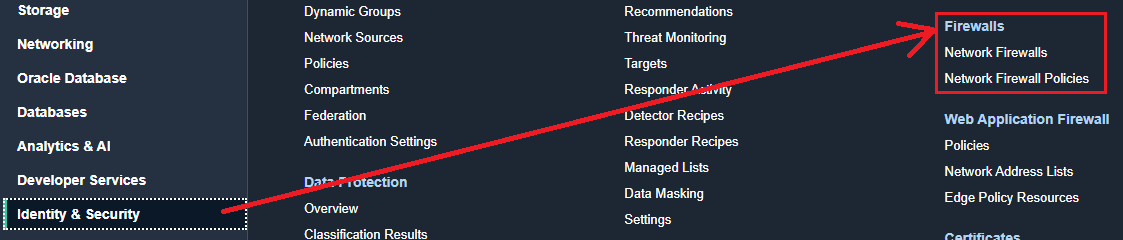
1.1 Navigate to Identity & Security -> Firewalls
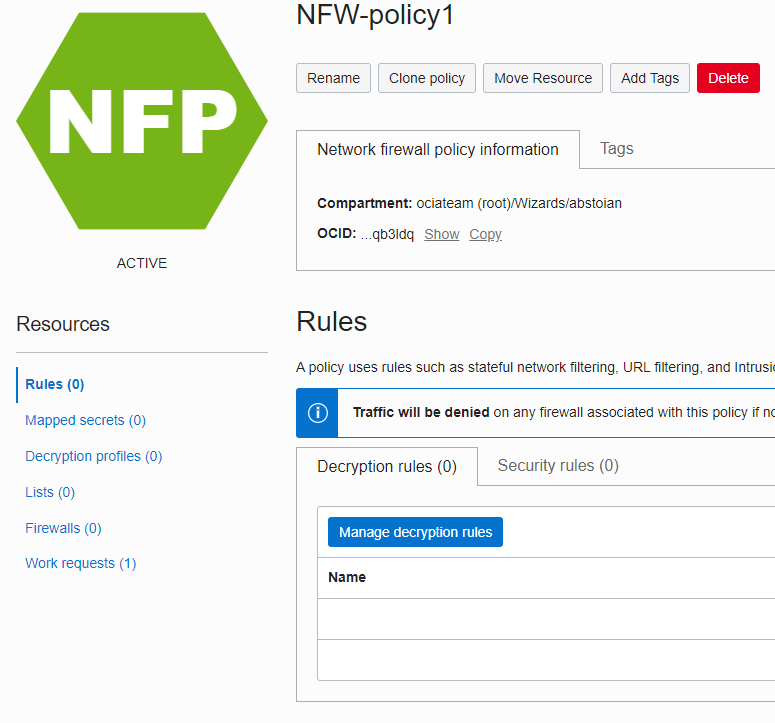
1.2 Prior creating the Network Firewall, let’s create a Network Firewall Policy, we will need the policy when we create the Network Firewall.
Click on Create policy and provide a name, in my example I used NFW-policy1, then click Next on all the sections until the policy is created:
1.3 Return to Network Firewall and click Create network firewall:
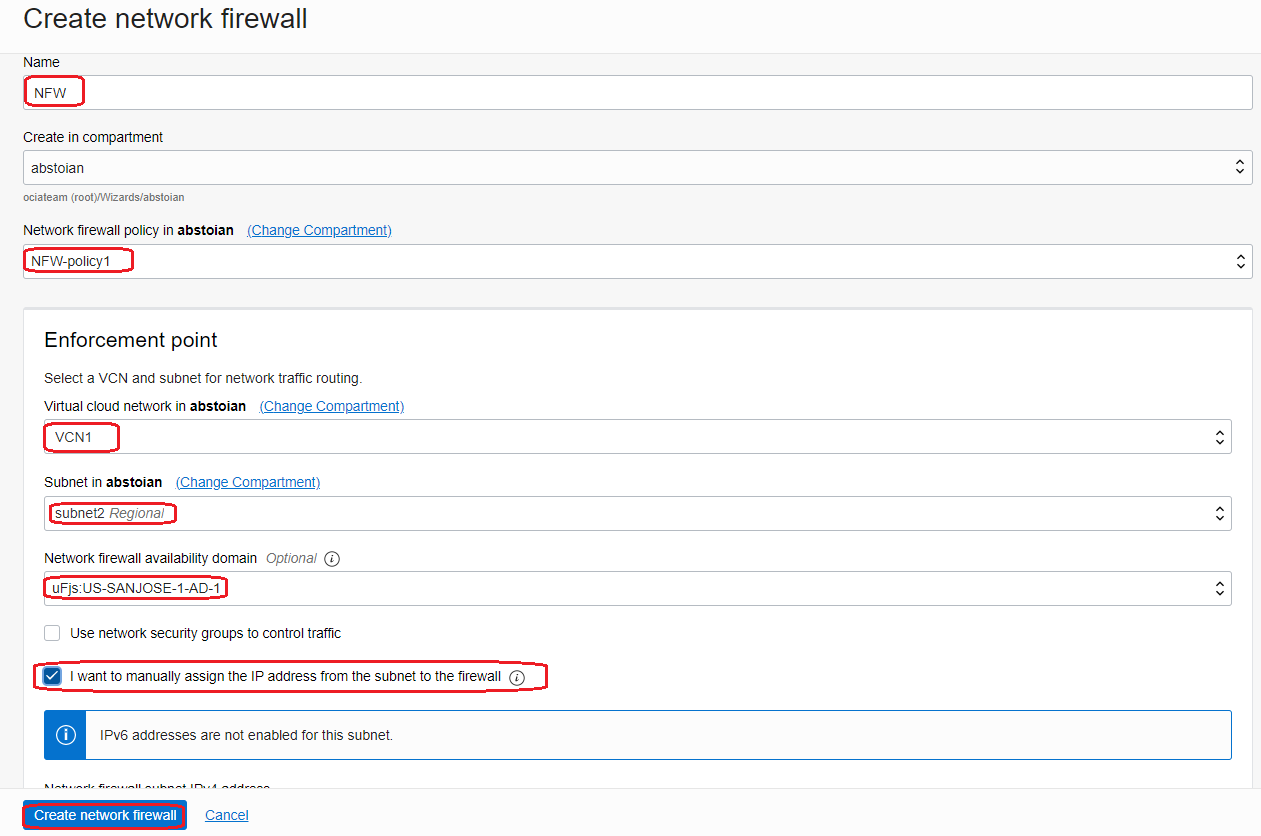
Our new Network Firewall will use the policy defined at the preceding step. I wanted to control the IP address allocated to the Network Firewall so I enabled the function to specify the private IP address since the IP address will be used in our routing entries. In my example the IP address assigned to the Network Firewall is 192.168.0.20. If you decide to not allocate the private IP address, the system will randomly allocate a free IP address from the subnet where the Network Firewall is deployed.
After clicking the Create network firewall button, we need to wait between 20-30 minutes for the Network Firewall to be created:
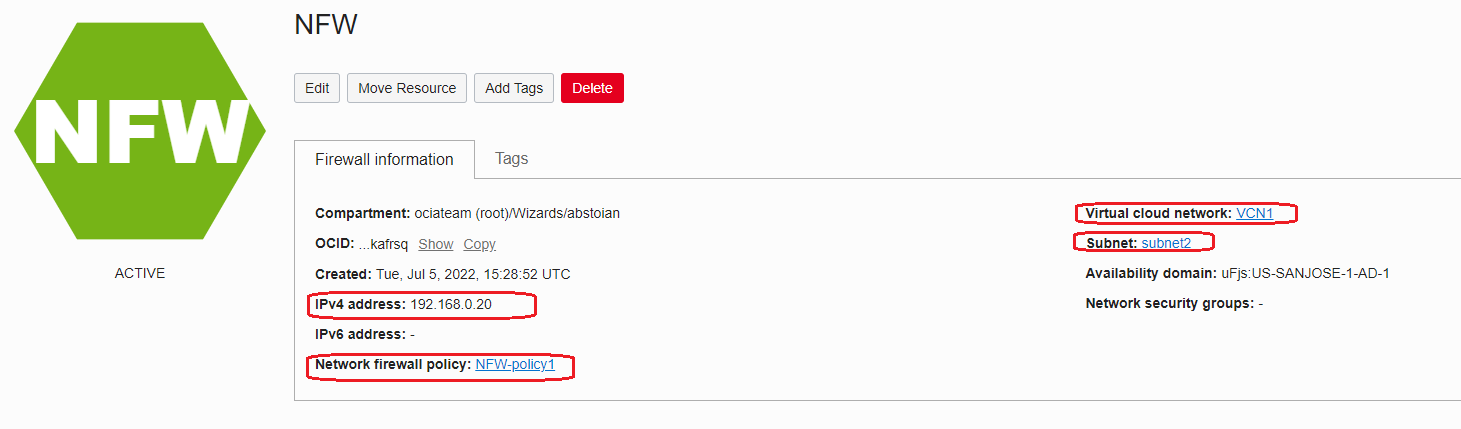
Now, our brand new Network Firewall is ready to be used.
2. Use Case: Access a VCN VM from the Internet using the Internet Gateway and Network Firewall
2.1 Networking Topology
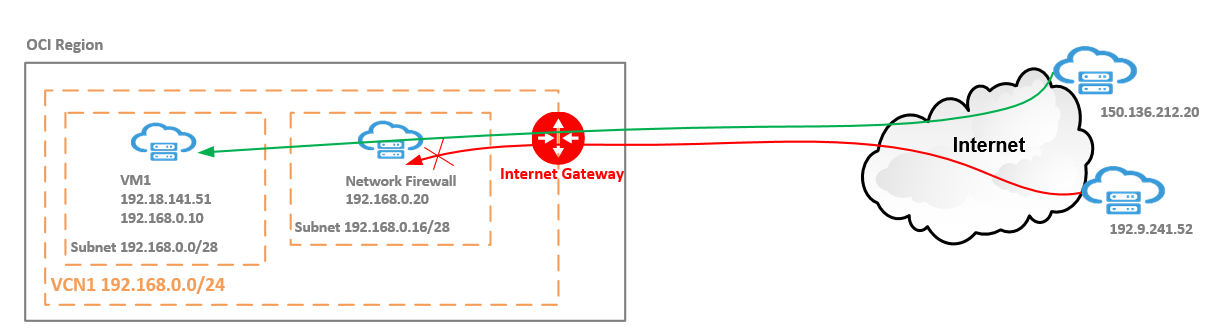
We will analyze a simple use case but still widely implemented.
We are using two hosts on the Internet, one owning the 150.136.212.20 IP address and another one owning the 192.9.241.52 IP address. From 150.136.212.20 to 192.18.141.51 (the OCI VM) the ICMP type 8 and SSH on port 22 will be allowed by the Network Firewall (represented by the green line). On the other hand, the ICMP Type 8 and SSH on port 22 sourced by 192.9.241.52 will be denied by the Network Firewall (represented by the red line) and the denied traffic will be logged for further analyze.
2.2 Routing Configuration
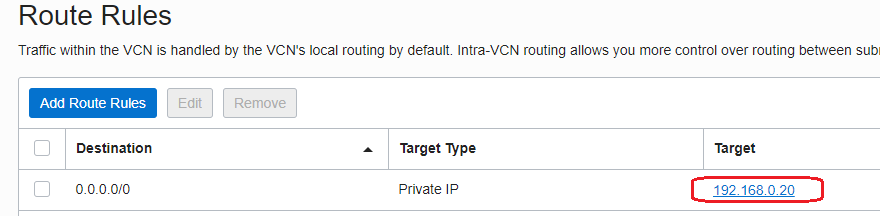
- The route table attached to the subnet where VM1 is located:
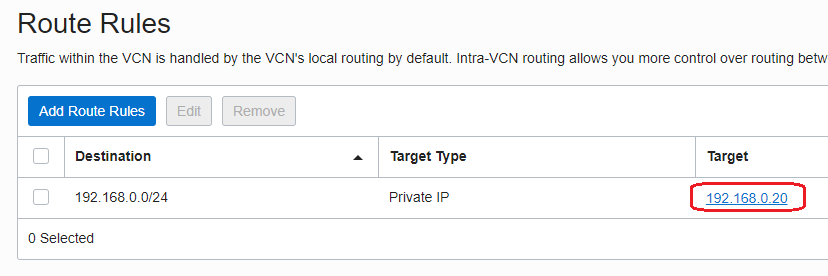
- The route table attached to the subnet where our Network Firewall is deployed:
We can clearly see above that the Internet traffic will reach the VCN via the Internet Gateway -> Network Firewall. As we know until now, we cannot force the Internet Gateway to send the traffic to the VM1 via the Network Firewall at 192.168.0.20, or, can we? The answer is yes, we can. We have expanded the Internet Gateway capability and now we can attach a route table to the Internet Gateway. In the route table attached we can specify routing rules and use the Network Firewall as a next-hop for reaching the subnets inside the VCN.
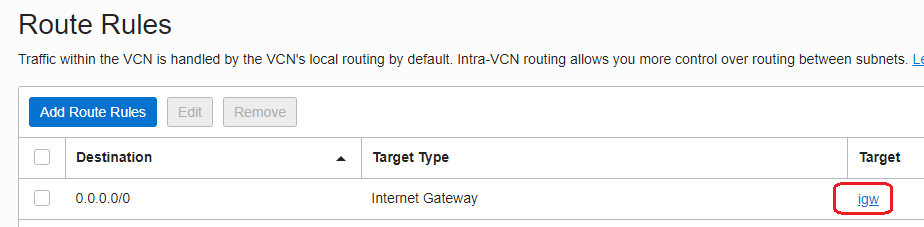
- Create a new route table and add a route using the Network Firewall as a next-hop:
- Attach the above route table to the Internet Gateway:

We have finished the routing configuration. Make sure that the Security List or NSGs you are using permits the traffic to flow.
2.3 Network Firewall Configuration
In order to instruct the Network Firewall to achieve the scope listed above, we need to add the correct rules in the firewall policy that the Network Firewall is using. Intentionally I did not add any rule in the policy at the creation phase (at step 1.2) because I want to show the way a particular policy can be edited once it is used by the Network Firewall.
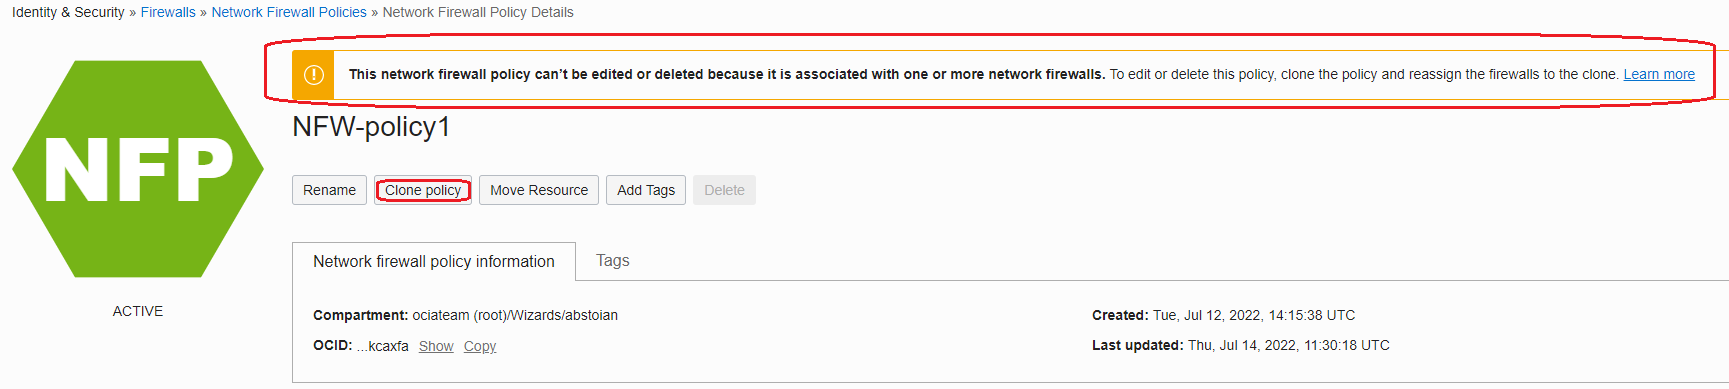
The above message clearly states that a policy currently used cannot be directly modified. Instead, we can use the Clone policy function. Clone policy permits to create a clone of the existing policy used by the Network Firewall, for editing purposes. During the clone policy edit process, the Network Firewall will perform without any downtime, it still uses the policy. After the new clone policy was added, we need to wait between 5-10 minutes for the new cloned policy to be loaded and the Network Firewall to start using it.
Once the NFW is starting to use the cloned policy, the existing established connections will be interrupted, only if:
1. Updating mapped secret information in a policy associated with a firewall.
2. Changing the firewall policy to one that uses different mapped secret information than the current policy.
Editing other types of information in the associated policy does not result in a connection reset.
That being said, let’s proceed.
- Clone the NFW-policy1 by clicking the Clone policy button and provide a name for the cloned policy:

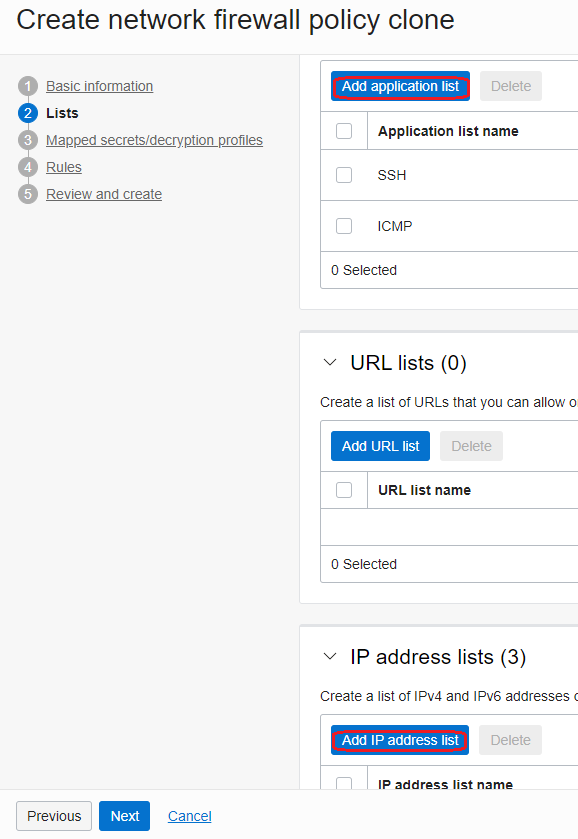
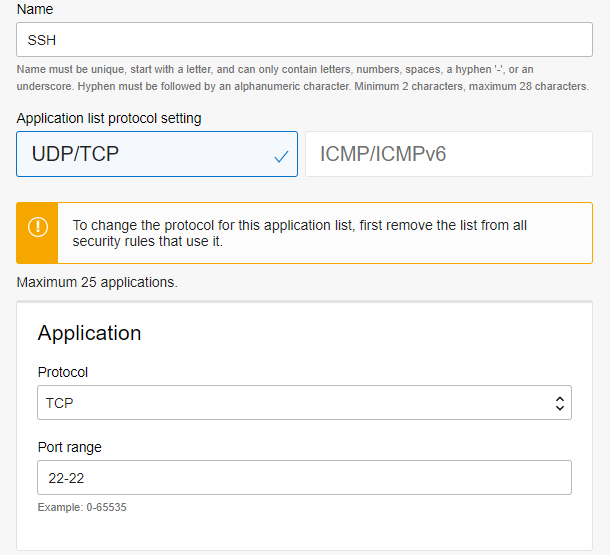
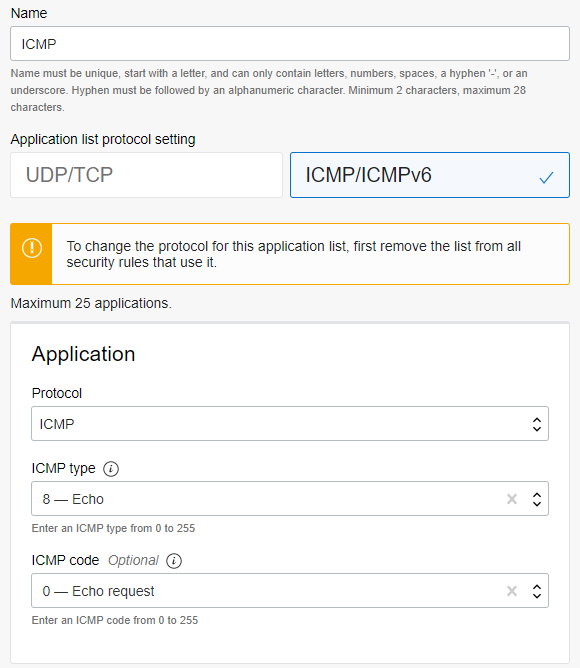
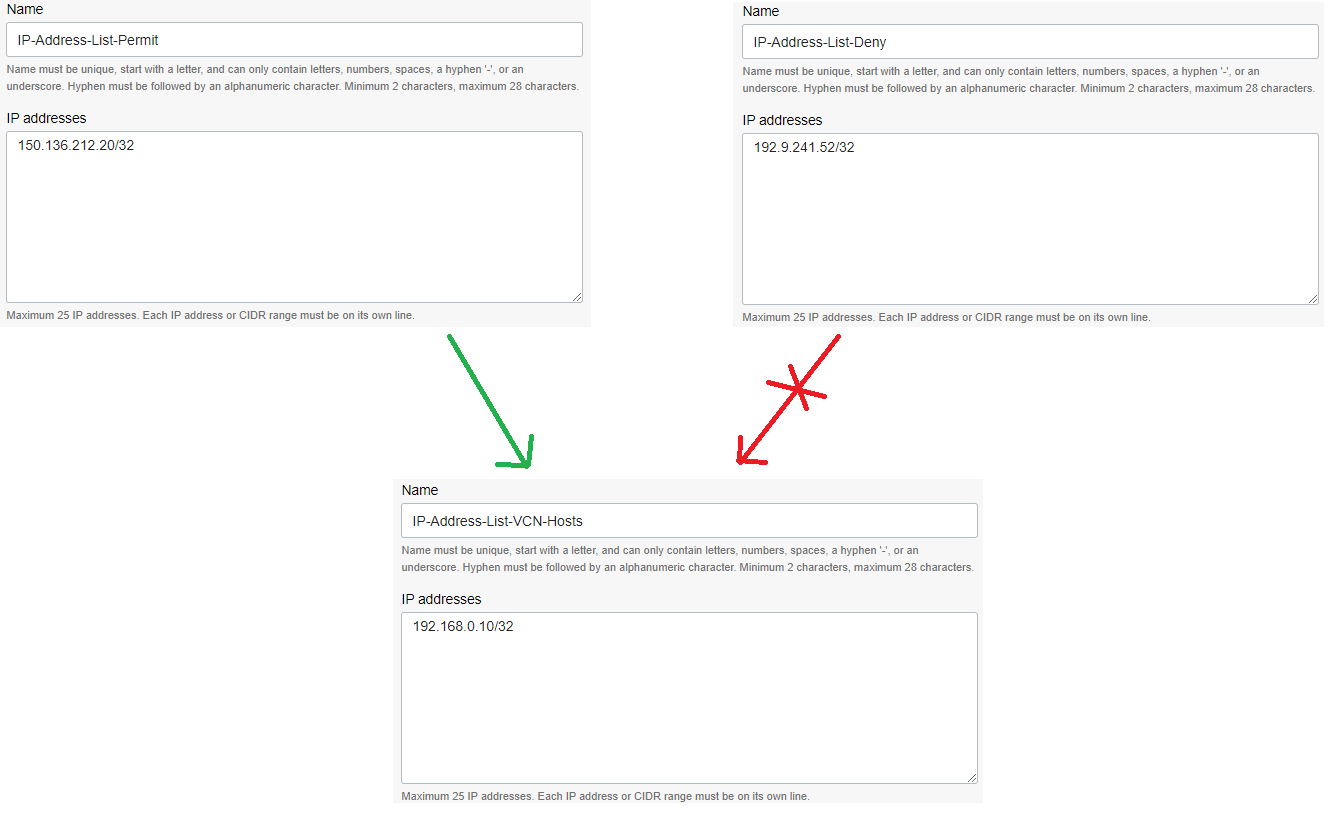
- Create an Application list (for ICMP and SSH) and IP address list to define the destination VM and the two Internet hosts:
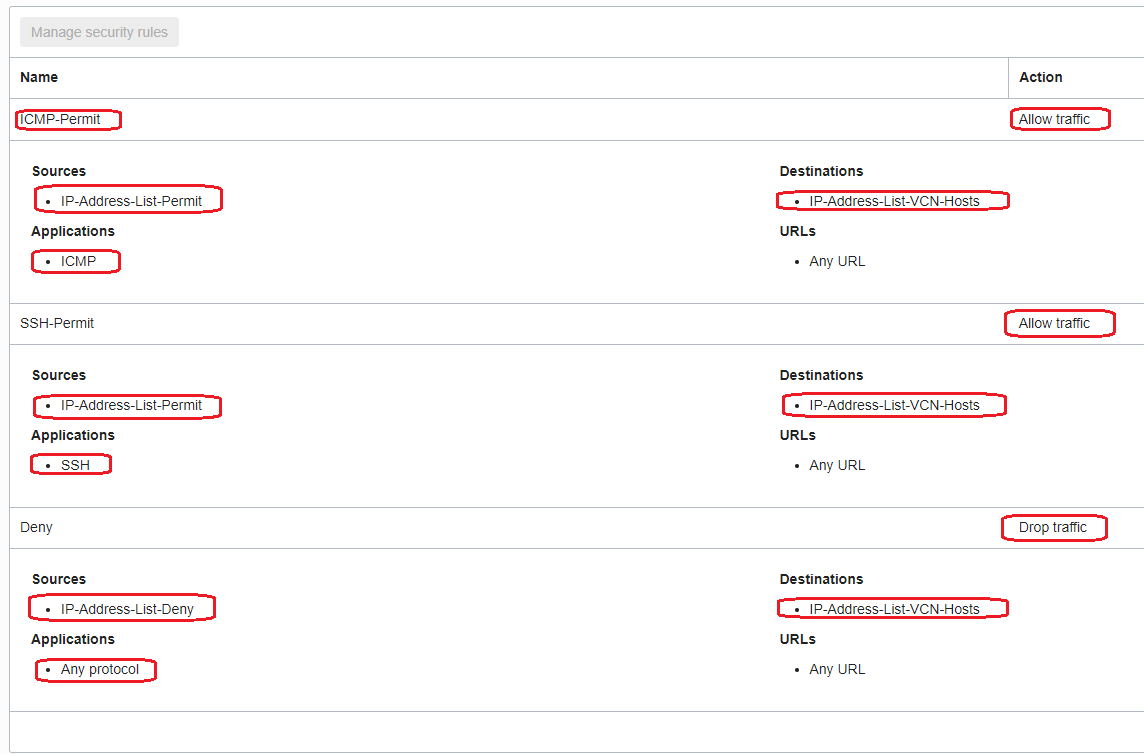
- Under Rules, create the following Security Rules using the application lists and IP address lists defined above:
- Attach the cloned policy to the Network Firewall and wait between 5-10 minutes for the Network Firewall icon to become green again:

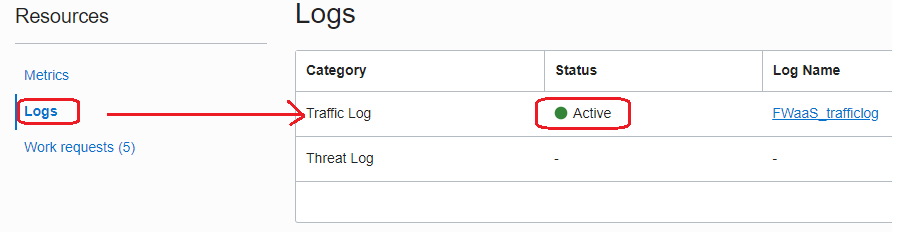
- Go to Network Firewall and from the Logs, start the Traffic Log:
2.4 The ICMP and SSH sessions initiated by 150.136.212.20 to 192.18.141.51
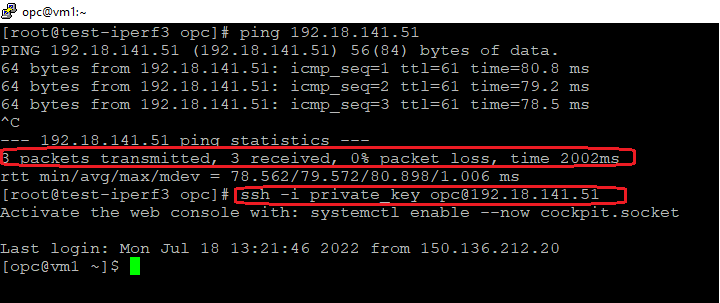
The log entries:
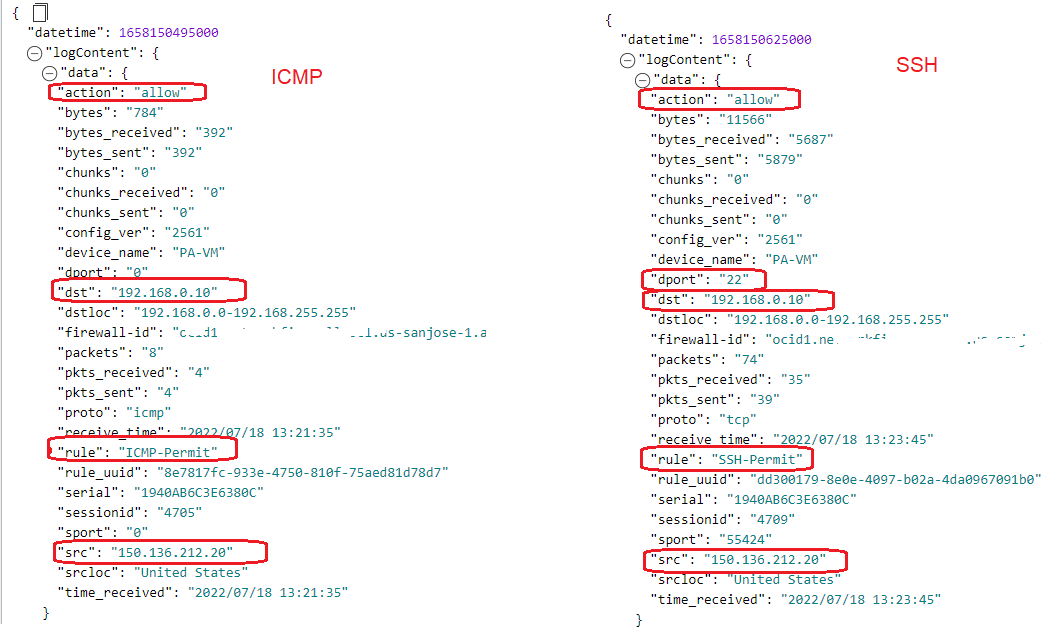
As confirmed by the above logs, the policy rules created are accomplishing the scope for the sessions initiated by 150.136.212.20 to be allowed.
2.5 The ICMP and SSH sessions initiated by 192.9.241.52 to 192.18.141.51
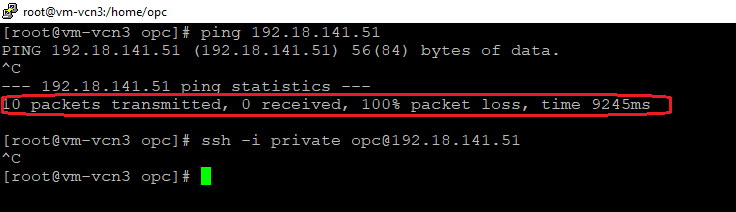
The log entries:

The denied traffic is logged based on the requirement implemented on the policy.
The Network Firewall is a great security feature in the OCI Networking/Security portfolio that will add another layer of protection to the VCN infrastructure.