Introduction
This blog aims to show you how to set up and manage routing in an OCI Internet and NAT gateways to give your cloud resources internet access while associating them to Public and Private subnets. I also discuss Compute Instances for testing the connections.
Note: I split the agendas into two different blogs to prevent publishing a long blog and cover the most efficient concepts. The blog hyperlinks are included in the agendas listed below.
Please check the architecture below.

Agenda
1. OCI Subnet Types
• OCI Public Subnet
Public Subnet Introduction
Public Subnet Creation
• OCI Private Subnet
Private Subnet Introduction
Private Subnet Creation
2. OCI Compute Instance
• Compute Instance Introduction
• Compute Instance Creation with Public Subnet (Assign Public IPv4)
• Compute Instance Creation with Private Subnet (Do not Assign Public IPv4)
• Test Connectivity to the VM with Assigned Public IPv4 address
3. OCI Internet Gateway
• Internet Gateway introduction and creation
• Update the default route table to use the IGW
• Update the default security list
• Test connectivity
4. OCI NAT Gateway
• OCI NAT Gateway Introduction and Creation
• Create the specific route table for the private subnet
• Test Connectivity
5. Conclusion
1. OCI Subnet Types
Subnets are logical divisions of a virtual cloud network. We can create one or more subnets in a VCN, each of which has a range of non-overlapping IP addresses. CIDR blocks determine this range of addresses.
Subnets can be designated as either: Public or Private.
Note: Each subnet can be AD-specific or Regional Subnet. This blog’s architecture consists of a virtual cloud network (VCN) with regional public and private subnets.
Note: Please check the link below if you need more information about the OCI virtual cloud network.
Create and configure a virtual cloud network
• OCI Public Subnet
Public Subnet introduction:
OCI public subnet allows public IP addresses for instances in a subnet, which means you can allocate a public IP address to your server (vNIC). When you create a subnet, by default, it’s considered public, which means instances in that subnet are allowed to have public IPv4 addresses, and Internet communication is permitted by using the Internet Gateway.
Public Subnet Creation:
With the quick intro above, let’s log in to the OCI dashboard and create a public subnet for your VCN. (I assume you already have VCN under your preferred region)
Open the navigation menu and click Networking.
Under Overview, click Virtual Cloud Network and select the VCN you already created for this blog.
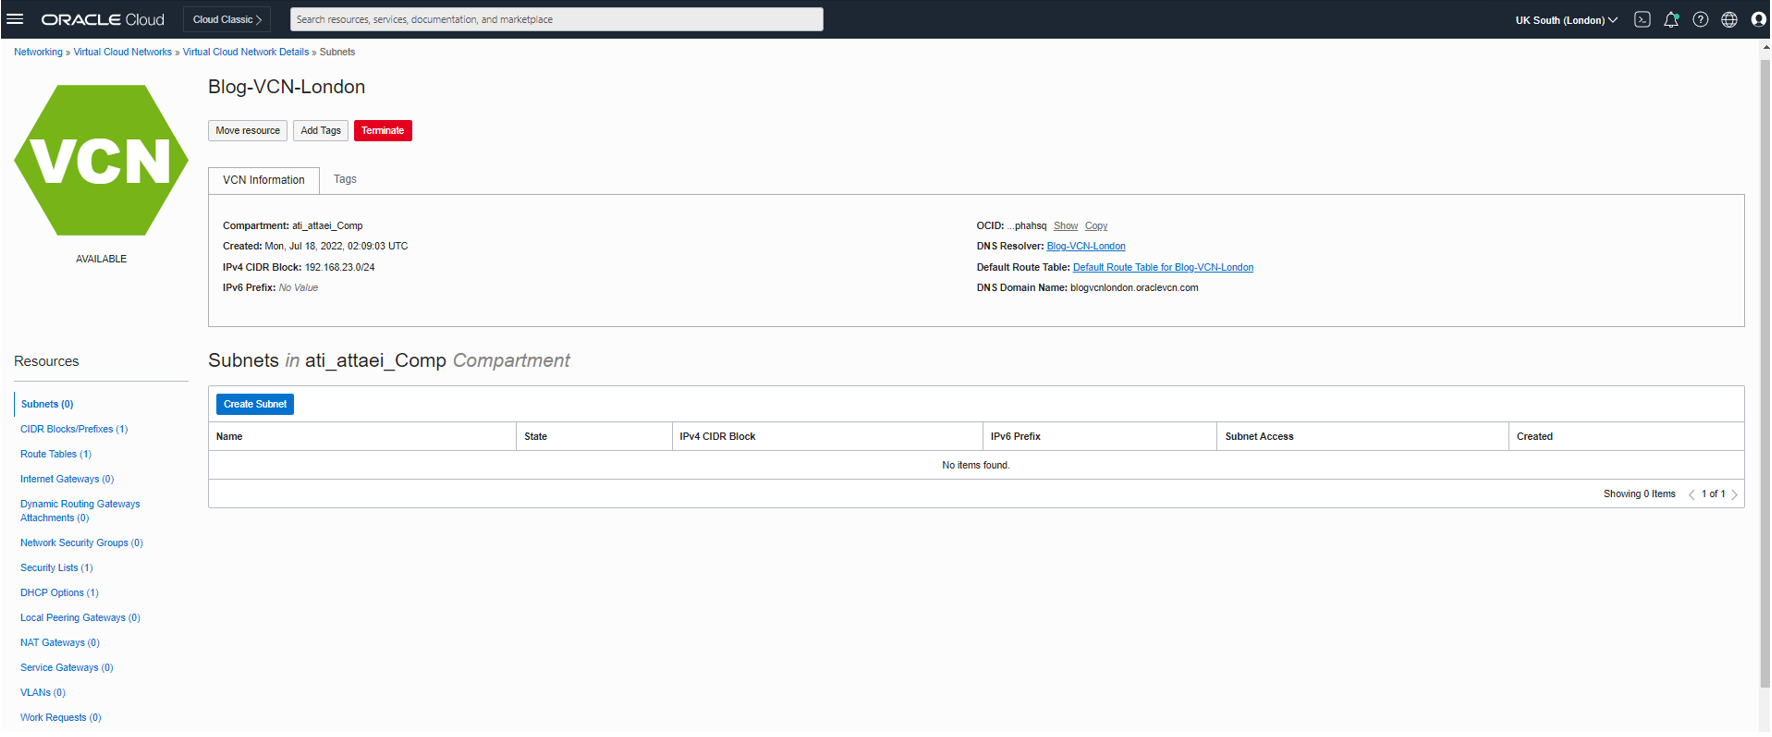
As you see in the screenshot above, VCN Route Tables, Security Lists, and DHCP Options are created by default.
Now it’s time to create Subnets.
On the left menu under Resources, click on Subnets, Create Subnet.
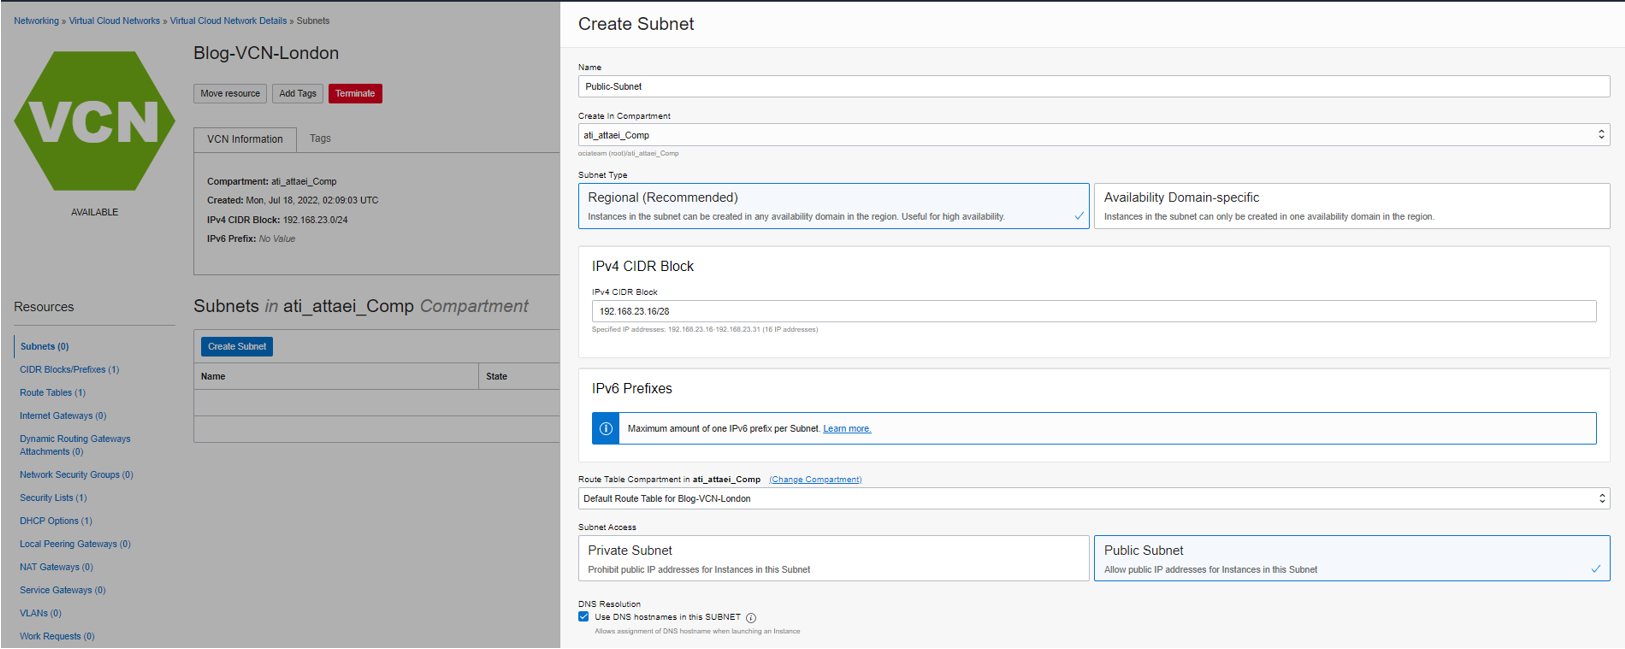
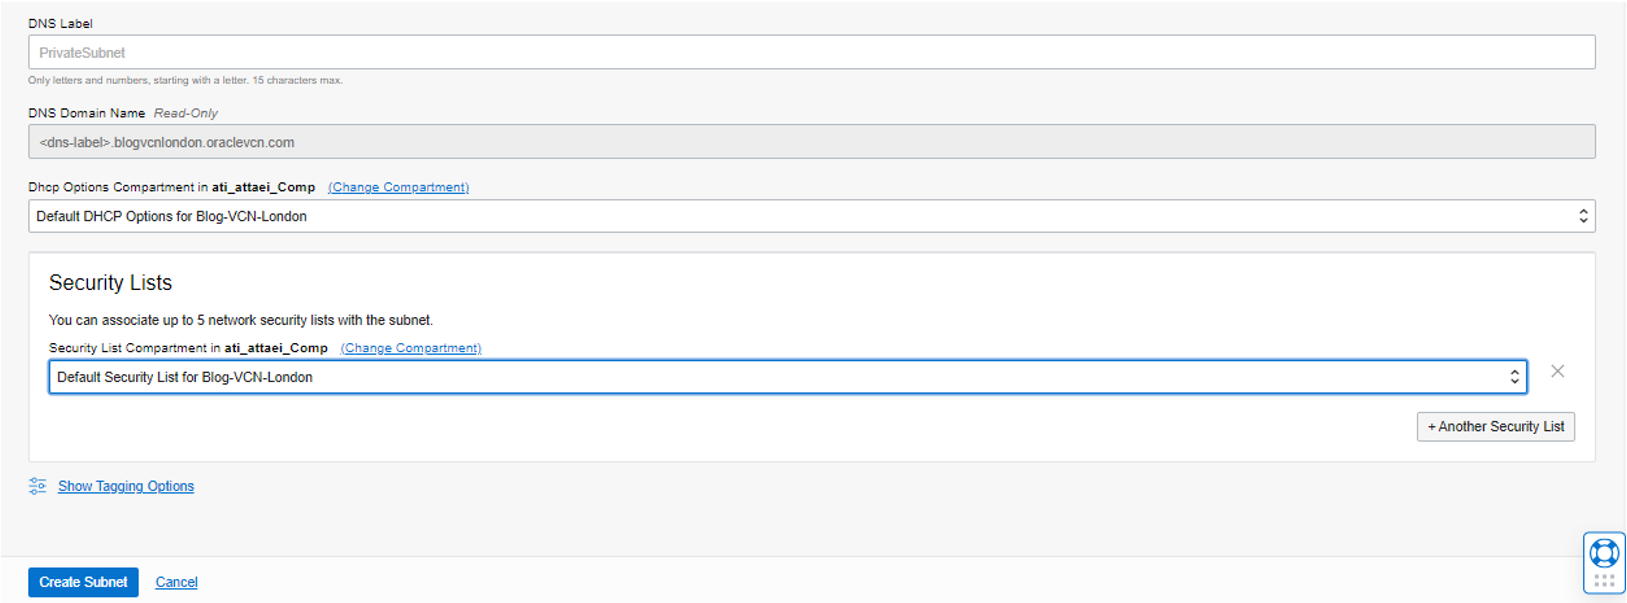
Please enter a name, for instance, Public-Subnet.
Select the Compartment.
Subnet Type: In our case is Reginal which means the associated subnet will be available across all three Availability Domains in London or UK South region.
Select the IPV4 CIDR Block contained in its VCN CIDR (192.168.23.0/24), and I chose 192.168.23.16/28.
Route Table: Default. Subnet Access: Public Subnet.
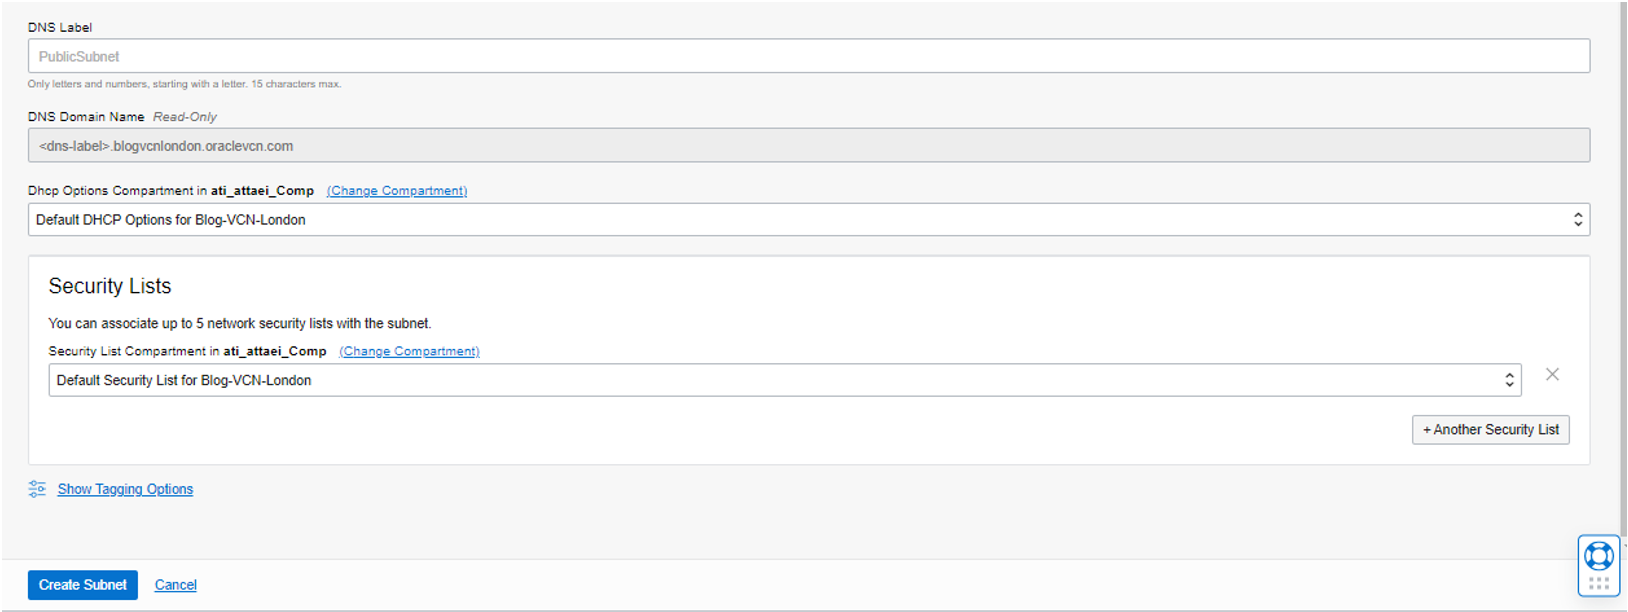
DNS Resolution: Enable.
DHCP Option and Security Lists will leave as a Default, and click on Create Subnet.
• OCI Private Subnet
Private subnet introduction:
OCI private subnet holds private servers such as database servers and doesn’t allow public IP addresses. The compute instances in the private subnet can access the internet using a network address translation (NAT) gateway that resides in the VCN.
Private subnet creation:
Repeat the steps above as we did for the public subnet and choose the proper IPv4 CIDR block.
Note: Subnet Access would be Private Subnet
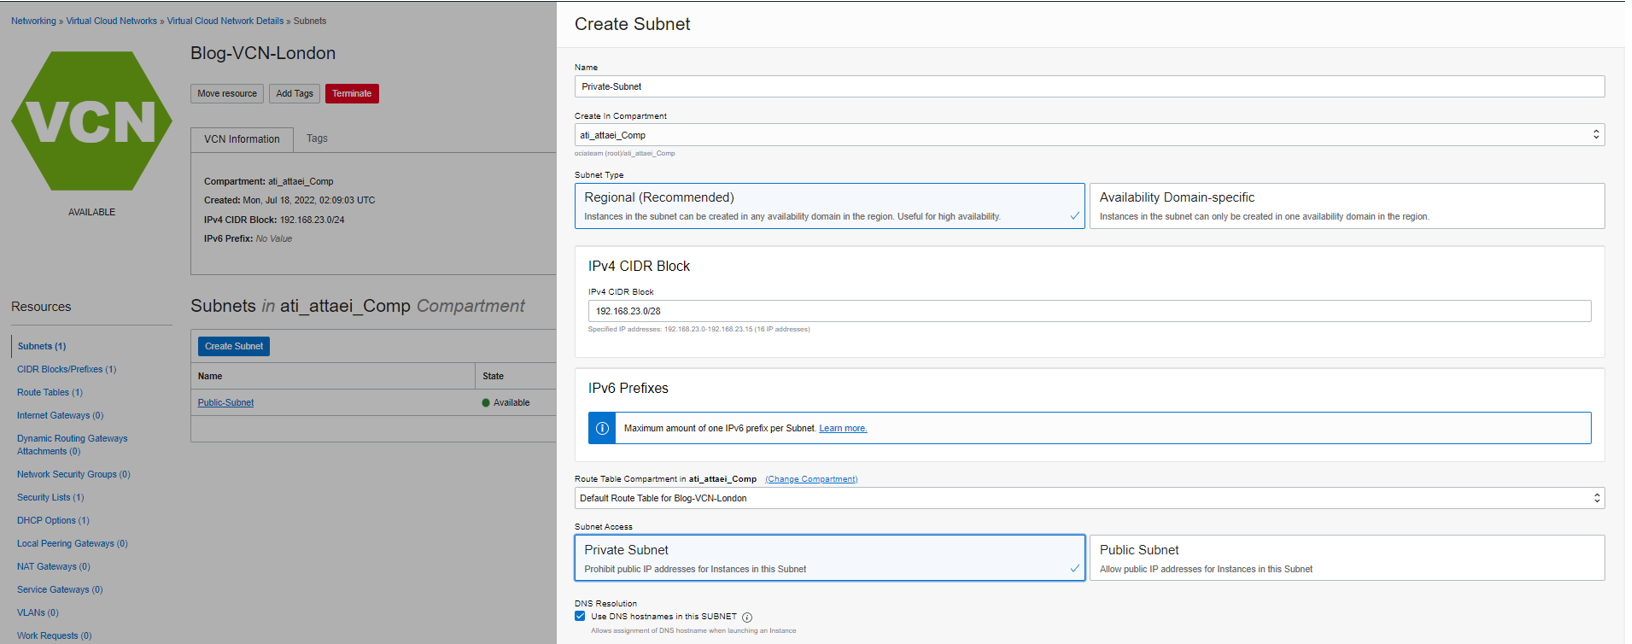
DHCP option and Security List leave as a Default.
Now we have a private and public subnet for the next step. However, we need first to create some Compute Instance resources.
2. OCI Compute Instance
• Compute Instance Introduction
Oracle Cloud Infrastructure compute lets you provision and manage the compute host, known as instances. When you create an instance, the instance is automatically attached to a virtual network interface card (vNIC) in the cloud network’s subnet and given a private IP address from the subnet’s CIDR. The private IP address allows instances within the cloud network to communicate. If the subnet is public, you can communicate with the instance over the Internet and establish an (SSH) or (RDP) connection to the instance from outside the cloud network.
Note: You can also create SSH or RDP connections to instances without public IP addresses using a Bastion.
• Compute Instance Creation with Public Subnet (Assign Public IPv4)
Login to the OCI dashboard.
From the OCI services menu, click Instances under Compute.
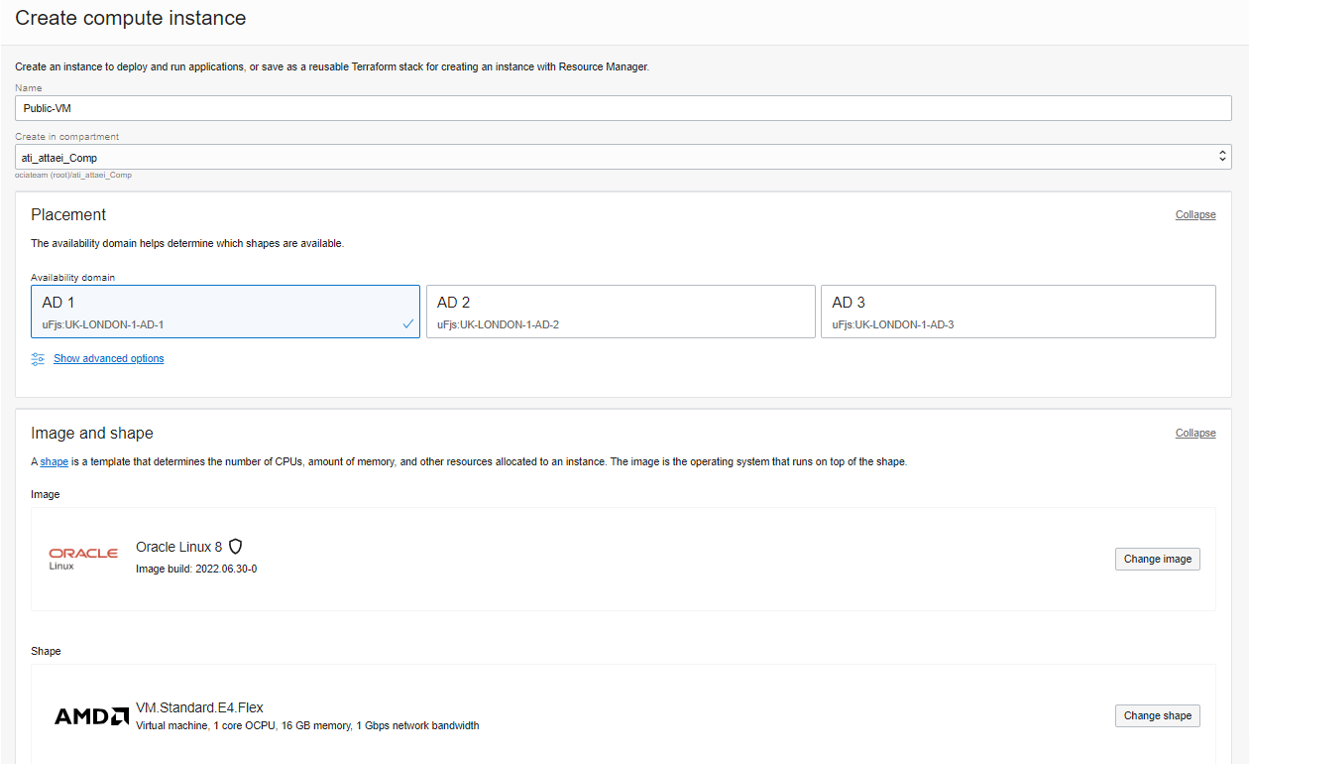
Select the appropriate compartment under List Scope in the left navigation pane and click on Create instance Please enter a name.
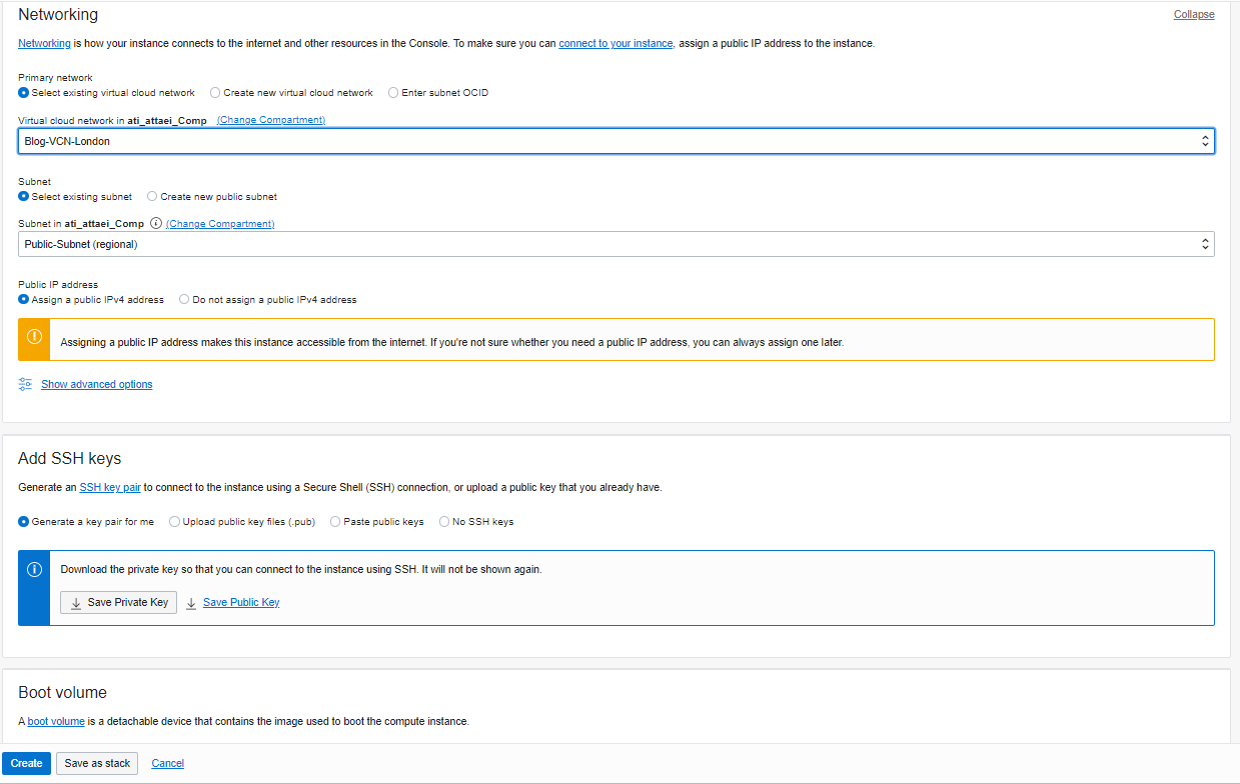
I called it Public-VM and selected availability domain one. I left the Image and Shape as default. In the networking section, make sure you are selecting the right VCN, Public subnet, and assign a public IPv4 address to the instance.
In Add SSH keys, I selected Generate a key pair for me and then saved private and public IPs to my system, and Boot volume will leave as the default set up and click on Create.
Please check the screenshots below.
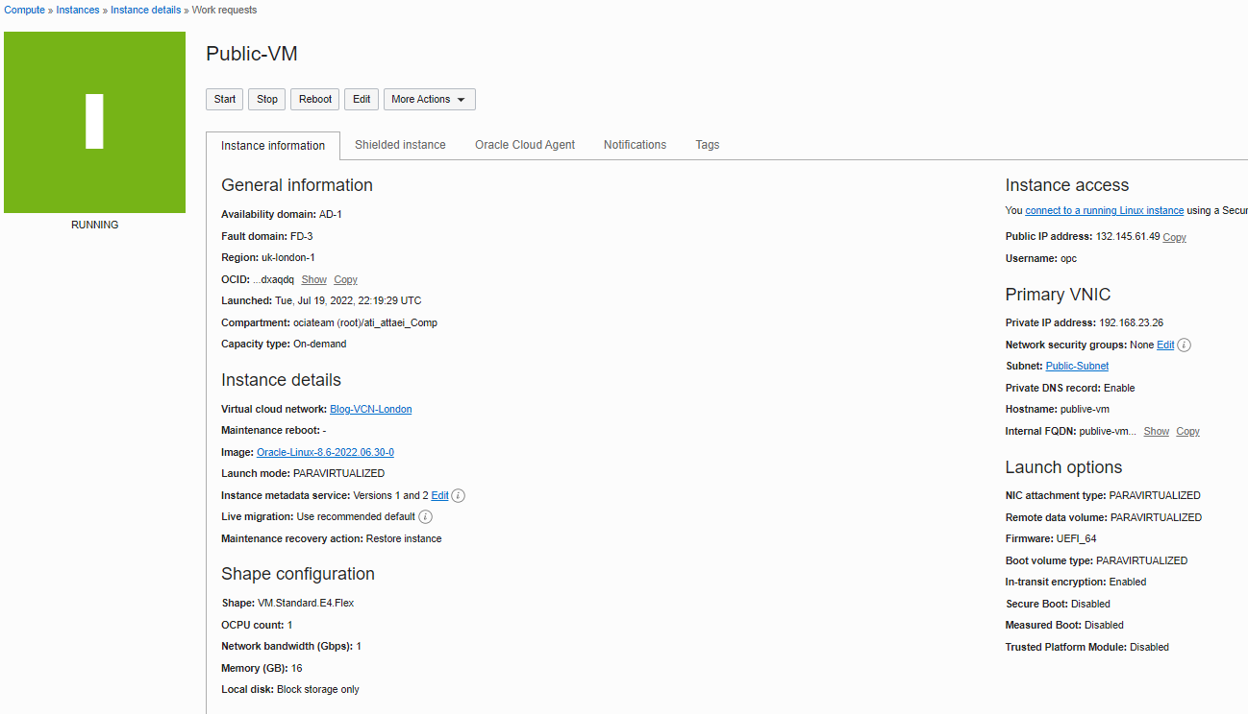
Here is what we’ll see after successful VM creation.
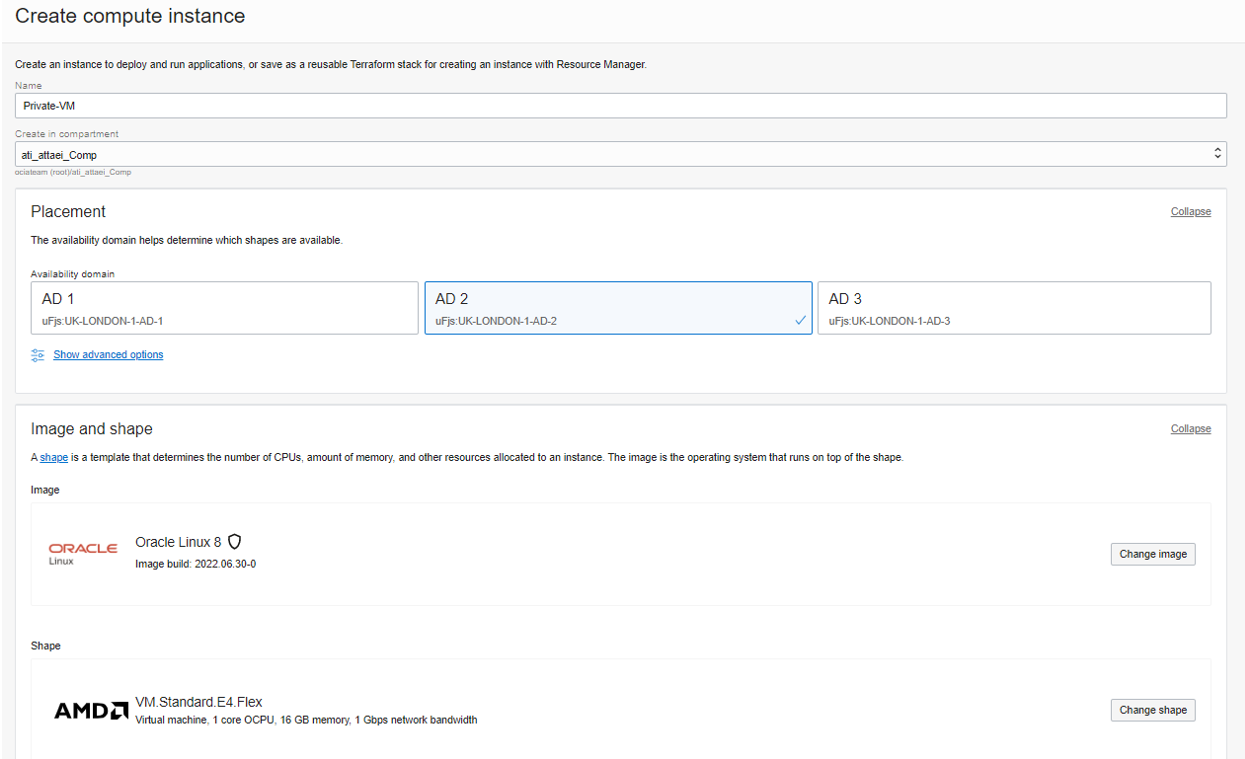
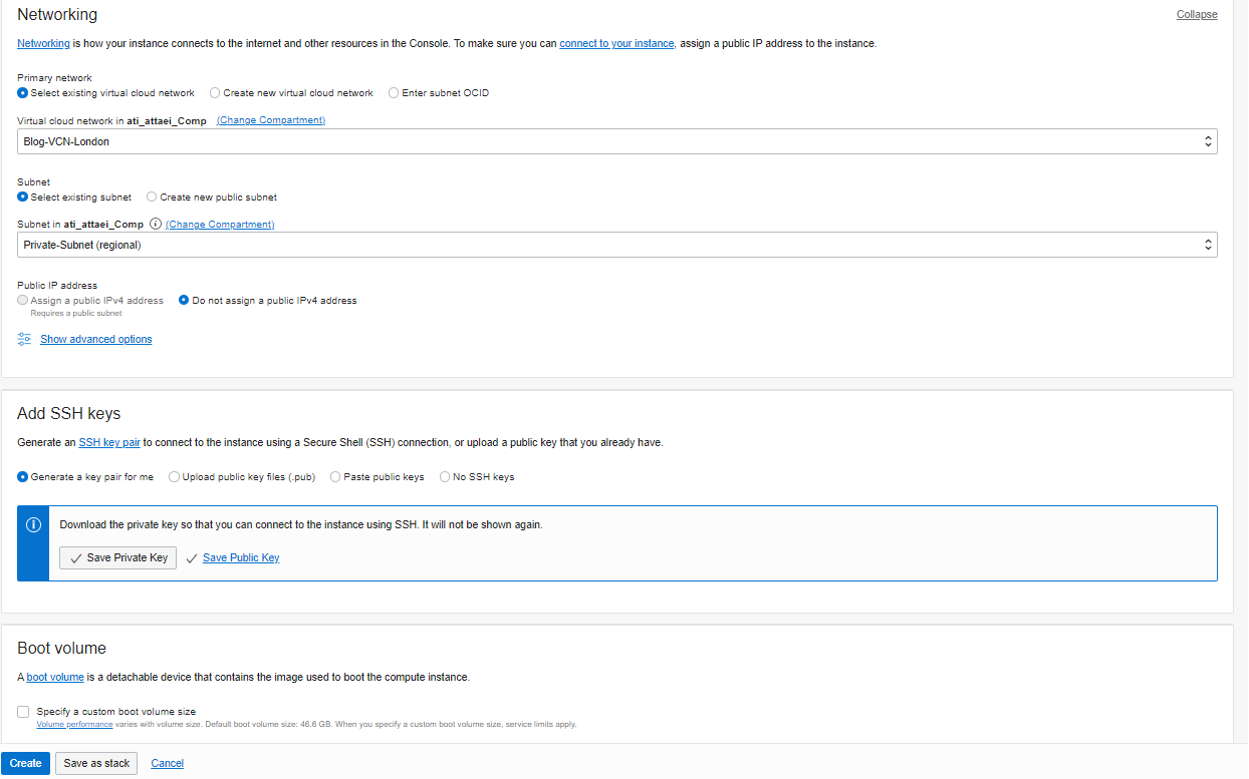
• Compute Instance Creation with Private Subnet (Do not Assign Public IPv4)
Now, we will create a second Compute Instance.
I called it Private-VM and placed it in Availability Domain 2.
Shape and Image left as default. Same VCN as my Public VM, Subnet Private-Subnet, and we didn’t assign a public IPv4 address to our private compute instance.
In Add SSH keys, I selected Generate a key pair for me, and Boot volume left as default,
and click on Create.
Please check the screenshots below.
Now we have our VMs ready for the next steps!

• Test Connectivity
Let’s try to connect to the public VM with we just created.
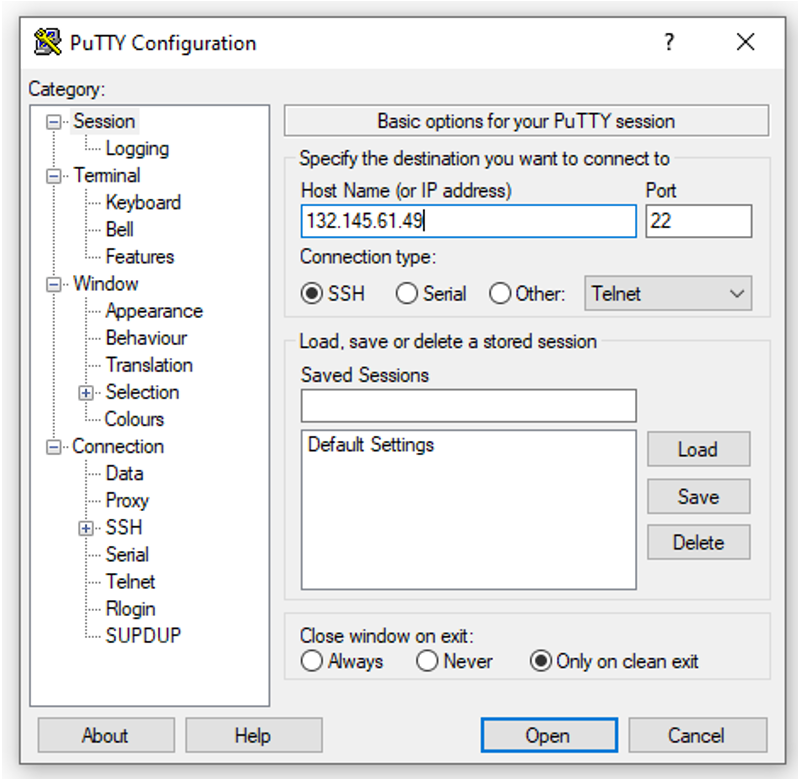
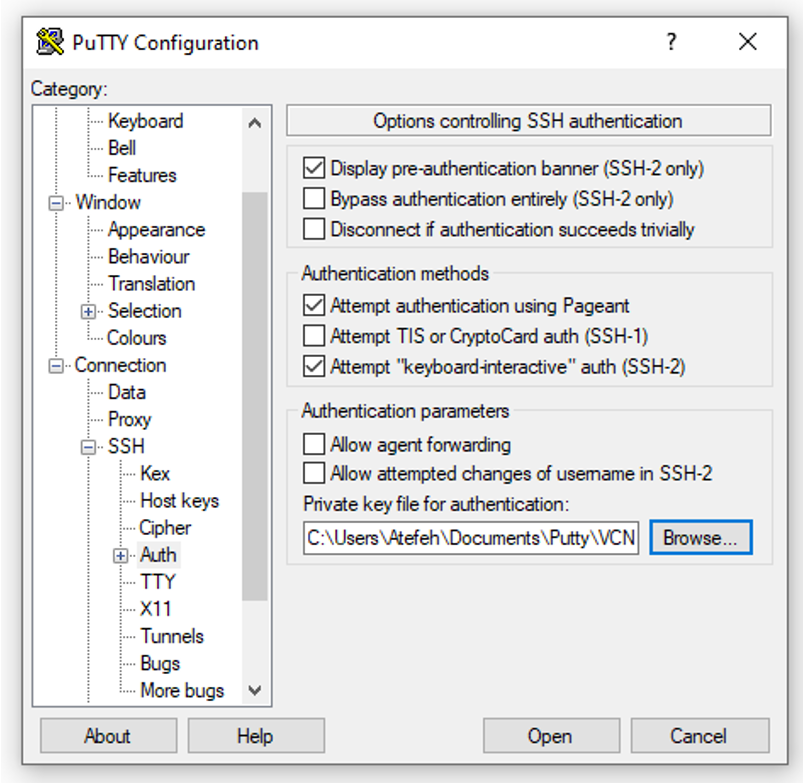
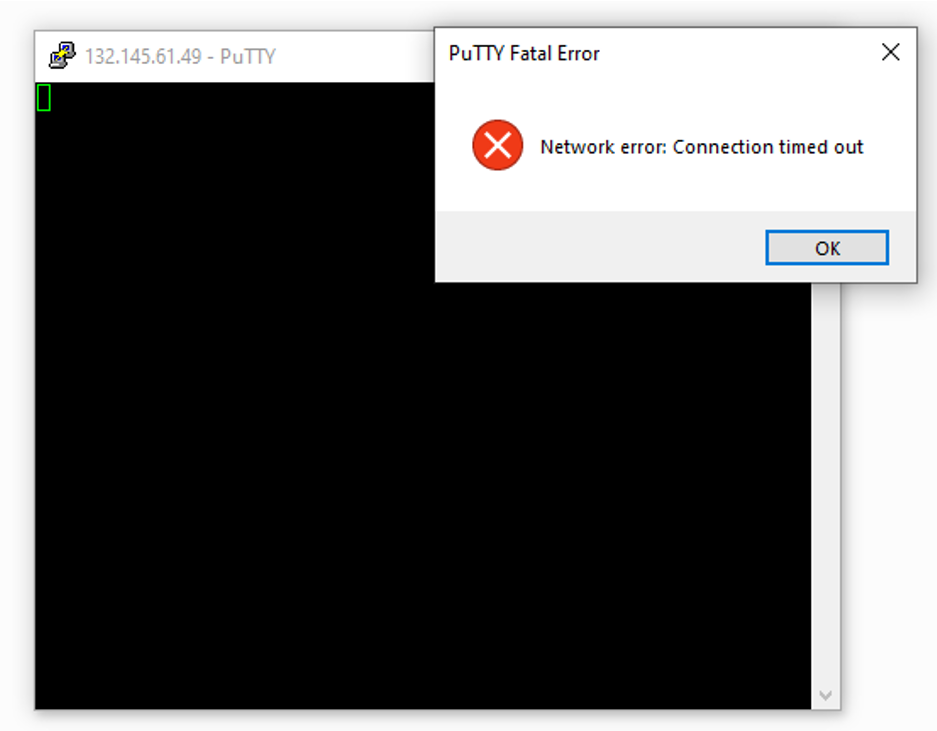
As you see above, our putty connection request to the public VM didn’t work because we don’t have a path between our VCN and the Internet yet, which means we need to create an Internet Gateway.
To continue, please click on the link below.
OCI Public and Private Subnets in association with Internet and NAT Gateways (Part-2)
Blog links
OCI Public and Private Subnets in association with Internet and NAT Gateways (Part-1)
OCI Public and Private Subnets in association with Internet and NAT Gateways (Part-2)