The OCI Bastion Service makes it easy to securely connect to your compute instances regardless of where you and they are. Whether you’re sitting on your corporate network or out at a coffee shop. And whether your instance is on a public subnet or private subnet. None of it matter – the OCI Bastion service gives you a path to get connected.
And with the ProxyJump feature of OpenSSH (added in OpenSSH 7.3 back in 2016) the command line needed is actually simpler than you would expect.
Plus you can not only ssh in but you can also scp or even rsync files to your heart’s content!
This is all because the OCI Bastion service is actually fully managed “jump host”. A jump host is exactly what it sounds like – a host you can connect to and then jump from to reach somewhere else. The ProxyJump setting is how you tell the SSH client about that jump host.

Prerequisites
The ProxyJump feature was added in OpenSSH version 7.3 back in 2016 and so it’s very likely that you already have that or a newer version installed.
To check what version you have open a terminal and run the command “ssh -V” (for version):
➜  ~ ssh -V
 OpenSSH_9.0p1, OpenSSL 1.1.1p  21 Jun 2022
If you get back the word “OpenSSH” and some version number greater than 7.3 you’re good to go.
If you get something different (like Dropbear) you will probably be disappointed.
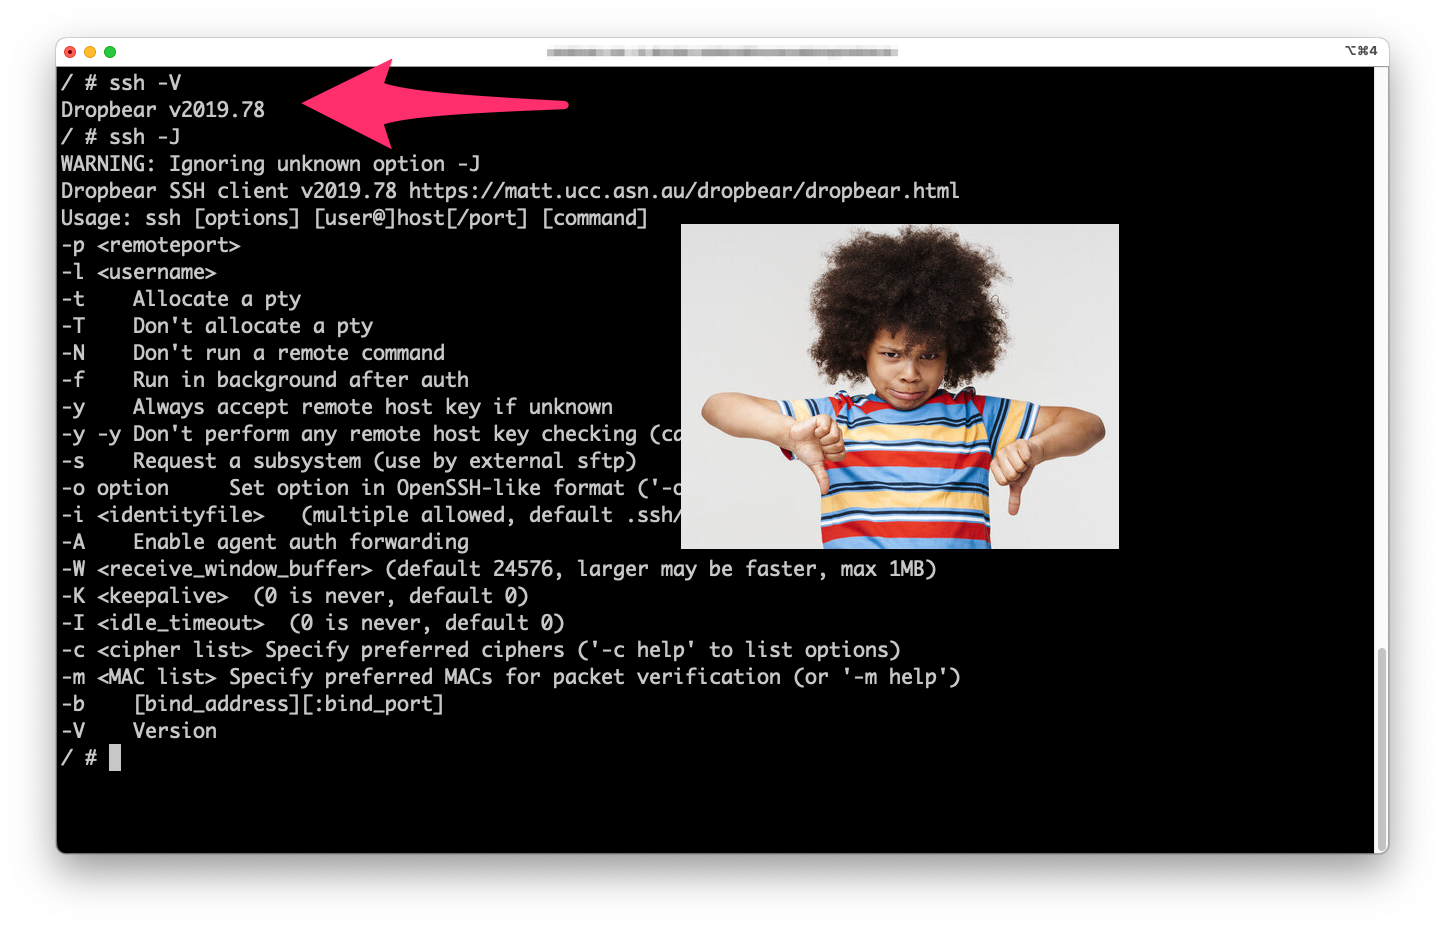
Update: Dropbear can be used with OCI Bastions service. See my new blog post for more info on how.
Other than that, you just need access to the OCI console and permission to use the bastion service!
Creating a Bastion
To use the Bastion service the first step is to create a bastion attached to the subnet you want to access.
You can do this from the UI or the CLI but for help and an explanation check out my compatriot Bogdan’s post where he explained the bastion service and showed you the basics of how to use it.
Creating a Bastion Session
A bastion session gives someone with the right SSH private key the time limited permission + ability to actually connect to a host on the above subnet.
When you create a bastion session you choose the type of session you want from these options:
- A TCP forwarding connection
- A Managed SSH session
The TCP forwarding connection allows you to route any random TCP traffic you like over the bastion session. But that’s not what we want.
The Managed SSH session allows you to connect to the specified host and if also adds an ssh public key to the destination host; when the session ends it removes that key. This is the type of session we need for this use case.
From your UI (or the CLI if that’s your bag) create a Managed SSH session.
For example:
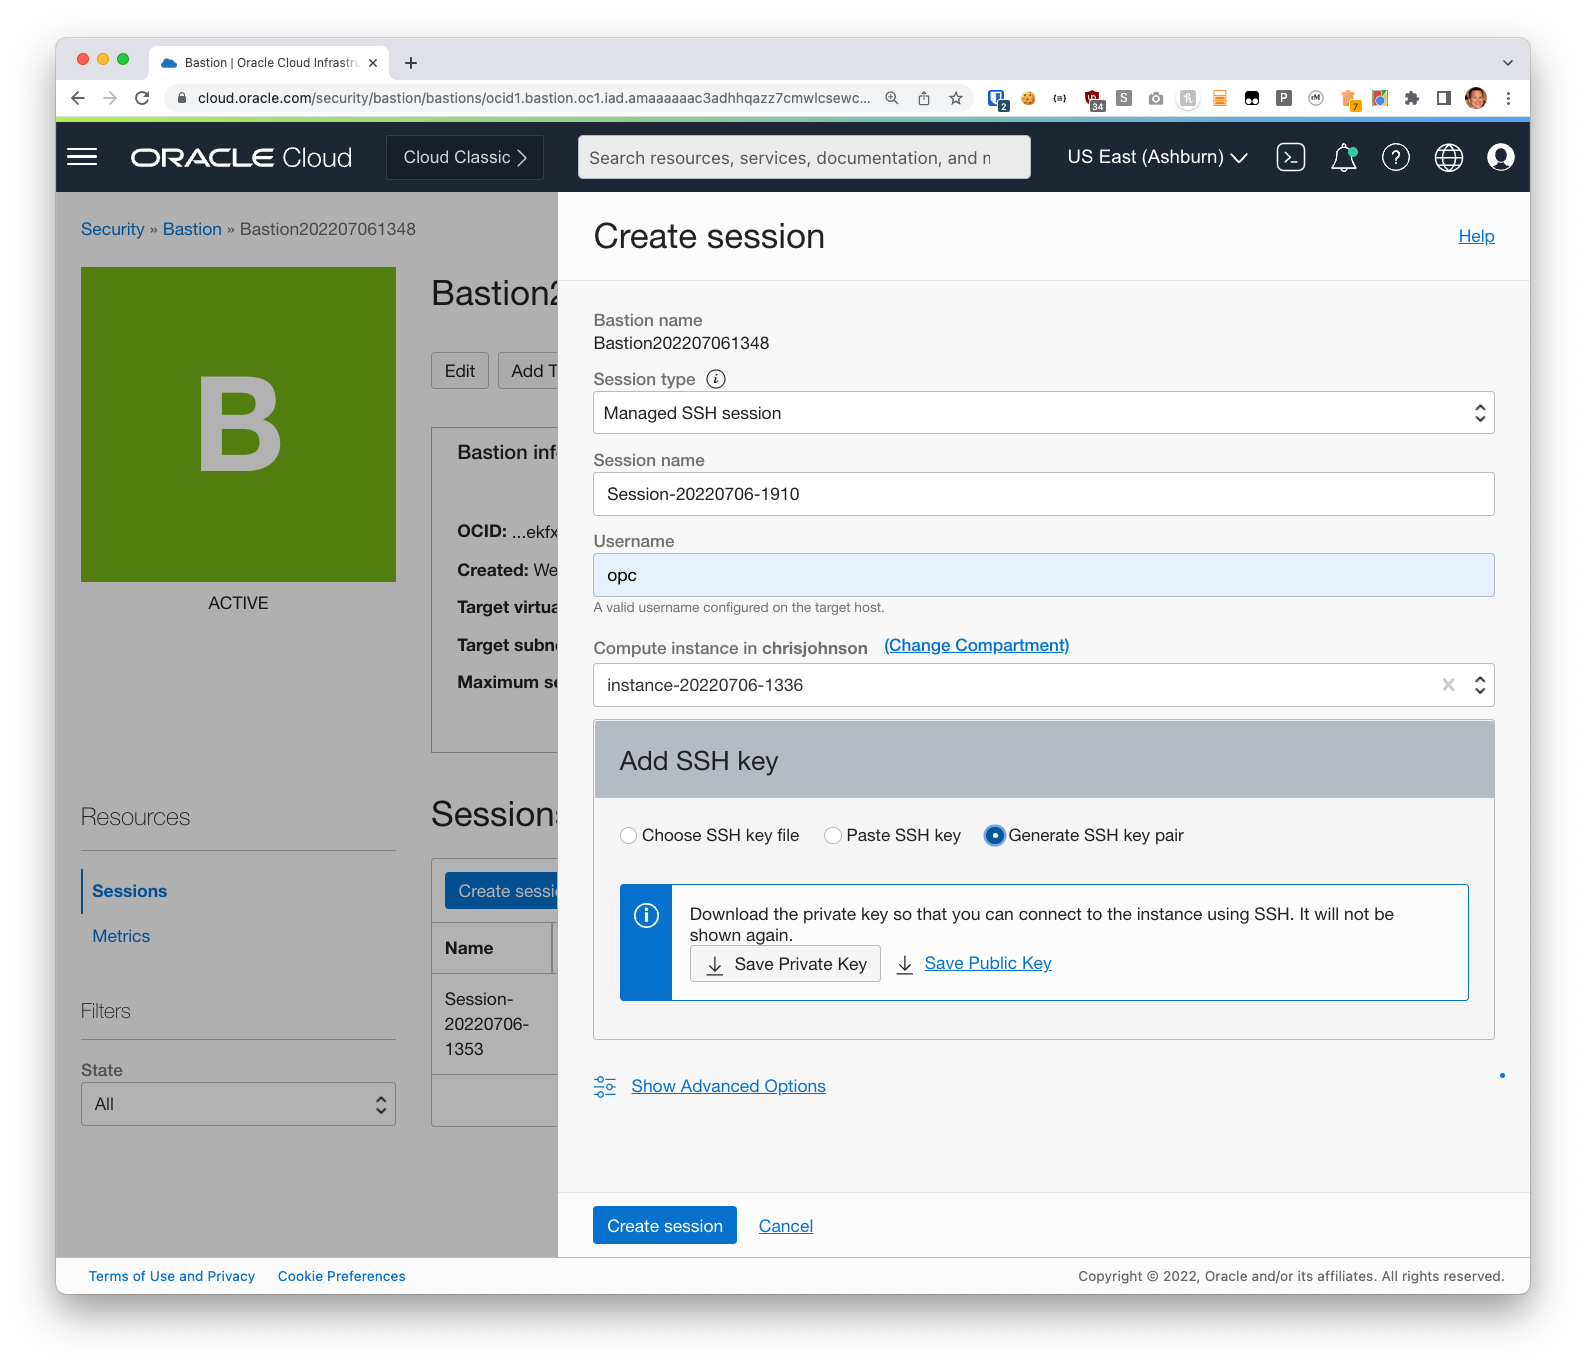
You can choose to plug-in your existing SSH key or generate a new one. I usually use an existing one, but any one you use will work great.
Examine the Bastion Command Line
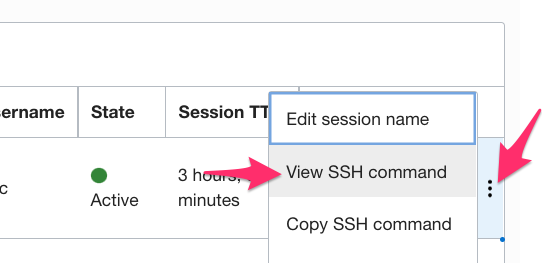
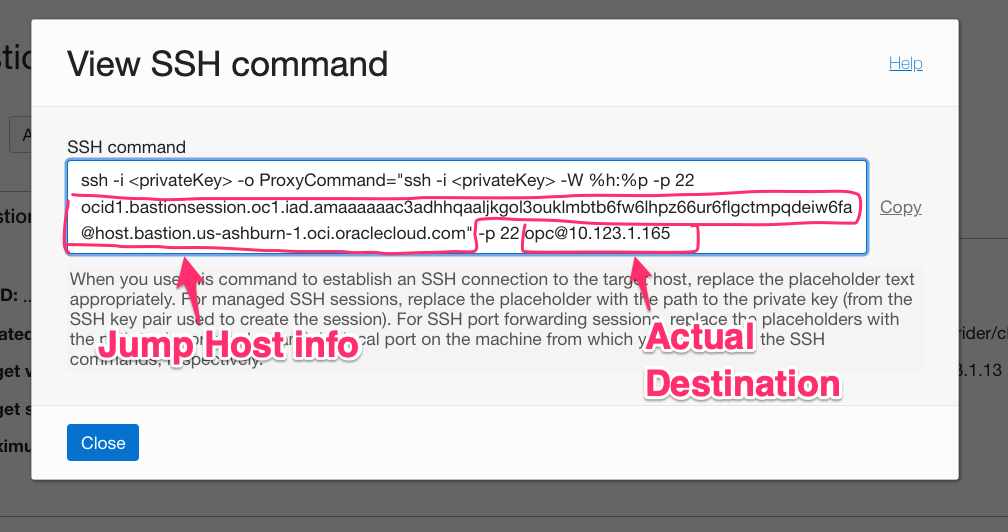
Once your bastion session has been created you need a few bits of info that are (currently) only available from the “View SSH Command” menu option. So, let’s go get them:
And you should see something like this:
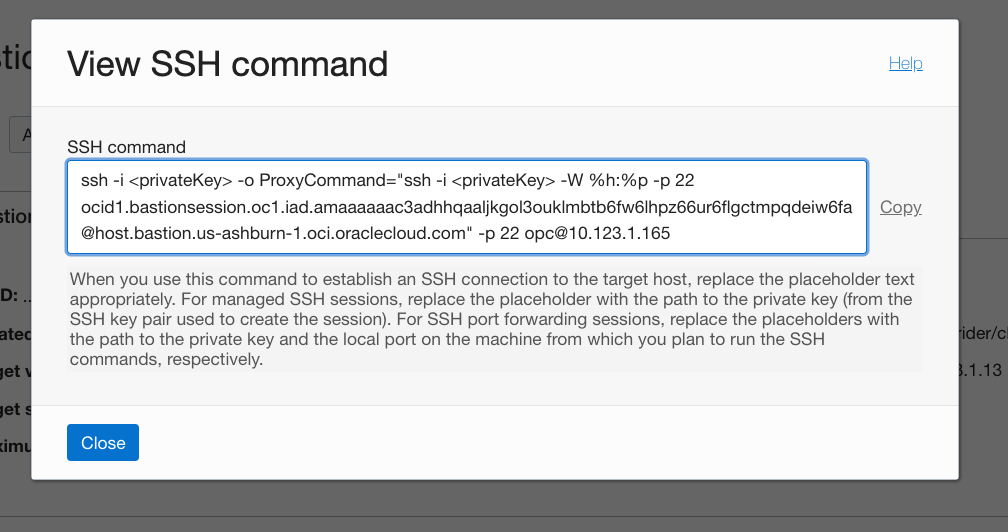
This command line will absolutely work. But if we use ProxyJump we only need two of them:
- the Jump Host information
- the destination
Here’s where they are:
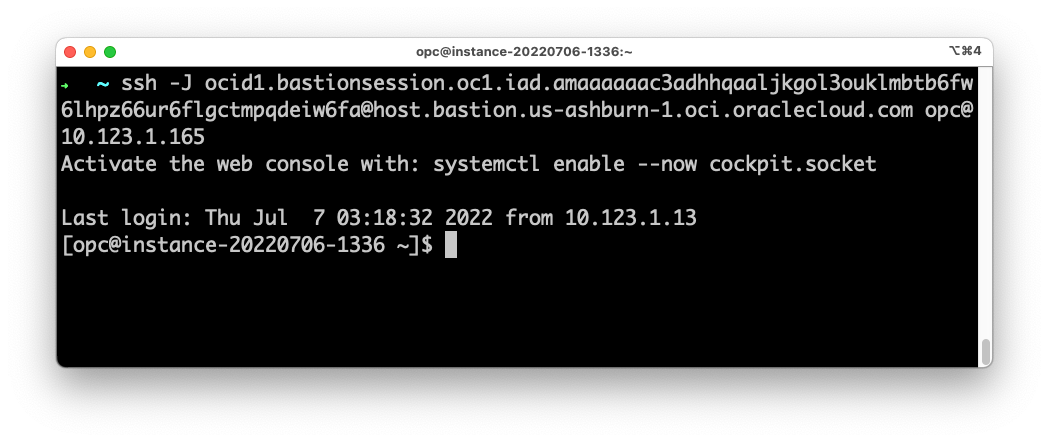
Run “ssh” with the right command line options
Now just construct a new command line in the form:
ssh -i <privateKey> -J ocid1.bastionsession.XXXXXXXX@host.bastion.<region>oci.oraclecloud.com <username>@<destination>
From the command line above that would be:
ssh -i mykey -J ocid1.bastionsession.oc1.iad.XXX@host.bastion.us-ashburn-1.oci.oraclecloud.com opc@10.123.1.165
If I run that I get connected to the host:
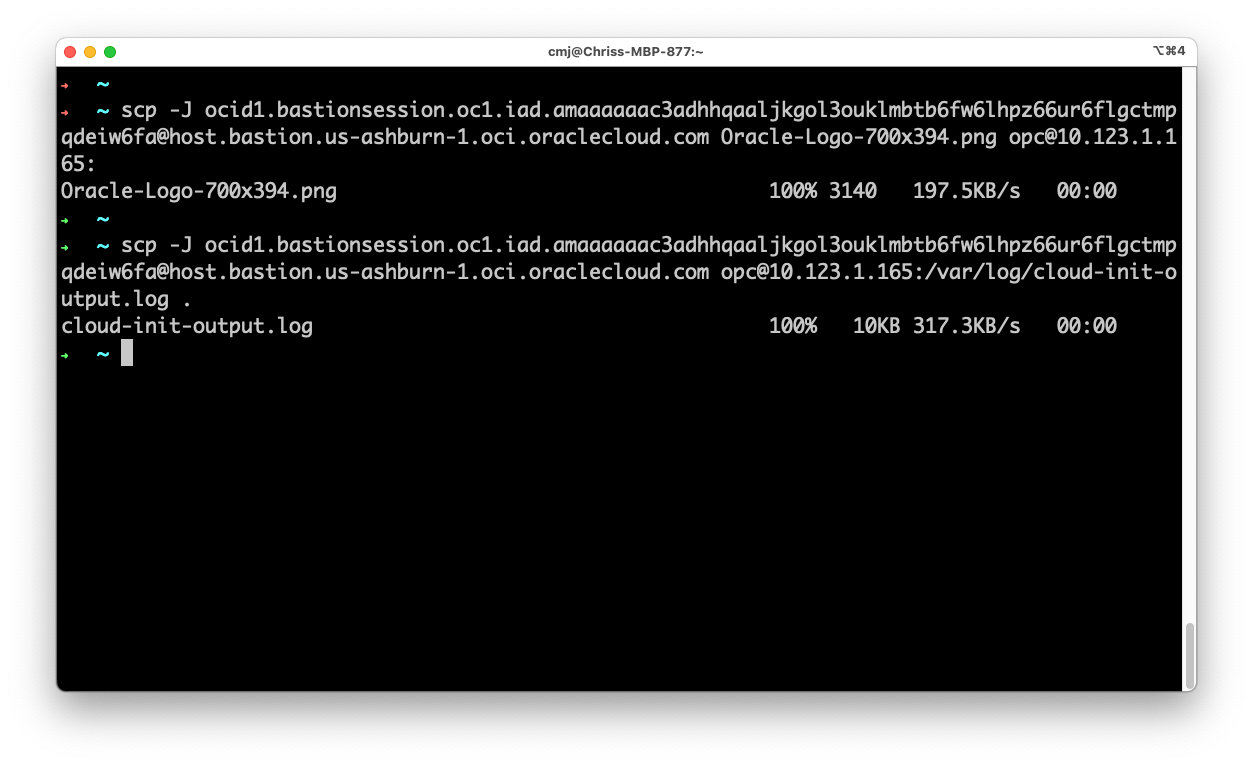
What About scp and rsync?
SSH is used for lots more than just an interactive terminal. And the most popular and widely used is scp (sometimes kinda incorrectly referred to as sftp) and rsync.
Since those tools rely on the ssh executable to do the work they also can be made to use the ProxyJump feature!
SCP
The scp command supports the same -J option so you can copy files up or down to the remote host via the bastion easy peasy:
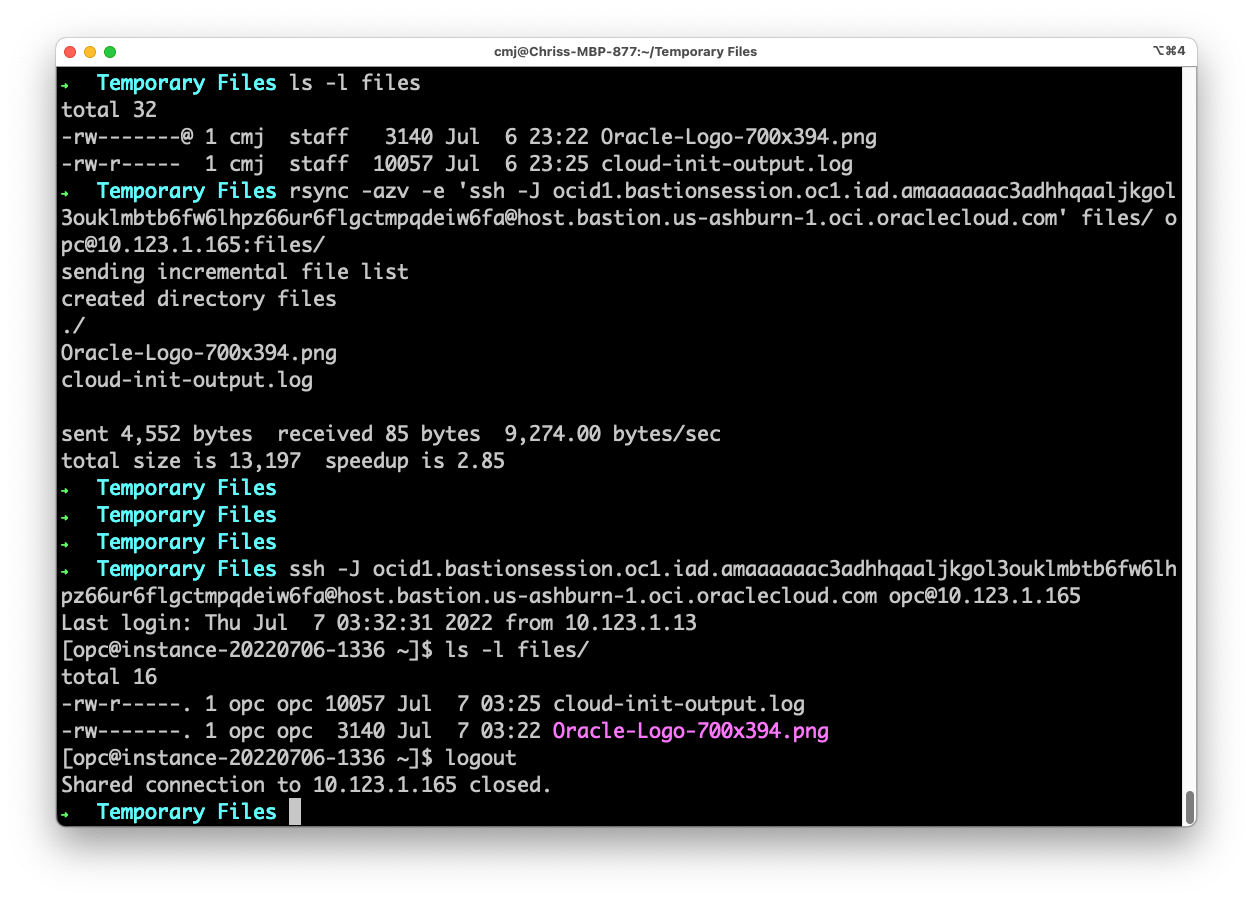
Rsync
Sadly, rsync doesn’t support the -J option directly. And in fact the -J option actually means something else to rsync so they can’t just add it easily.
But that’s not a problem – it does support a “-e” argument which allows you to tell it a command to execute instead of just plain old “ssh”.
So we just add a “-e” and then basically the same arguments to SSH that we used above – minus J, the bastion username and the bastion hostname:
-e 'ssh -J ocid1.bastionsession.oc1.XXXXXXX@host.bastion.us-ashburn-1.oci.oraclecloud.com' ...
Like so:
You can also set an environment variable to do the same:
export RSYNC_CONNECT_PROG='ssh -J ocid1.bastionsession.oc1.XXXXXXX@host.bastion.us-ashburn-1.oci.oraclecloud.com'
And then just run your rsync as normal.
What Else?
This same sort thing works for most every other tool that relies on the SSH command line or uses SSH under the covers. If there’s an option for a “Jump Host” you can use the ocid1.bastion.oc1.XXXX@host.bastion.REGION.oci.oraclecloud.com value to route your request via the Bastion service.
This means things like git, ansible, rdiff-backup, and many many more can seamlessly talk to your compute instance in OCI even if it’s on a private subnet.
As the kids say, it’s pretty dope!