Introduction
Nowadays, many customers choose multi cloud providers to find the best solution for their on-prem network migration to the cloud. So, when you design your network based on multi-cloud vendors, you might need to connect your public clouds to achieve your connectivity requirements.
Are you observing that when customers implement cloud native workloads in a multi-cloud architecture, they typically use VPN for connectivity?
The Site-to-Site VPN is one of the fastest and most secure ways to connect your multi-cloud providers.
In this blog, I will show you how to connect OCI to the AWS transit gateway via a Site-to-Site VPN connection.
Prerequisites
For this blog, you must know about the OCI and AWS networking concepts and have created available networking constructs (VCN & VPC) on both clouds.
Agenda
1. AWS – login to the Amazon VPC console
2. AWS – Create a temporary Customer gateway
3. AWS – Create Transit Gateway
4. AWS – Create Transit gateway attachment with VPC
5. AWS – Create a Site-to-Site VPN connection
6. OCI – Login to the OCI console
7. OCI – Create Customer-premises equipment (CPE)
8. OCI – Create DRG
9. OCI – Create DRG attachment with VCN
10. OCI – Create Side-to-Site VPN
11. AWS – Create Customer gateway
12. AWS – Modify VPN connection
13. AWS – Modify VPN tunnel options
14. OCI and AWS – Check the tunnel and BGP status
Let’s start with the AWS portal.
Step 1: login to the Amazon VPC console
Step 2: Create a temporary Customer Gateway
We need to create a temporary customer gateway for creating a VPN connection in AWS to have the public IP of the remote VPN peer before configuring an IPsec connection in OCI. (We will create a permanent gateway and replace it with a temporary one after discovering the OCI tunnel’s public IP addresses in step 10).
On the navigation pane, go to Virtual Private Network (VPN), Customer gateways, and click on Create customer gateway. Fill out the required field and click on Create customer gateway. (I considered a dummy IP address 1.1.1.1 for a temporary CGW external interface).

Step 3: Create AWS Transit Gateway
On the navigation pane, go to Transit gateways and click on Create transit gateway. Fill out the required field and click on Create transit gateway.

Step 4: Create Transit gateway attachment with VPC
To enable the routing, you need to attach your transit gateway to your VPC; in this case, you would allow your VPC subnets to advertise to OCI.
On the navigation pane, go to Transit gateways, transit gateway attachments, and click on Create transit gateway attachment. Check the screenshot below.
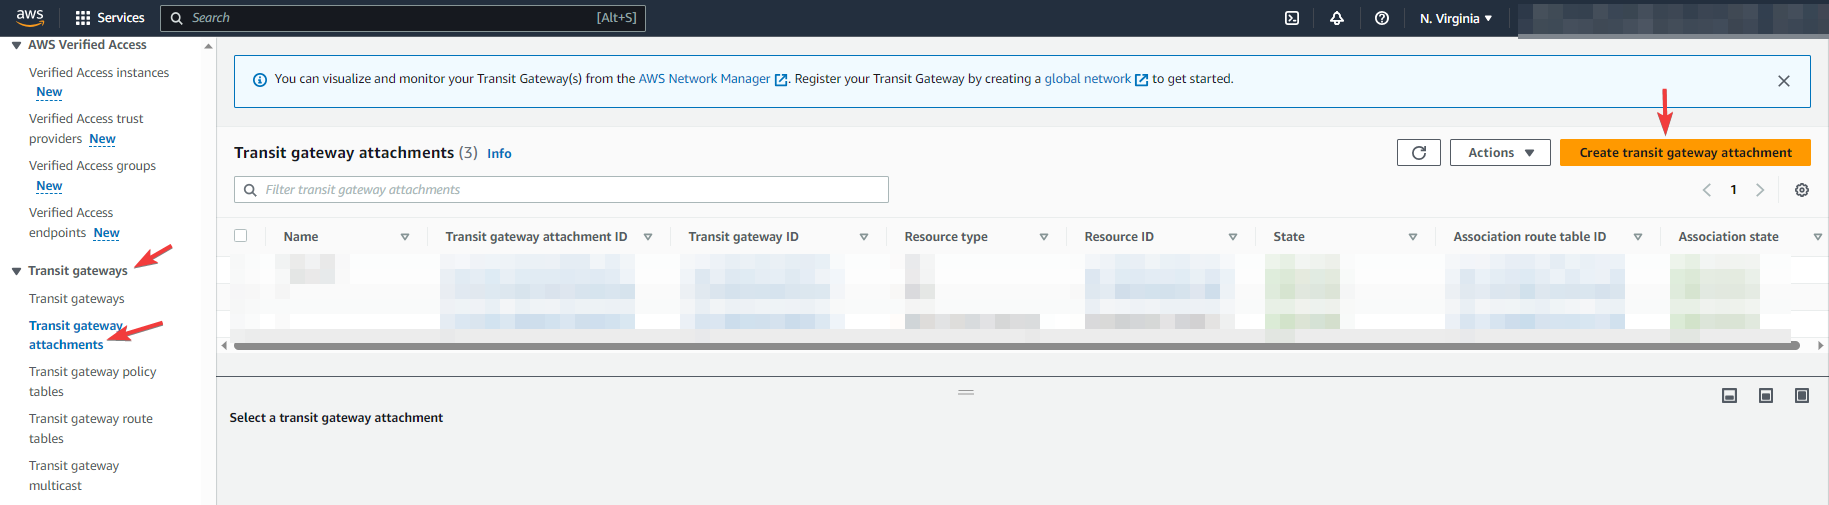

Note: Ensure you attach the proper VPC (Normally Hub VPC) and select all required subnets that you want to advertise to OCI through BGP routing.
Step 5: Create Site-to-Site VPN connection
Navigate to Virtual private network (VPN), go to Site-to-Site VPN connection, and click on Create VPN connection.
Fill out the required fields and click on Create VPN connection. Check the highlighted config in the screenshot below.
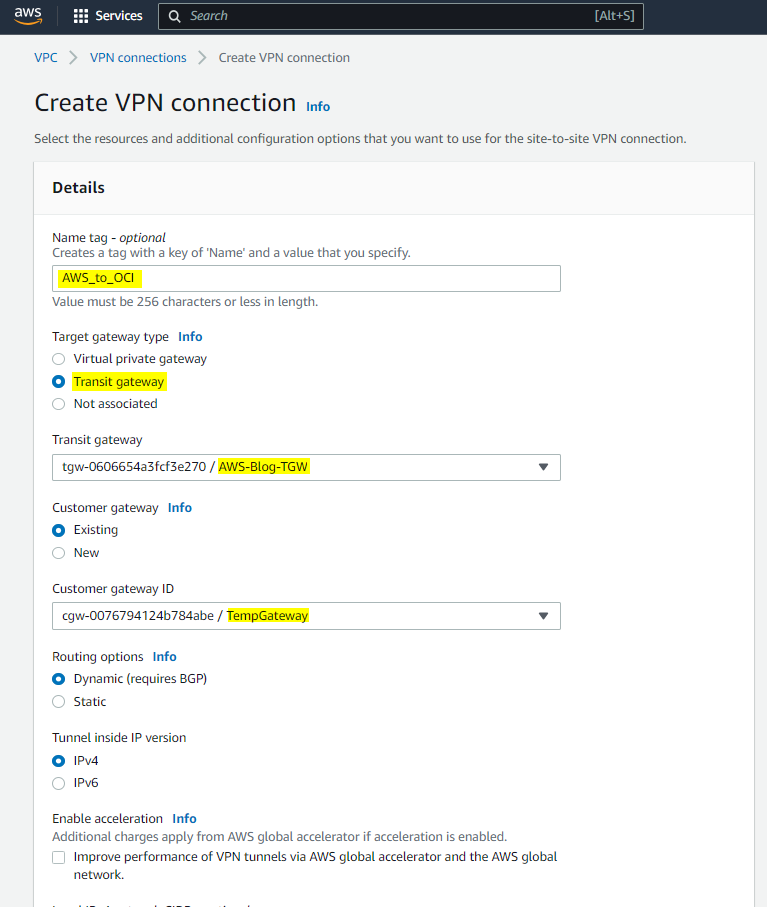
Note: After you named your VPN connection, you would choose a Transit gateway as a target gateway and choose the Transit gateway you created in step 3.

Note: For Tunnel1 Inside IPv4 CIDR, you need to choose a /30 CIDR from within the link local 169.254.0.0/16 range. Please consider OCI doesn’t allow you to use the following IP ranges for inside tunnel IPs.
- 169.254.10.0-169.254.19.255
- 169.254.100.0-169.254.109.255
- 169.254.192.0-169.254.201.255
To continue Tunnel1 config, I decided to edit Tunnel1 options under Advanced options for tunnel and having the custom configuration following the OCI and AWS best practice for phase 1 and 2 tunnel configuration. Check the highlighted config below.


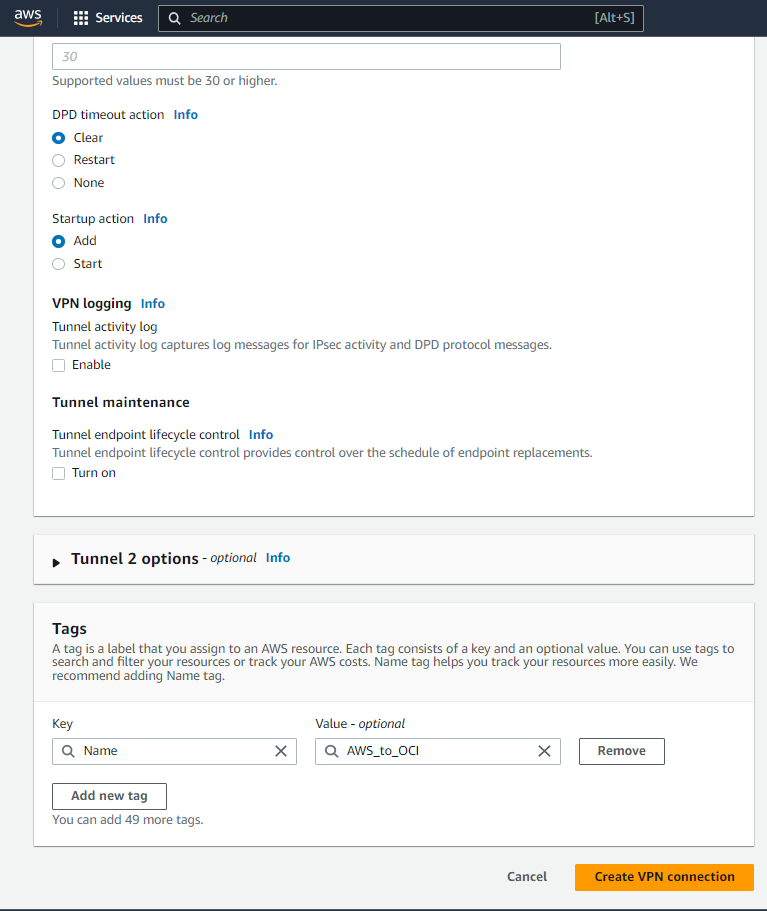
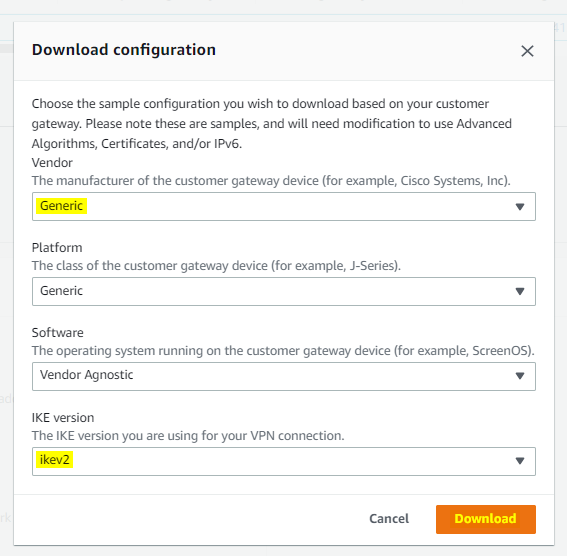
As soon as you create your VPN connection you would see the VPN details page, now click on Download configuration to get tunnel’s information.

Note: You can check the tunnel IPs info from the download file or check the Tunnel details from the VPN connection page.
Please note the highlighted info below.

Now, let’s login to OCI dashboard.
Step 6: OCI- Login to the OCI console
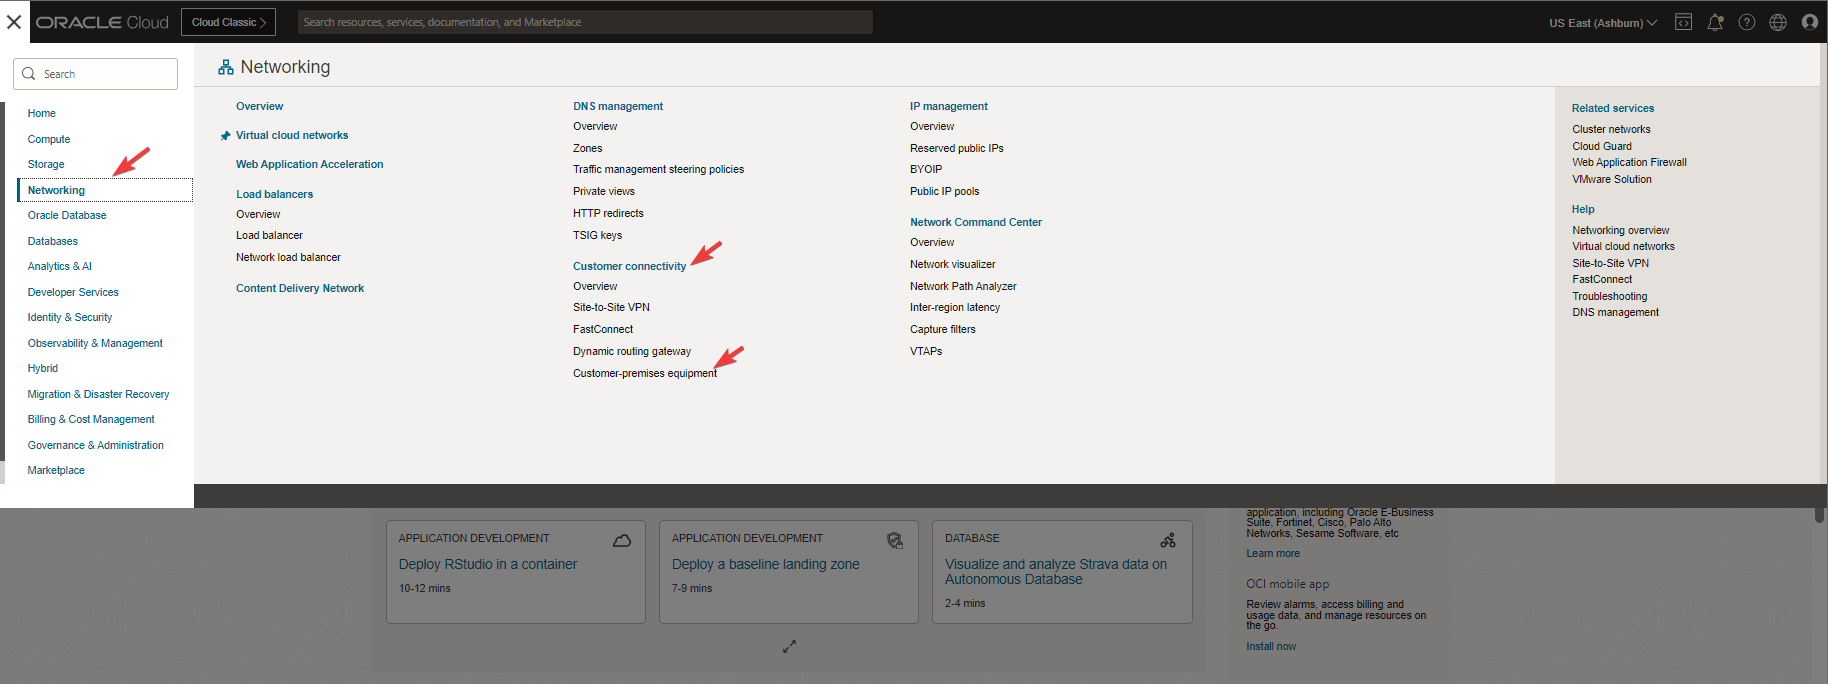
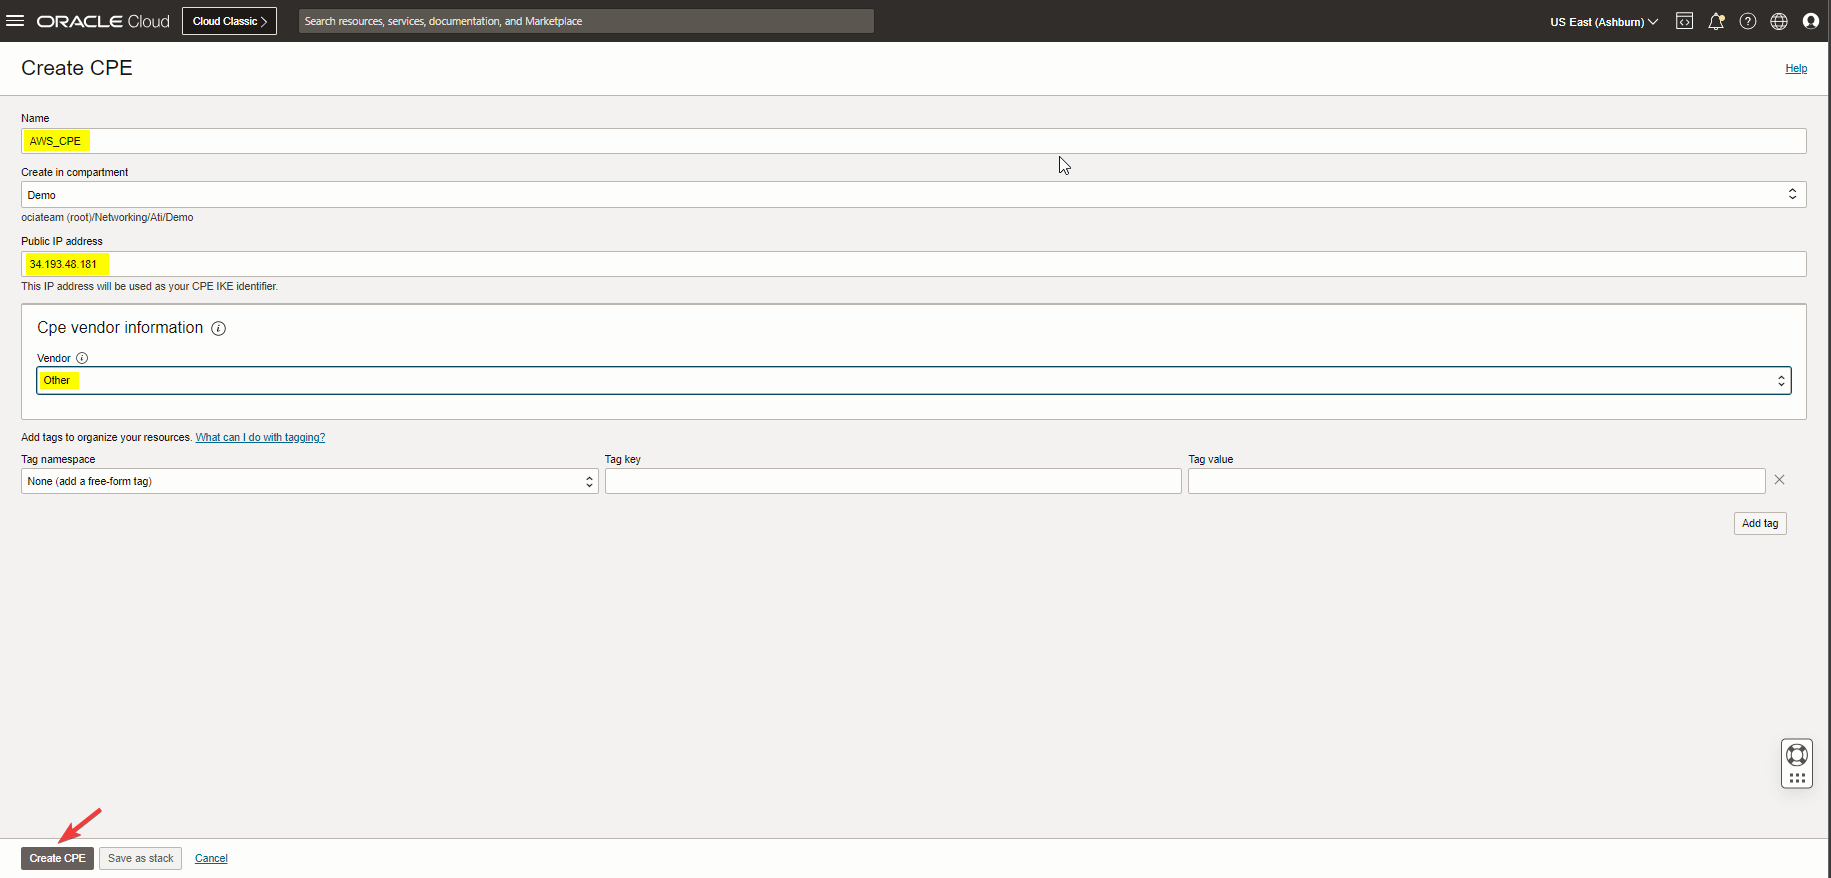
Step 7: Create Customer-premises equipment (CPE)
Navigate to the hamburger menu, go to Networking, under Customer connectivity click on Customer-premises equipment to create an CPE with tunnel1 public IP address 34.193.48.181.
Step 8: Create DRG
Navigate to the hamburger menu, go to Networking, Customer connectivity, Dynamic routing gateway, and click on Create dynamic routing gateway.

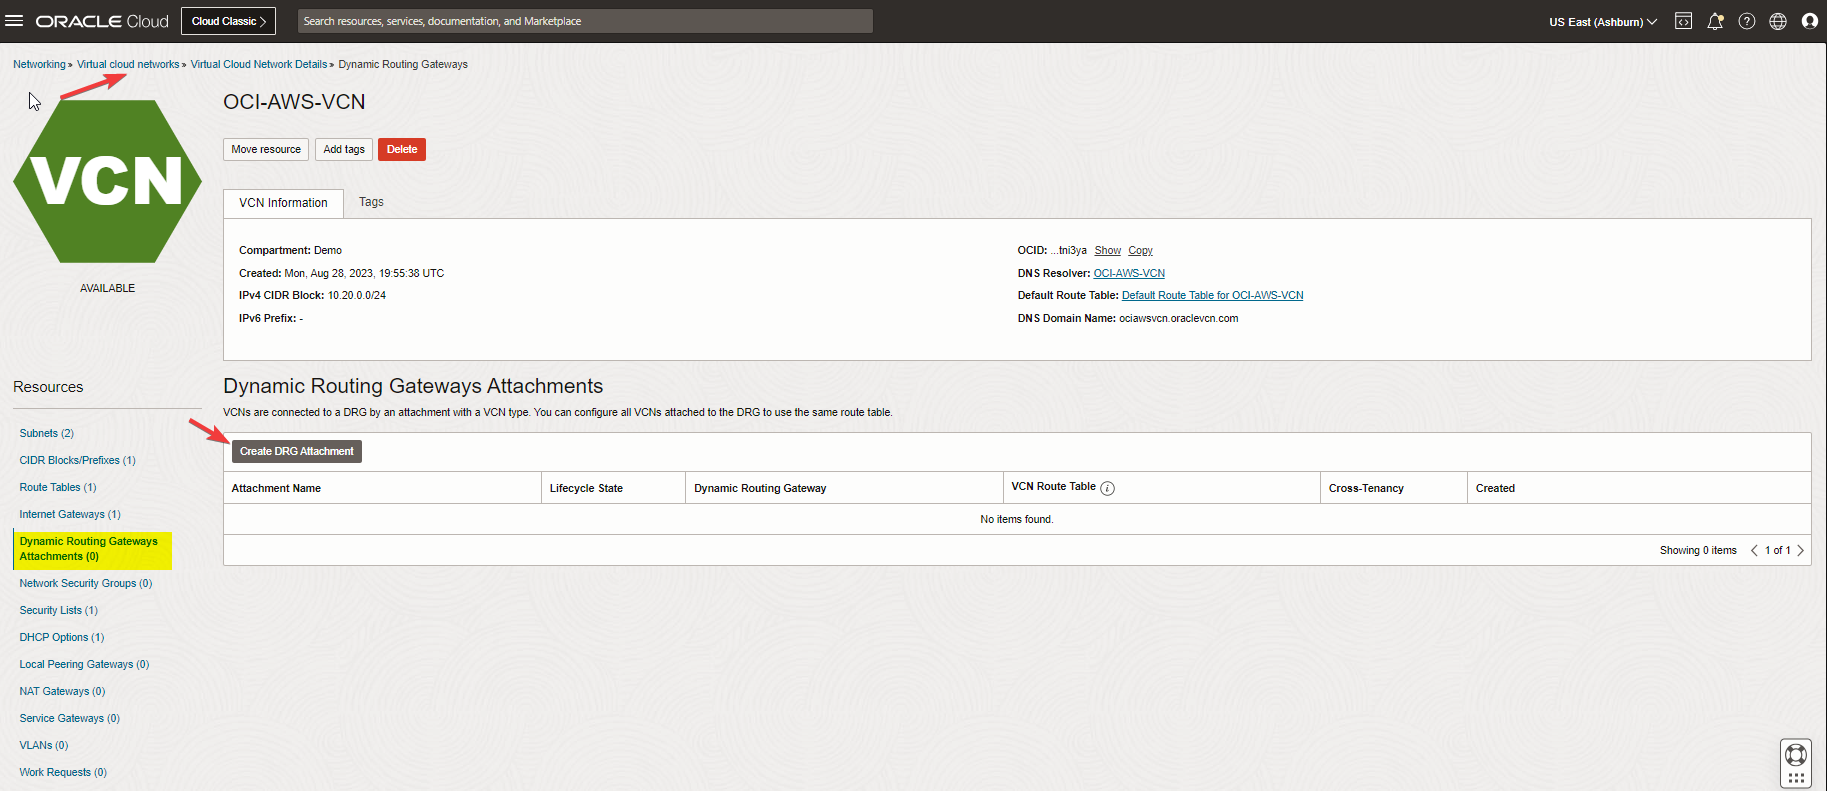
Step 9: Create Dynamic Routing Gateways Attachment
To enable the routing, you need to attach your DRG to your VCN; in this case, you would allow your VCN subnets to advertise to AWS.
Navigate to the hamburger menu, go to Networking, Virtual cloud network, Virtual cloud network details, under the resources click on Dynamic Routing Gateways Attachments and Create DRG Attachment.
Note: You can also attach the VCN from the DRG menu.

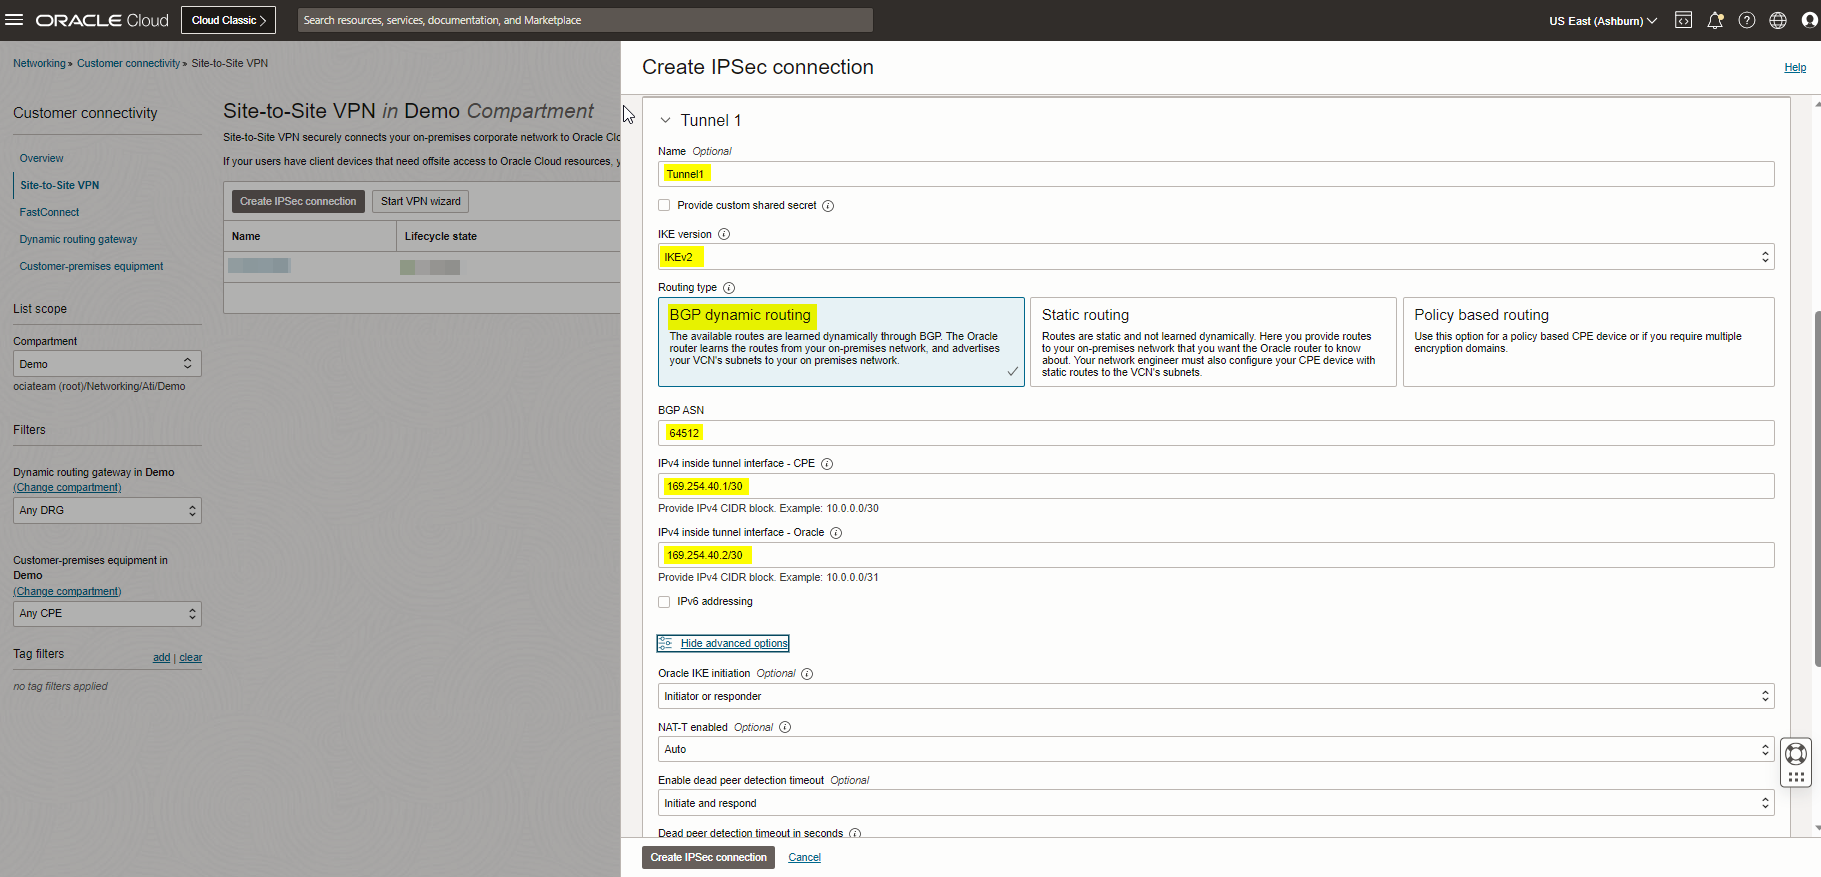
Step 10: Create Site-to-Site VPN
Navigate to the hamburger menu, go to Networking, Customer connectivity, Site-to-Site VPN, and click on Create IPSec Connection.
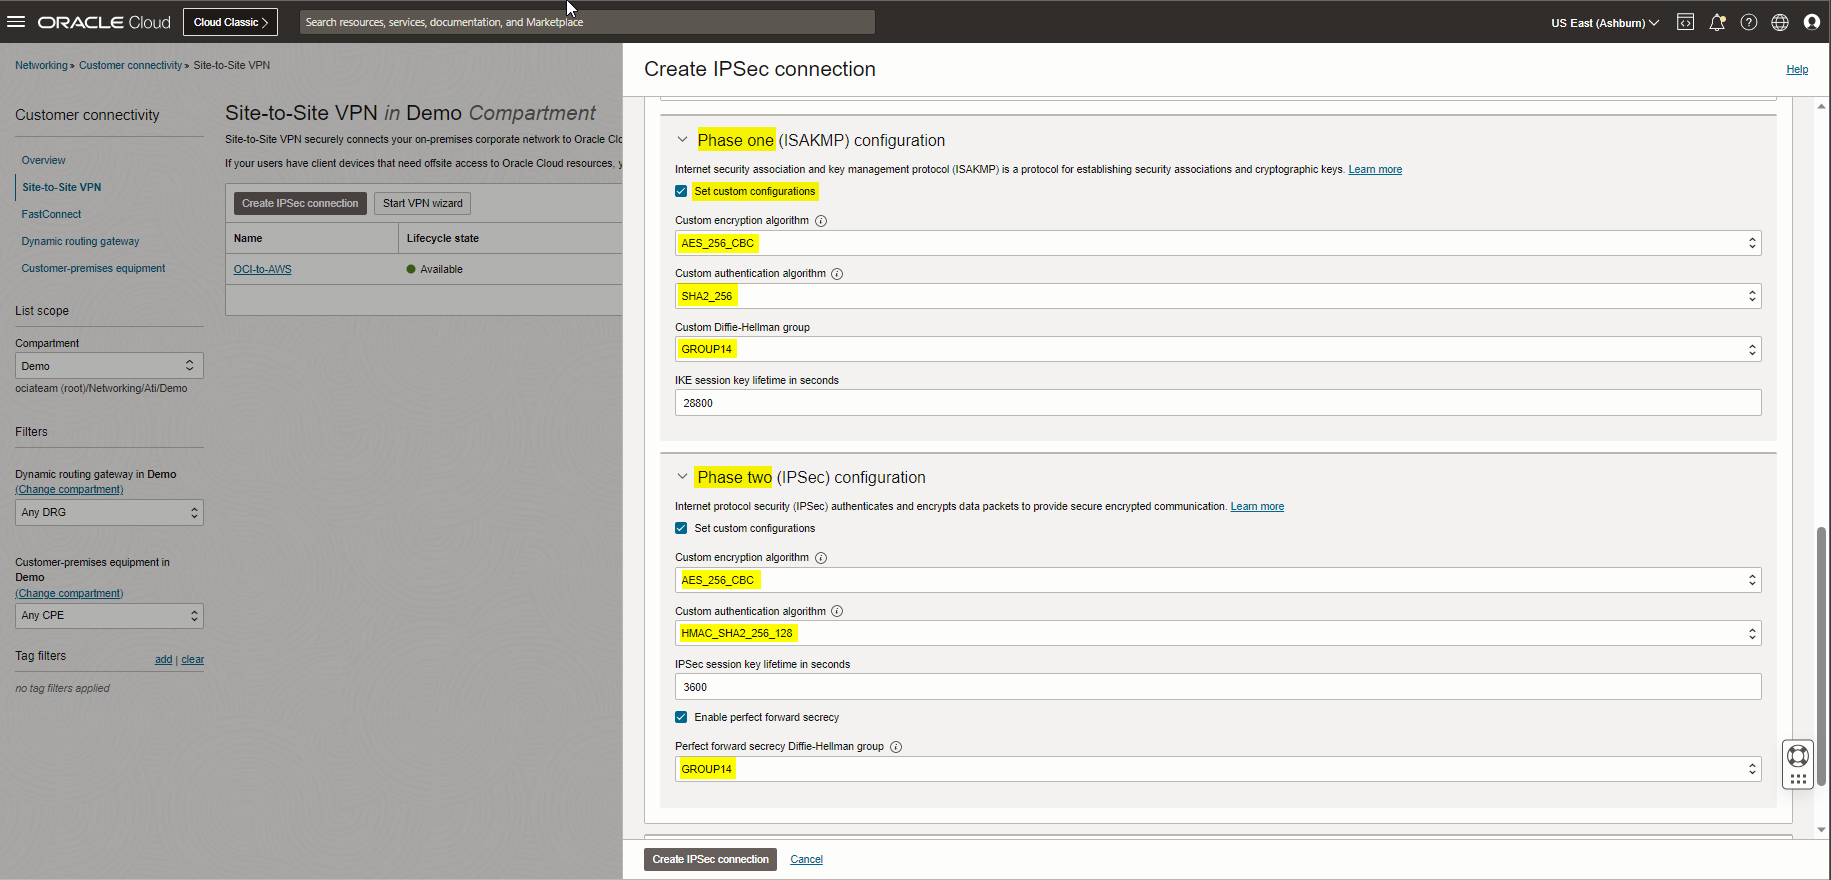
Note: Please check the screenshots below, as you see I tried to match my Tunnel1 Phase 1 and 2 config with my AWS Tunnel config.
Note: For IPv4 Inside Tunnel Interface- CPE: Enter the Virtual Private Gateway inside IP from the AWS VPN configuration file.
Note: For IPv4 Inside Tunnel Interface – Oracle: Enter the inside IP address for the Customer Gateway from the AWS configuration file.
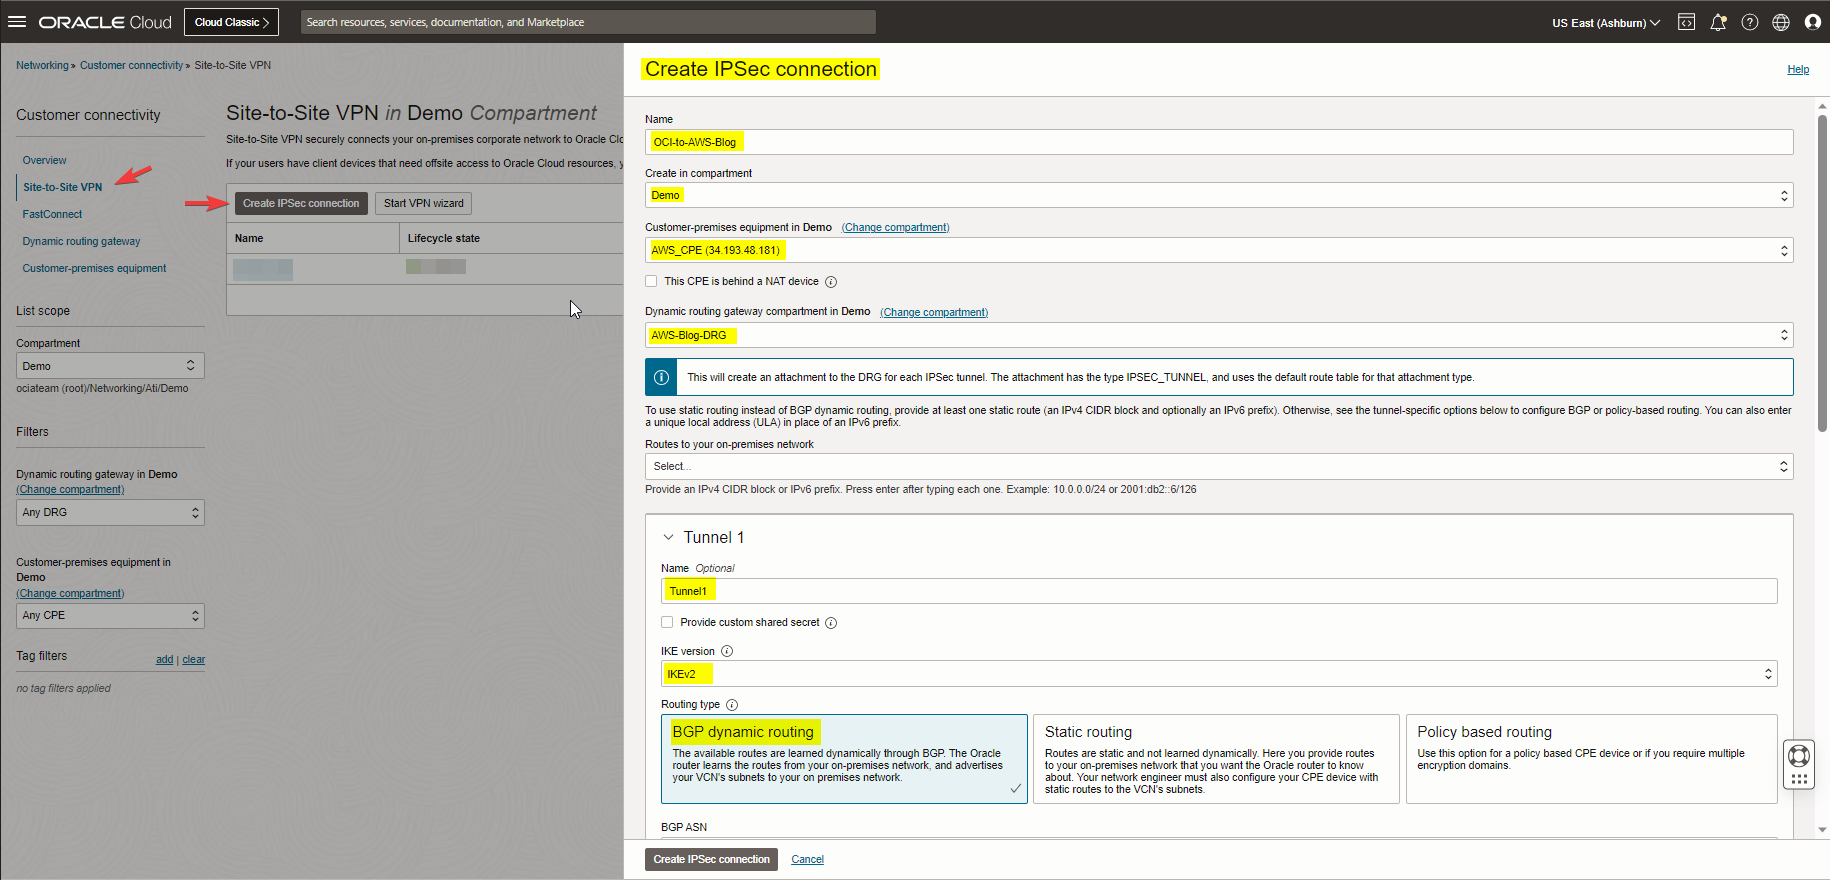

Note: You won’t see Tunnel2 status change to UP at the end of this blog. For having the redundancy, you would need to create second Site-to-Site VPN to AWS.
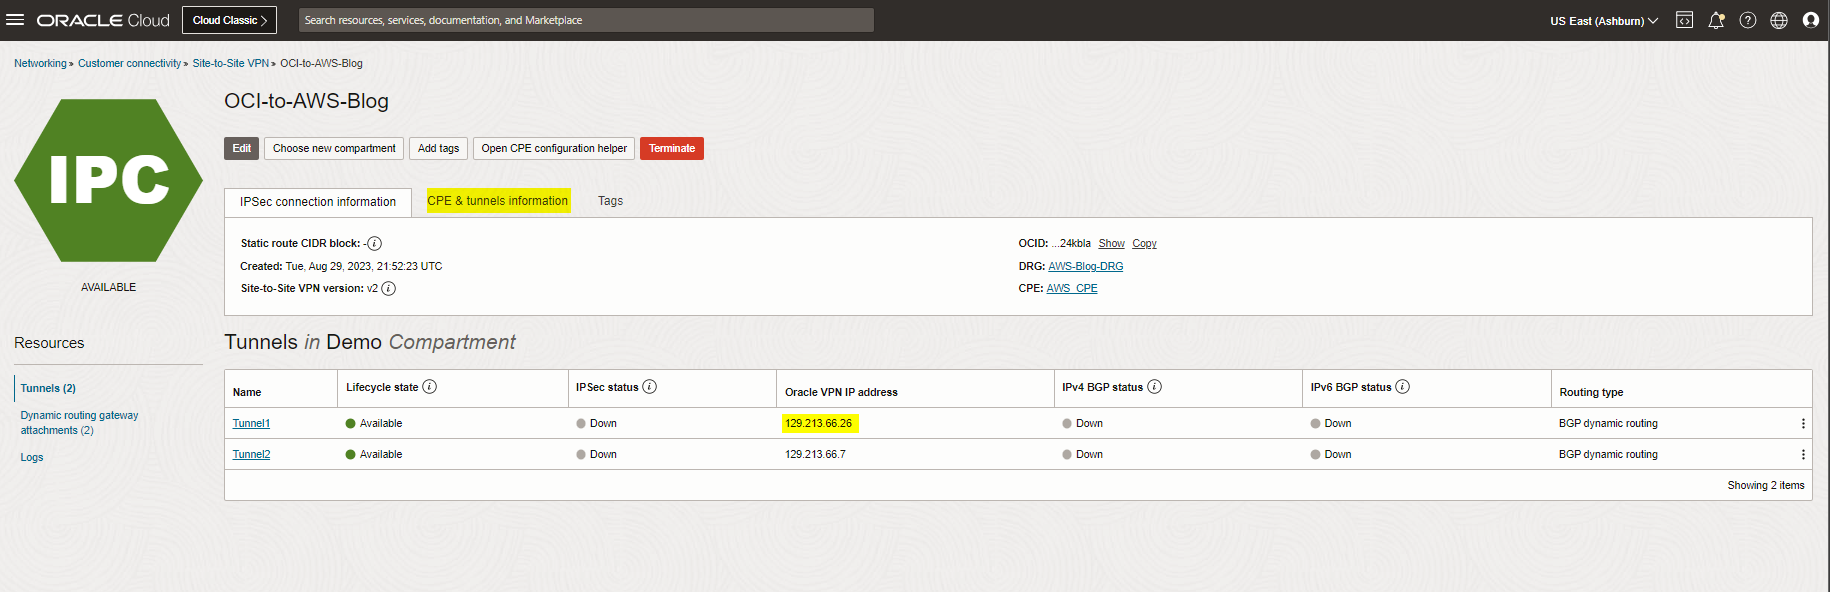
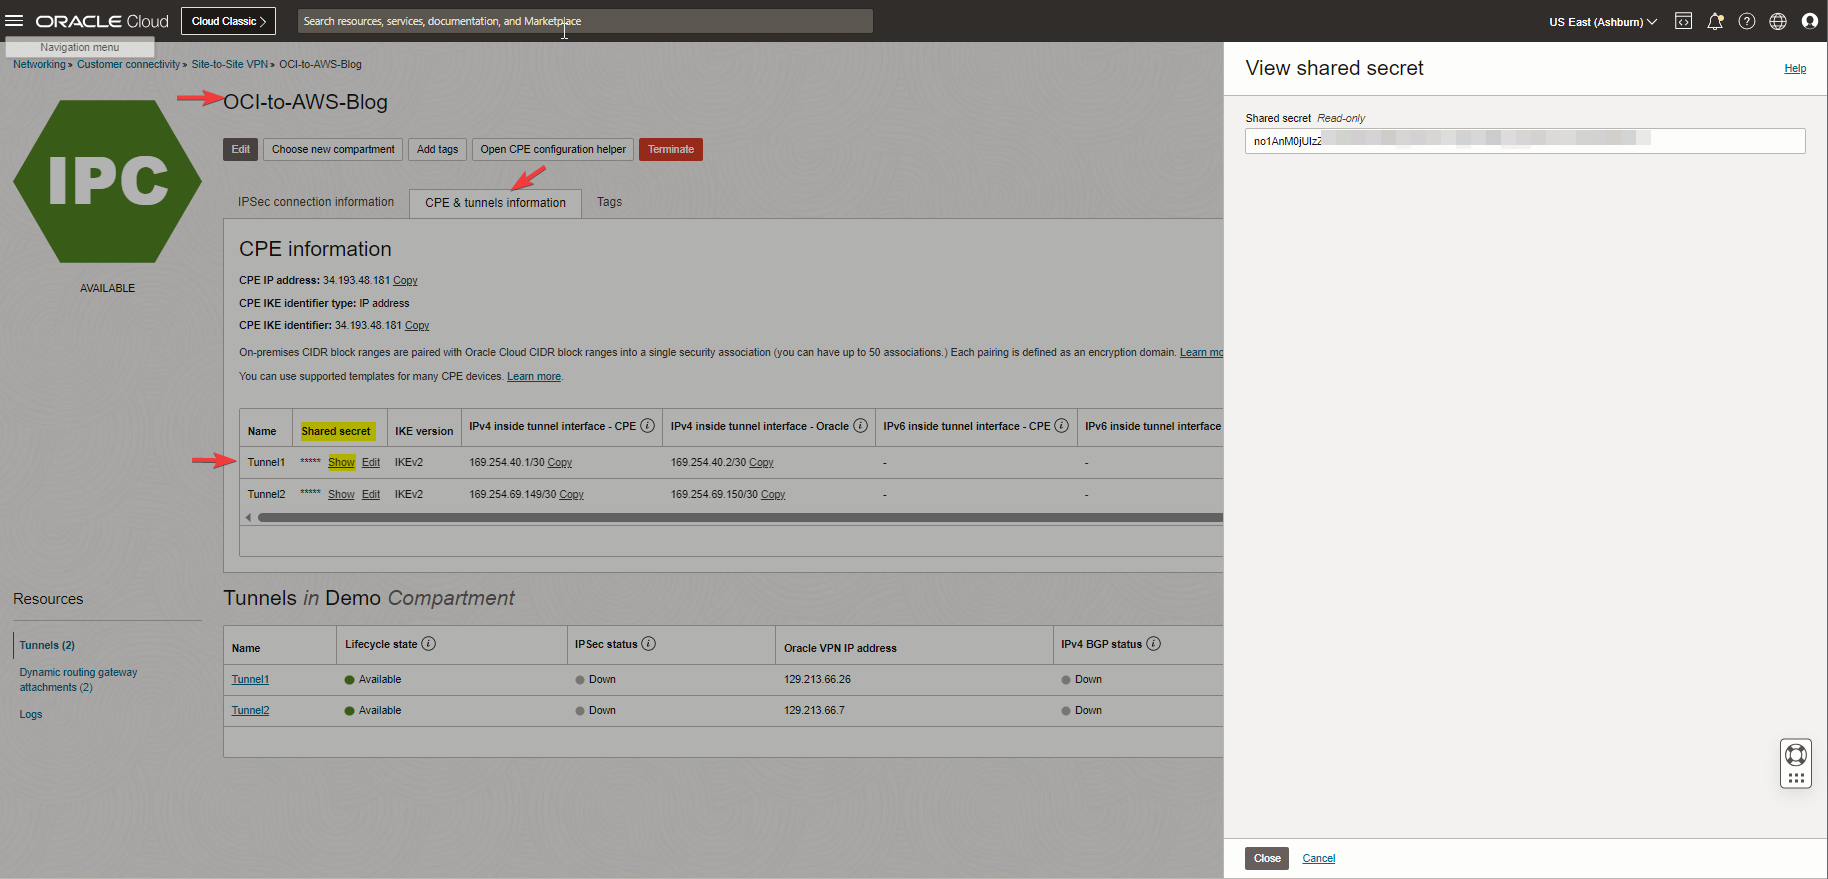
Note: As you see above, an IPSec VPN connection is created, and at this step, we need to note the Oracle public IP address for Tunnel1 and Tunnel1 Shared secret key to match the AWS with the OCI side.
Note: The AWS Pre-Shared Key shared with me in the configuration file included unaccepted characters from OCI, so I had to match AWS with the OCI key.
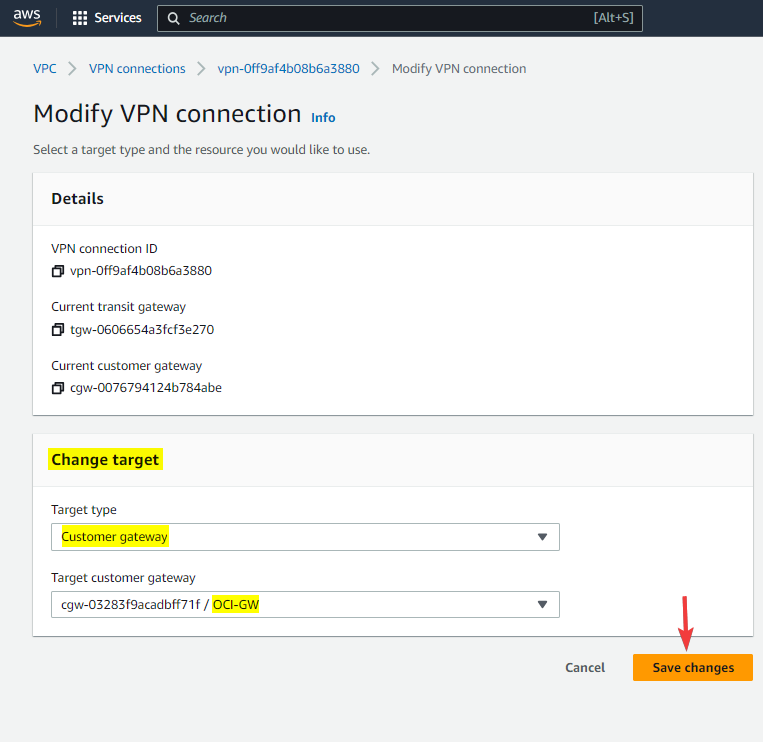
Step 11: Create Customer gateway with OCI Tunnel1 Public IP address
At this step, we will log in back to AWS VPC console, Virtual private network (VPN), and click on Customer gateway to create a new gateway and replace that with the temporary one. Check the screenshot below.

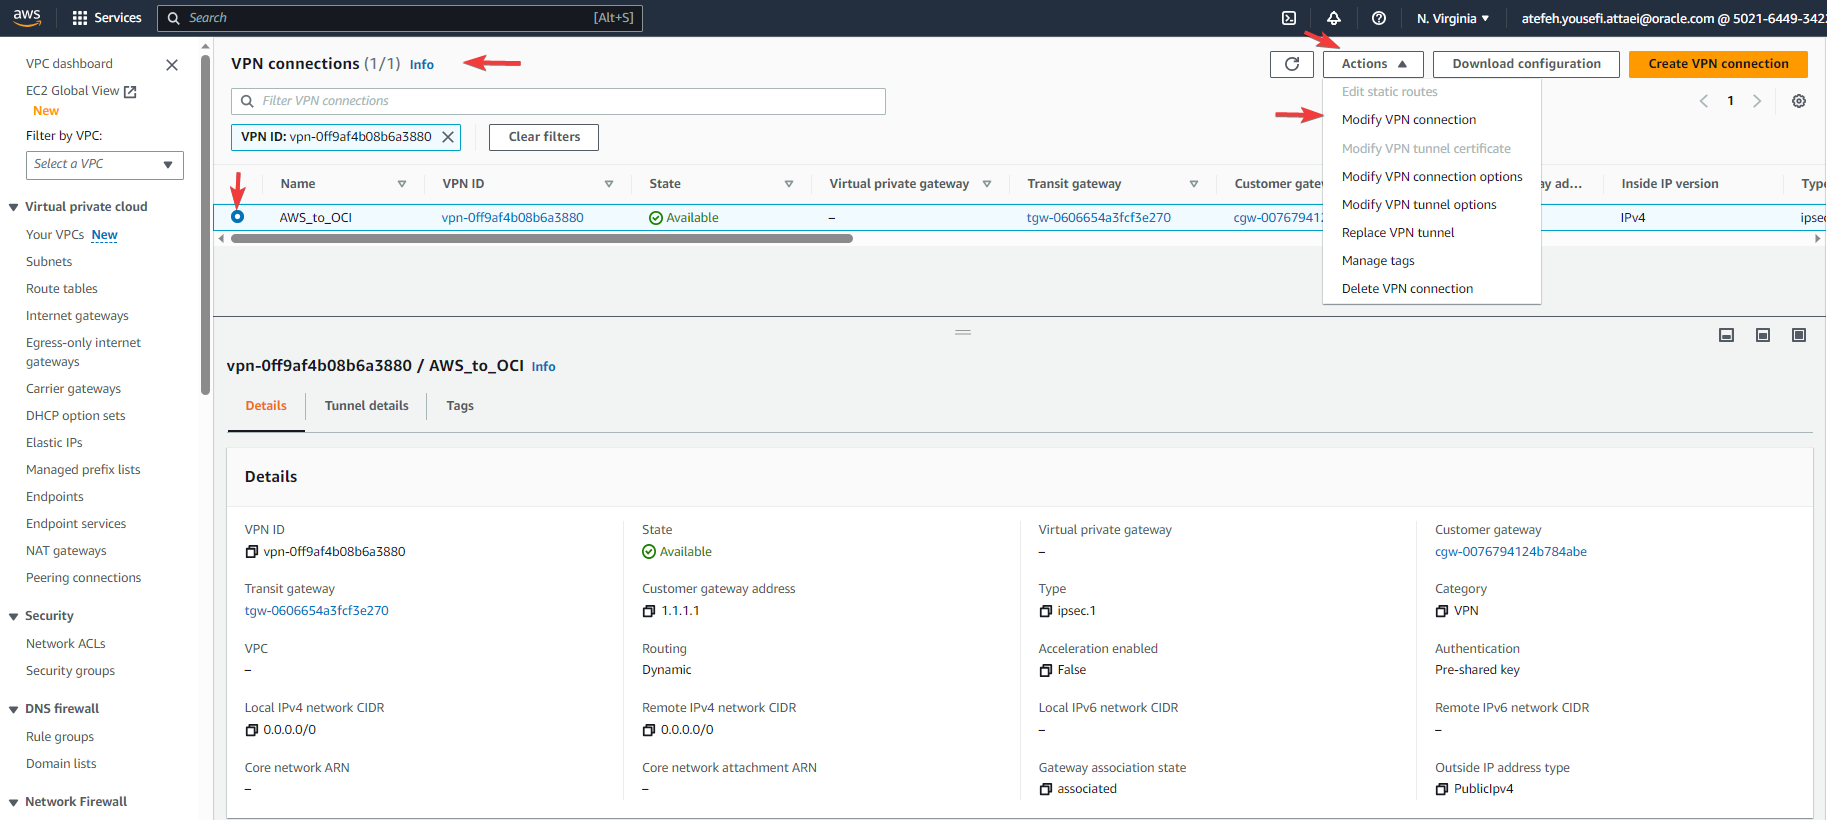
Step 12: Modify VPN connection
Check the screenshots below, as you see I changed the target to the new Customer Gateway.
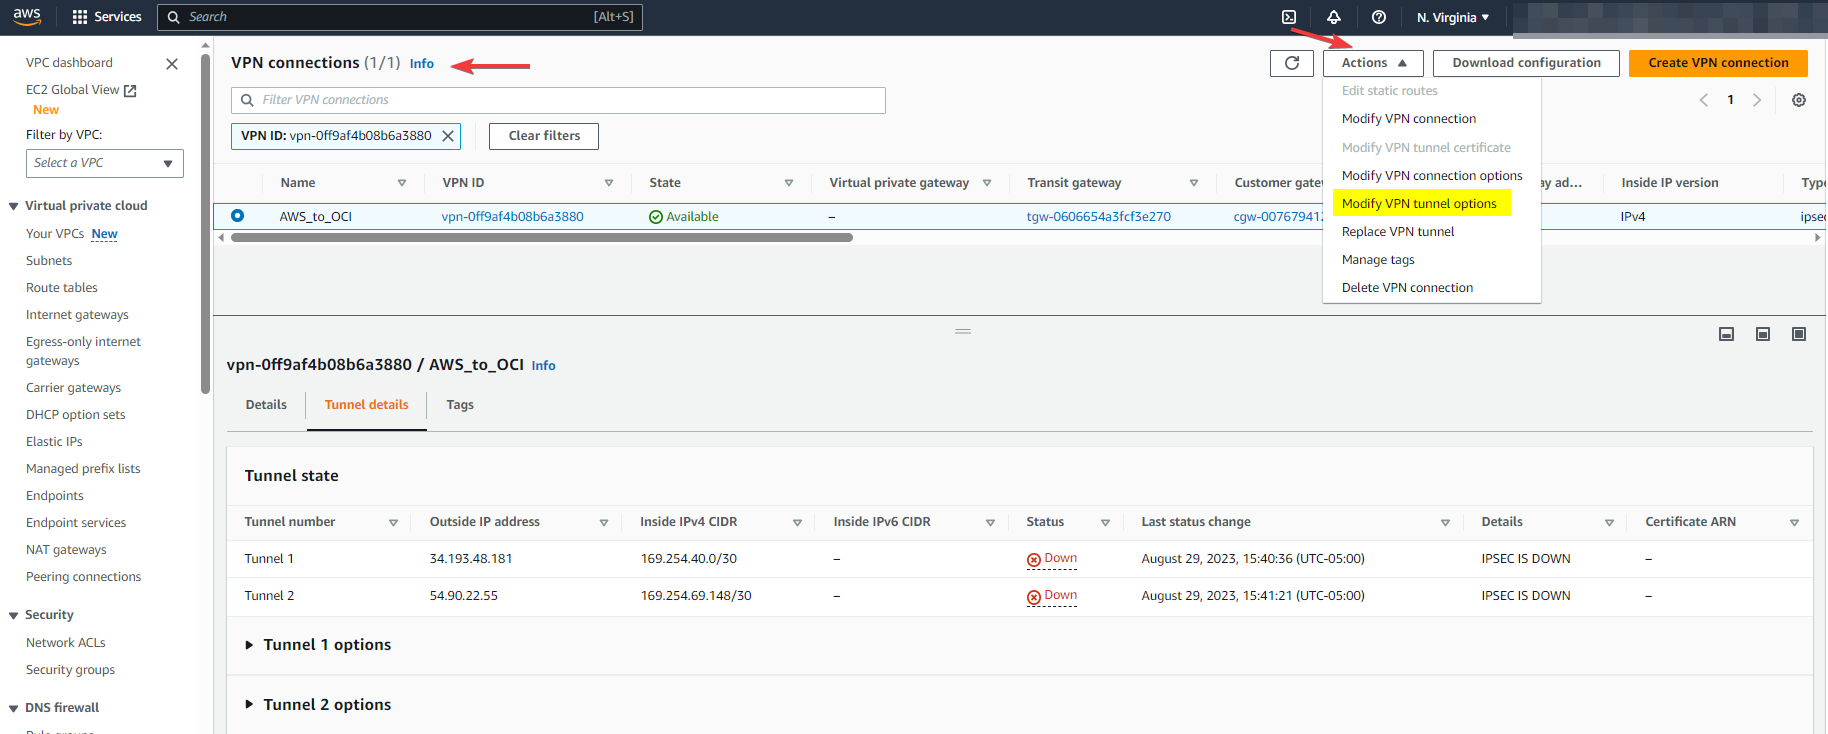
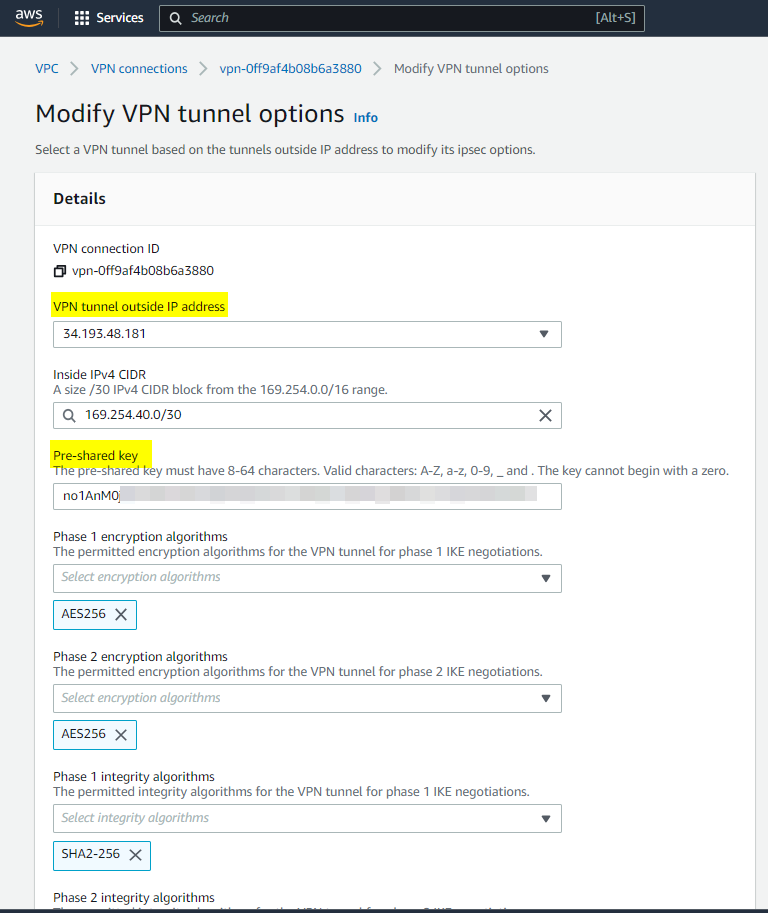
Step 13: Modify VPN tunnel options
Check the screenshots below, as you see I chose the Tunnel1 and matched the Pre-Shred key with the OCI Tunnel1.
Step 14: Check the tunnel and BGP status
Let the AWS config modifications be finished. With all we have done so far, we should see the tunnels are up from both sides.

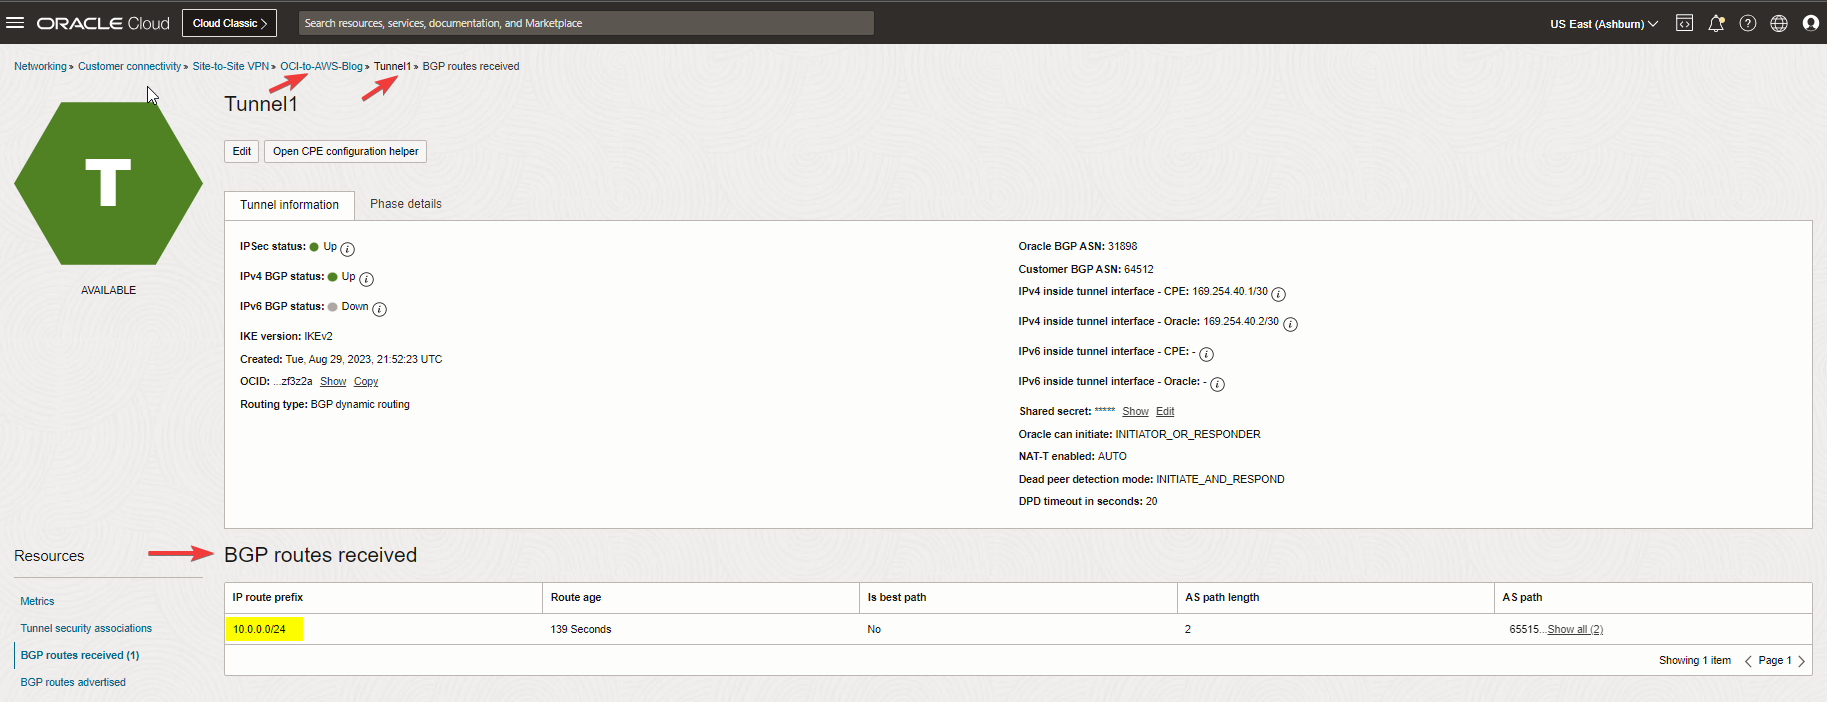
Check the BGP routing, as you see we are receiving the VPC CIDR from AWS side.
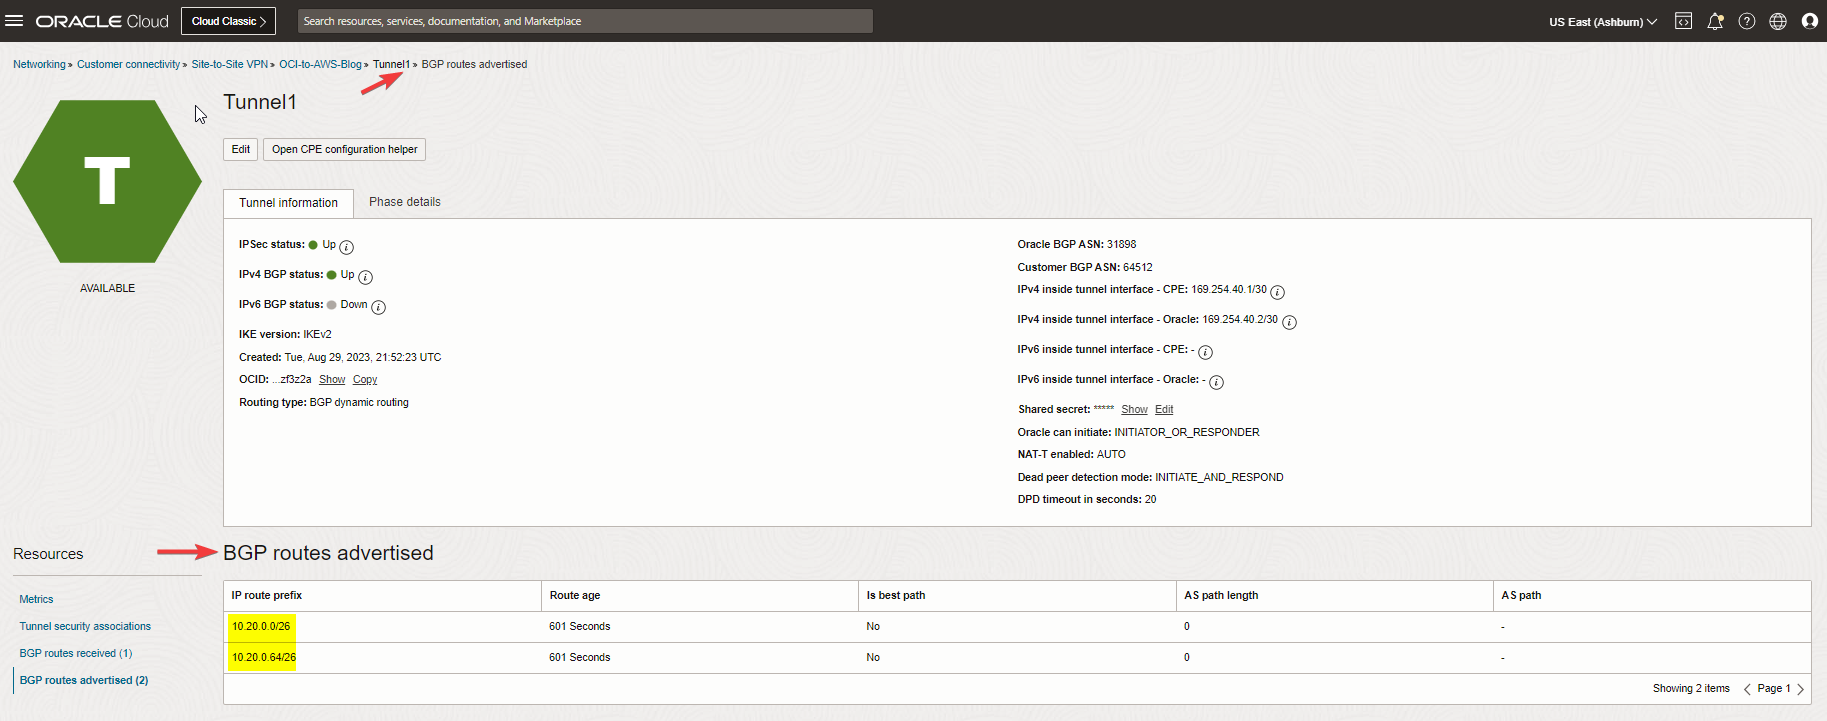
And advertising the VCN subnets to AWS.
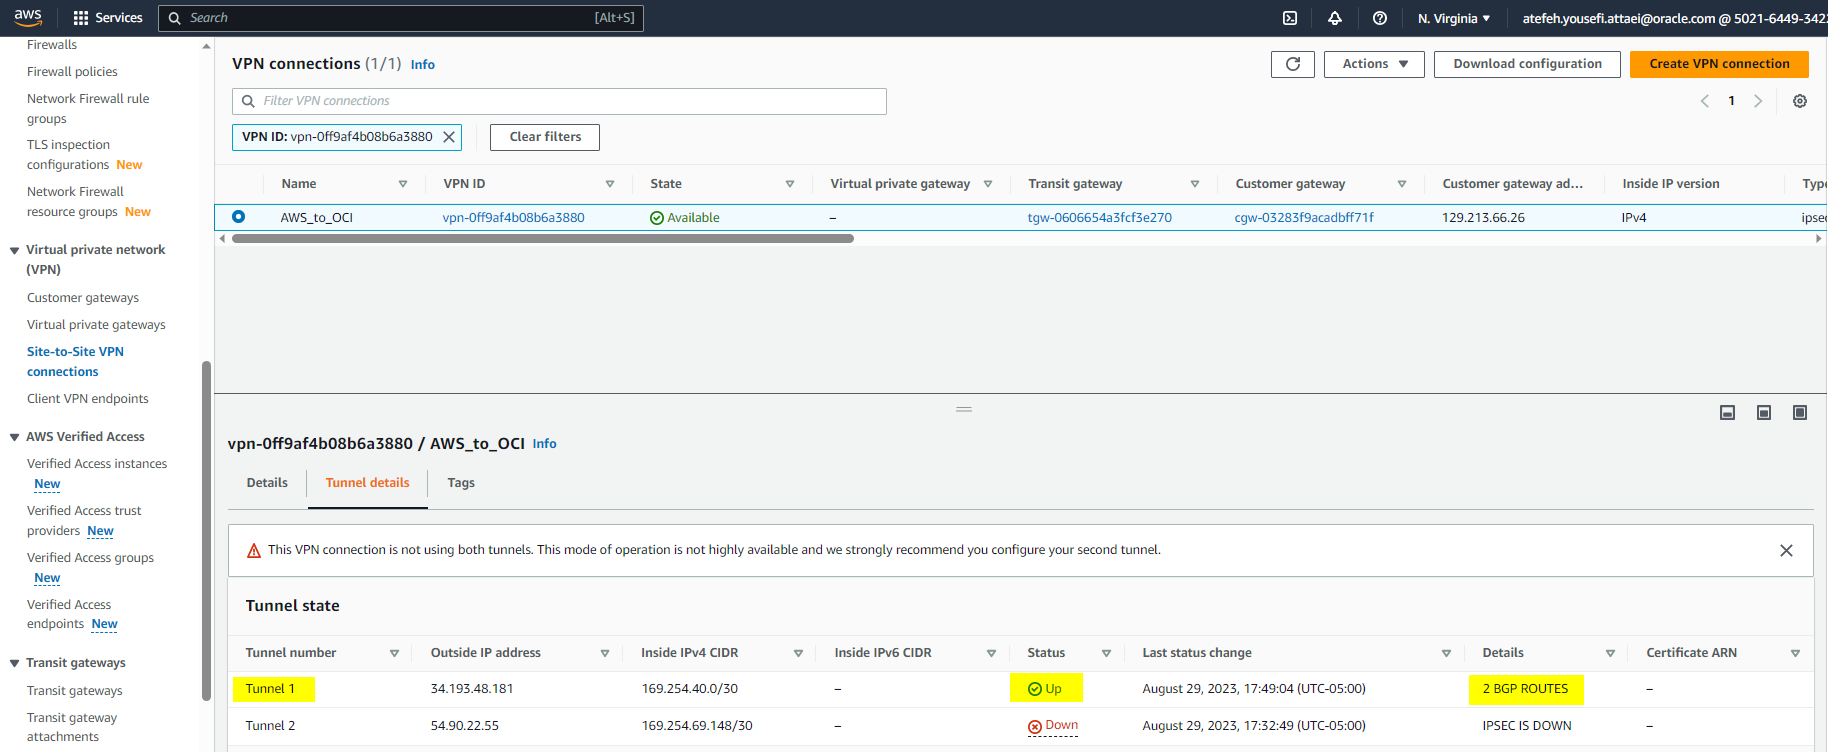
We can also confirm the tunnel and routing status from the AWS portal.
I hope you enjoyed it!