Few days ago I have received a request from one of my colleagues, the request was as follow: I have a customer who wants to copy a file over the Internet to a private VM in OCI using a bastion VM. The file copy should occur directly to the private VM and not to the bastion VM and from the bastion to the private VM. As we can conclude from the request only the bastion VM is exposed to the Internet.
Reading further about the request we saw that other cloud vendors explained how this can be achieved. It is a good time to prepare a solution that can be used by the OCI Customers.
Our goal in this blog is to copy a file from a Windows box to the private VM in OCI and from a Linux box to the private VM in OCI.
Networking topology

Case 1: Copy the file from the Windows box using WinSCP
1. On the bastion-host we will activate the IP Forwarding function (all the traffic will be forwarded by the bastion-host to the app-server):
[root@bastion-host opc]# cat /proc/sys/net/ipv4/ip_forward
1
If the above command shows 0 just activate the ip_forwarding function with the command: echo 1 > /proc/sys/net/ipv4/ip_forward
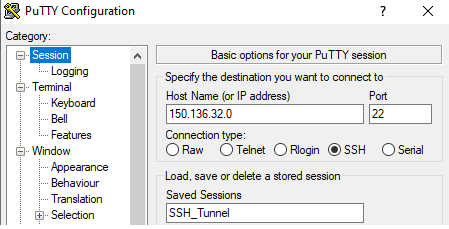
2. Start the Putty client on the Windows box and create an SSH tunnel to 172.31.2.2 using the bastion-host:
2.1 Create the SSH connection
2.2 In the Putty left panel expand the SSH section and in the Auth section use the correct private key for your bastion-server:

2.3 Navigate to Tunnels and create the SSH tunnel to 172.31.2.2 using a random local free TCP port – in this example I will use 17192:
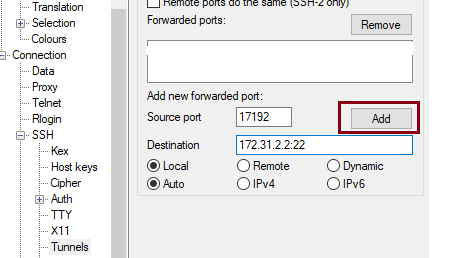
After click Add, the forwarded ports will appear in the list.
2.4. Save the connection and Open:

We have opened the SSH tunnel and the file copy over SSH is almost ready. The connection should stay opened during the file transfer.
3. Configure WinSCP to use the SSH tunnel opened above:
3.1 Configure an SFTP session to 172.31.2.2:
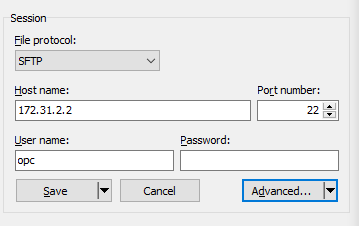
Click Advanced and go to Connection -> Tunnel.
3.2 Configure the Tunnel in following way:
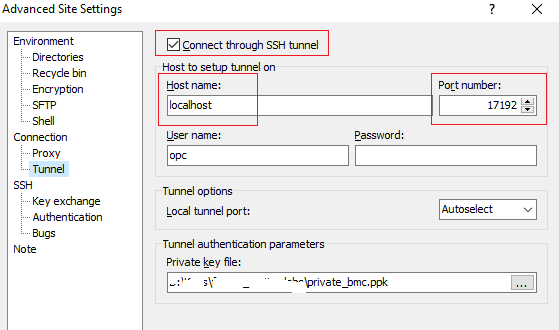
We are ready to Login after the connection is saved.
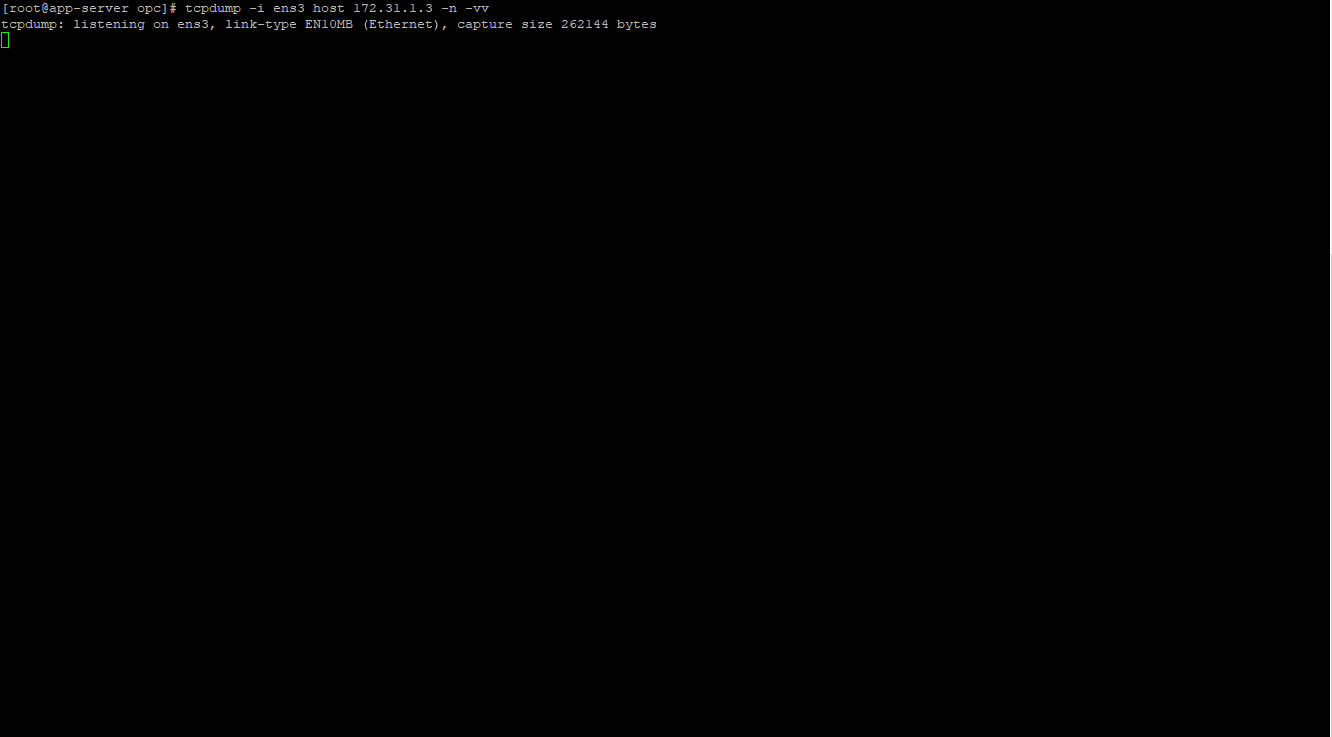
Prior to open the WinSCP connection open a tcpdump on the app-server in the following way:
[root@app-server opc]# tcpdump -i ens3 host 172.31.1.3 -n -vv
172.31.1.3 is the private IP of the bastion-host. We are expecting to receive the traffic from 172.31.1.3.
4. Connect using WinSCP and start the file transfer
Once we click the Login on WinSCP the connection is established and the tcpdump shows the traffic is received from 172.31.1.3:
Let’s transfer the file:

After the transfer is finished:
[root@app-server opc]# ls -l –block-size=M
total 3318M
-rw-rw-r–. 1 opc opc 3318M Jul 22 2019 file1.tgz
We can see that the file was copied on the app-server directly.
Case 2: Copy the file from the Linux box using RSync
1. On the bastion-host we will activate the IP Forwarding function (all the traffic will be forwarded by the bastion-host to the app-server):
[root@bastion-host opc]# cat /proc/sys/net/ipv4/ip_forward
1
If the above command shows 0 just activate the ip_forwarding function with the command: echo 1 > /proc/sys/net/ipv4/ip_forward
2. Create the private key on the Linux box used for ssh connection to the bastion-host and give the right permissions to the file (read and write):
[root@test-iperf3 opc]# ls
file_to_be_tranferred for_transfer.tgz private_key
[root@test-iperf3 opc]# chmod 600 private_key
3. Create the configuration file under /root/.ssh/
[root@test-iperf3 .ssh]# ls
authorized_keys config known_hosts
[root@test-iperf3 .ssh]# cat config
Host 150.136.32.0
Hostname 150.136.32.0
User opc
IdentityFile /home/opc/private_key
Host 172.31.2.2
Hostname 172.31.2.2
User opc
IdentityFile /home/opc/private_key
ProxyCommand ssh -i /home/opc/private_key 150.136.32.0 -W %h:%p %r
More details regarding Linux ProxyCommand can be found by following the link: https://www.redhat.com/sysadmin/ssh-proxy-bastion-proxyjump
The proxy command will be executed when contacting 172.31.2.2.
4. Test the file transfer using RSync
On the Linux box we will transfer the files highlighted:
[root@test-iperf3 .ssh]# ls /home/opc
file_to_be_tranferred for_transfer.tgz private_key
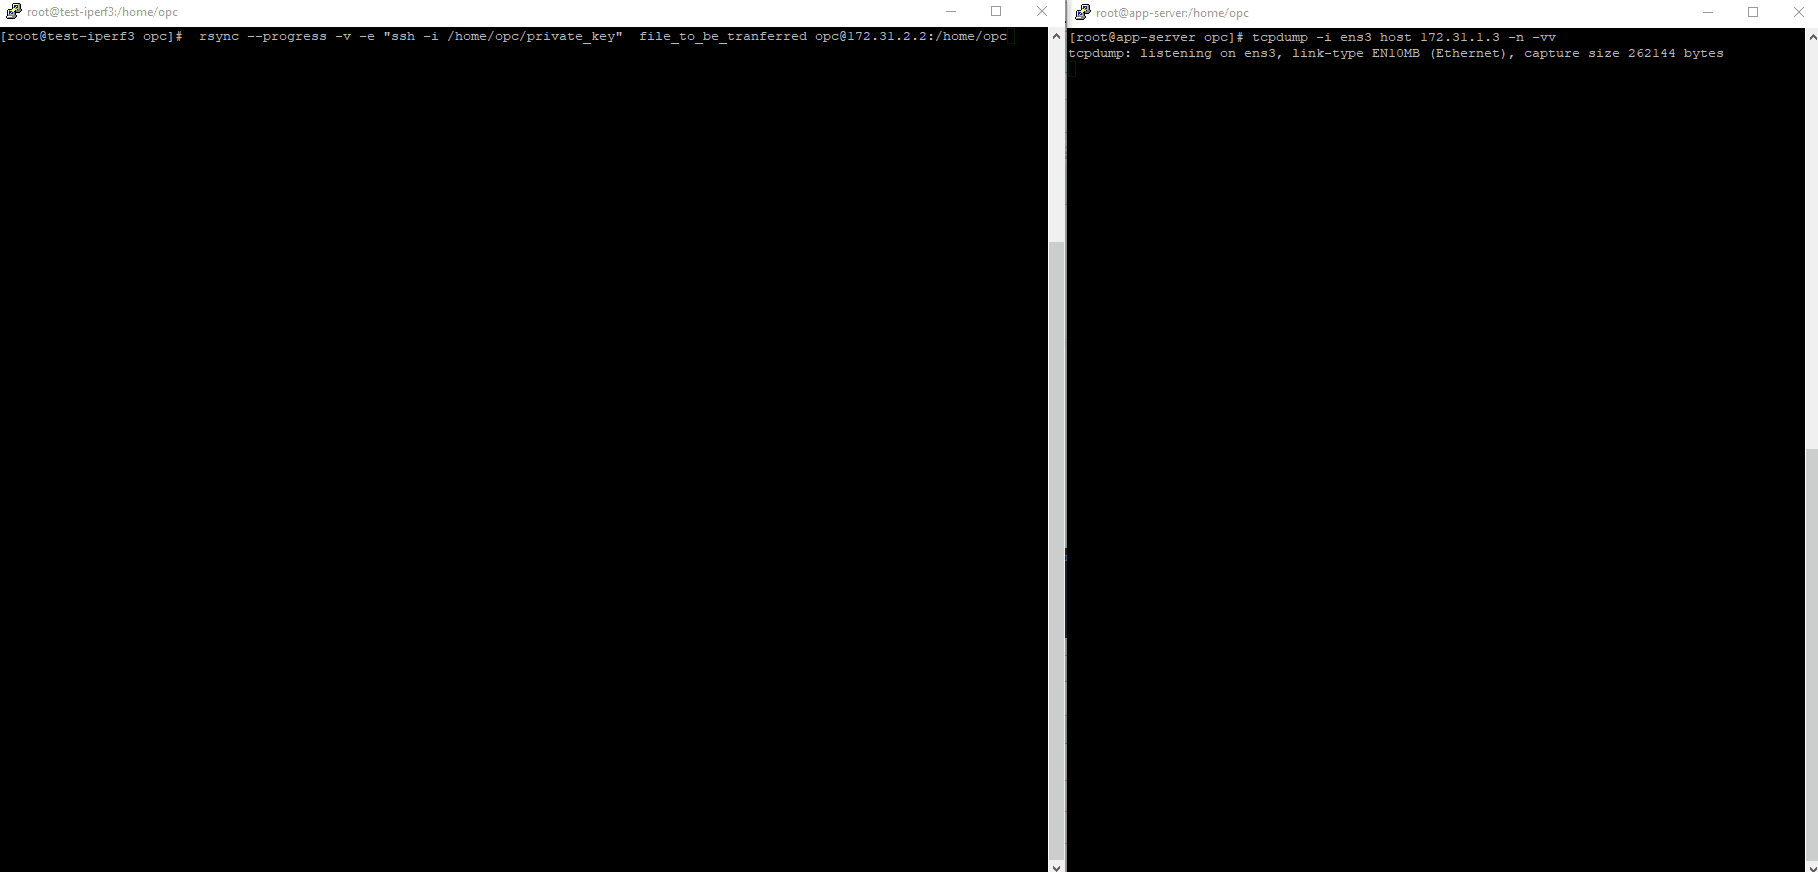
After the file transfer is finished:

In both cases the files were transferred directly to the private VM using the SSH tunnel.