When designing a cloud network infrastructure, security naturally becomes a critical consideration. As networks expand, maintaining a strong security posture requires more granular control to keep workloads secure and access restricted.
In this blog, let’s discuss a real-world customer use case where the customer hosted multiple web servers on Oracle Cloud Infrastructure (OCI) for different clients.
For example:
- Web Servers 1-4 for Client A
- Web Servers 5-6 for Client B, and so on
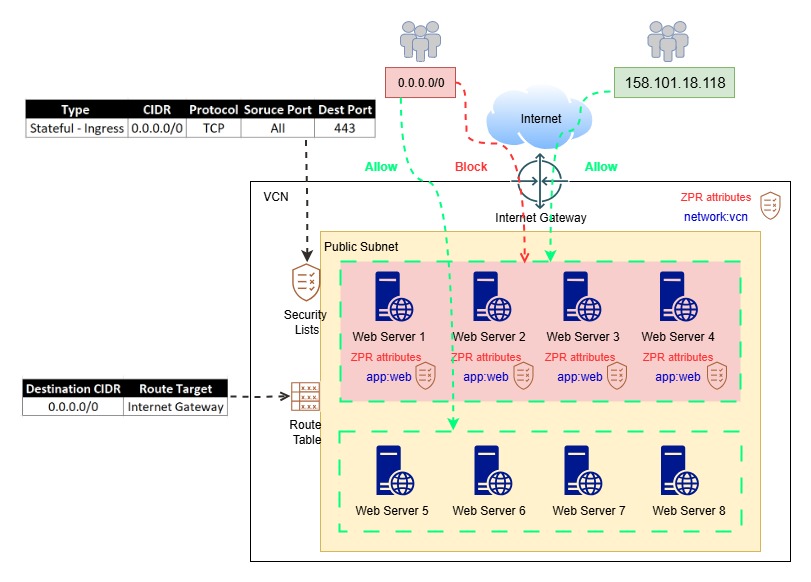
Initially, all these web servers were provisioned in the same subnet, with a single security rule allowing requests from all IP addresses (0.0.0.0/0) on TCP port 443.

This configuration worked fine at first. However, later, Client A requested that their Web Servers (1, 2, 3, and 4) be accessible only from their corporate IP address, i.e., 158.101.18.118
(Note: This IP address is for demonstration purposes; in the real-world scenario, there were multiple such IP addresses.)
Exploring Potential Options:
We evaluated the following options, but none were ideal for this use case:
1. Security Lists and Network Security Groups
Since the VMs were in the same subnet, the rules applied to individual VNICs were effectively the union of Security Lists and Network Security Groups (NSGs), making it impossible to isolate traffic at the VM level.
2. Instance-Level Firewalls
Using Windows Firewall, iptables, or firewalld was not preferred, as the customer didn’t want to modify production VMs. Moreover, applying and maintaining these rules manually across multiple VMs is not scalable.
3. OCI Network Firewall or 3rd Party Firewall from Marketplace
Provisioning a firewall appliance adds additional cost and complexity, as well as the need to change routing in the existing setup. This approach was therefore not suitable for this specific use case.
4. Re-provisioning VMs in Different Subnets
Re-deploying VMs into different subnets using custom images or cloning was possible but not efficient. The customer wanted a native, unified security solution without disrupting existing configurations.
Solution: Zero Trust Packet Routing (ZPR)
OCI Zero Trust Packet Routing (ZPR), protects sensitive data from unauthorized access through intent-based security policies applied to OCI resources using security attributes.
ZPR enforces policy at the network level every time access is requested – regardless of network changes or misconfigurations.
ZPR operates on top of existing Network Security Group (NSG) and Security Lists (SL) rules.
For a packet to reach its target, it must satisfy all:
- NSG rules
- SL rules
- ZPR policies
If any one of these denies access, the request is dropped.
Steps to Implement ZPR:
Implementing ZPR involves three main steps:
- Create a Namespace and Security Attributes
- Create a Policy
- Add Security Attributes to OCI Resources
Step 1: Create Namespace and Security Attributes
- Go to: Main Menu → Identity & Security → Zero Trust Packet Routing → Security Attribute Namespace
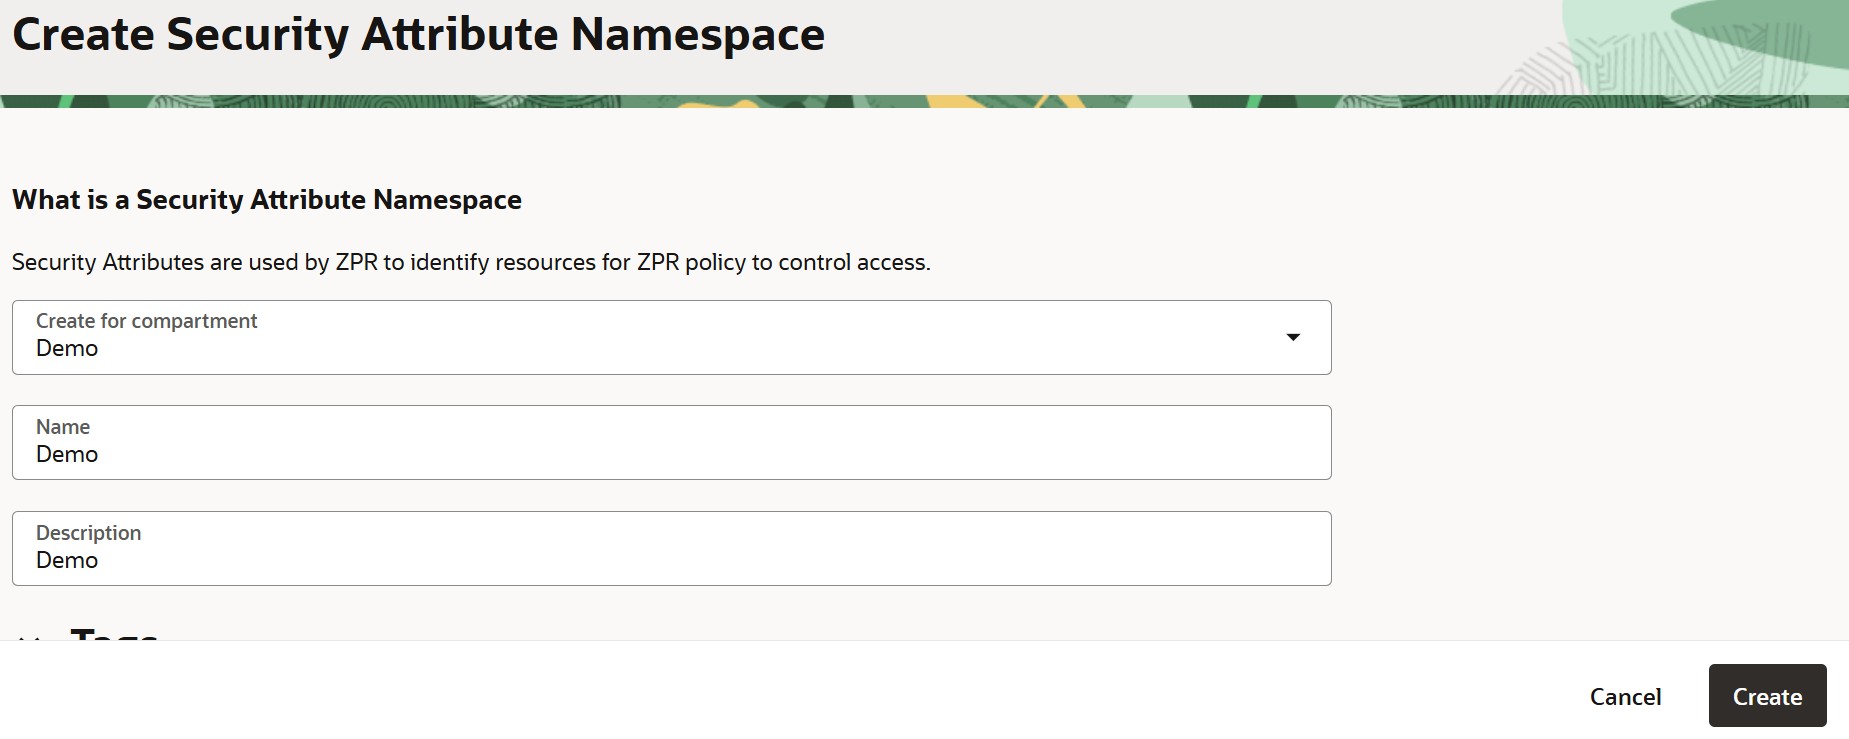
- Click Create Security Attribute Namespace
- Select the compartment, enter a name and description, and click Create.
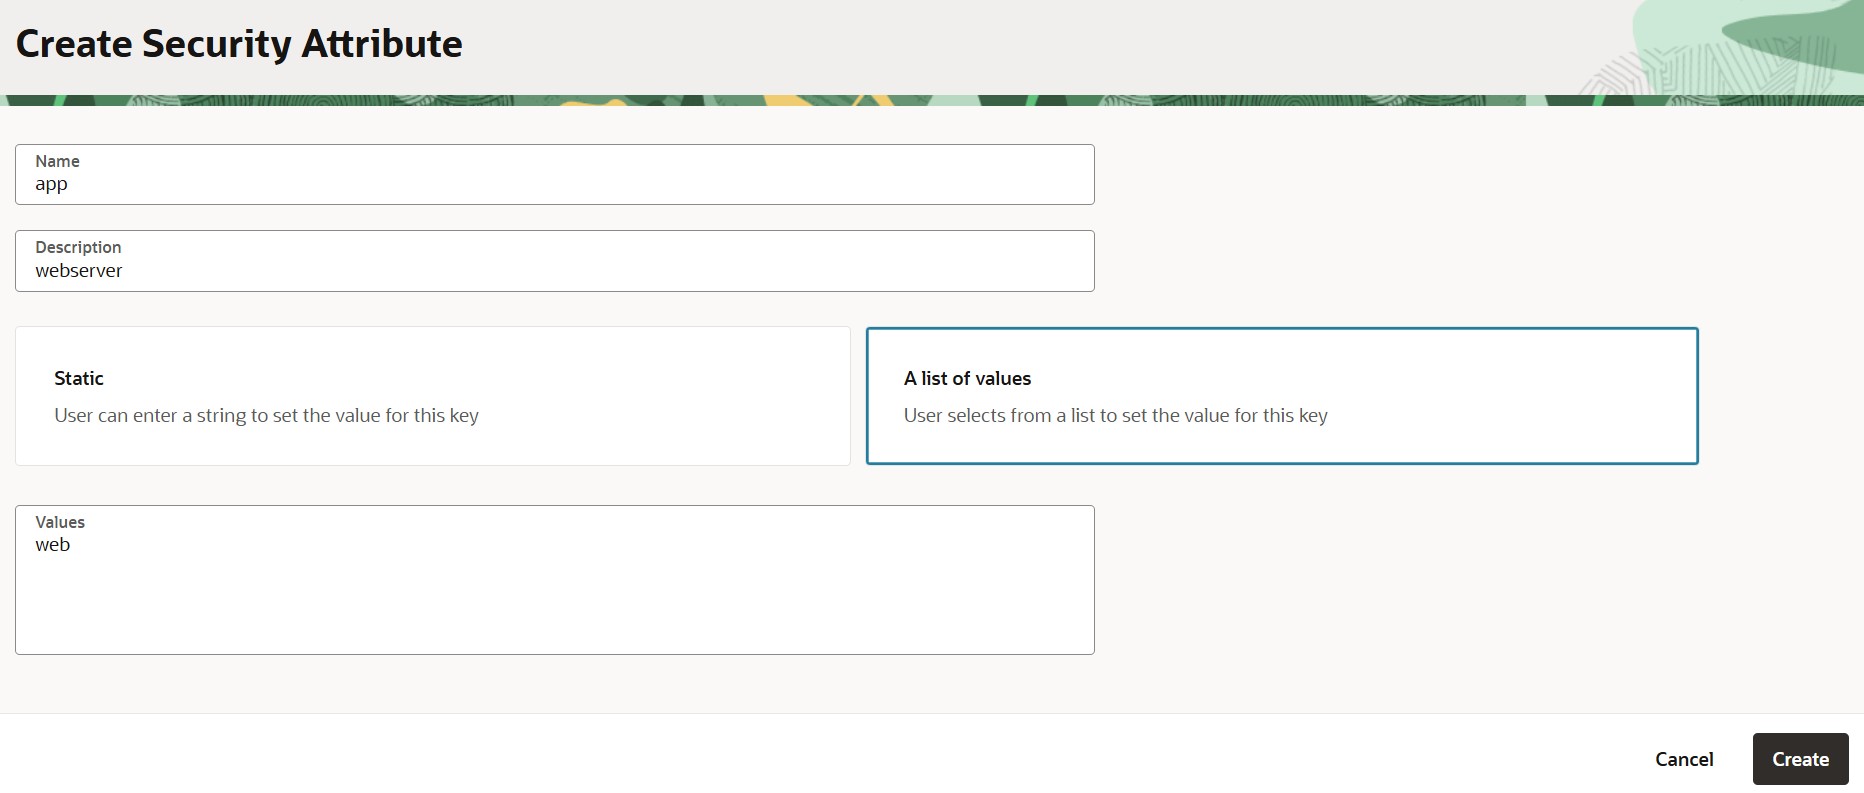
Next, click on ’Create Security Attributes’ create two security attributes under this namespace:
Security Attribute 1:
- Key: app
- Value: web
Purpose: Used for endpoints (instances)
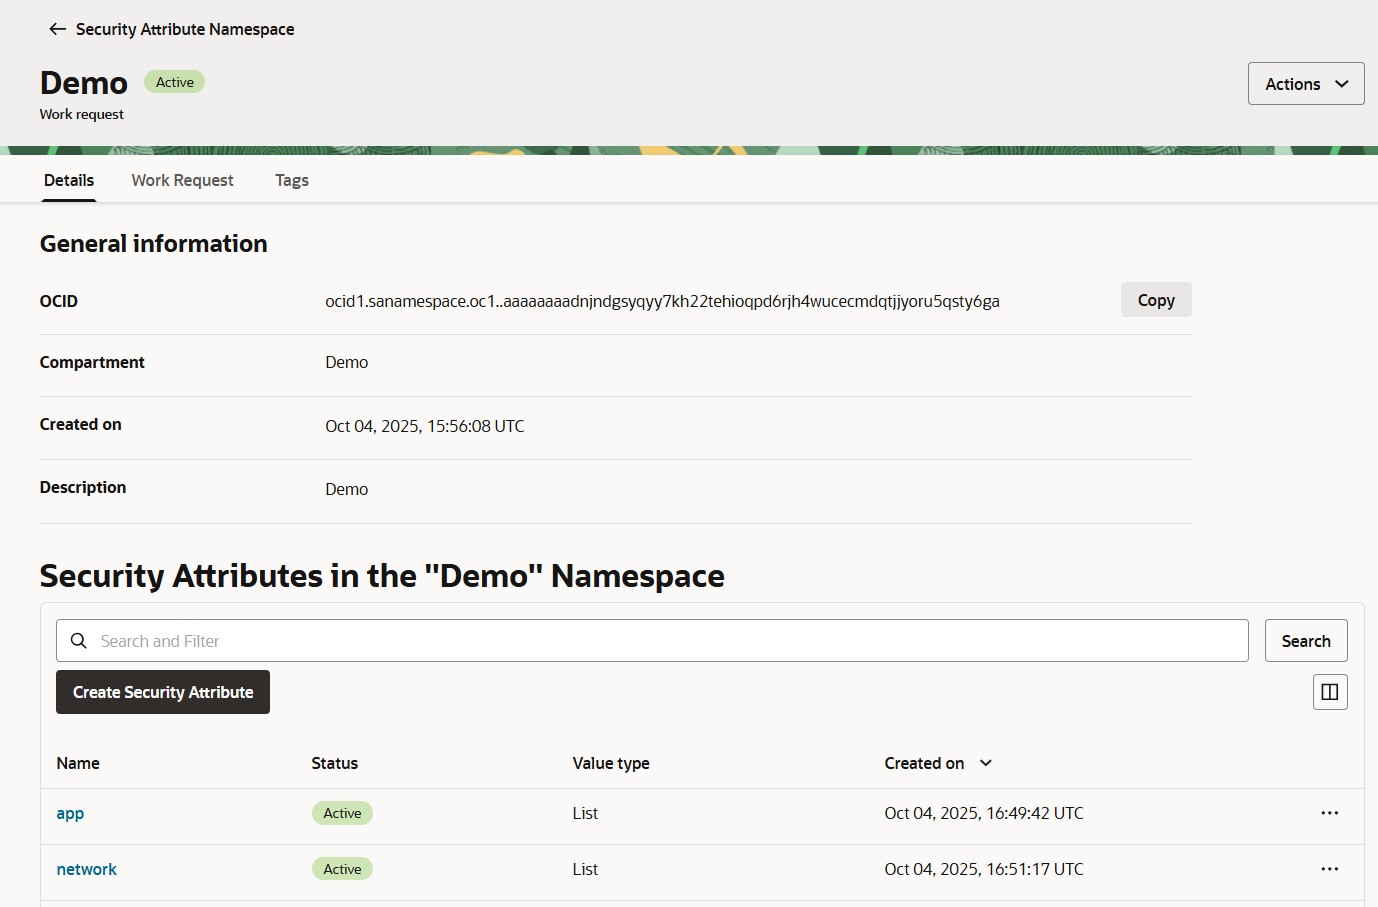
Security Attribute 2:
- Key: network
- Value: vcn
Purpose: Used for Virtual Cloud Network (VCN)

Both attributes will now appear under the namespace “Demo”, with the status set to Active.
Step 2: Create Policy
- Go to: Main Menu → Identity & Security → Zero Trust Packet Routing → Policies
- Click Create Policy
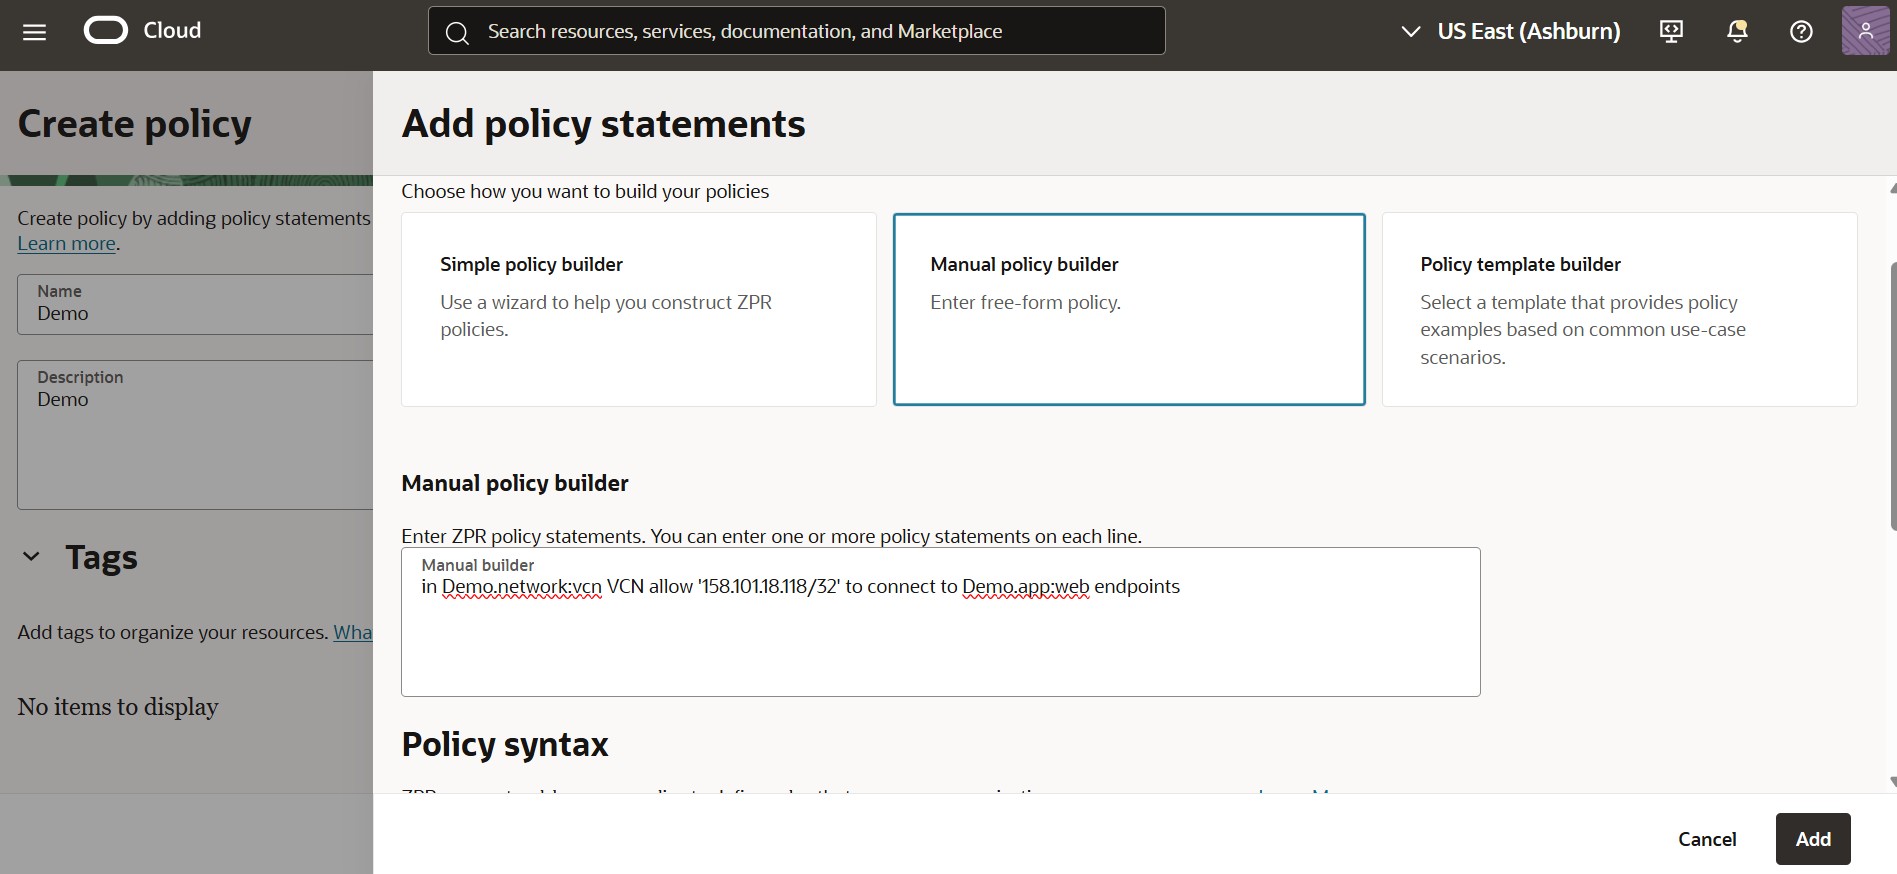
- Enter a name, description, and then click Add Policy Statement
- Under Manual Policy Builder, write the following:
in Demo.network:vcn VCN allow '158.101.18.118/32' to connect to Demo.app:web endpoints
Here,
- Demo = Namespace
- network and app = Security attribute keys
- vcn and web = Corresponding attribute values
Finally, click Add, and then Create Policy.
Note:
ZPR policies include an implicit “deny all” rule at the end of every policy. This means that if a packet doesn’t explicitly match any “allow” statement in the ZPR policy, it is automatically denied — even if corresponding Network Security Group (NSG) or Security List (SL) rules would otherwise permit it.
In this use case, that implicit deny rule in ZPR overrode the broader NSG and SL permissions, ensuring that only traffic from the specified IP address (158.101.18.118) could reach the target VMs.
Step 3: Add Security Attributes to OCI Resources
Add Attributes to VCN
- Navigate to: Main Menu → Networking → Virtual Cloud Networks
- Select the desired VCN → Security tab → Add under Security Attributes
- Choose the namespace, key, and value, then click Add Security Attributes.

Add Attributes to Endpoints (Instances)
- Go to: Main Menu → Compute → Instances
- Select the instance → Security tab → Add under Security Attributes
- Choose the namespace, key, and value, then click Add Security Attributes.

Testing the Configuration
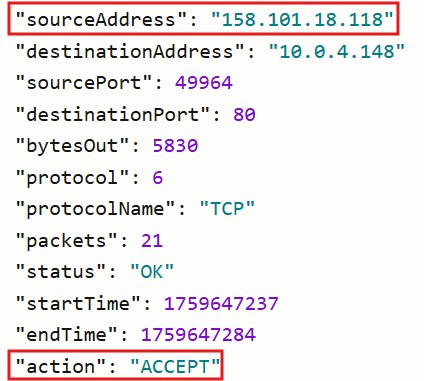
1. Try accessing the web server from the authorized IP address (158.101.18.118).
- Access should be allowed.

2. Try accessing the same web server from any other public IP.
- Access should be denied.
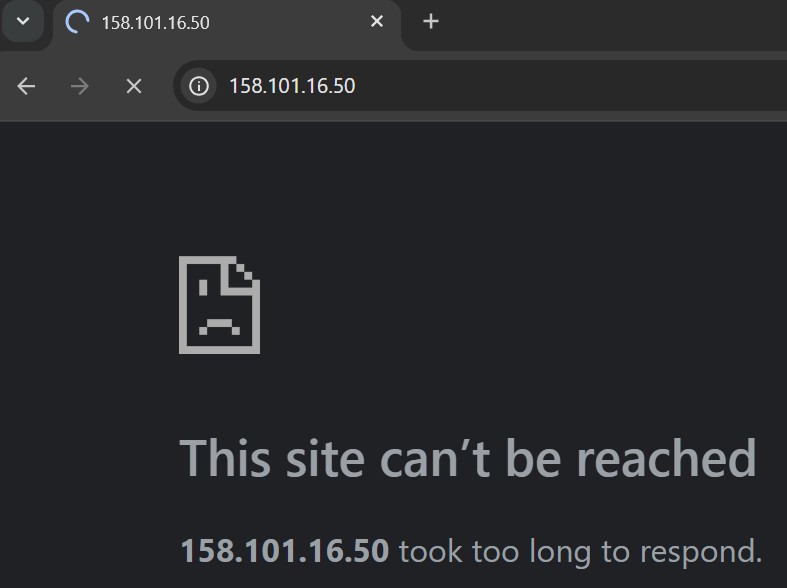

The test confirms that the ZPR policy is functioning correctly, allowing only the authorized IP address to access the web server.
(Note: TCP port 80 has also been allowed for this demonstration.)
Conclusion
Zero Trust Packet Routing (ZPR) provides a native, scalable, and efficient solution to implement fine-grained traffic control in Oracle Cloud Infrastructure.
By using intent-based security attributes and policy-driven enforcement, ZPR simplifies access management, minimizes operational overhead, and enhances security- without requiring changes to existing subnet structures or VM configurations.
In this use case, ZPR helped the customer achieve restricted access control within the same subnet, ensuring each client’s workloads remained secure, isolated, and compliant – a true embodiment of the Zero Trust Security Model.