OCI recently debuted the Resource Scheduler to automate start/stop of certain resources. One of the supported resource types are OCI Functions, the serverless service provided by OCI. Functions let you develop custom bits of code that run based on defined triggers. Usage is only accumulated while the Function is executing. This feature makes Functions a very cost effective tool for tasks that need to be handled infrequently or on-demand.
Having the Resource Scheduler trigger a Function at set intervals makes sense for many use cases. There have been many examples of Functions being used to manipulated data, manage objects in storage, or push data to destinations in real time. A simple use case is going to be discussed in this article based on a management task that I required for managing one of our OCI accounts.
The Scenario
I have an OCI tenancy (cloud account) that has a large number of admin users that require their own sandboxes for proof of concept/demo building/research/etc. It’s important that the admins are able to create things as required to perform their duties, and I don’t want to create an approval step or any other hoops to jump through. I try to keep an eye on resource usage as cost governance is important. One way I try to keep track of which resources are in use and which are potentially stale is via tags enforcing an expiration date.
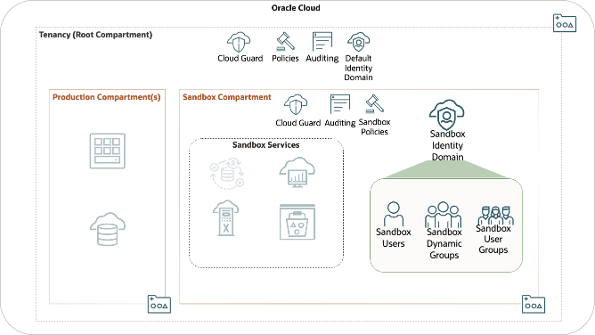
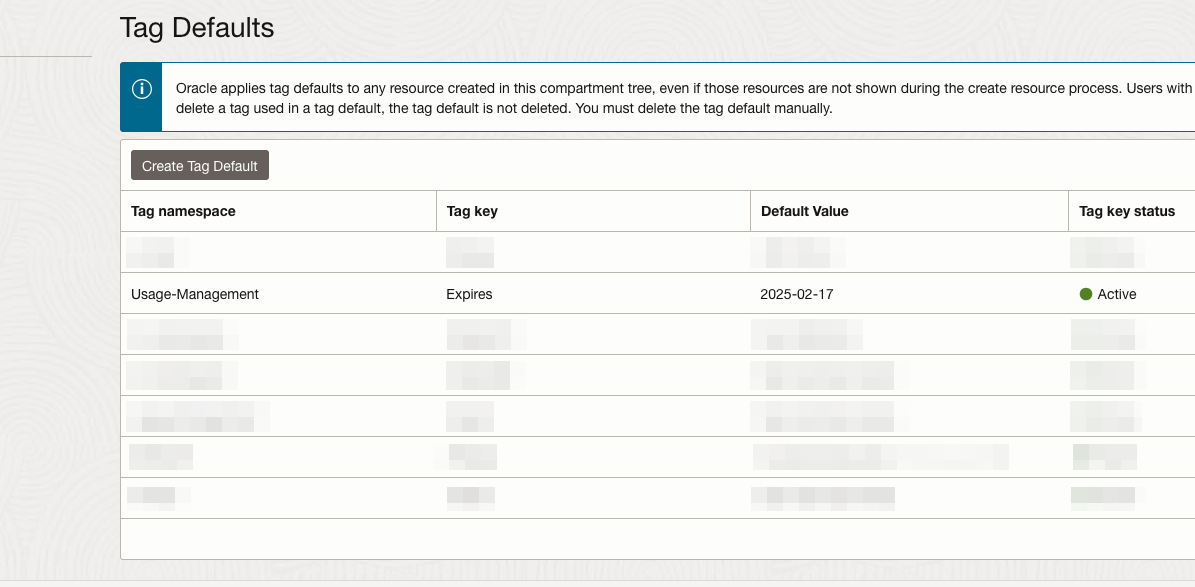
A Tag Default is added to the tenancy (root compartment) that adds the tag to everything that is created. However, this tag needs to be updated every day for currency and consistency. An out of date tag will cause false positives on my dashboards and create rework as I need to continually check statuses on various resources. It’s important that the tags are updated daily and are applied consistently through the environment.
The Solution
A little bit of the Python SDK, an OCI Function, and Resource Scheduler ensure the Tag Default is updated every day. The tag is applied to everything, so glancing or searching for the tag value will give a list of everything set to expire. This way, I know what may no longer be needed and I can notify the owner to exend the expiration or clean up their project. Small mistakes add up, enough mistakes can compound usage over time, and the expiration tag is one tool to prevent those small mistakes.
Once the Tag Default is in place many possiblities open up around being able to create search queries and tools that utilize the tag. This solution uses a small amount of Python, or any other OCI SDK, and OCI services. We can go over each of the required objects in detail as we proceed.
The Function
Next, we’ll need a Functions development environment and a Functions Application. Follow the links to learn how to get both of those if they don’t already exist. There are several programming languages that can be used to accomplish this task, but I’m using Python as it’s a popular language that’s easy to pick up. The following examples will all be in Python 3.11.
We create a new Function by running the command:
fn init --runtime python tag-update
The directory tag-update will be created and populated with some boilerplate code. The function handler is our entrypoint into the application and takes a context ctx and data if applicable. We won’t be using data for this exercise. The handler willl aways return an fdk.response.Response. An example is provided below:
import io
import json
import logging

from fdk import response

def handler(ctx, data: io.BytesIO = None):
    name = "World"
    try:
        body = json.loads(data.getvalue())
        name = body.get("name")
    except (Exception, ValueError) as ex:
        logging.getLogger().info('error parsing json payload: ' + str(ex))

    logging.getLogger().info("Inside Python Hello World function")
    return response.Response(
        ctx, response_data=json.dumps(
            {"message": "Hello {0}".format(name)}),
        headers={"Content-Type": "application/json"}
    )
We’re going to write our own logic to change tag defaults using the OCI SDK for Python. Let’s rewrite our handler function to take advantage of our Dynamic Group by invoking our Function as a Resource Principal:
import io
import os
from fdk import response
from oci.auth import signers
def handler(ctx, data: io.BytesIO = None):
signer = signers.get_resource_principals_signer()
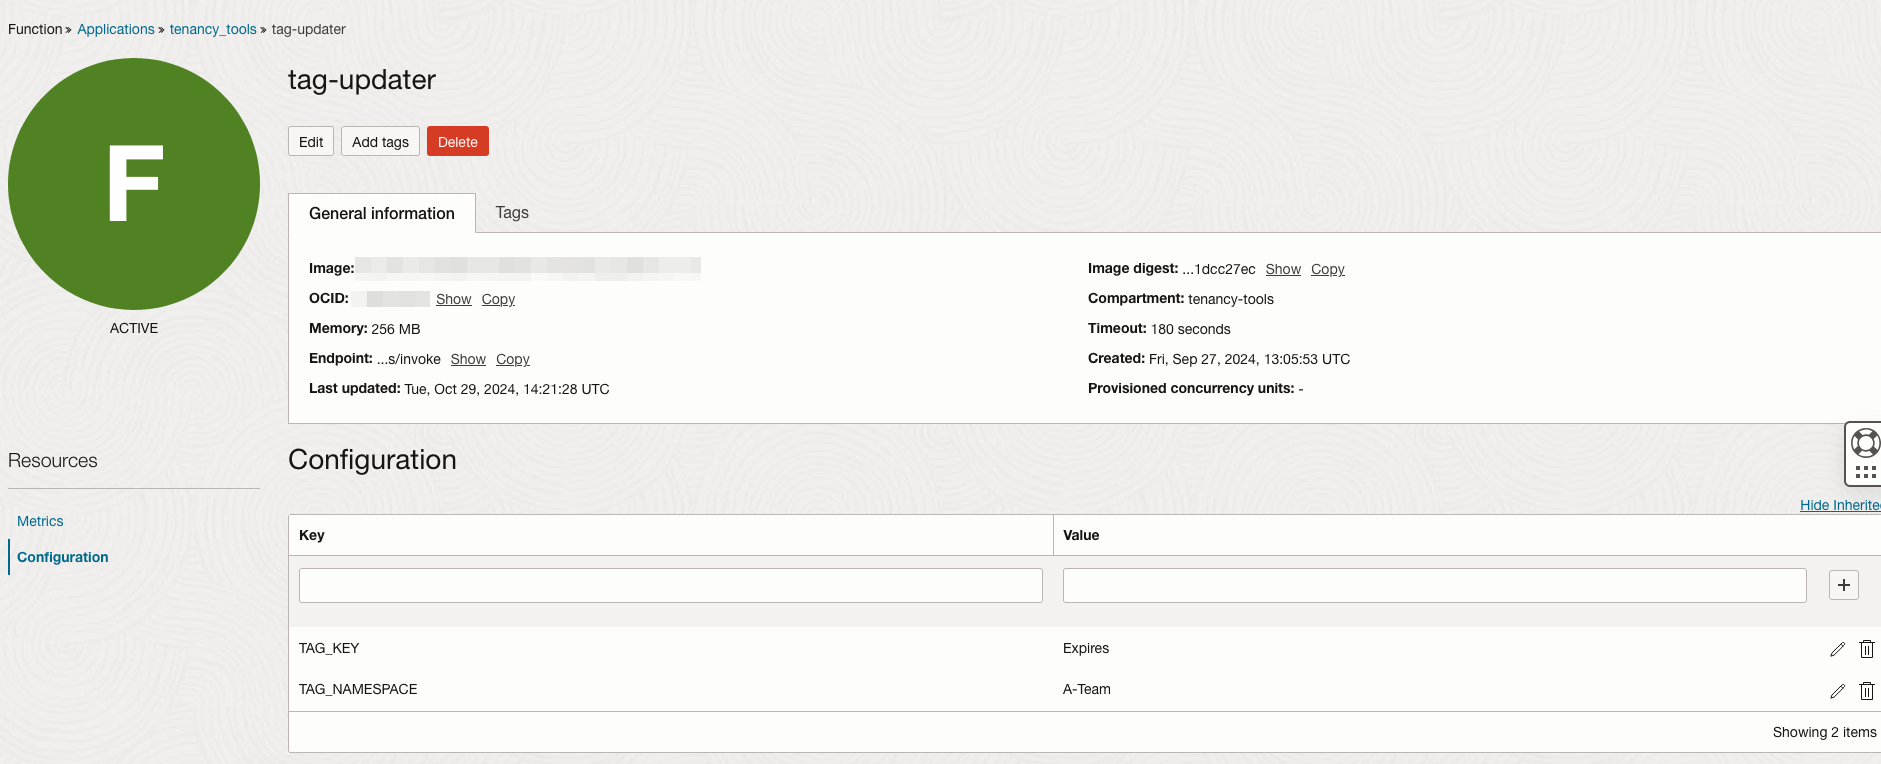
tag_default_id = os.getenv('TAG_DEFAULT')
update_tags(tag_default_id, signer=signer)
return response.Response(ctx)
In our handler function we see the standard Function signature, using ctx and optionally data as arguments. We retrive a signer for our Resource Principal to authenticate to OCI services in the first line of the function. We next get our tag default ID (ex. ocid1.tagdefault.oc1..wxyz1234abcd…) from an environment variable TAG_DEFAULT. We use both of those pieces of information to invoke an update_tags function, which we will examine next:
from oci import identity

def update_tags(tag_default_id: str, signer=None):

    client = identity.IdentityClient({}, signer=signer)

    details = identity.models.UpdateTagDefaultDetails(
        is_required=True,
        value=get_value()
    )

    client.update_tag_default(tag_default_id, details)
The update_tags function creates a client utilizing the signer that we passed from handler, which will be used to make the REST API call shortly. We assemble the details of the request into an UpdateTagDefaultDetails object. The is_required attribute tells OCI to apply the tag as a requirement on object creation. The value attribute will be the value set in the tags key-value pair. We use another function to retrive the correct value. Finally, the client applies the new tag default with a call to the update_tag_default method. A response can be assigned for error checking and other processes, but for simplicity we don’t do that here.
Finally, let’s take a quick look at the get_value function.
import datetime

def get_value() -> str:


    date = datetime.date.today() + datetime.timedelta(days=90)


    return date.strftime('%Y-%m-%d')
In get_value, we generate today’s date, add 90 days to it, and return it in a formatted string. Not too much going on here thankfully.
The Deployment
We should have our Functions Application already created. To deploy our function, all we need to do is use fn to deploy it. In this example, our Function Application will be called update-app.
fn deploy --app update-app
You should see the container being built and pushed to the OCI Registry where it can be used by Functions. We can invoke the function next.
fn invoke update-app tag-update
You may not see a response, since we didn’t return any data. The tag should be updated.
The Scheduler

In the “hamburger menu”, under Governance & Administration > Resource Scheduler > Schedules we can set up our automated schedule.
Click the Create a schedule button to begin.
We’ll need to give the schedule a name of some sort, a description if desired, and Start as our Action to be executed. Click the Next button.
We can assign resources to be selected either statically or dynamically. For the sake of simplicity, we will leave Static selected and find our Function in the menu. Check the box for the Function. Click Next.
The Policies

We’ll need a few policies in place to do several things. First, we’ll need to create a policy allowing Resource Scheduler to interact with Functions. Remember, even OCI services require permissions to take actions in your tenancy. These permissions can be assigned either for the tenancy (whole account), or for specific compartments. This allows permissions to be narrowly scoped to a location if not required throughout the entire tenant. The policy will look like one of the following:
Allow any-user to manage functions-family in tenancy where all {request.principal.type='resourceschedule',request.principal.id='your_scheduler_ocid_here'}
or
Allow any-user to manage functions-family in compartment cool_beans where all {request.principal.type='resourceschedule',request.principal.id='your_scheduler_ocid_here'}
Next, the Function will need some permissions to interact with OCI services. A Dynamic Group will be required as a principal to assign permissions to. The scope of the Dynamic Group should include the Function.
Allow dynamic-group tag_grp to manage tag-defaults in tenancy
Allow dynamic-group tag_grp to use tag-namespaces in tenancy
or
Allow dynamic-group tag_grp to manage tag-defaults in compartment cool_beans
Allow dynamic-group tag_grp to use tag-namespaces in compartment cool_beans
The Conclusion

We’ve now put the puzzle together. The code, function, schedule, and finally policies that make things work end-to-end. Every day at the selected time, our selected tag will be updated to the current date without any further intervention.
Many processes rely on timing to function. Utilizing a similar approach as the one we put together here can automate these processes, reducing congnitivie load and releasing capacity for other problems. I’m anticipating that many problems will be solved by utilizing scheduled serverless Functions in OCI. Happy solving.