OCI Private Network Load Balancer
Private Network Load Balancer Introduction:
To isolate your network load balancer from the internet and simplify your security posture, create a private network load balancer.
You can access the private network load balancer using the methods and technology below.
1. Cross-VCN (Using LPG peering)
2. From another region (using RPC)
3. From on-prem (using FC private peering)
4. DRG
Private Network Load Balancer Creation:
Login to the OCI dashboard
Open the navigation menu and click Networking.
Under Overview, click Load Balancer, and then Create Load Balancer.
Add Details
Enter a name and select “Private” Visibility Type.
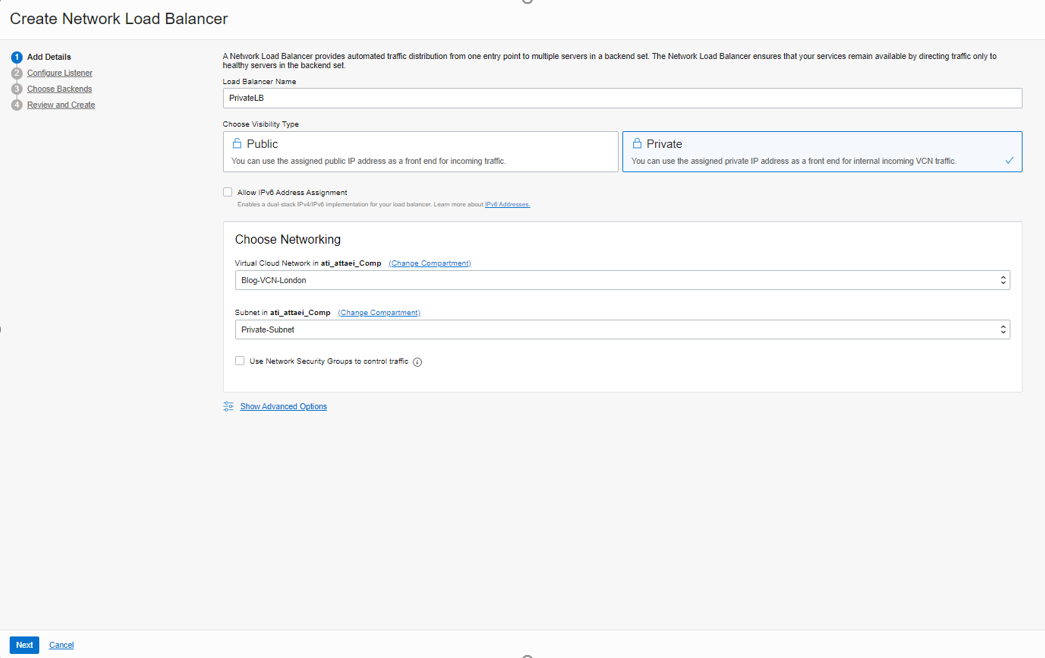
Choose VCN and Subnet, then click on “Next.”
Configure Listener
Enter a name and select UDP/TCP/ICMP as the type of traffic that my listener will handle.
Note: As you see, when we choose UDP/TCP/ICMP, we will get the message that “ICMP support requires enabling Source/Destination Header (IP, Port) Preservation on the Network Load Balancer. This will lock Source/Destination Header (IP, Port) Preservation, and you will be unable to change it.”
This means in this mode network load balancer doesn’t modify the client packet characteristics and preserves the client source and destination IP header information.
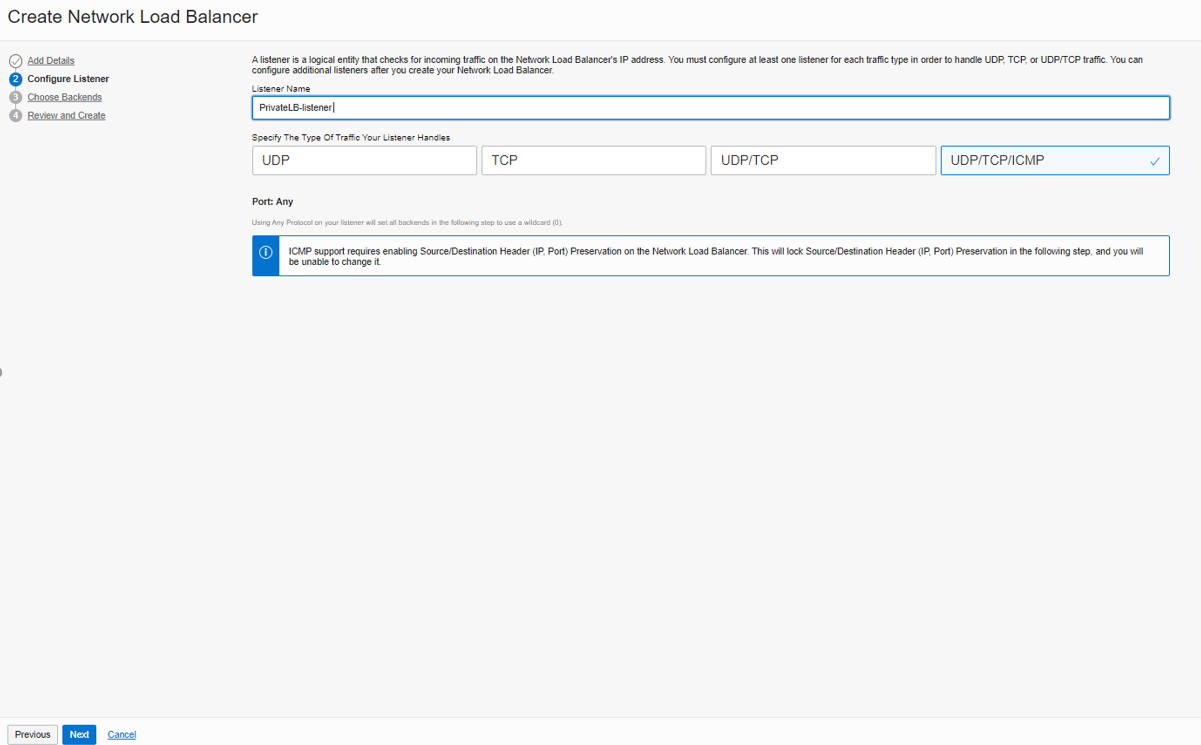
click on “Next.”
Choose Backends
Please choose the Backends Set servers and click on Add Backends to specify Health Check Policy.
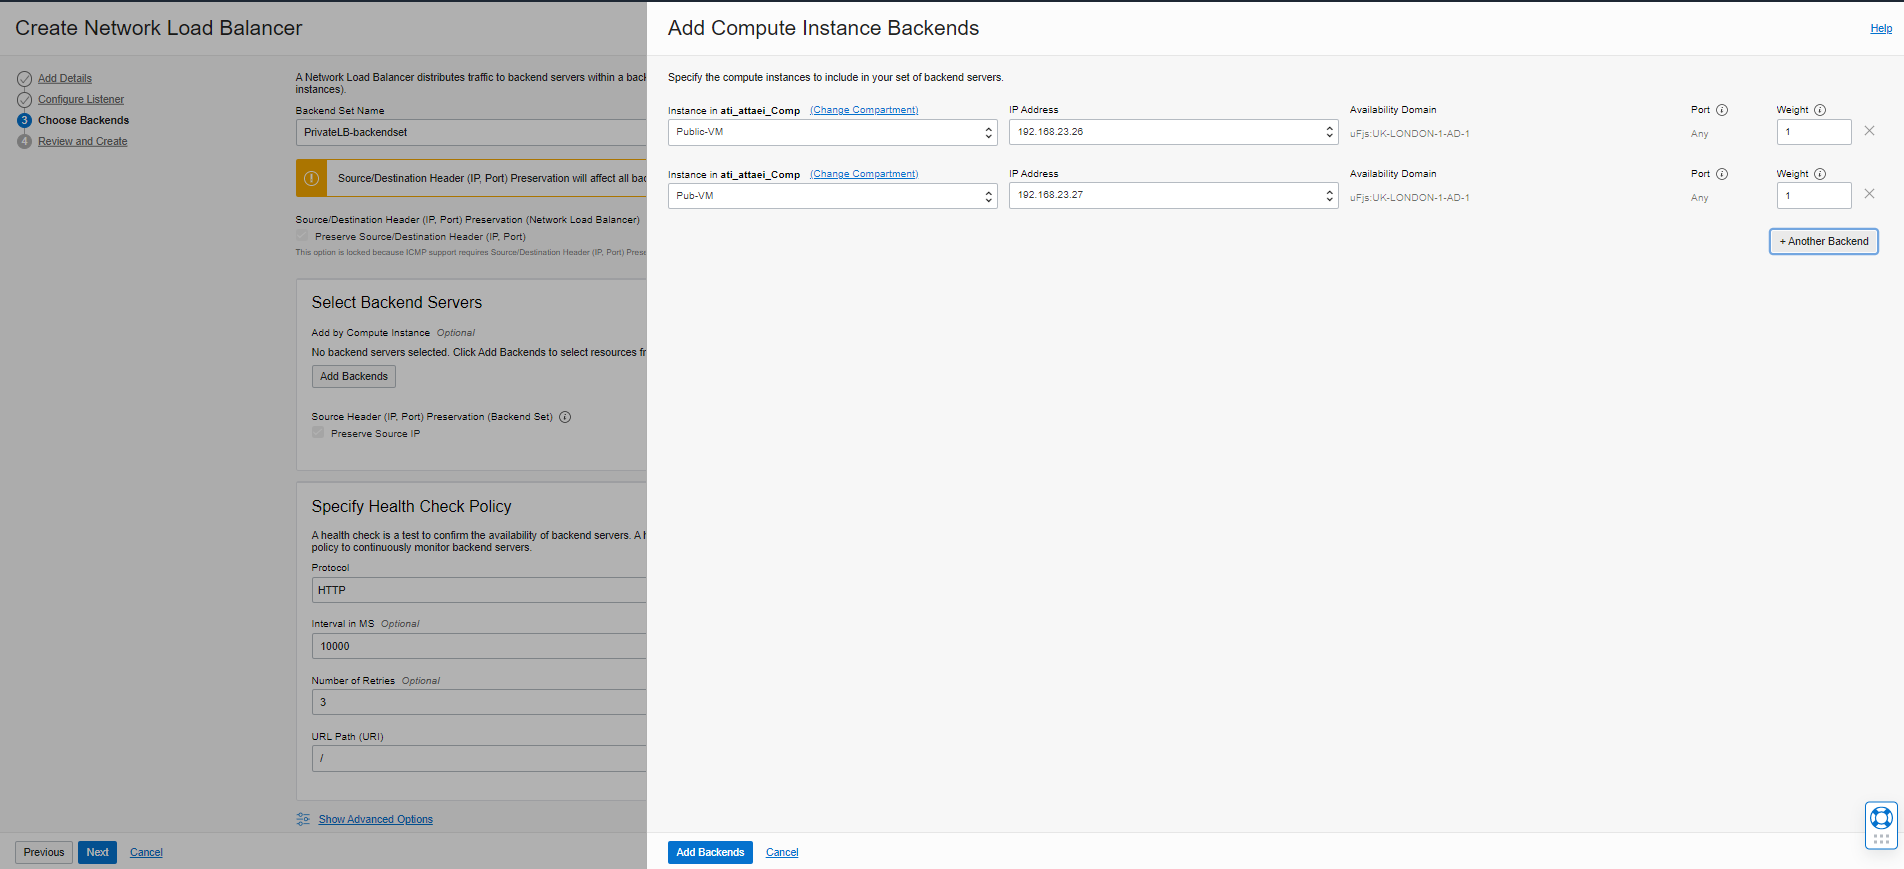
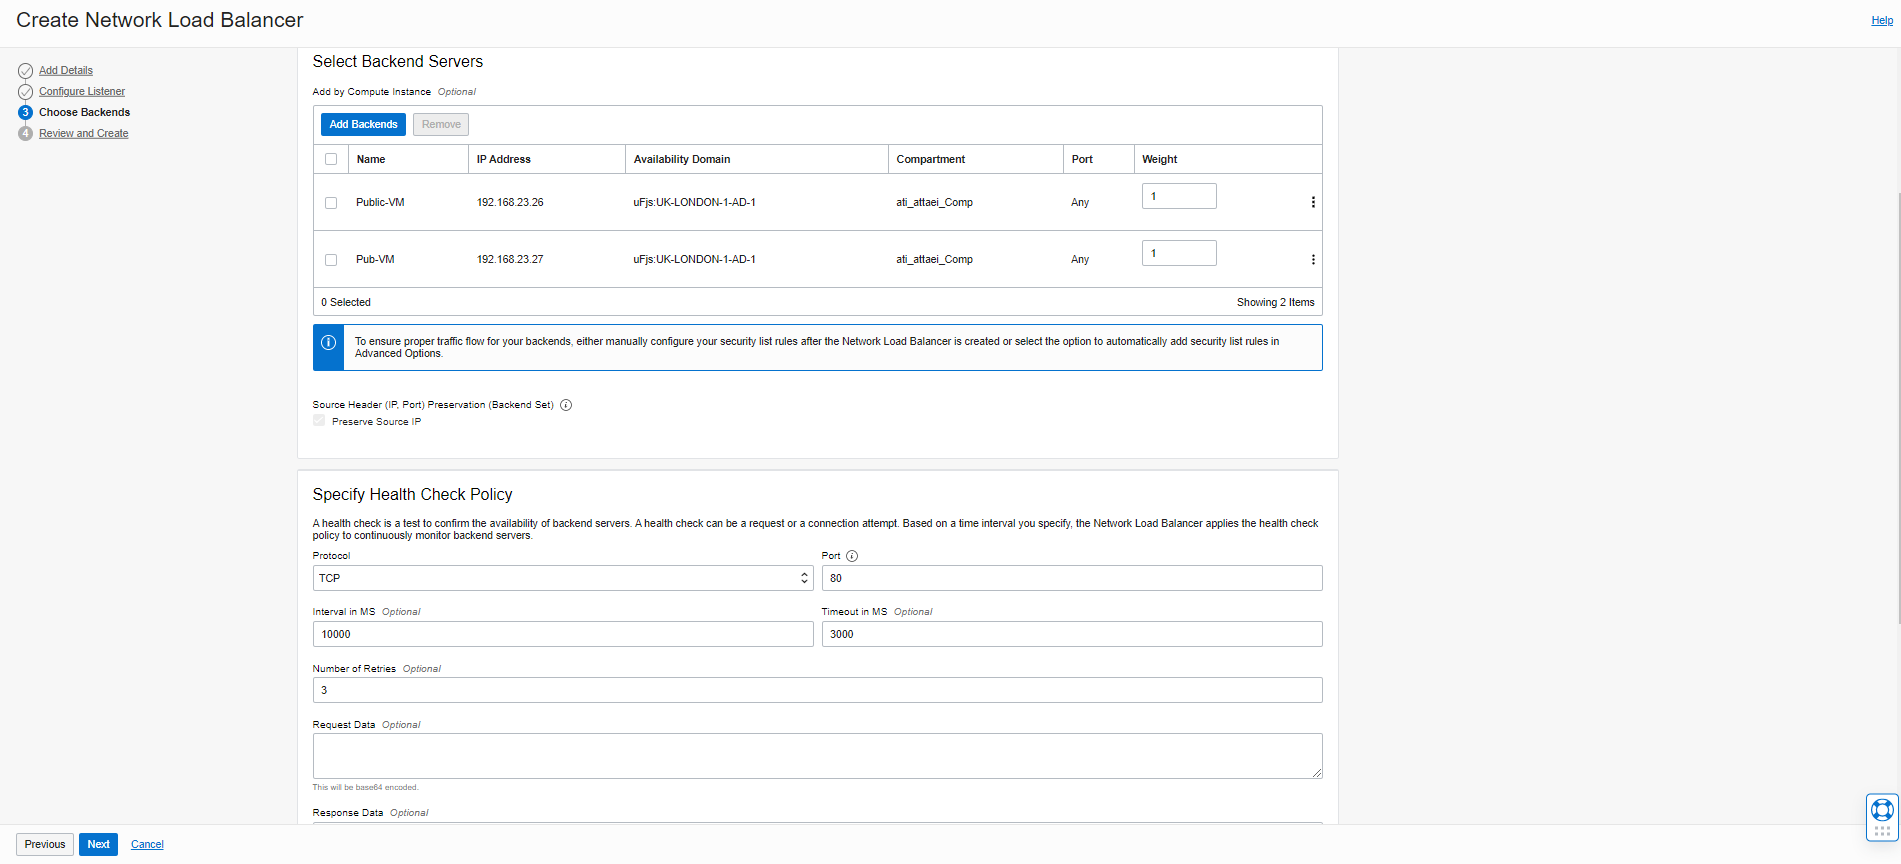
click on “Next.”
Review and Create
Review your configuration and click on “Create Network Load Balancer.”
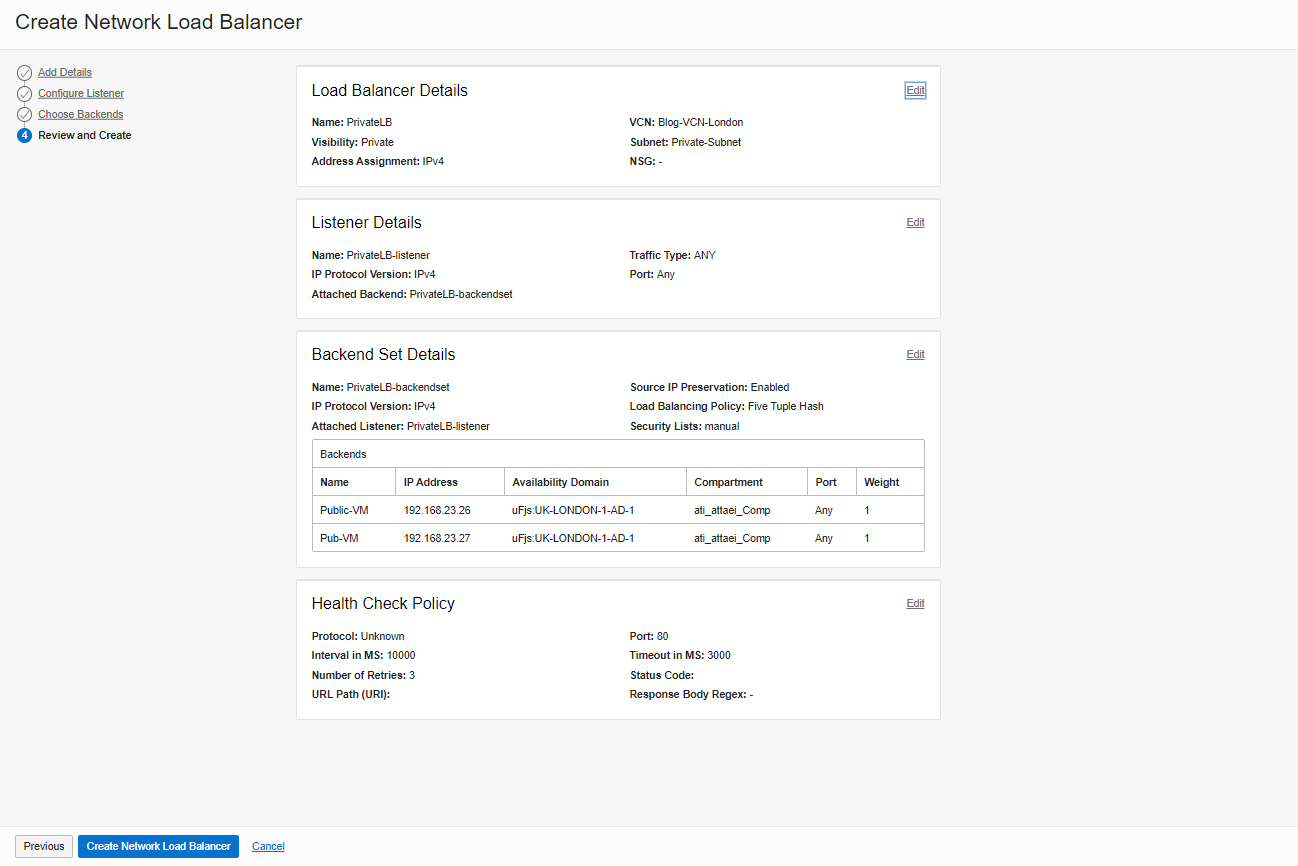
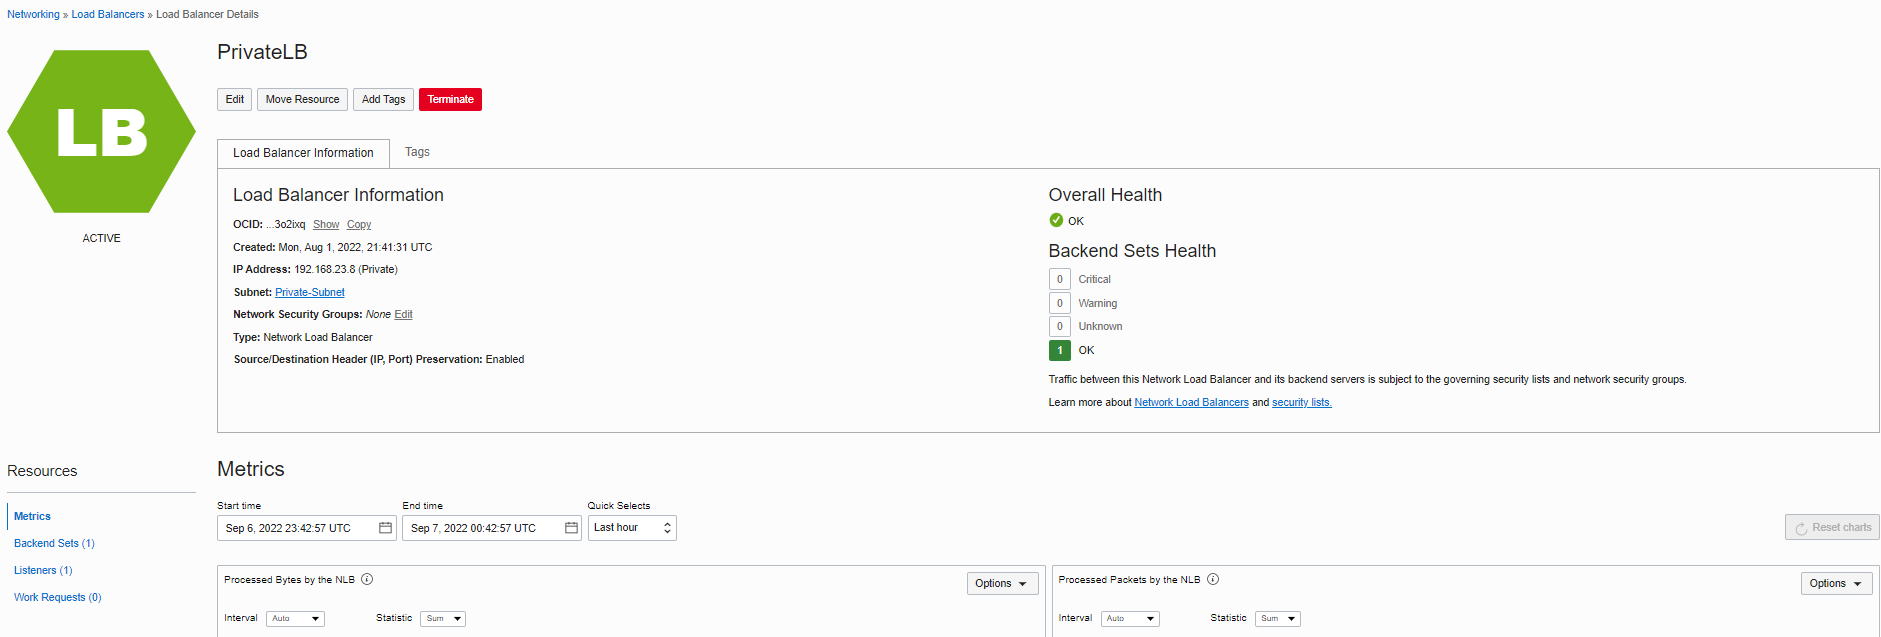
Here is what we have after creating the “Private Load Balancer”
Overall Health of Private LB
Private Load Balancer Use Case and Best Practice:
Private Network Load Balancer would be as a front-end to network virtual appliance cluster (Like Palo Alto Firewalls).
With a private load balancer, we can enable the firewall instance hosted behind the network load balancer in Hub and Spoke VCNs design. In this method, the firewall appliance will inspect the original client packet and apply security policies before forwarding it to the backend servers in the spoke VCNs.
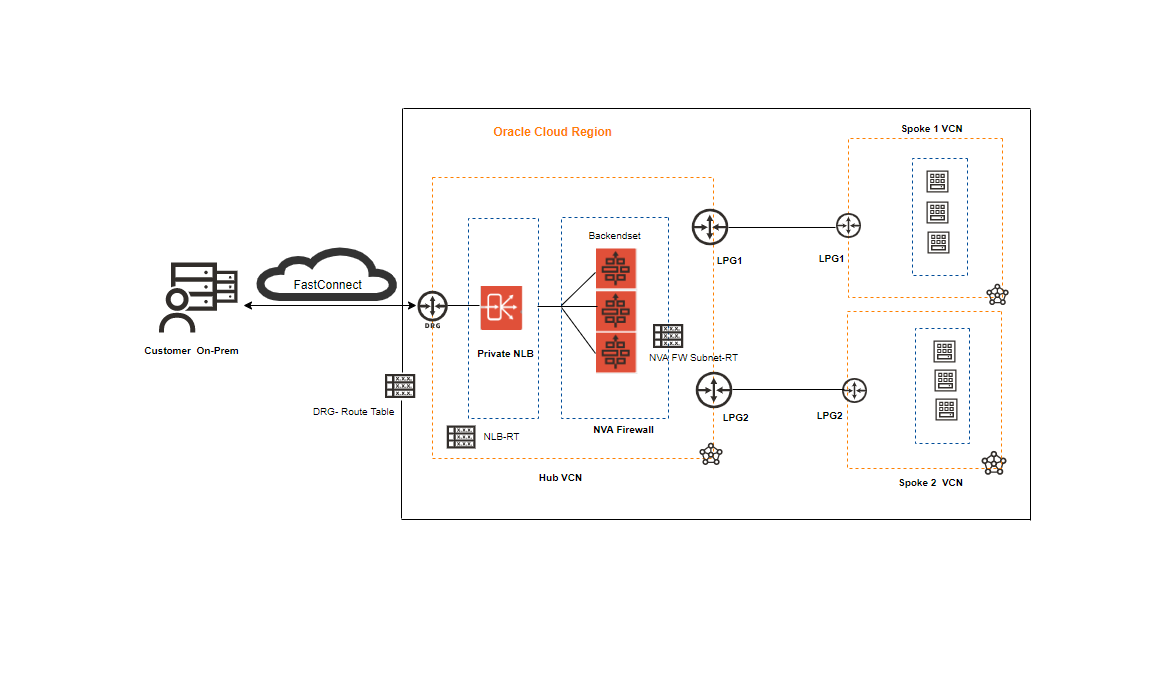
As you see above, the Hub VCN connects to the Spoke VCNs through LPGs.
All spoke traffic uses route table rules to route traffic through the LPGs to the hub using Private Network Load Balancer for inspection by the Palo Alto VM series Firewall cluster.
Please check the link below if you need more information.
Secure-App-Palo Alto-Firewall-NetworkLoadBalancer
Please consider the listed Private Network Load Balancer specifications when provisioning your Load Balancer.
1. According to the Oracle documents, you can configure your network load balancer so that the original source and destination IP
addresses and ports contained in the header of each incoming packet are preserved on the backend server.
2. The network load balancer will not modify packet characteristics. The source and destination IP header information will be identical
when viewed at the network load balancer or a backend server. No network address translation (NAT) occurs.
3. The source/Destination Preservation feature is only available on the private network load balancer.
4. Enabling this feature (Source/Destination Preservation) affects all backend sets in the network load balancer. Update your route table
to utilize this feature.
Testing:
• Install Apache HTTP Server
I installed Apache HTTP server on the VMs in load balancer’s backend servers, by the commands below.
” sudo yum install httpd ”
” sudo service httpd start ”
Note: To allow the Overall Health Check path (which Shows Green with OK status), you must ensure the host-based firewall is configured correctly!
In my case, just for blogging purposes, I disabled the firewall by the command below.
” sudo service firewalld stop ”
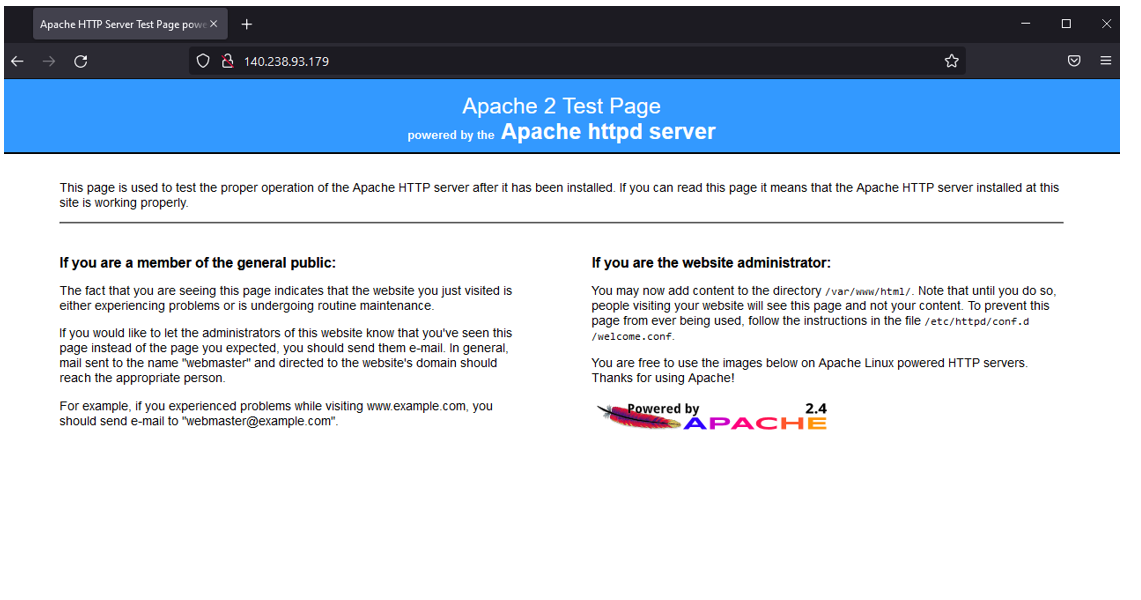
However, I won’t recommend that in the production environment. As you see below, if you copy and paste the Network Load Balancer public IP address to any browser (I used Firefox), you’ll see your Apache server test page that you just installed on your backend servers.
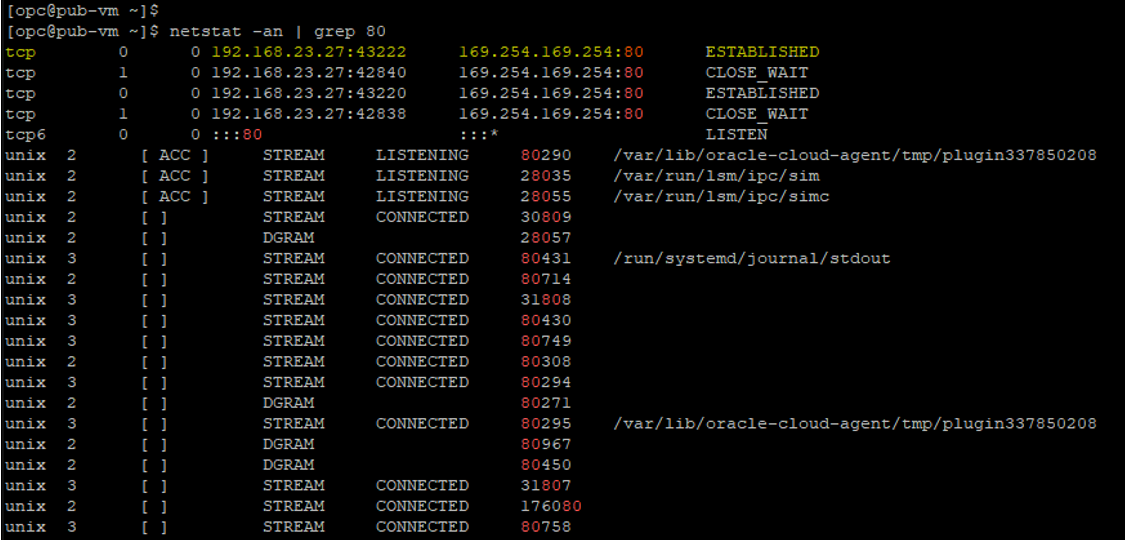
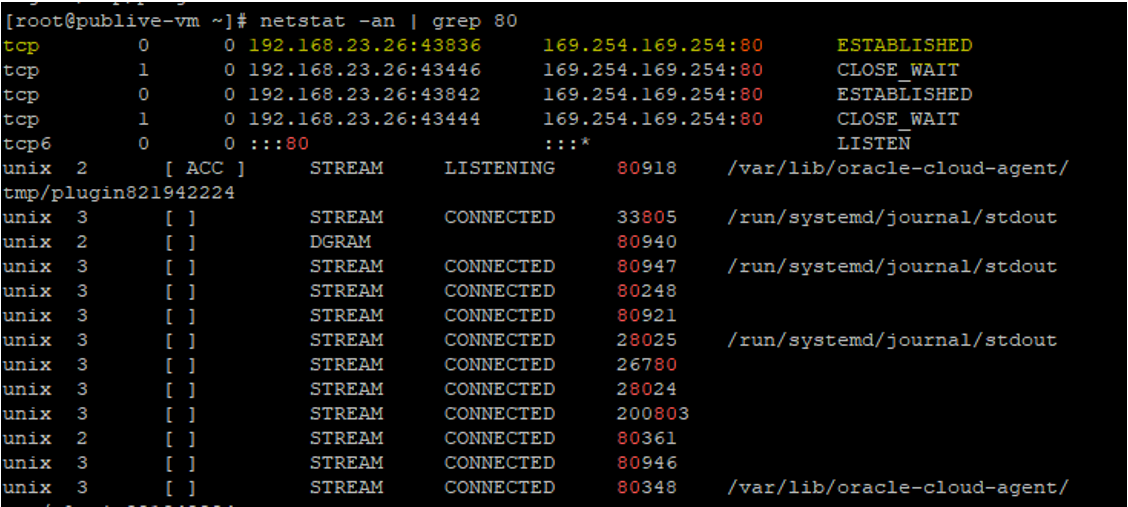
• Display TCP/IP Connections
I displayed connections and listening ports for our current TCP/IP connection by the command below.
“netstat -an | grep 80”
Blog Agenda Links
OCI Public Network Load Balancer
OCI Private Network Load Balancer
I hope you enjoyed it!