Introduction
This blog is the first part where I will configure the Equinix side to connect two Oracle Cloud Infrastructure (OCI) Regions using Equinix Infrastructure. This solution can replace the OCI Remote Peering Connection (RPC) and has all the benefits of Equinix SLAs.
Please go here for the main page.
Please go here for the OCI FastConnect side configuration, the second part of this blog series.
Please go here for the Equinix Connection to OCI, activation of AS Override feature and validation, the last part of this blog series.
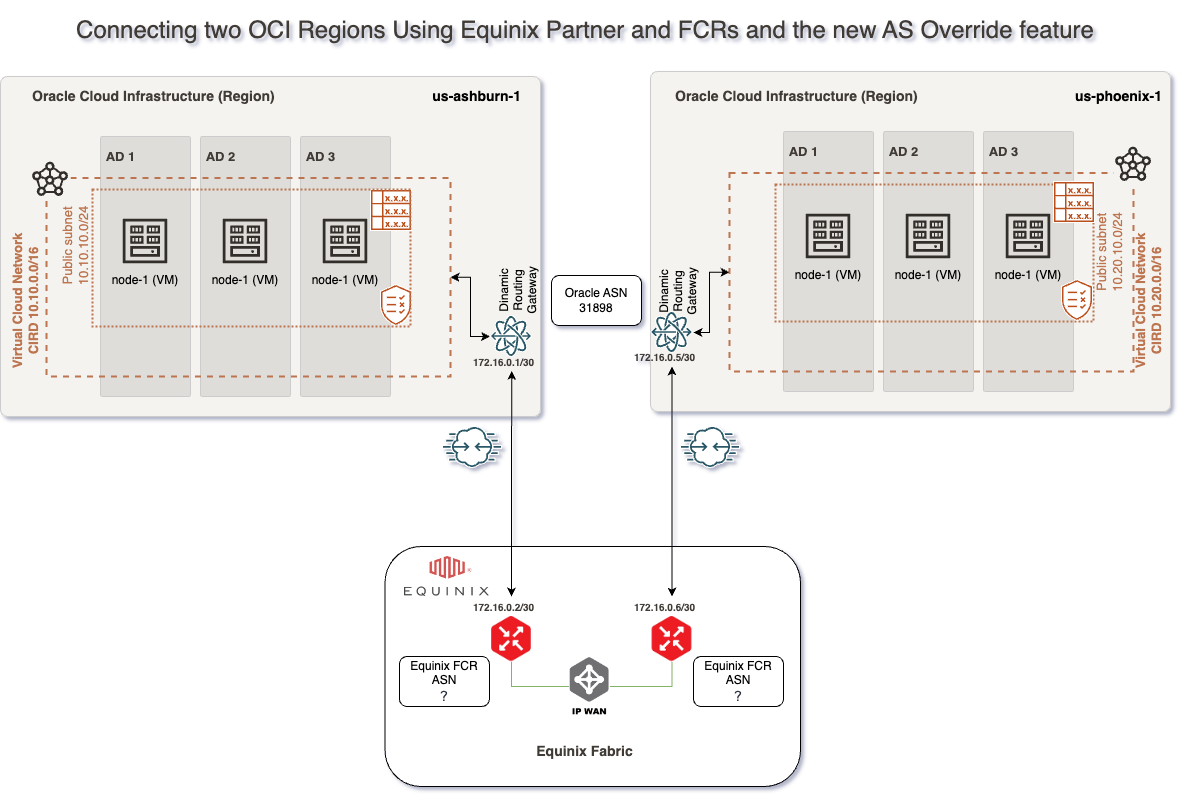
For this connectivity model, we will use two FastConnects with Equinix as a Partner, two Equinix Fabric Cloud Routers, four Equinix Connections, one IP Wan Network and the Equinix Fabric. I will not focus on redundancy options.
In this blog, we will use the following technologies:
– Equinix Cloud Router – for more information, please access official documentation at https://docs.equinix.com/en-us/Content/Interconnection/FCR/FCR-intro.htm
– Equinix IP-WAN connections for FCRs in different metro locations – for more information, please access official documentation at https://docs.equinix.com/en-us/Content/Interconnection/FCR/connections/FCR-ip-wan-intro.htm
Prerequisites
In this blog, we will cover how to provision the Equinix FCRs and connect them together usinf am IP WAN connectivity. To do this, we will need the following resources/access:
1. Access to the Equinix portal with the possibility to provision and Order required components.
Solution Description
This solution does not focus on redundancy, and the connectivity will be based on this network diagram:
This blog will focus on how we can configure the Equinix Fabric, which can be done by following the following steps:
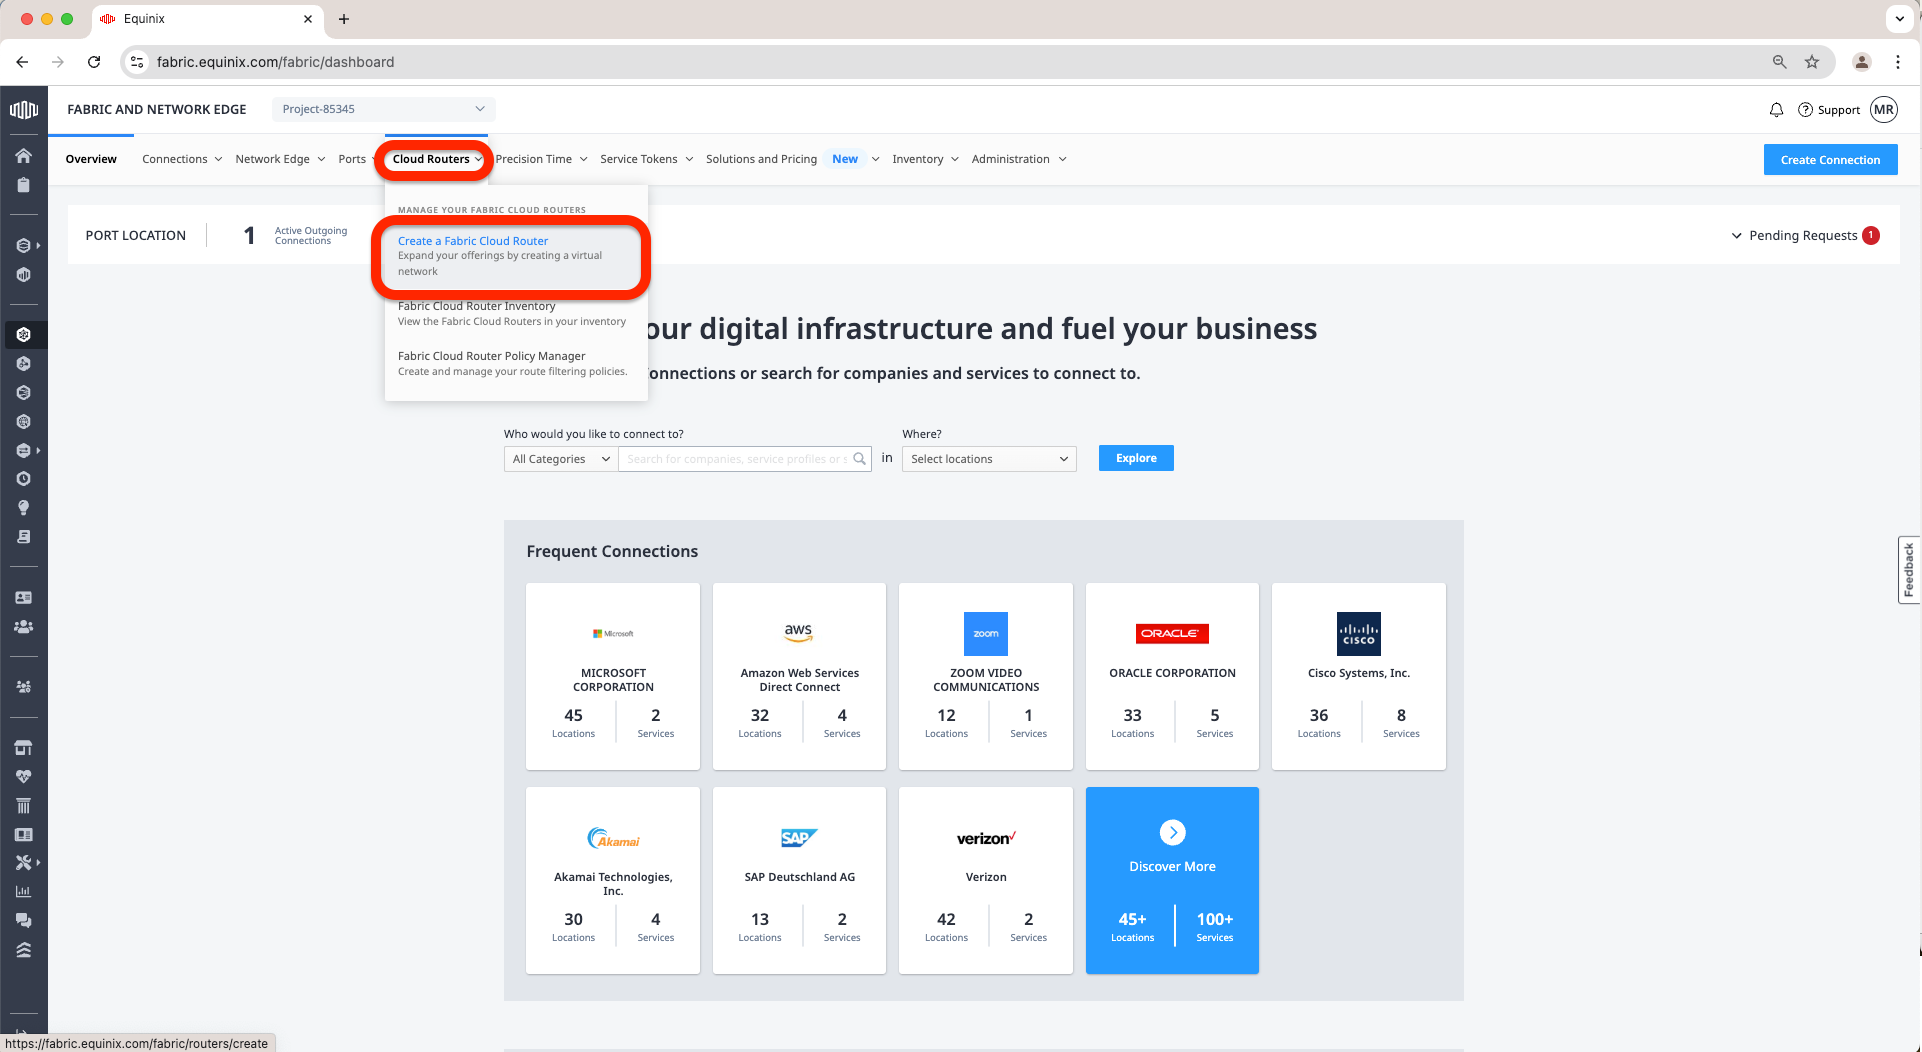
a. Access the Equinix Fabric at https://fabric.equinix.com/. Log in with your credentials, go to the Cloud Routers tab, and click Create a Fabric Cloud Router.
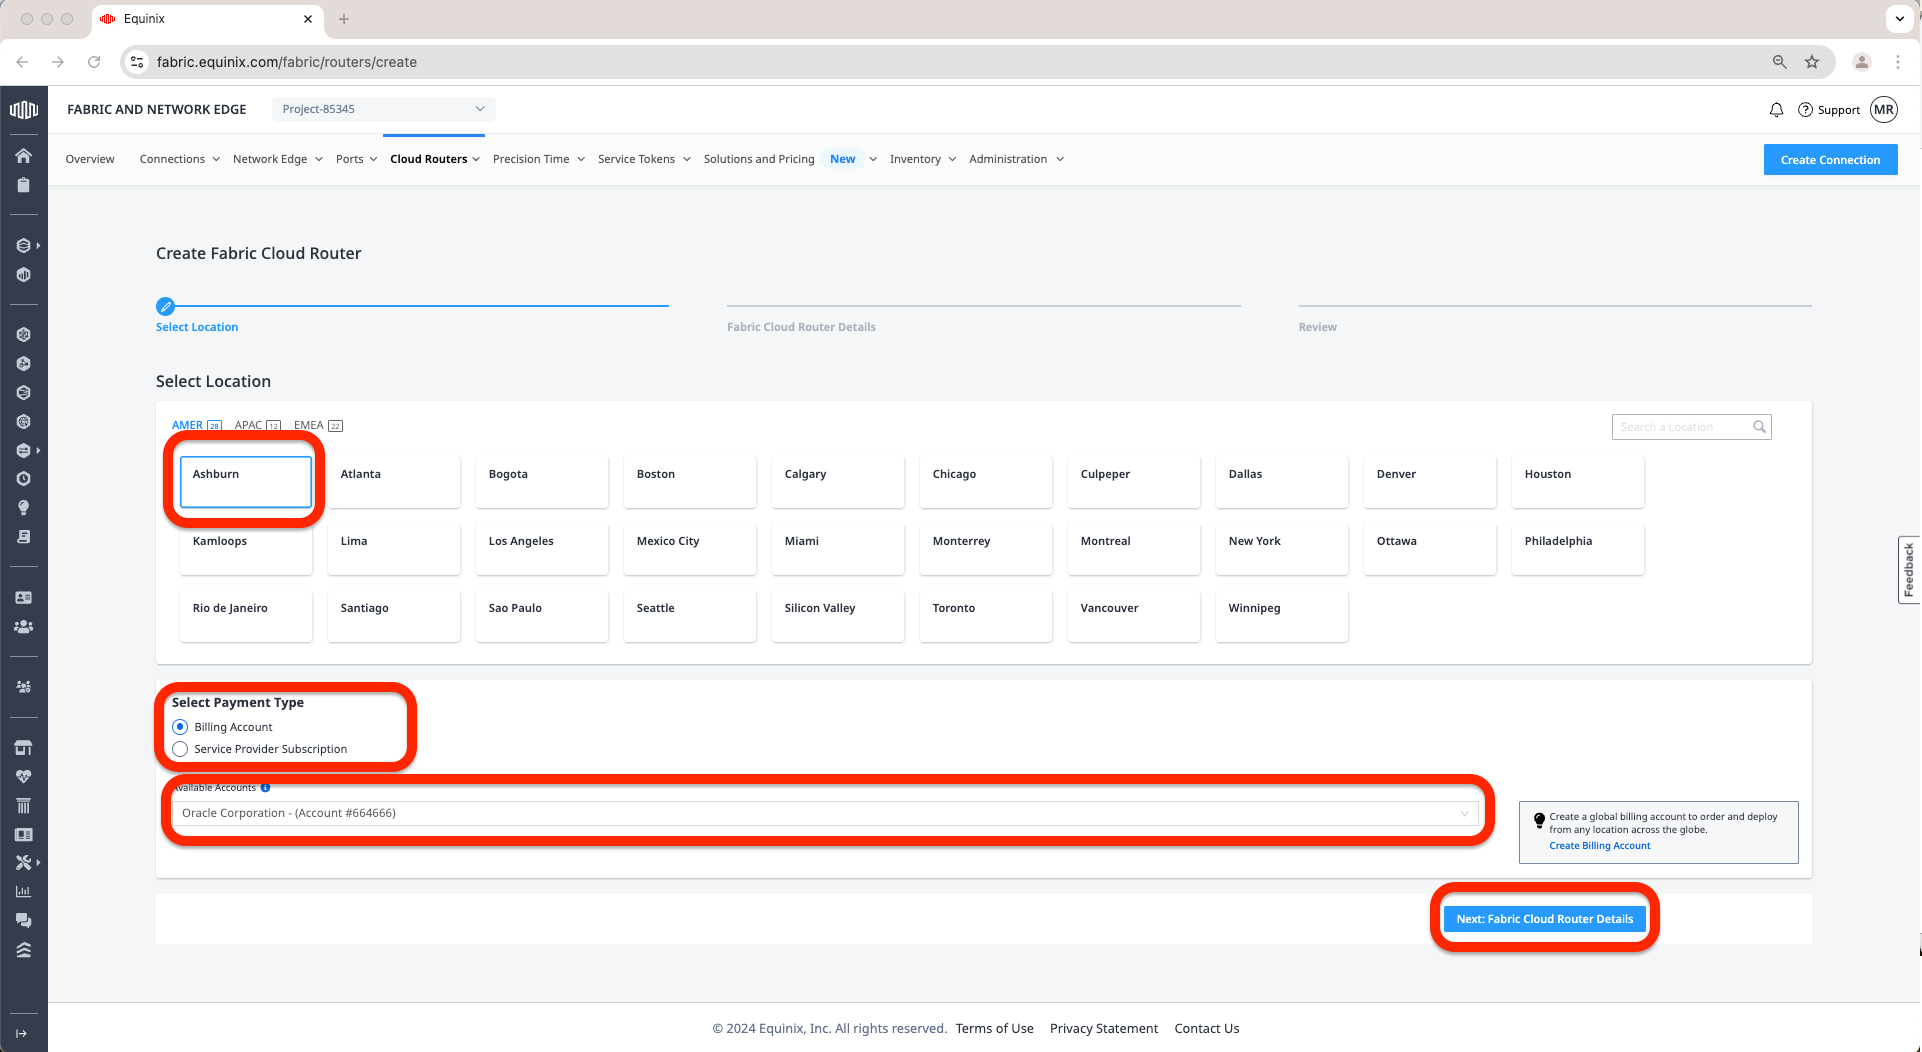
b. Select a location for the FCR. In my case, I have selected Ashburn. Select a Billing Account or Service Provider Subscription. In my case, I have chosen a Billing Account. Finaly, Click Next: Fabric Cloud Router Details.
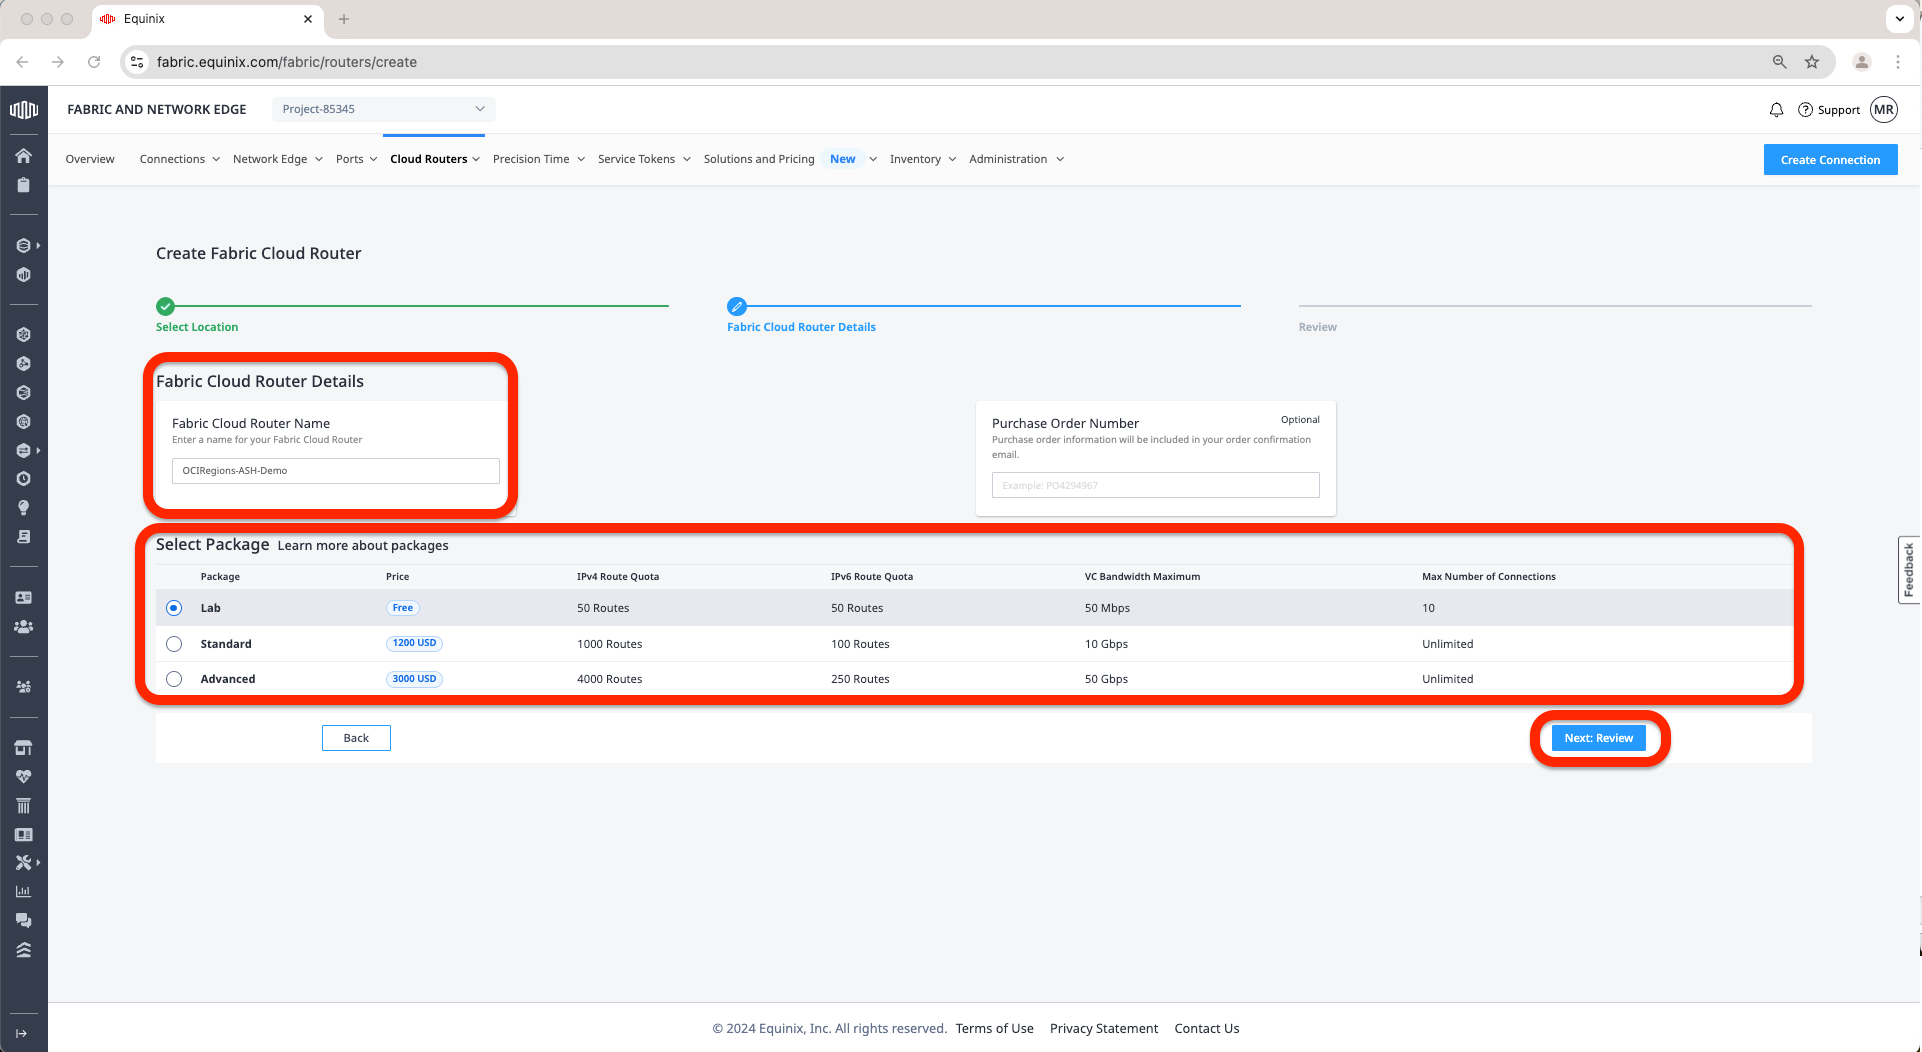
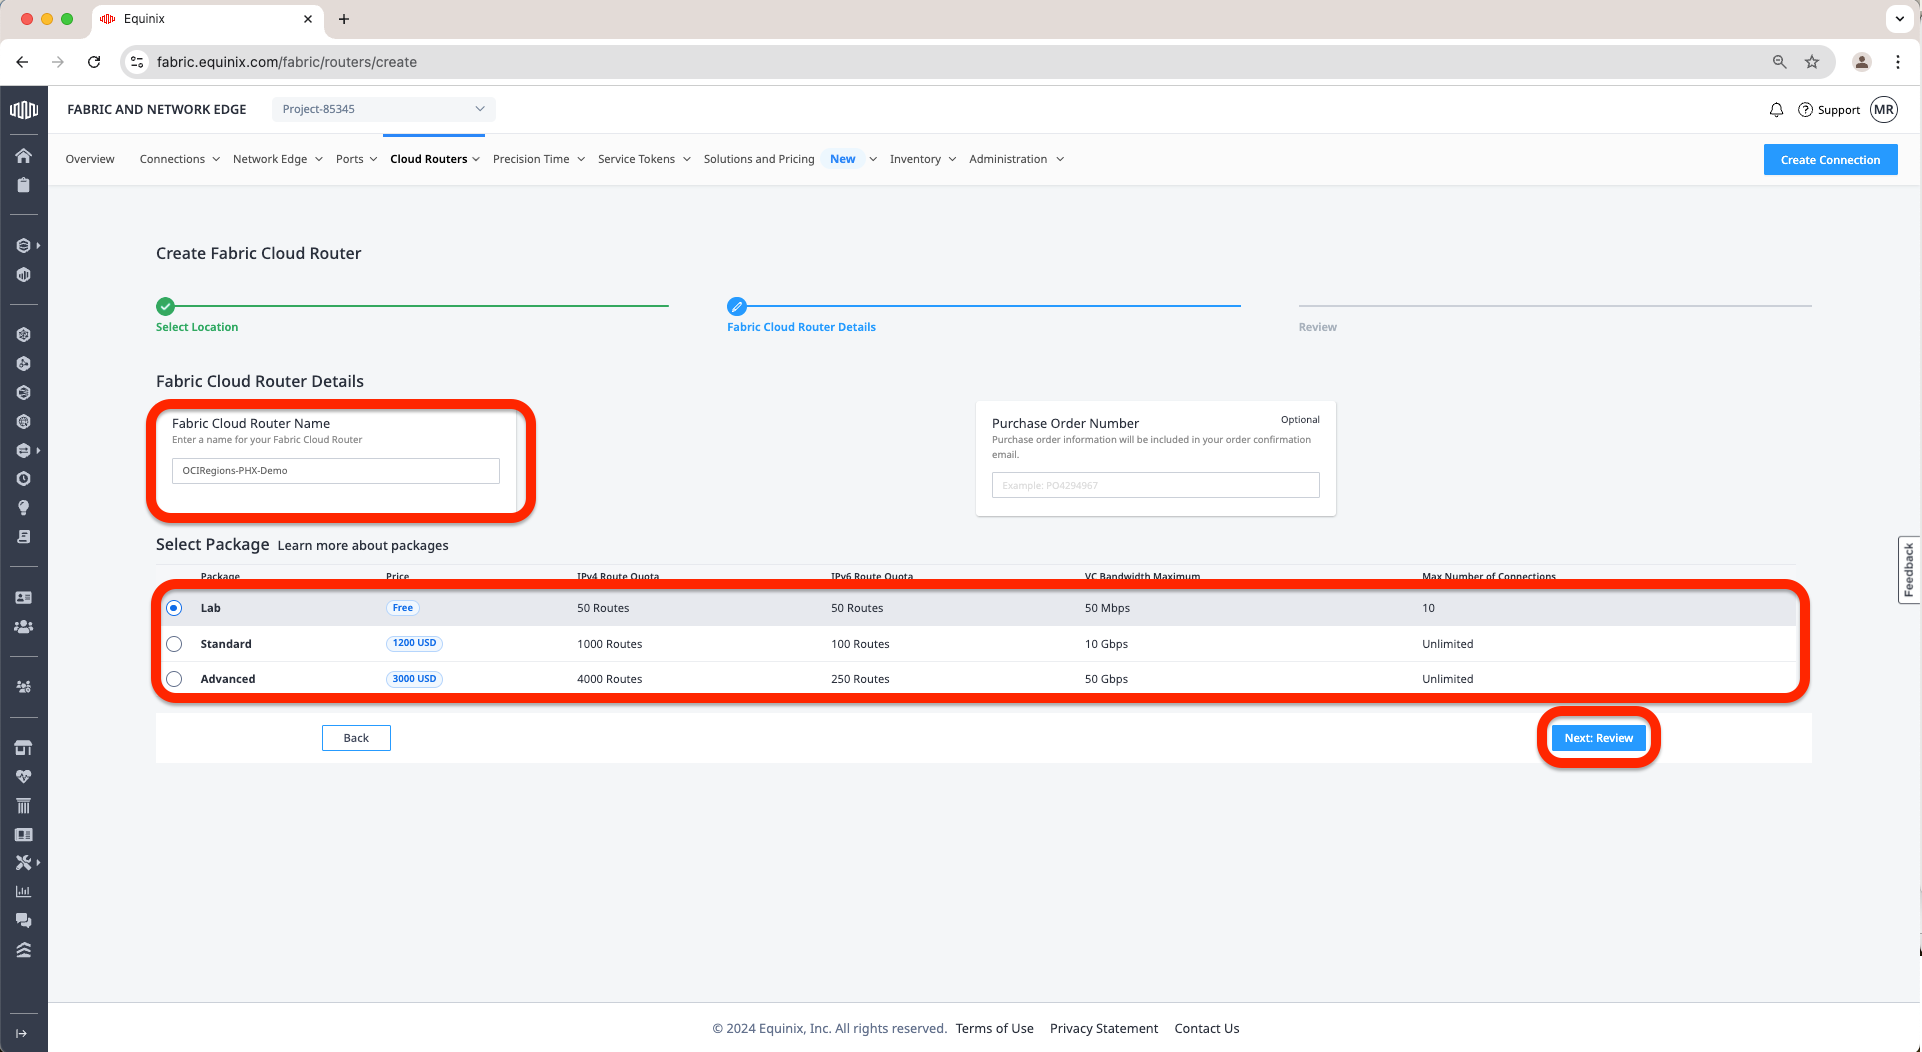
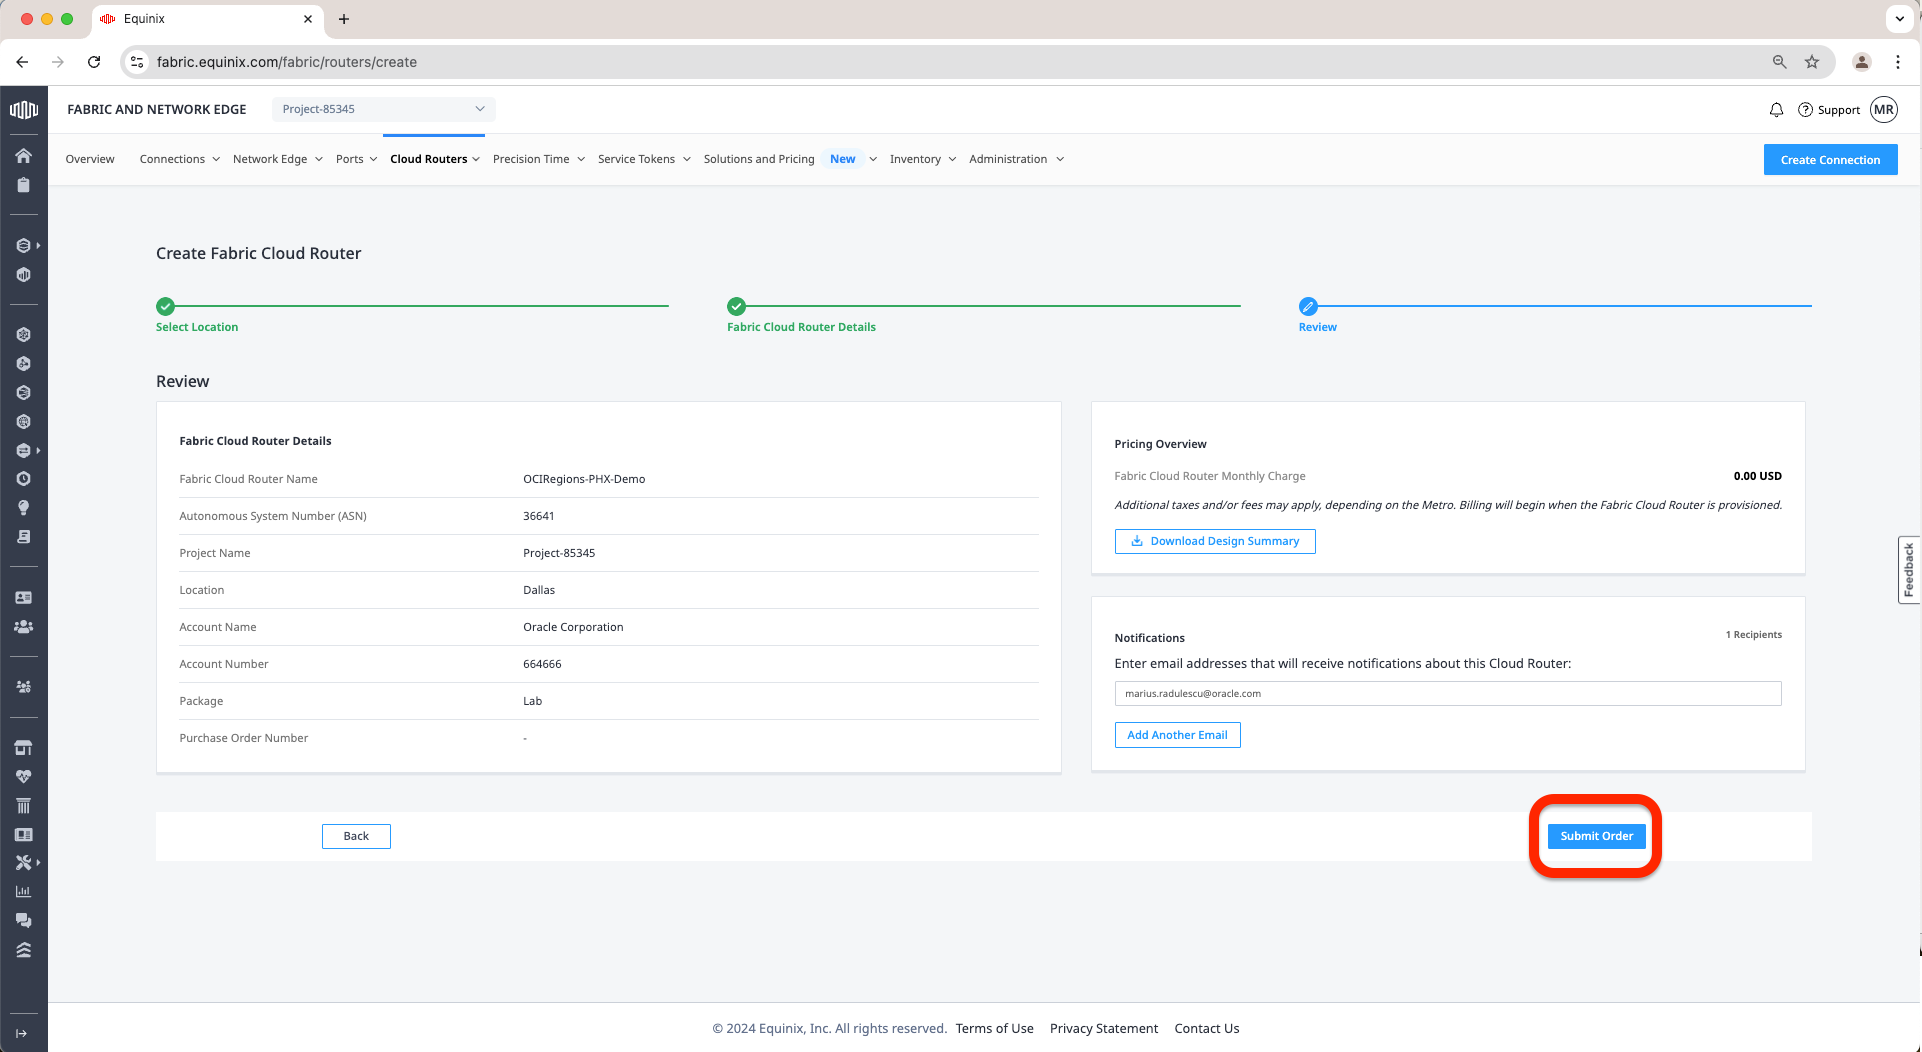
c. Enter Fabric Cloud Router Name; in my case, I have added “OCIRegions-ASH-Demo”, select a Package, I have chosen a Lab package. Click Next:Review.
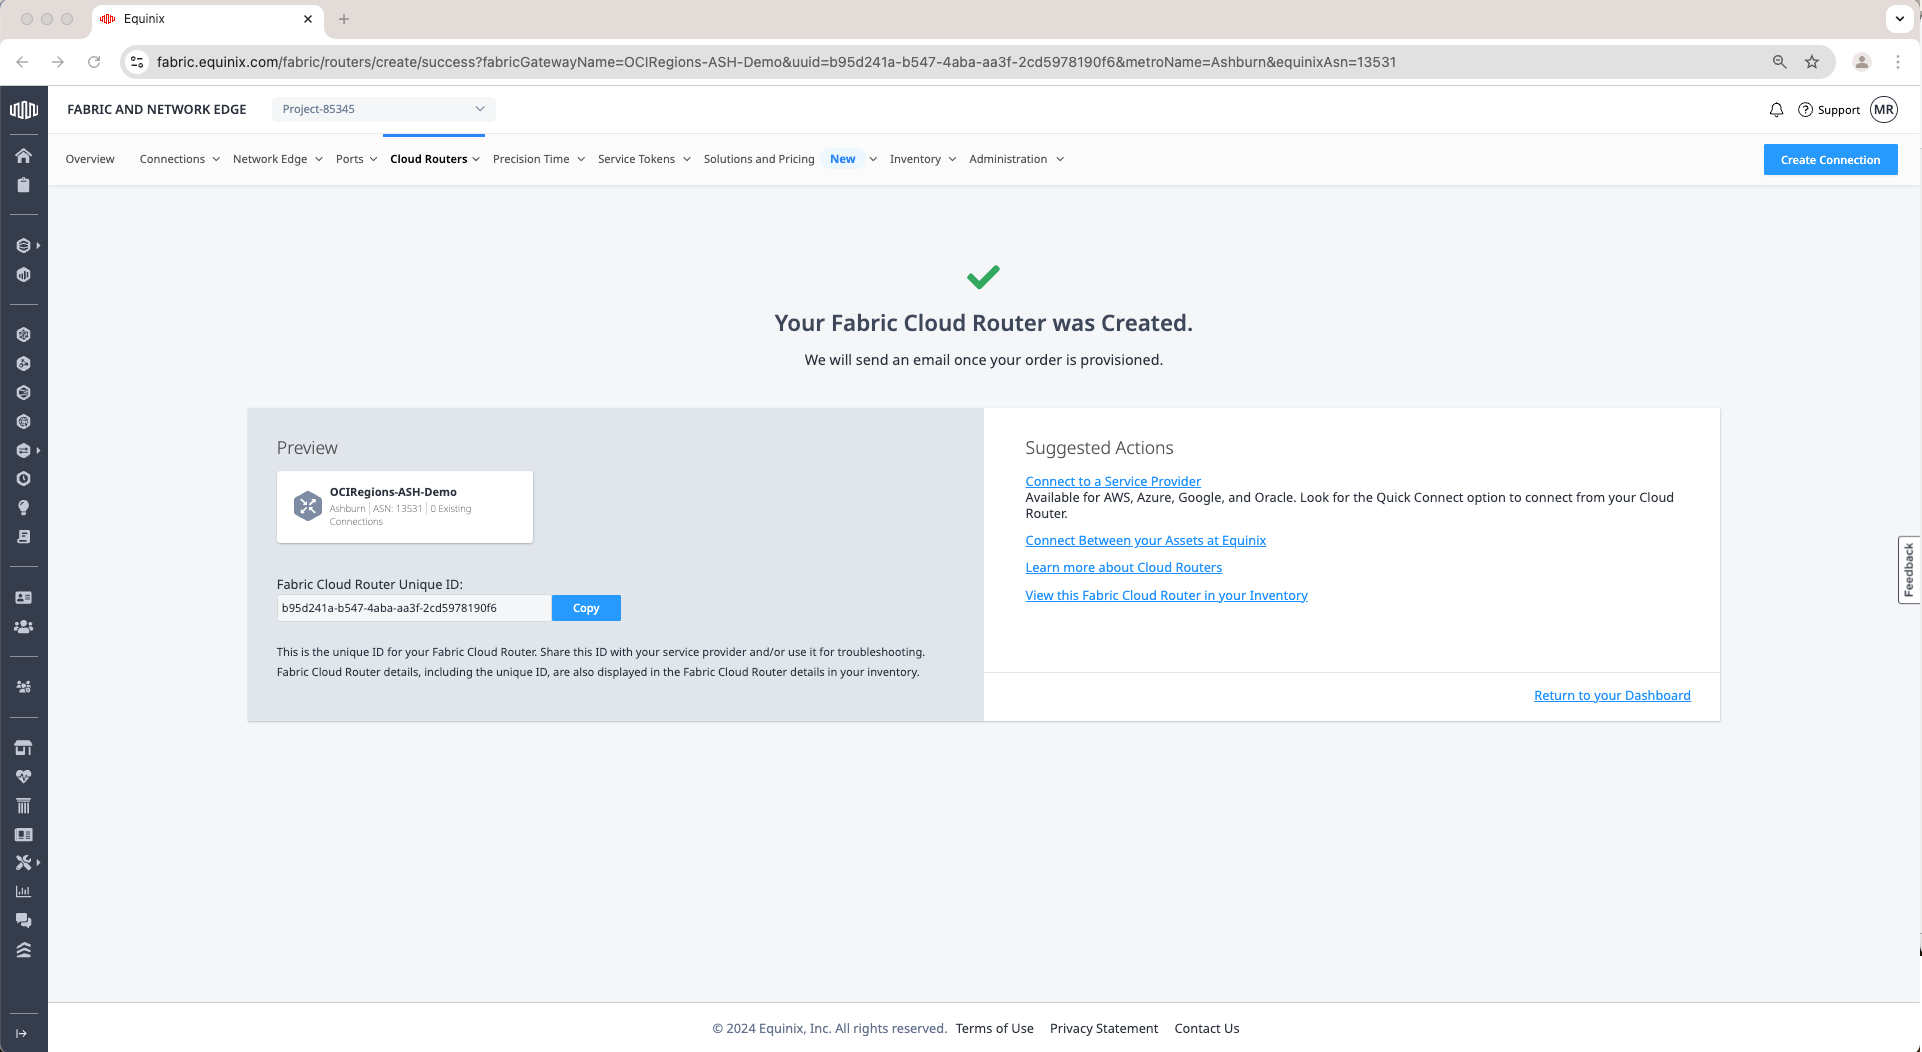
d. Review and Submit Order.

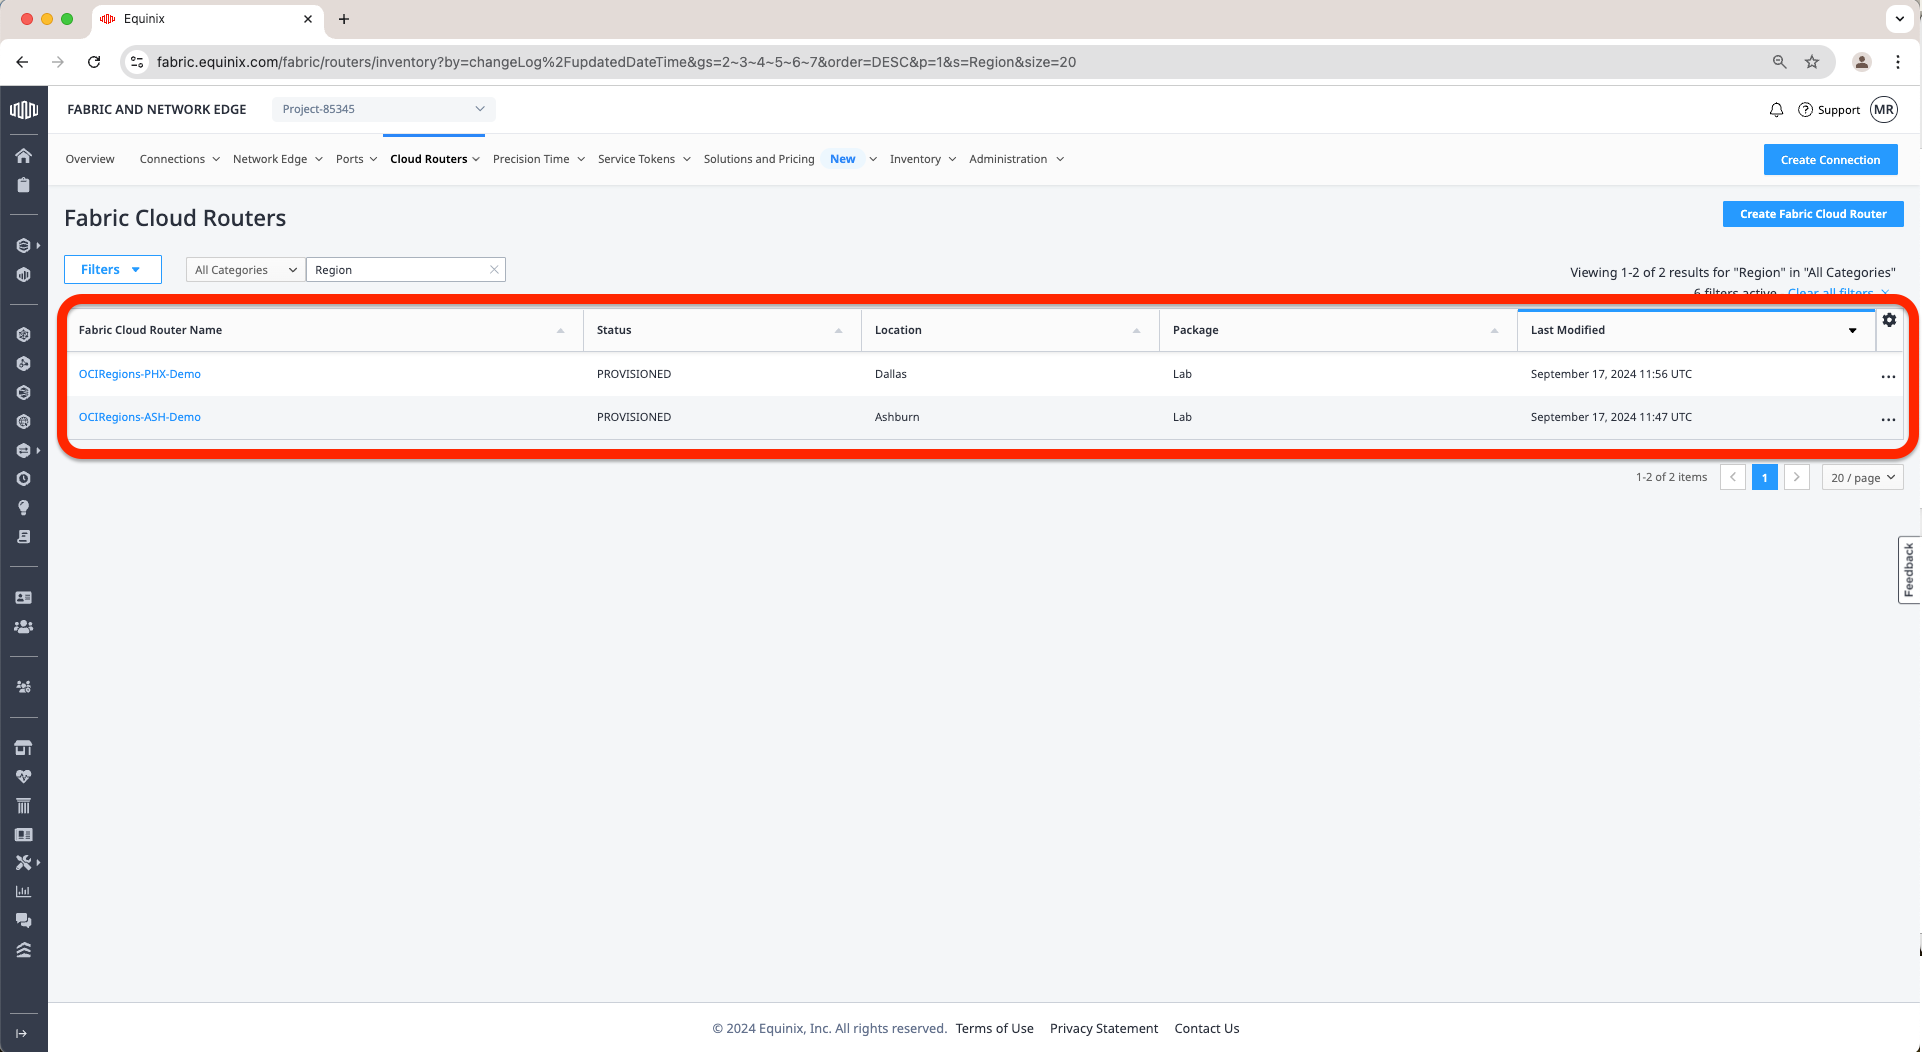
e. Once we have confirmation that the FCR was created, I will create a second FCR in the Phoenix region using the same steps from a to d.
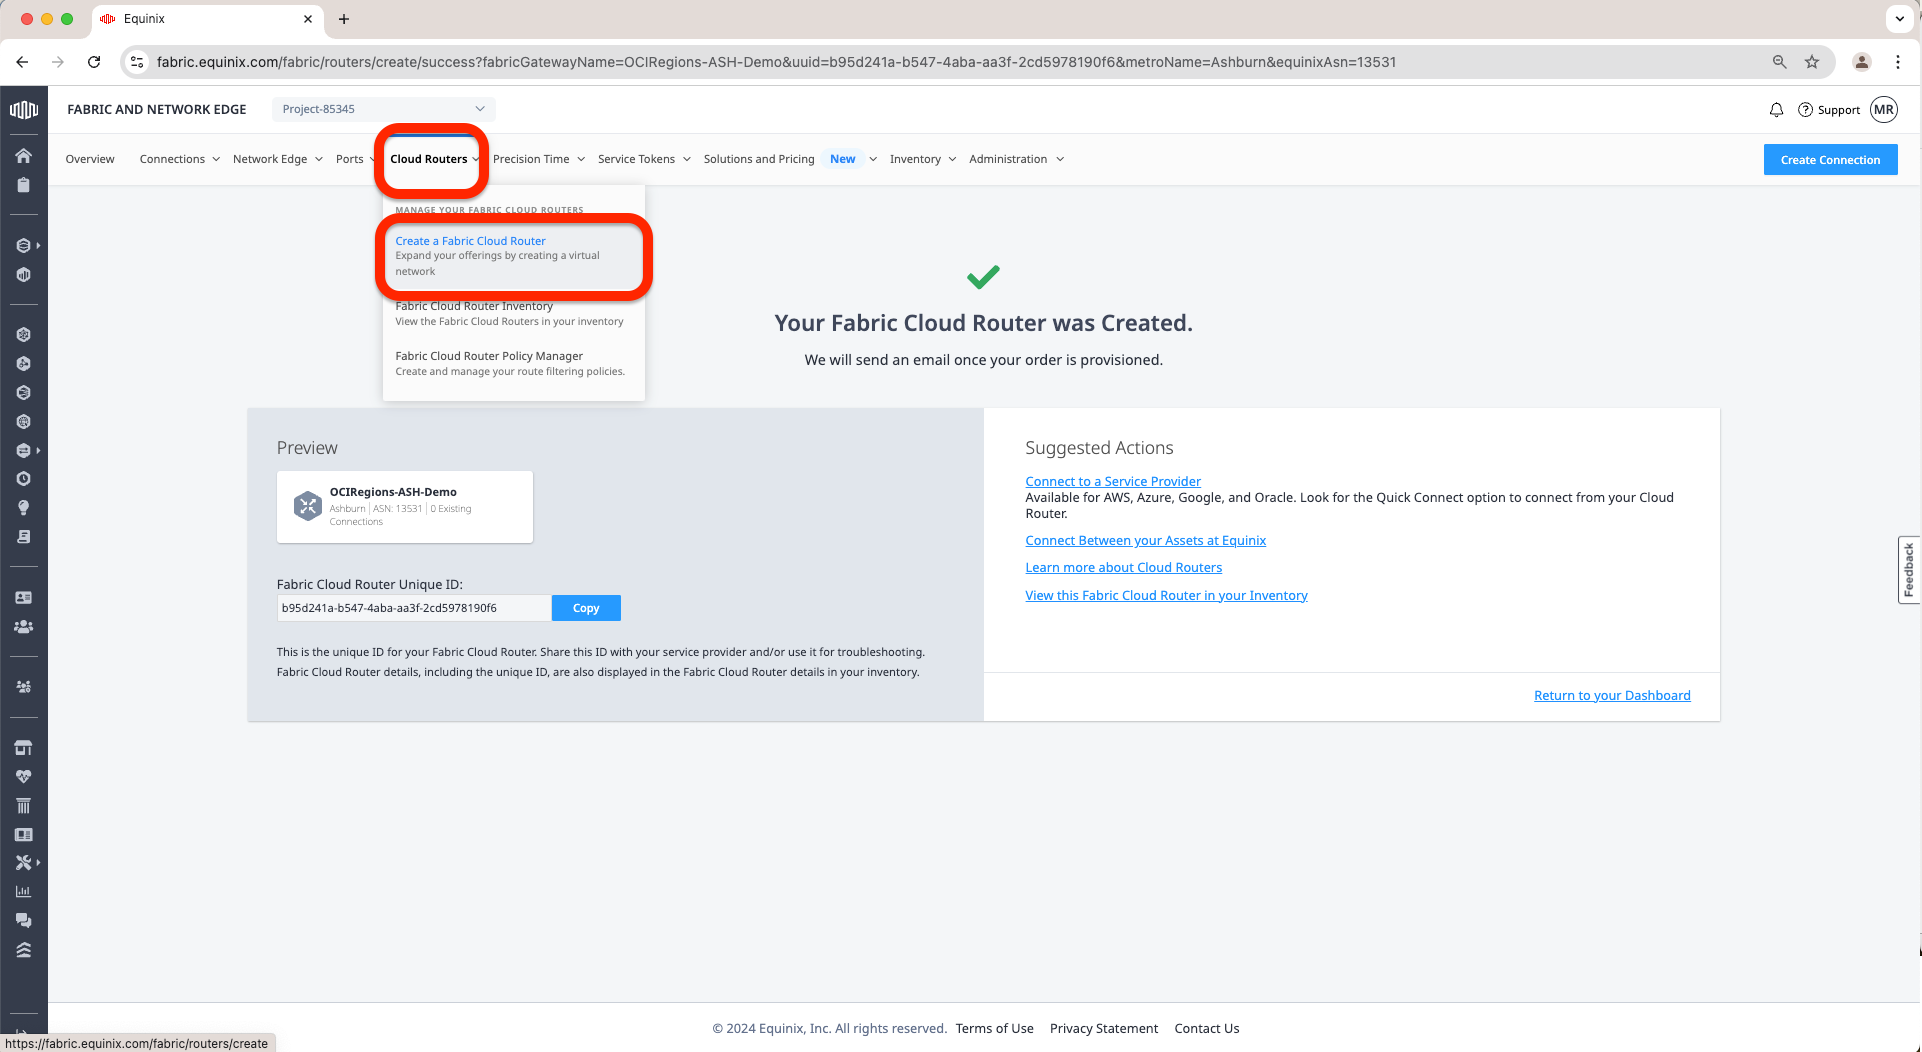

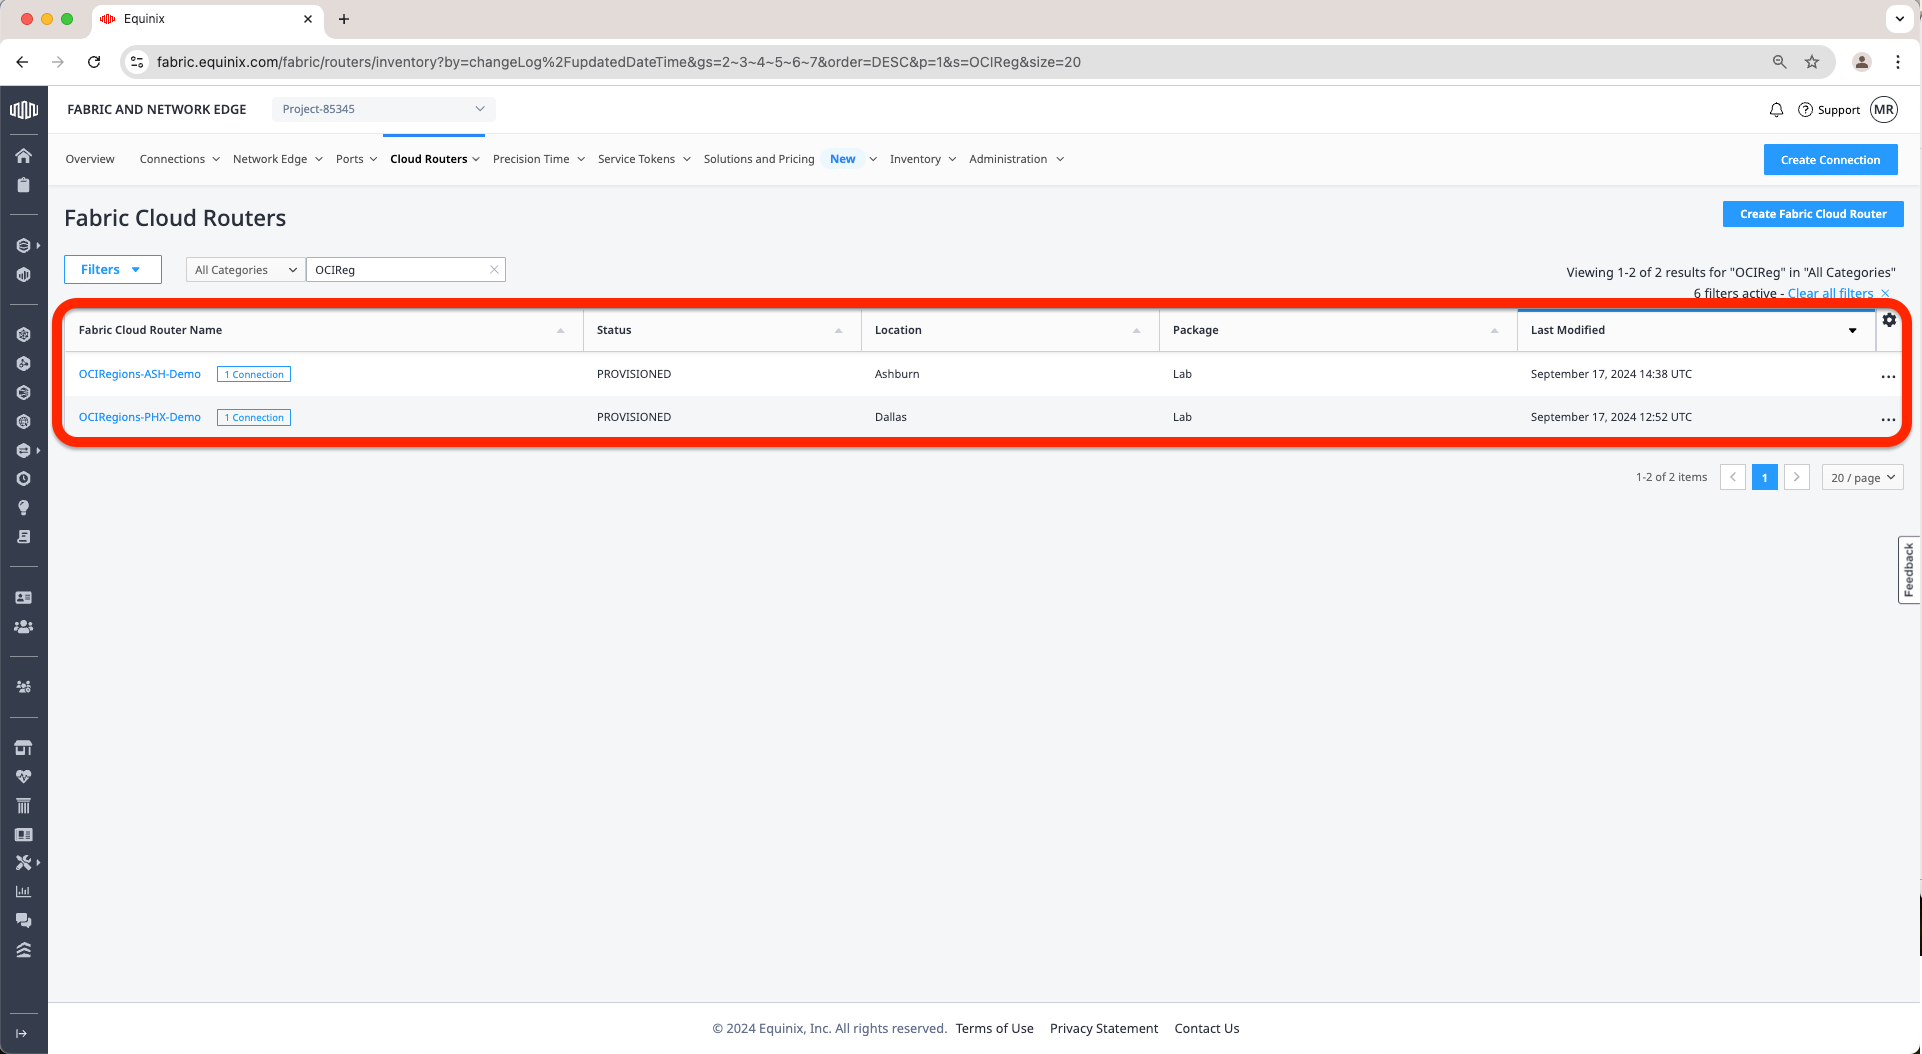
f. Once we have again the confirmation the second FCR was created we can go to Cloud Routers Tab and click on the Fabric Cloud Router Inventory.

g. On this page we should see the 2 FCRs we have created until now.
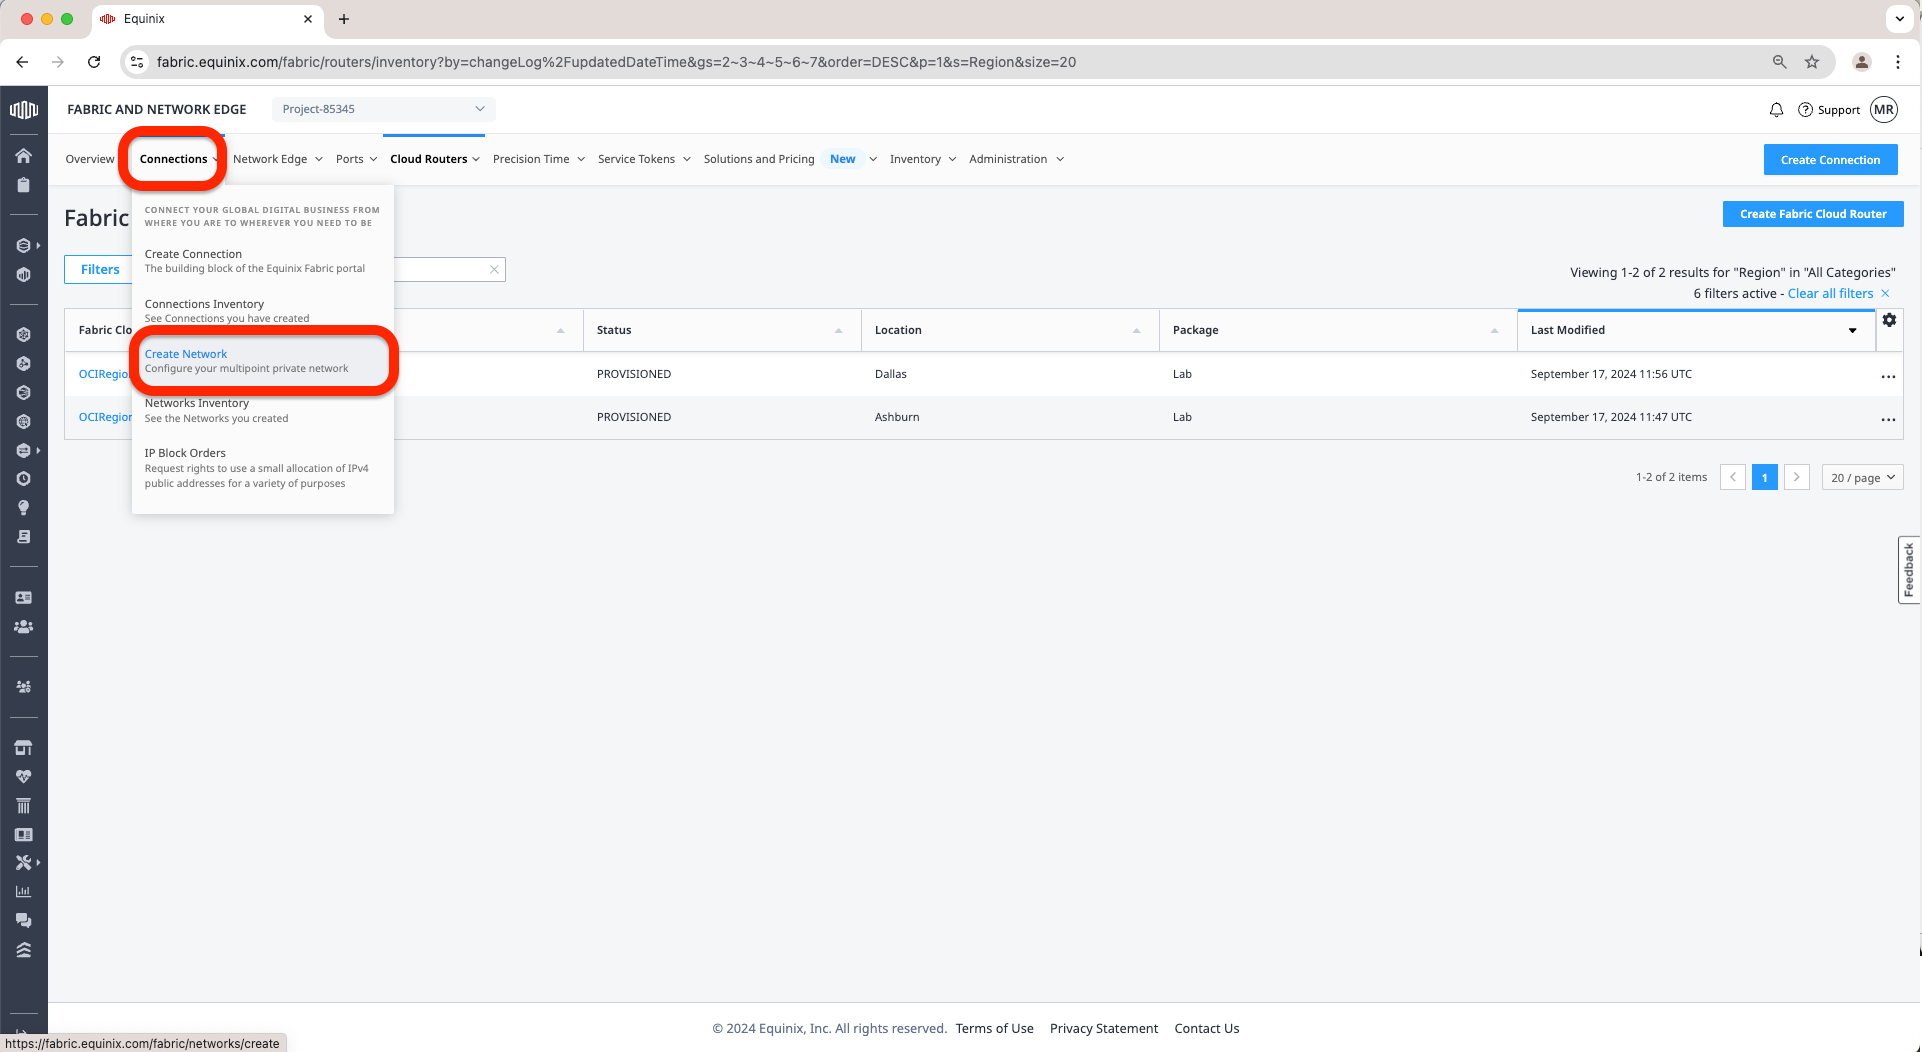
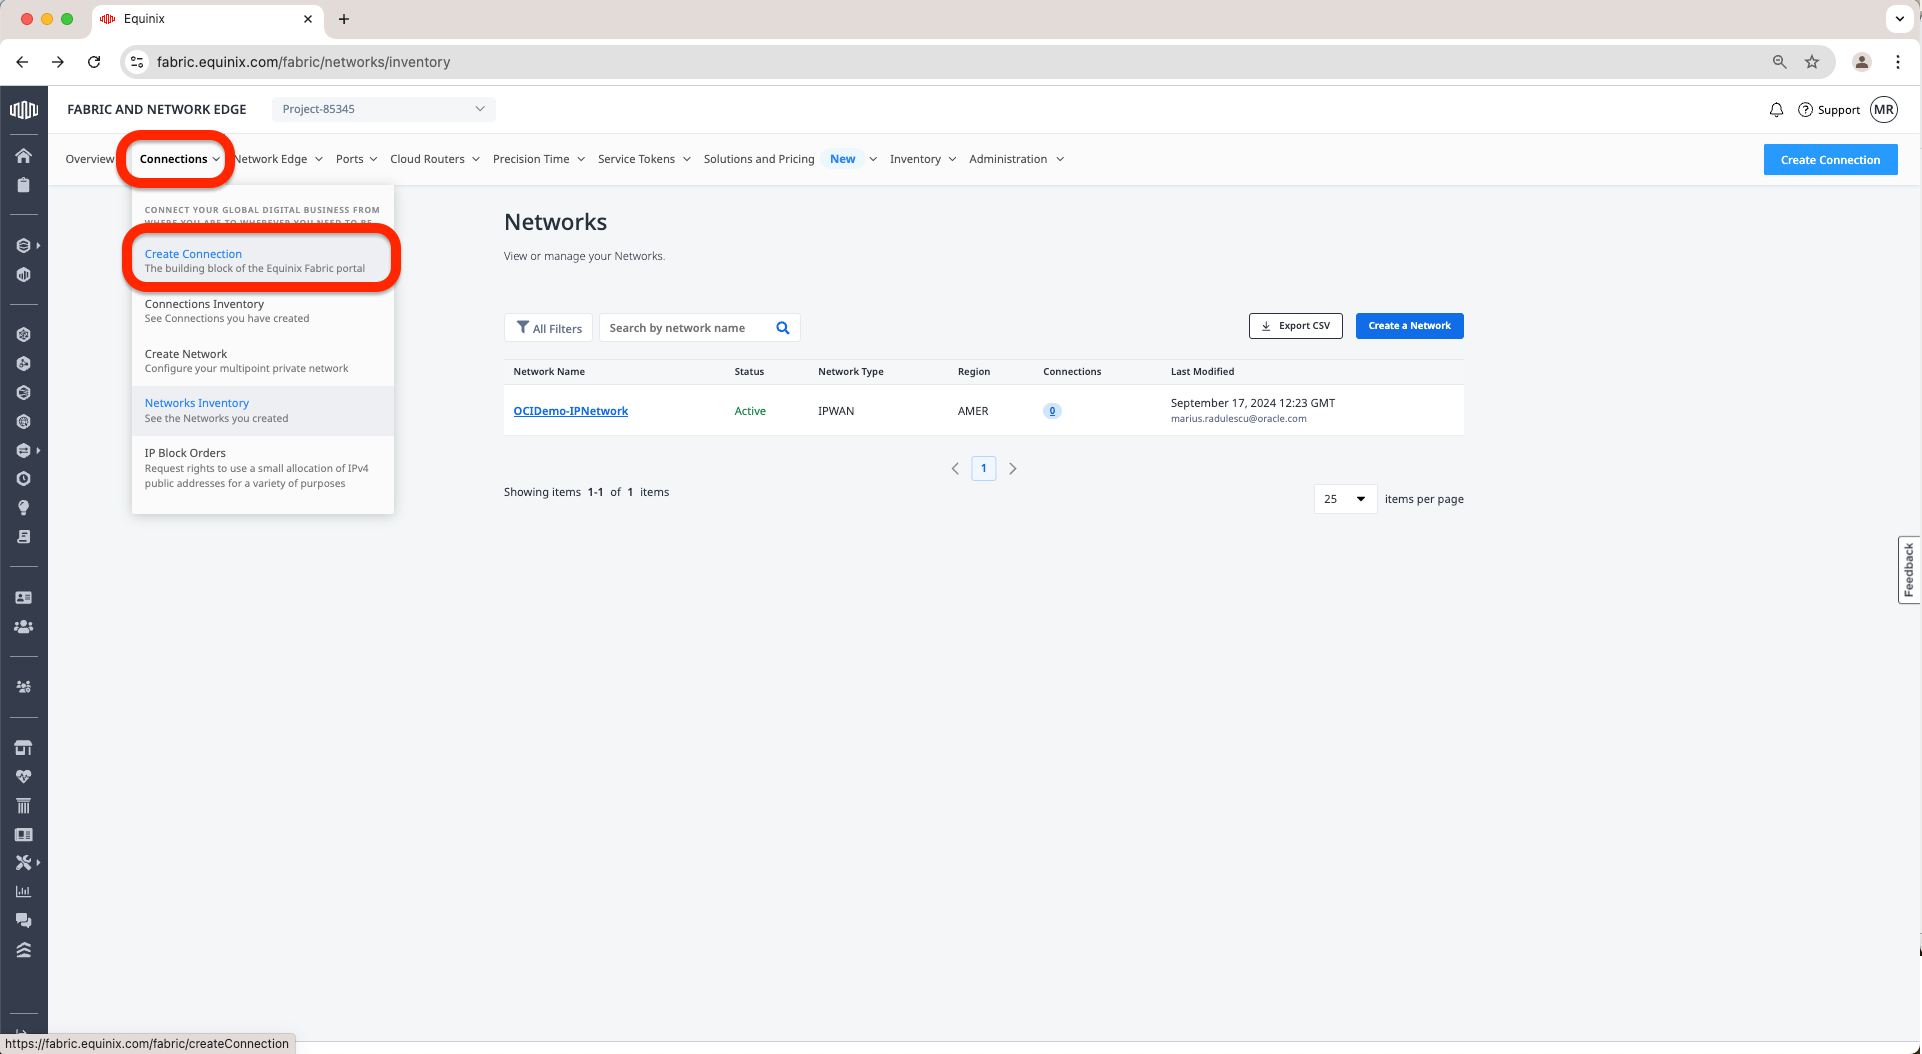
h. Next step is to create the IP-WAN network, and for that go to Connections Tab and click on Create Network.
i. On the first page I will select Next.
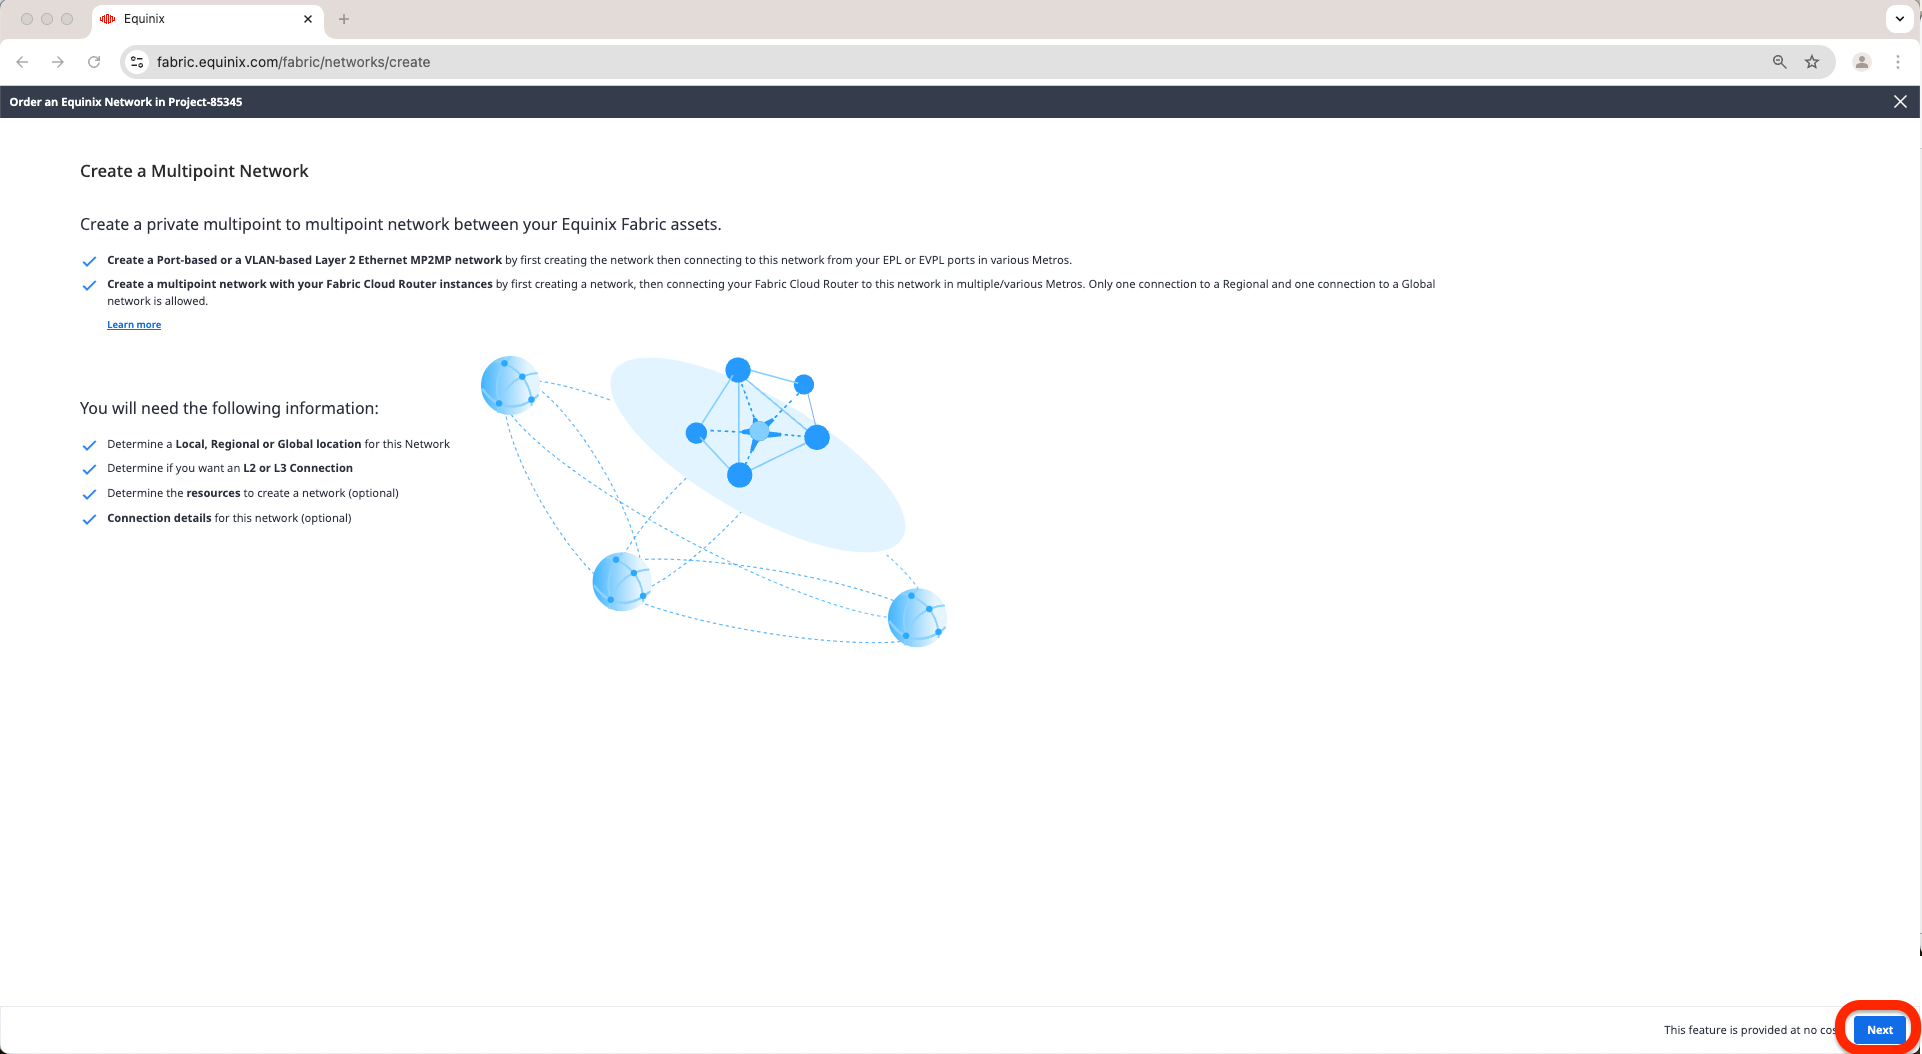
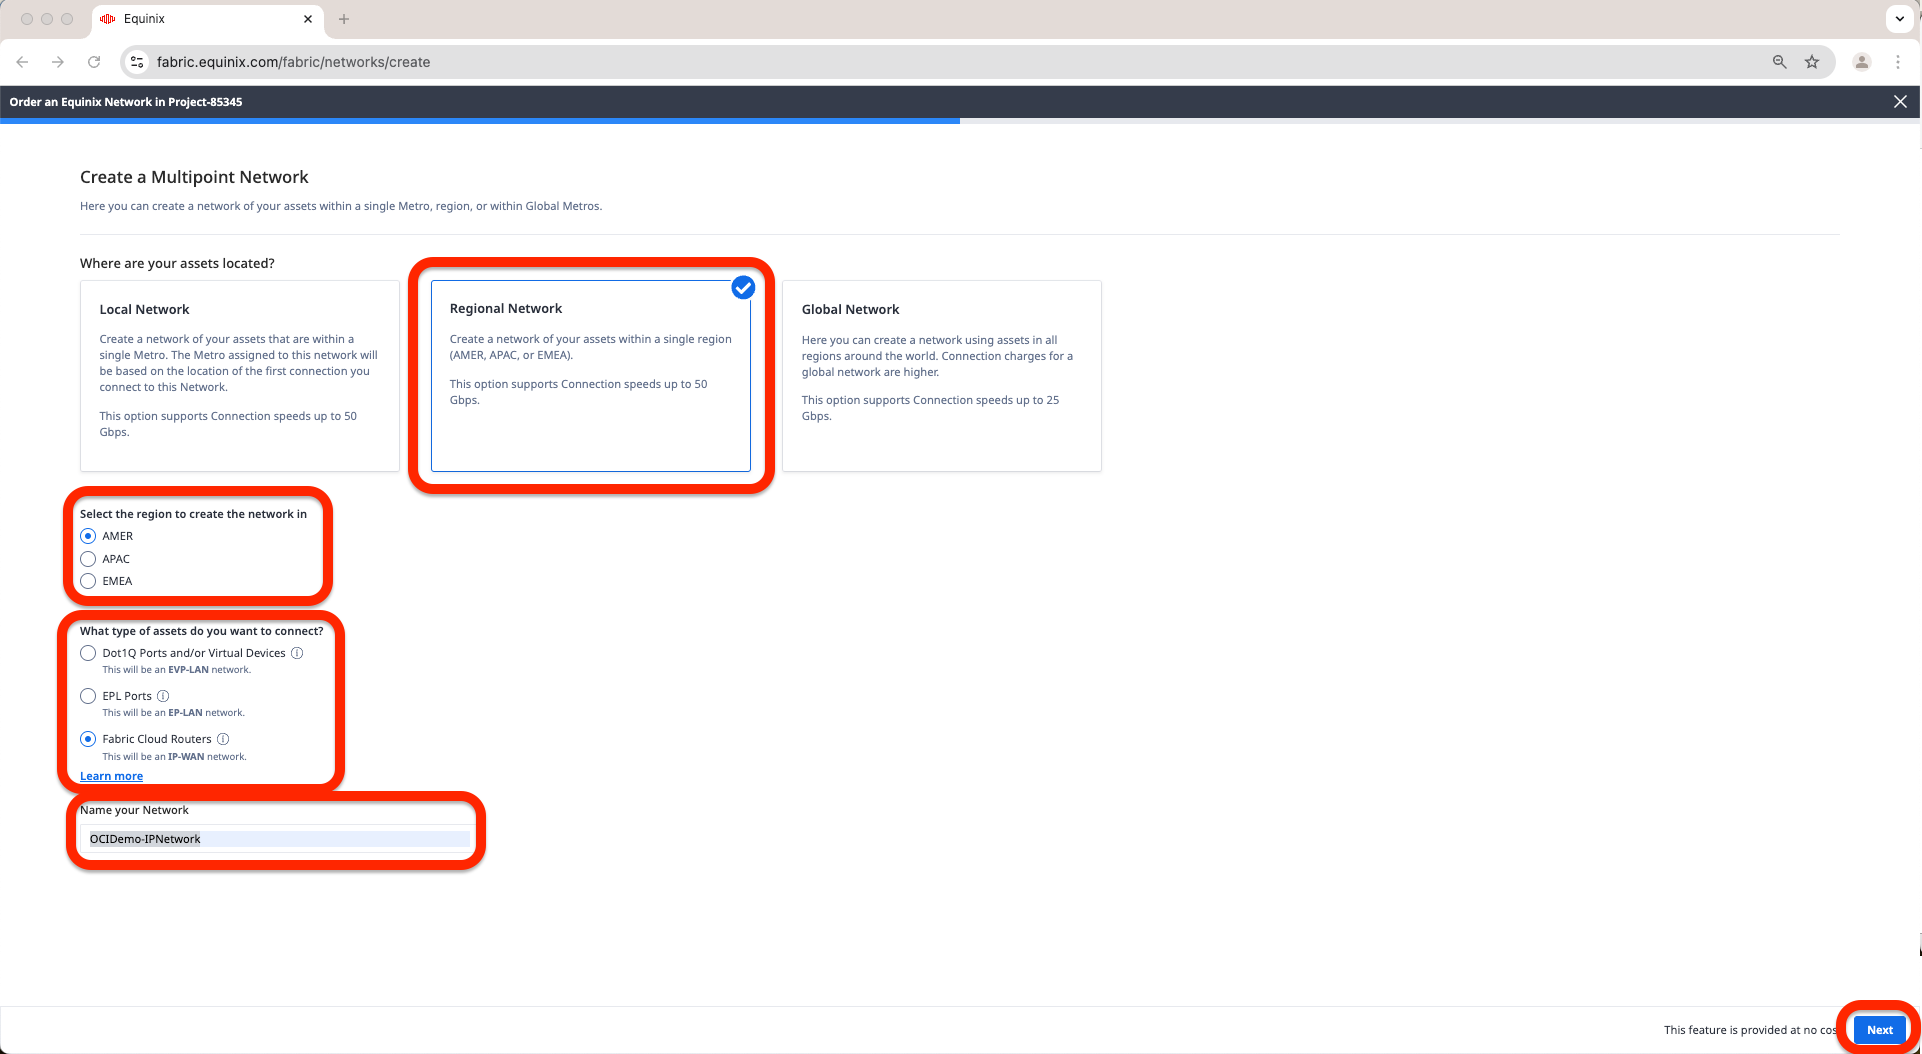
j. Now, select where the assets are located. In my case, I have chosen a Regional Network since my two FCRs are both located in the same Region. After I have selected the Region I want to create the Network. In my case, I have selected AMER. Finally, choose the type of Network. In my case, I have selected Fabric Cloud Routers. Provided a Name for the Network. In my case, I have chosen OCIDemo-IPNetwork. Click Next.
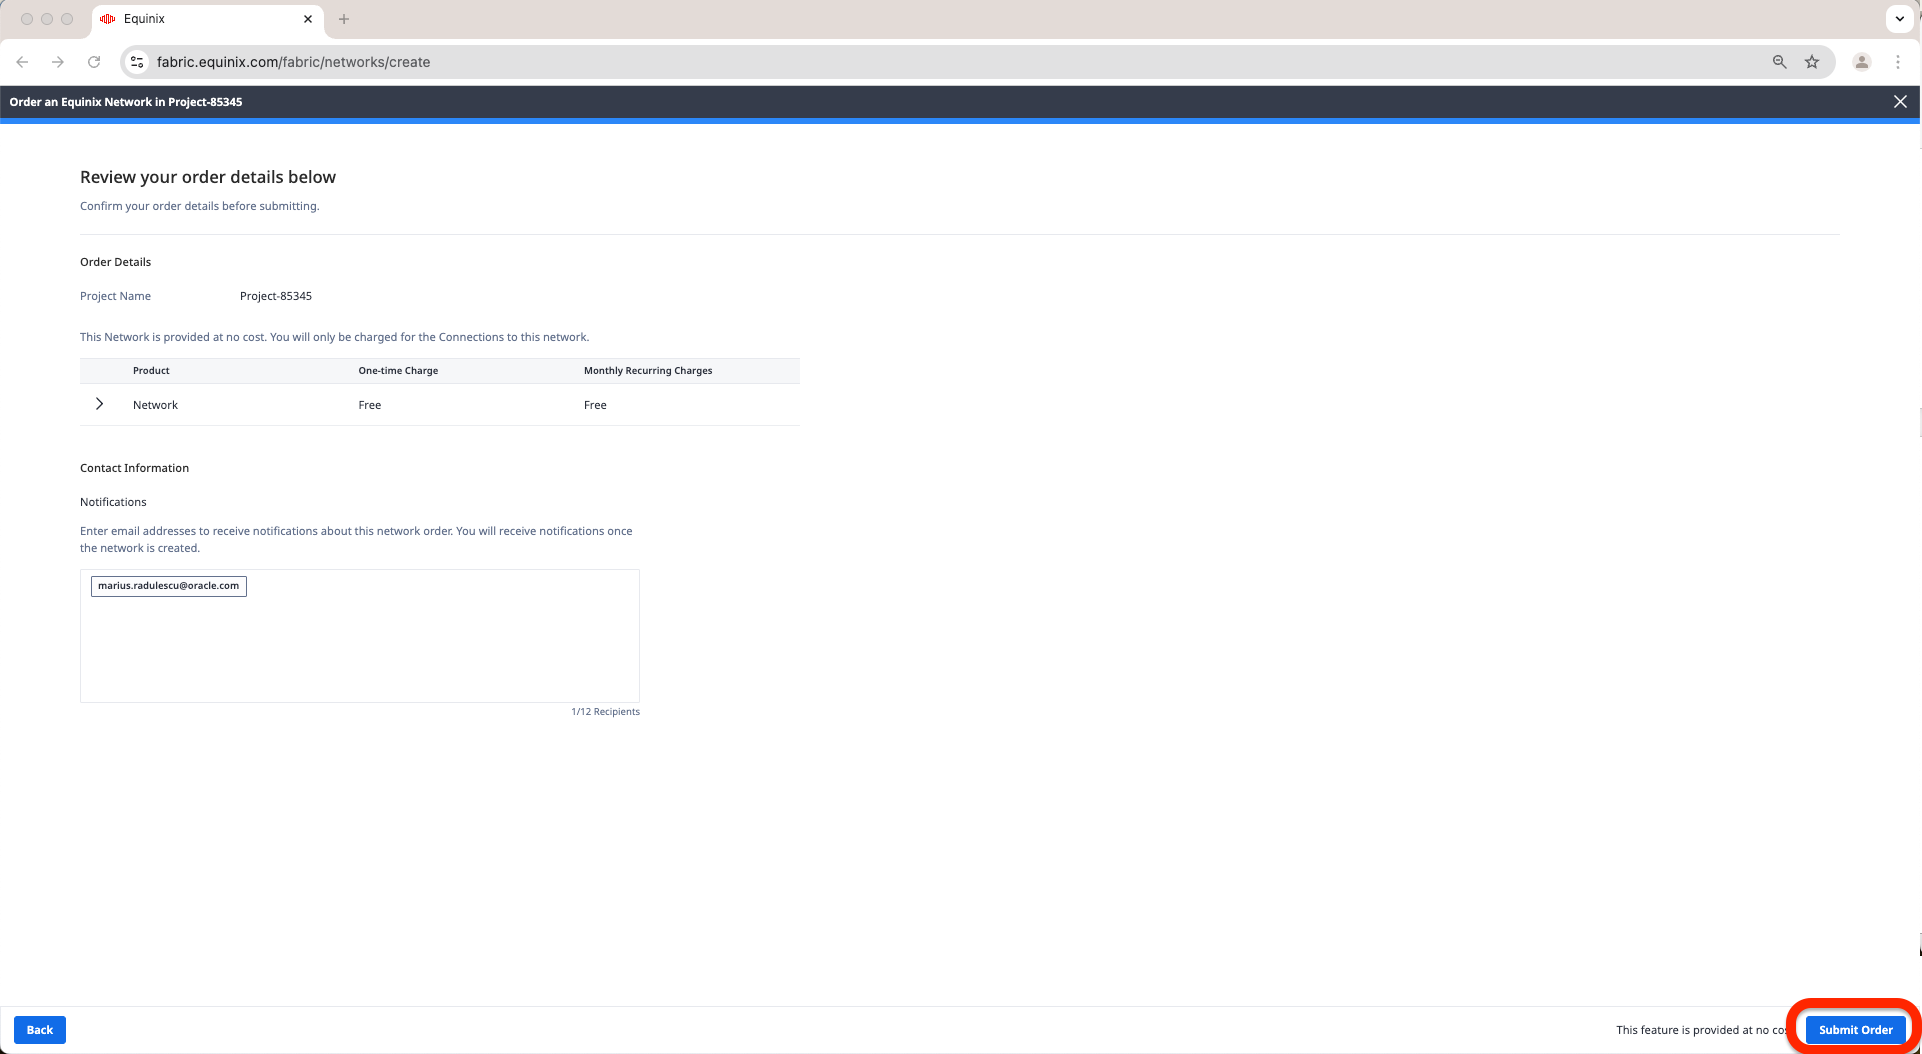
k. Review and Submit Order.
l. Once the confirmation that the order is submitted you can click on View this Network in your Inventory to check the network is there.
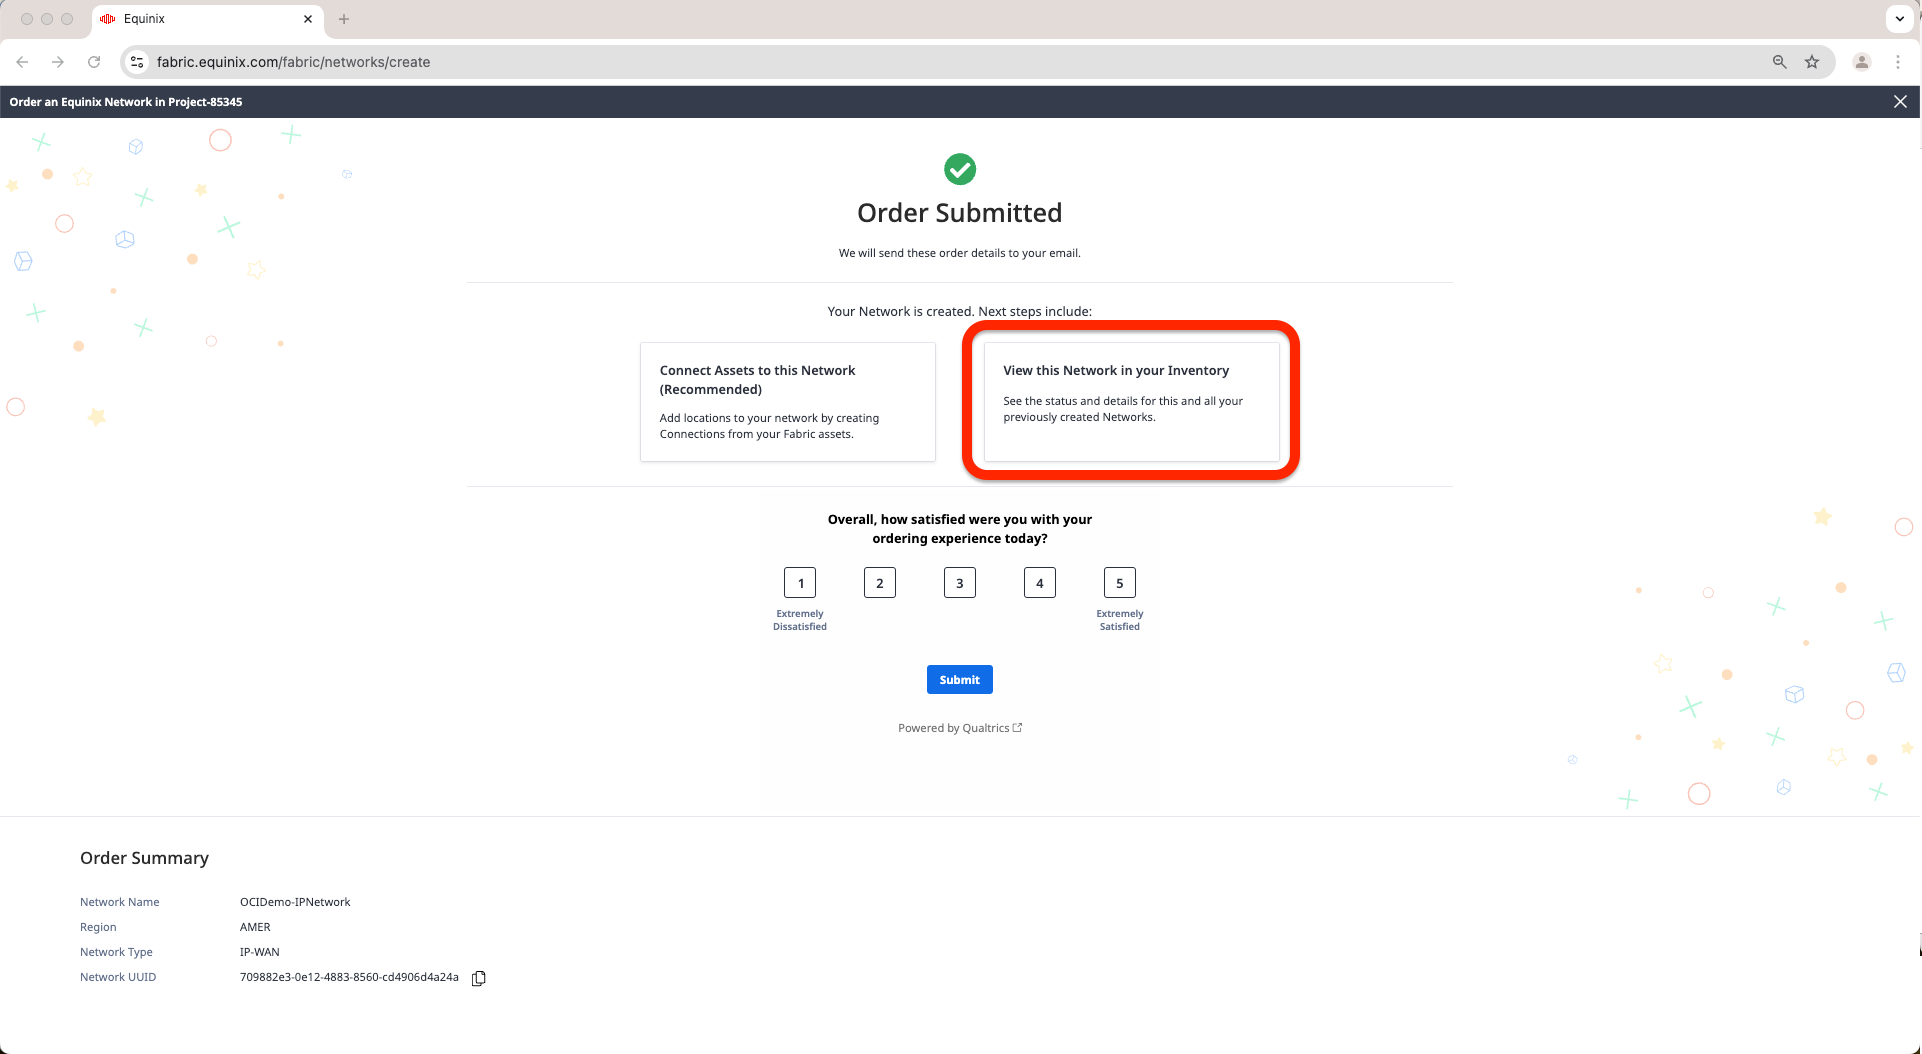
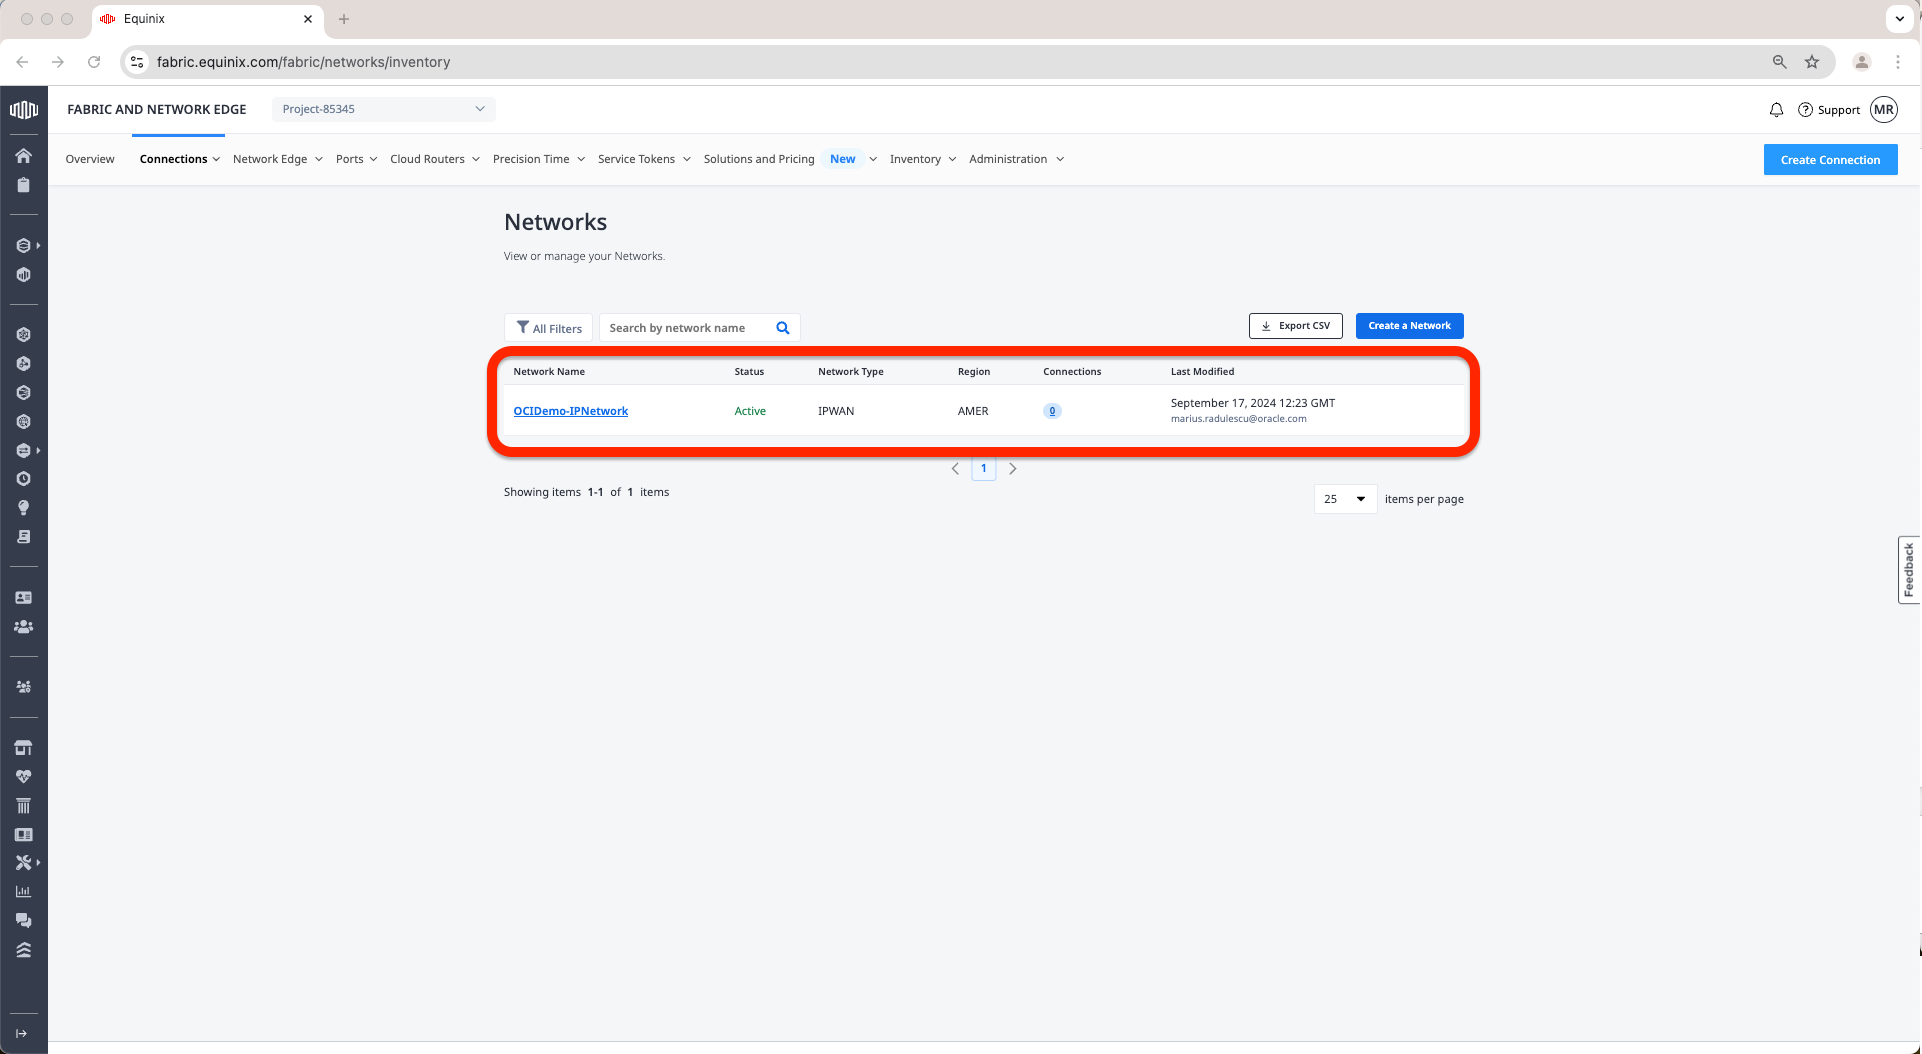
m. At this point, we should see the network as Active.
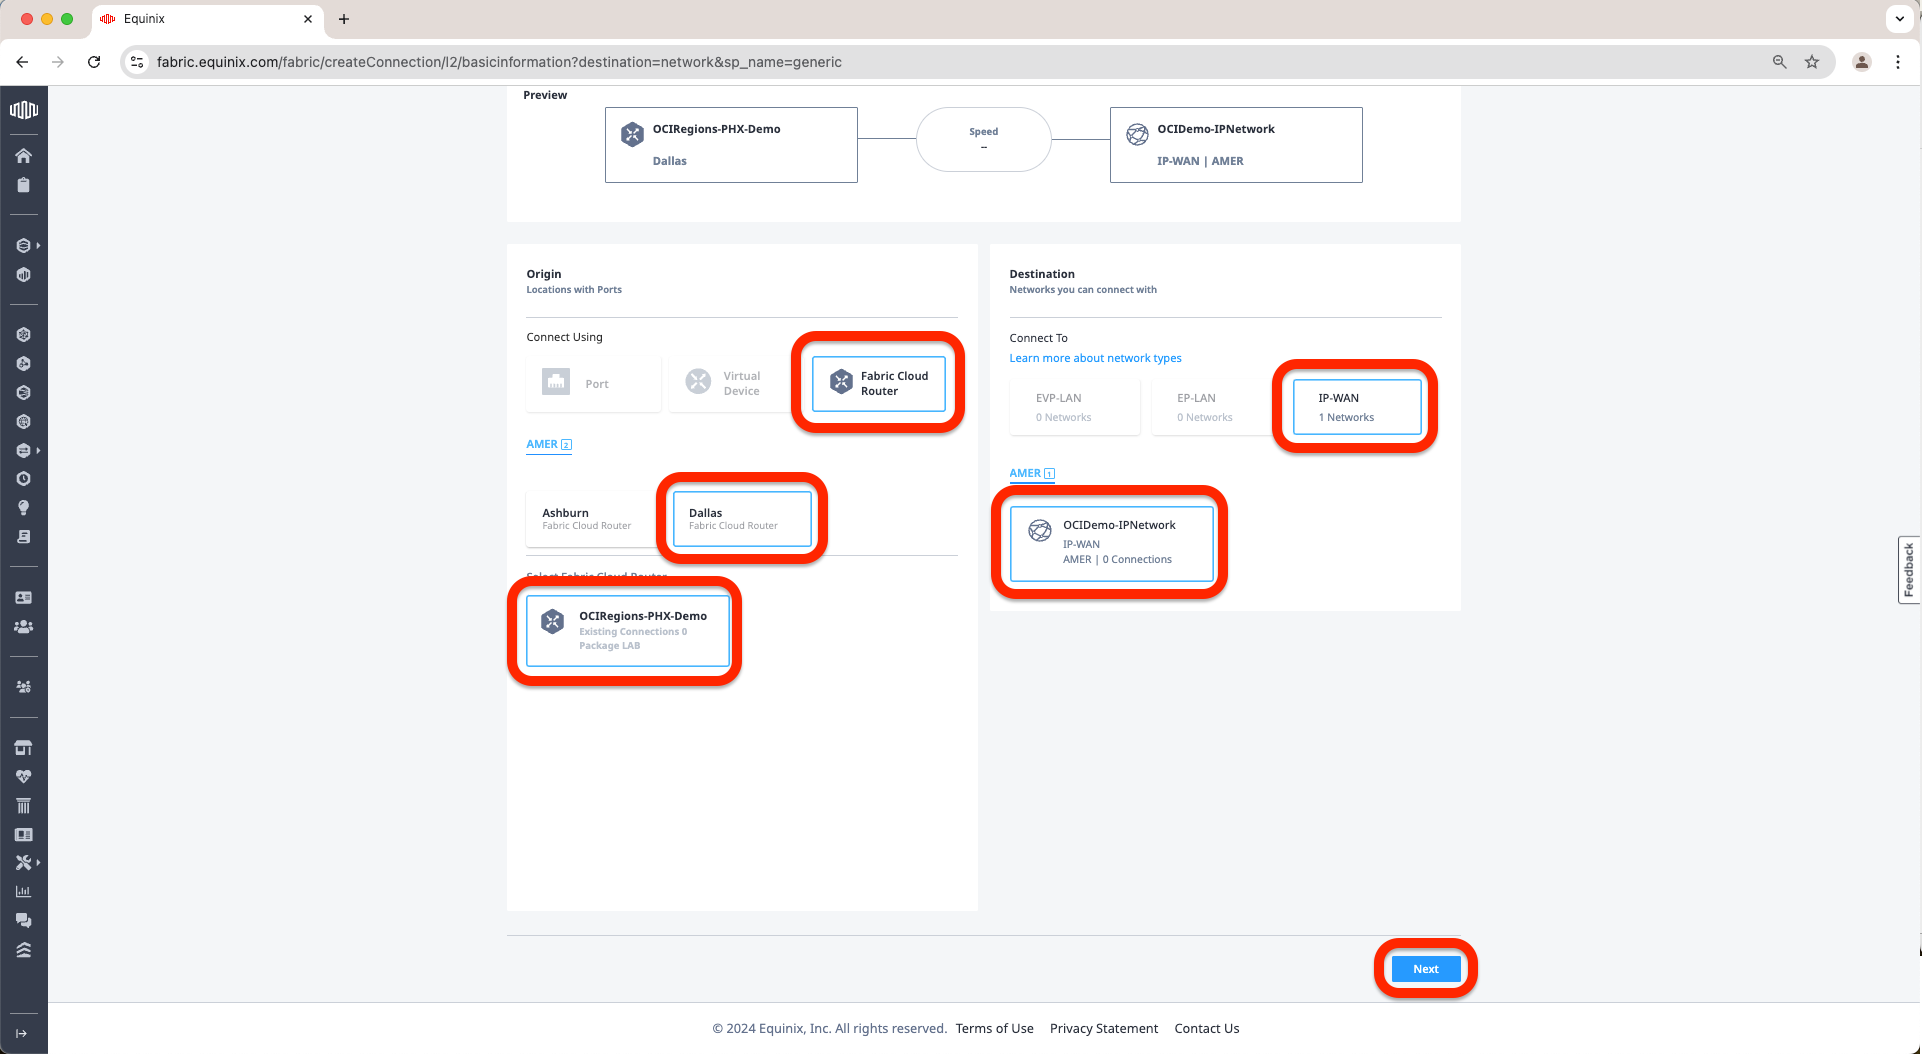
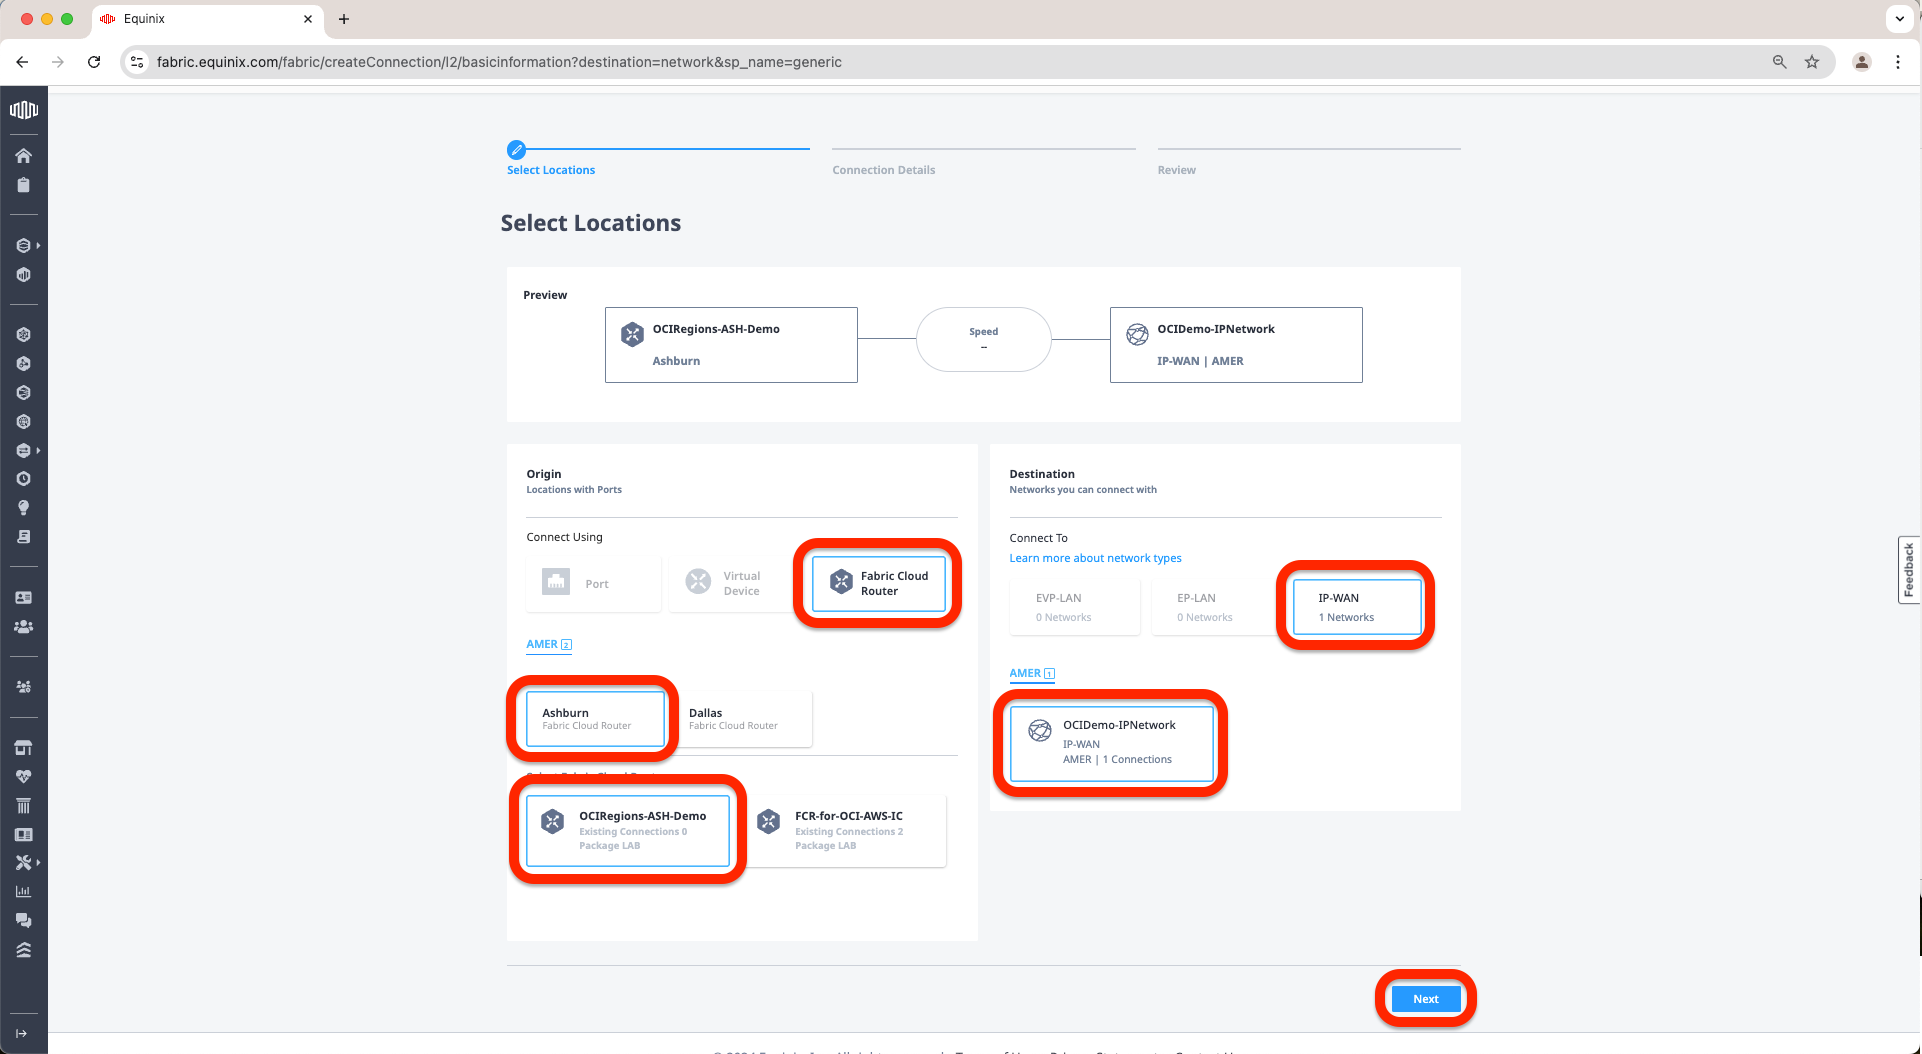
n. Now is time to connect the 2 FCRs we have created earlier to this IP-WAN Network, For this go to Connections tab and click on Create Connection.
o. Select My own Assets and click Create Connection under Connect to a Network.

p. Under Origin Port select Fabric Cloud Router, one of the two Locations we have selected when we configured the FCRs earlier, in my case I have selected Dallas. Select the FCR we created earlier. Now move under Network and select IP-WAN and select the network we have created earlier. Click Next.
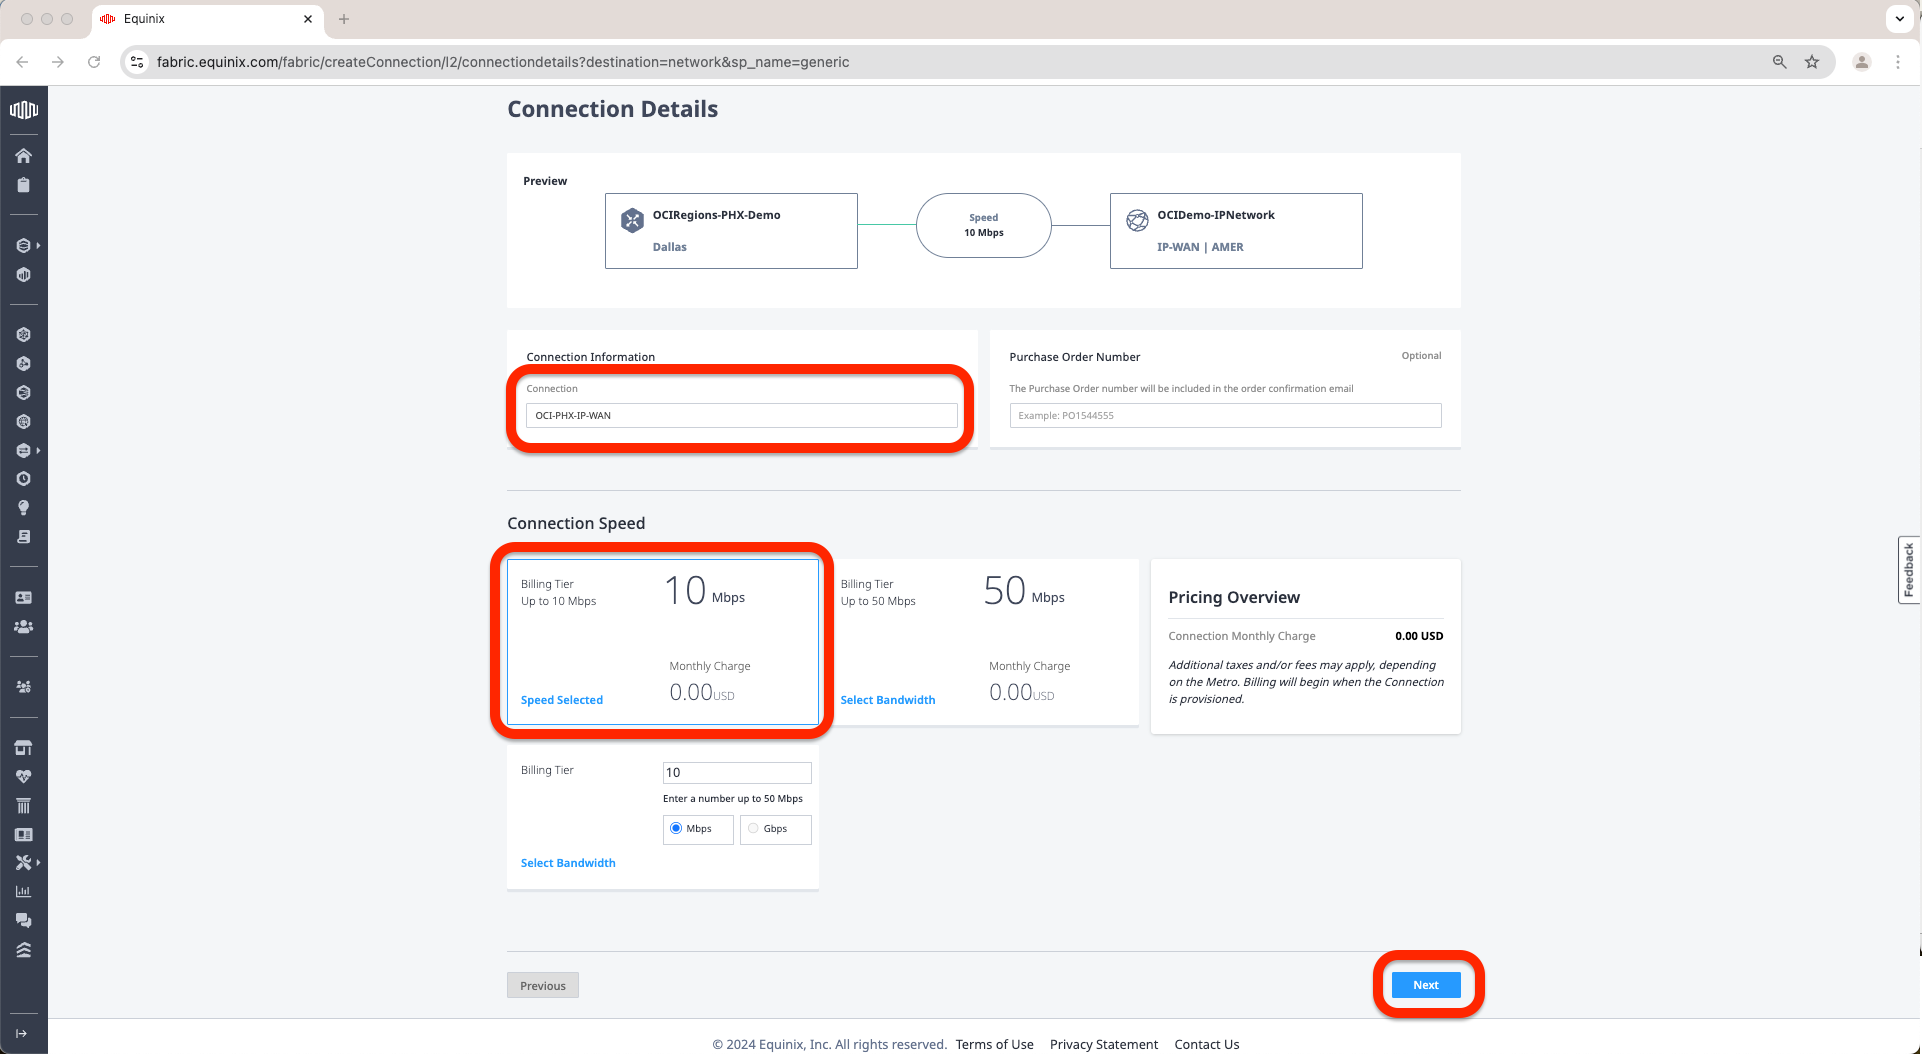
q. Now give the connection a name. In my case I have used OCI-PHX-IP-WAN. Select a connection speed as needed. In my case I have selected 10mbps. Click Next.
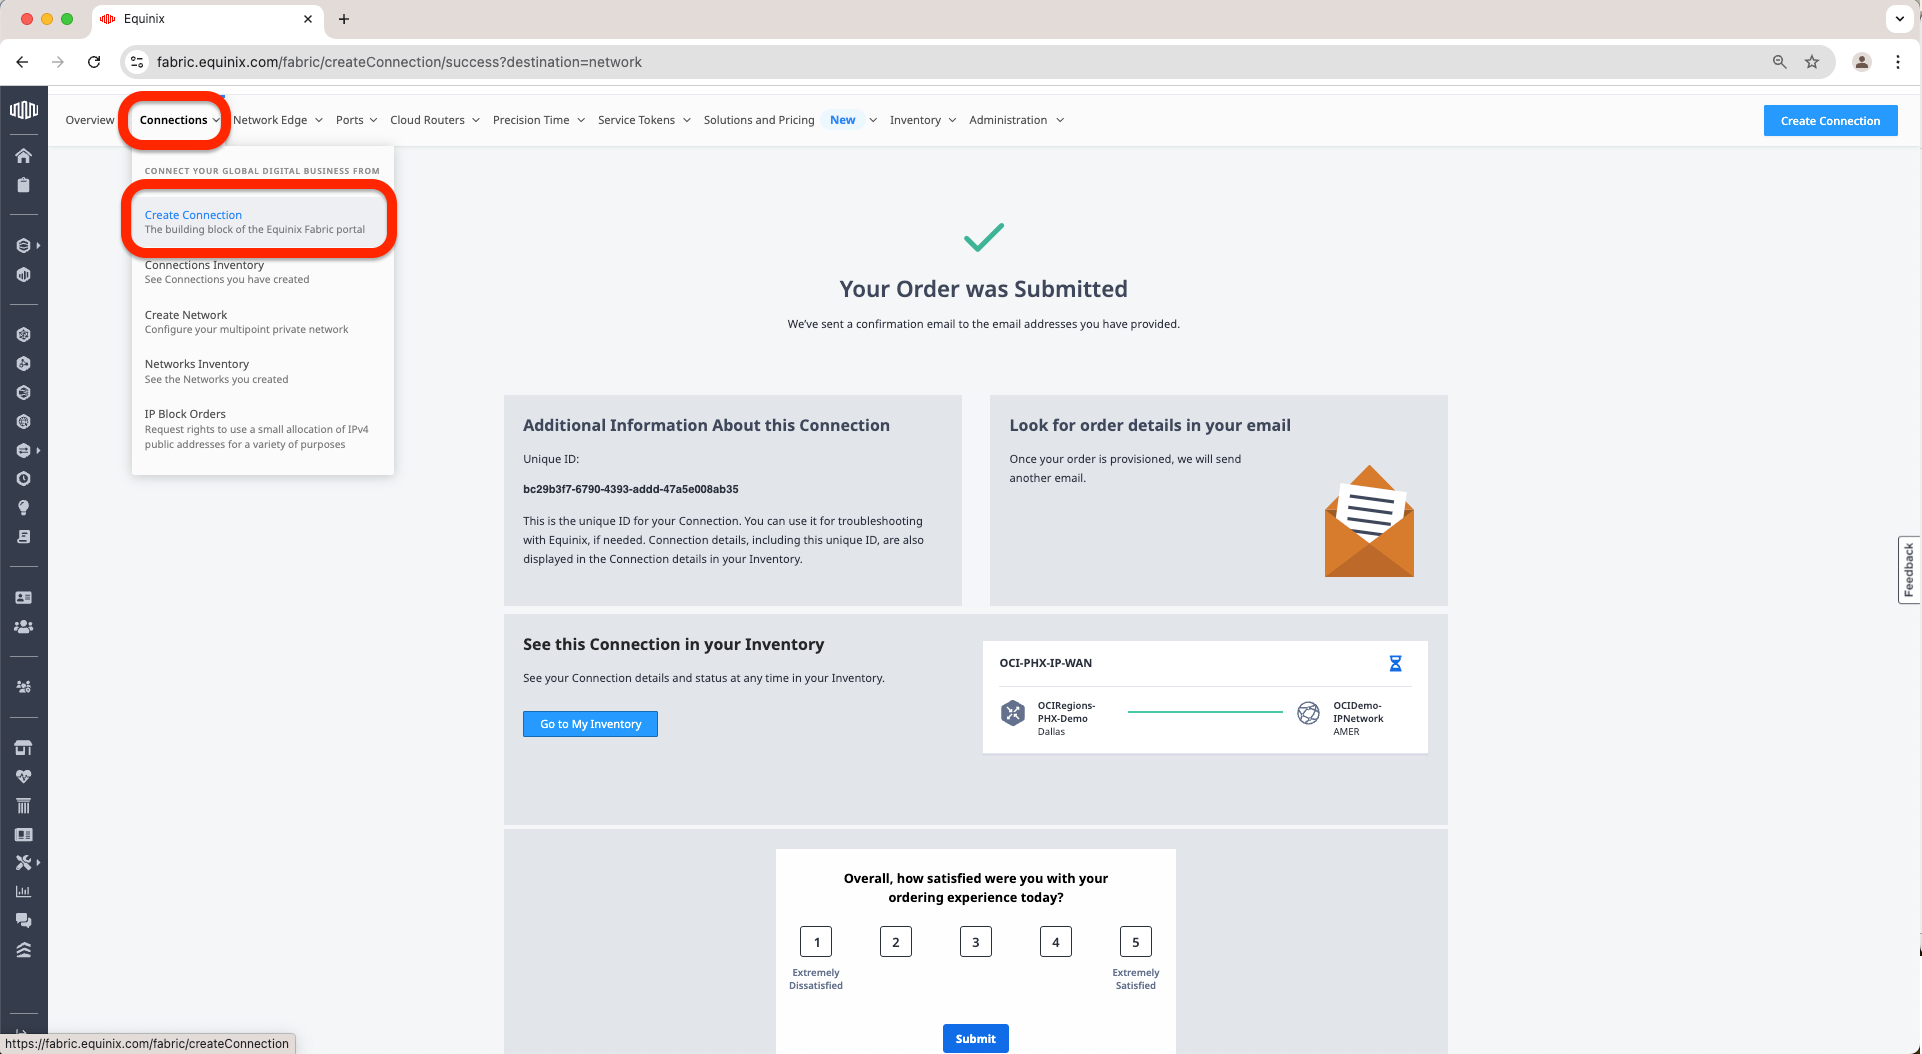
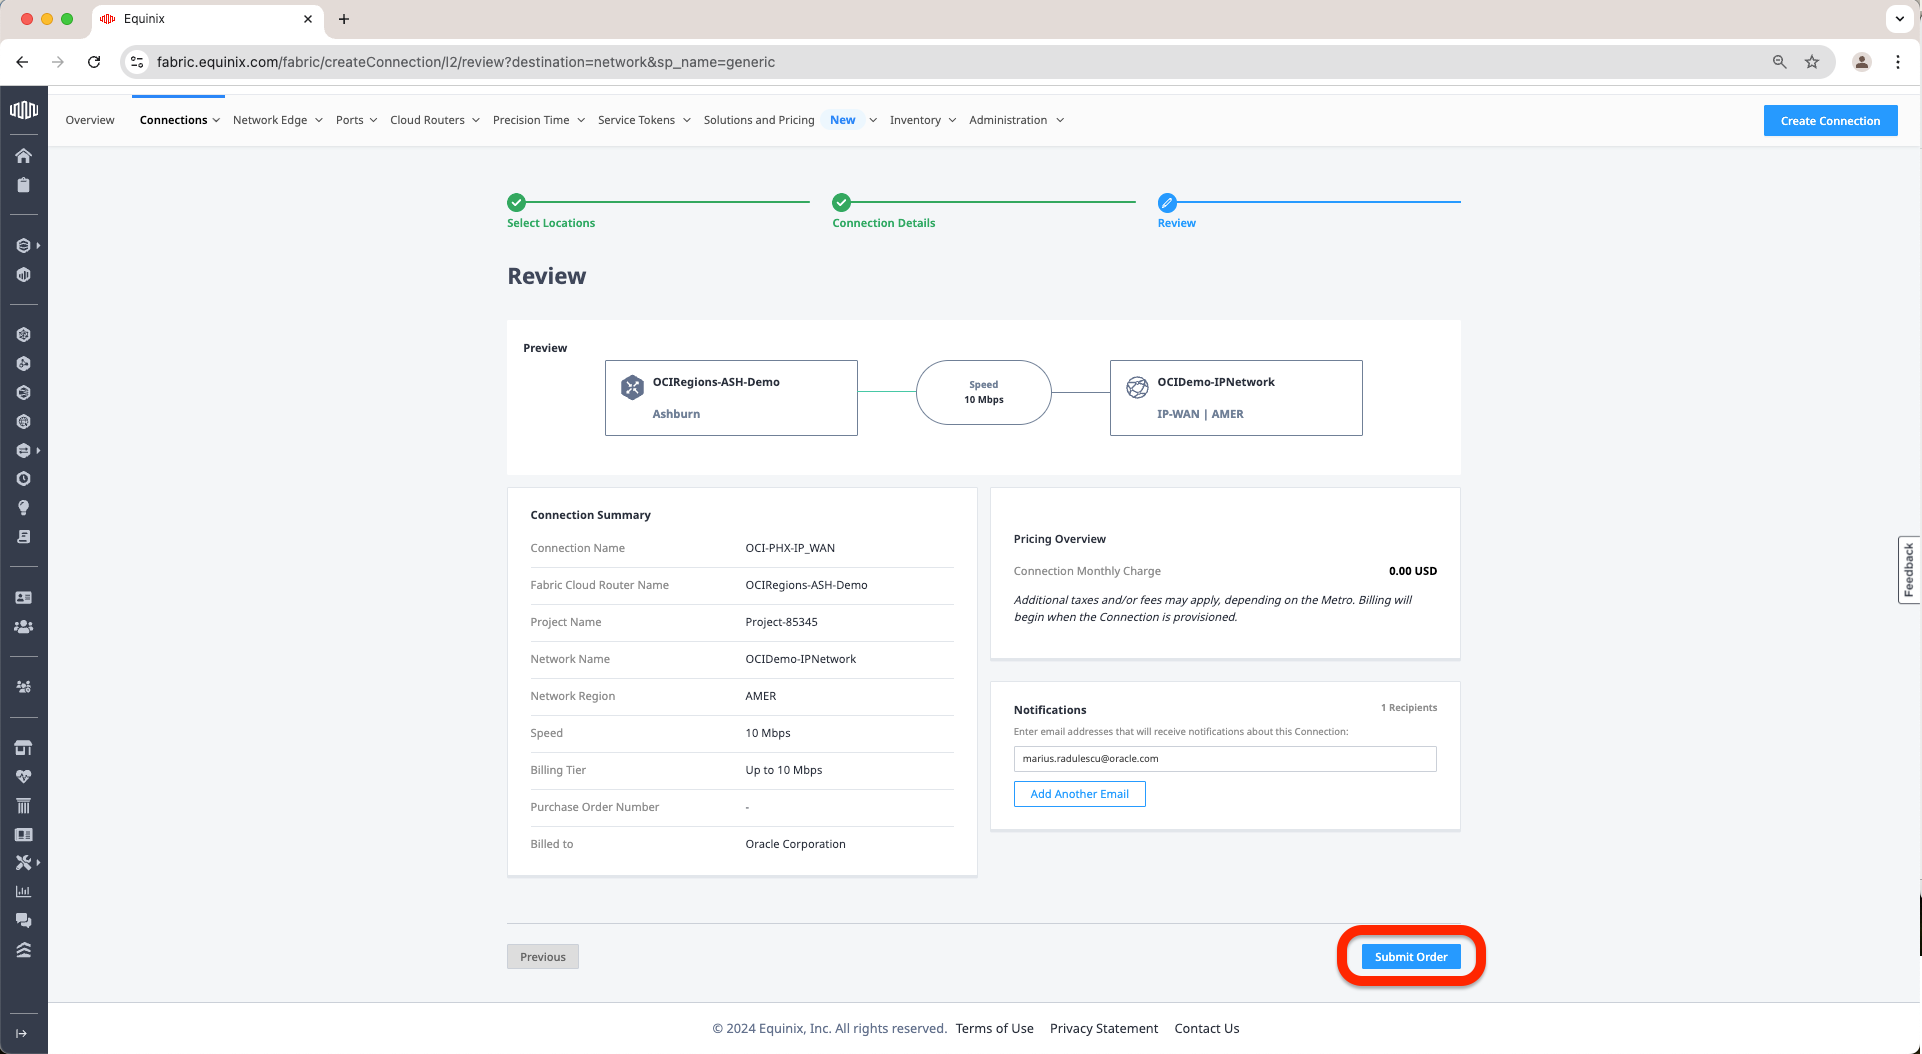
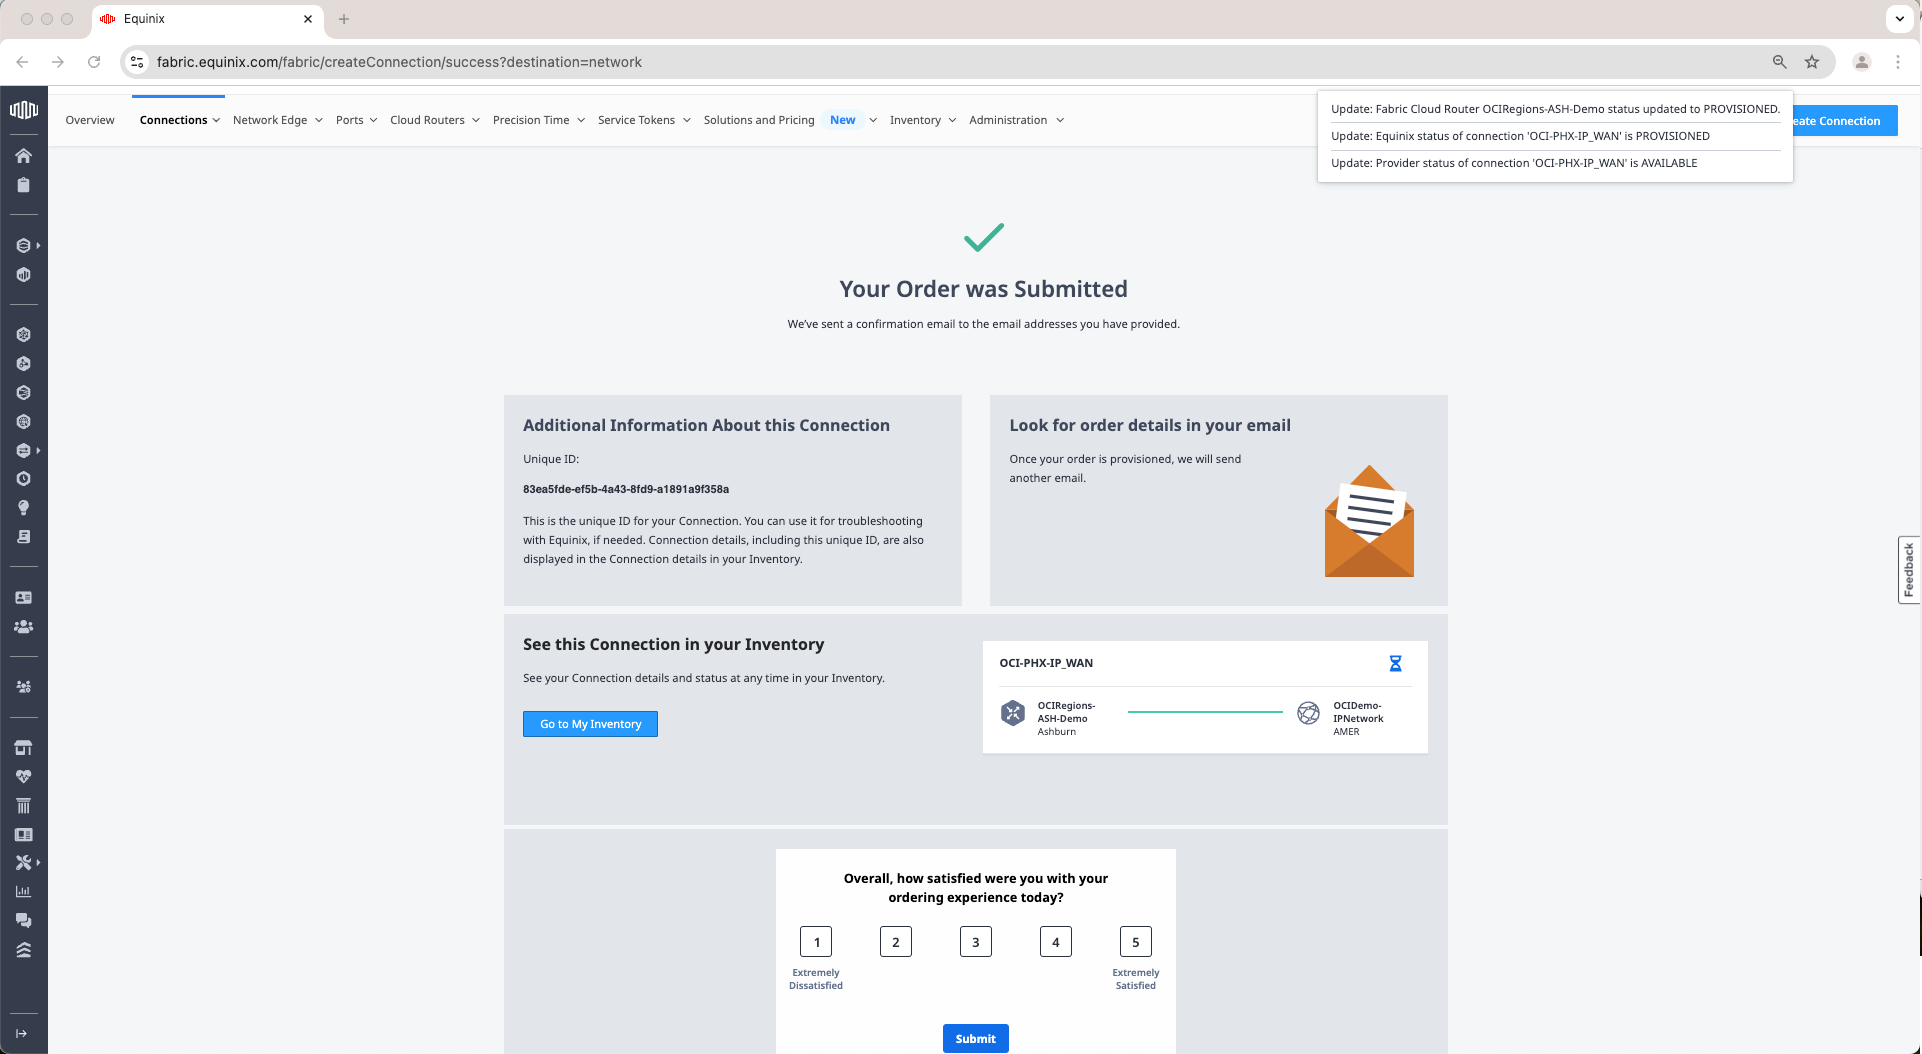
r. Review and Submit Order.

s. Finaly created a connection from the Ashburn FCR to the IP-WAN Network using steps n to r from this blog.

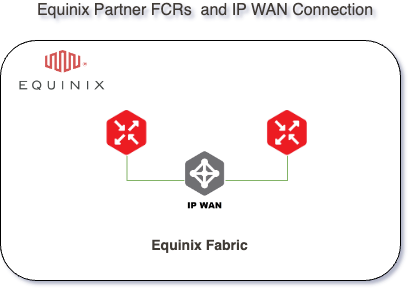
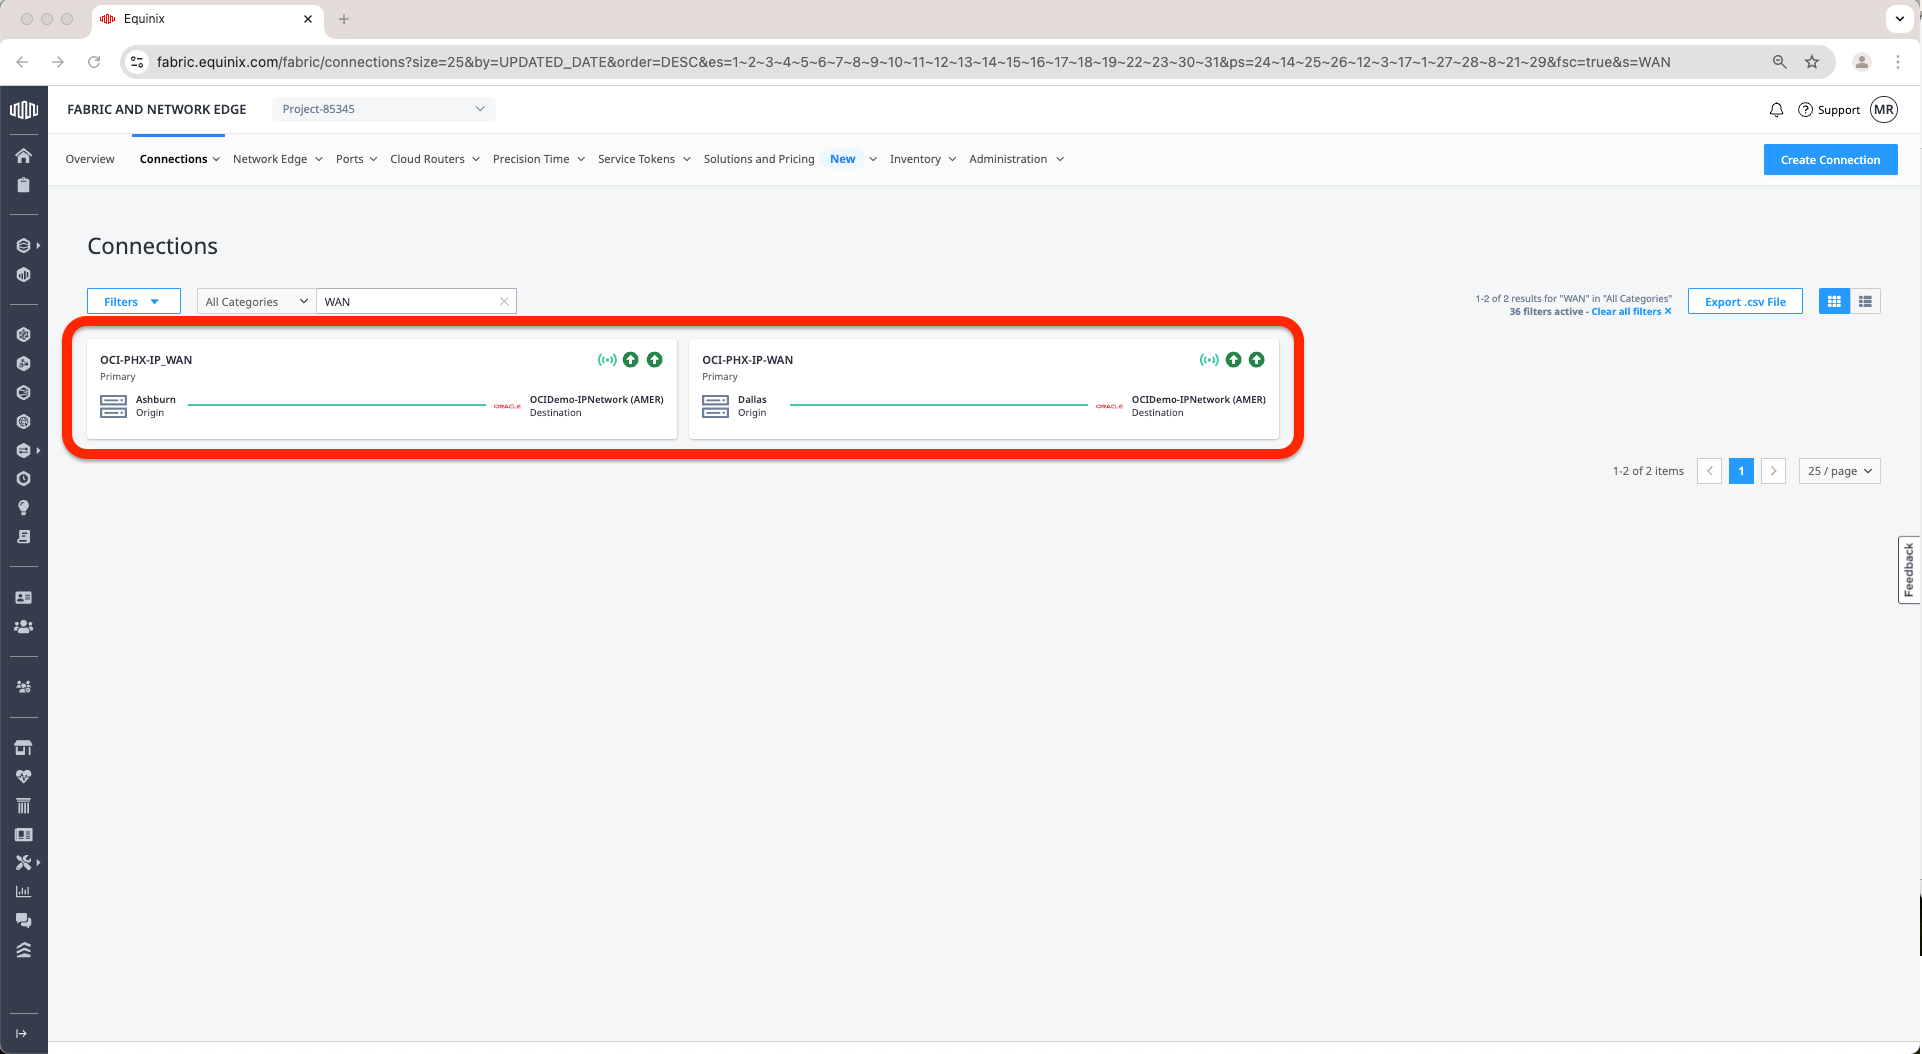
t. At this point, what we needed to configure in the scope of this blog is done. Now you should have 2 FCRs, each one being connected to the IP-WAN Network like in the images below:
Two FCRs
IP-WAN Network

Connections
This concludes the configuration of the Equinix FCRs and IP-WAN Network. In the next blog, which can be found here, we will configure OCI FastConnects.
I hope you enjoyed this blog. Thank you for reading!