Introduction
After publishing the blog series on OIC v2 back in 2022, from time to time we received questions around the OIC v3 custom endpoint and disaster recovery. Radu and me have been discussing creating a mini-series of posts on Oracle Integration Cloud version 3 for over six months. I want to acknowledge his support for the serie.
Oracle Integration cloud is a PaaS service part of Oracle Cloud Infrastructure (OCI).
After provisioning the service, a customer will have two urls: the Design-time url where the integrations are provisioned and monitored and the Runtime where url where the integrations are used. The design time url can’t be modified. The runtime url is be part of the domain ocp.oraclecloud.com.
This blog focuses on the step by step configuration of a custom endpoint for the runtime url.
If you are looking for creating a custom endpoint for OIC version 2, check out this blog.
Create the Customer-Managed Custom Endpoint
Before following the steps below, please read the official documentation on the Custom Endpoint.
Prerequisites for Configuring a Customer-Managed Custom Endpoint
We will follow the steps from the Public Documentation that can be found here.
Create the VCN
For the purpose of this blog, we will create a new VCN with a single Public Subnet (an existing Public Subnet can be used) and use the Default Route Table and the default Security list.
– After the provisioning of the subnet, create an Internet Gateway and a Nat Gateway.
– Add an Internet Gateway target type route entry for the default route (0.0.0.0/0)
– Resolve the IP address of the Runtime hostname.
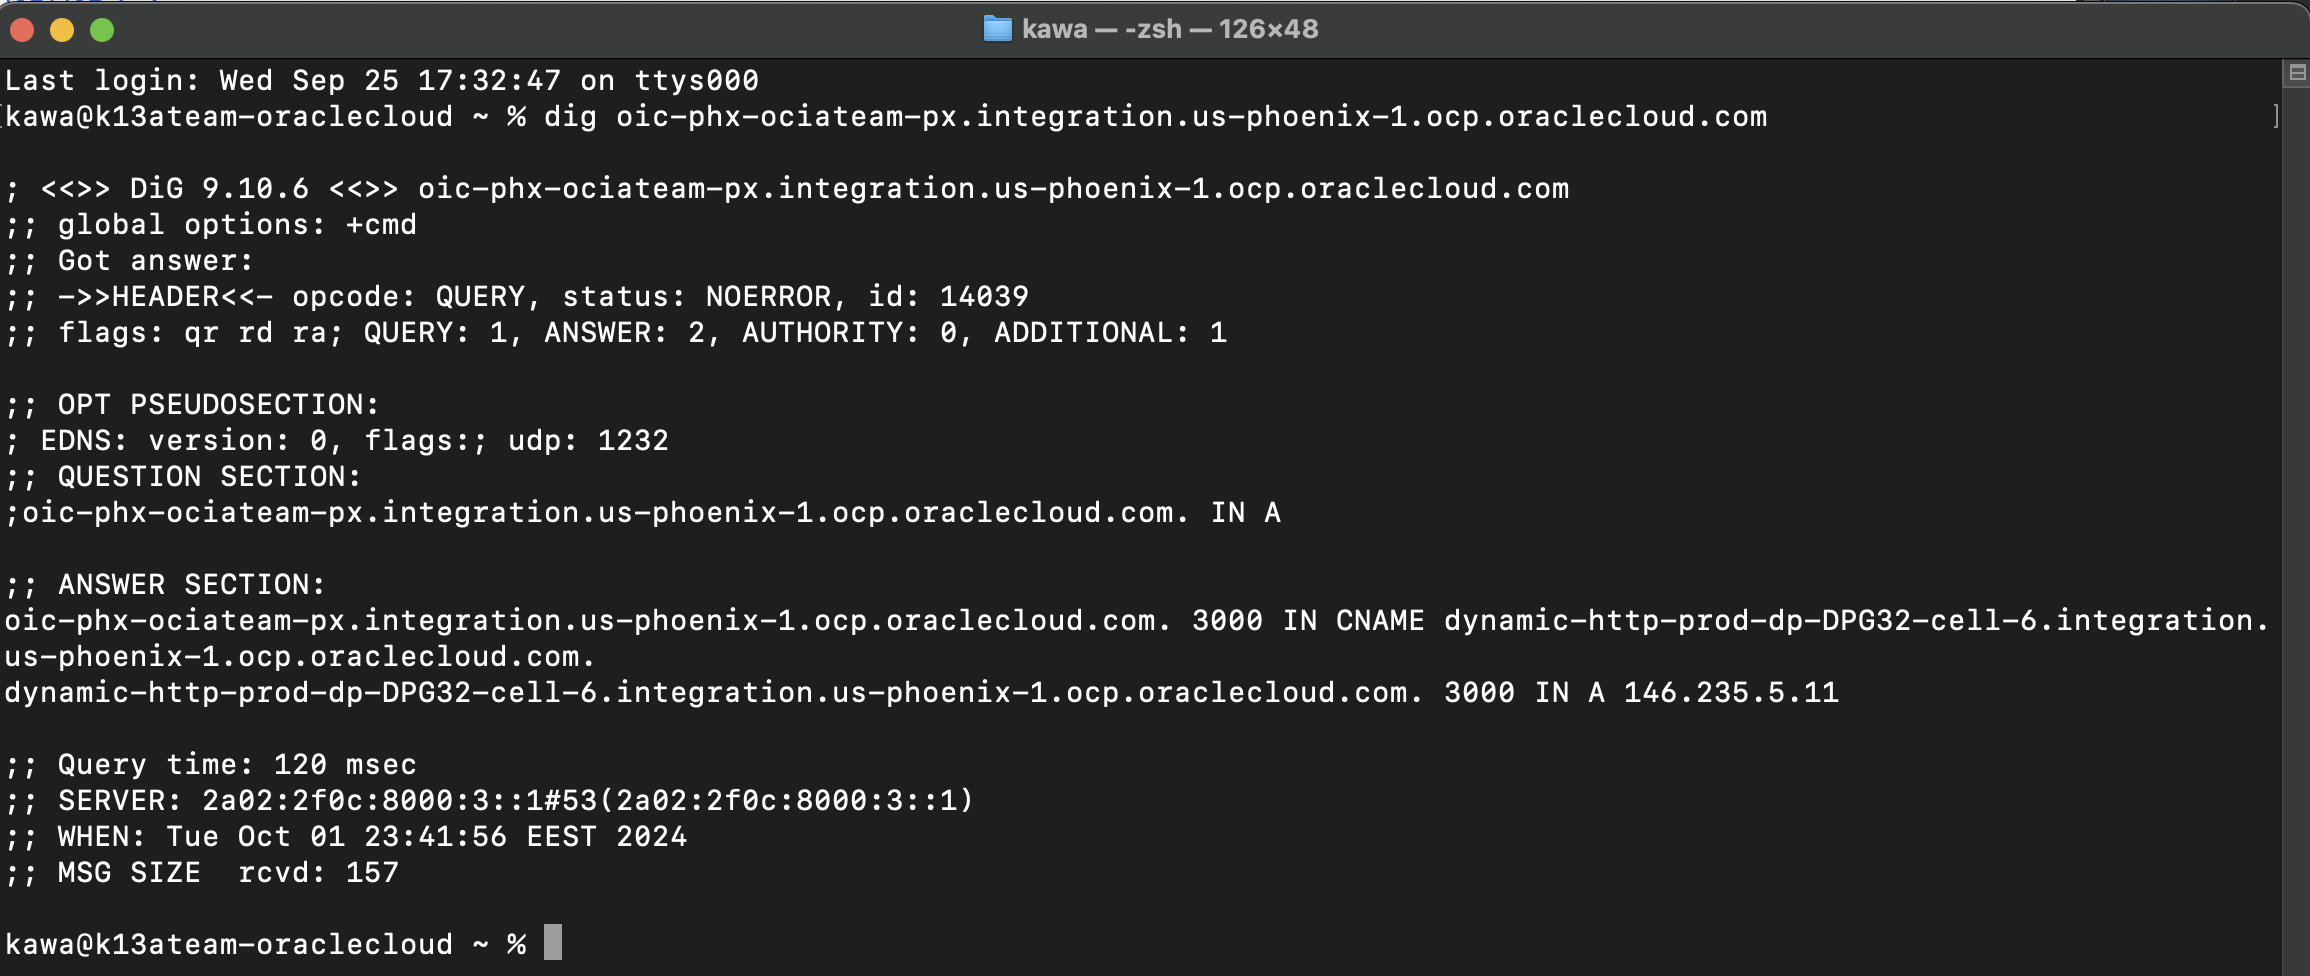
– Add a Nat Gateway target type route entry for the Runtime hostname (146.235.5.11/32)
Provision the Load Balancer
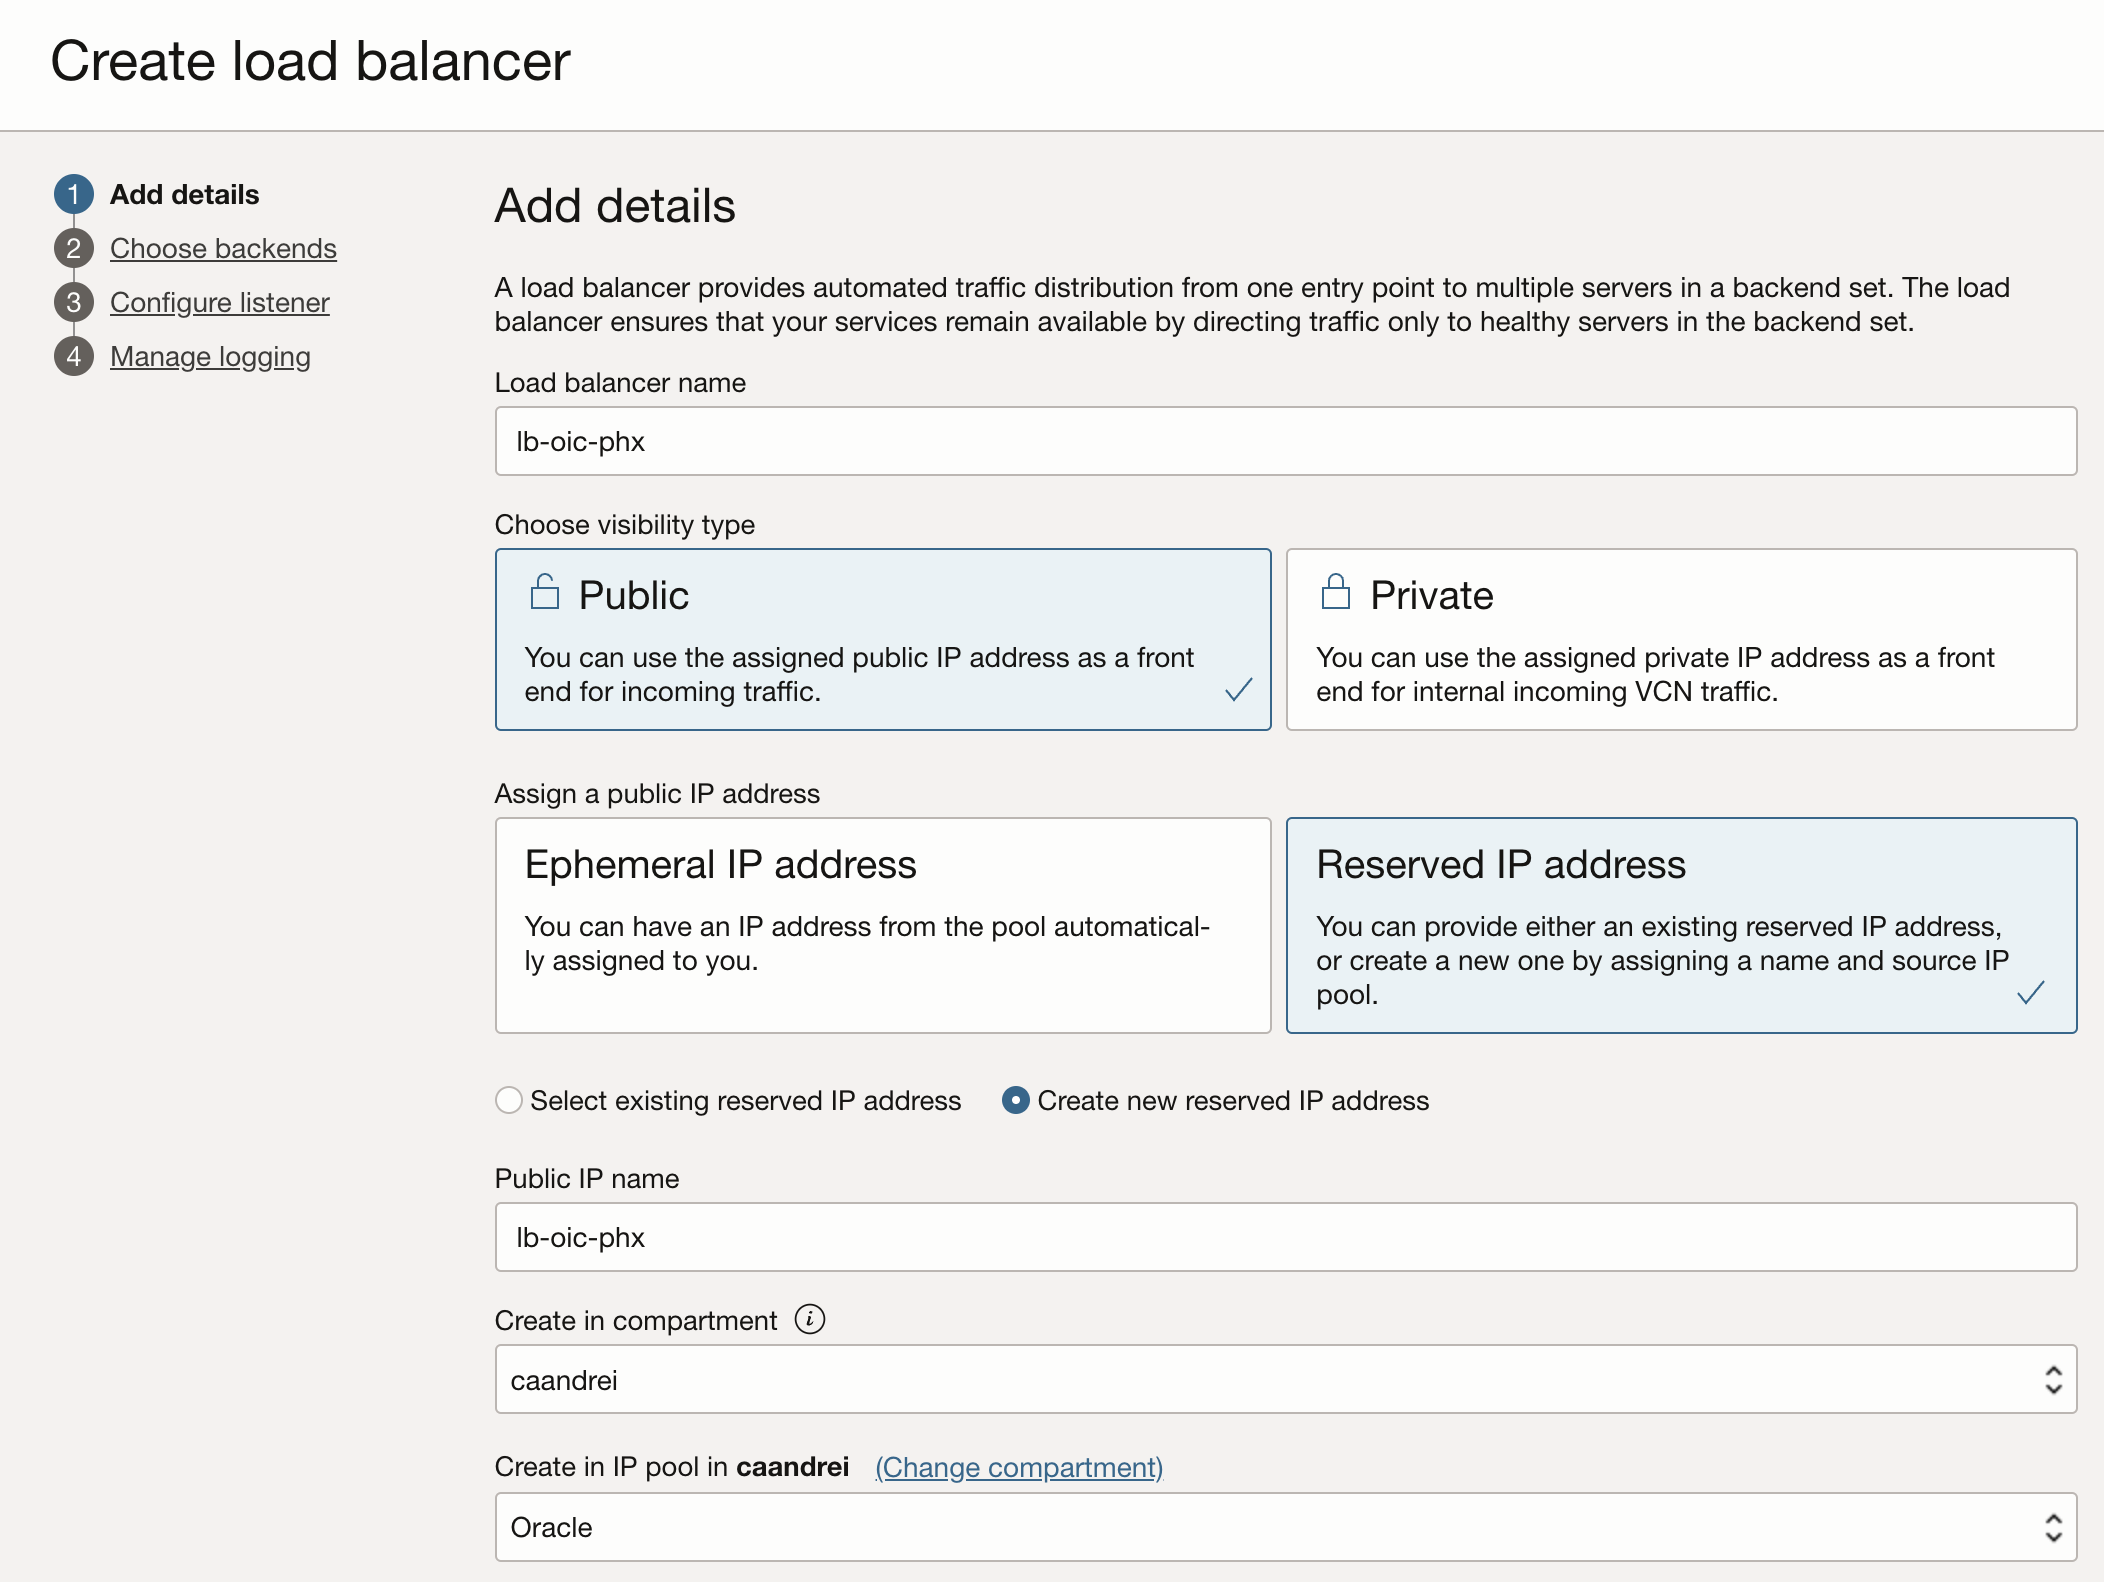
Start the provisioning of a Public load balancer in the public subnet that we just created and assign a reserved IP Address. You can notice from the screen-shot that we did not had any reserved IP address beforehand.
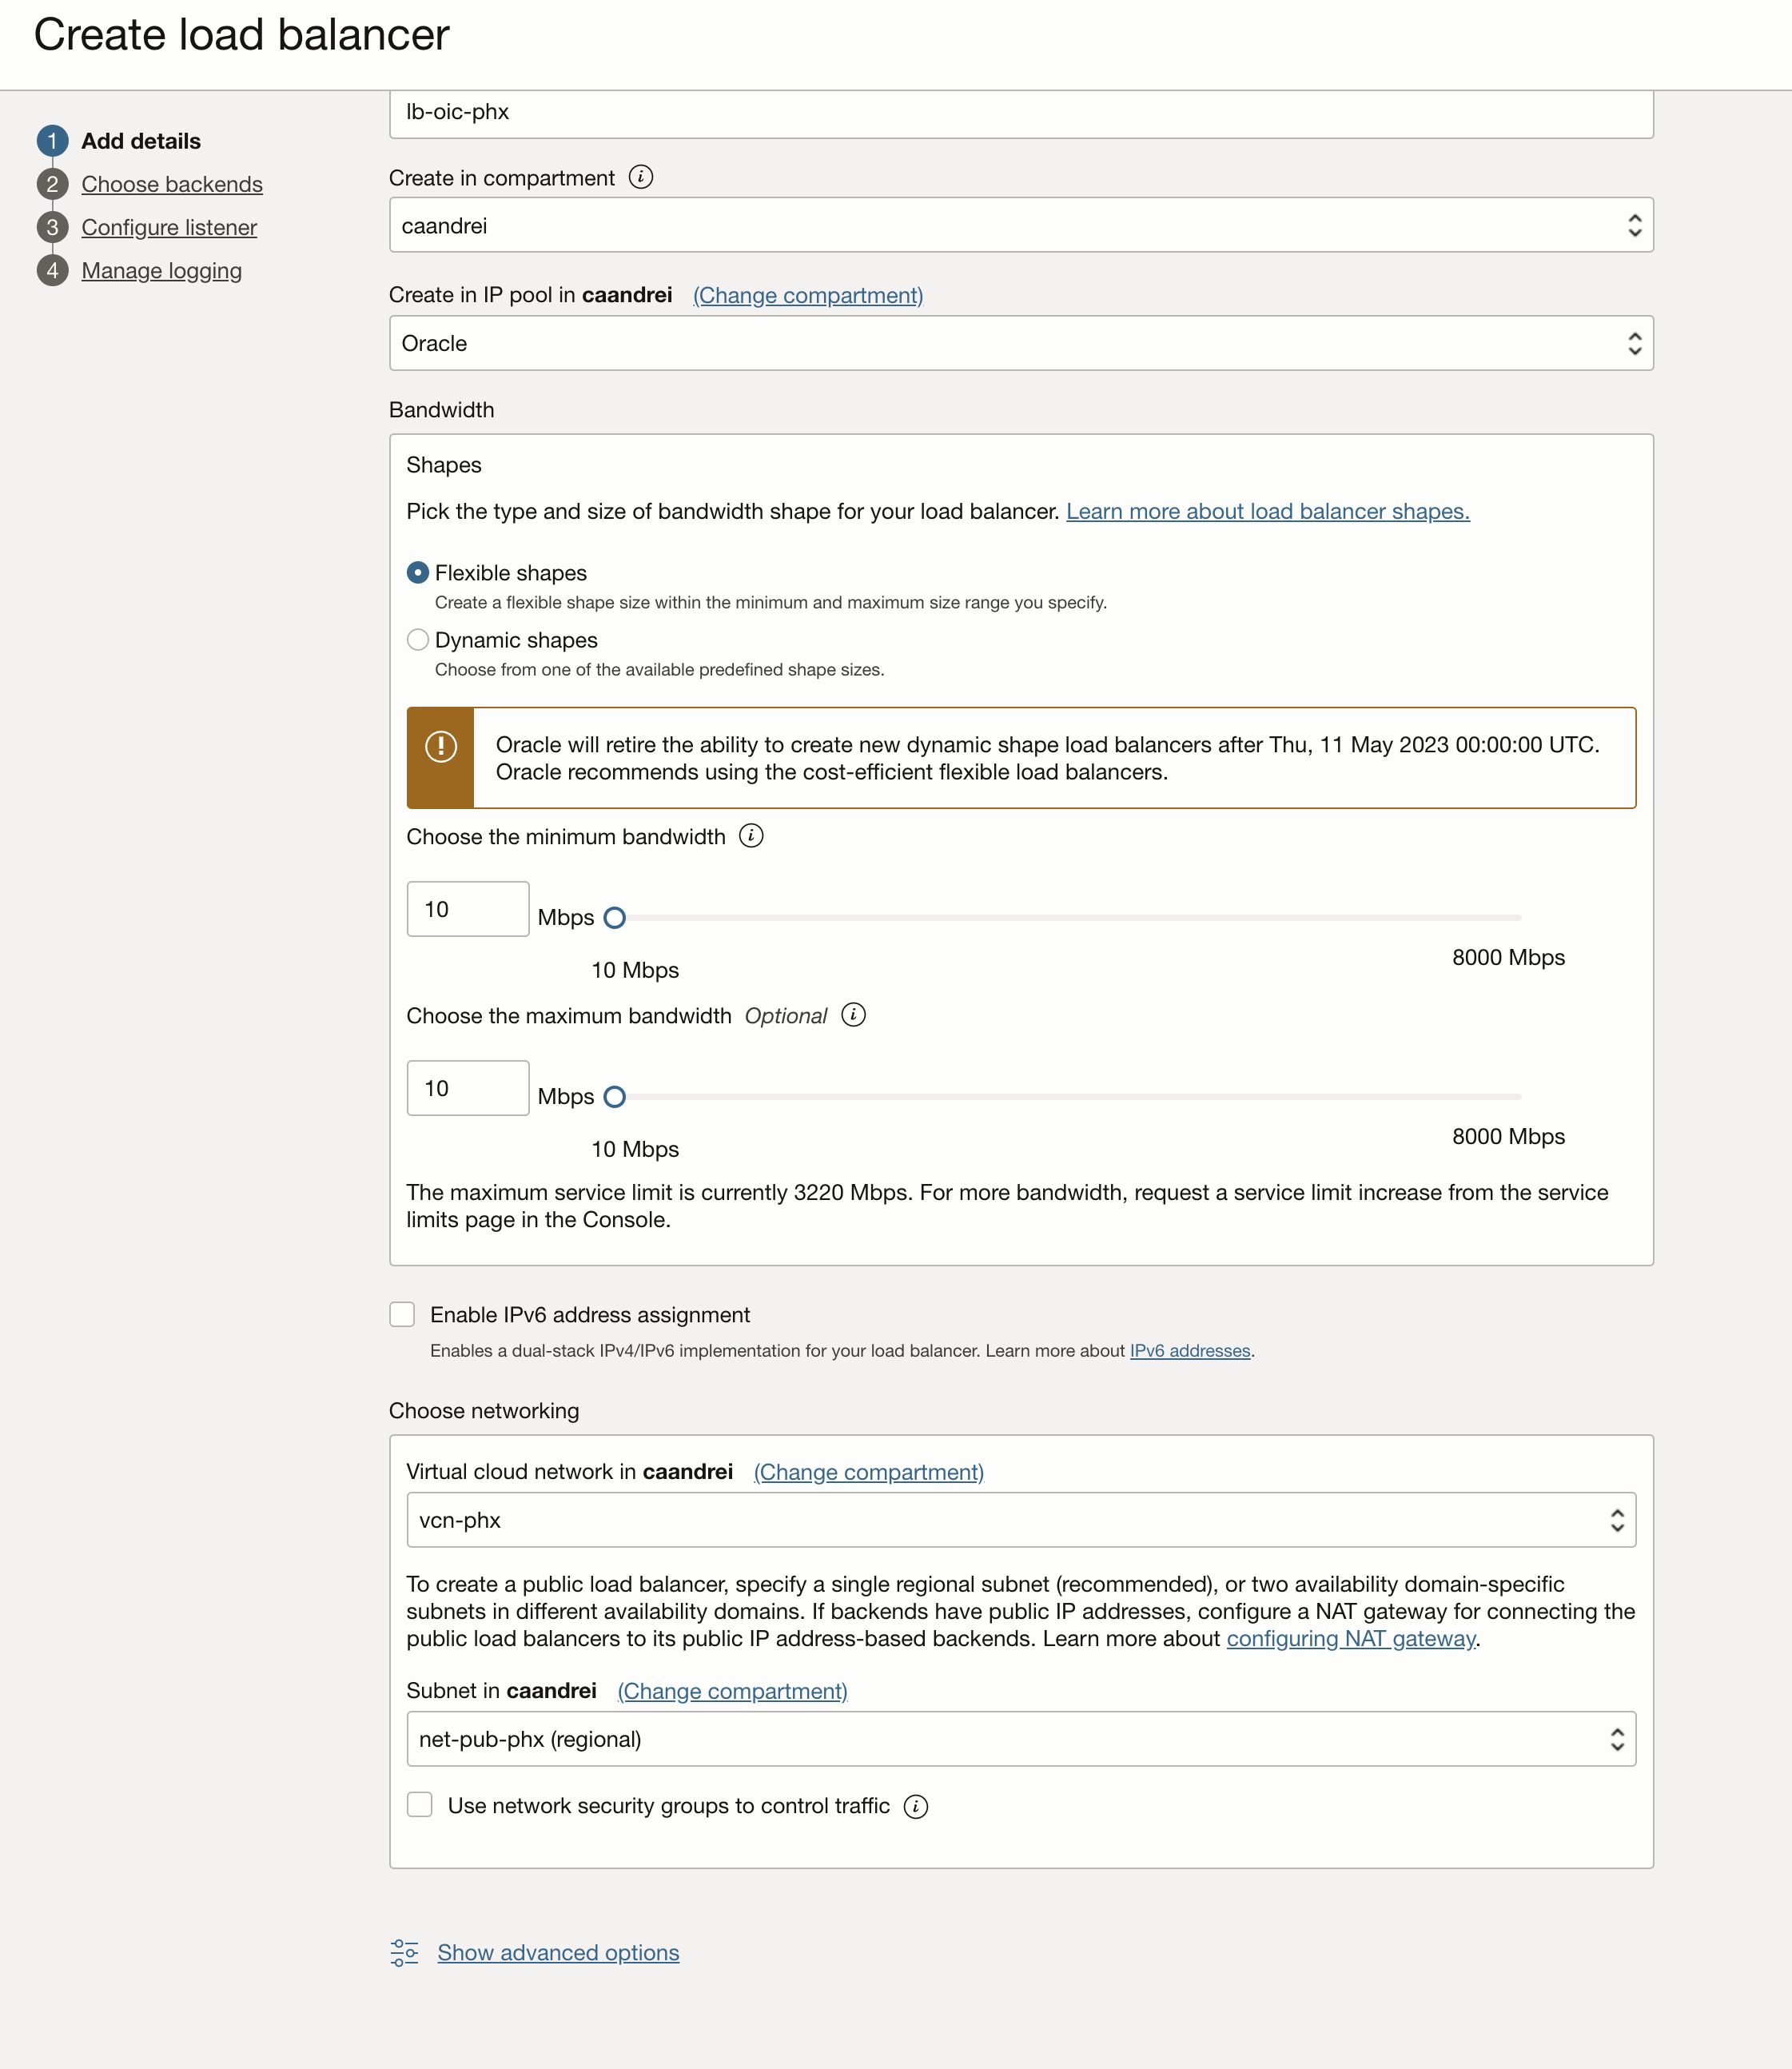
For the purpose of this blog we are creating a very small LB with a bandwidth of 10Mb. In a production environment, the LB needs to be scaled to be able to handle the traffic.
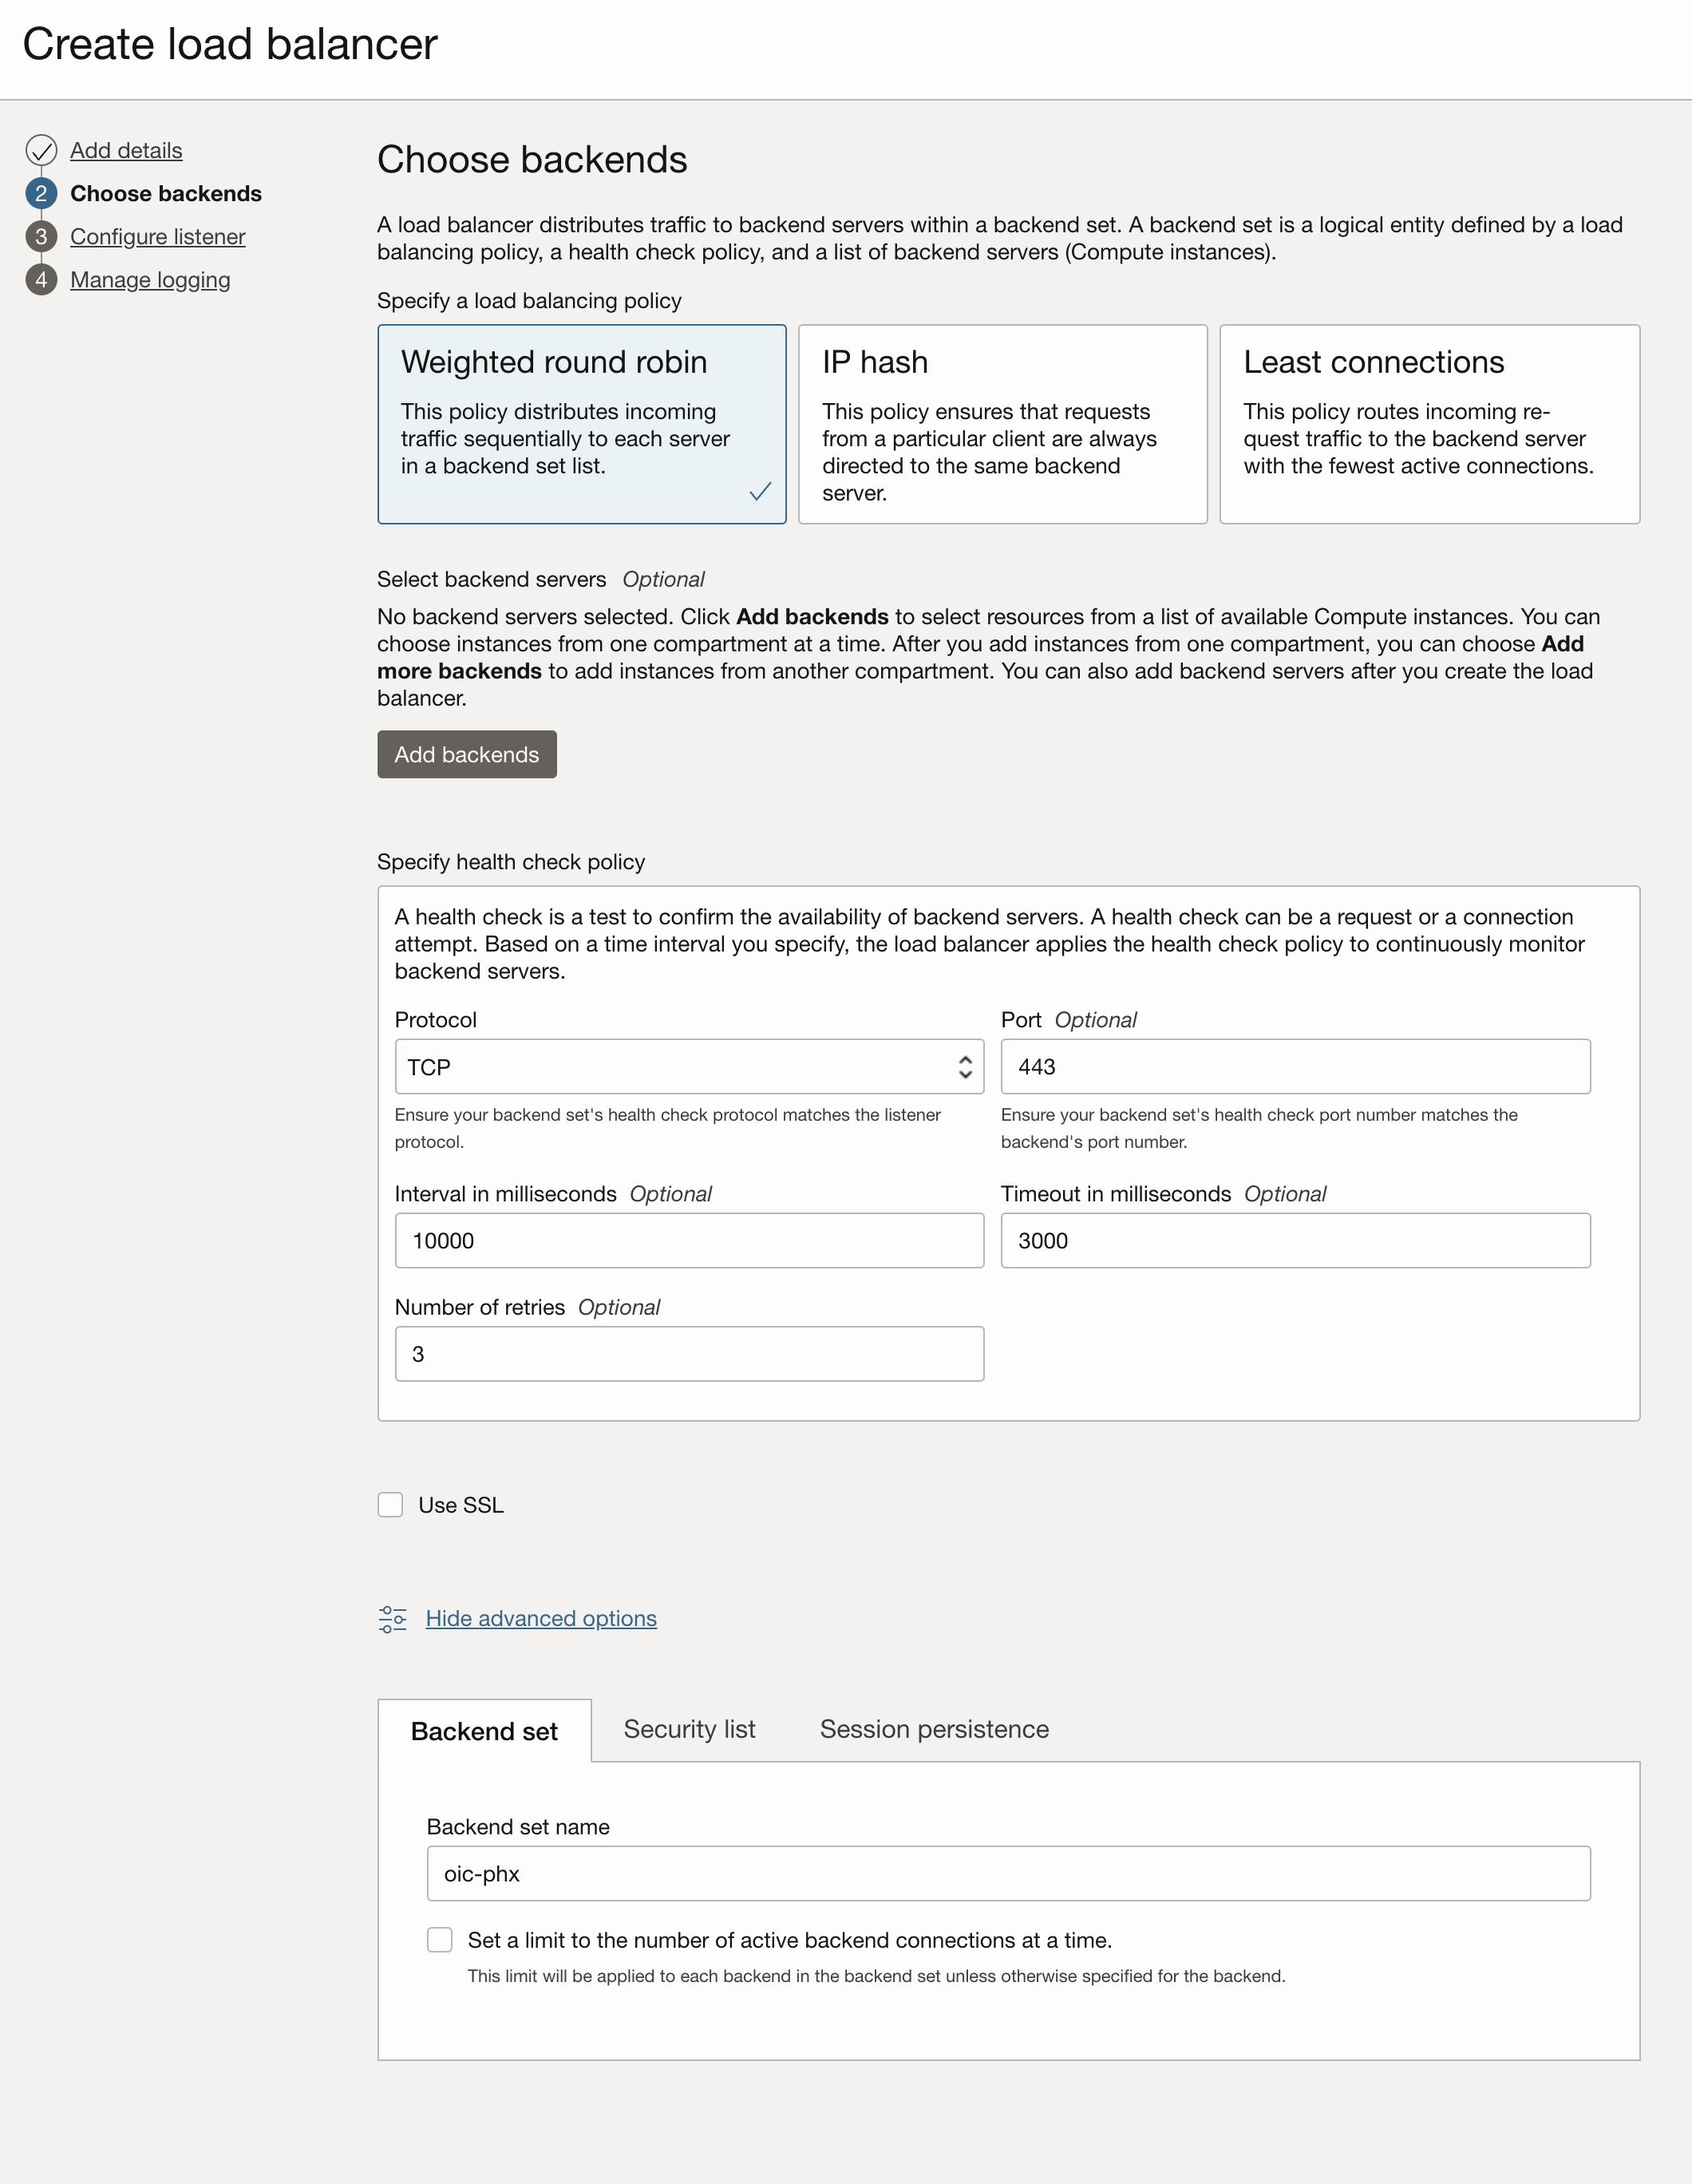
Configure the health check policy to use the TCP protocol and the 443 port. Please notice that we did not add any backends at this point.
Configure the listener to handle HTTPS traffic, provide the ssl certificates. This post is not covering the procurement of a valid SSL certificate. For test purposes you can follow this blog to get a free public certificate from Let’s encrypt. We are using a wildcard certificate for the *.ateam-oracle.cloud domain from let’s encrypt.
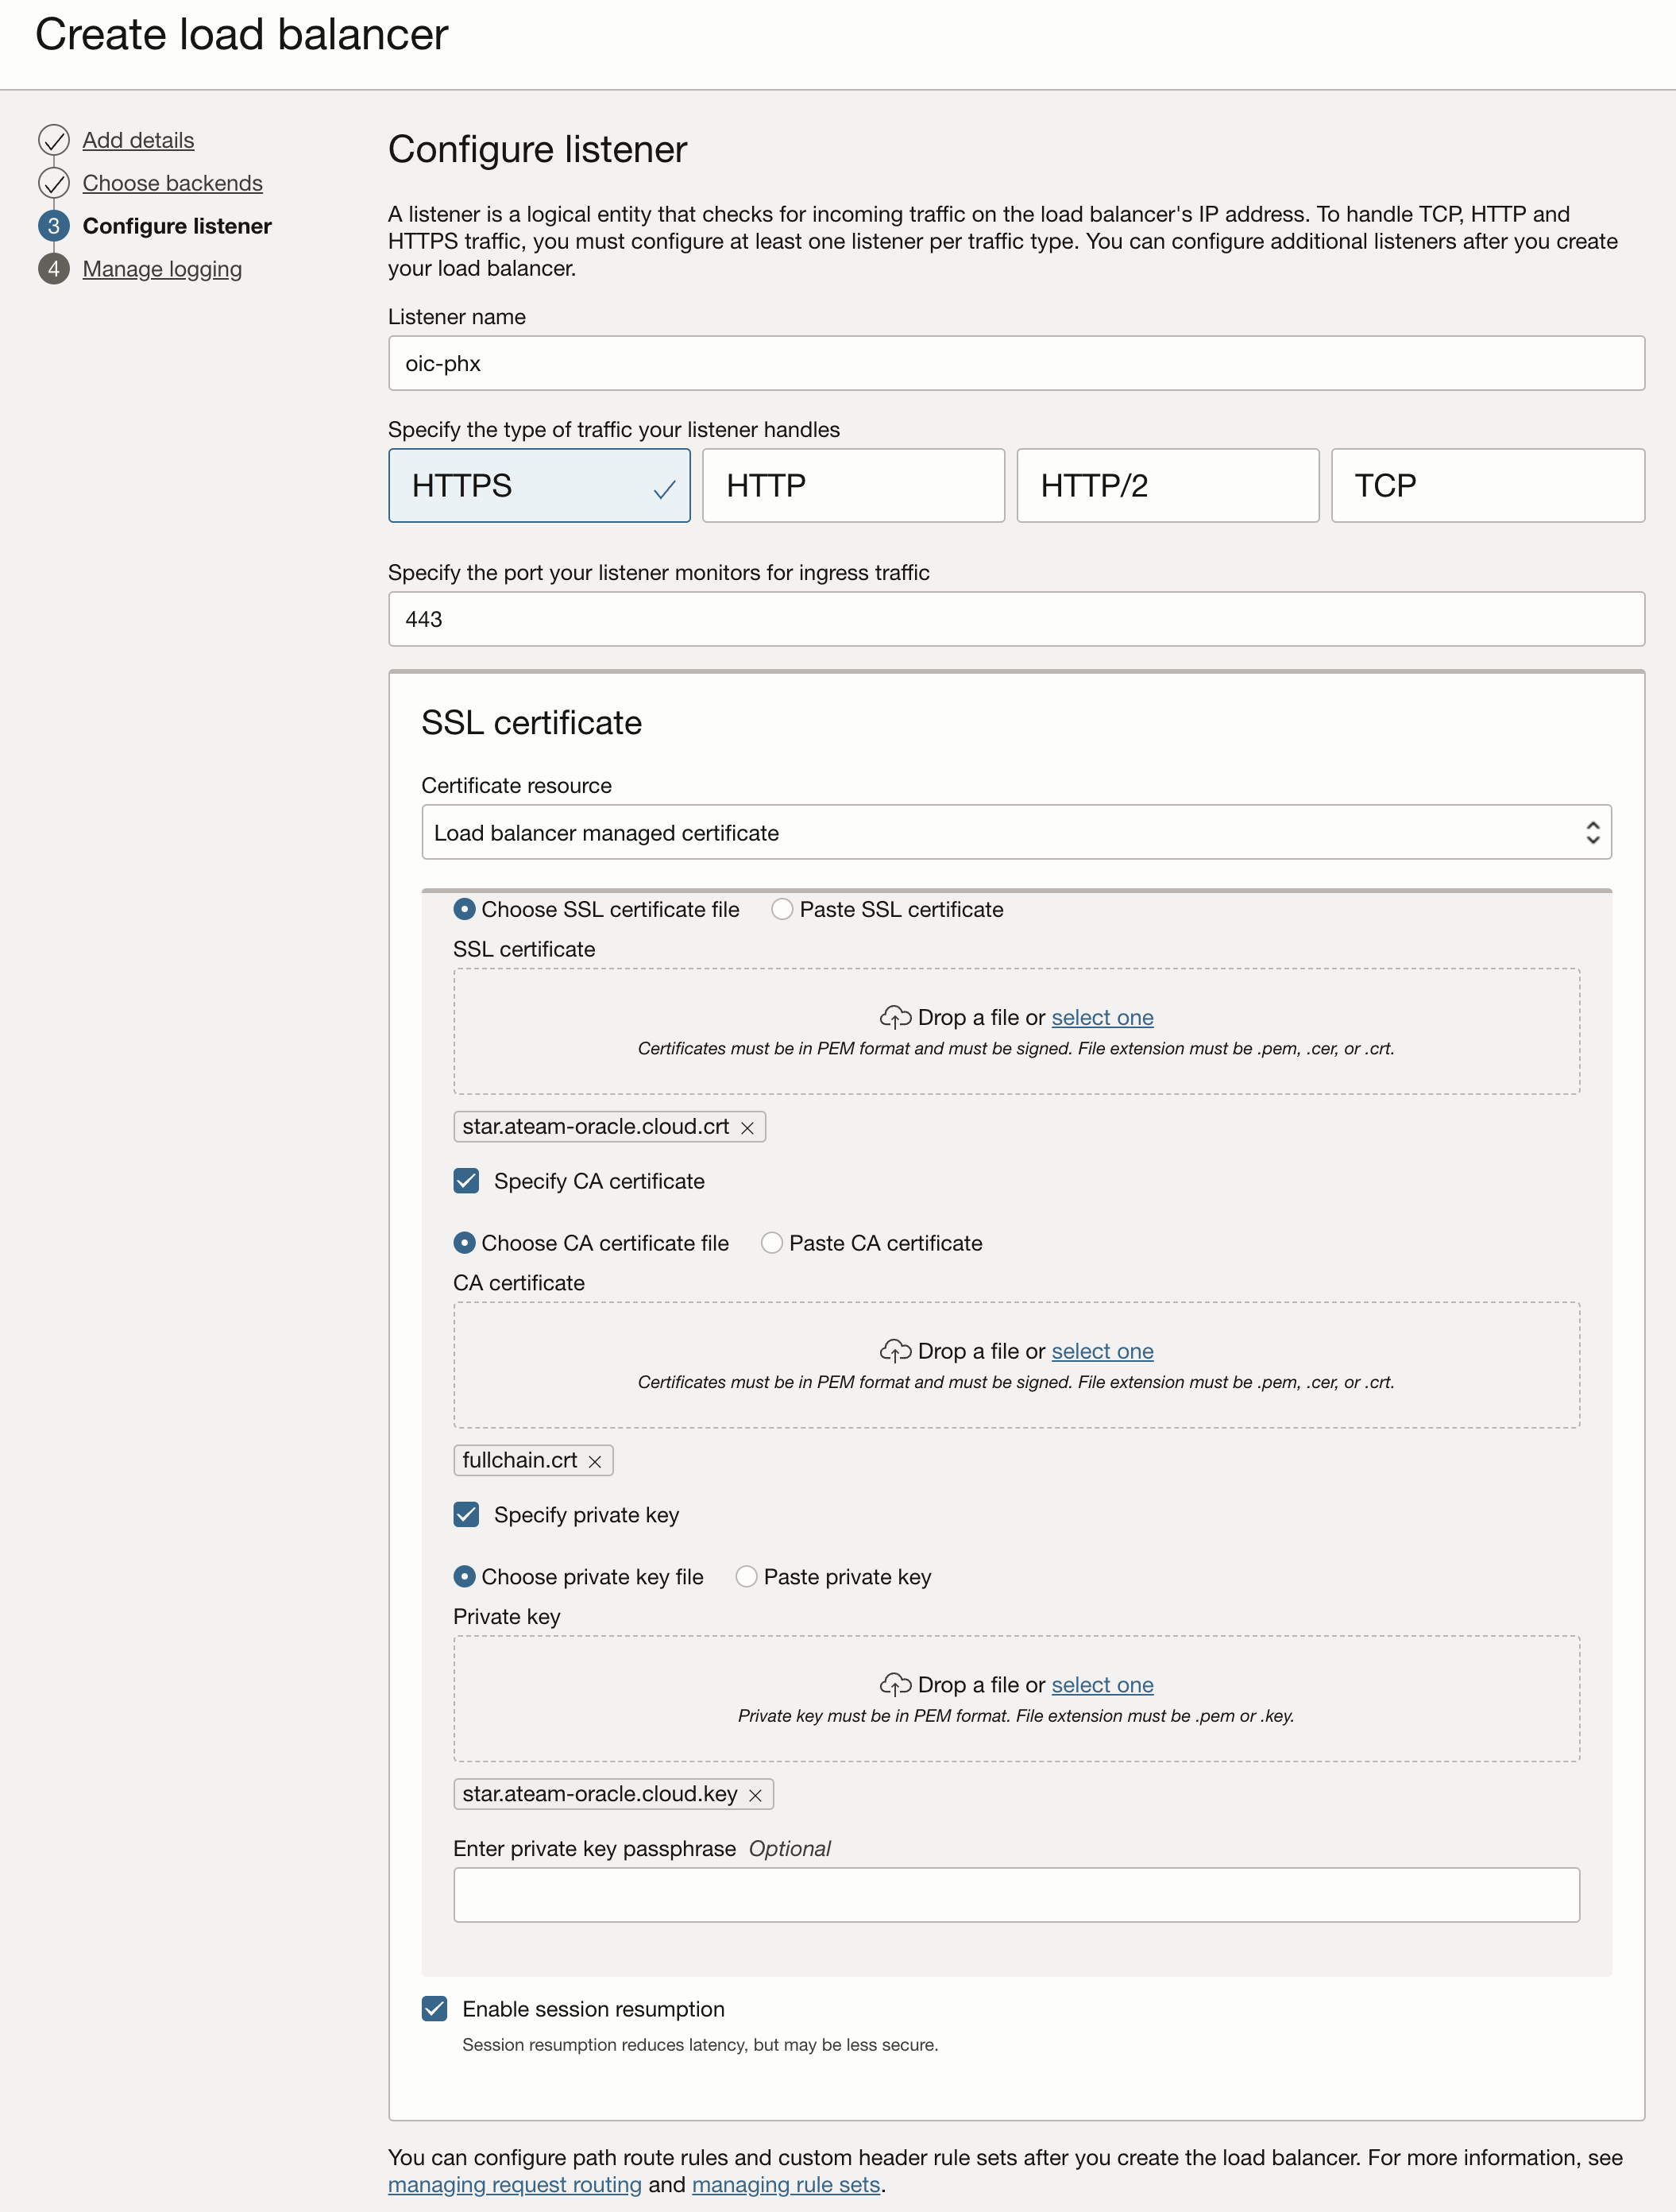
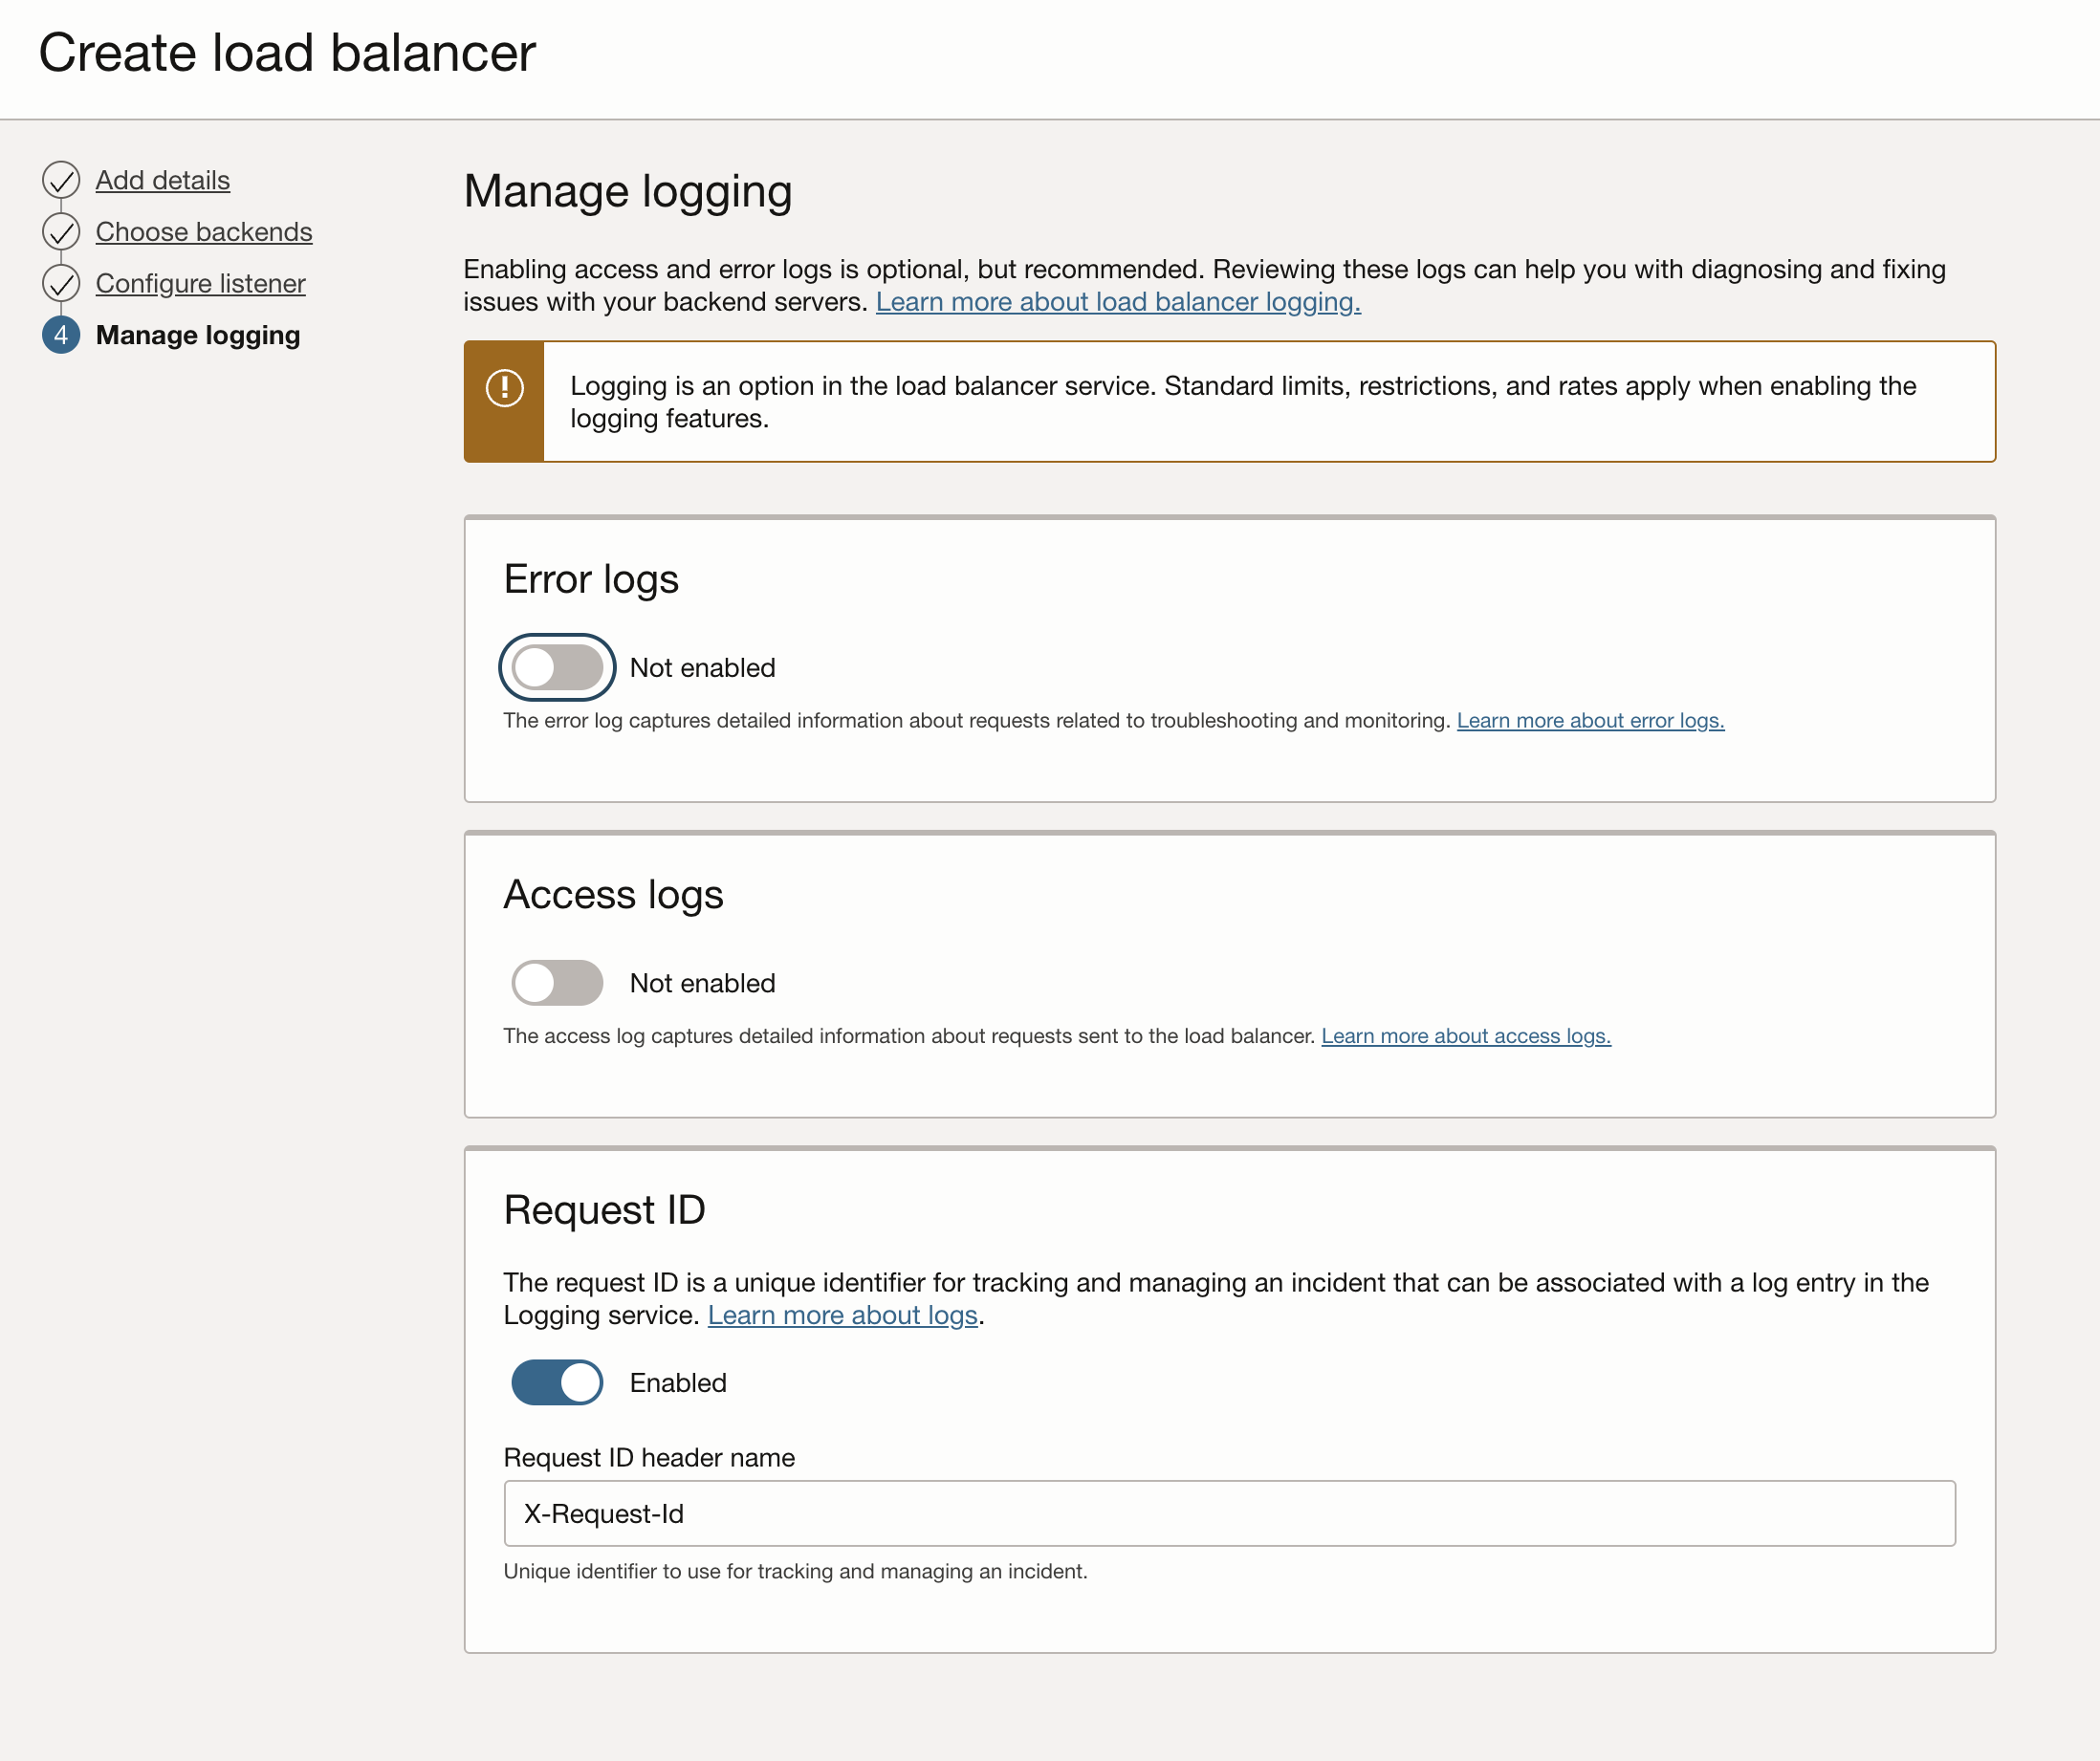
For testing purposes we will turn off all the logging feature on the LB.
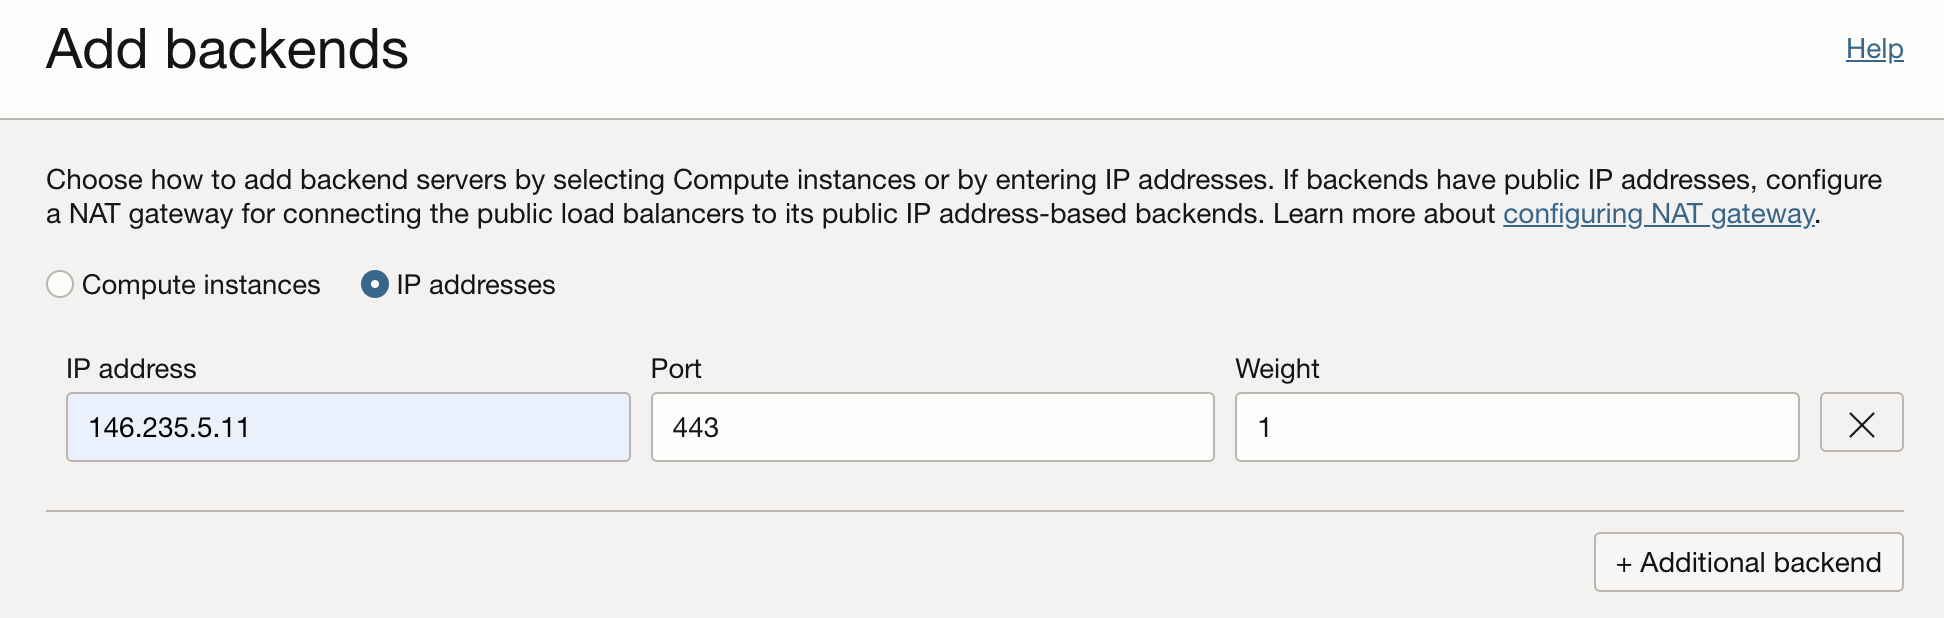
After the LB is provisioned:
– Add the runtime hostname IP address as a backend.
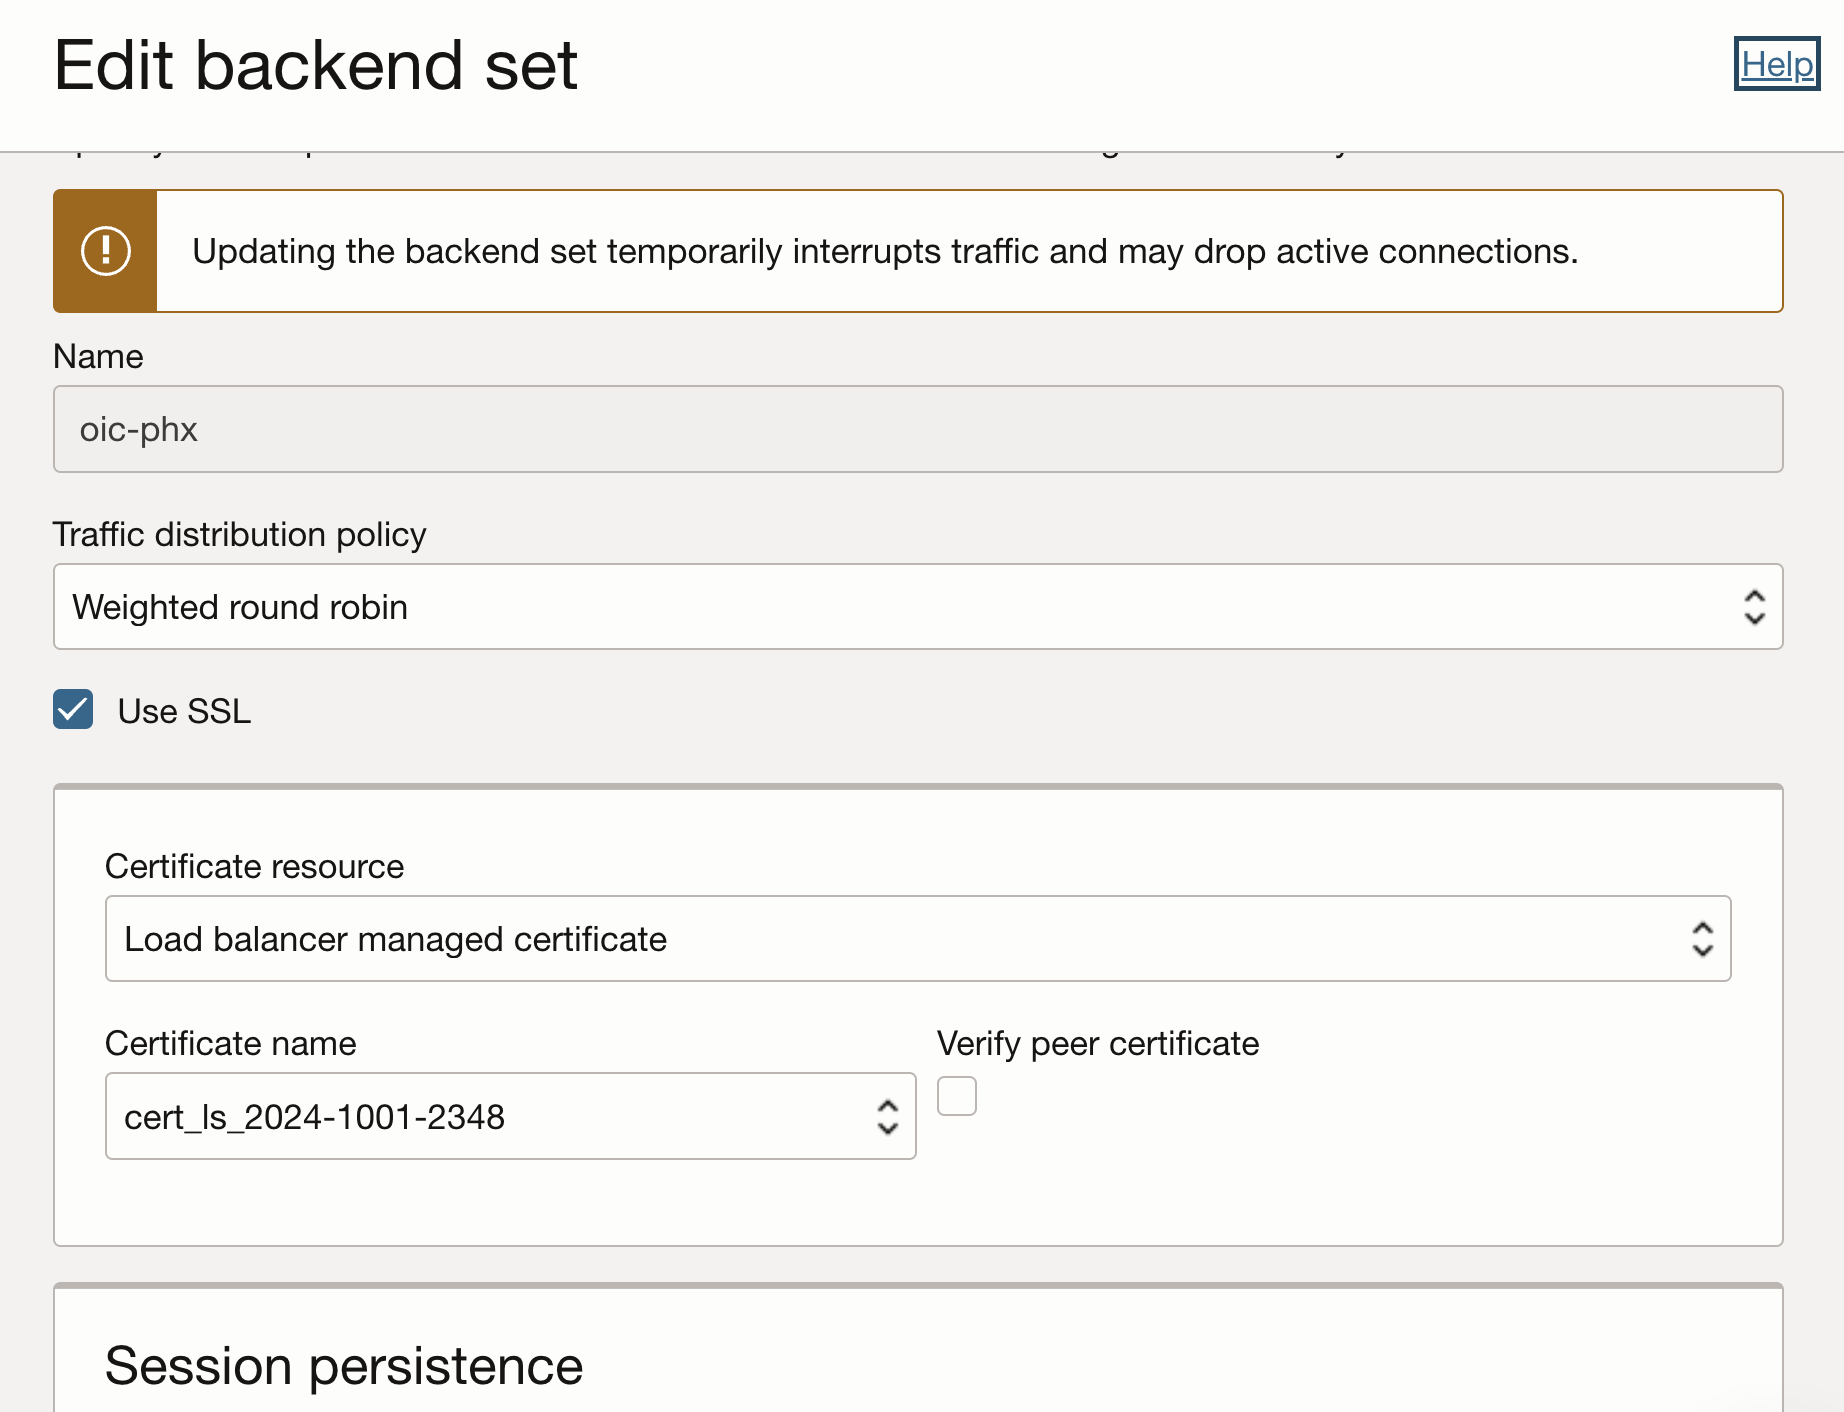
Update the backend set to use SSL.
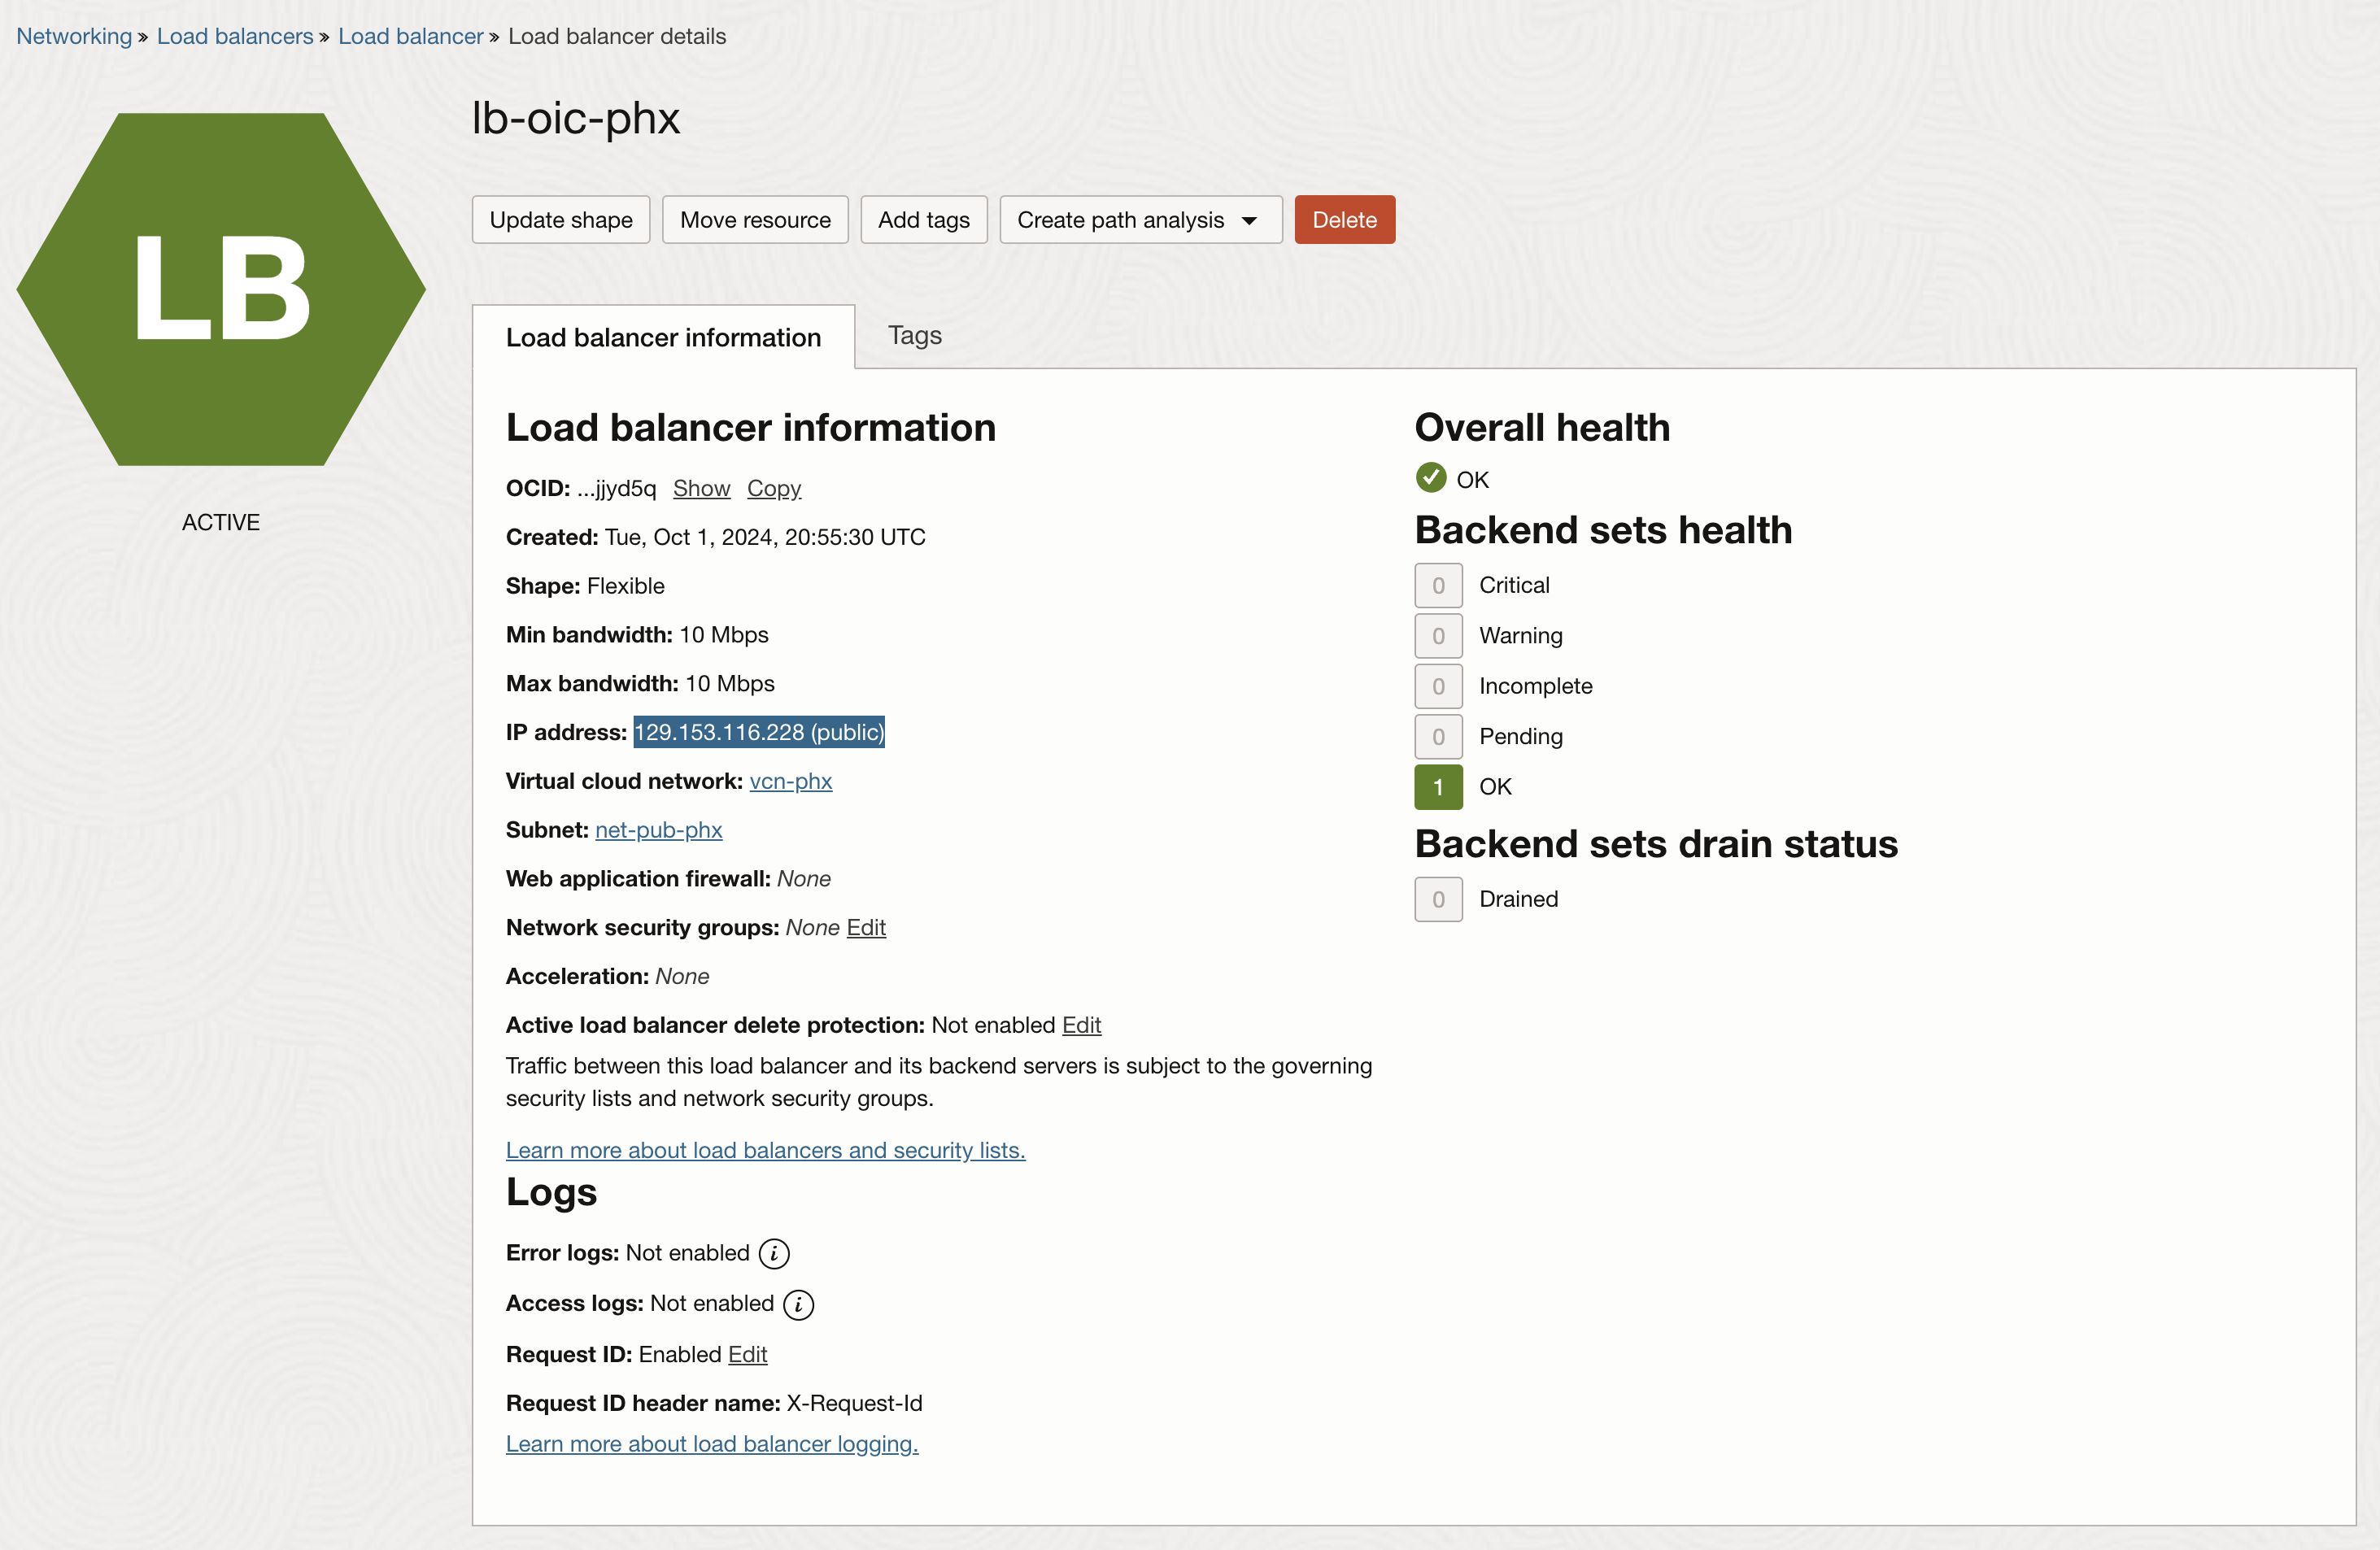
Notice that the LB has the health checks OK and note the public IP address assigned to the LB.
Create the Customer-Managed Custom Endpoint
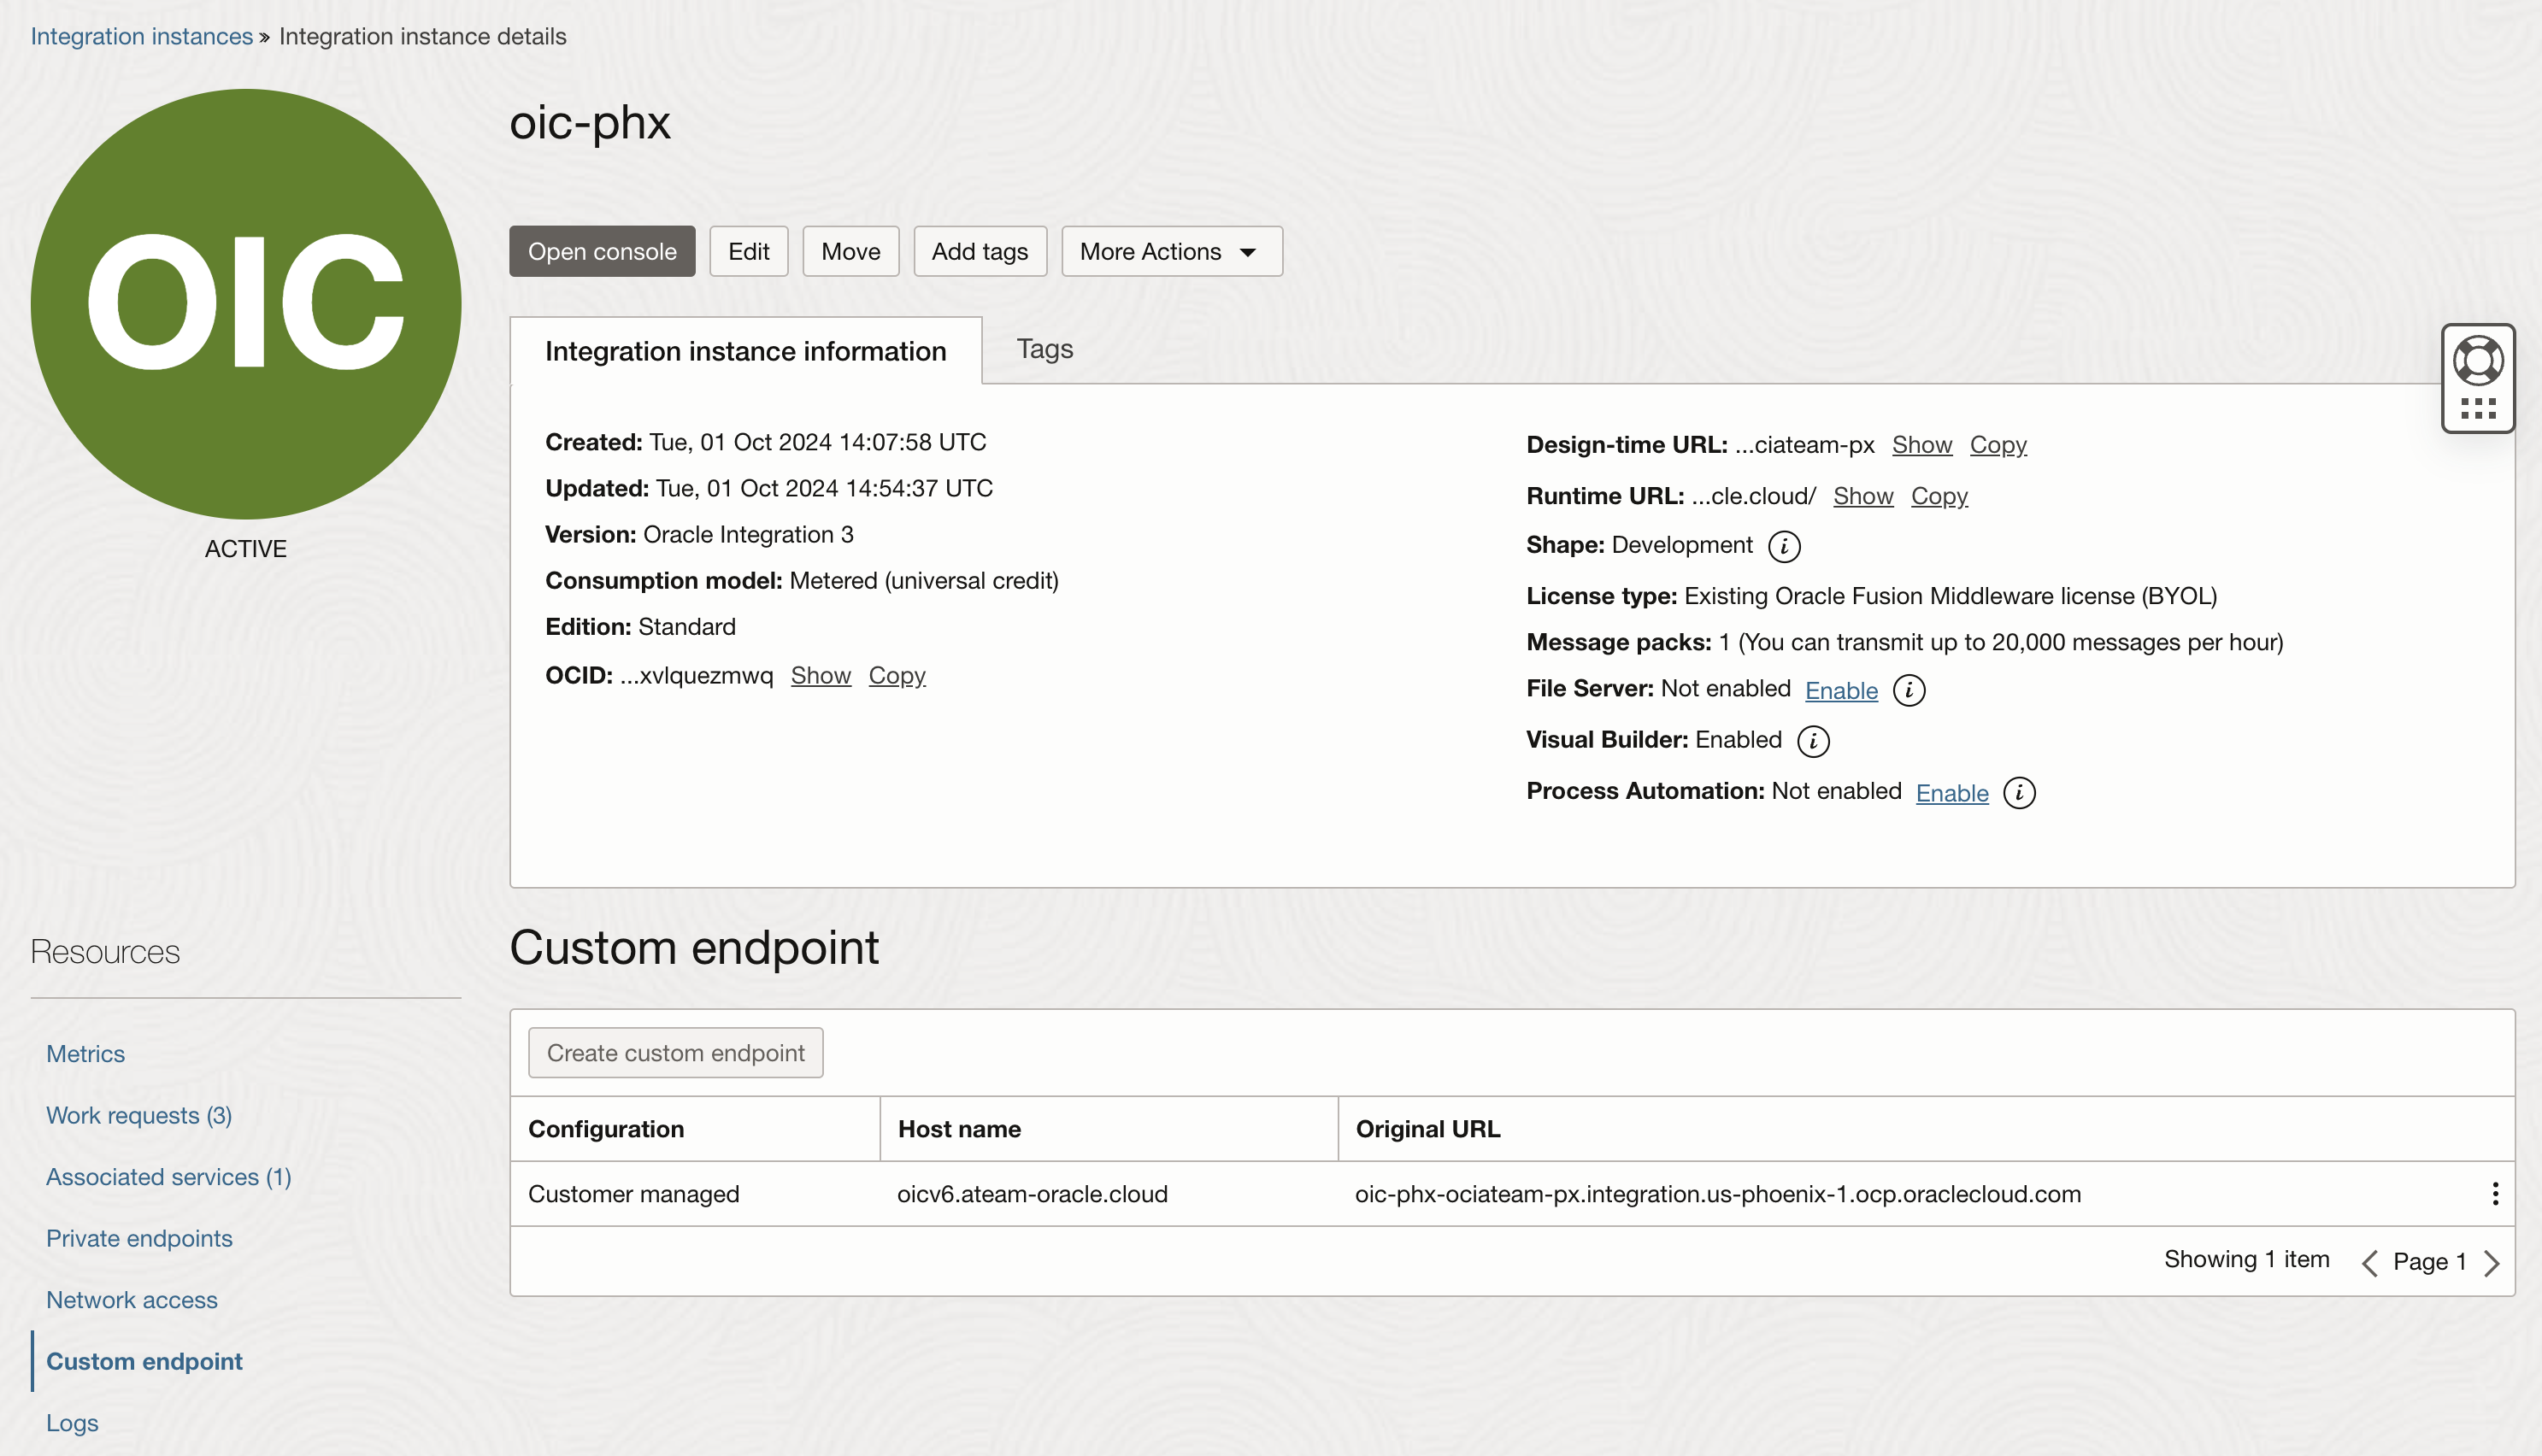
Navigate to the “Developer Services >> Application Integration >> Integration” and click on the OIC instance.
Under the “Custom endpoint” create a new endpoint. This is the hostname that we will use for connections.
Configure DNS
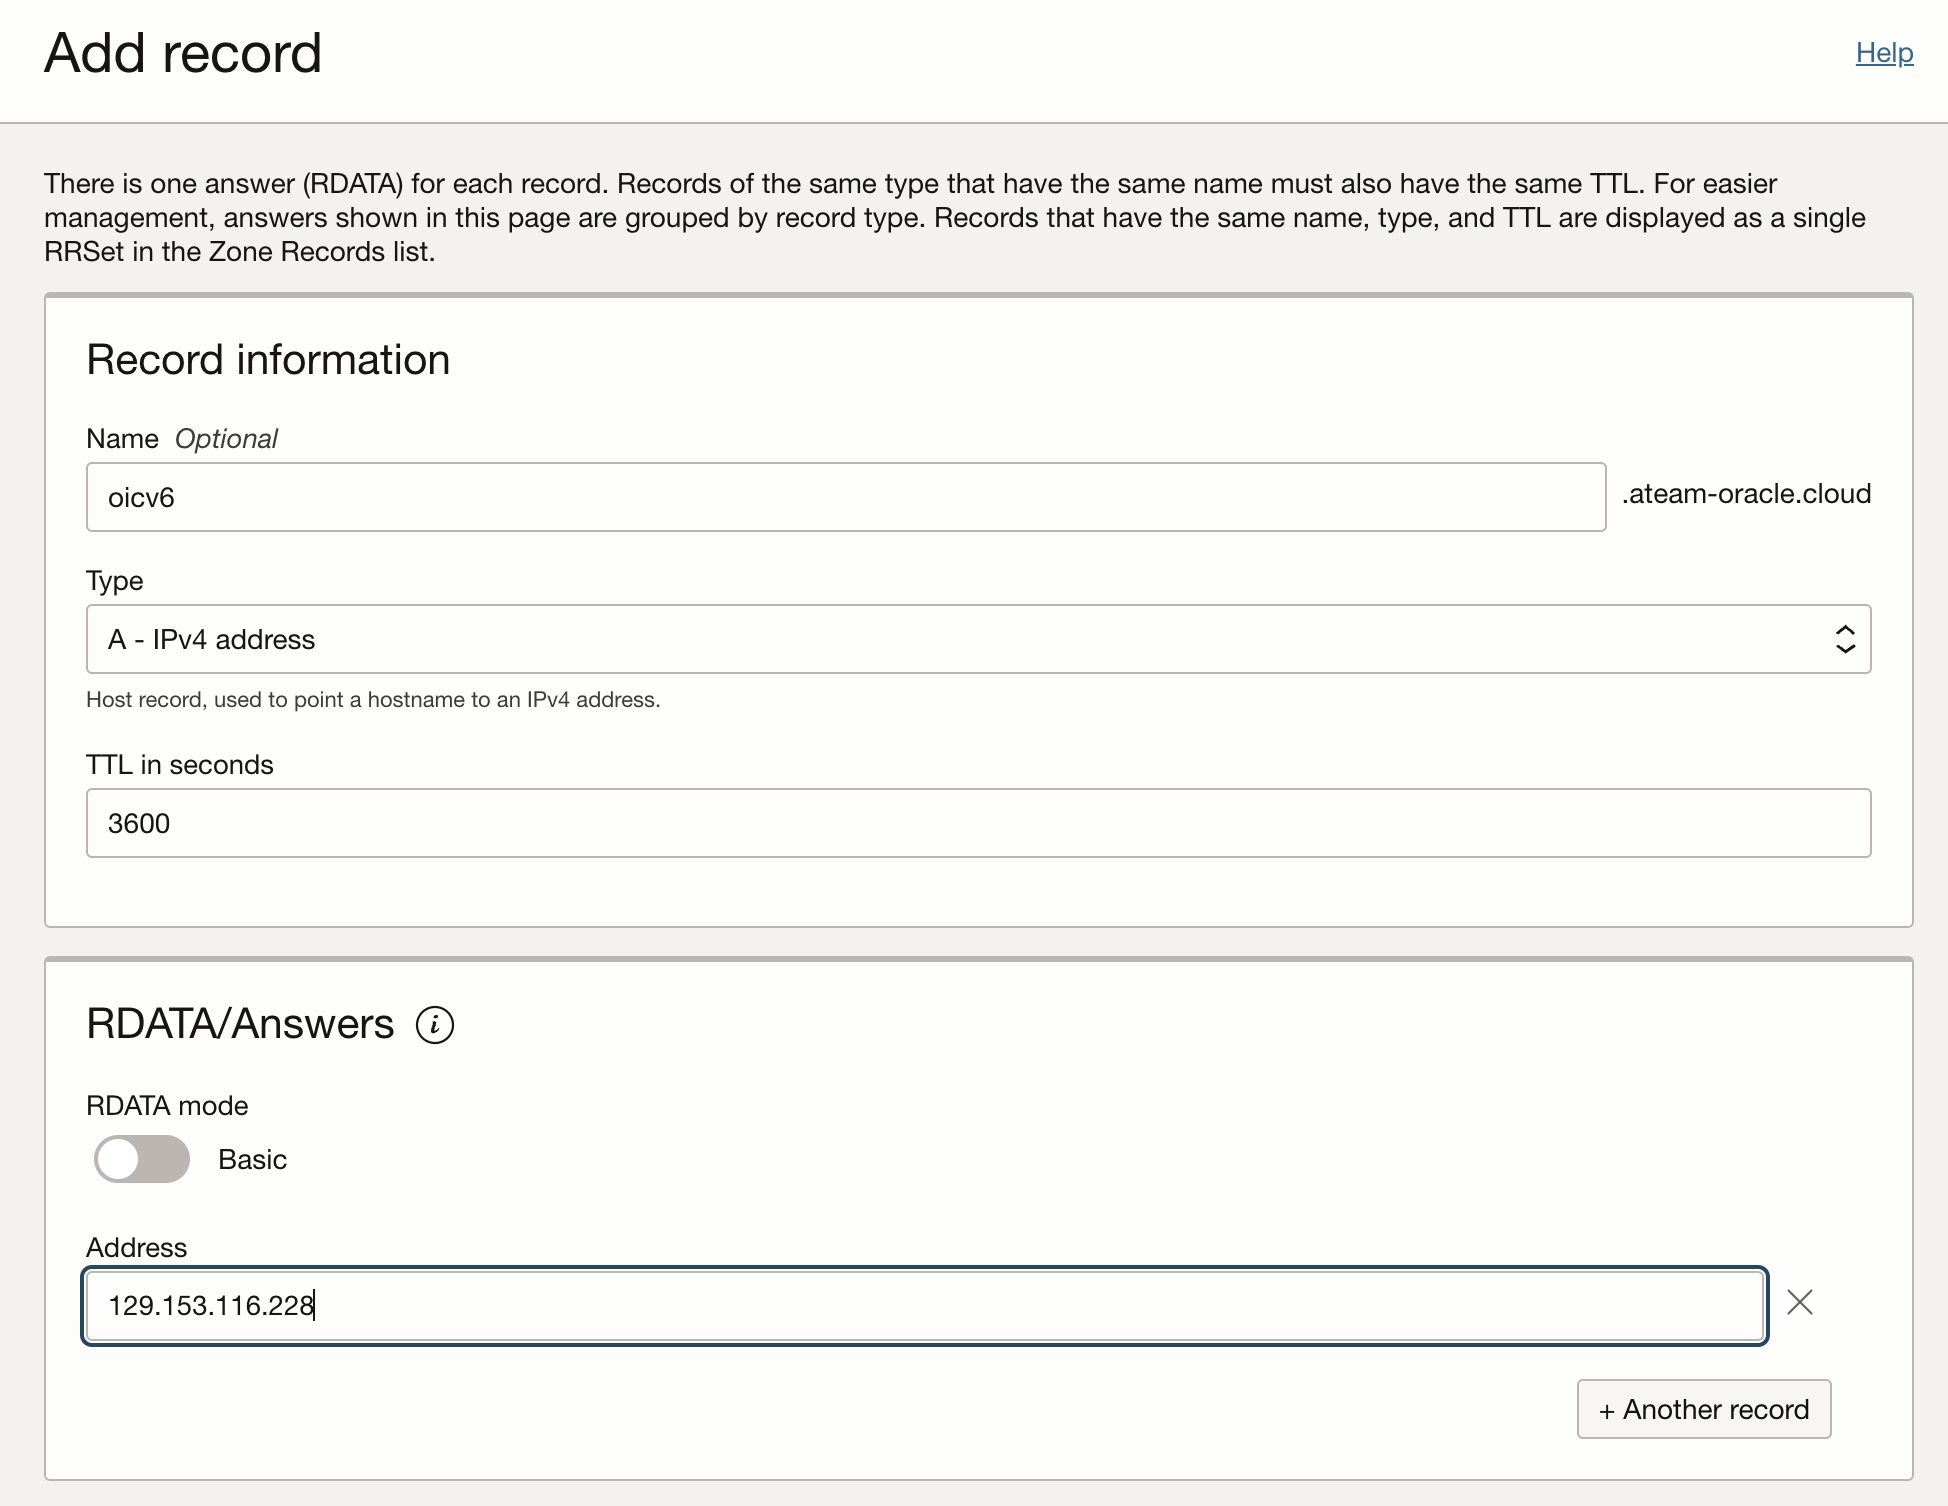
On the DNS zone add a record for the custom endpoint.
Test the connectivity
From a browser we will connect to the custom endpoint and in paralel we will have an Inspector enabled.
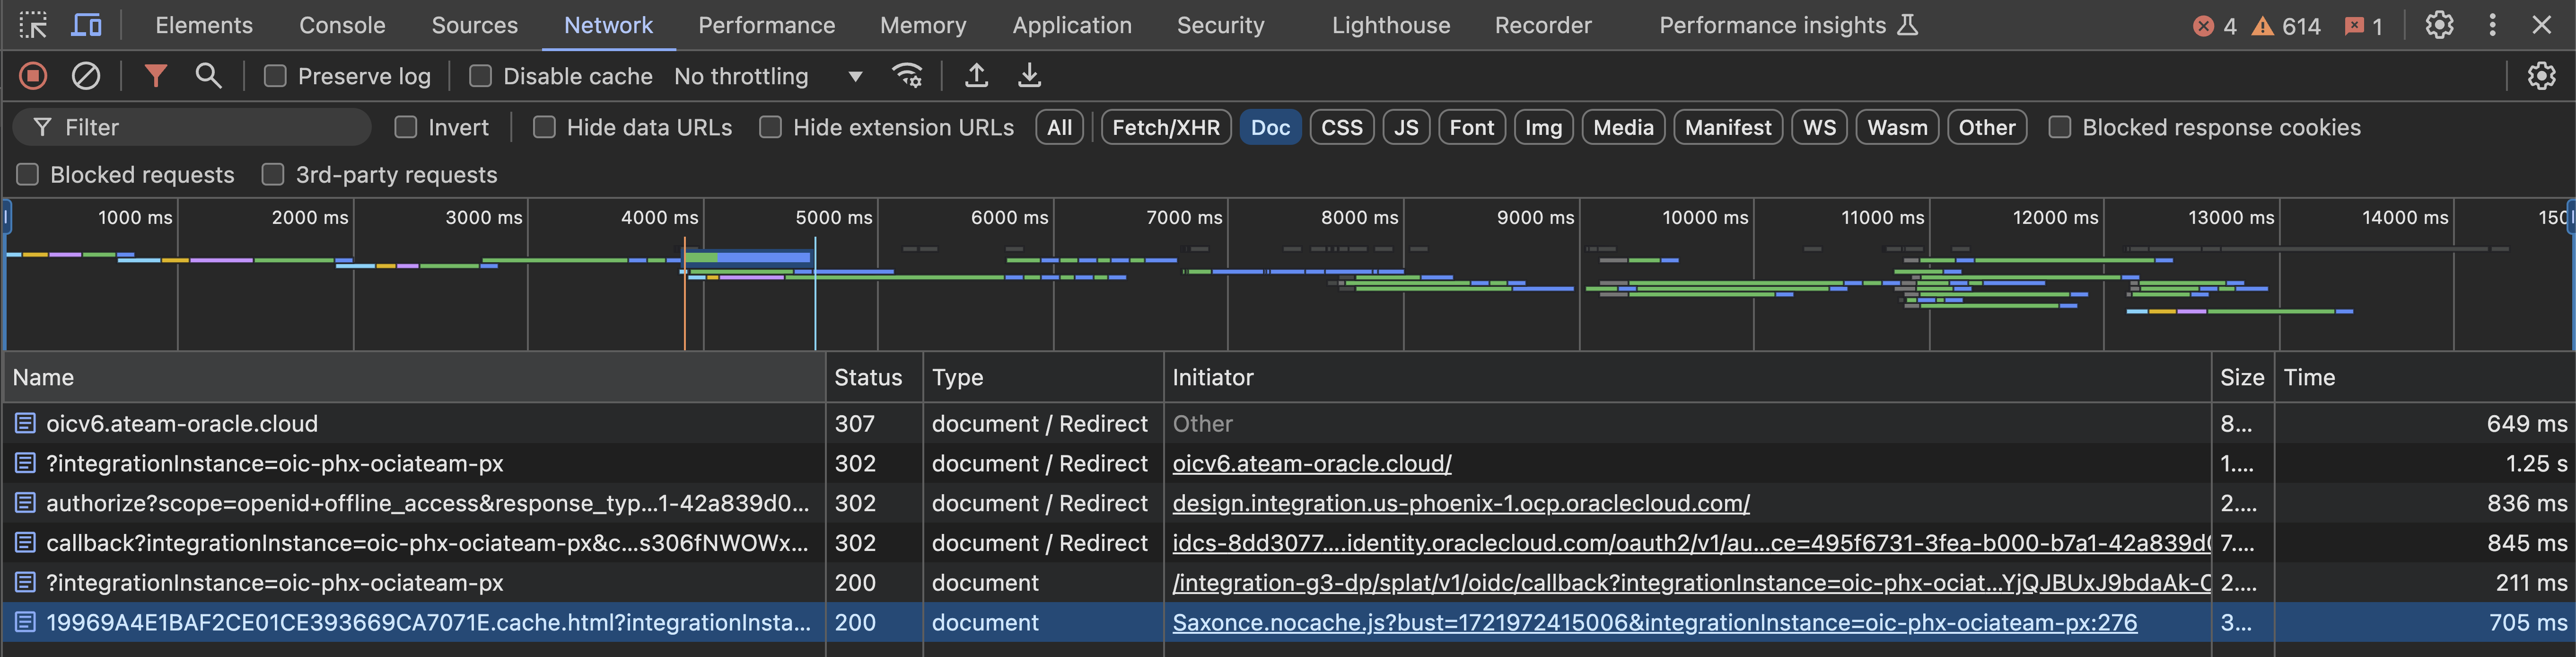
Notice that the request hits our custom endpoint in it gets redirected to the design-time url.
Conclusion
In this blog we showed a step by step process to create a custom endpoint for the OIC v3 instance.
Please check the next post in this series covering the configuration of a sample integration and the oauth 2.0 client credential authentication.