Introduction
This post is part of a mini-serie covering the Oracle Integration Cloud v3 from the networking perspective.
I will cover the configuration of a test integration and the OAauth 2.0 authentication to it.
**I am not an integrations expert nor a security expert , while writing my previous post, i wanted to test the connectivity to a customer managed custom endpoint and i struggled to achieve this simple task and i wanted to capture these steps to reuse it in the future.**
Please read the post on configuring a custom endpoint before moving forward.
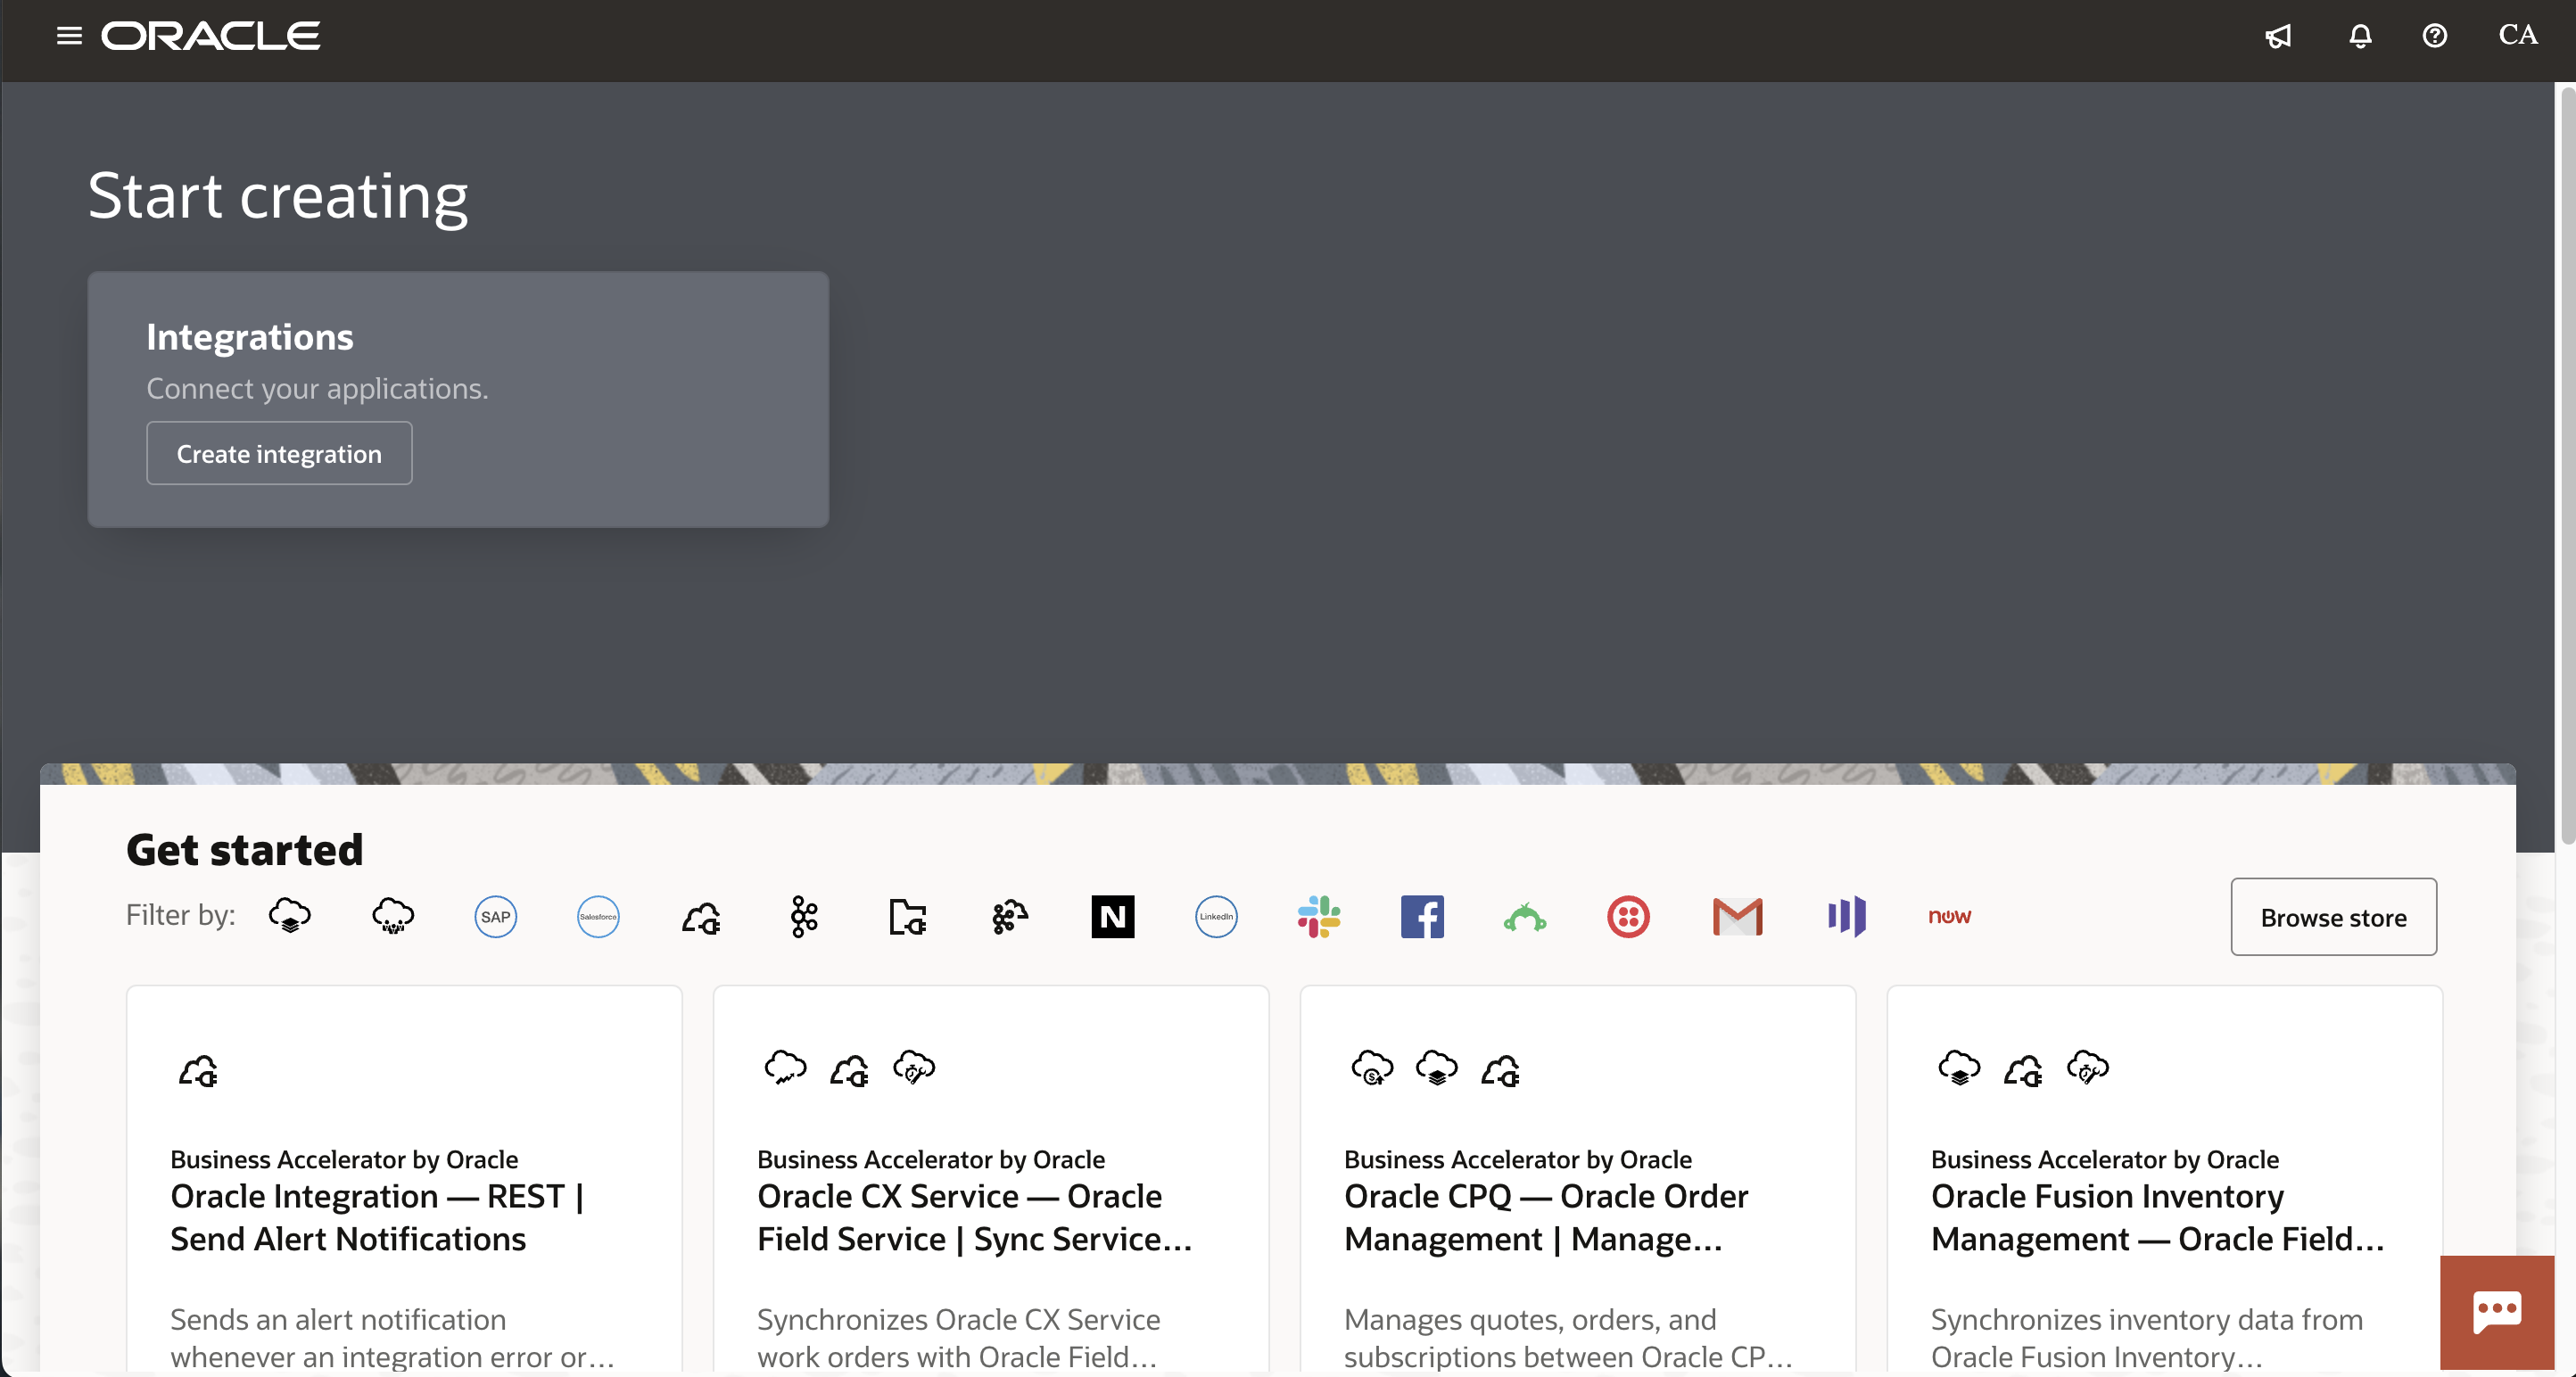
Configure a sample integration
After provisioning an OIC v3 instance, you can create several sample integrations following the official documentation. For the purpose of this post, i will configure the simplest one, called “echo”.
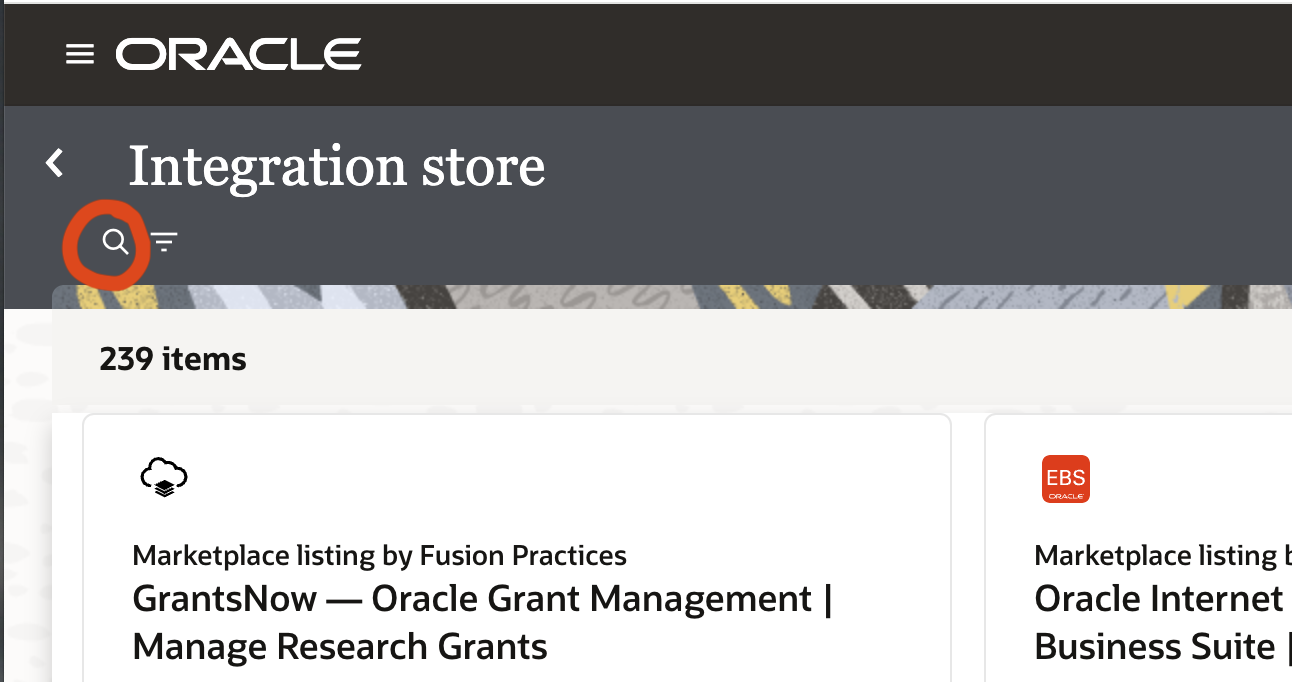
Login to your OIC design-time url, click the “Browse store” botton.
Click the search button,
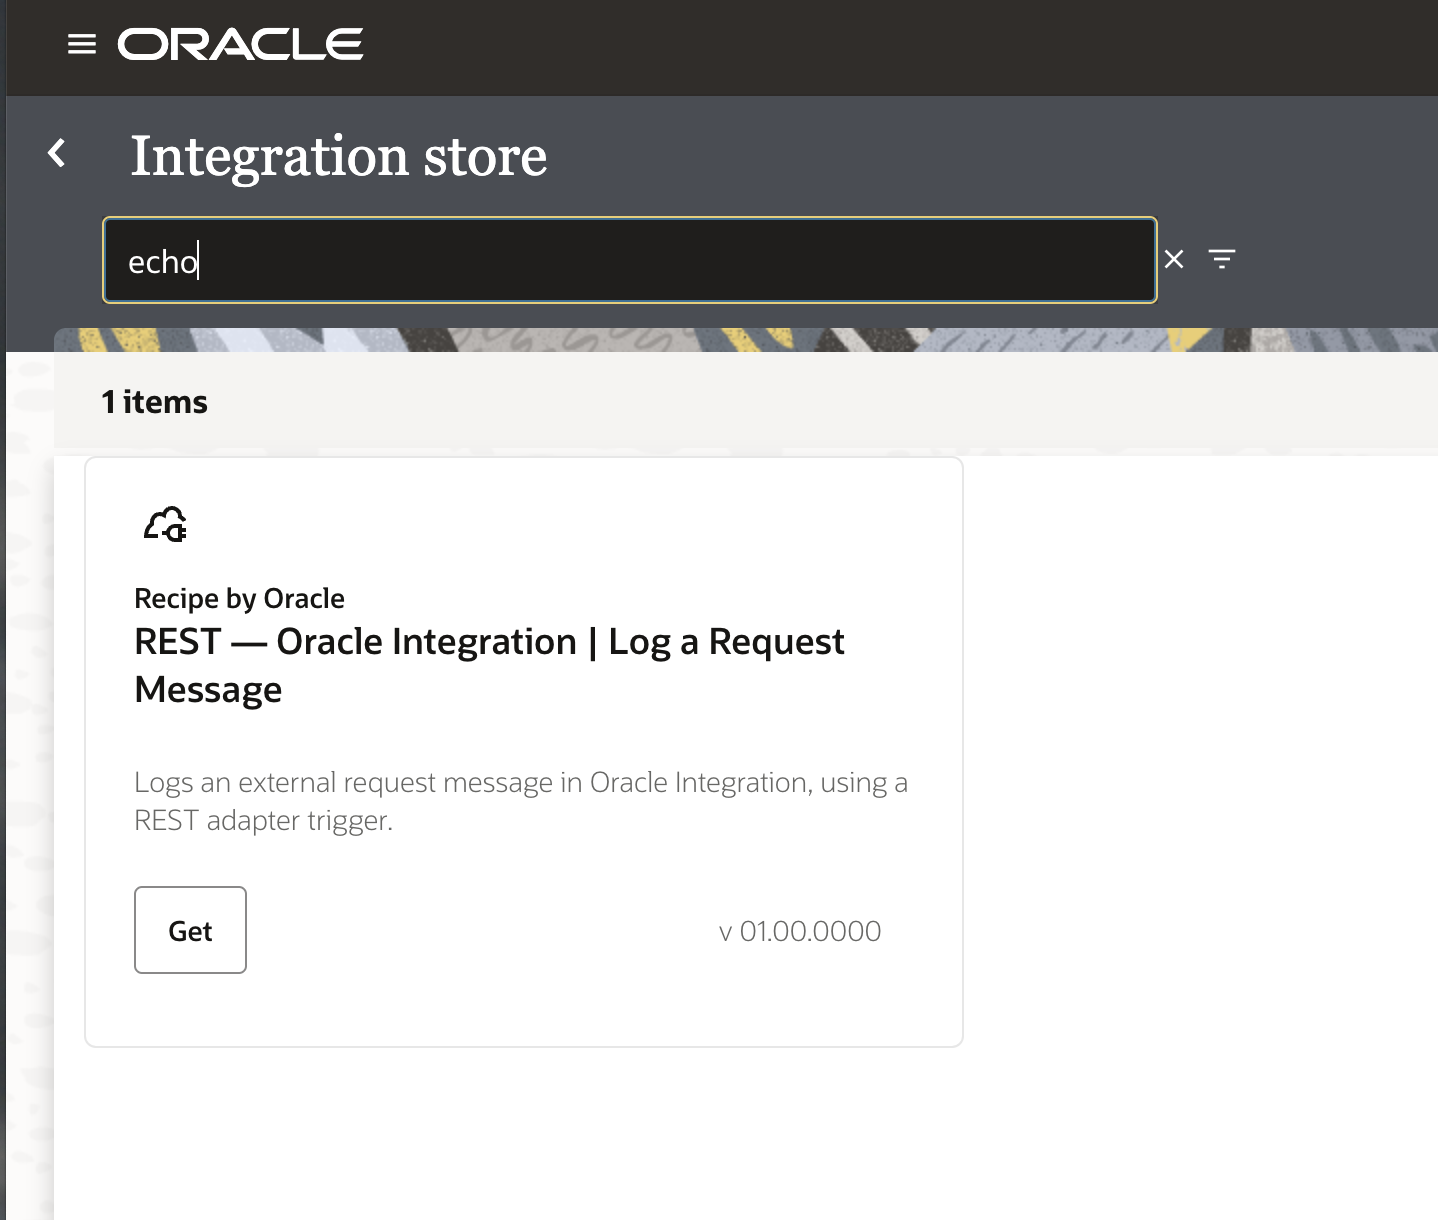
and search for “echo” and hit “Get”.
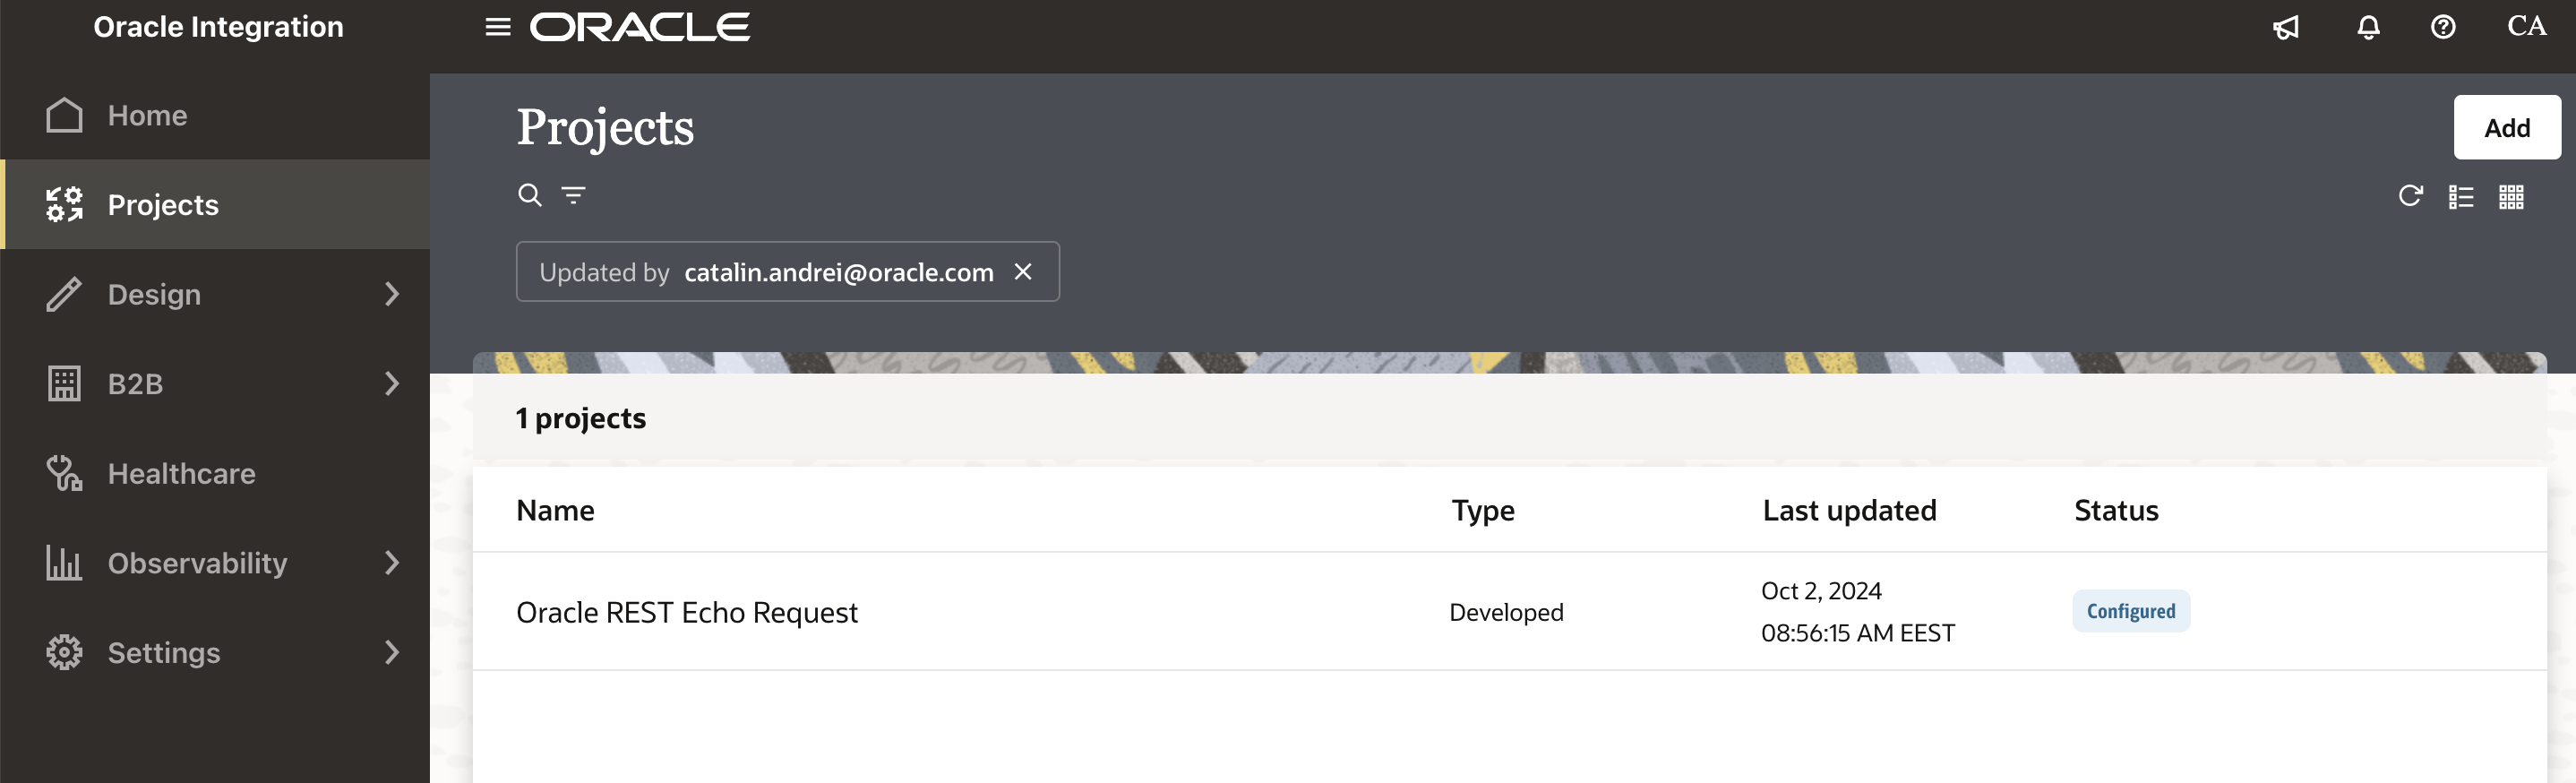
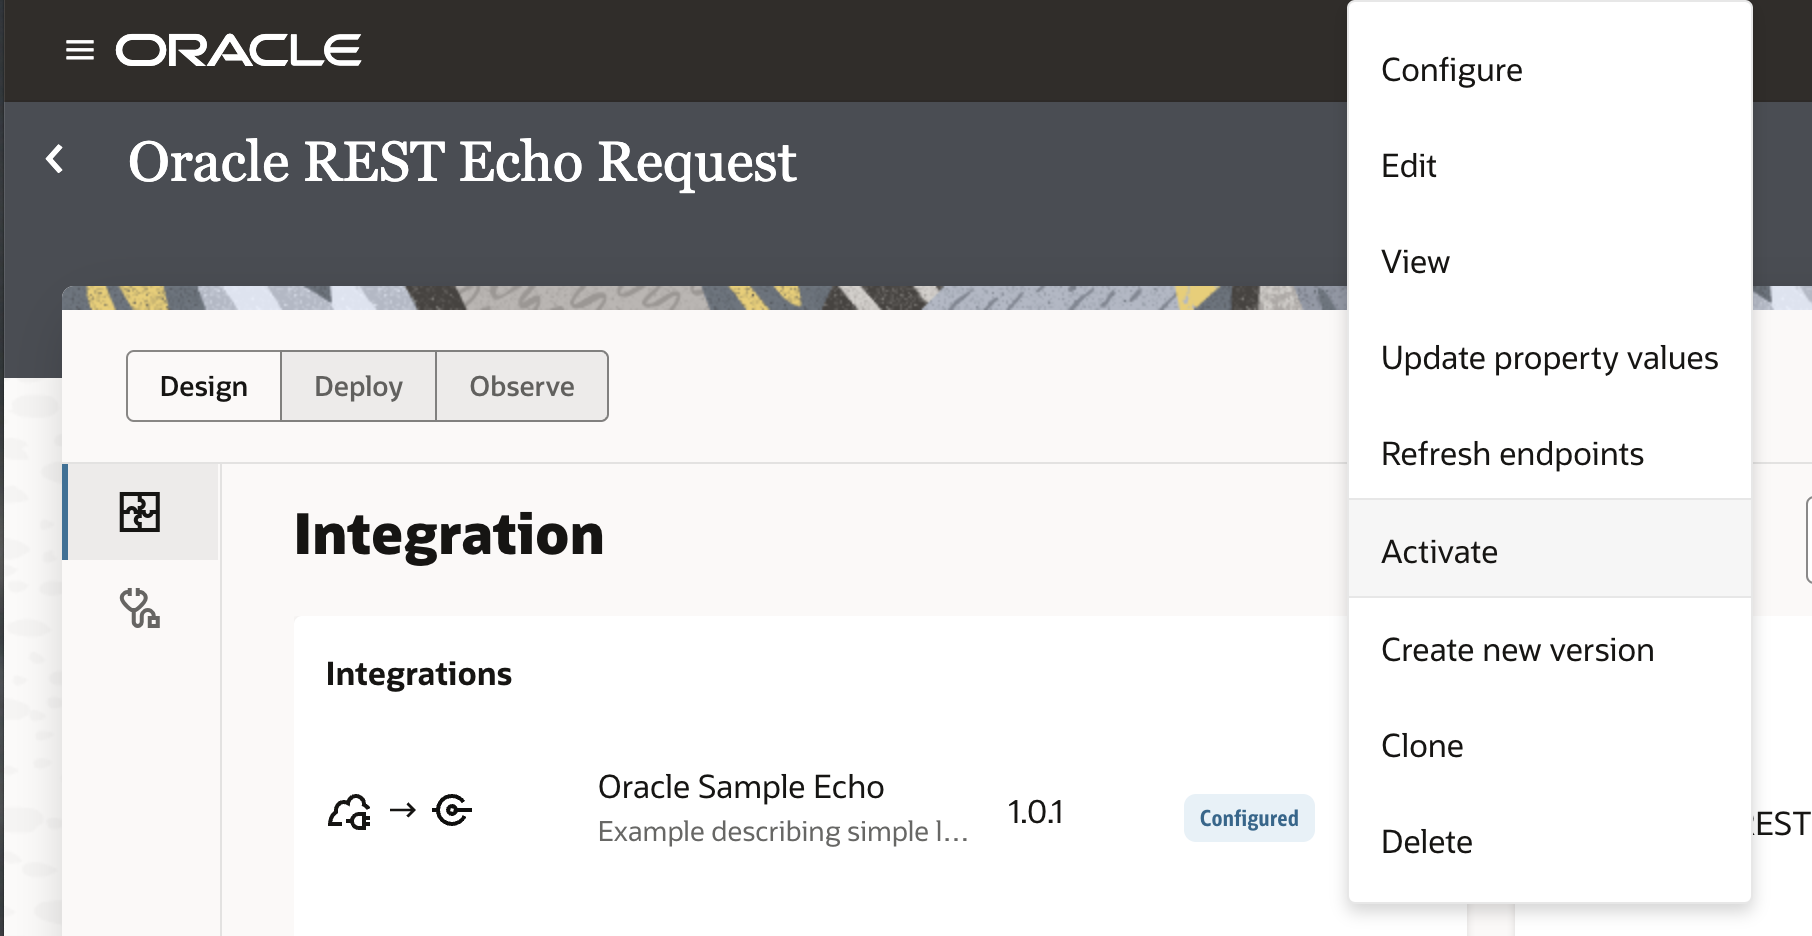
From “Home” navigate to “Projects”, and click on the “Oracle REST Echo Request”.
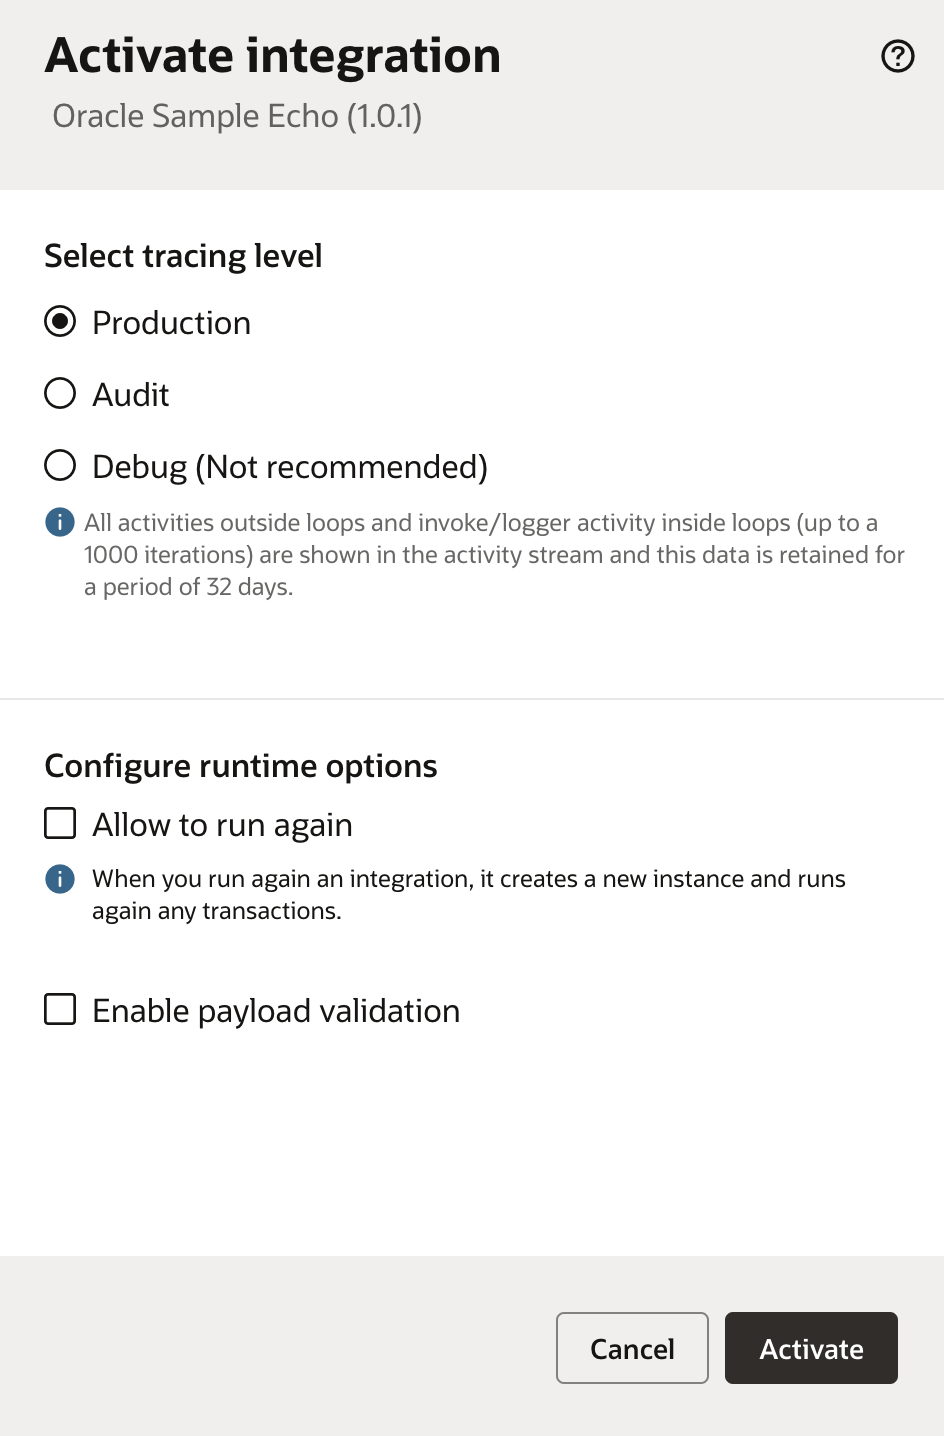
Click on the integration and “Activate” it.
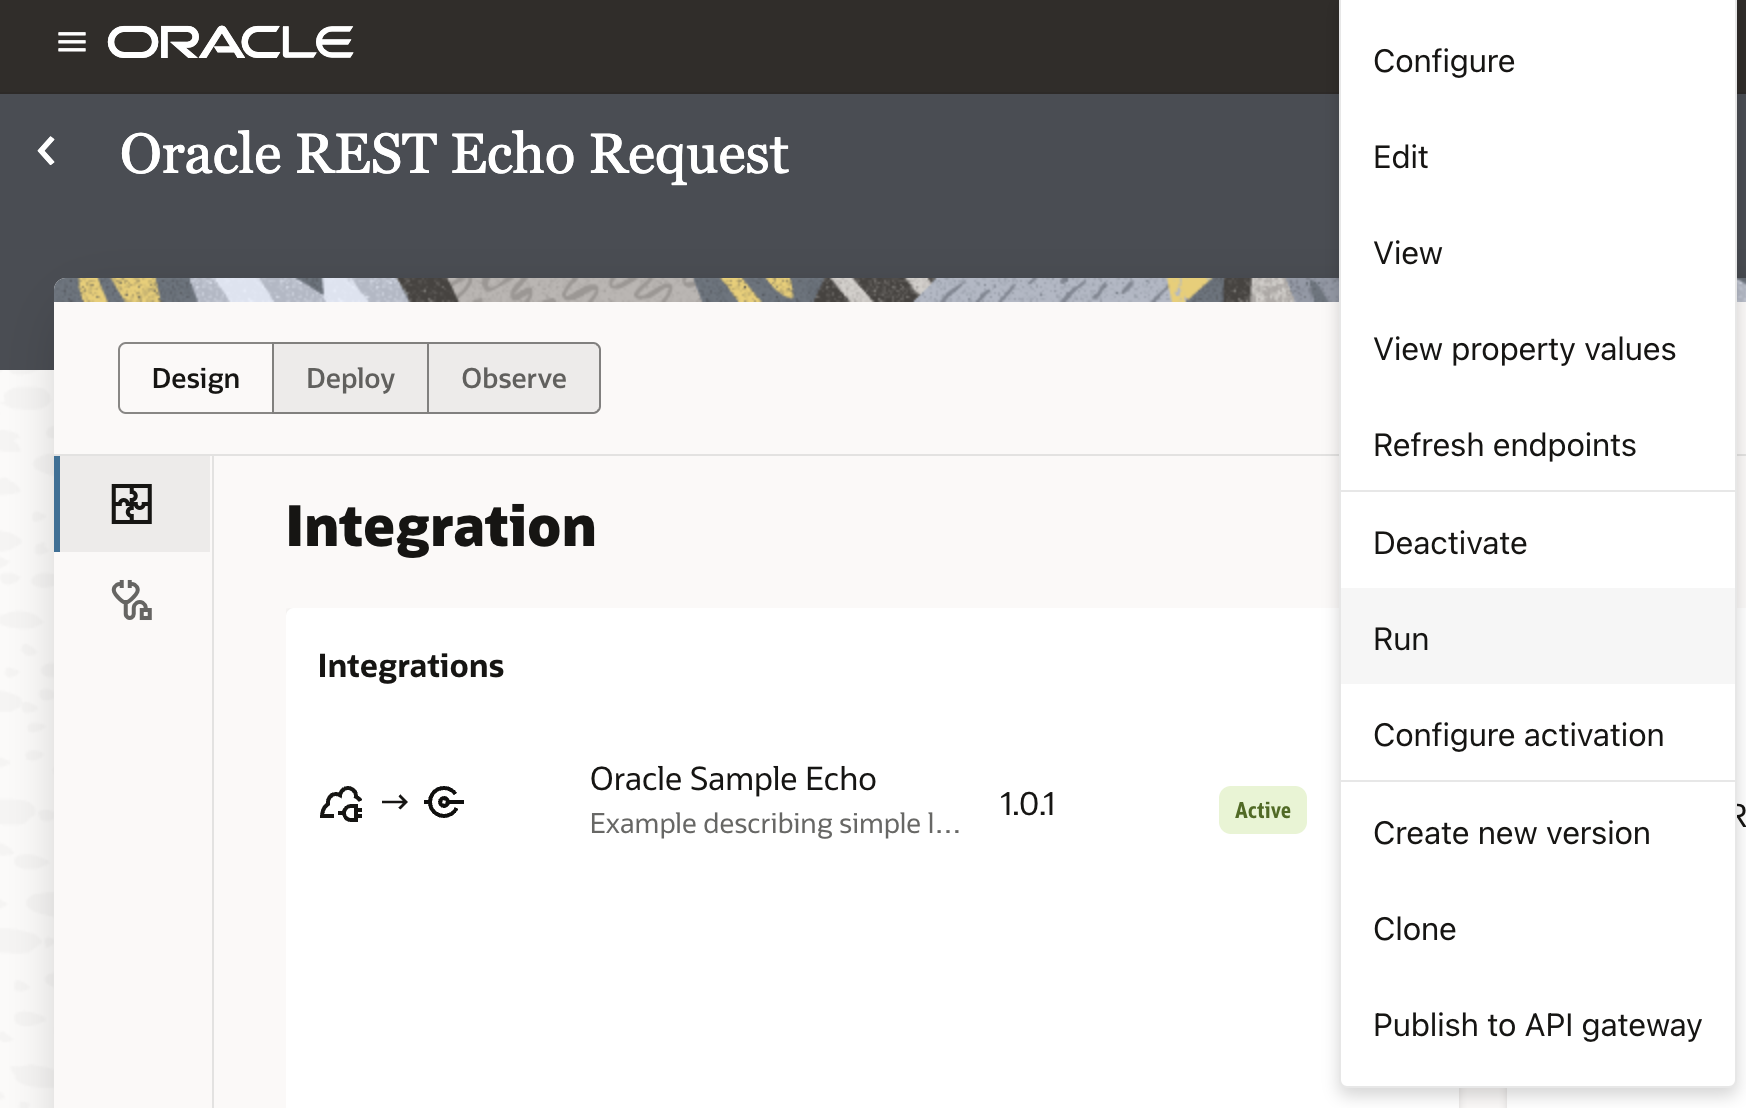
Click on the integration and hit “Run”.
You can do a simple test and if the Custom endpoint is configured correctly, you will get a 200 OK http status.
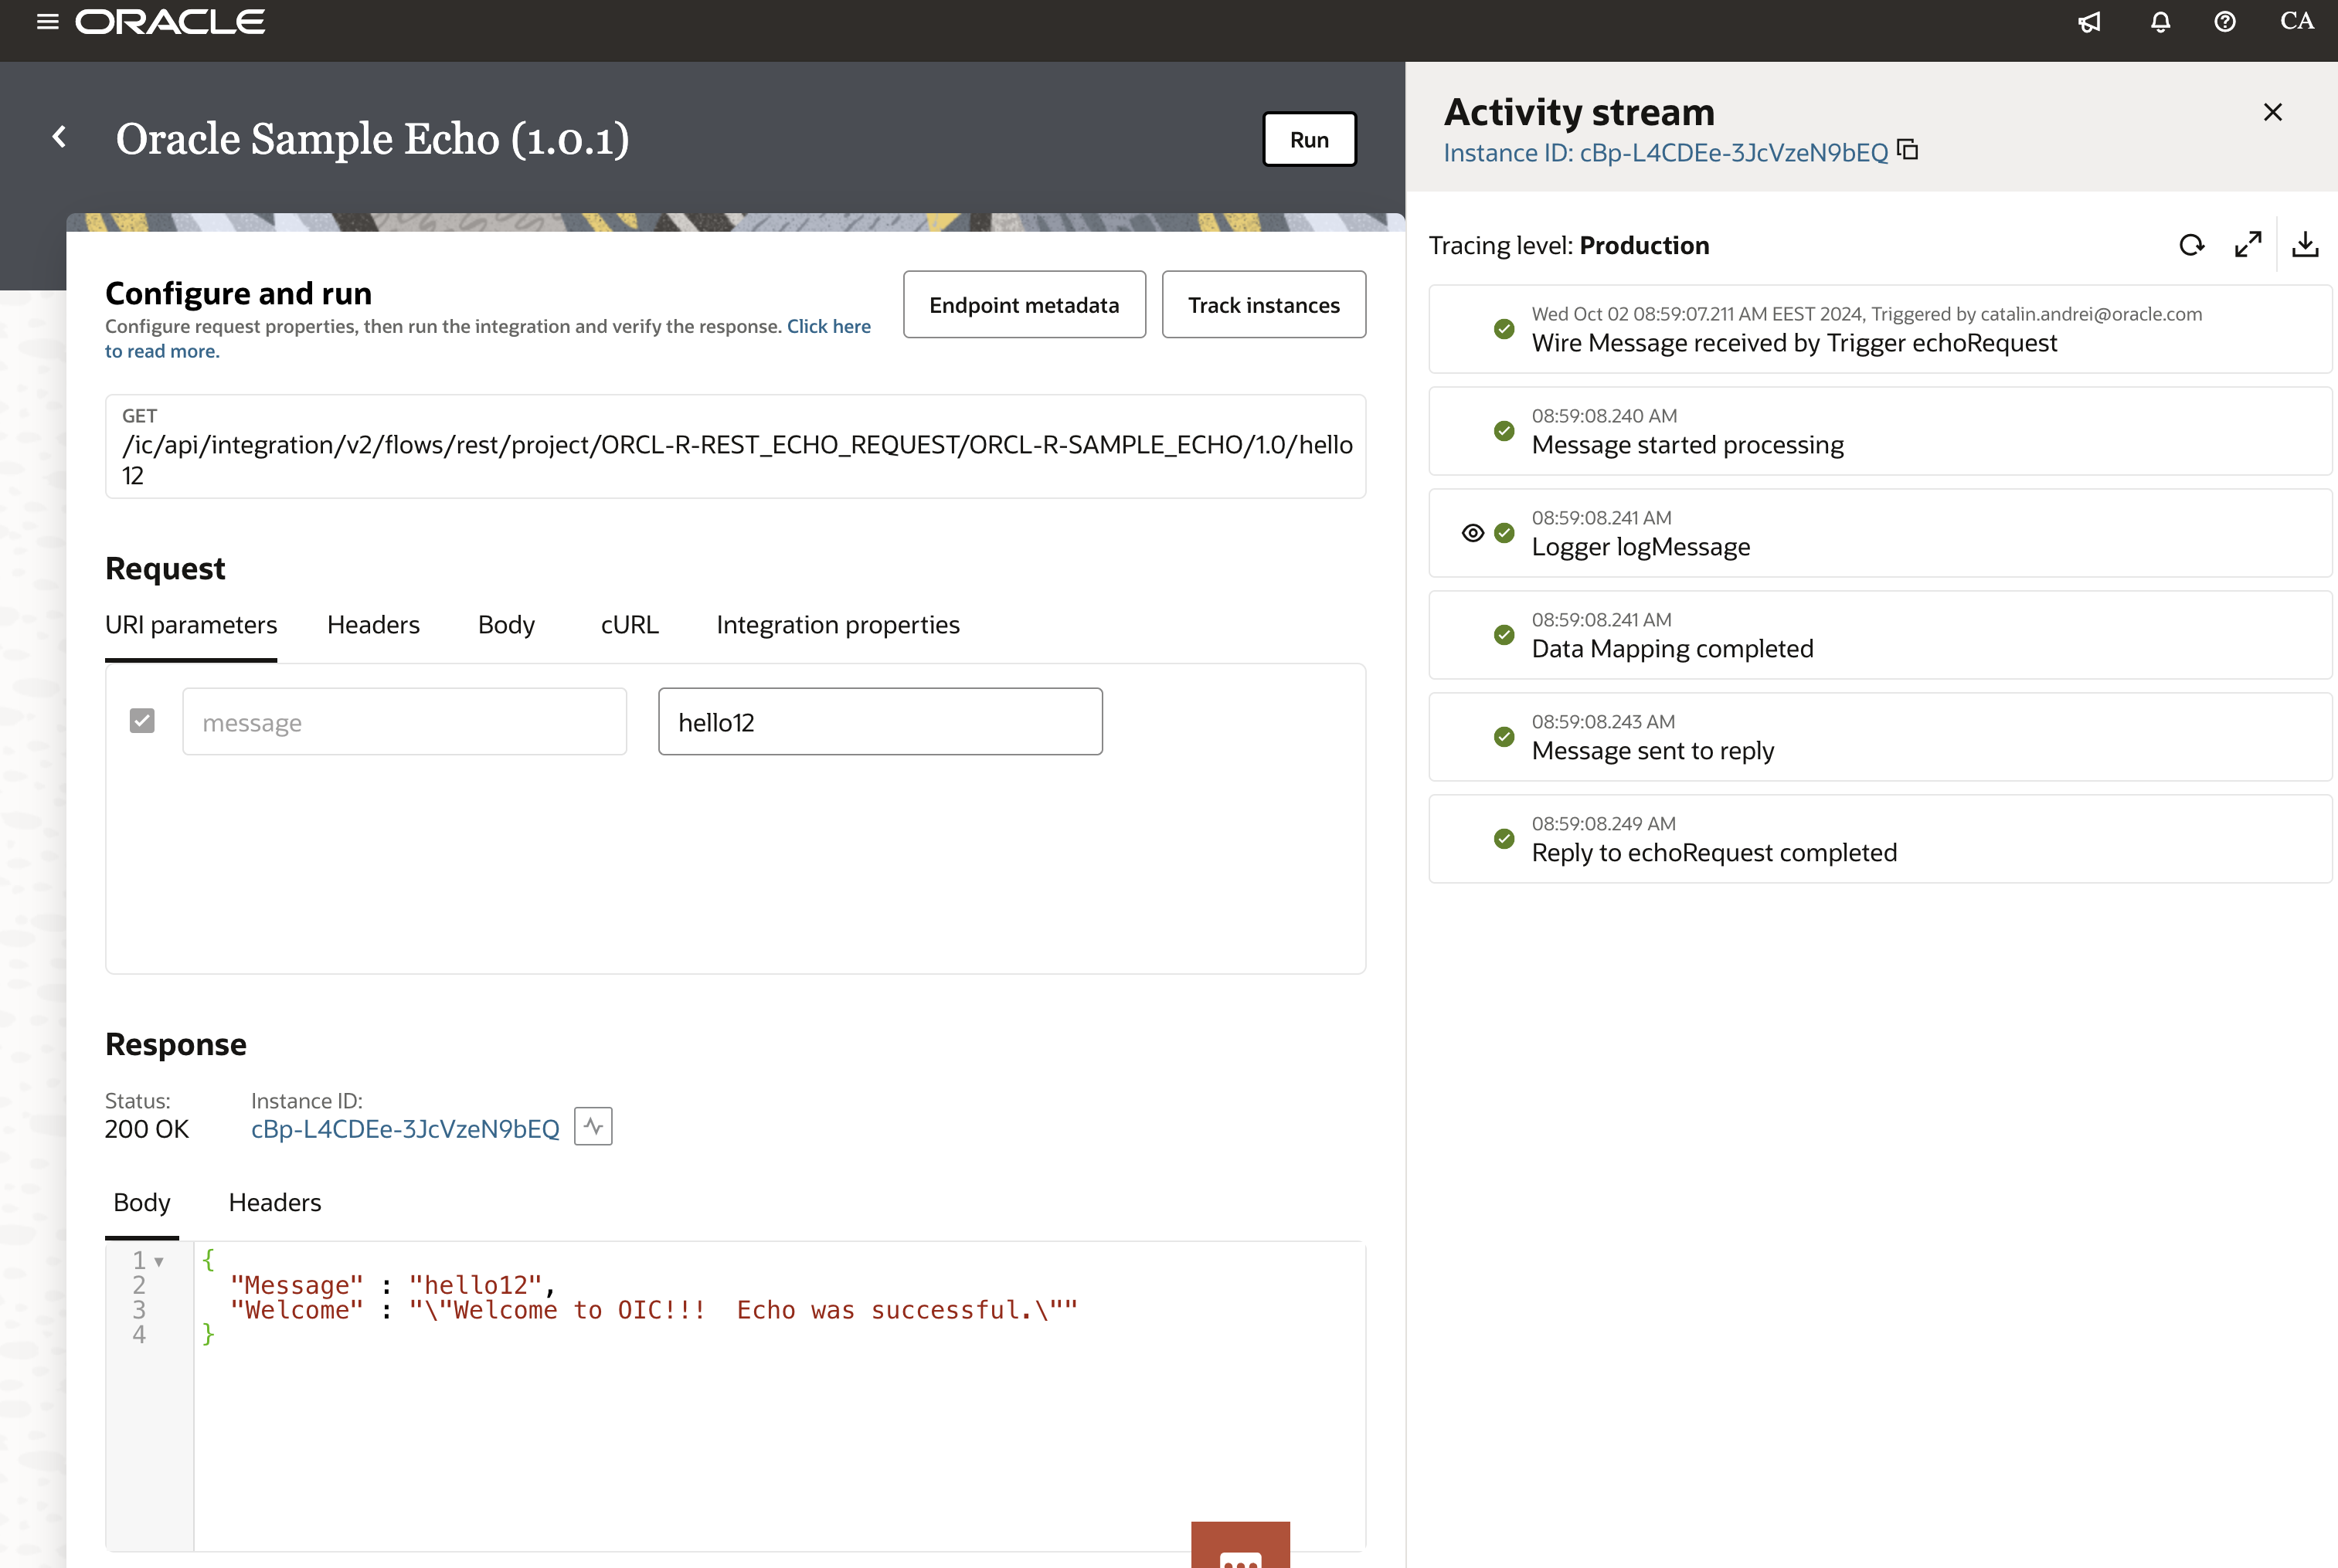
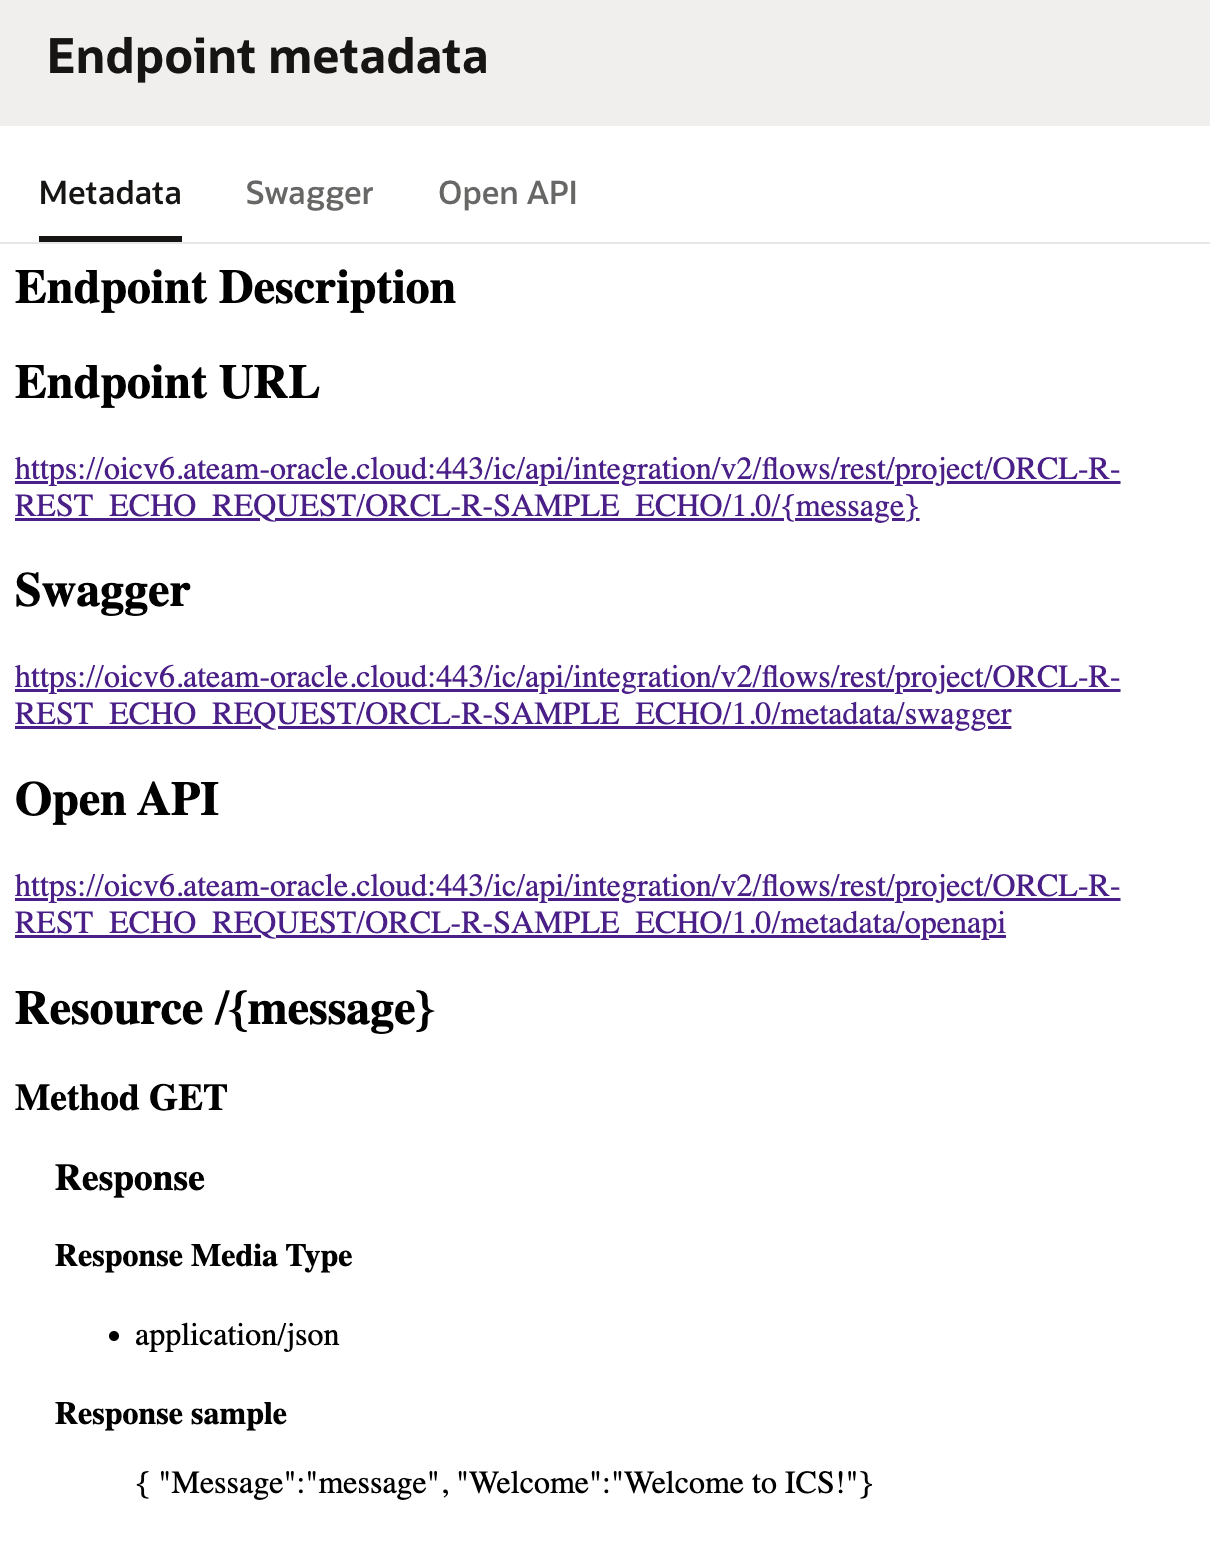
If you click on the “Endpoint metadata”, you will see the endpoint details.
Configure the OAuth 2.0 client credential authentication
Next we will configure the OAuth 2.0 for authenticating Requests for Invoking Oracle Integration Flows.
Please read the official documentation for authenticating the request.
Configure the Integrated Application
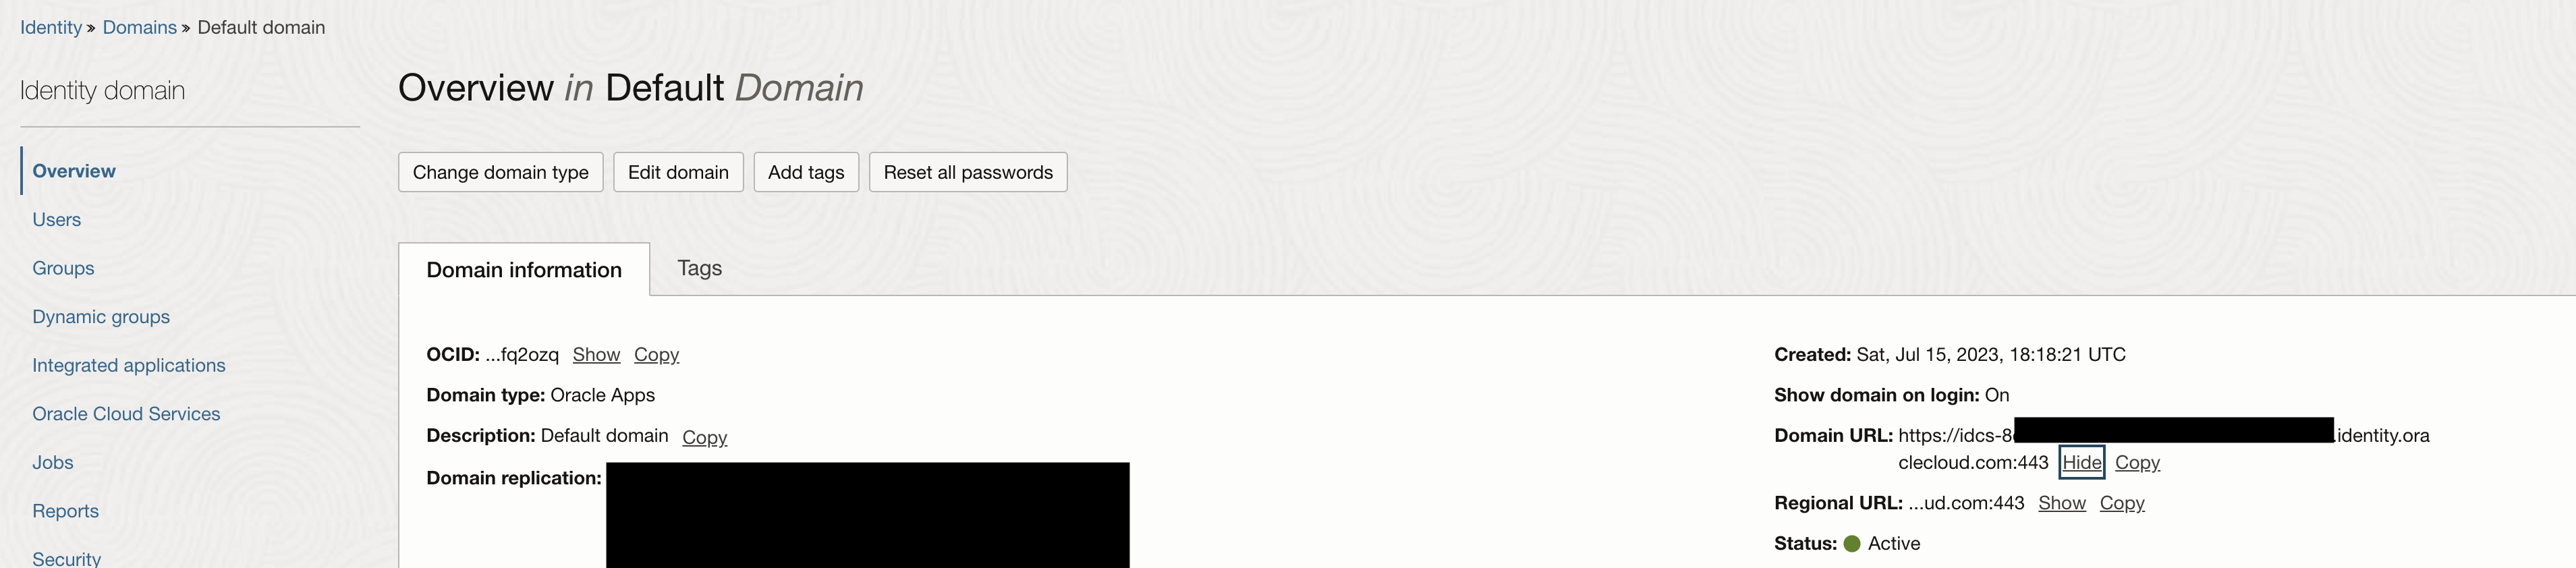
Navigate to “Identity and Security >> Identity >> Domains” and choose you configured Identity domain (in my example it is the default domain).
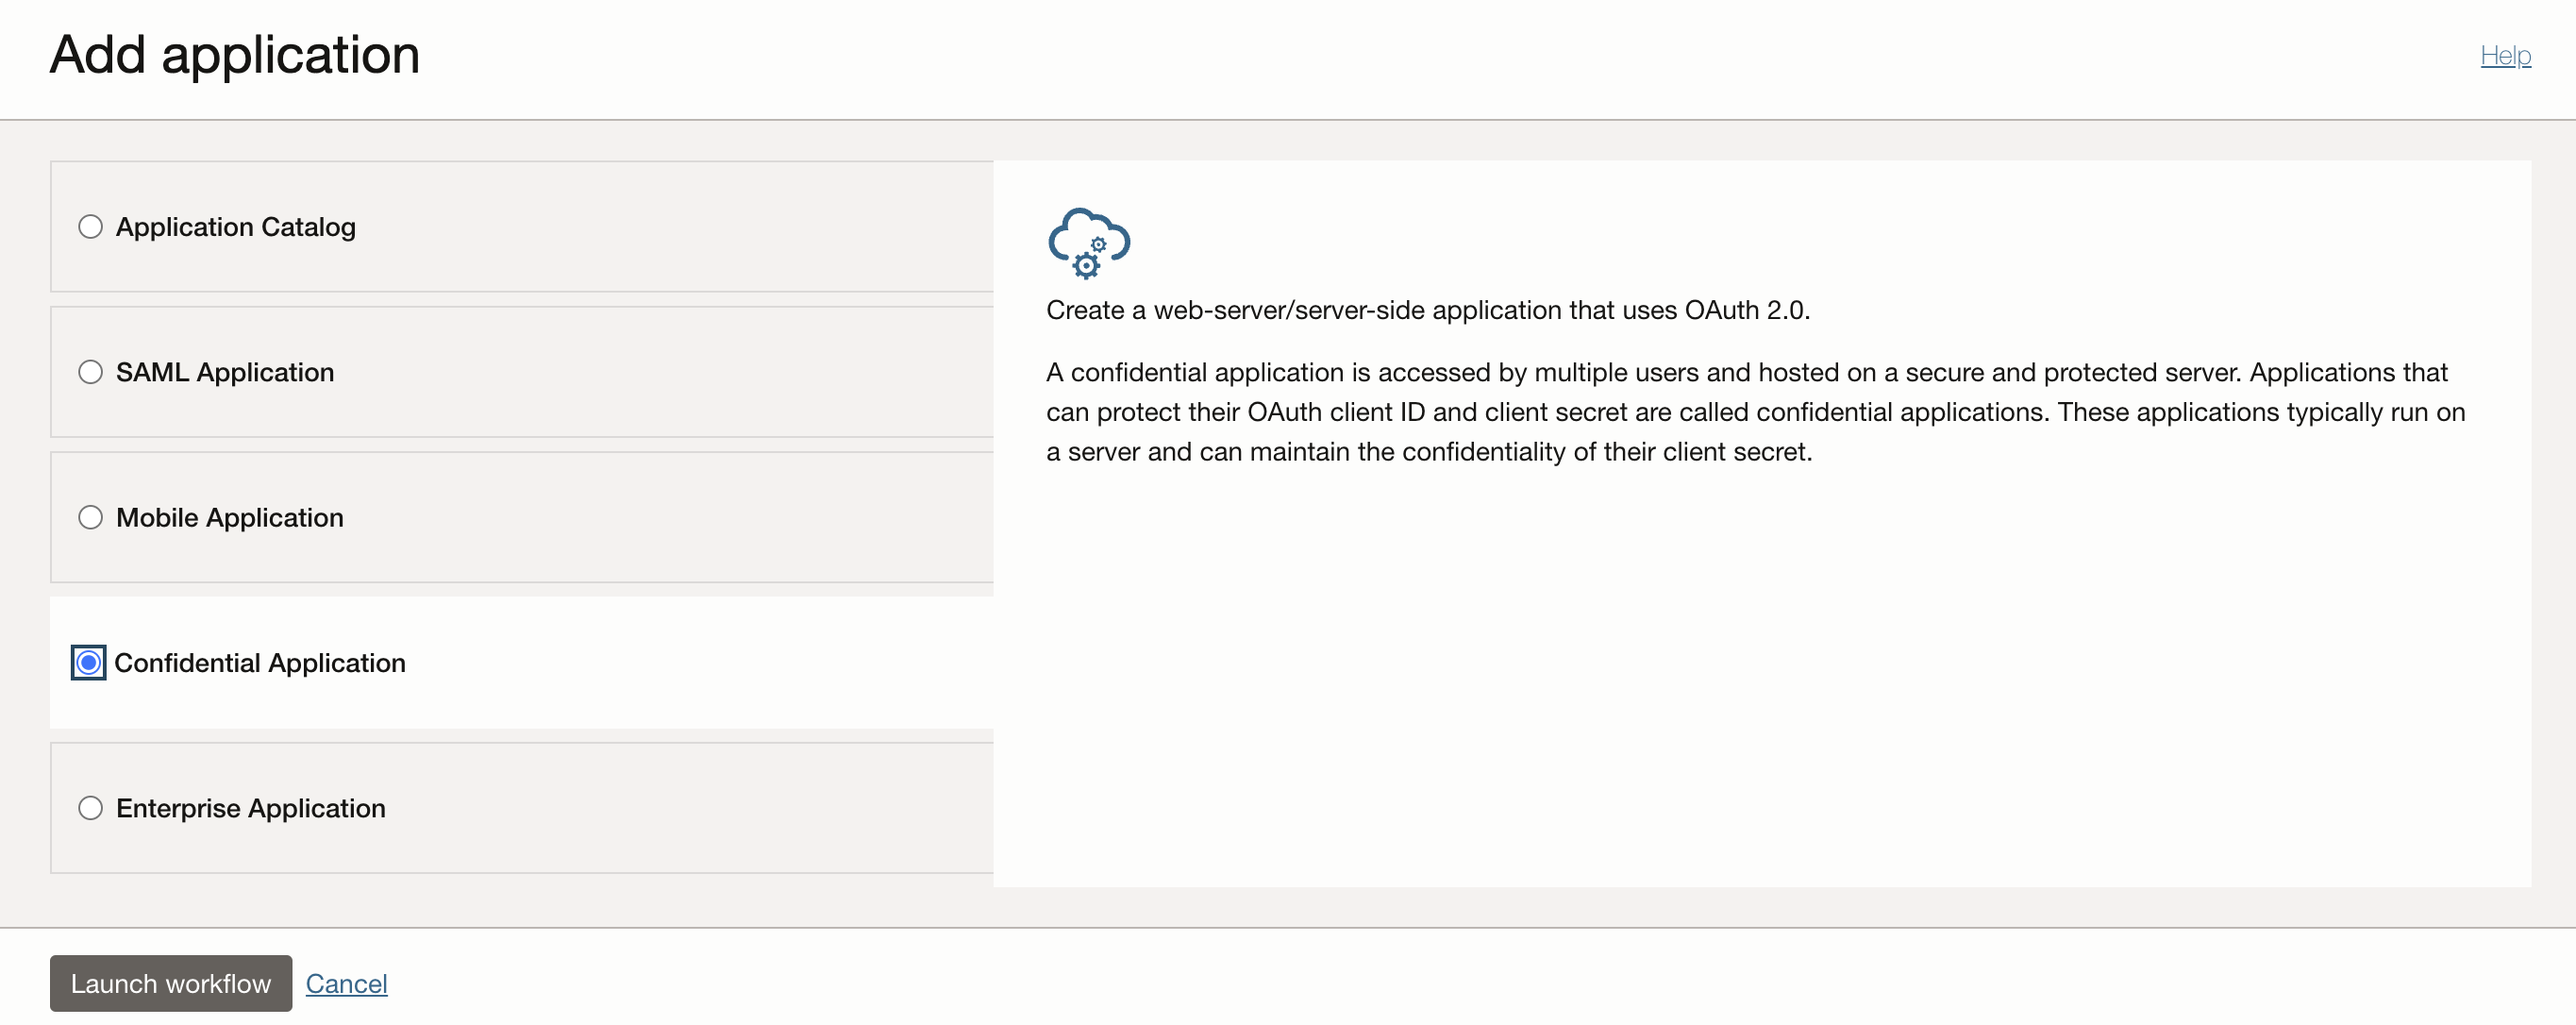
Navigate to “Integrated Applications” and hit “Add application” and choose “Confidential Application”.
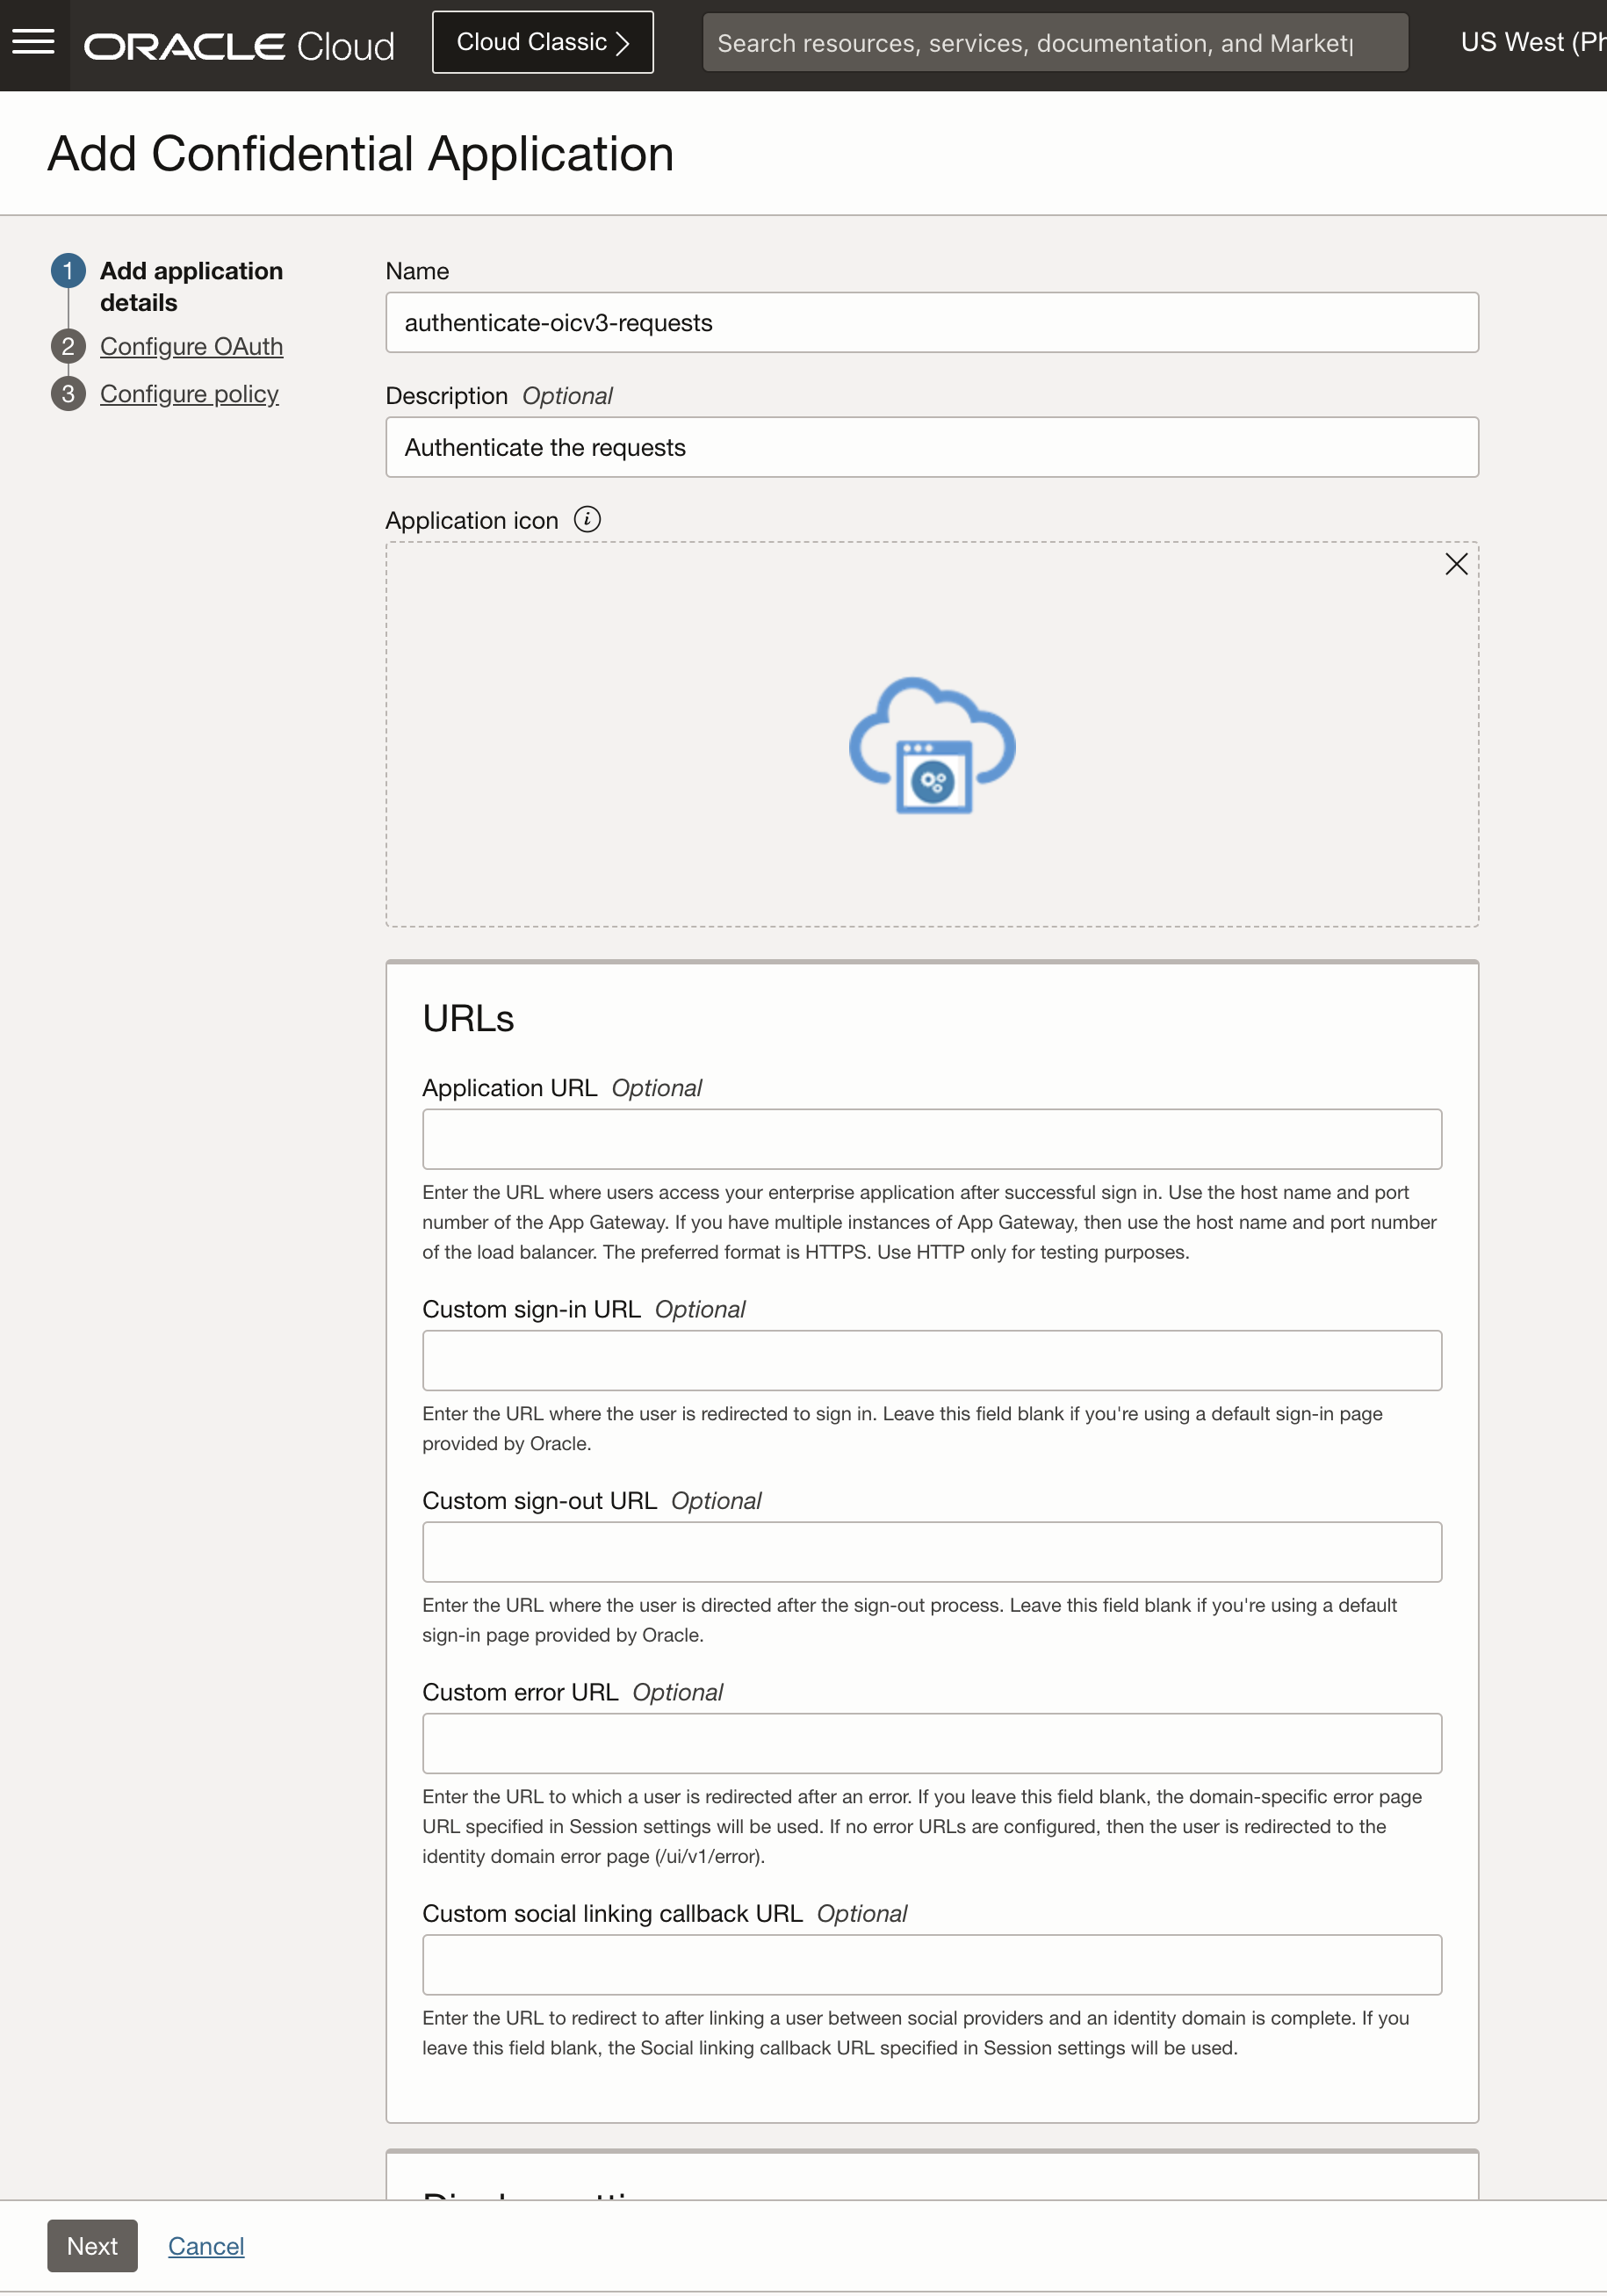
Give it a name and a description, left everything else not filled in and hit “Next”.
Configure the OAuth as “Client Configuration”, under Authorization check “client credentials” and “refresh token”.
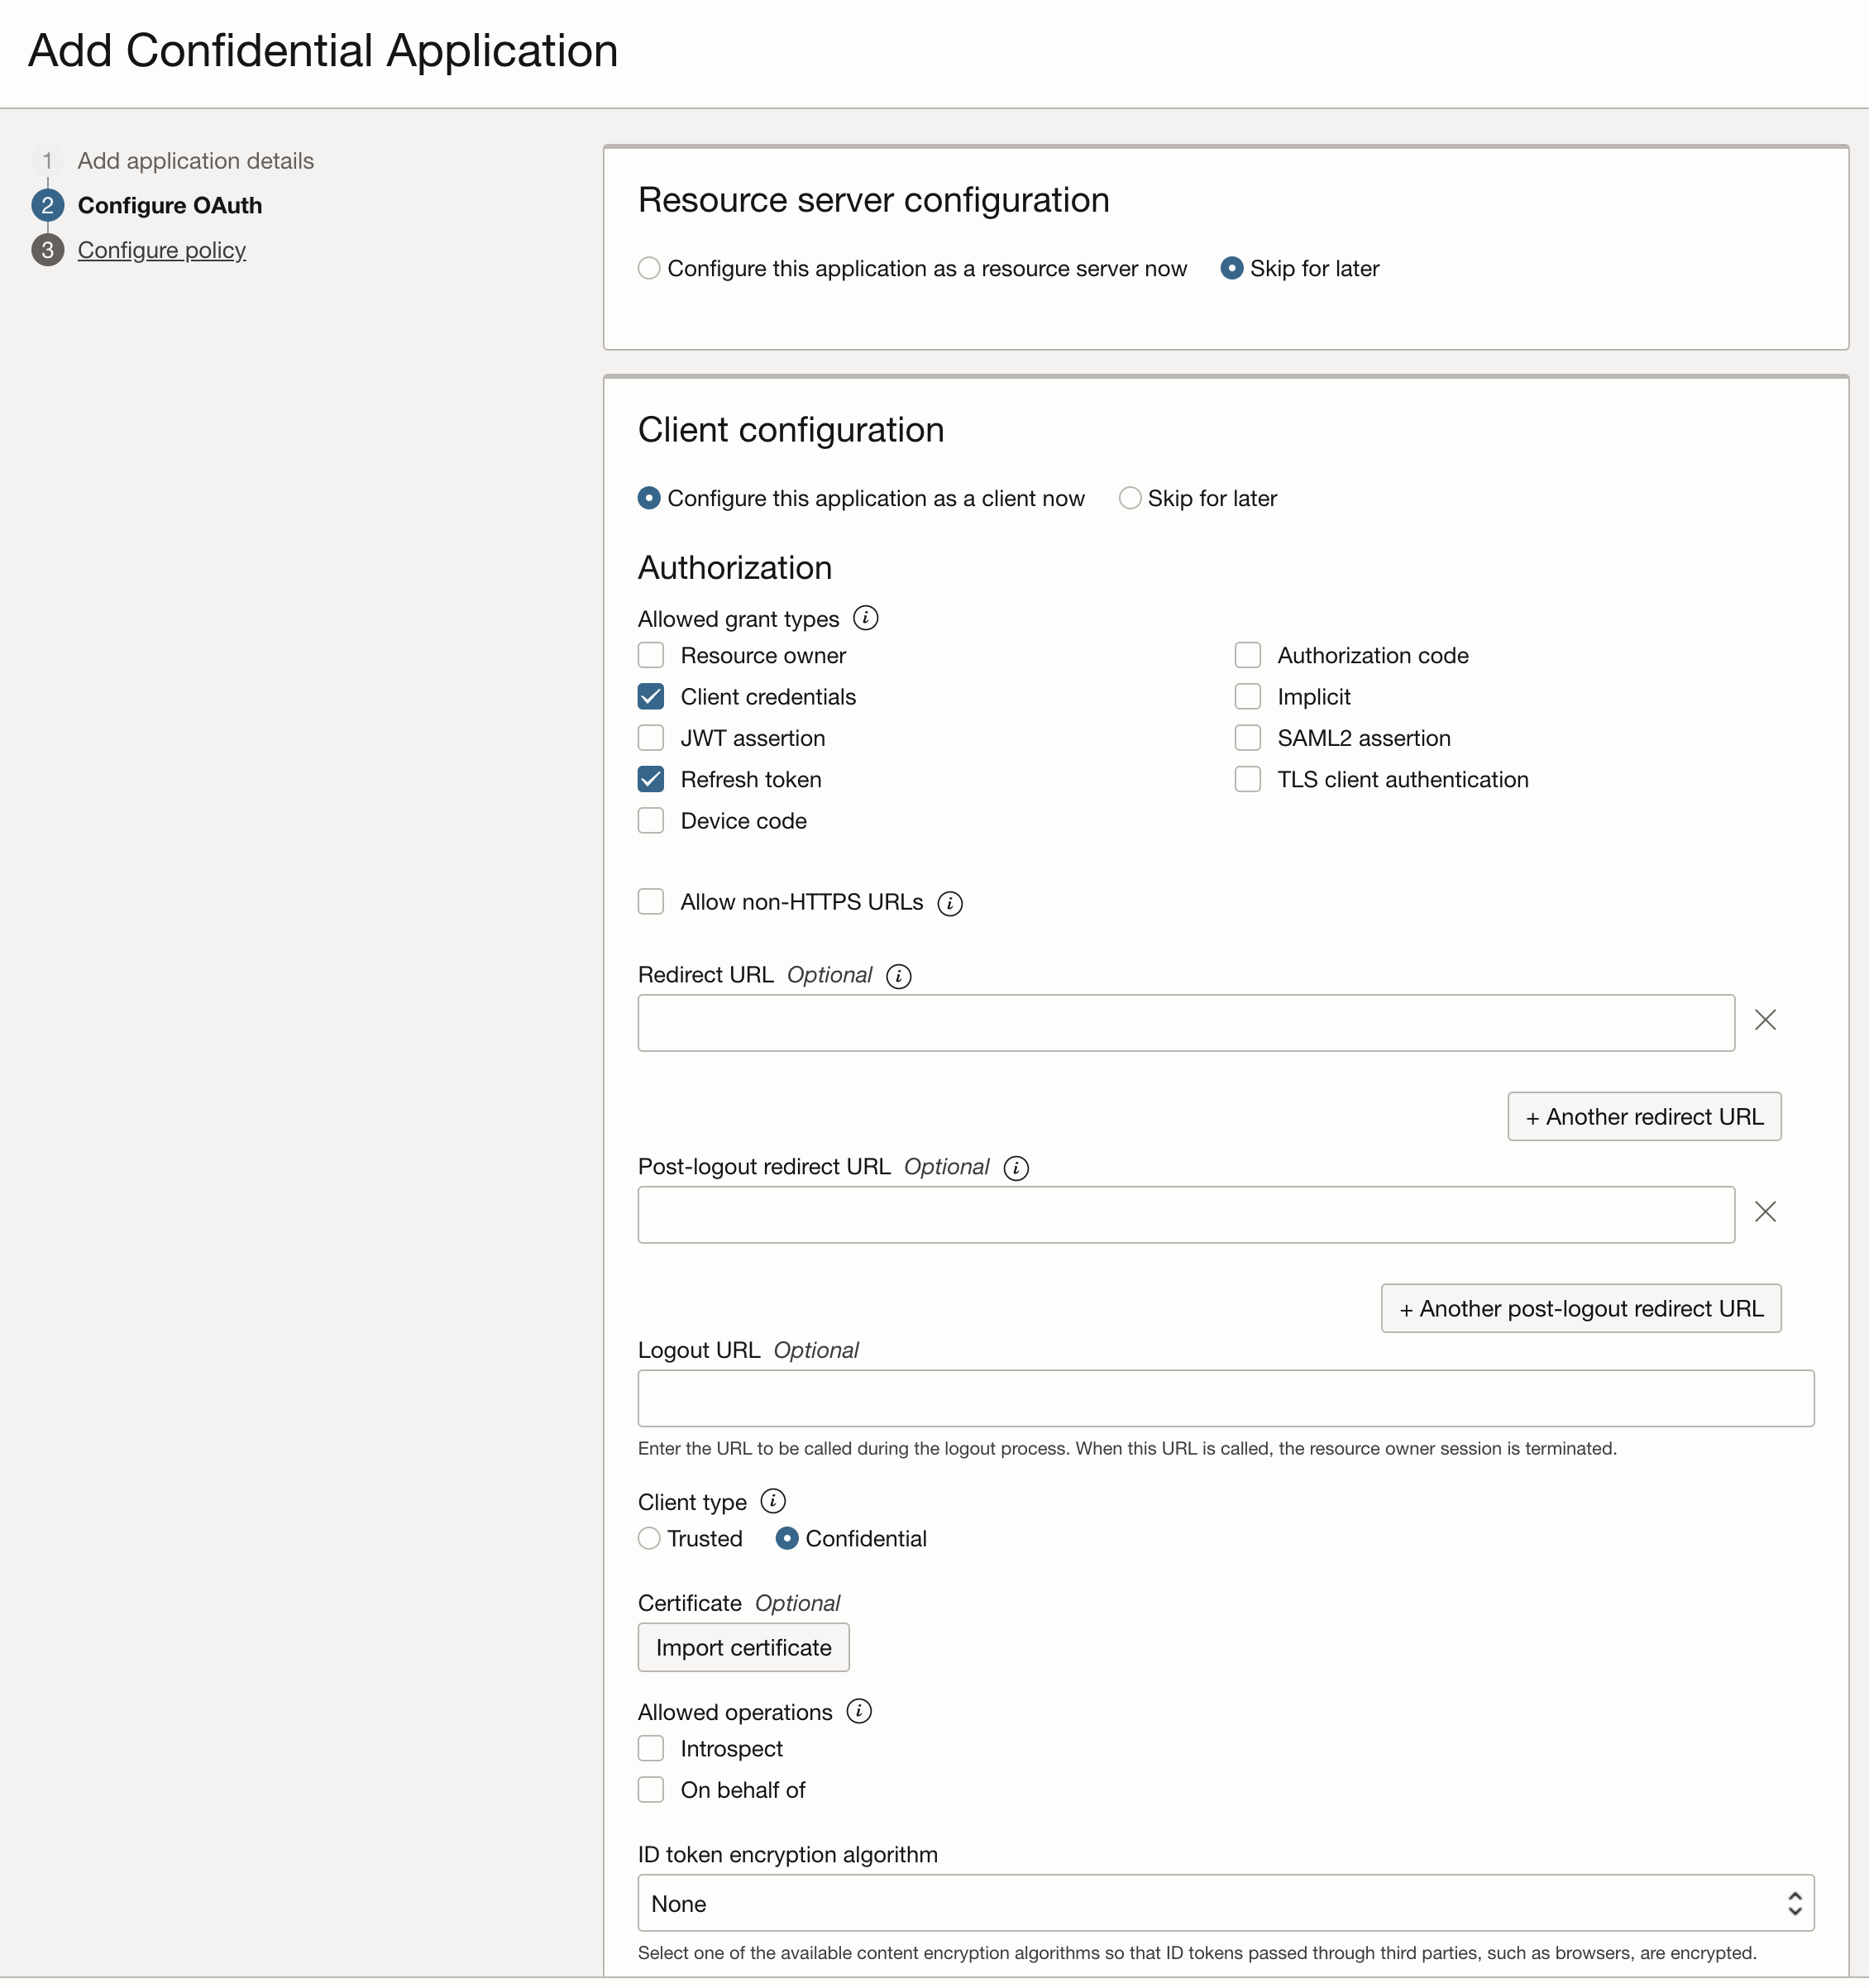
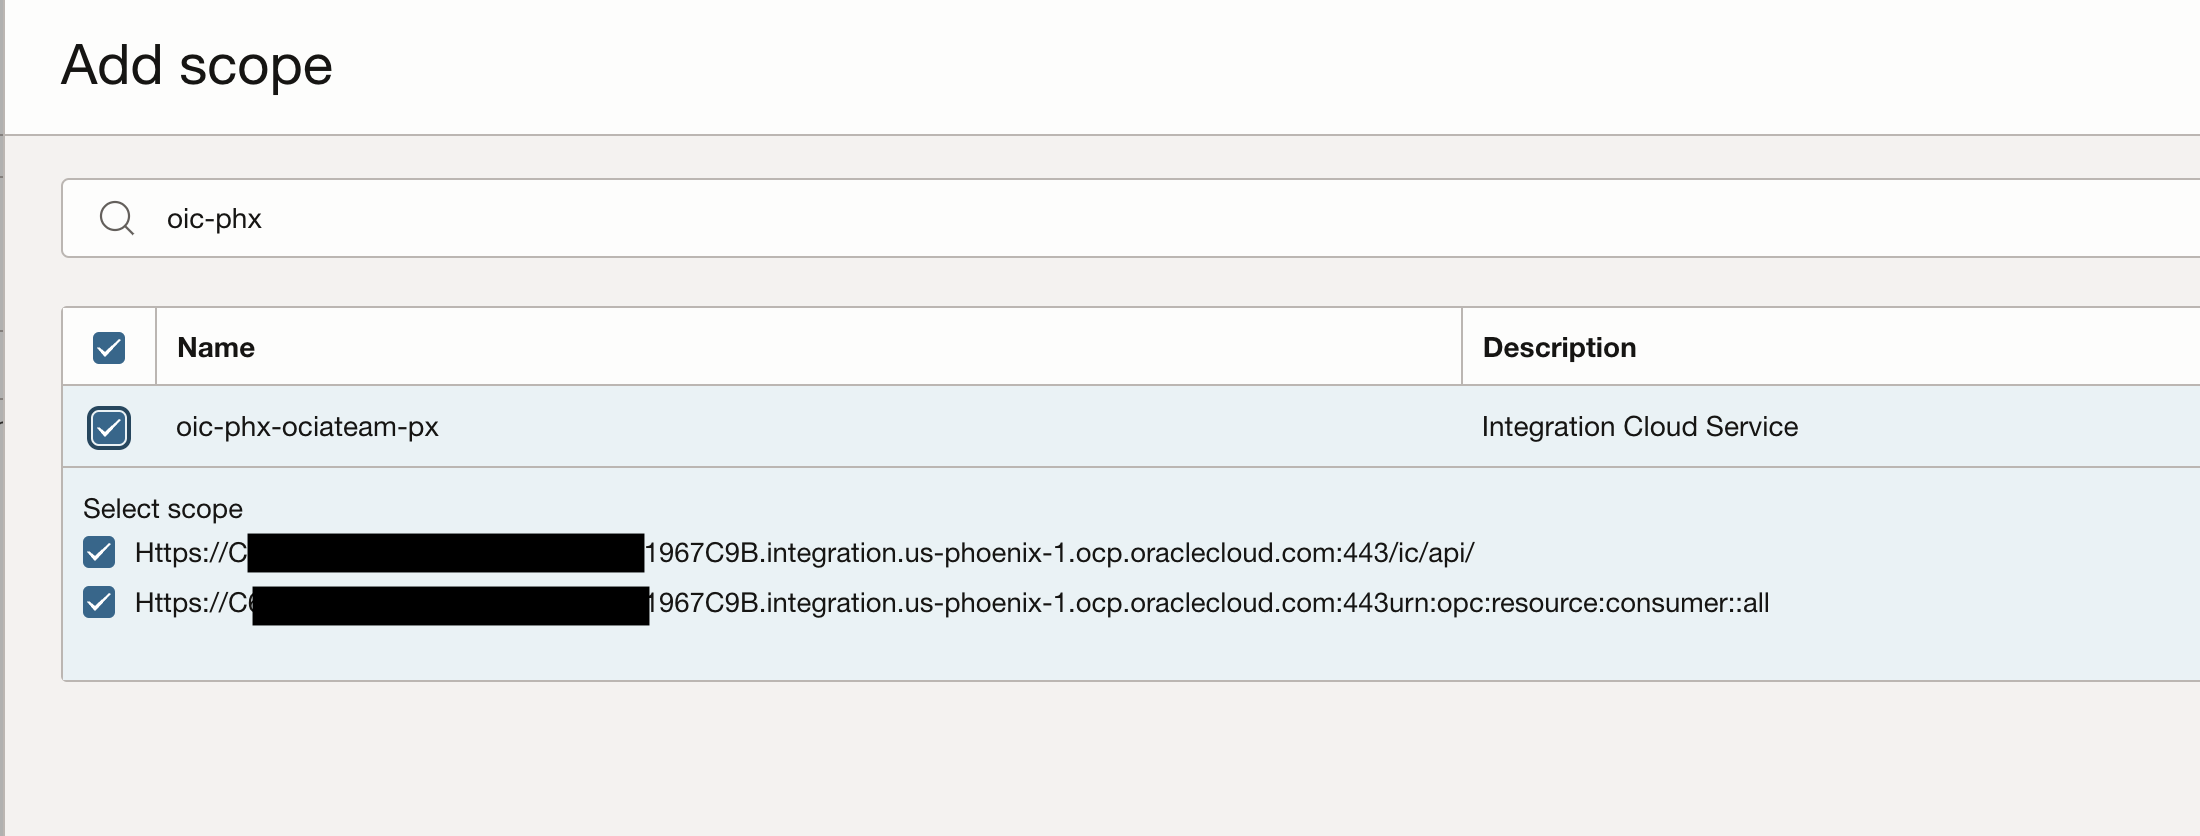
Under “Token issuance policy” set the “Authorised resources” to “specific” and select “”add resources”.
Under “Add scope” search your provisioned integration instance, expand it, select the scopes and hit add.
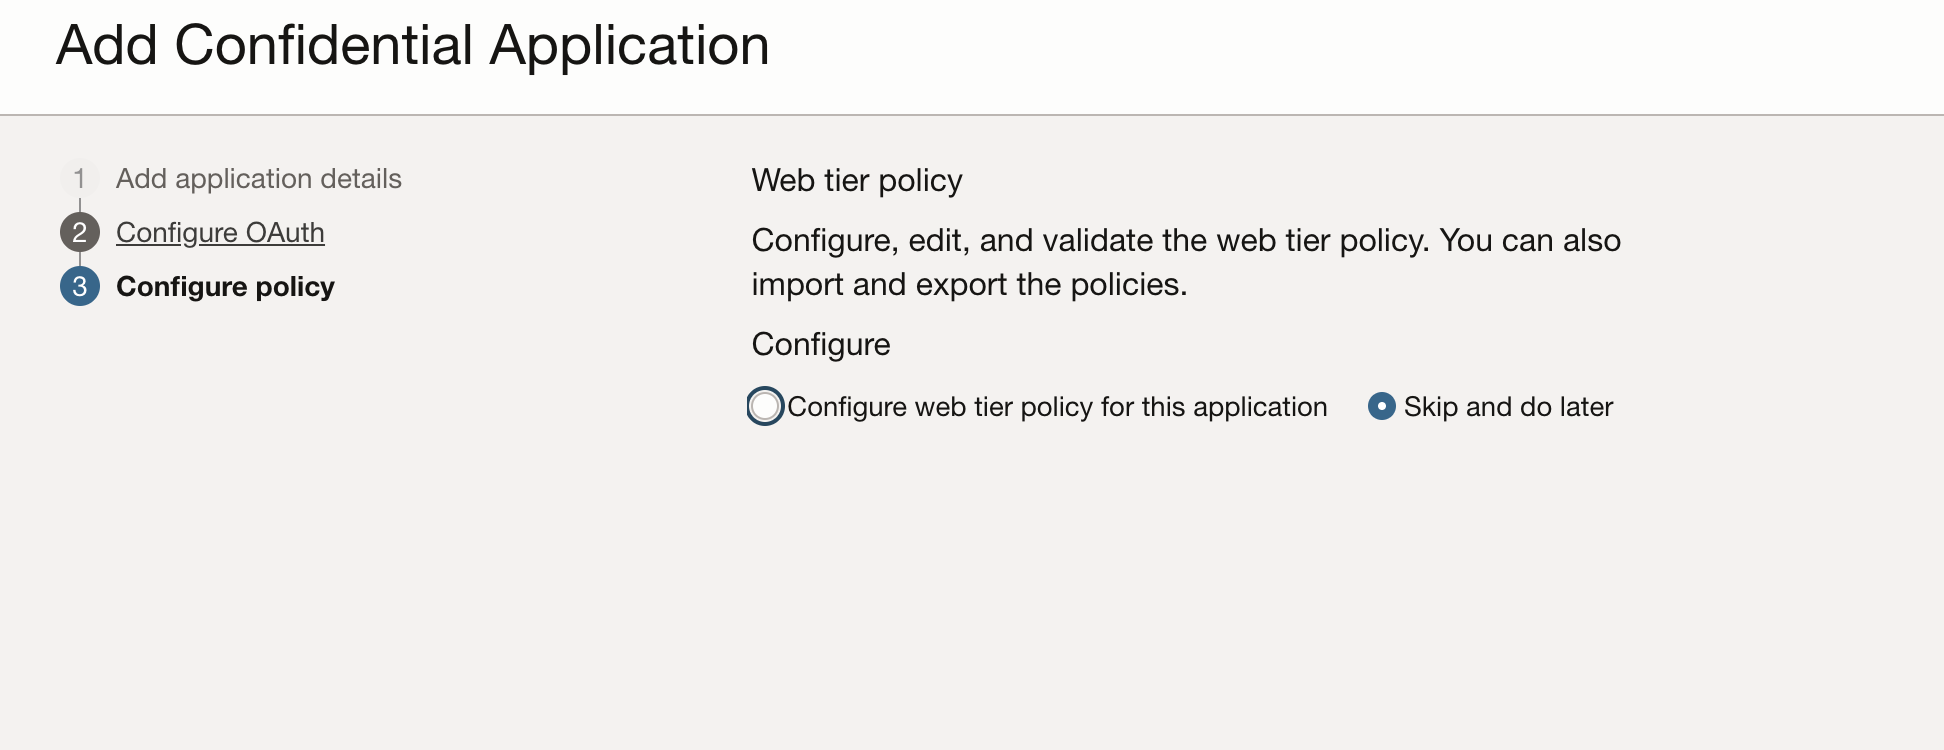
Hit next to the proceed to the “Configure policy” section which will be left as “Skip and do later”.
The application is disabled, so we will need to hit the “Activate” button.

Configure the Integration Instance to use oauth2
Next we will assign the application to the “Oracle Cloud Services” created application for your Integration instance.
Before configuring this, we need to understand what users can do by role. Please check the official documentation.
In this exercise, i will use the “Service User” role.
Navigate to “Identity and Security > Identity > Domains” and choose your configured Identity domain (in my example it is the default domain).
Under Oracle Cloud Services, search for your integrations instance name. You will get the application configured when you provisioned the integration instance. Under this application we will configure the oauth2 authentication.
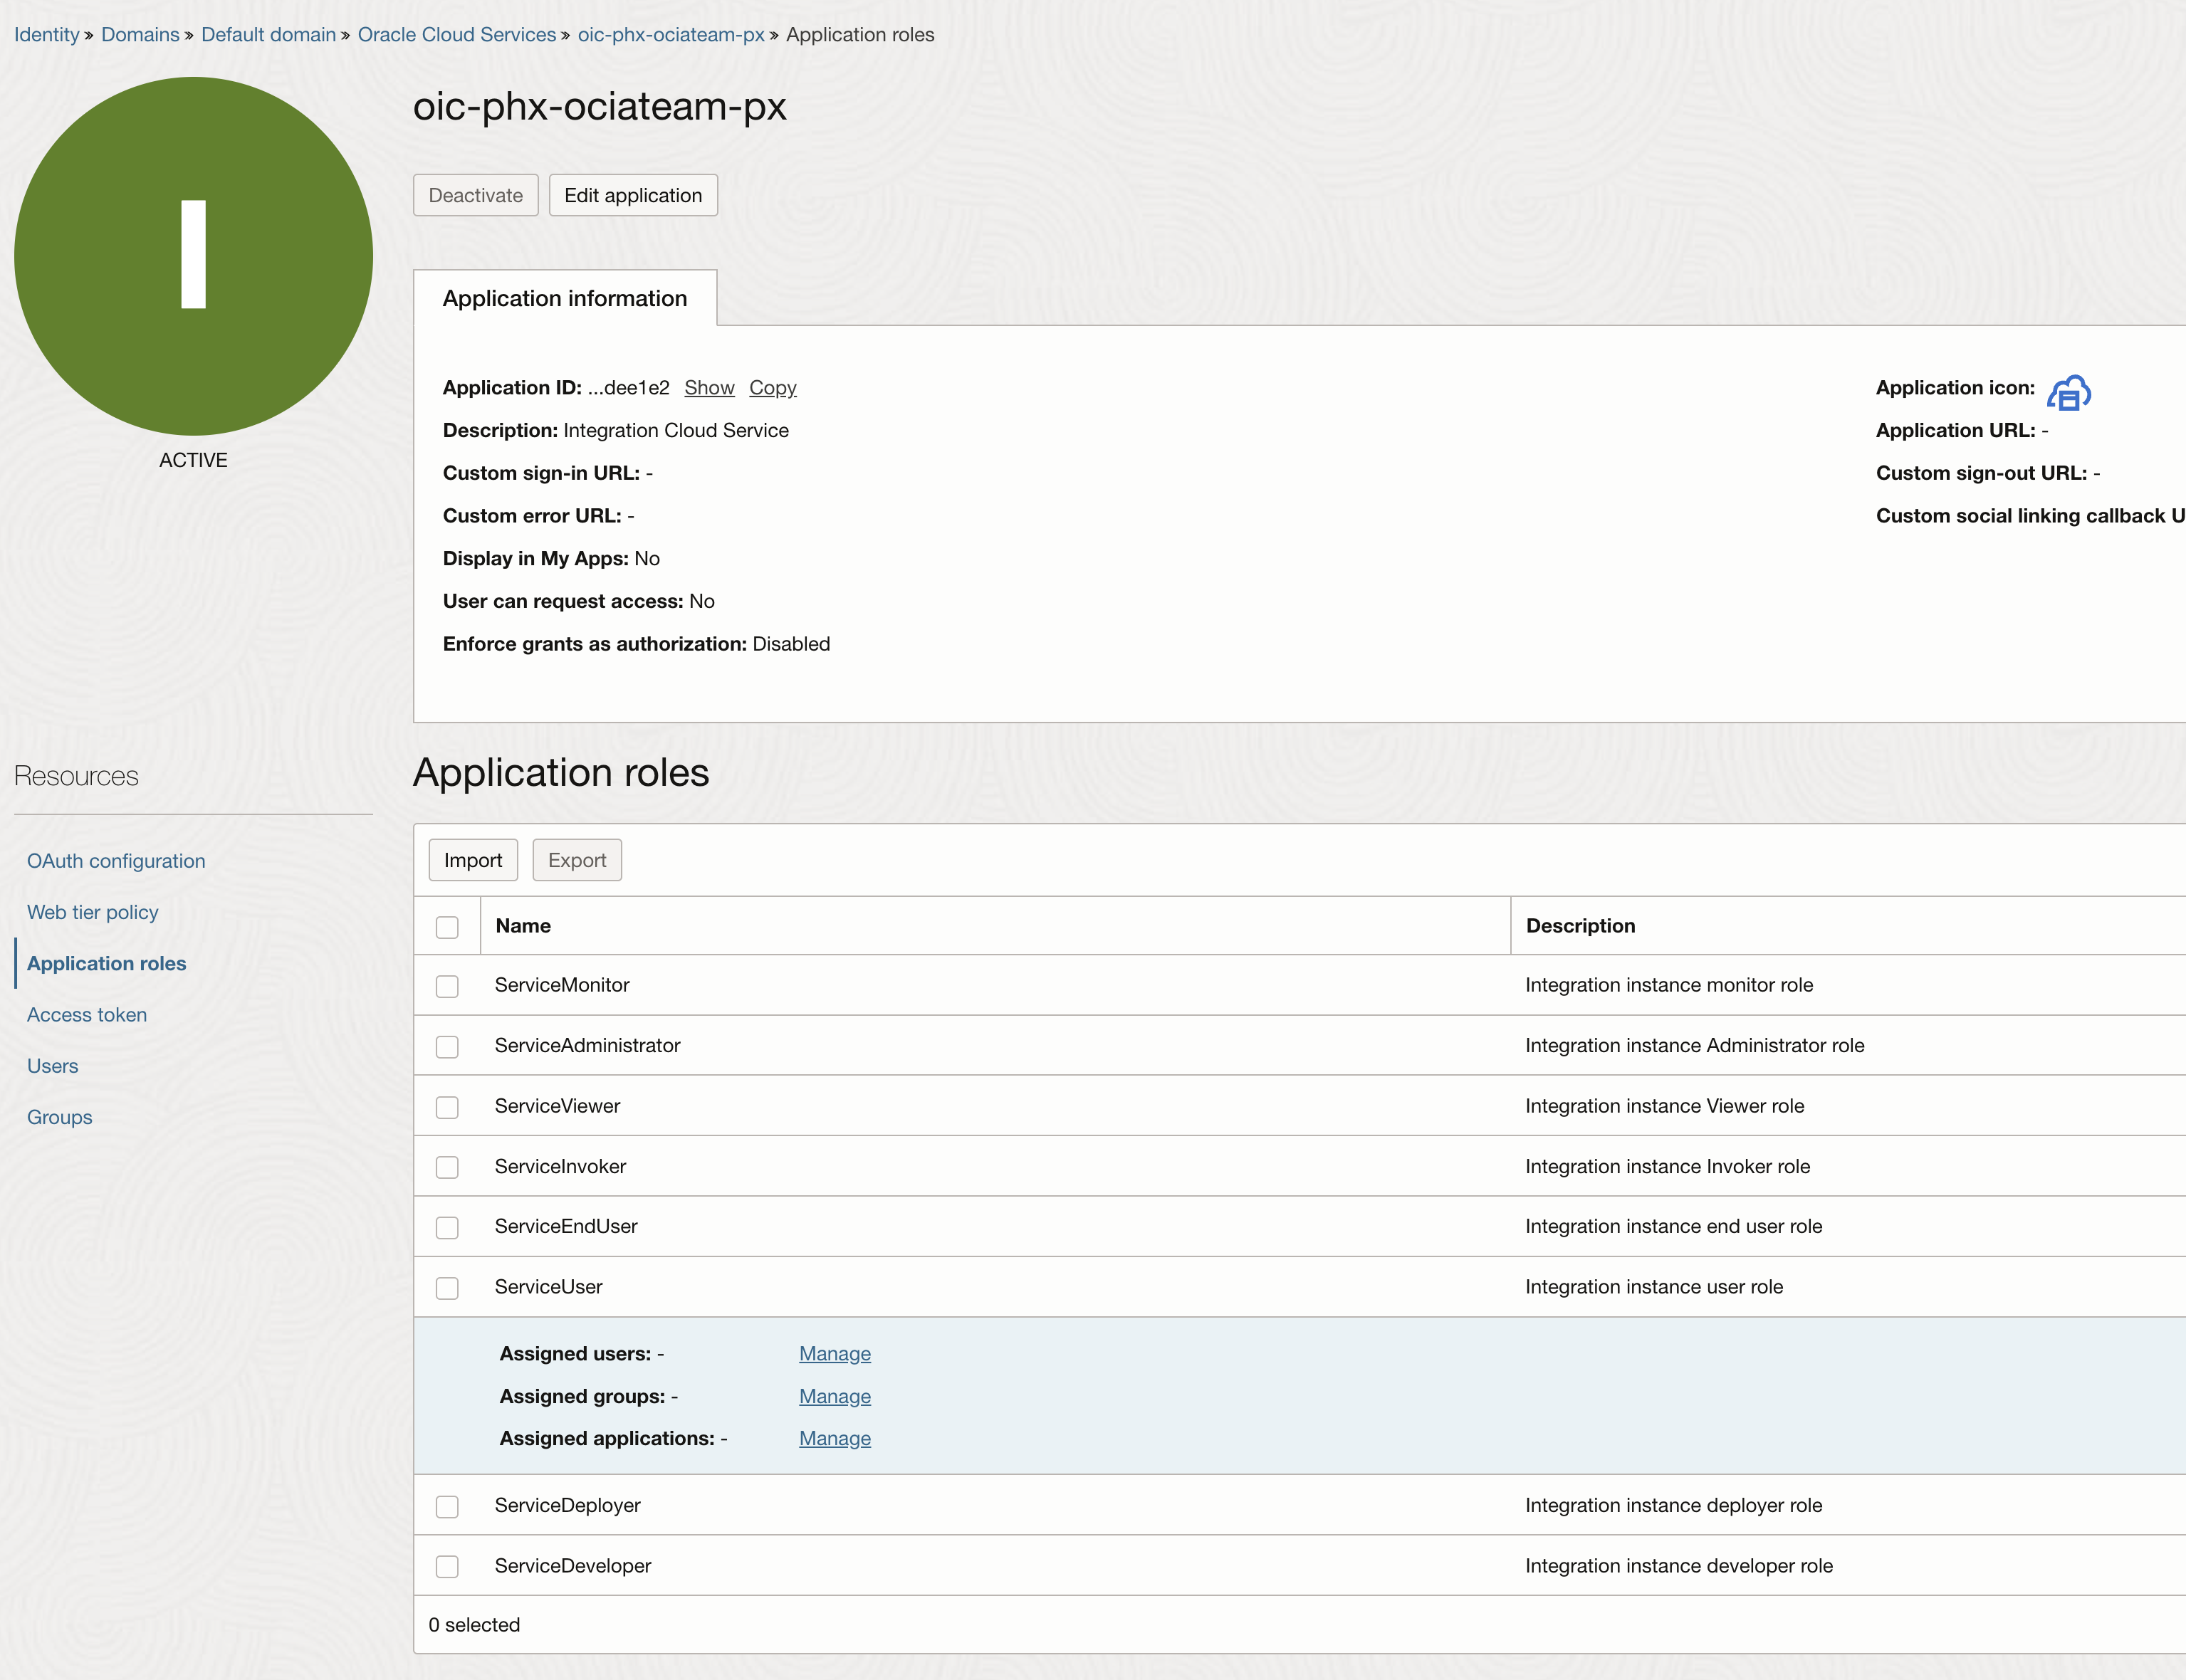
Under “Resources”, navigate to “Application roles”, expand the “ServiceUser” role and under “Assigned application” hit “Manage”.
Under “Available applications” search for the integrated application that was just configured and hit “Assign”.

Test Connectivity
Now that we have a test application under our integration instance and the authentication of the requests setup, we will use Postman to do a connection.
Postman is a software client that is used throughout the industry to test APIs.
In this post i used the free version of the service, where i configured a new collection called OICv3.
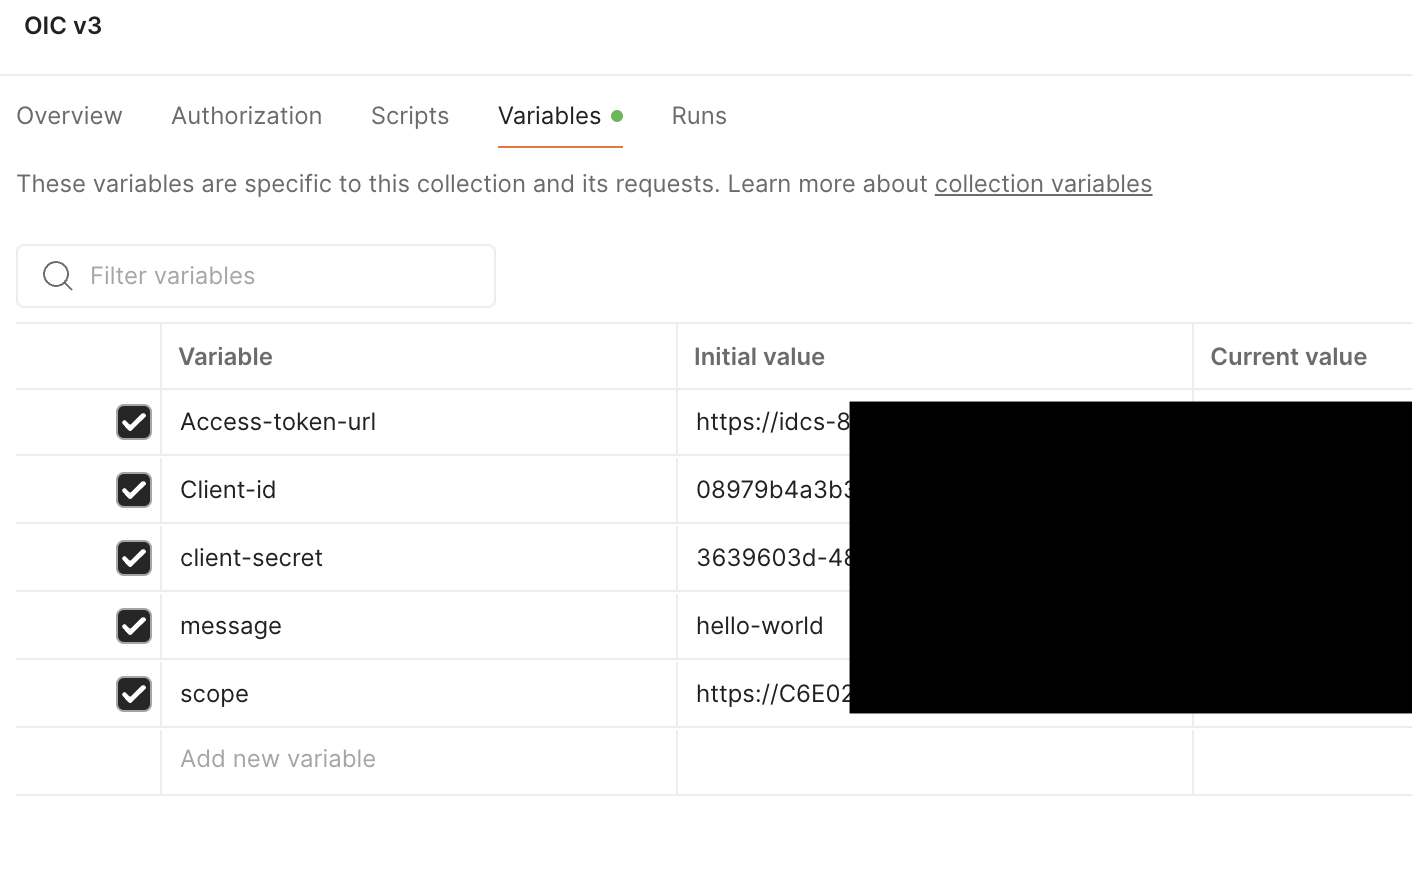
Under the collection i configured the following variables:
– Access token url
This is the IDCS url appended with the path “”/oauth2/v1/token
The IDCS url can be found by navigating to “Identity and Security > Identity > Domains” and choose you configured Identity domain (in my example it is the default domain).
– Client ID and Client Secret
This information can be found under Identity and Security >> Identity >> Domains >> Default domain >> Integrated applications >> “your application”.
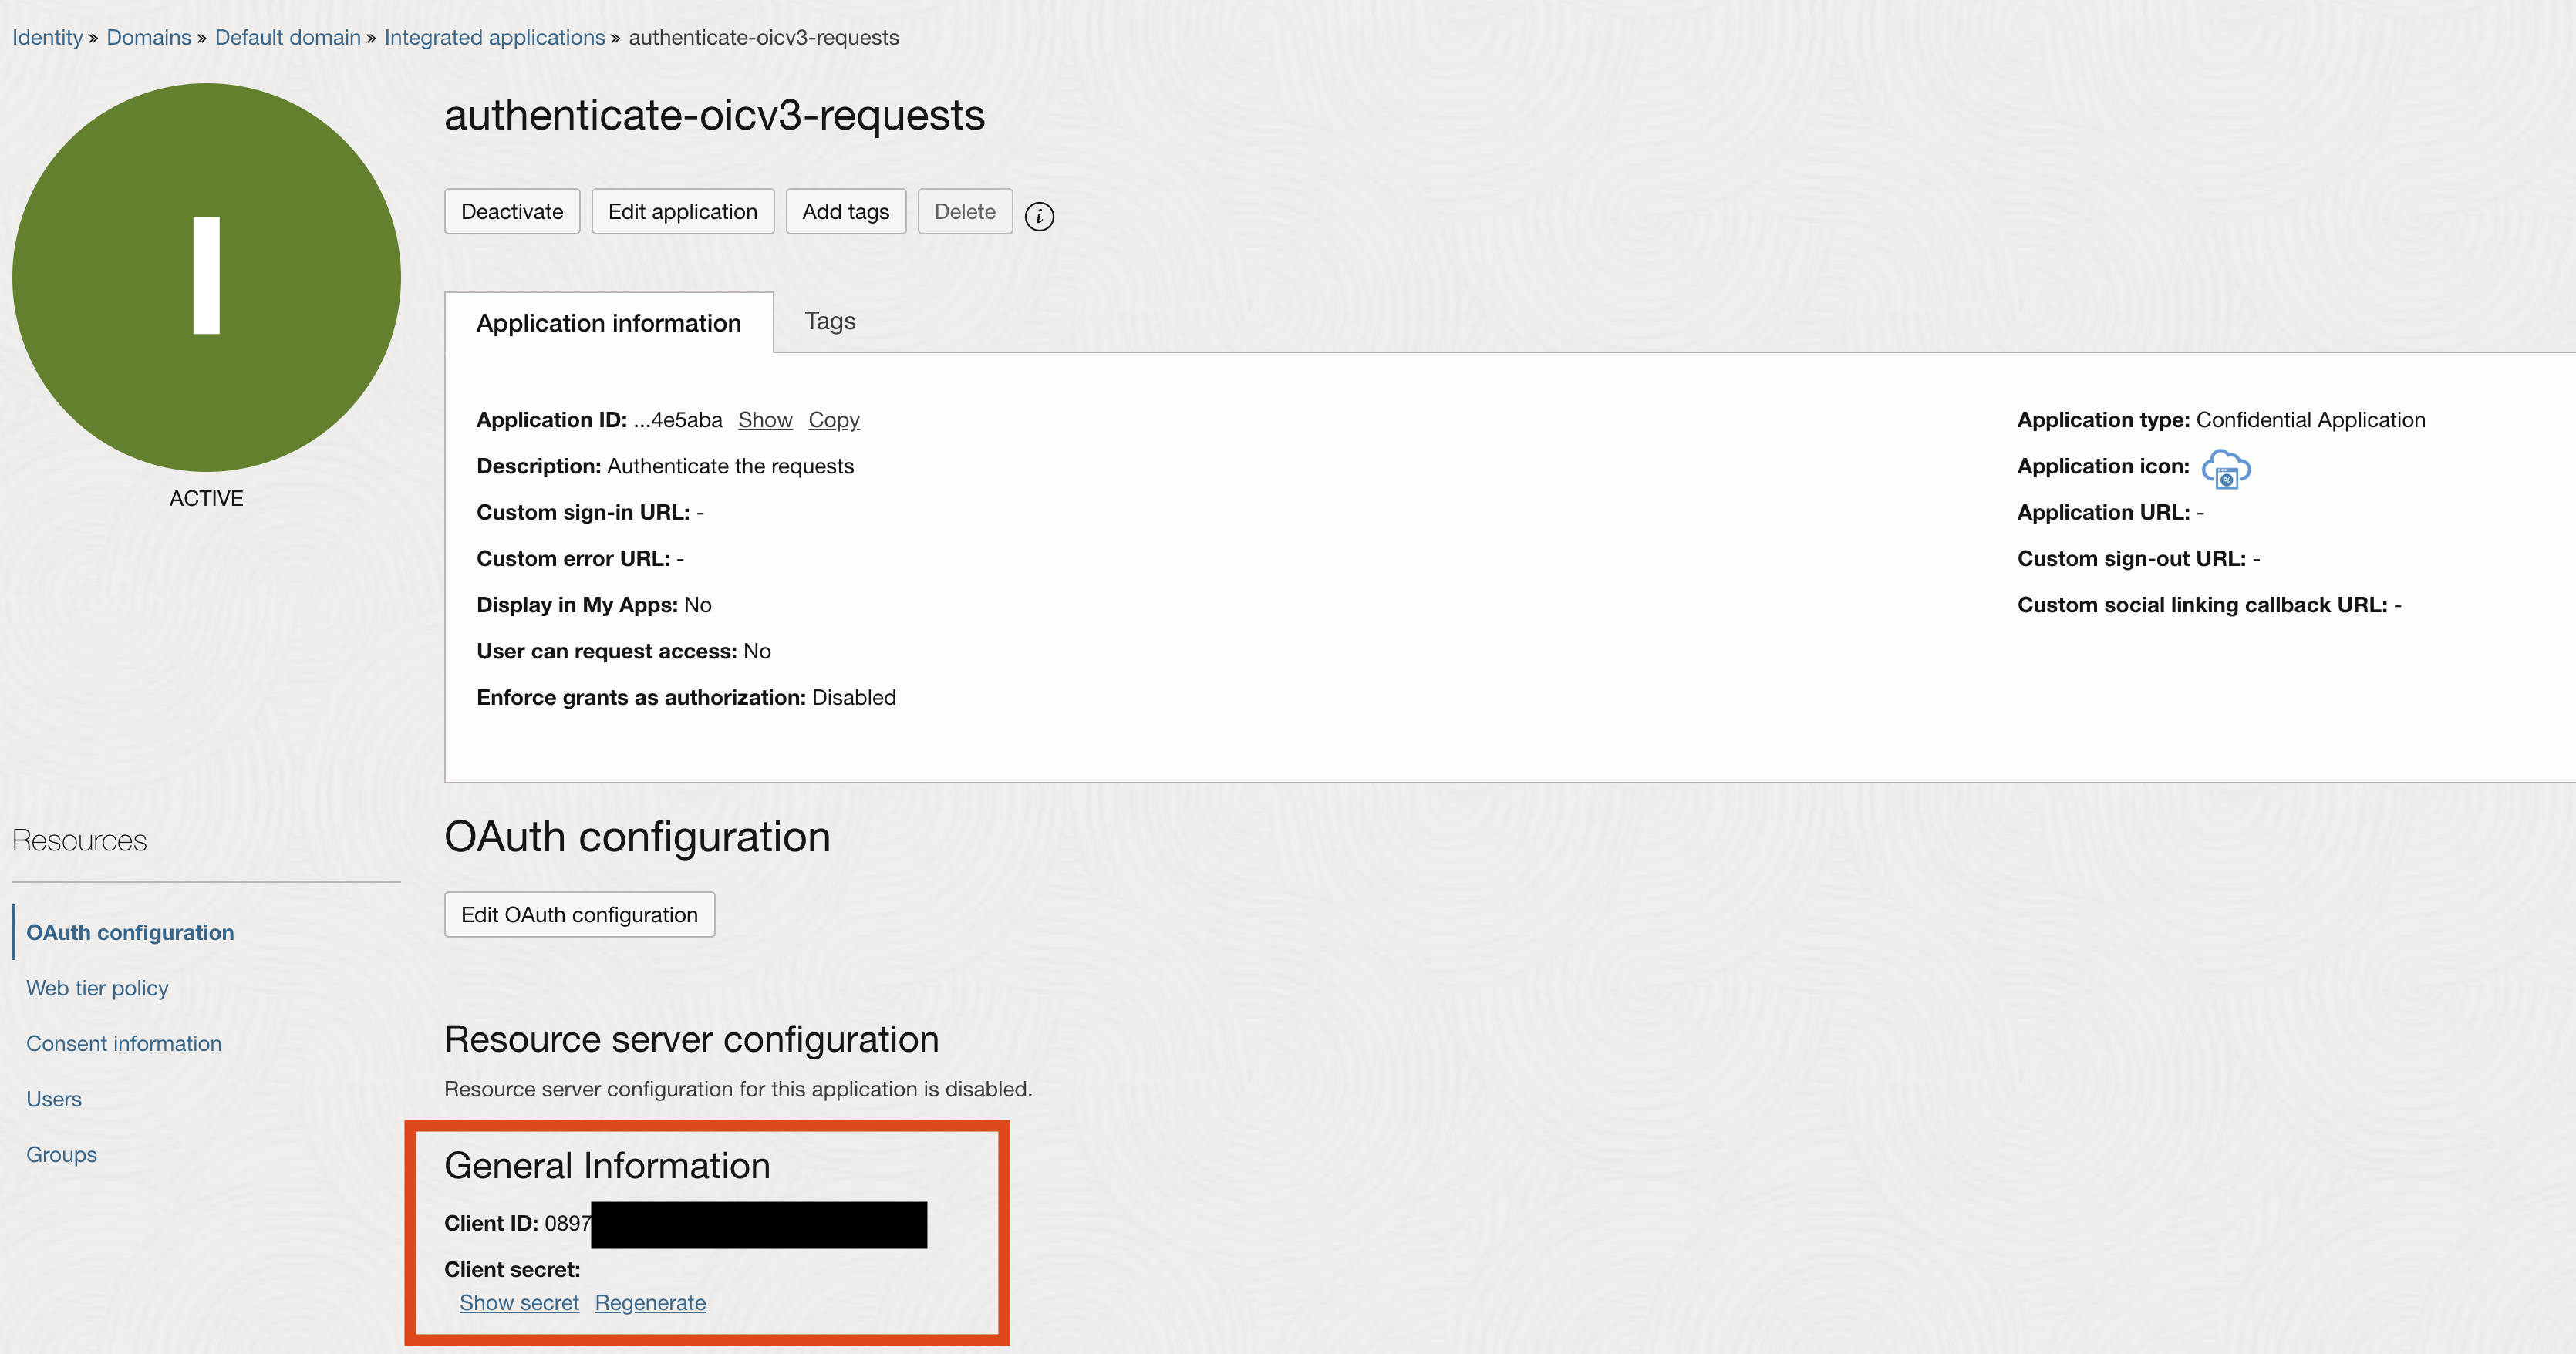
– Scope
Under the same path as the Client ID, we can pind the scope

– message – will be the message that will be sent to the integration.
Now that we have the variables, we can configure a connection.
In order to get the endpoint url, we need to login to the Oracle Sample Echo application on our integration instance and get the endpoint metadata.

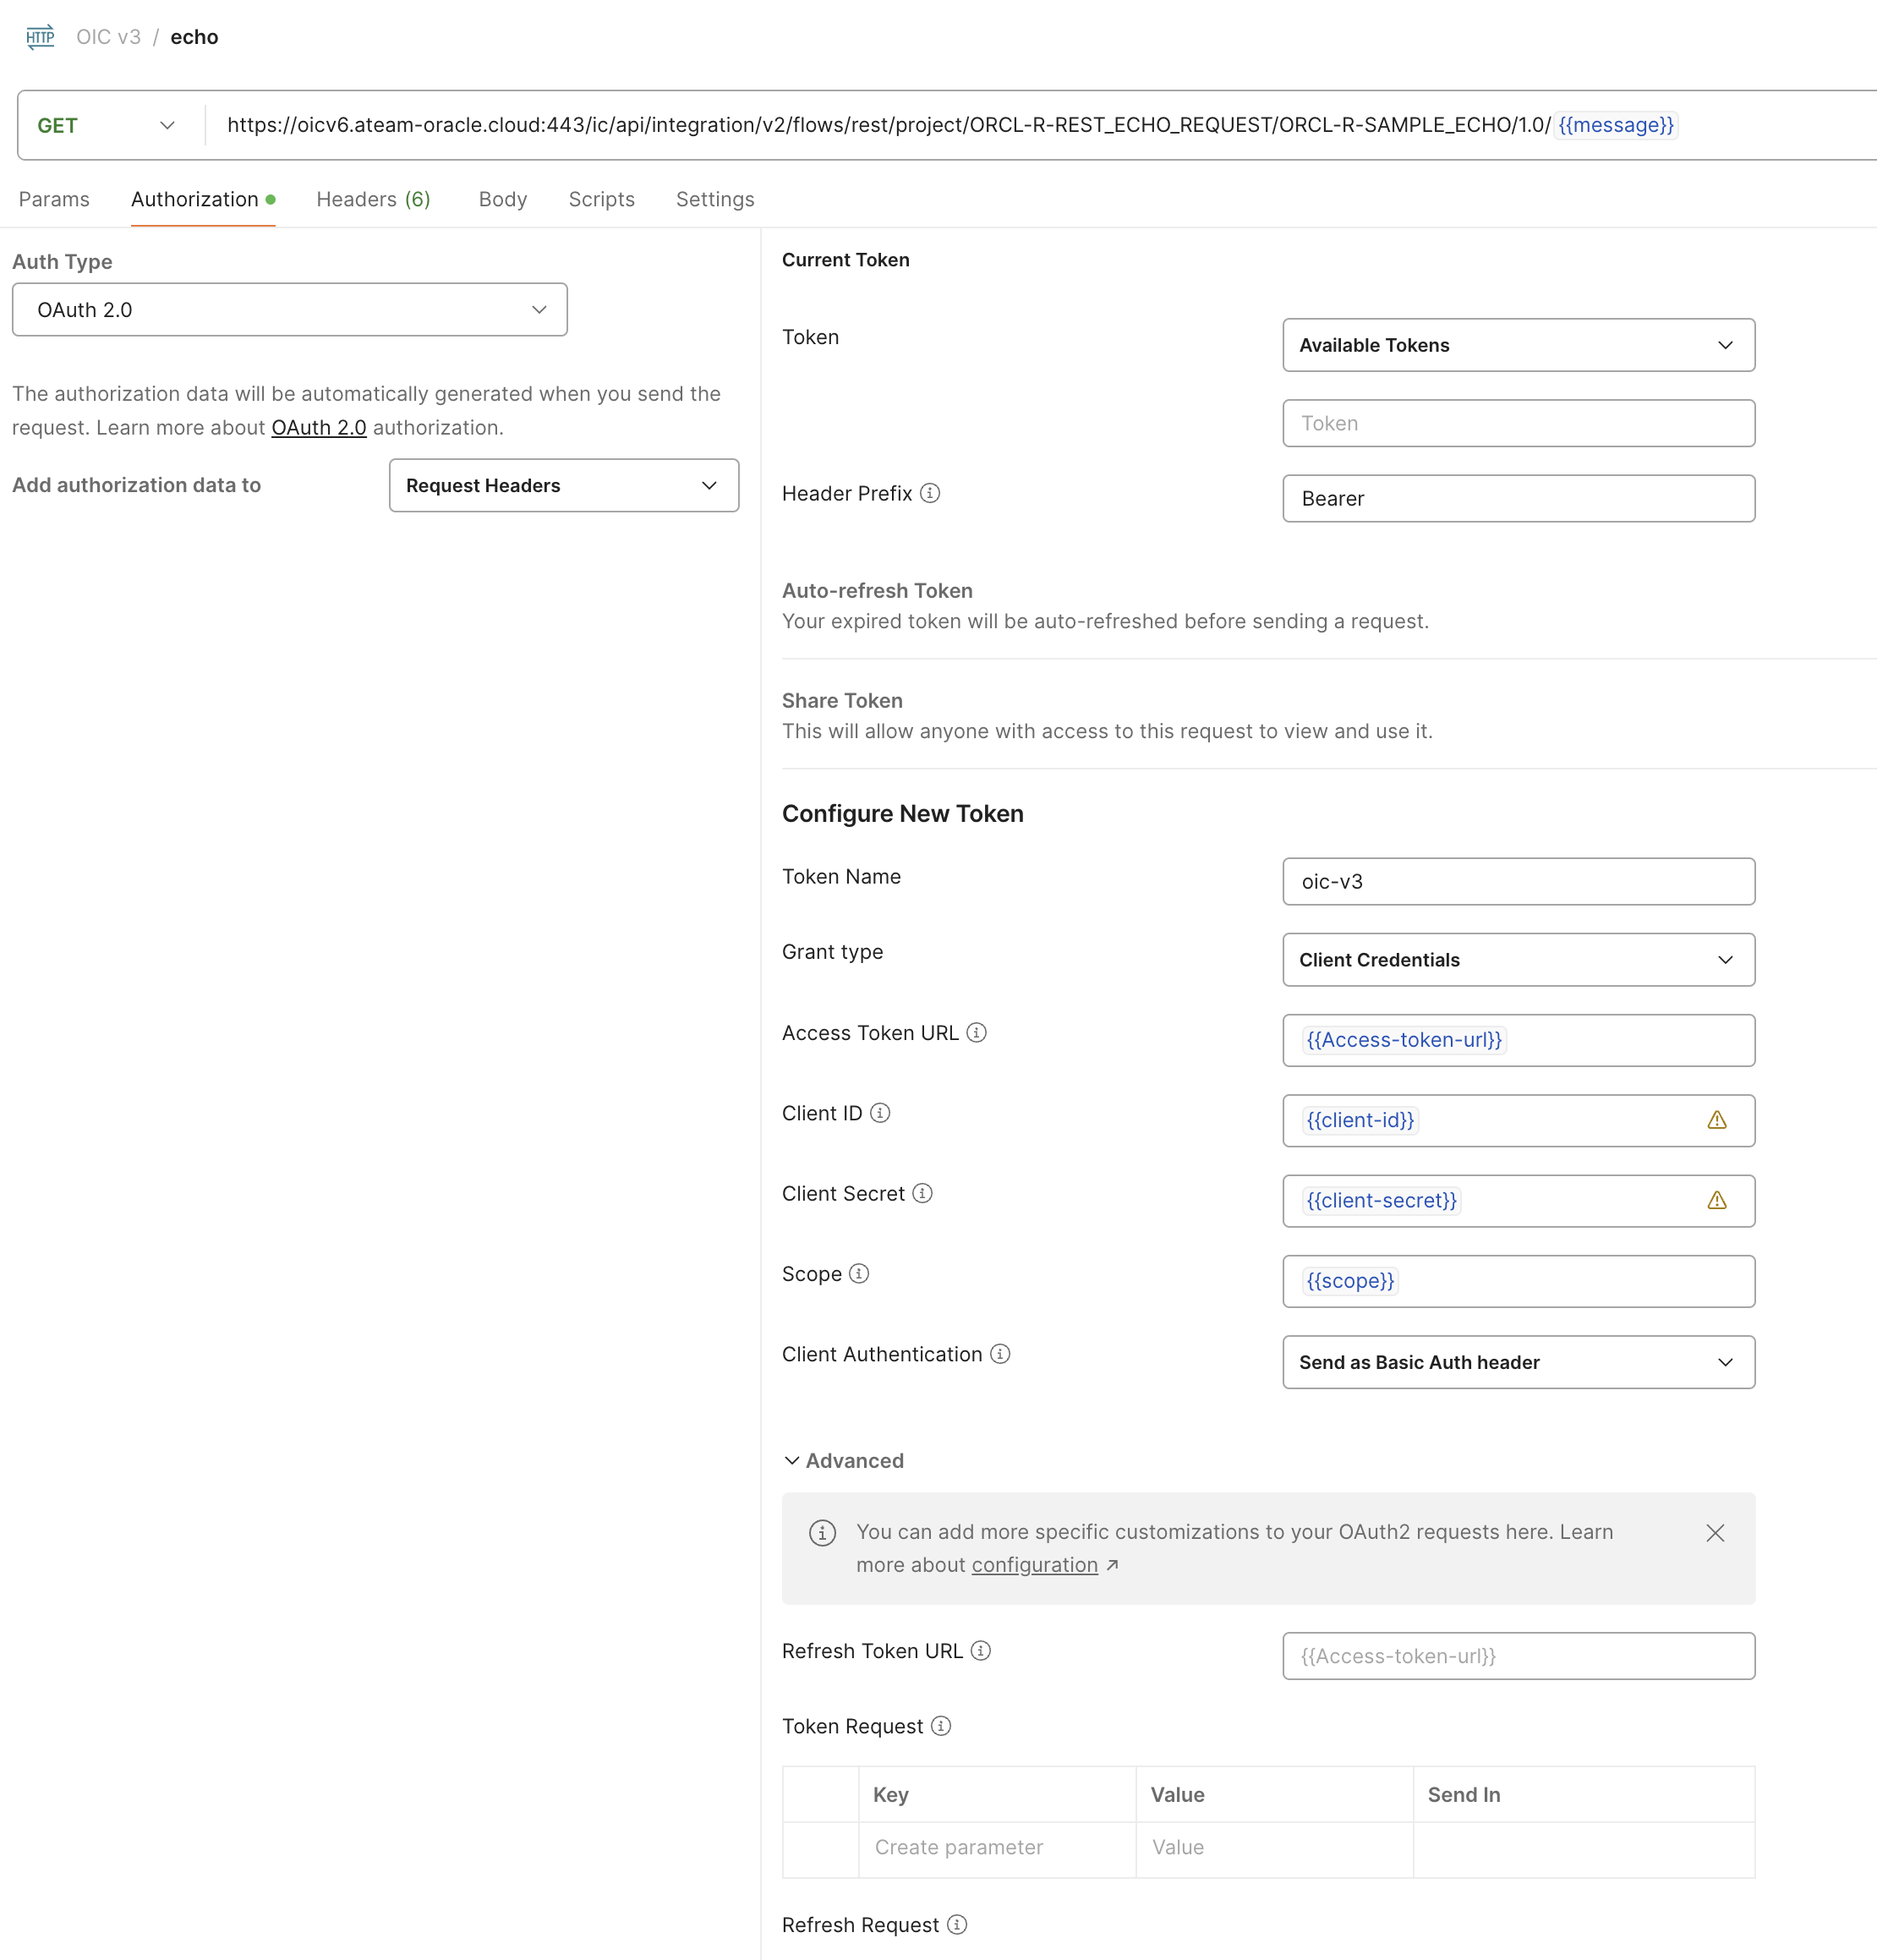
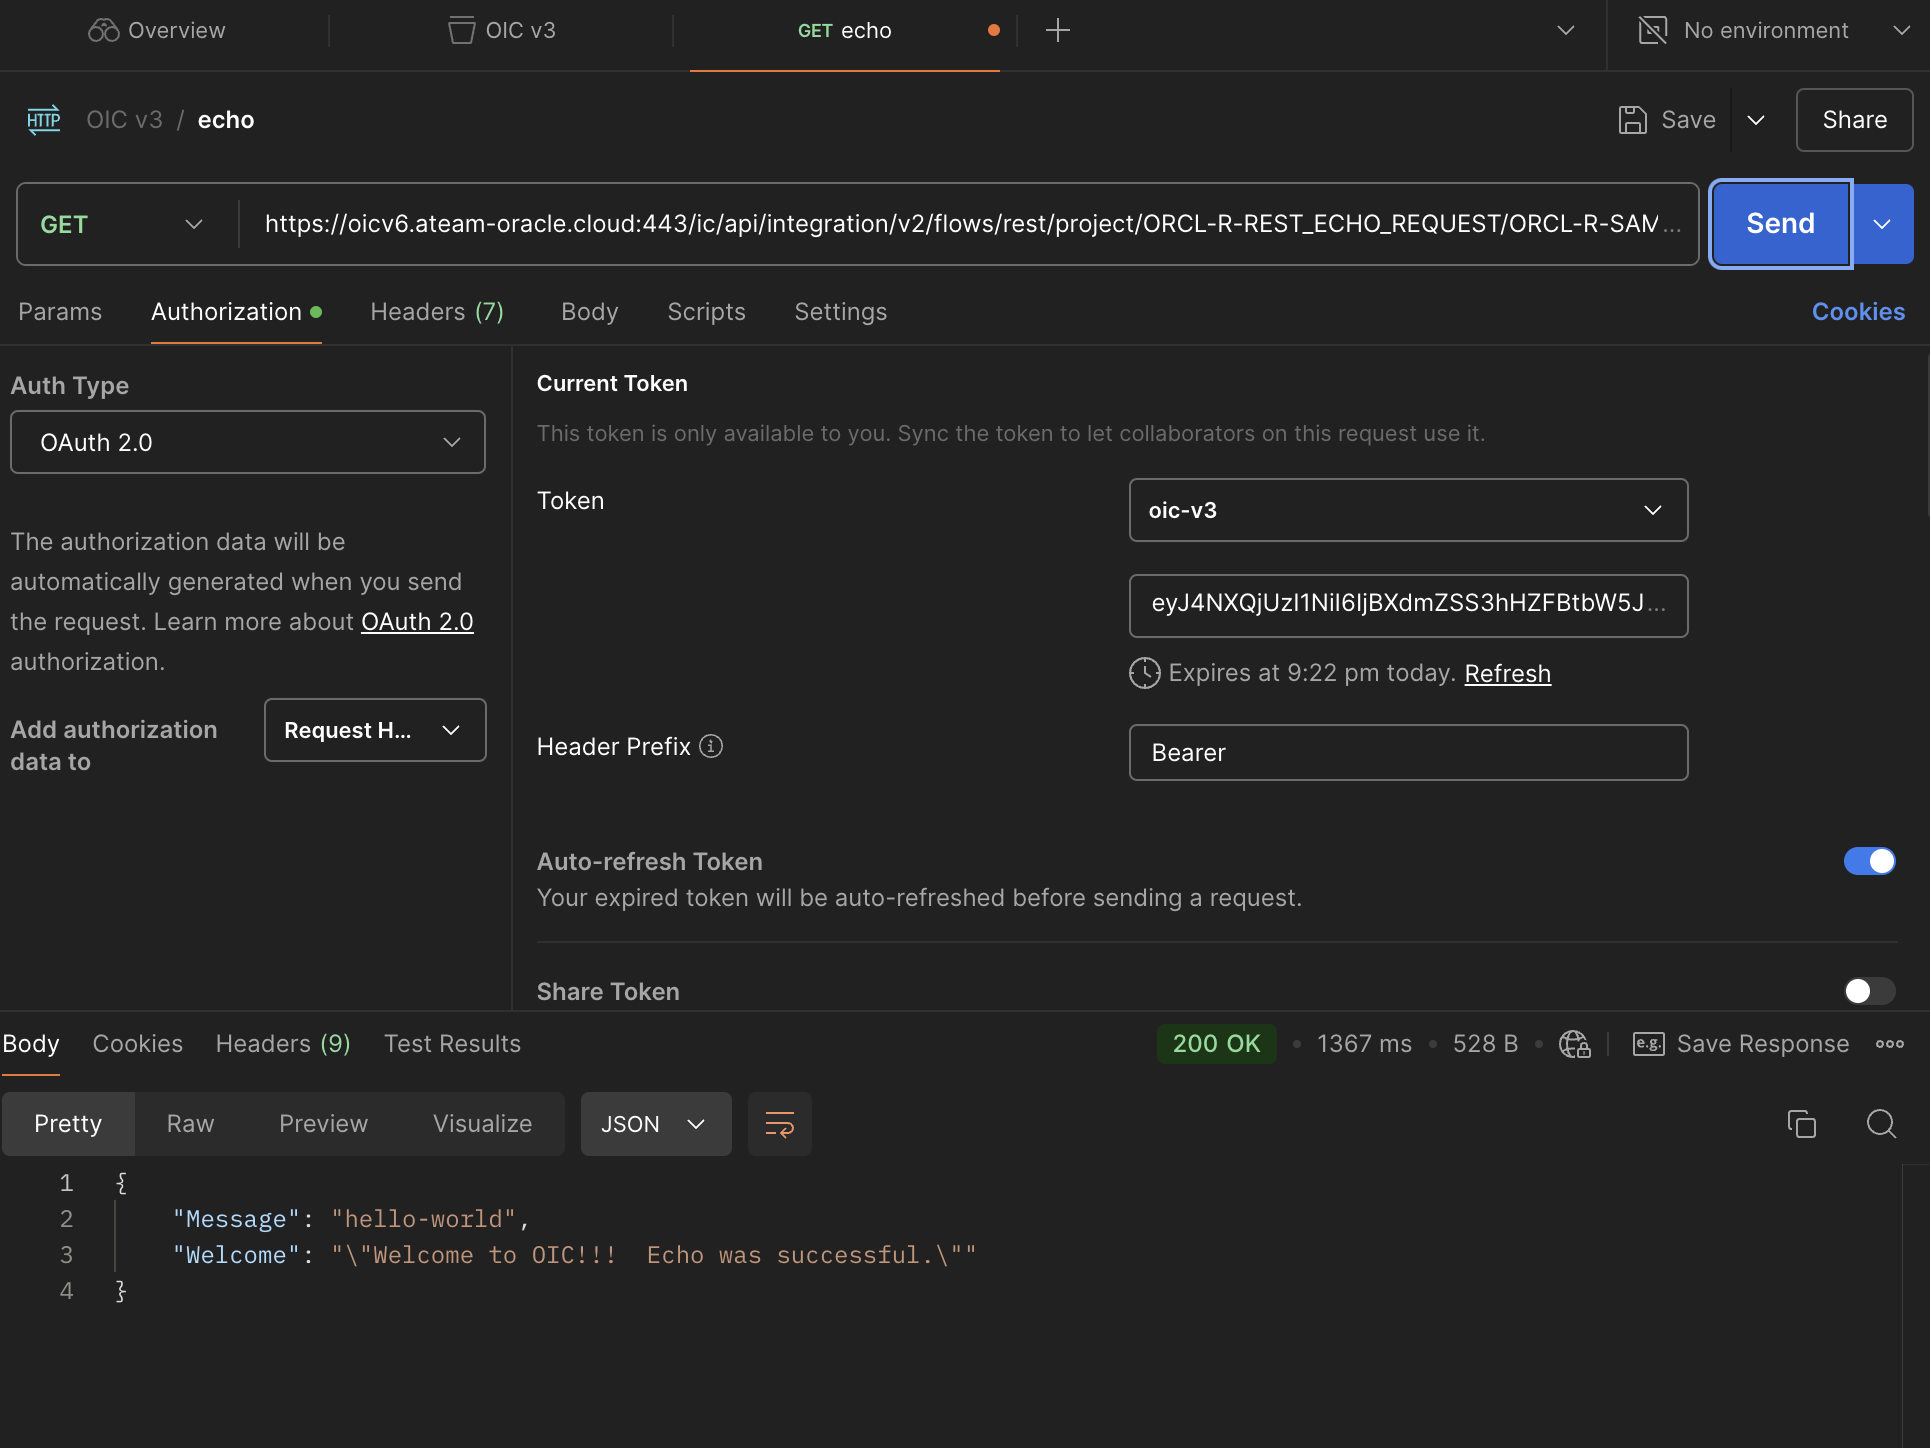
In Postman under the collection that we created, select “add request”, put as method “GET”, under URL put the endpoint url and under “Auth Type” choose “OAuth 2.0” and under “Add authorization data to” choose “Request Headers” and for the rest of the configuration, use the variables that we just created like in the screenshot below.
In order to authenticate, first we need to acquire a token. for this task we will hit the “Get new Access Token”.

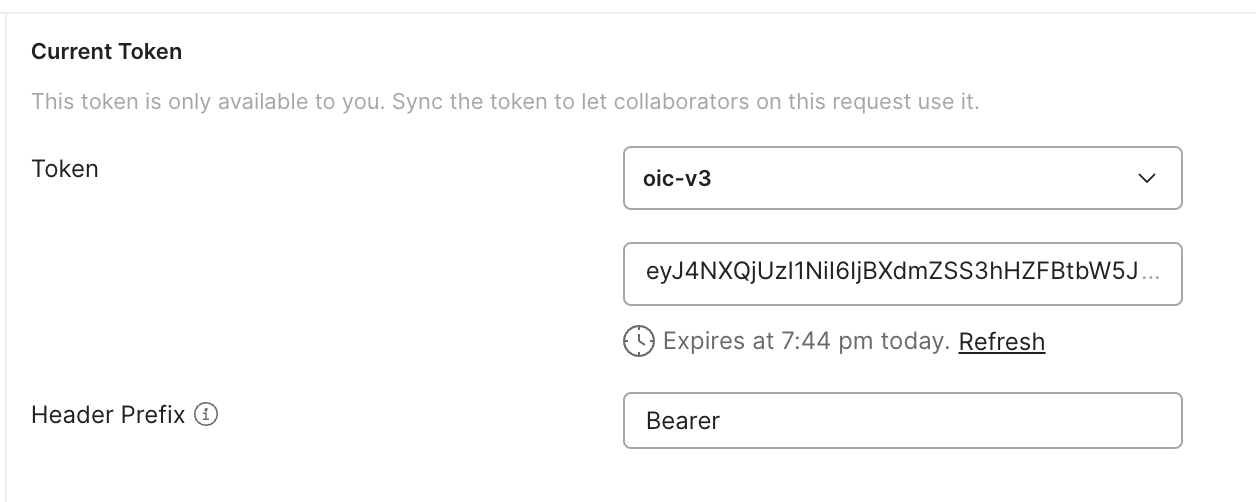
once the token is created you are getting a confirmation,
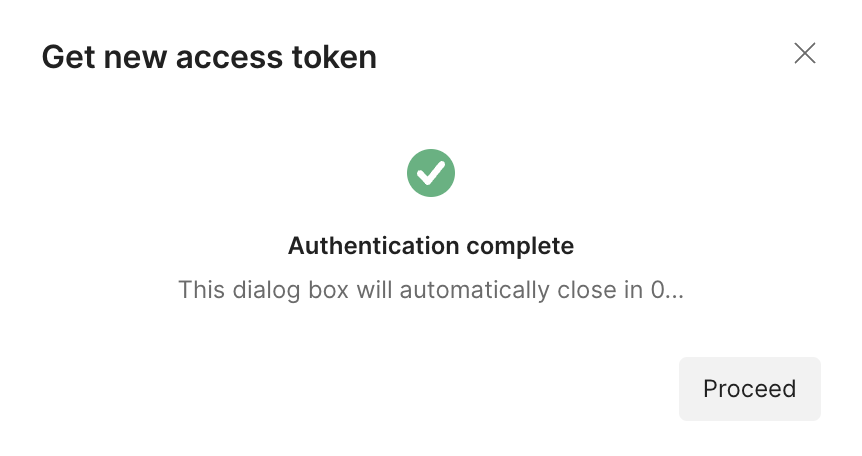
and you will see the token.
Once you send the request, you will get a 200 OK message.
Conclusion
After following this post you are able to configure a sample integration and authenticate the requests to it using oauth 2.0.
In the next blog we will configure Disaster Recovery.