Hi! In this blog, we will take a look at how Oracle Cloud’s Load Balancer services can be configured to pass the original source IP of a connection to their backend systems.
Oracle Cloud Load Balancers
OCI has two load balancer services: the Application Load Balancer (simply called Load Balancer) and the Network Load Balancer. Both services have ways to pass the original source IP of a connection to the backends. Let’s see how each of them does it.
OCI Load Balancer
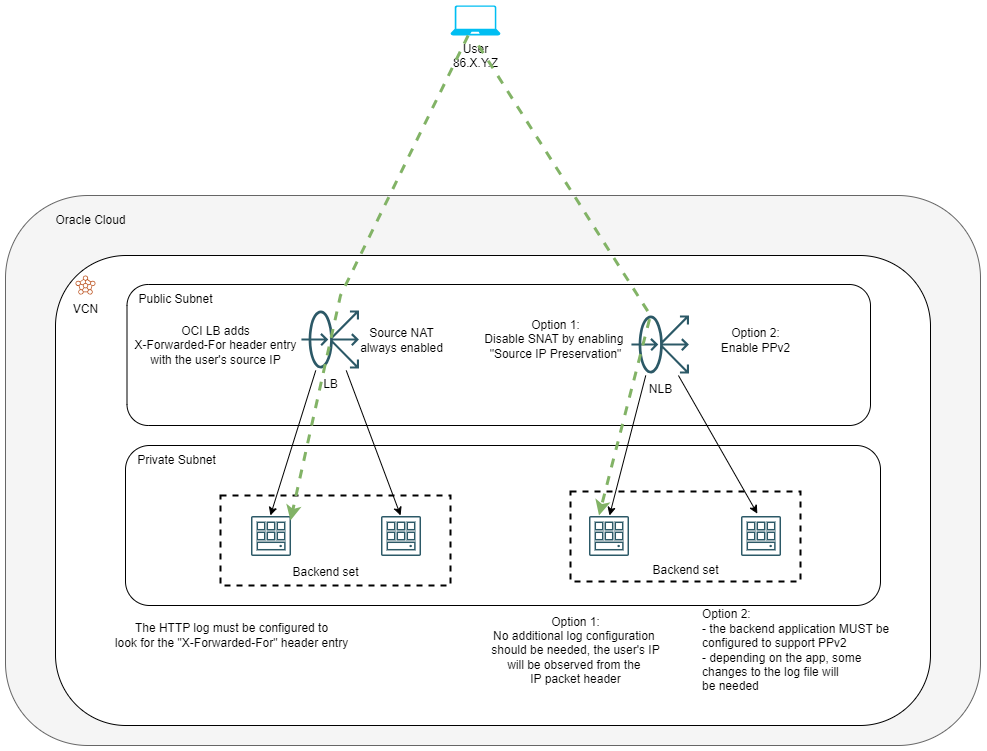
The OCI LB will always perform source NAT when sending a packet to the backends. This means that, at the network layer, the backends will always “see” the connections coming from the Load Balancer’s IP. However, the LB will always add the non-standard, but common, HTTP “X-” headers. Out of the list of said headers, the one that interests us is called “X-Forwarded-For”, which will have the original IP of the request written in the respective header field by the load balancer. Note that if the traffic passes through multiple Load Balancers (or other reverse proxies) and the header is already there, the LB will append the upstream IP, so the backend log will show multiple IPs, not just the last one.
OCI Network Load Balancer
The OCI NLB is OCI’s load balancing service for Layer3/Layer4 IP traffic. It provides two different ways for the backend servers to get the original IP of the request.
1) Disable Source NAT on the connection to the backend servers. While the Application LB always performs SNAT on the connections to the backend, the NLB allows us to disable it in two ways:
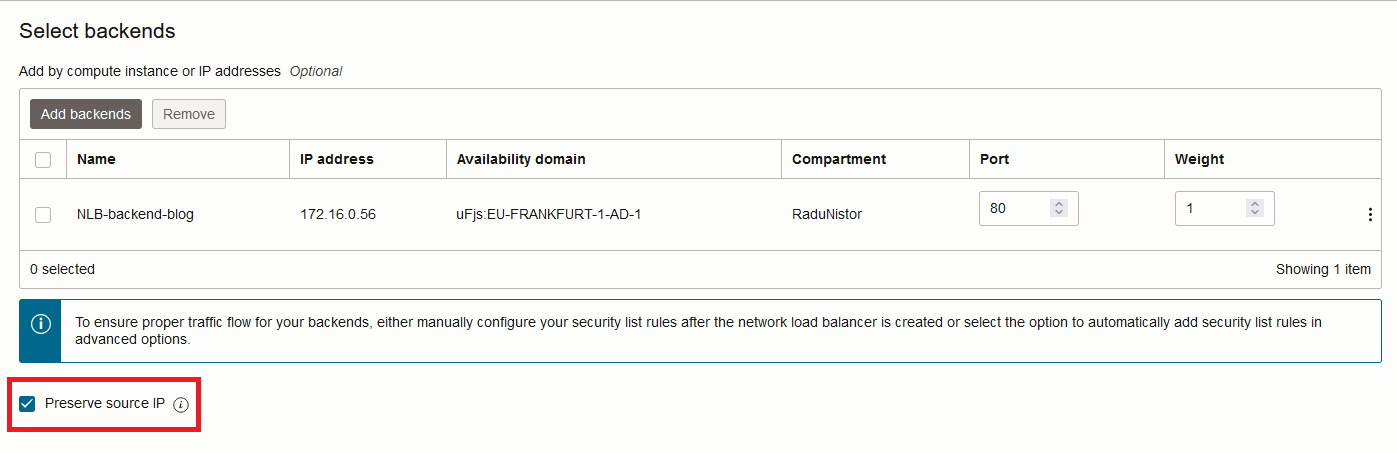
a) Enabling a feature called “Source IP Preservation”, on the backend set. This will make the NLB forward the packets without performing SNAT. Note that this mode is not supported for “IP based” backends, meaning backends defined by their IP, which can be in any remote location, as opposed to backends defined as an OCI resource.
b) Enabling a global feature called “Header preservation”, available only for private NLBs – this mode is for specific usecases, where the backend set is a pair of firewalls or other network appliances. Enabling “Header preservation” will also force the feature “Source IP Preservation” to be enabled.
2) Enable Proxy Protocol v2 on the NLB listener (available only for TCP based traffic).
The Proxy Protocol was developed to provide connection details to services deployed behind proxies. While the “X-“ headers are strictly HTTP, PP doesn’t really care what application runs through it because it is designed to work at a lower layer. Basically, any proxy that has this feature enabled will create a PP header packet that contains the connection details (IPs, ports) and send it to the downstream service immediately after the TCP 3-way handshake completes. The downside is that the receiving end must be “Proxy Protocol aware” as it needs to parse the incoming packets and get the relevant data.
Let’s put all of this on a diagram.
Demo
Let’s see a short demo for each of the three methods discussed above. I will use a simple deployment with:
– One VCN with one public subnet and one private subnet, the various gateways needed, and the required routing and security configuration. I will not show this part as it is a standard VCN deployment if you use the Wizard.
– Two Public Load Balancers (LB and NLB) deployed in the public subnet; all listeners will be on HTTP (LB) and TCP 80 (NLB).
– Two backend servers, one for each Load Balancer, deployed in the private subnet.
For the backend server application, I will choose NGINX because it can look into the X headers and also be configured to run with the Proxy Protocol. I will not go into deployment details, but you can follow this procedure.
LB X Headers
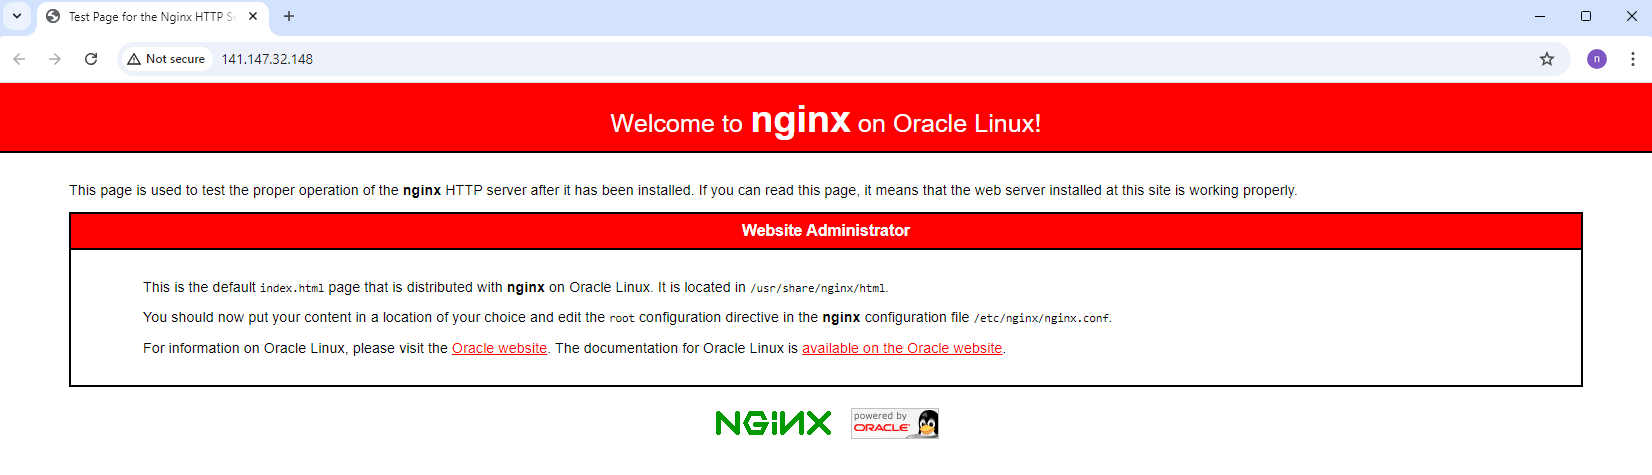
After you install NGINX and correctly configure the compute as the LB’s backend, you should be able to see the NGINX welcome page if you connect with HTTP to the LB’s public IP:
Let’s look at how the NGINX access log is formatted out-of-the-box.
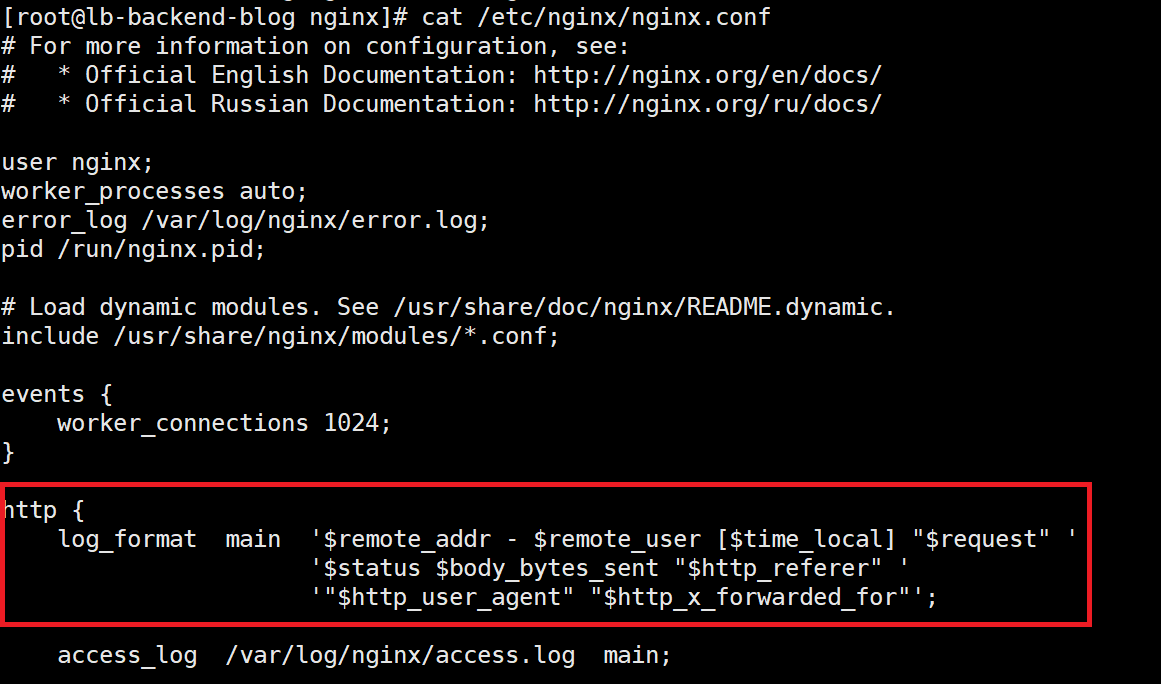
We can see that:
– The first in the log is the IP of the upstream device
– The last in the log is the IP in the “X-Forwarded-For” header
Let’s see the actual log:

According to the log definition, 10.0.0.48 is the IP of the Load Balancer (remote address) and the IP starting with 86 is my actual IP written by the Load Balancer in the HTTP header. But what happens when I access the Load Balancer through another proxy?

As you can see, there are now 2 IPs in the X-Forwarded-For header because each proxy will append the upstream IP.
And there it is, NGINX will show the X-Forwarded-For entries automatically, no need for additional configuration. This is probably true for most web servers out there.
NLB Source IP Preservation
The second method to see the actual source IP of the request is to preserve the entry in the IP packet header. As said above, this is done on the backend set configuration.
An important thing to note is that preserving the actual source IP means that the backend security checks must allow the traffic. For example, even if you have the backend in the private subnet, the Security List or the Network Security Group guarding the instance must allow packets from the real source IP. Also important to note is that the routing rules of the private subnet will be bypassed and the response traffic will be sent to the NLB by the underlying infrastructure.
Let’s see what an NGINX log looks like when the NLB is preserving the source IP.

We can clearly observe that my 86 public IP is now the first in the log, the NLB IP is not present, nor are any entries in the “X-Forwarded-For” header.
NLB Proxy Protocol V2
I will now disable “Source IP Preservation” on the backend set and enable the Proxy Protocol on the Listener.
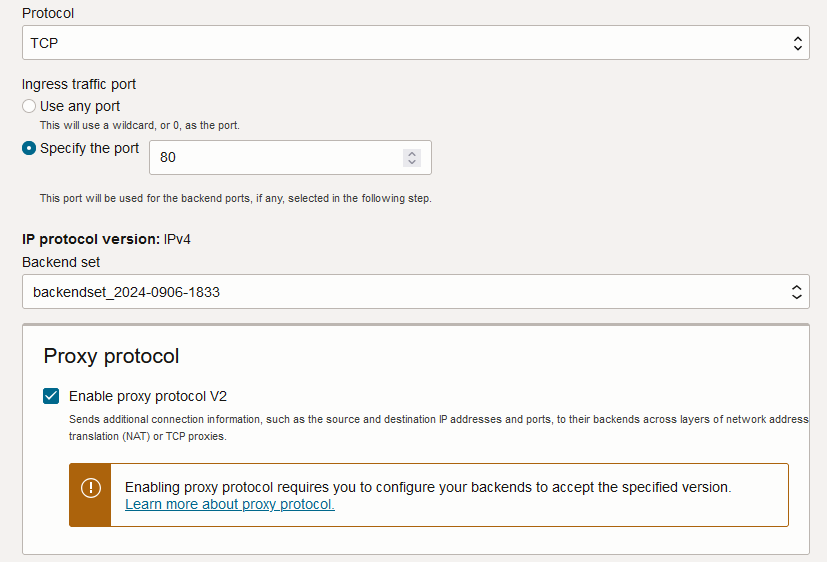
This will make the NLB perform SNAT towards the backend but also add the Proxy Protocol packets.
Note that enabling the Proxy Protocol on the NLB without configuring the backend to support it will make all flows fail.
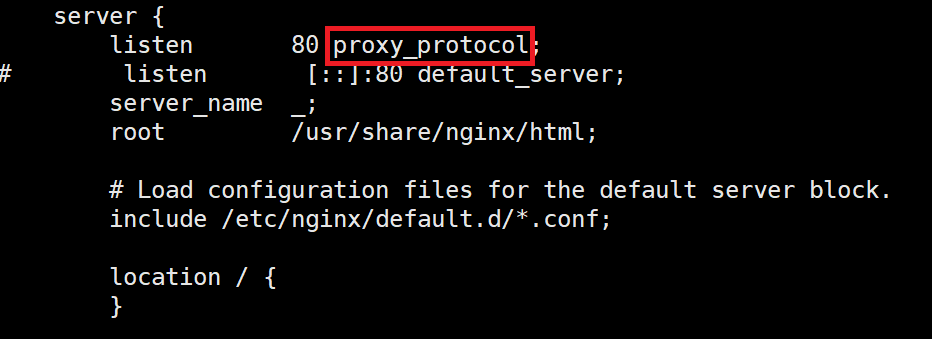
Again, each application has its own configuration to support the Proxy Protocol. For NGINX to support the Proxy Protocol we need to modify the conf file, under the server config:
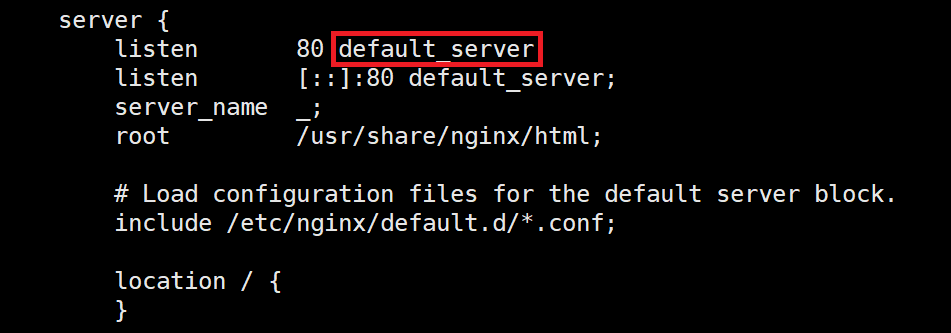
Replace “default_server” with “proxy_protocol” and restart the service.
Next, we have to configure the NGINX Log to look into the Proxy Protocol packets. We do that by adding the $proxy_protocol_addr variable anywhere in the log. I will replace the “X-Forwarded-For” default entry with the Proxy Protocol variable, in the nginx.conf file.

Let’s see what the log shows:

The log will show the real source IP of the request, this time through the Proxy Protocol instead of the “X-Forwarded-For” HTTP Header.
