A couple of weeks ago my compatriot Catalin blogged about how to get an x.509 certificate from Let’s Encrypt using an ACME client and copy/pasting into the OCI console. Which is cool and all.
But you know what’s cooler? A billion dollars. No, wait. Wrong movie quote.
What’s cooler is doing it without having to open a browser window or doing things by hand.
Which is exactly what my Certbot plug-in does.
I wrote my plug-in back in 2020 and pushed it to github, but I didn’t publish it to pypi. Some someone else wrote the same thing a little later, but he actually finished the work and published it to pypi so his is more easily installed. Both plug-ins do the same thing in nearly the same way – so use whichever you prefer.
With either plug-in the steps to acquiring a certificate are pretty straightforward…
- Buy / acquire a domain name
- Setup OCI as the DNS server for your domain
- Install the OCI CLI and set it up
- Install Certbot
- Install the certbot-dns-oci plug-in
- Run certbot to acquire your certificate
Step by Step
1. Buy / acquire a domain name
This is somewhat outside the scope of my blog post, but you’ll need a domain name. If you don’t have one you can buy one from a bunch of places. My usual is namecheap.com because I want dot com domains, am well known to be a cheapskate frugal and NameCheap sells those for under $10, and NGL I kinda love their company name. But there are tons of companies that sell domain names or offer some for free (e.g. FreeNom will give you a domain name under a few niche TLDs for free for at least a few months).
Any domain name provider will work so figure that out, register a domain name, and you’ll be good to go.
I won’t step you through this but for namecheap this means signing in, searching for a domain name, picking one you like, and paying them.
For the purposes of this post I bought thebokononist.com. Because I reread Cat’s Cradle this summer and Vonnegut’s fake religion of Bokononism from the Cat’s Cradle is just absurd enough to tickle my fancy.
Plus the domain name was available.
2. Setup OCI as the DNS server for your domain
Once you have a domain name you need to tell OCI to be your DNS service. There are two steps here – creating the domain in OCI DNS and then telling your name registrar (namecheap for me) that OCI is going to serve up your DNS.
2a. Create the domain in OCI DNS
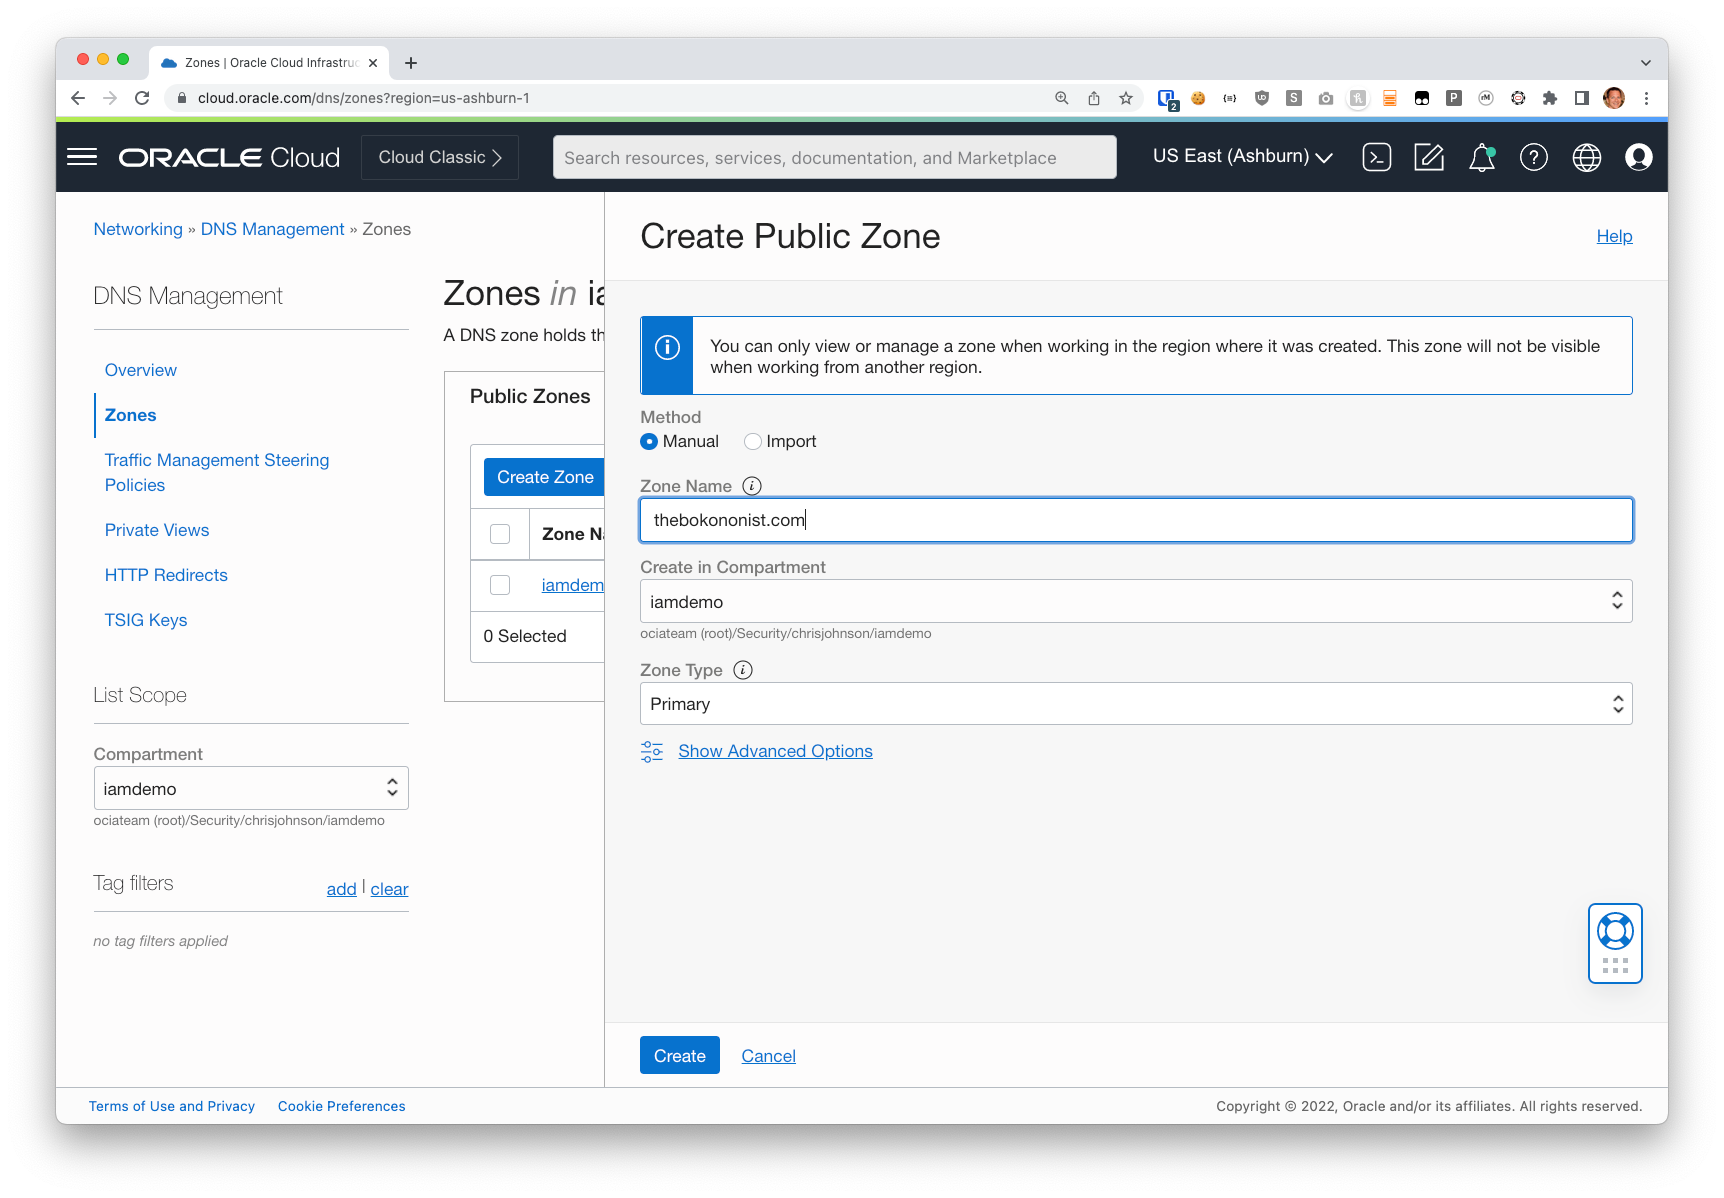
Open the OCI Console and navigate to Networking -> DNS Management -> Zones.
Click the Create button and enter the domain name in the Zone Name field. Then click Create.
2b. Tell your registrar to use OCI DNS
When you registered your domain name your registrar probably setup a basic DNS service for you. Since we’re going to have OCI DNS service we need to tell the registrar to point DNS clients at OCI’s DNS public DNS servers instead.
When you look at the DNS Zone in the OCI console you can see the hostnames of OCI’s DNS servers. Generally speaking these will be ns1 thorugh 4 under the “p68.dns.oraclecloud.net”, but you should check the Zone to be sure.
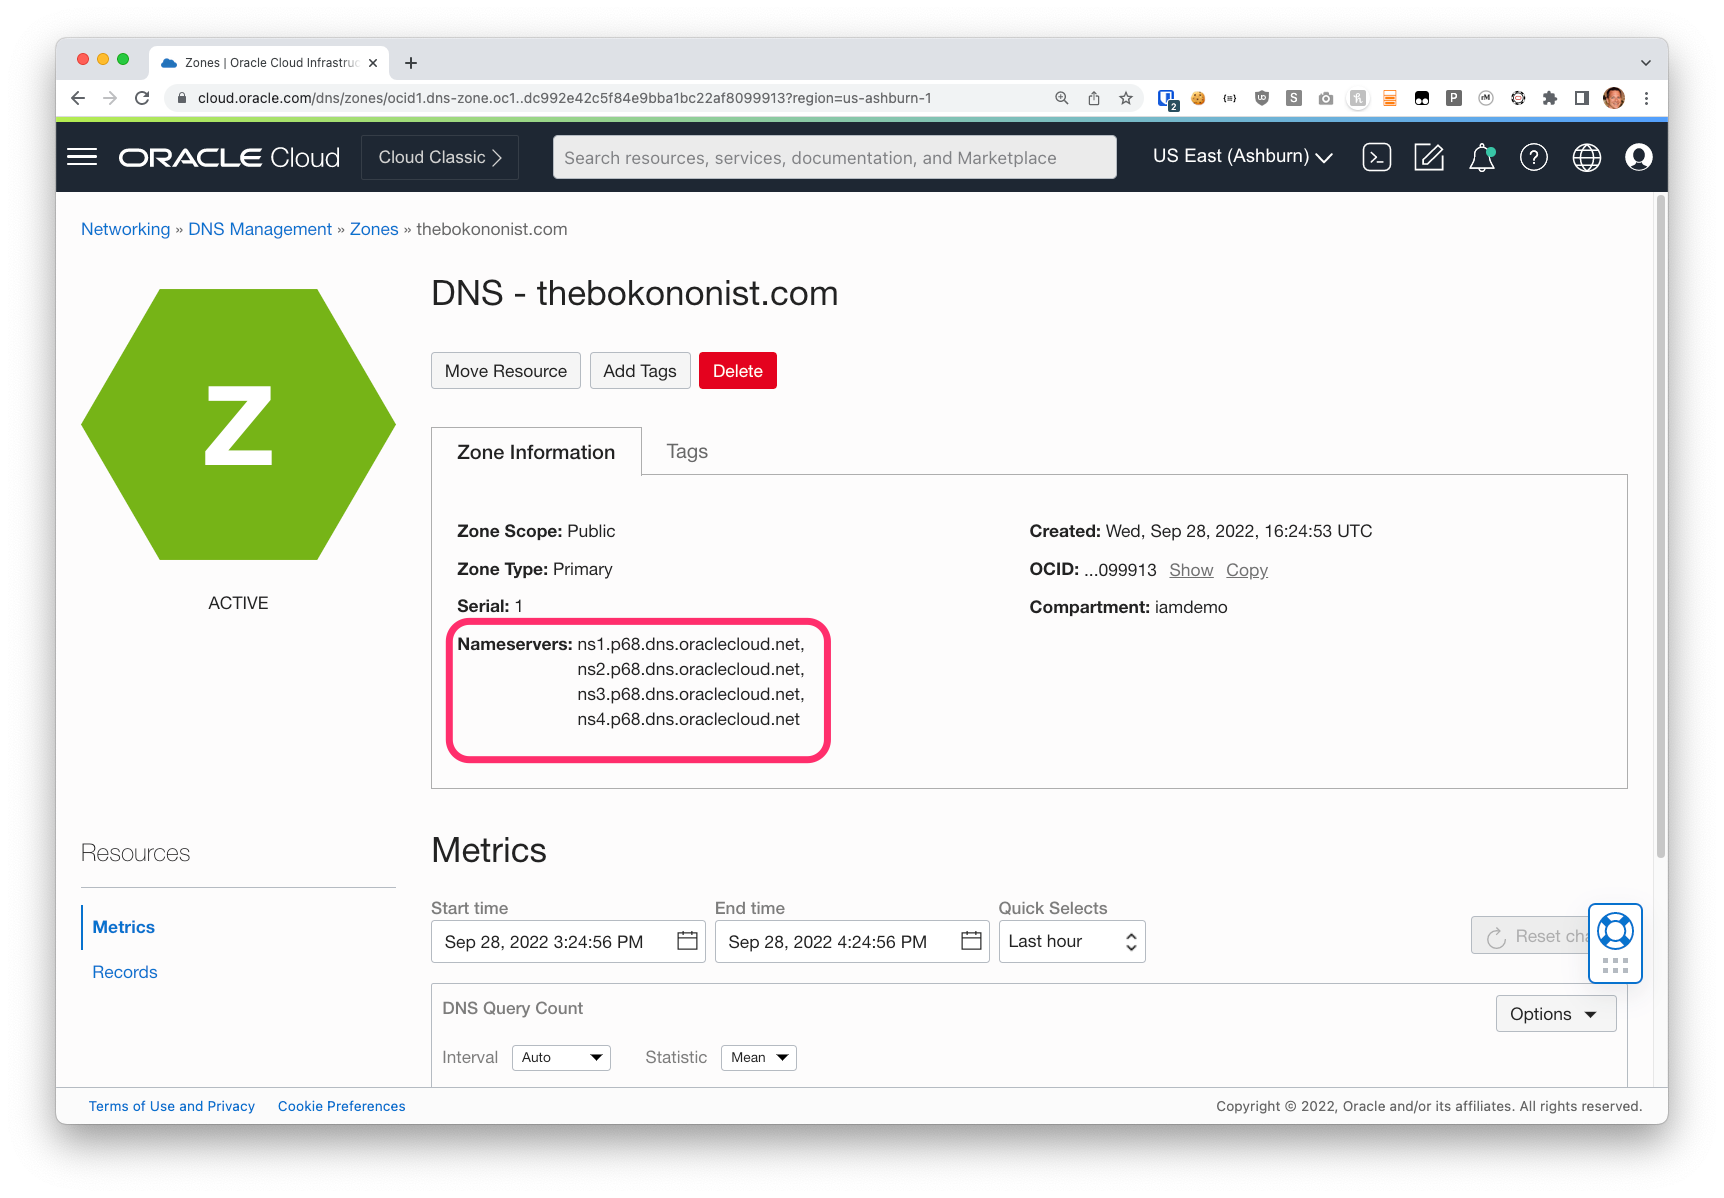
Copy these names to your clipboard, and then update the settings at your name registrar to use these as your DNS servers.
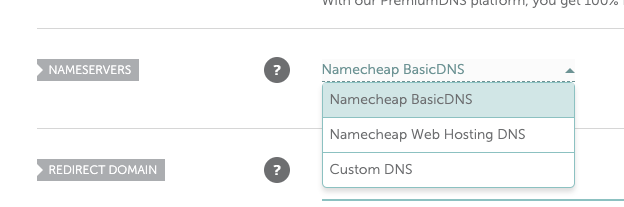
For Namecheap that means changing the value in the dropdown next to Name Server from “Namecheap BasicDNS” to “Custom DNS”.
Click the dropdown and choose Custom DNS
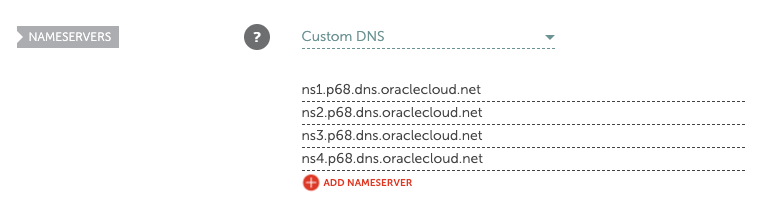
Then add OCI’s DNS servers and hit save.
If you’re using a different registrar it will be similar but slightly different.
Note: it may take some time for this change to propagate through your Name Registrar and to the root name servers. Namecheap is quick but some other registrars can take 24 hours to make this change.
3. Install the OCI CLI and set it up
Again this is somewhat out of scope. Certbot is written in Python and the certbot-dns-oci plug-in (either version of it) uses the OCI Python SDK. Both the CLI and the various SDKs use the same configuration files and keys.
For help getting the CLI installed and configured please see the documentation:
4. Install Certbot
Certbot is a command line tool provided by the EFF and Lets Encrypt.
Certbot generates a key pair and then uses the ACME protocol to (1) request a certificate from Lets Encrypt and (2) retrieve a “challenge” from them that is used to prove that you control the DNS domain name that the certificate will be used for, (3) put that challenge into a special DNS record, (4) ask LetsEncrypt to check that you did it right, and then (5) retrieve the certificate that LetsEncrypt provides.
It can also automatically install the certificate into your web server once it’s been acquired or renewed.
Certbot is available a few different ways, but if you’ve already got Python you can just “pip3 install certbot” and be done with it. If you’re on a Mac you can just “brew install certbot”.
it’s also available in docker containers and a bunch of other ways.
Again it’s kinda outside the scope of this post but do feel free to ask or discuss below in the comments!
5. Install the certbot-dns-oci plug-in
Once you have certbot itself installed you need to add the plug-in that allows certbot to manage OCI DNS records.
If you use the other guy’s plug-in you can just “pip3 install certbot-dns-oci”. If you want to use mine you’ll need to follow the instructions on my github page.
6. Run certbot to acquire your certificate
And now we’re finally ready to actually acquire a certificate.
This last step is to run certbot with the right command line arguments. My github page has them but here they are again:
This command will generate the certificate (but not install it), putting logs in the “logs” directory, using “work” as the work directory, and storing the certificates and other stuff in the “config” directory.
The other two options and their arguments tell certbot to use the OCI DNS plug-in for the challenge and response and that we want the certificate for the “demosite.ociateam.com
Note: In this case I am using “special” directories for logs, work, and config so that certbot doesn’t try to use the defaults (including /etc). If you leave those options off you may wind up with errors because you lack permissions or the certificate might wind up being placed somewhere you didn’t expect.
Certbot will do its thing and, if there are no errors, you’ll see something like this:
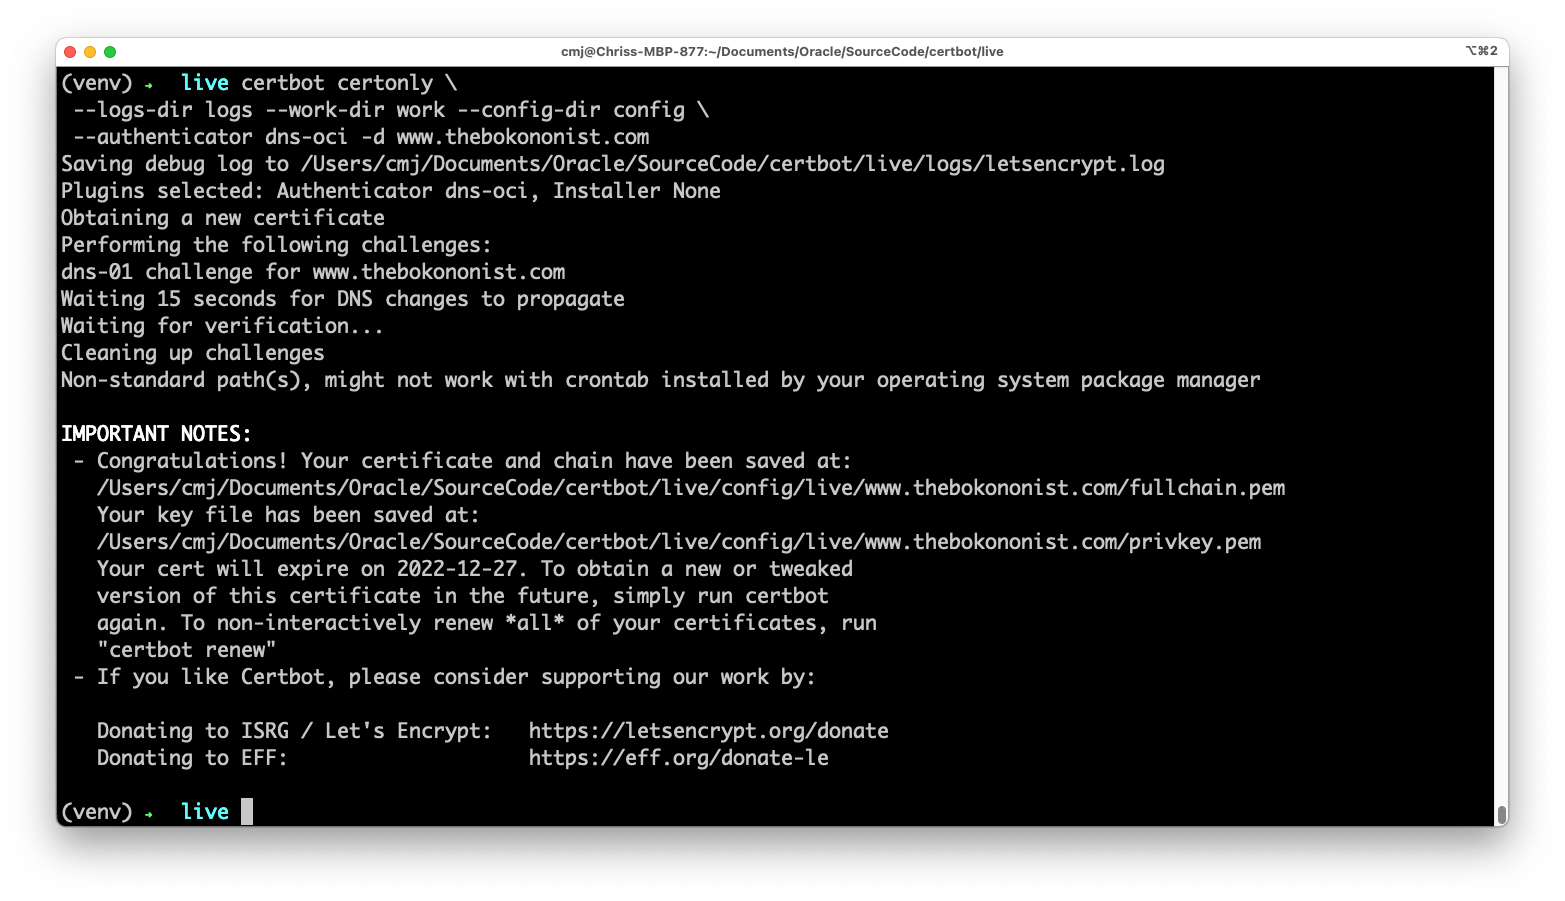
And if you look in the “config/live” directory you’ll find a directory for each certificate you request. So:
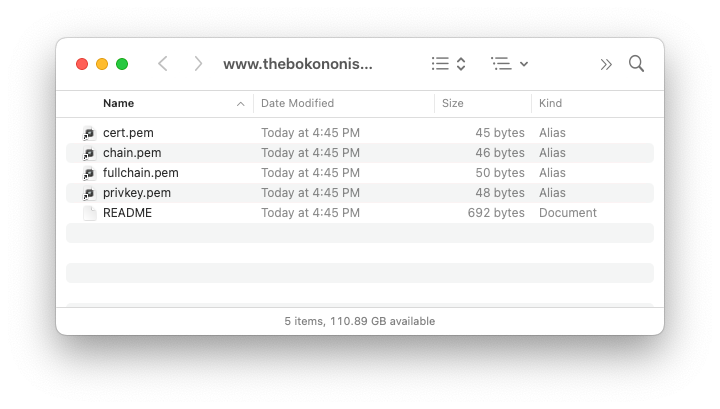
The README explains the contents of each of those files, but their names are pretty self explanatory.
What’s next?
Once you have the keys and certificate you’re able to use them in your web server, load balancer, or other OCI service.
If you’re using Certbot on a Unix box inside OCI then you can follow the normal instructions from the EFF about automatically installing the certificate in your web server, and for configuring automatic renewal of the certificate before it expires.
In the next post I’ll talk about my plug-in for Certbot that installs the certificates in the OCI Certificates Service so you can use it with the OCI Load Balancer, the API Gateway, or other OCI services. See you in about a week!