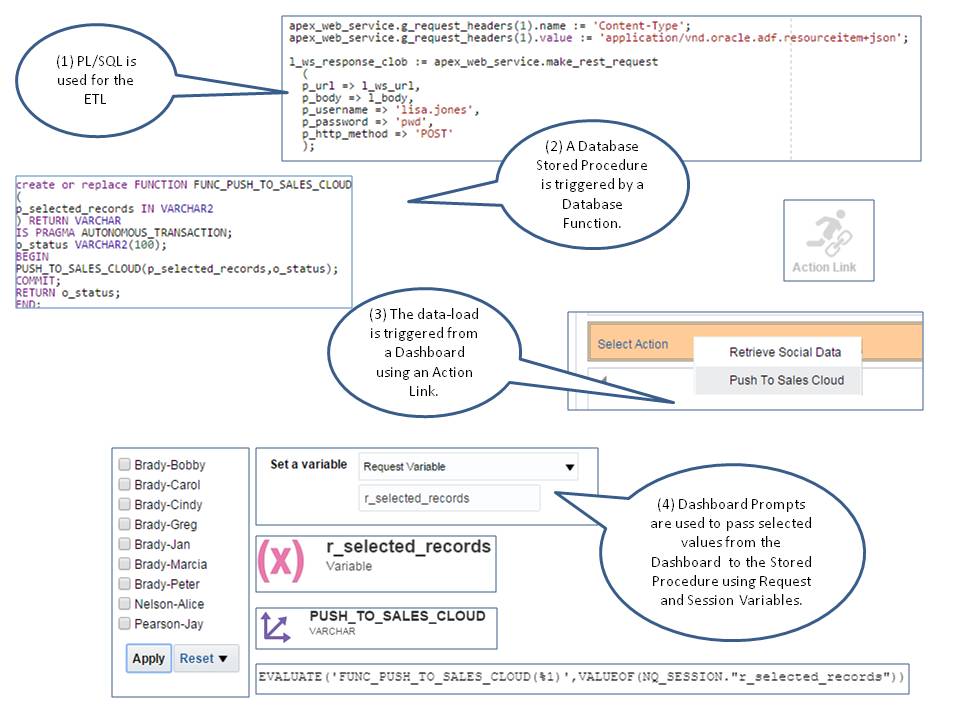
2) A database Stored Procedure is triggered by a database Function.
3) The database Function is referenced in the RPD using EVALUATE.
4) The data-load is triggered from a Dashboard using an Action Link.
5) Dashboard Prompts are used to pass selected values from the Dashboard
to the Stored Procedure using Request and Session Variables.
The more ambitious component of this article is replicating the user experience of scraping data from a dynamically filtered Dashboard Analysis Request. Write-back is emulated by replicating what the user views on the Dashboard in a stored procedure SQL SELECT.
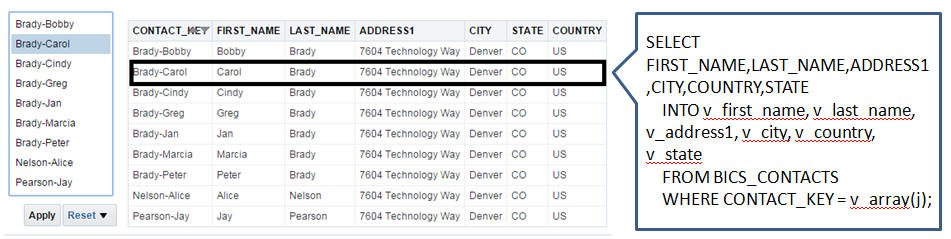
1) The Dashboard Consumer refines the results on the Dashboard with a Prompt that represents a unique record identifier.
2) The Dashboard Prompt Sections are passed to the Stored Procedure SELECT and used in a WHERE clause to replicate the refinement that the Dashboard Consumer makes on the Dashboard.
Note: When replicating dashboard SQL in the stored procedure, be cautious of data that has had row level security applied in the RPD. To avoid erroneous results, all customized permissions must be manually enforced through the stored procedure SQL WHERE clause.
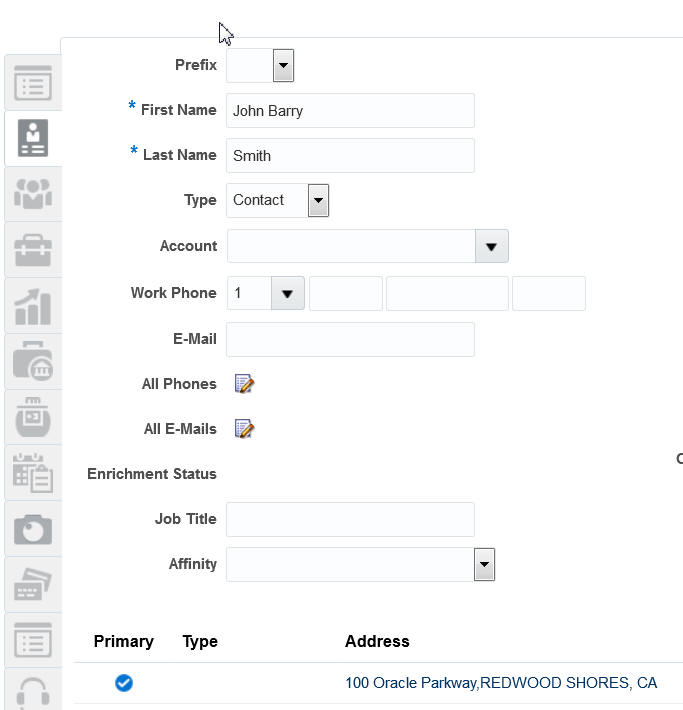
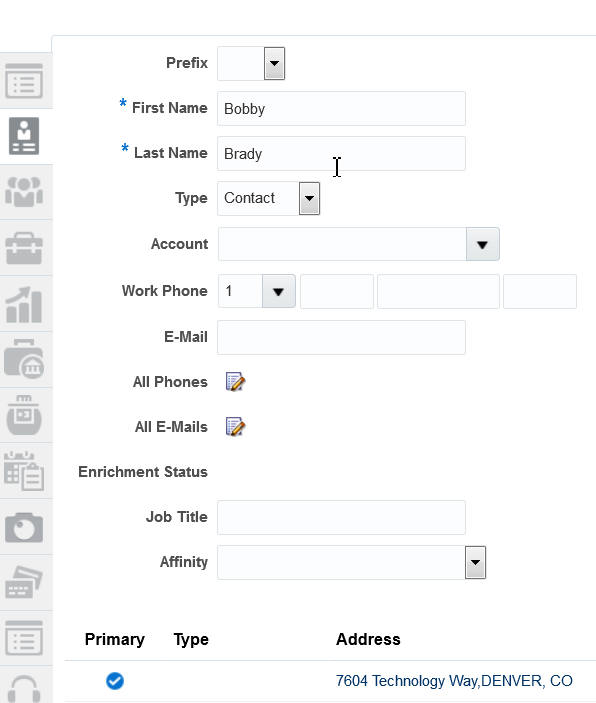
The following steps walk-through the creation of the necessary OAC and PL/SQL artifacts needed to load data from a OAC Dashboard into Sales Cloud. The example provided interprets the contact information from the Dashboard and creates a new matching contact in Sales Cloud. This example could be easily modified to support other REST API methods.
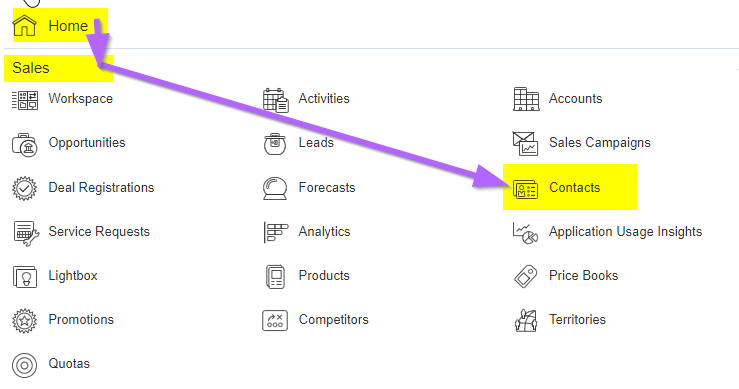
Part A – Configure OAC Dashboard
1) Create Table
2) Insert Records
3) Create Analysis Request
4) Create Dashboard
Part B – Configure PL/SQL
5) Review REST API Documentation
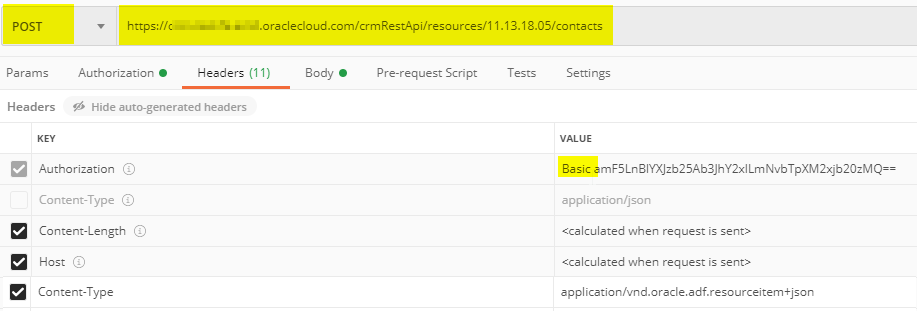
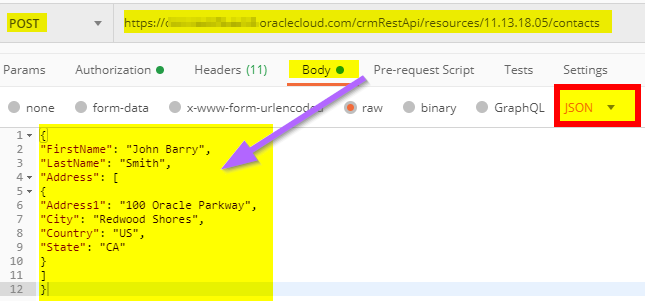
6) Test POST Method
7) Create Stored Procedure
8) Test Stored Procedure
9) Create Function
10) Test Function
PART C – Configure Action Link Trigger
11) Create DUMMY_PUSH Table
12) Create Variable
13) Reference Variable
14) Create Model Expression
15) Create DUMMY_PUSH Analysis Request
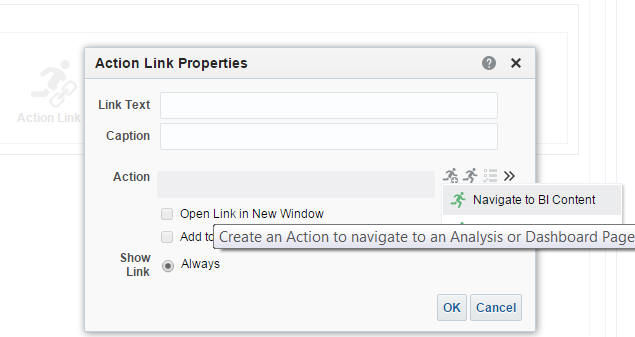
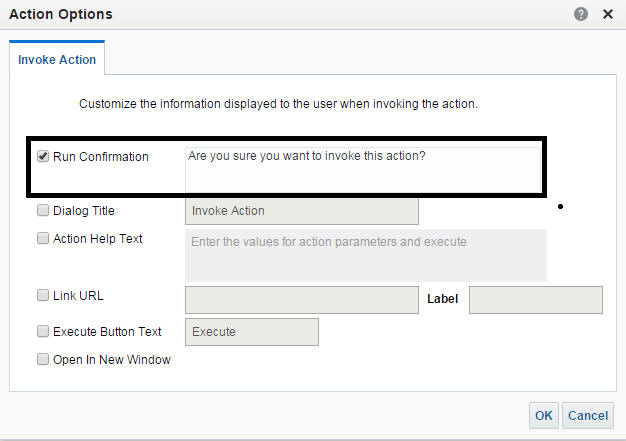
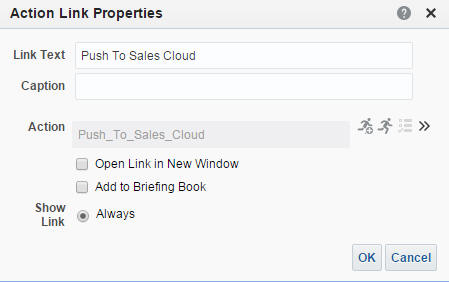
16) Create Action Link
17) Execute Update
Main Article
Part A – Configure OAC Dashboard
Step 1 – Create Table
From SQLDeveloper or SQL query tool of choice create a table called “CONTRACTS”.
Where CONTACT_KEY is the unique record identifier that will be used to refine the data on the Dashboard. This must be something that the Dashboard Consumer can easily recognize and decipher.
CREATE TABLE CONTACTS( FIRST_NAME VARCHAR2(500), LAST_NAME VARCHAR2(500), ADDRESS1 VARCHAR2(500), CITY VARCHAR2(500), COUNTRY VARCHAR2(500), STATE VARCHAR2(500), CONTACT_KEY VARCHAR2(500));
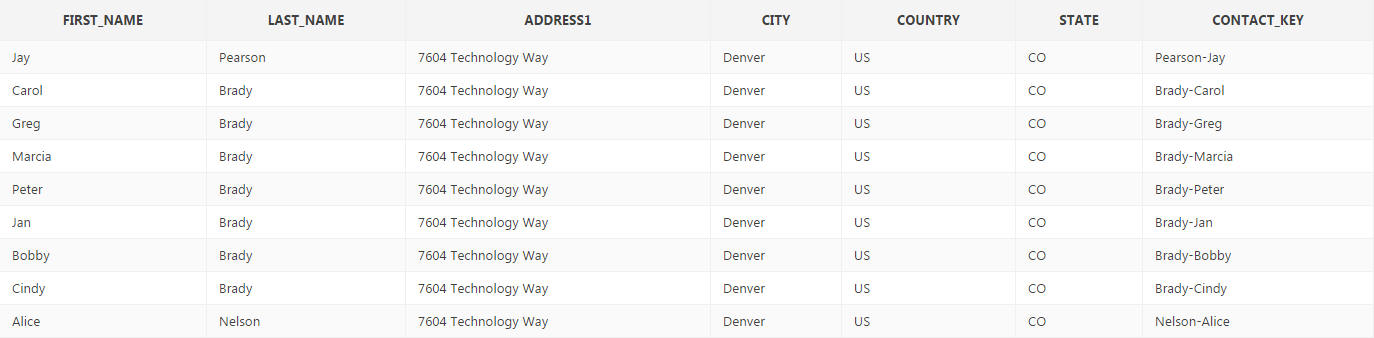
Step 2 – Insert Records
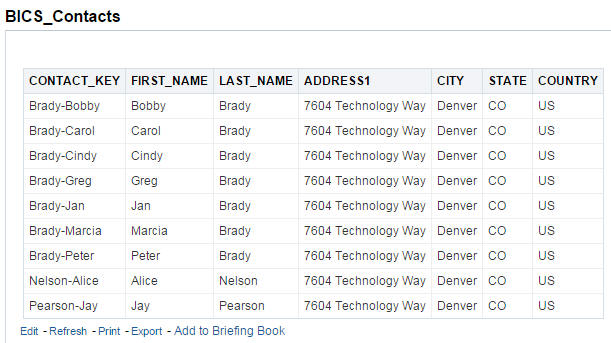
Insert a selection of sample contact records into the contacts table.
INSERT INTO CONTACTS(FIRST_NAME,LAST_NAME,ADDRESS1,CITY,COUNTRY,STATE,CONTACT_KEY) VALUES (‘Jay’,’Pearson’,’7604 Technology Way’,’Denver’,’US’,’CO’,’Pearson-Jay’);
Step 3 – Create Analysis Request
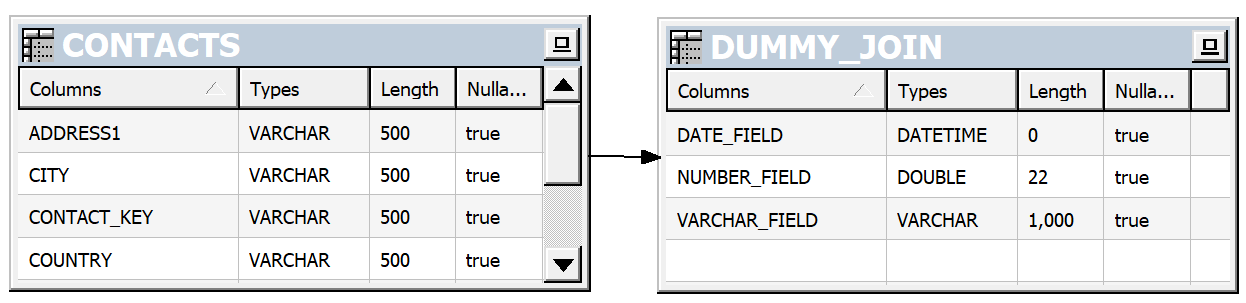
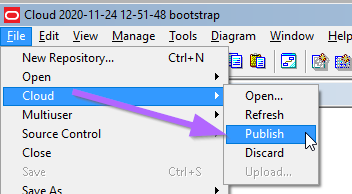
Add the CONTACTS table to the three layers of the RPD. In the Physical Layer join it to another table (create dummy table if required) -> Publish to the Cloud.
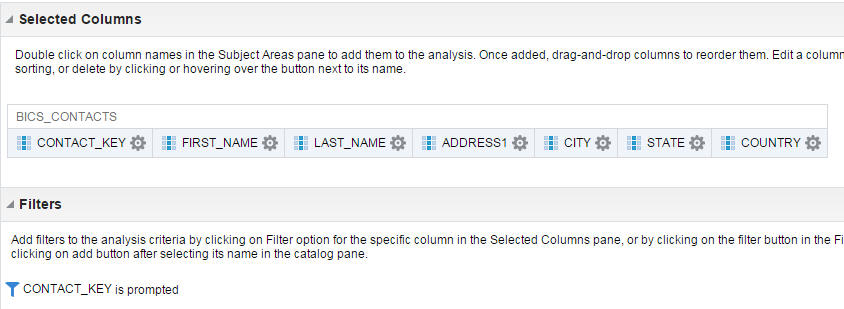
Create an Analysis Request based on the CONTACTS table.
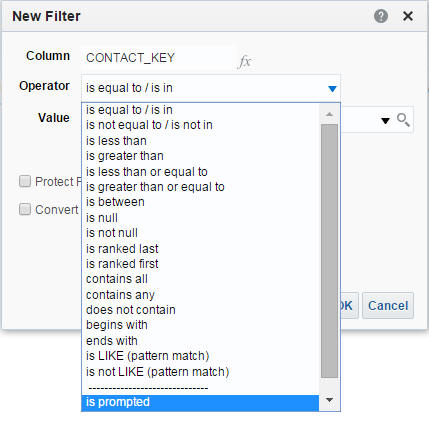
Add a filter on CONTACT_KEY where Operator = “is prompted”.
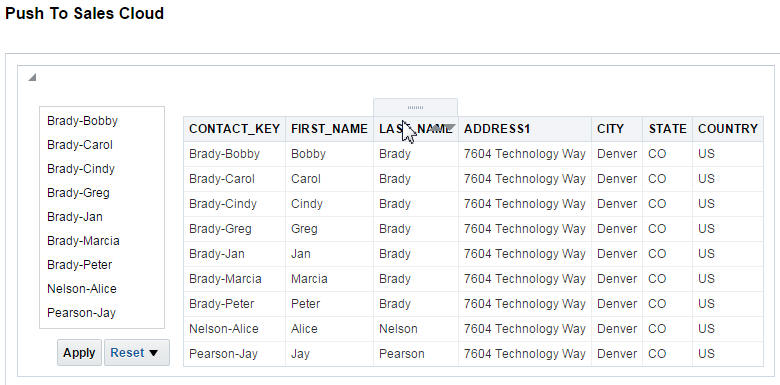
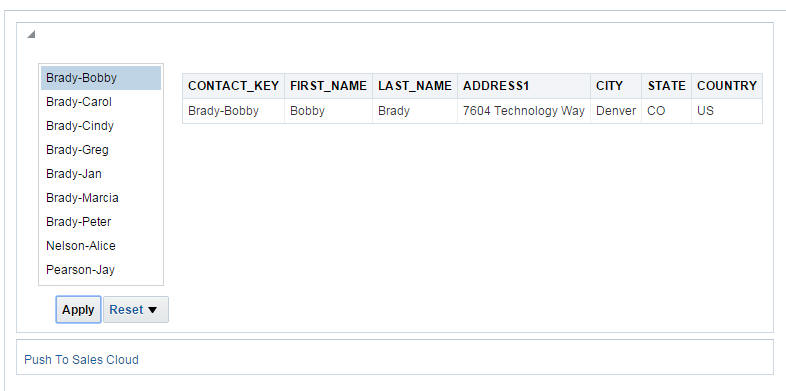
Step 4 – Create Dashboard
Create a Dashboard. Add the Contacts Analysis and a Prompt on CONTACT_KEY. To keep the example simple, a List Box Prompt has been used. Additionally, “Include All Column Values” and “Enable user to select multiple values” are disabled. It is possible to use both these options, with extra manual SQL in the stored procedure.
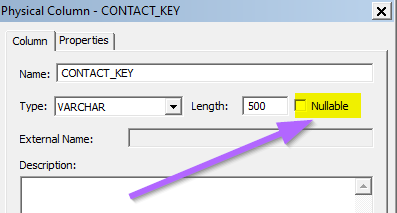
In RPD uncheck Nullable on CONTACT_KEY and any other column that a prompt will be applied.
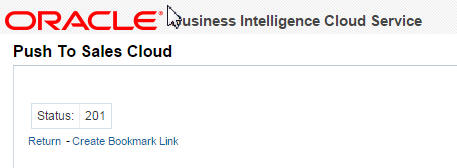
RETURNS: 201 – indicating successful creation of contact
Step 9 – Create Function
create or replace FUNCTION FUNC_PUSH_TO_SALES_CLOUD ( p_selected_records IN VARCHAR2 ) RETURN VARCHAR IS PRAGMA AUTONOMOUS_TRANSACTION; o_status VARCHAR2(100); — PUSH_TO_SALES_CLOUD(p_selected_records,o_status); COMMIT; RETURN o_status; –;
Step 10 – Test Function
select FUNC_PUSH_TO_SALES_CLOUD(‘Pearson-Jay’) from dual;
RETURNS: 201 – indicating successful creation of contact
Part C – Configure Action Link Trigger
Quick Re-Cap:
It may be useful to revisit the diagram provided in the intro to give some context to where we are at.
“Part A” covered building the Dashboard show in #4
“Part B” covered building items #1 & #2.
“Part C” will now cover the remaining artifacts show in #3, and #4.
Step 11 – Create DUMMY_PUSH Table
This tables main purpose is to trigger the database function. It must have a minimum of one column and maximum one row. It is important that this table only has one row as the function will be trigger for every row in this table.
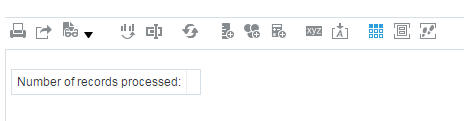
INSERT INTO DUMMY_PUSH(REFRESH_TEXT) VALUES (‘Status:’);
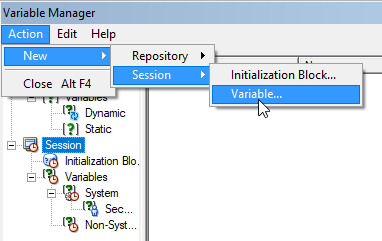
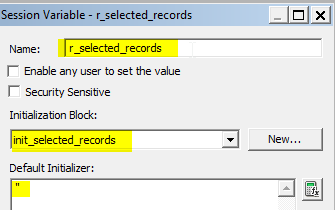
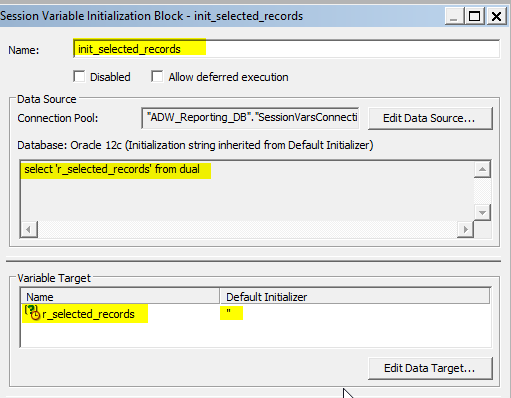
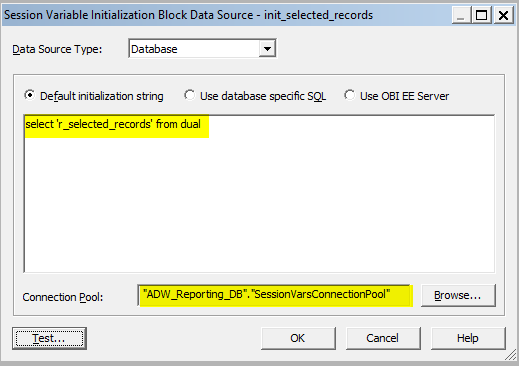
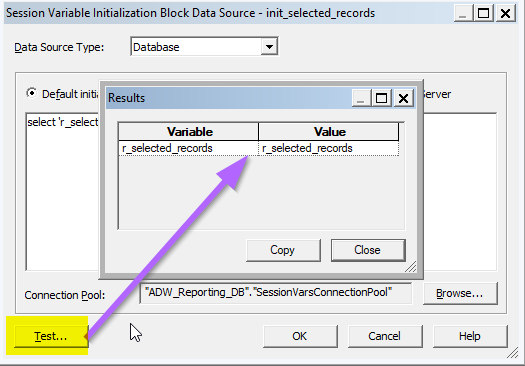
Step 12 – Create Variable
From the RPD create a variable called “r_selected_records”. Provide a starting Value and define the SQL Query.
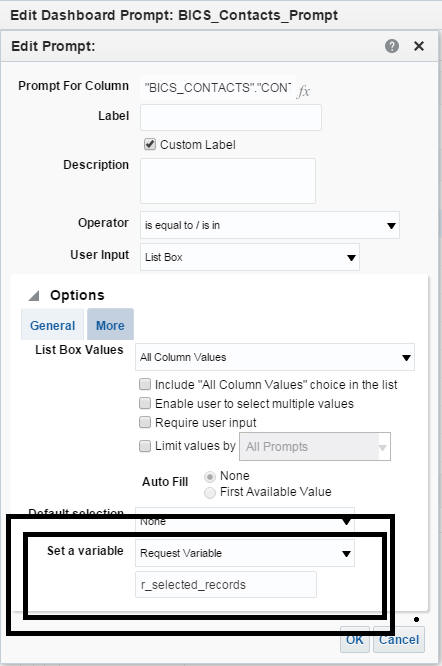
Step 13 – Reference the Variable
On the Dashboard Prompt (created in Part A – Step 4) set a “Request Variable” matching the name of the Variable (created in Part C – Step 12). i.e. r_selected_records
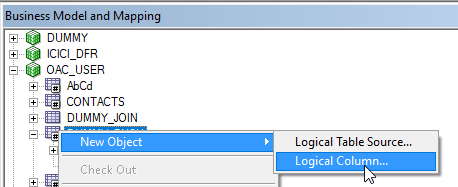
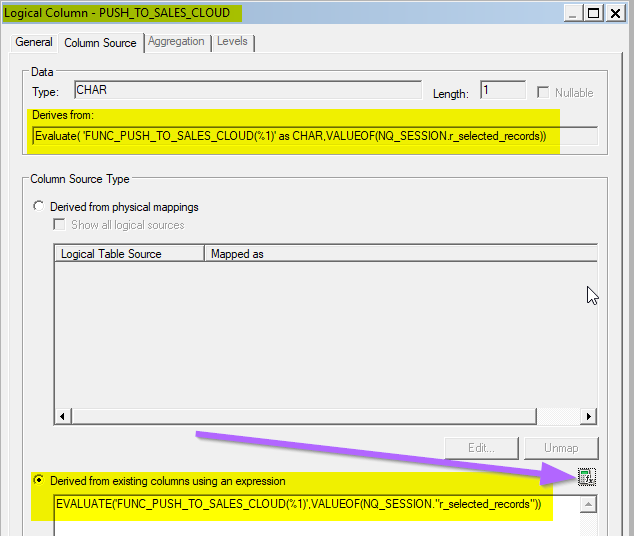
Step 14 – Create Expression
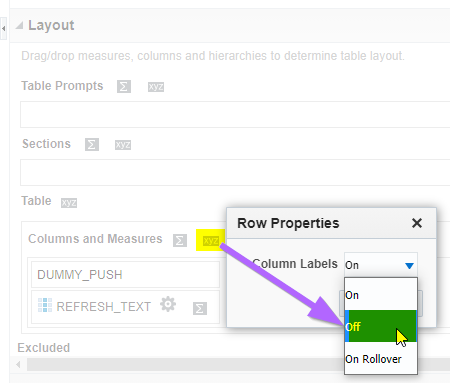
Add a new Logical Column called PUSH_TO_SALES_CLOUD to DUMMY_PUSH Logical Table to the Business Model Layer.
Click here for the REST API for Oracle Sales Cloud guide.
Click here for the Application Express API Reference Guide – MAKE_REST_REQUEST Function.
Summary
This article provided a set of examples that leverage the APEX_WEB_SERVICE_API to integrate Oracle Sales Cloud with Oracle Analytic Cloud (OAC) using the REST API for Oracle Sales Cloud.
The use case shown was for OAC and Oracle Sales Cloud integration. However, many of the techniques referenced could be used to integrate Oracle Sales Cloud with other Oracle and non-Oracle applications.
Similarly, the Apex MAKE_REST_REQUEST example could be easily modified to integrate OAC or standalone Oracle Apex with other REST web services.
Authors
Jay Pearson
Consulting Solutions Architect, Business Intelligence