As you may know Oracle Cloud Infrastructure Data Flow (OCI Data Flow) lets you run Apache Spark jobs at any scale with almost no administration. It is serverless, elastic, and you only pay for the OCPUs you use when a job is running. But more importantly you don’t need to administer, maintain, secure and patch an entire cluster by yourself. That gives you a lot of time to focus on developing new jobs! For all these reasons our customers want to try it.
You can write your own Spark Applications in Python, Java or Scala. Or you can use a data integration tool like Oracle Data Integrator to generate the Python code for you. Oracle Data Integrator supports Spark since release 12.1.3 and is used by many of our customers to run Spark jobs on their on-prem clusters. Luckily Oracle Data Integrator is flexible and extensible. So we can duplicate an existing Spark Knowledge Modules and make some changes so it create and run the Spark Application in OCI Data Flow using the OCI Java SDK. This is what we will discuss today and it can be used in the following use cases :
- Generation new Spark Applications using a graphical tool rather than hand-scripting it.
There are pros and cons to using an ETL tool versus writing the code yourself. If you want to hear more about it, check our latest Cloudology Podcast : Code vs No Code ETL.
- Migration of existing on-prem Spark Applications built as Oracle Data Integrator mappings to OCI Data Flow Spark Applications from using.
As we have many customers working with Oracle Data Integrator on their on-prem Spark Cluster, this Knowledge Module lets them move their jobs to OCI Data Flow without having to rebuilt anything. It can be used as an extension for the on-prem Spark clusters for some specific Spark jobs that requires a larger cluster once a month. Or it can be used to entirely migrate to OCI Data Flow if you are happy with the result.
Limitations
- Currently our Knowledge Module only supports Oracle Cloud Infrastructure Object Storage (OCI Object Storage) as source and target for your Spark Applications.
- This Knowledge Module is provided as a community development. It is not part of the supported features of Oracle Data Integrator. If you face any issue with it, contact me and I’ll do my best to help you.
How it works
In order to transform the logic in your mapping into a Spark Application and run it, Oracle Data Integrator will follow these steps :
- Generate the Spark scripts representing your mapping’s logic and the ODI PySpark Extension script . These steps are exactly the same as in the original Spark Knowledge Module we duplicated.
- Upload these scripts to OCI Object Storage.
- Create an OCI Data Flow Application by referencing these scripts.
- Delete any existing target files (Optional).
- Create an OCI Data Flow Run using the Application it just created.
- Monitor the OCI Data Flow Run.
- Remove any local files – spark scripts and log files (Optional).
- Delete the OCI Data Flow Application (Optional).
How to set it up
-
OCI Config file
The first thing to do is to tell the OCI Java SDK how to reach your compartment to create the OCI Data Flow Application. For that the SDK needs your private key in the pem format and a configuration file, stored by default in the following location ~/.oci/ folder. Here is an example of my config file :[DEFAULT] user=<my_user_OCID> fingerprint=<fingerprint_associated_to_my_user> key_file=~/.oci/oci_api_key.pem pass_phrase=<passphrase> tenancy=<my_tenancy_OCID> region=us-ashburn-1 compartment_id=<my_compartment_OCID> -
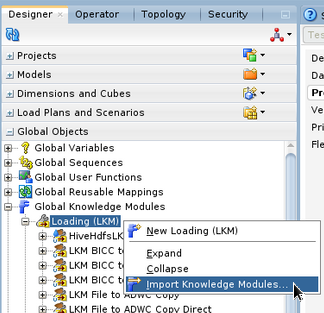
Download and import the LKM Spark Data Flow to Object Storage
The LKM can be found on the OCI Data Flow sample repository. Once downloaded on the Oracle Data Integrator server, it can be imported in Oracle Data Integrator Studio in the Global Objects section. -
-
Create the topology objects for the File Technology
In the Physical architecture, create a new Physical Schema pointing to a folder where you want the Spark Script to be generated.
In the Logical architecture, create a Logical Schema and link it to the Physical Schema through a Context.
-
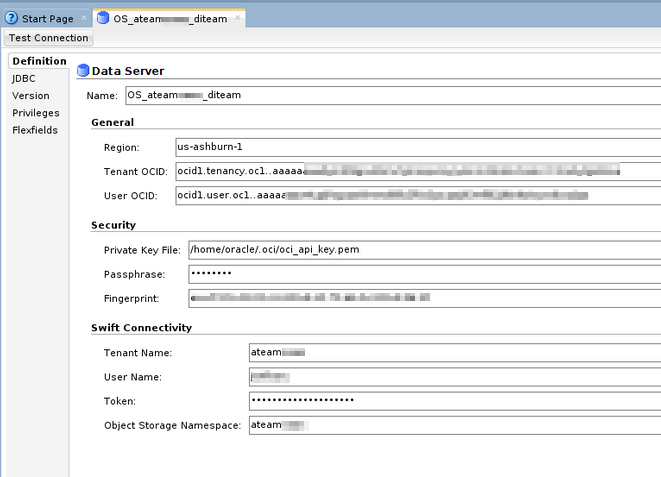
Create the topology objects for the Oracle Object Storage Technology
In the Physical topology, create a new Data Server. It can use similar information as the ones in the config file created in step 1.
Under that Data Server, create a new Physical Schema pointing to a bucket where you want the Spark Script to be uploaded.
In the Logical architecture, create a Logical Schema and link it to the Physical Schema through a Context.
-
Create the topology objects for the Spark Python Technology
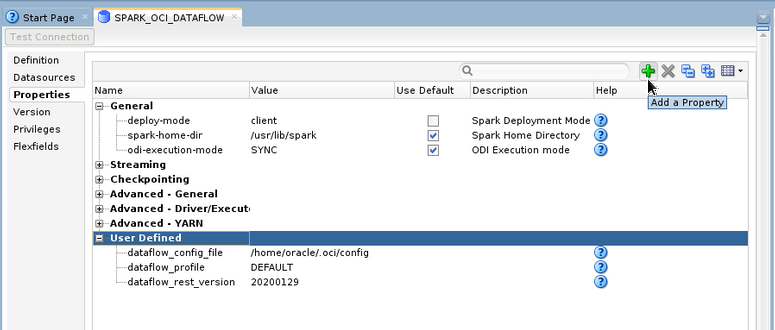
In the Physical topology, create a new Data Server. We don’t need it to point to an actual Spark cluster but we will use it to hold important information that the Knowledge Module will use. Furthermore, by using the Spark Python technology, Oracle Data Integrator will let us use the Spark KMs.
Change the Master Cluster so it holds the url of dataflow for your region – e.g. https://dataflow.us-ashburn-1.oci.oraclecloud.com.

On the Properties tab, change the deploy-mode to client. Then click the plus sign on the right side multiple times to add three User Defined properties :
– dataflow_config_file : path to your config file
– dataflow_profile : the name of the profile to use in your config file
– dataflow_rest_version : this is the REST APIs version that the OCI SDK should use. As we write the version is 20200129.
Under that Data Server, create a new Physical Schema. Leave it as default.
In the Logical architecture, create a Logical Schema and link it to the Physical Schema through a Context.
-
Create (an) Object Storage Model(s)
In the Designer, under Models, create a new Model. Set the Technology to Oracle Object Storage and select the Logical Schema pointing to the bucket where your source/target files are located.
Repeat if you have multiple buckets to connect to.
-
Create Data Stores and reverse engineer the attributes
Right click on Model and create a New Datastore. Give it a name and fill the Resource Name either by typing the name of your file or by using the magnifying glass on the right to search it from the list.
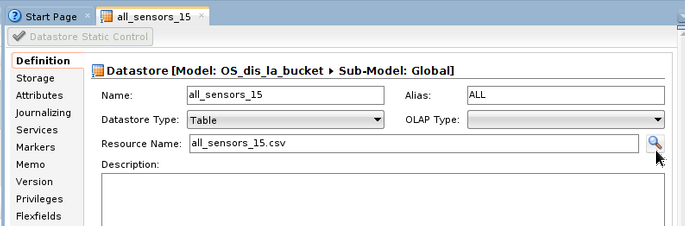
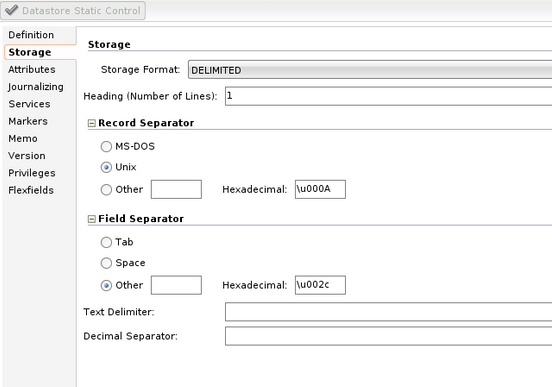
In the Storage tab, explain the format of your file.
In the Attributes tab, click on the Reverse Engineer button at the top and check if your attributes are correctly added.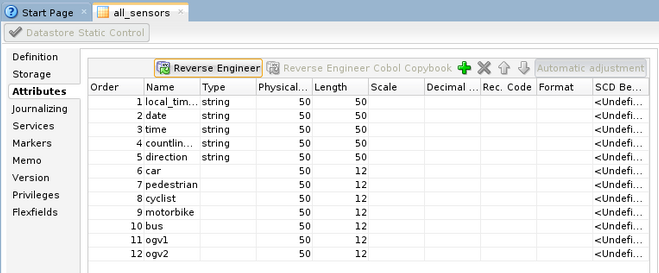
-
Create a mapping
In your project, create a new mapping.
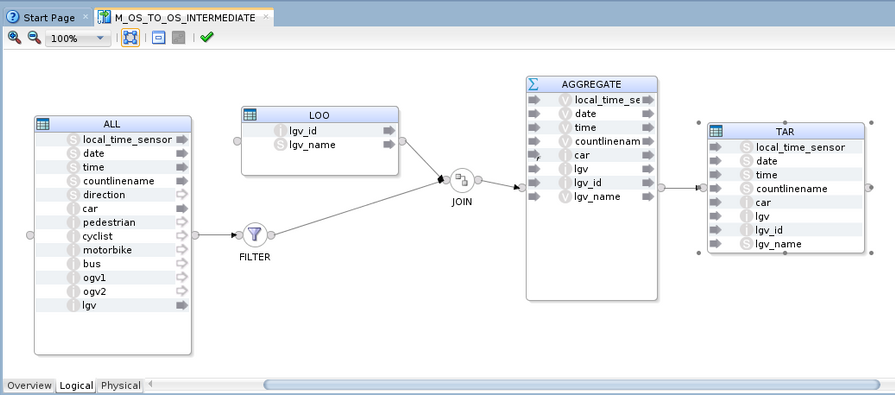
Drag and drop your source and target Data Stores and add the components required to build your transformation logic.
-
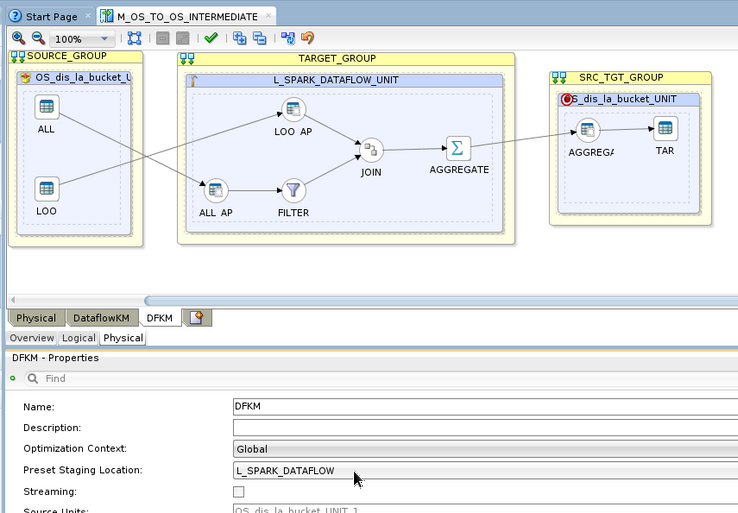
Configure the physical design
On the physical tab of your mapping, click on the canvas (white background) and set the Preset Staging Location property to point to the Spark Logical Schema created at step 5. This will tell ODI that we are using the Spark Technology to transform the data stored in OCI Object Storage.
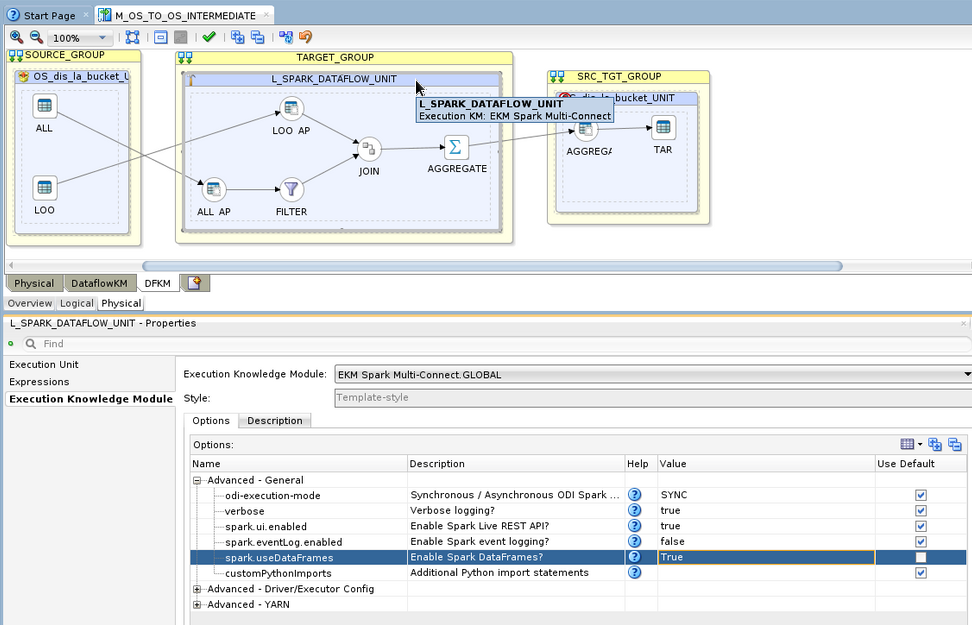
Click on the Staging UNIT (blue box in the center of the canvas with a hammer icon). On the Execution Knowledge Module tab, under the Advanced – General section, set the spark.useDataFrames option to True.
This is required for the code to run on OCI Data Flow. Spark introduces DataFrames a few years ago to speed up the Spark jobs.
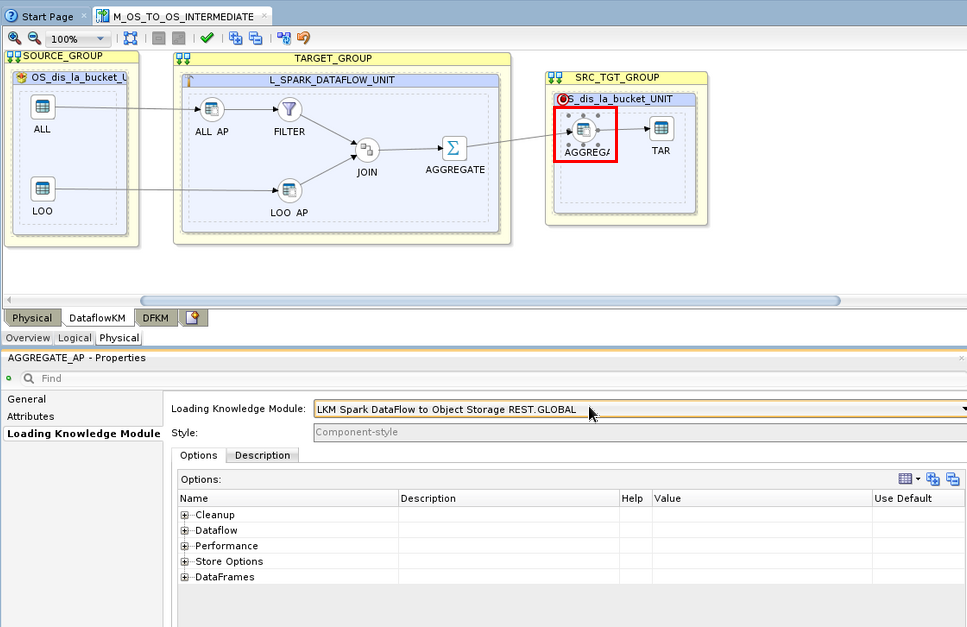
In the Target UNIT (blue box in the right side of the canvas with a target icon), click on the round Node and click on the Loading Knowledge Module tab in the Properties pane.
Change the Loading Knowledge Module to LKM Spark DataFlow to Object Storage REST.
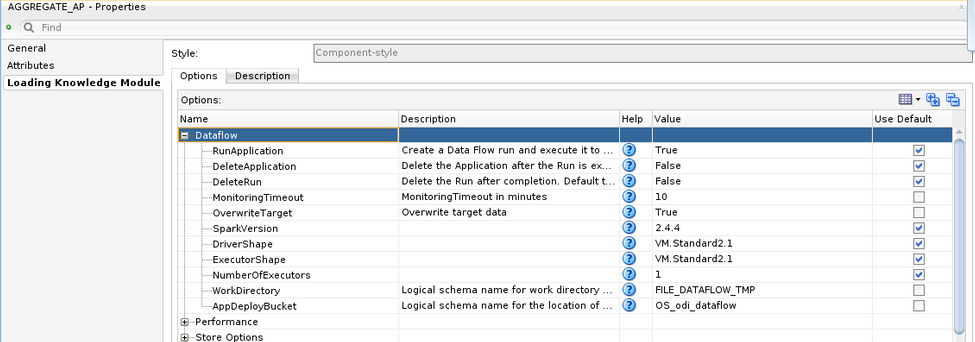
Change the options under the Dataflow section to your liking.
- Save and Execute the mapping !
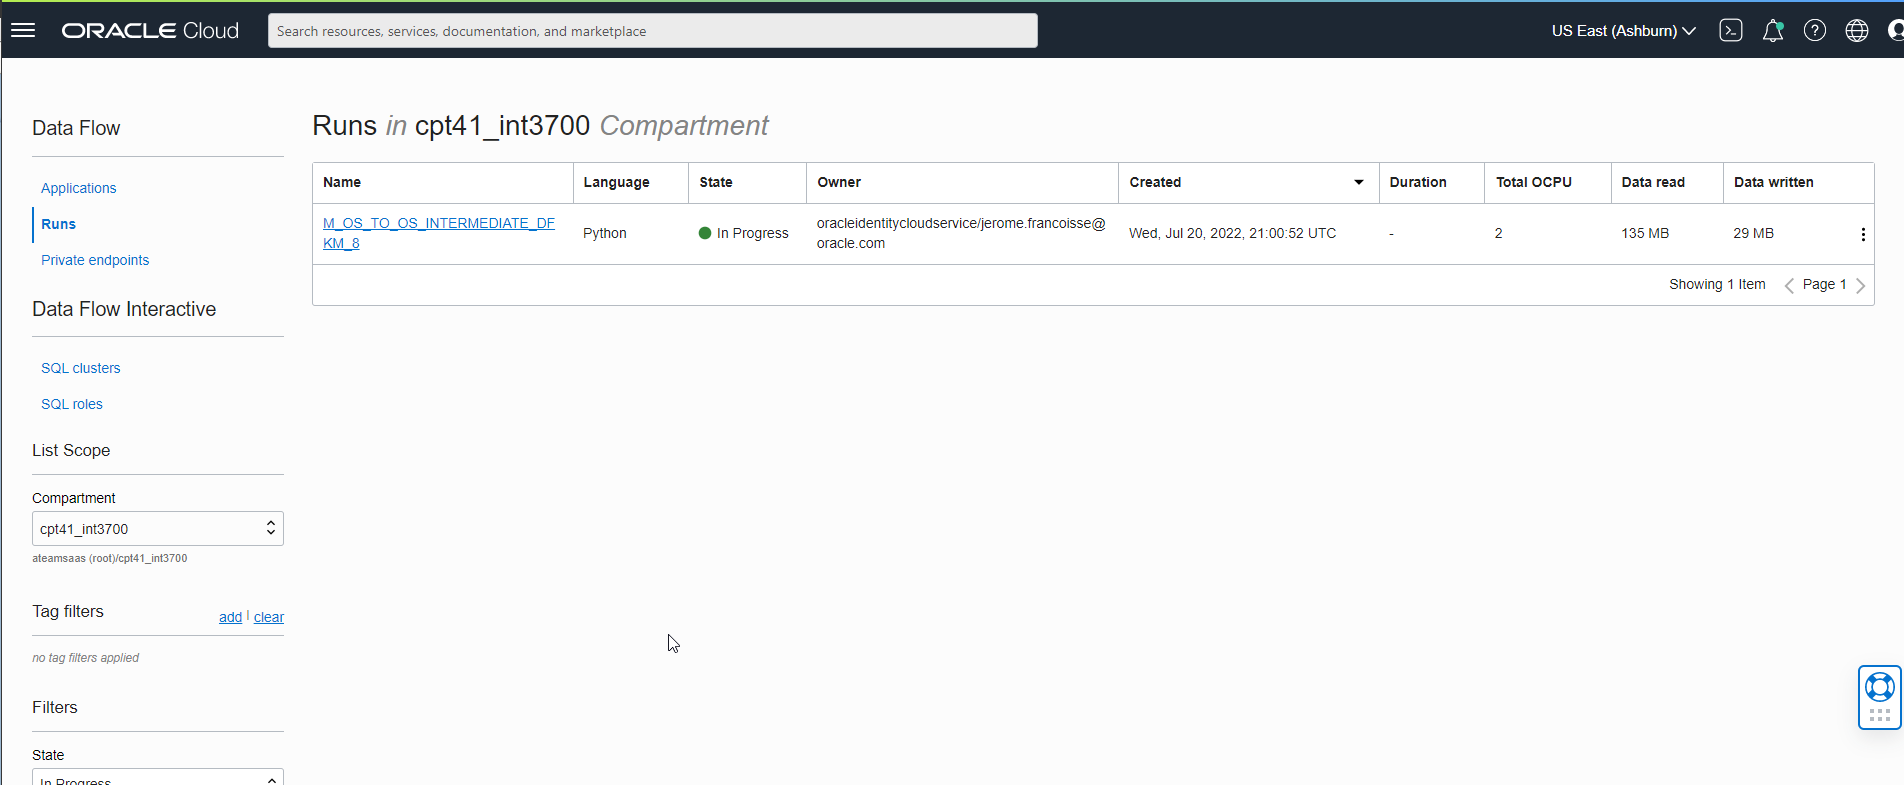
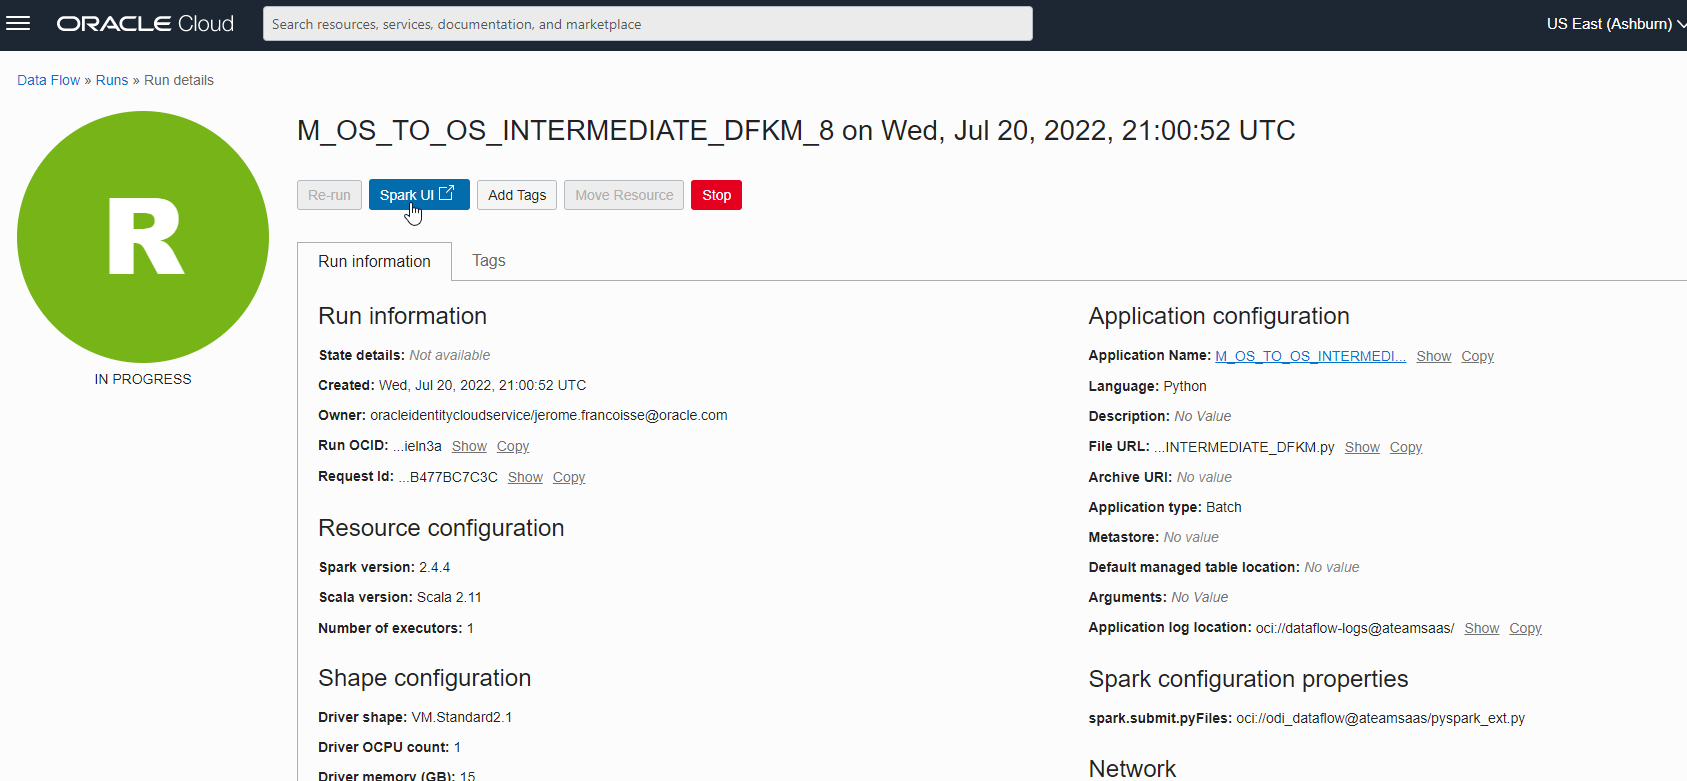
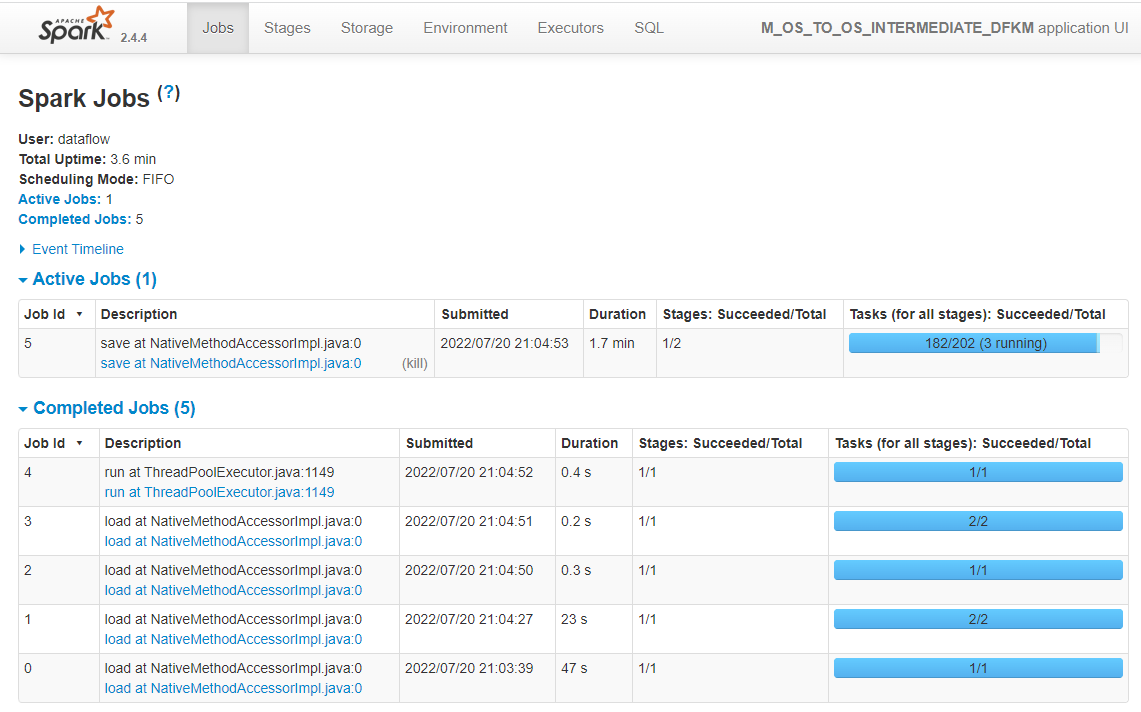
There it is, you can now head to the OCI Console and check if an OCI Data Flow Application is created. If you choose to run the Application in the LKM options, you should also see a new Run and you can monitor the execution.
Finally, head to the Object Storage page to check if you target file has been created.
In this blog, we have seen how we can extend ODI to make it support a new technology. We are now able to generate Spark code and run it on OCI Data Flow. This can be used for greenfield projects or to migrate existing Spark jobs running on on-premises cluster.
I want to thank Bojana Simova for the help she provided while building the first draft of the KM and for the great improvment she developed in there!
If you have any idea to improve this Knowledge Module, reach out to me on Twitter.
If you want to learn more, check all the other Data Management entries!
First published on 2022-07-27