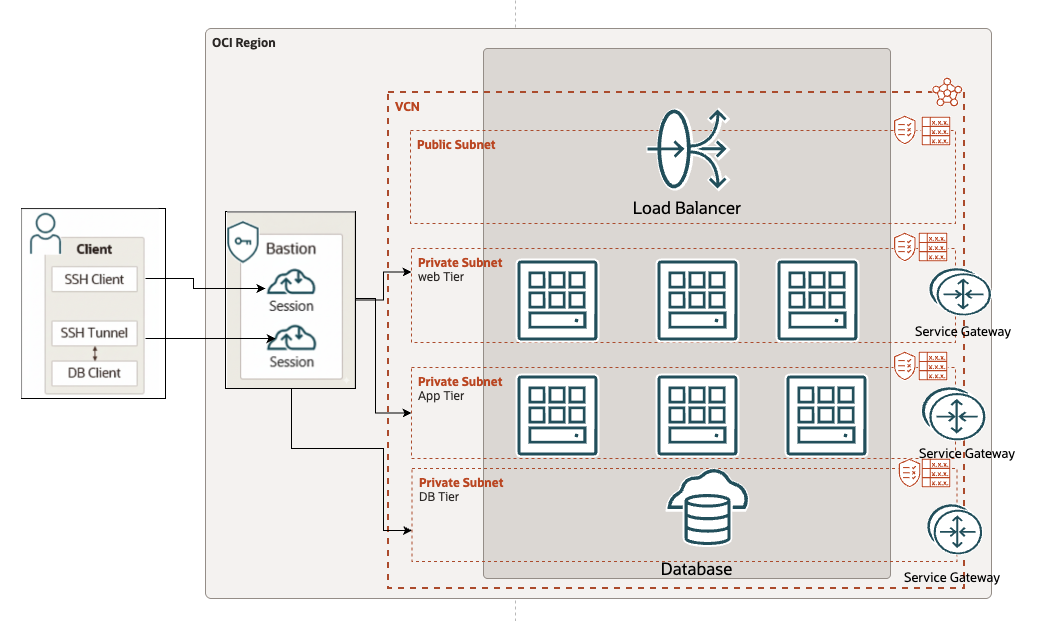
Modern cloud applications commonly follow a three-tier architecture with web, application, and database layers. While the public load balancer accepts traffic from the internet, all servers behind it usually stay private. This design significantly reduces your attack surface, but it introduces a practical challenge:
How do administrators securely access private compute and database resources?
That’s exactly what OCI Bastion is designed for.
In this post, we’ll walk through how Bastion simplifies secure access across a three-tier architecture and how you can use it to reach Linux servers, Windows servers, databases, and even private ORDS endpoints, without assigning public IPs or opening inbound ports from public internet.
Architecture Overview
A simplified architecture looks like this:
A public load balancer routes traffic to private web servers
Web servers communicate with private application servers
The application layer connects to a private database
OCI Bastion acts as a secure operational entry point
This setup keeps your infrastructure private, hardened, and tightly controlled.
Why Use OCI Bastion?
OCI Bastion gives you:
Time-bound access (auto-expiring sessions)
No SSH/RDP exposure to the internet
Multiple session Types:
Managed SSH session
SSH Port forwarding session
Dynamic Port forwarding (SOCKS5) session
For details about the IAM policies required to manage and use the Bastion service, please refer here.
Getting Started: Creating Your OCI Bastion
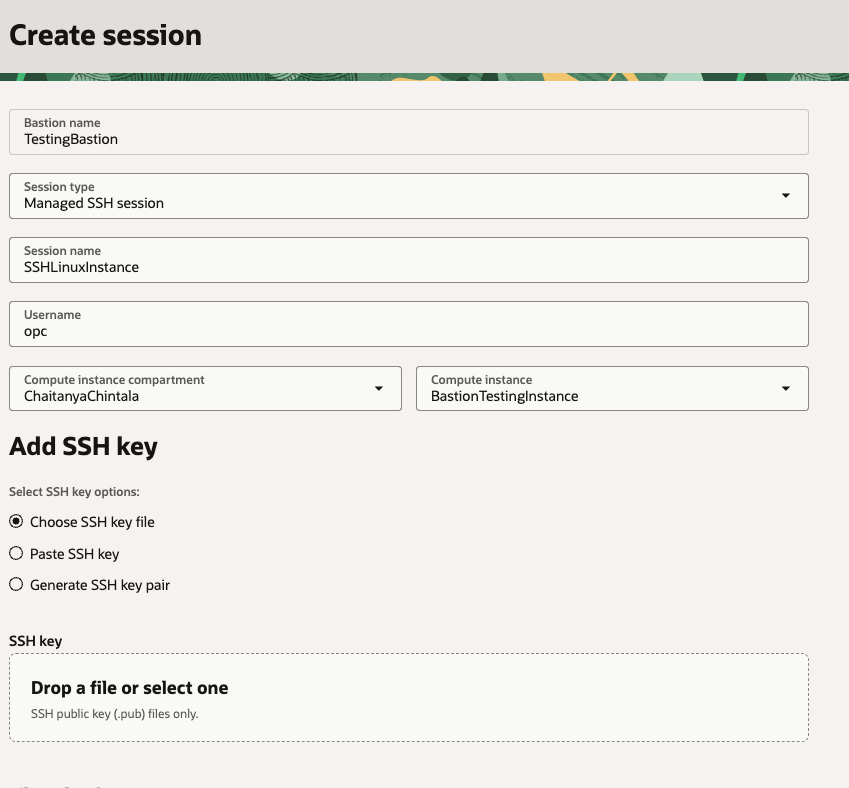
Before you can create sessions, you need to create a bastion to provide restricted access to target resources that don’t have public endpoints. This is a straightforward process in the OCI Console. You’ll specify a VCN, a target subnet and a CIDR block allowlist.
Here’s an example of a configured Bastion.
Note : When configuring Ingress Rules for your private resources, allow traffic only from the Bastion Private Endpoint IP address (e.g., 10.0.2.81 in the example above).
Step-by-Step: Accessing Each Tier
Below is a clean, simplified walkthrough covering Linux, Windows, databases, and REST endpoints
1. Linux Web/App Servers : SSH Managed Session
Managed SSH is the easiest and most secure method to access Linux private instances.
Prerequisites:
Bastion Plugin: Ensure the Oracle Cloud Agent “Bastion” plugin is enabled on the target instance.
Ingress Rules: Allow ingress from the Bastion private Endpoint IP address on Port 22 in the instance’s subnet security list.
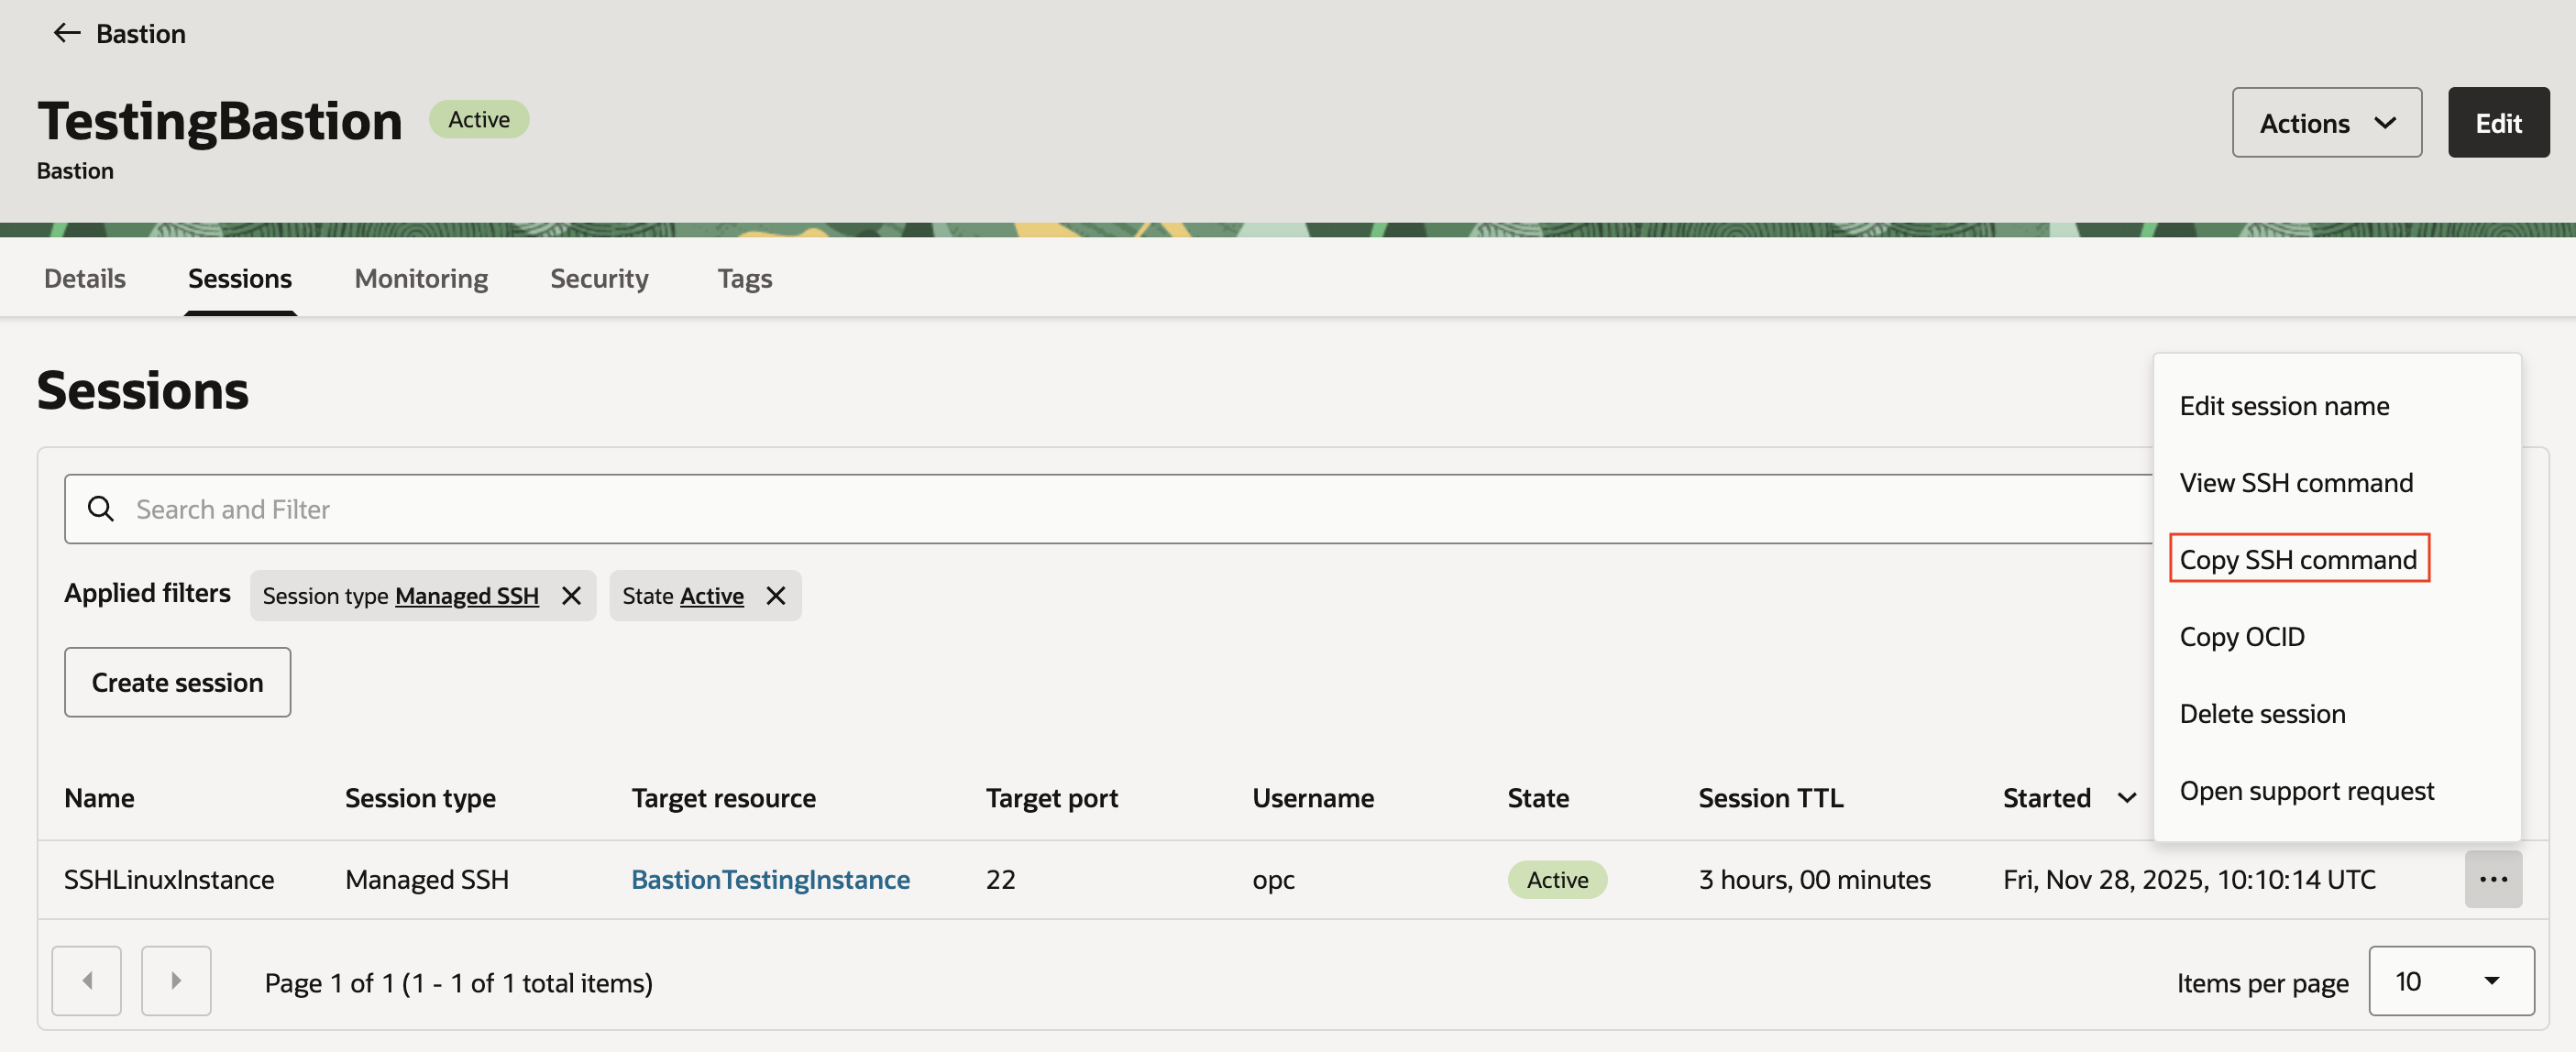
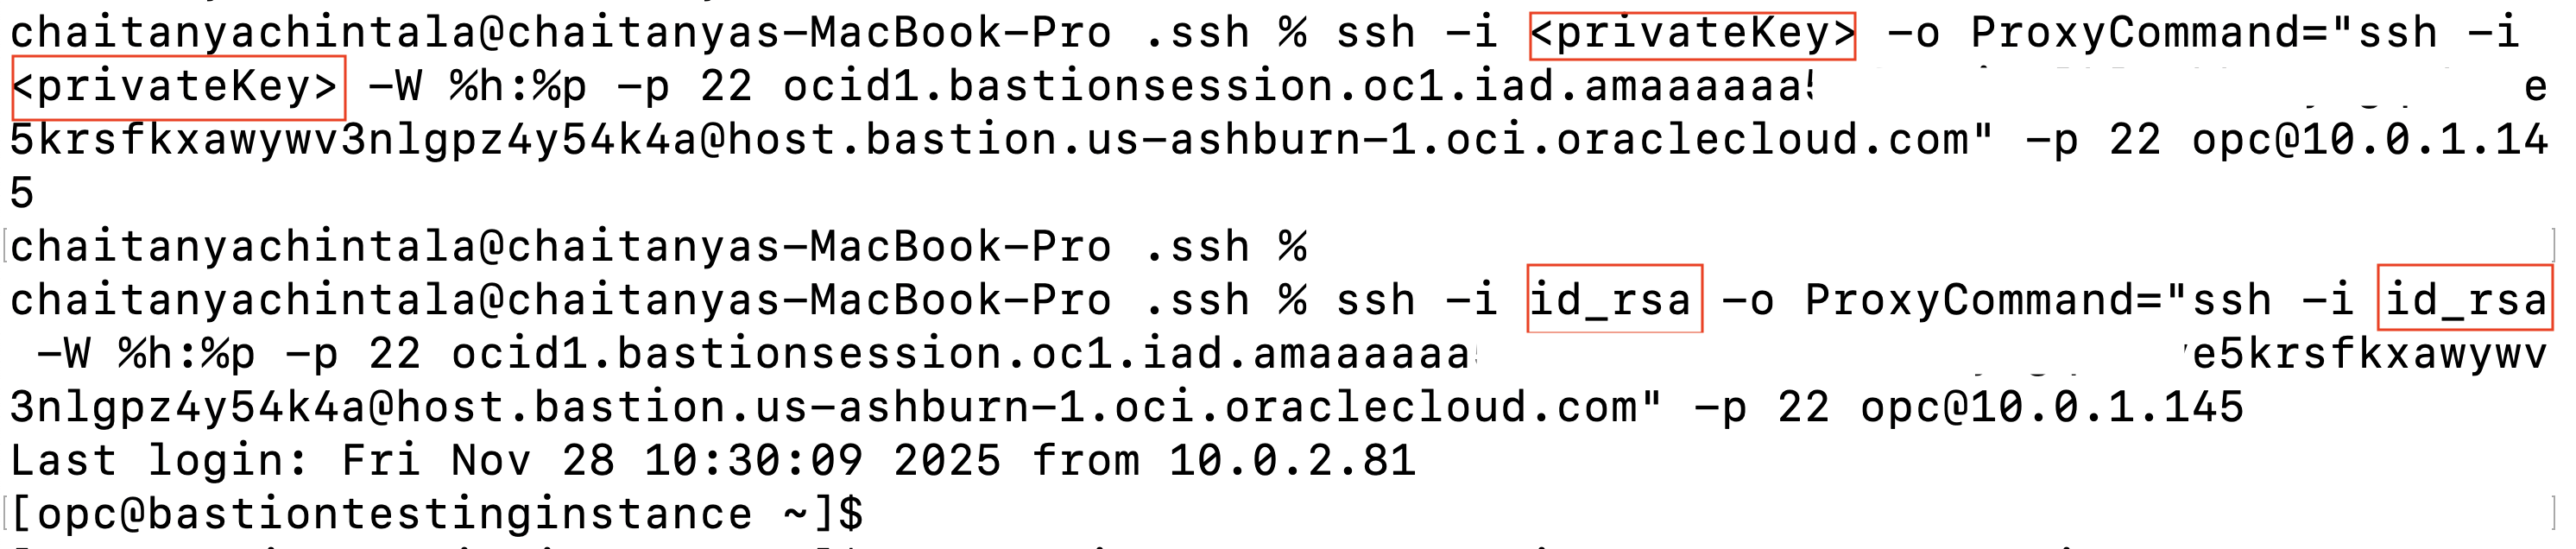
2. Copy the generated SSH command from the console and run it on Cloud Shell or on your local machine to get ssh access to the compute instance.
Note: Remember to replace <privateKey> with the correct path to your SSH private key file.
2. Linux GUI Access : RDP via Port Forwarding
Sometimes a visual desktop environment (GUI) is needed on a Linux server. This requires a few setup steps on the Linux VM before you can connect via Bastion. We will use Oracle Linux 9 (OL9) for this example.
Phase A: Configure the Linux Instance
Log in via standard SSH (see Section 1) and run the following to install the GUI and XRDP.
# 1. Install GNOME Desktop
sudo dnf groupinstall "Server with GUI" -y

# 2. Enable the Developer EPEL repo
sudo dnf config-manager --enable ol9_developer_EPEL

# 3. Install XRDP
sudo dnf install xrdp -y

# 4. Start XRDP services
sudo systemctl enable --now xrdp
sudo systemctl enable --now xrdp-sesman

# 5. Set a password for the opc user (Required for RDP login)
sudo passwd opc
# Enter a strong password

# 6. Configure Firewall
sudo firewall-cmd --add-port=3389/tcp --permanent
sudo firewall-cmd --reload
Note: Ensure your Linux Instance’s subnet Security List allows ingress from the Bastion Private Endpoint IP on port 3389.
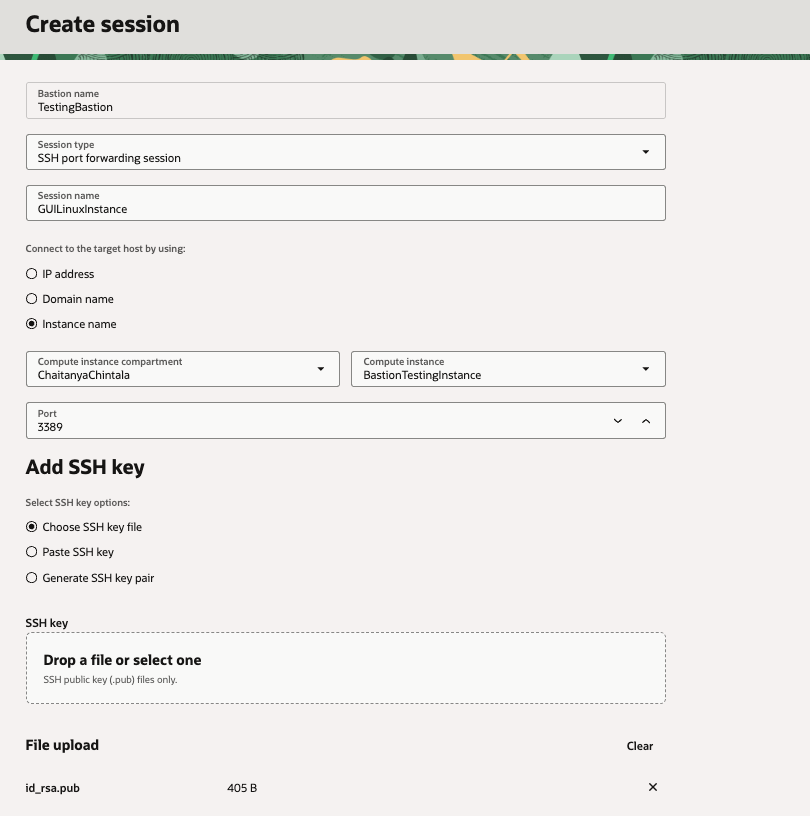
1. Create the Session: Create a Port Forwarding session in OCI targeting the Linux VM on port 3389.
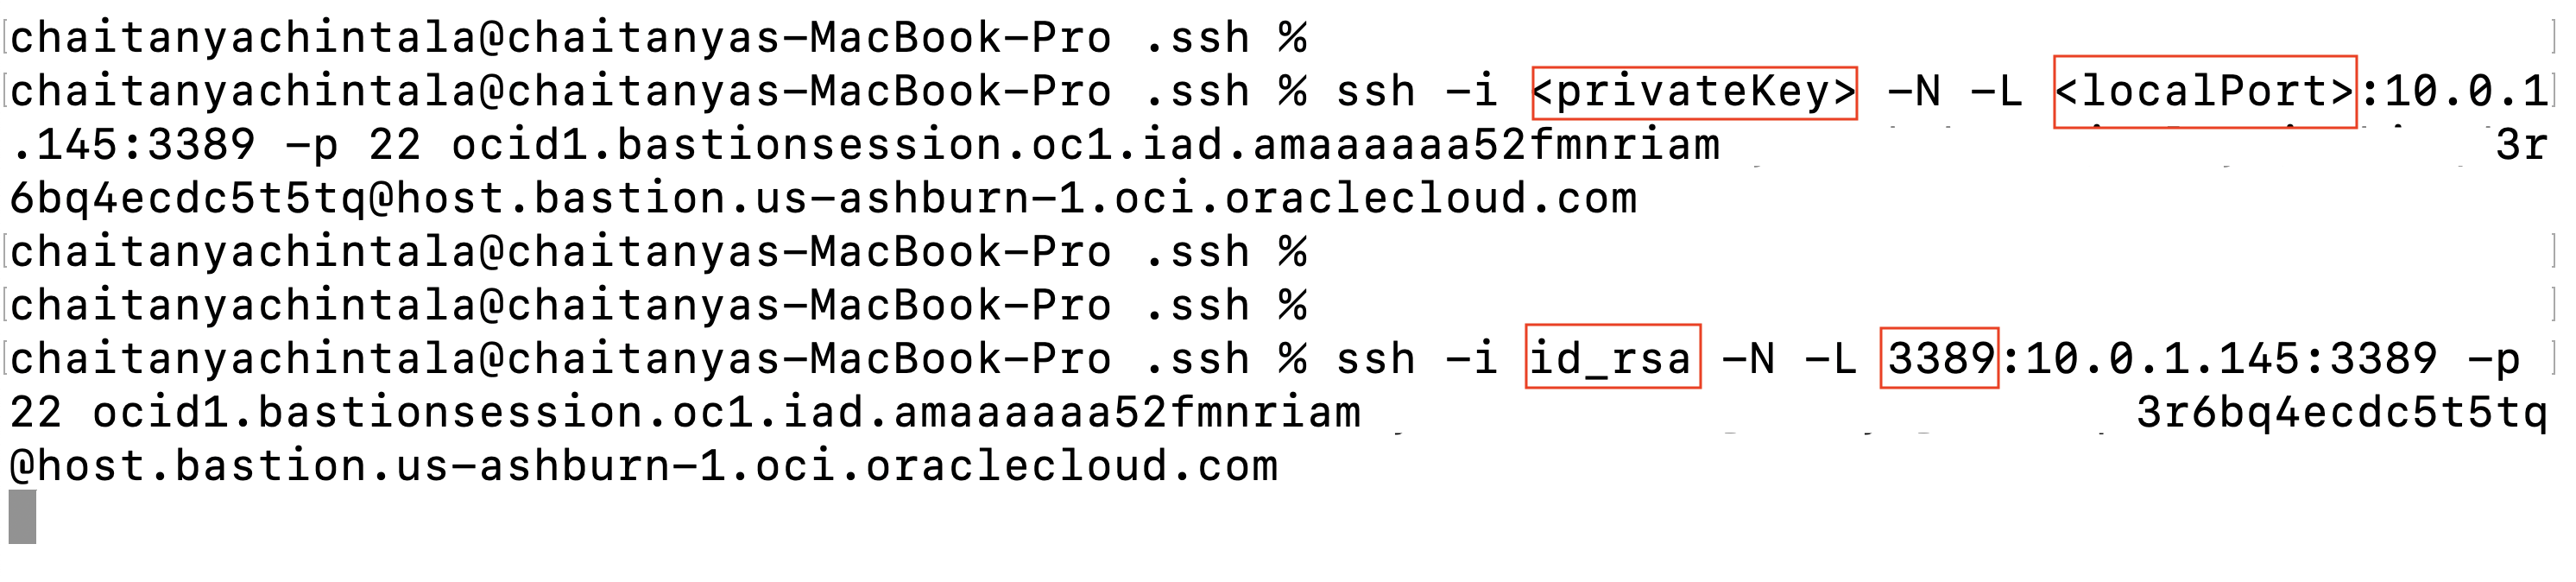
2. Start the Tunnel: Copy and run the generated SSH command locally to create a tunnel. It may look like it’s “hanging,” but this is normal because the tunnel is active.
Note : Remember to replace <privateKey> with the correct path to your SSH private key file and the <localPort> to 3389
3. Connect: Finally, open your RDP client(MSTSC on Windows or Microsoft Remote Desktop on Mac) and connect to localhost:3389.
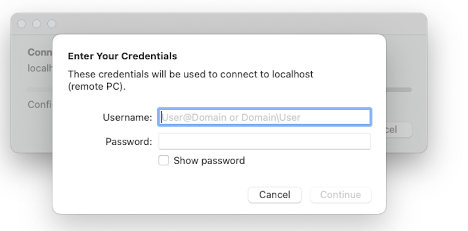
3. Windows Servers : RDP via Port Forwarding
Windows hosts are straightforward because RDP is native.
1. Start the Tunnel: Run the generated SSH command to create a tunnel.
Note: Remember to replace <privateKey> with the correct path to your SSH private key file and the <localPort> to 1521.
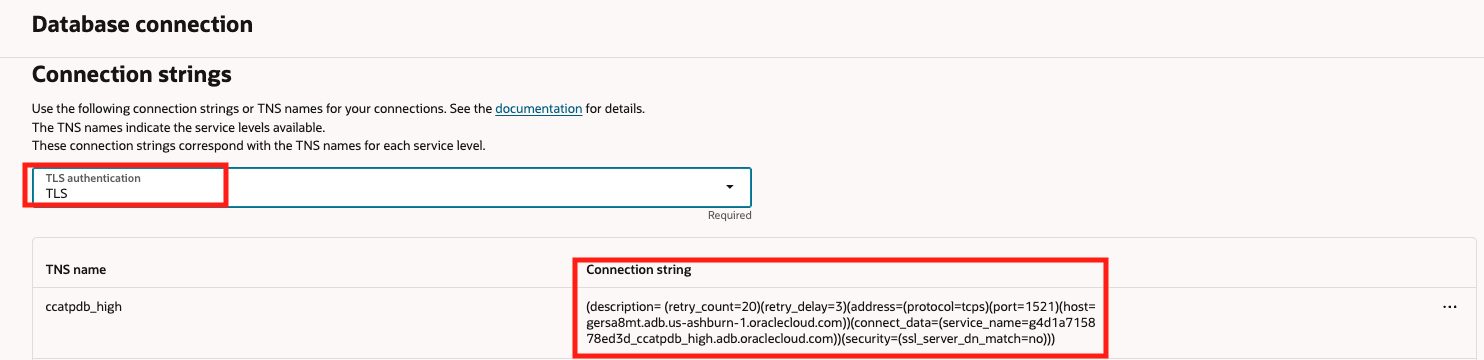
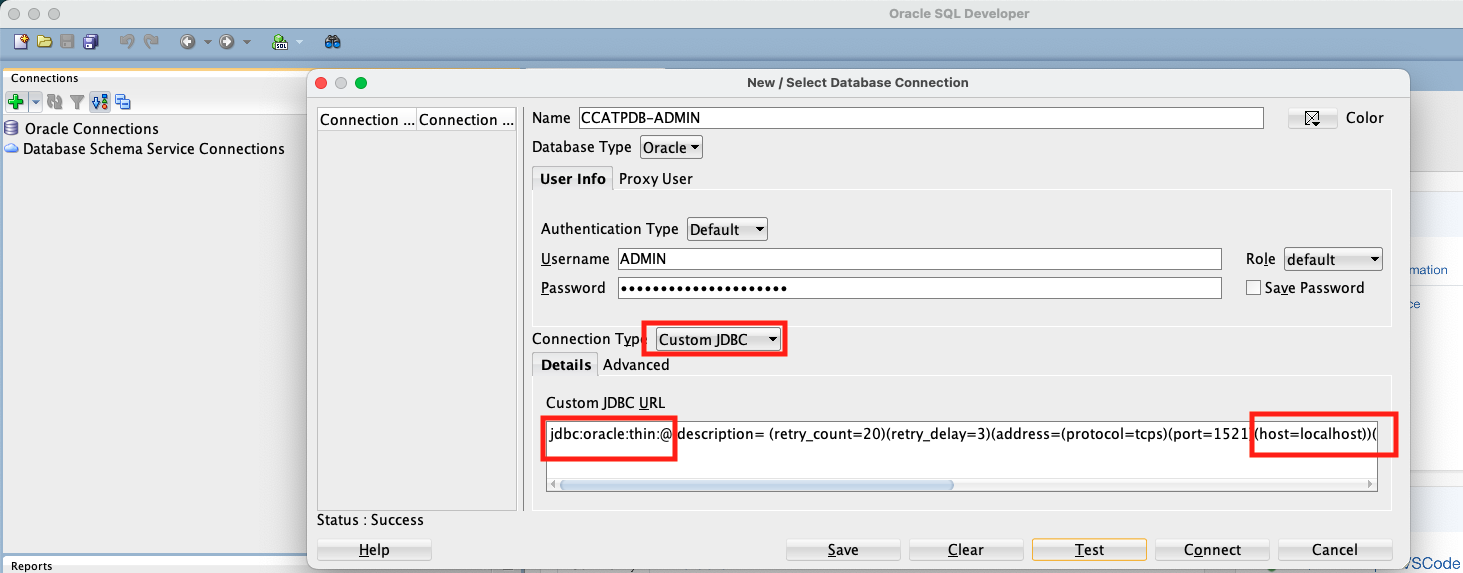
2. Configure SQL Developer: Since the tunnel forwards traffic from localhost to the database, you need to update the connection string.
Copy your TNS connection string or download the Wallet from the OCI Console.
Select Custom JDBC as the connection type in SQL Developer.
Modify the connection string by replacing the actual host with localhost and prefixing it with jdbc:oracle:thin:@ as shown below and connect.
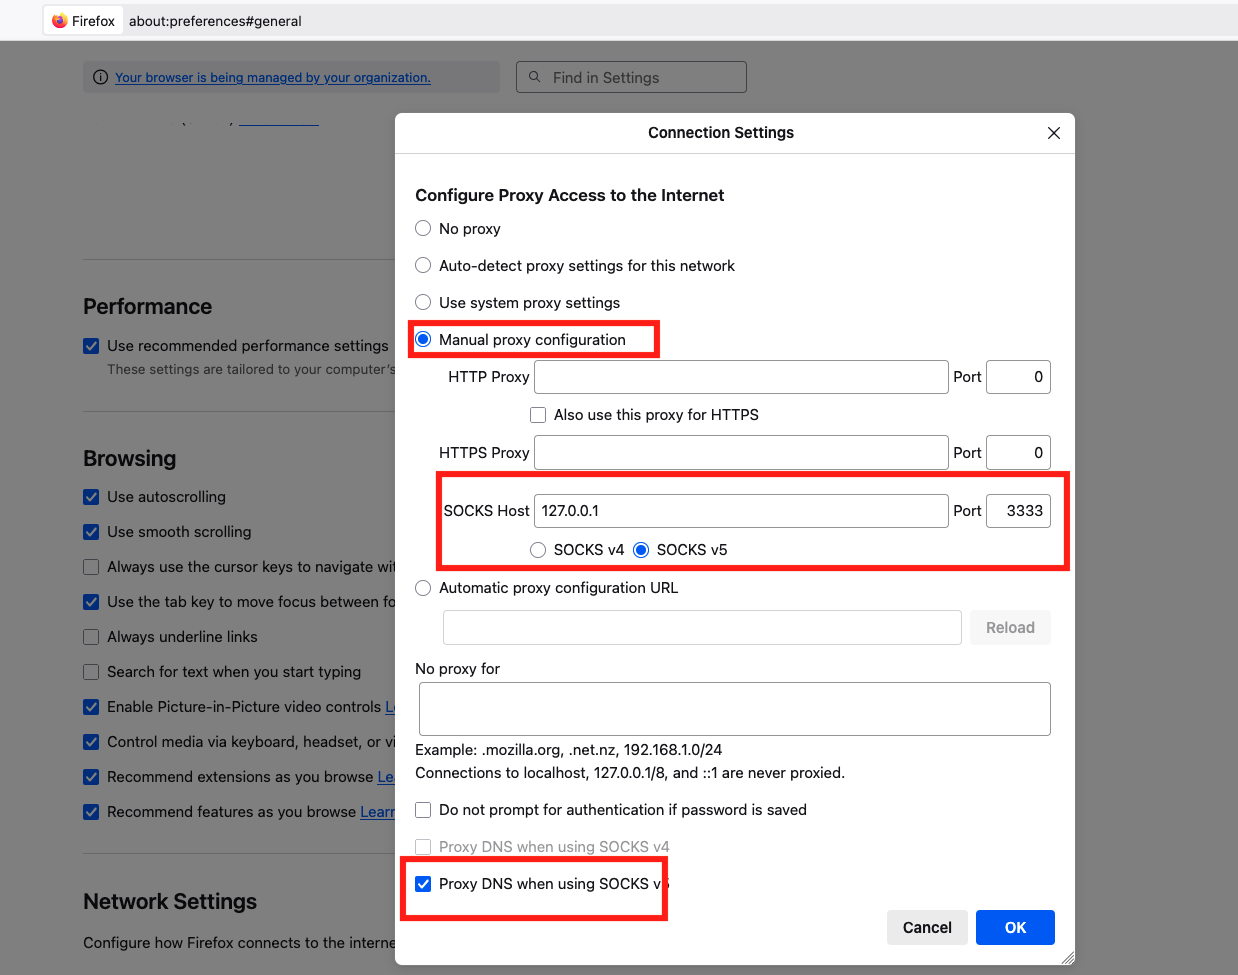
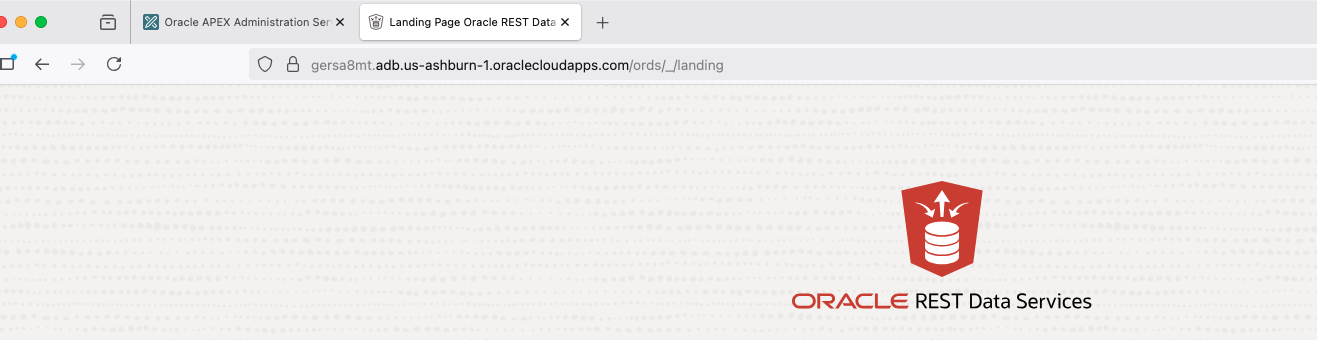
5. Accessing ORDS/REST Endpoints : Dynamic Port Forwarding (SOCKS5)
If you have Oracle REST Data Services (ORDS) or other web interfaces running in private subnets, the solution is Dynamic Port Forwarding (SOCKS5)session.
How it works:
1. Create a Dynamic Port Forwarding (SOCKS5) session. 2. Copy and Run the generated SSH command.
Note: Remember to replace <privateKey> with the correct path to your SSH private key file and update the port.
3. Configure your browser’s proxy settings to route traffic through the Host 127.0.0.1 (or localhost) on Port 3333.
4. Once configured, simply type your private ORDS URL into the browser. The traffic is tunneled through Bastion, allowing you to view the ORDS page.
Final Thoughts
OCI Bastion isn’t just a simple SSH jump box. It acts as the central access layer for your entire private application stack. Whether you are connecting to Linux terminals, Windows desktops, private databases, or internal REST endpoints, Bastion provides secure, temporary, and auditable access without ever opening a single inbound port to the public internet.

 3. Connect: Finally, open your RDP client(MSTSC on Windows or Microsoft Remote Desktop on Mac) and connect to localhost:3389.