Introduction
Oracle Cloud Infrastructure (OCI) Email Delivery lets us add and verify our own domain, to send emails from custom addresses. A custom email sender is a key step towards building a recognizable brand while ensuring stronger email security.
This blog showcases how we can add an email domain, update the SPF & DKIM records in DNS, and create an approved sender email. This sender can then be used in the Email Delivery service just like any other SMTP relay.
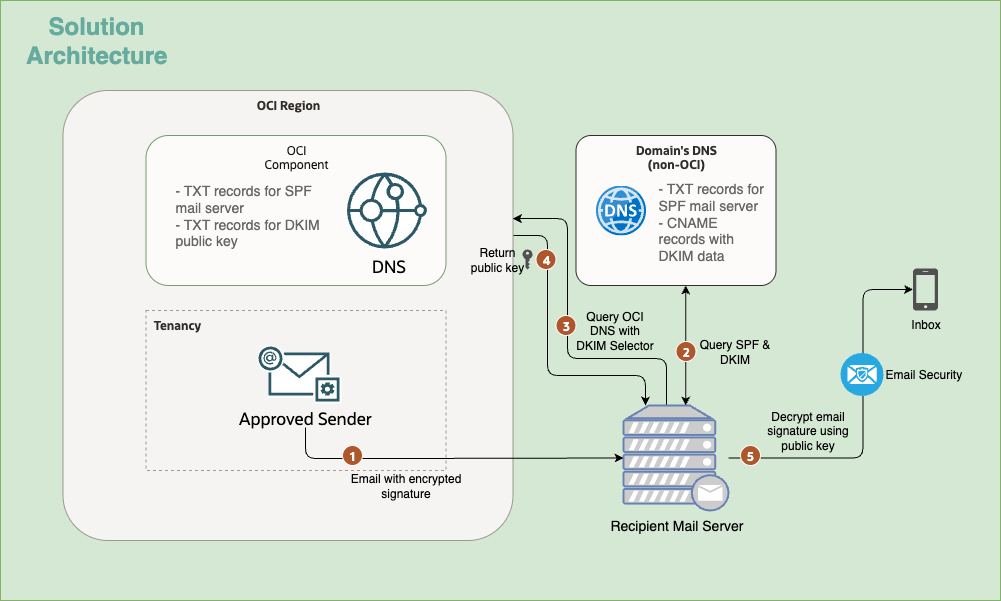
The architecture describes how an email is sent from an Approved Sender within an OCI Tenancy and validated by a Recipient Mail Server using standard email security protocols like SPF and DKIM.
1. Email Submission: The Approved Sender within the OCI Tenancy sends an Email with encrypted signature to the Recipient Mail Server.
2. SPF & DKIM Query: The Recipient Mail Server initiates the validation process by querying the Domain’s DNS (non-OCI) for SPF and DKIM records.
3. OCI DNS Query: Based on the returned TXT & CNAME records in Step 2, the Recipient Mail Server then queries the OCI DNS using a DKIM Selector to retrieve the necessary public key for signature verification.
4. Public Key Return: OCI DNS of the region returns the DKIM Public Key to the Recipient Mail Server.
5. Signature Decryption & Delivery: The Recipient Mail Server uses the returned public key to Decrypt the email signature. If the signature is successfully verified, the email is passed to the Email Security system and delivered to the recipient’s Inbox.
Note: DKIM (DomainKeys Identified Mail) is an email authentication method that uses cryptographic signatures to let the receiver verify that the message was sent from an authorized domain and wasn’t altered in transit. On the other hand, SPF (Sender Policy Framework) is an email authentication method that lets a domain specify which mail servers are authorized to send emails on its behalf.
By updating SPF and DKIM records in DNS, we enable receiving mail servers to verify that emails claiming to come from the identity domain are legitimate. To learn more on SPF & DKIM records, consider checking Oracle documentation Configuring SPF and Configure Email Authentication Settings for SPF and DKIM.
Objectives
-
Create the email domain
-
Gather the SPF & DKIM records
-
Update the respective TXT & CNAME records in the domain’s DNS
-
Create an approved sender address
-
Test email delivery
Prerequisites
-
Access to an OCI tenancy.
-
IAM policies to enable access to the email delivery service. Check Details for the Email Delivery Service to explore the individual verbs, resource-types & API permissions. This can help in defining fine-grained access with least privileges at a compartment level.
Below are some sample statements for reference.
allow group EmailAdmins to manage email-family in compartment ABC allow group EmailAdmins to manage email-domains in compartment ABC -
DNS access of the working domain.
Section 1: Creating the email domain
-
Open a browser tab and enter the URL:
https://cloud.oracle.com. -
Enter Cloud Account Name, also referred to as the tenancy name, and click Next.
-
Select the identity domain to sign in to. This is the identity domain that is used to configure SSO, for example
Default. -
Enter the administrator credentials to log in to the OCI Console.
-
Navigate to Developer Services, then goto Email Delivery and click Email Domains. Change the compartment from the filter as required.
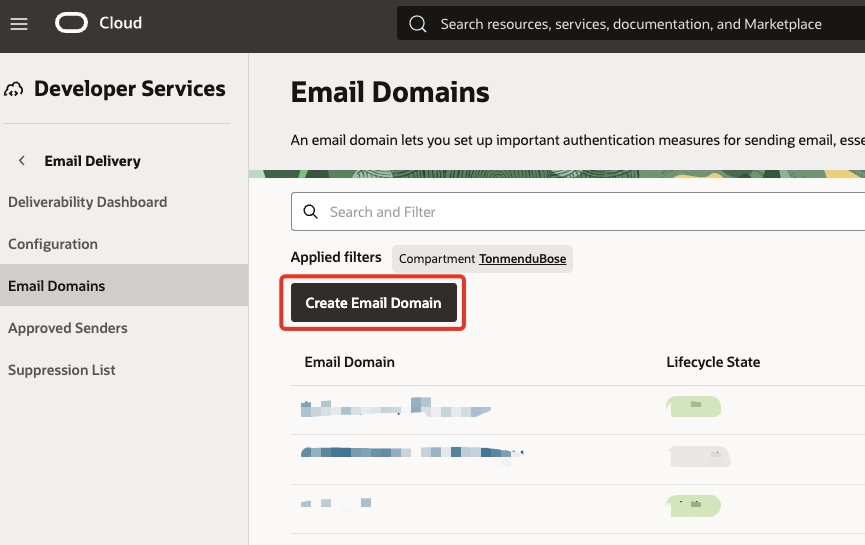
-
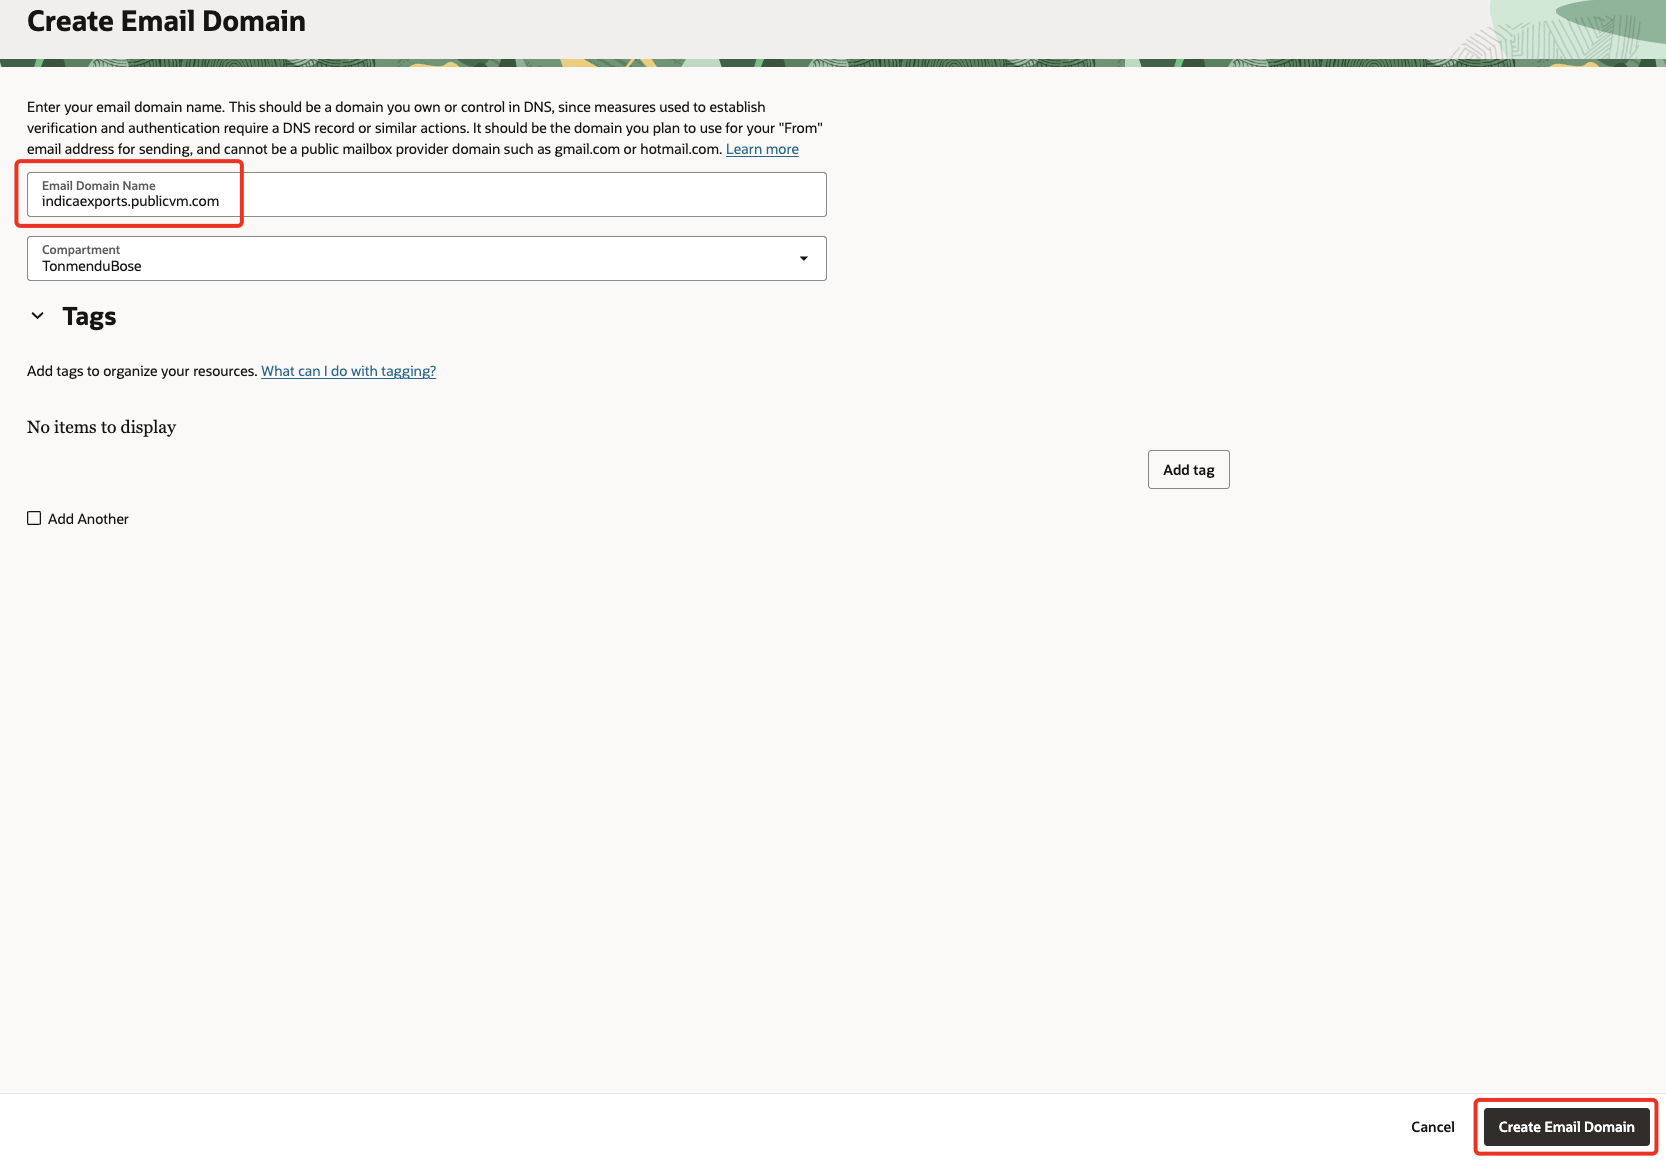
Click Create Email Domain, and provide the name of your registered domain. Click on Create Email Domain again.
Section 2: Obtaining DNS records
DKIM Selector for CNAME record
-
Once the Lifecycle State changes to
Activeclick on the email domain. -
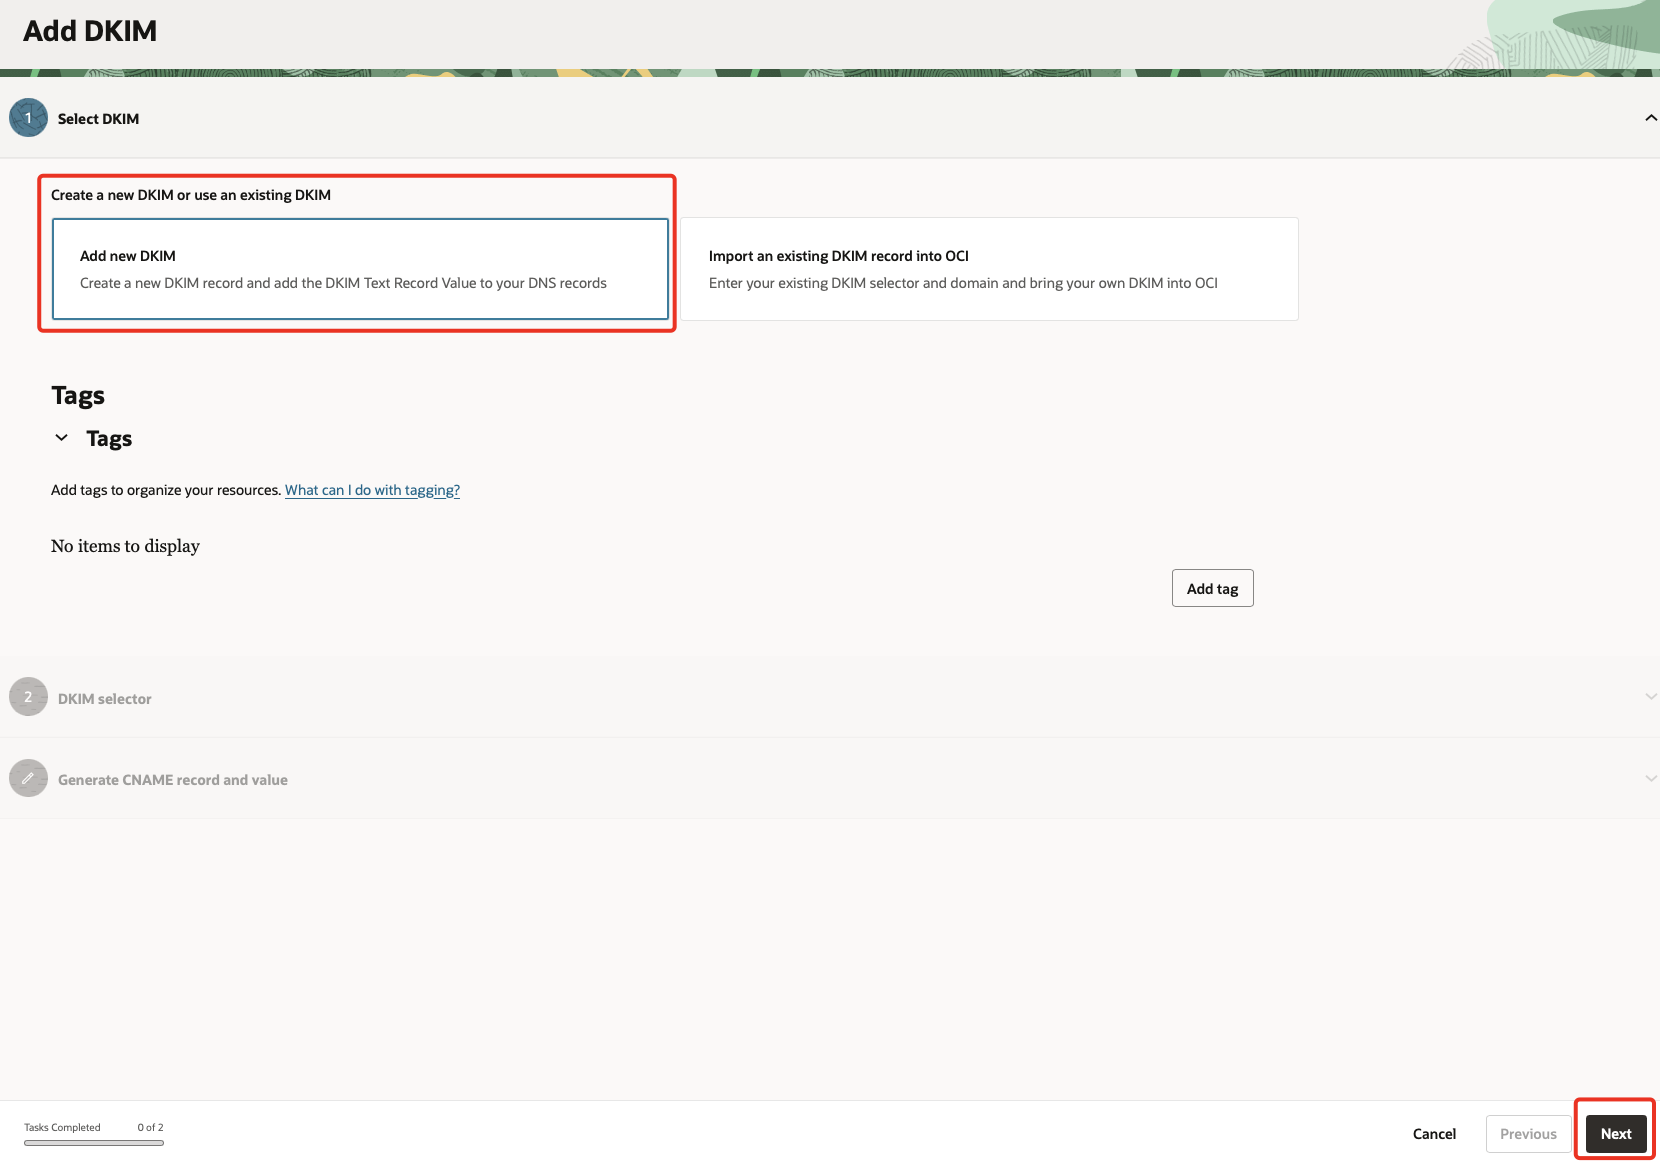
Goto the
DKIMtab & click on Add DKIM.

-
Select
Add new DKIM& click Next.
-
Under
DKIM selectorprovide a value in<prefix>-<regioncode>-<yyyymm>format. Click Next.Note: Prefix can be any alphanumeric value, the region code is specific to the region you’re creating, followed by the date. The CNAME record will get generated based on the DKIM Selector.
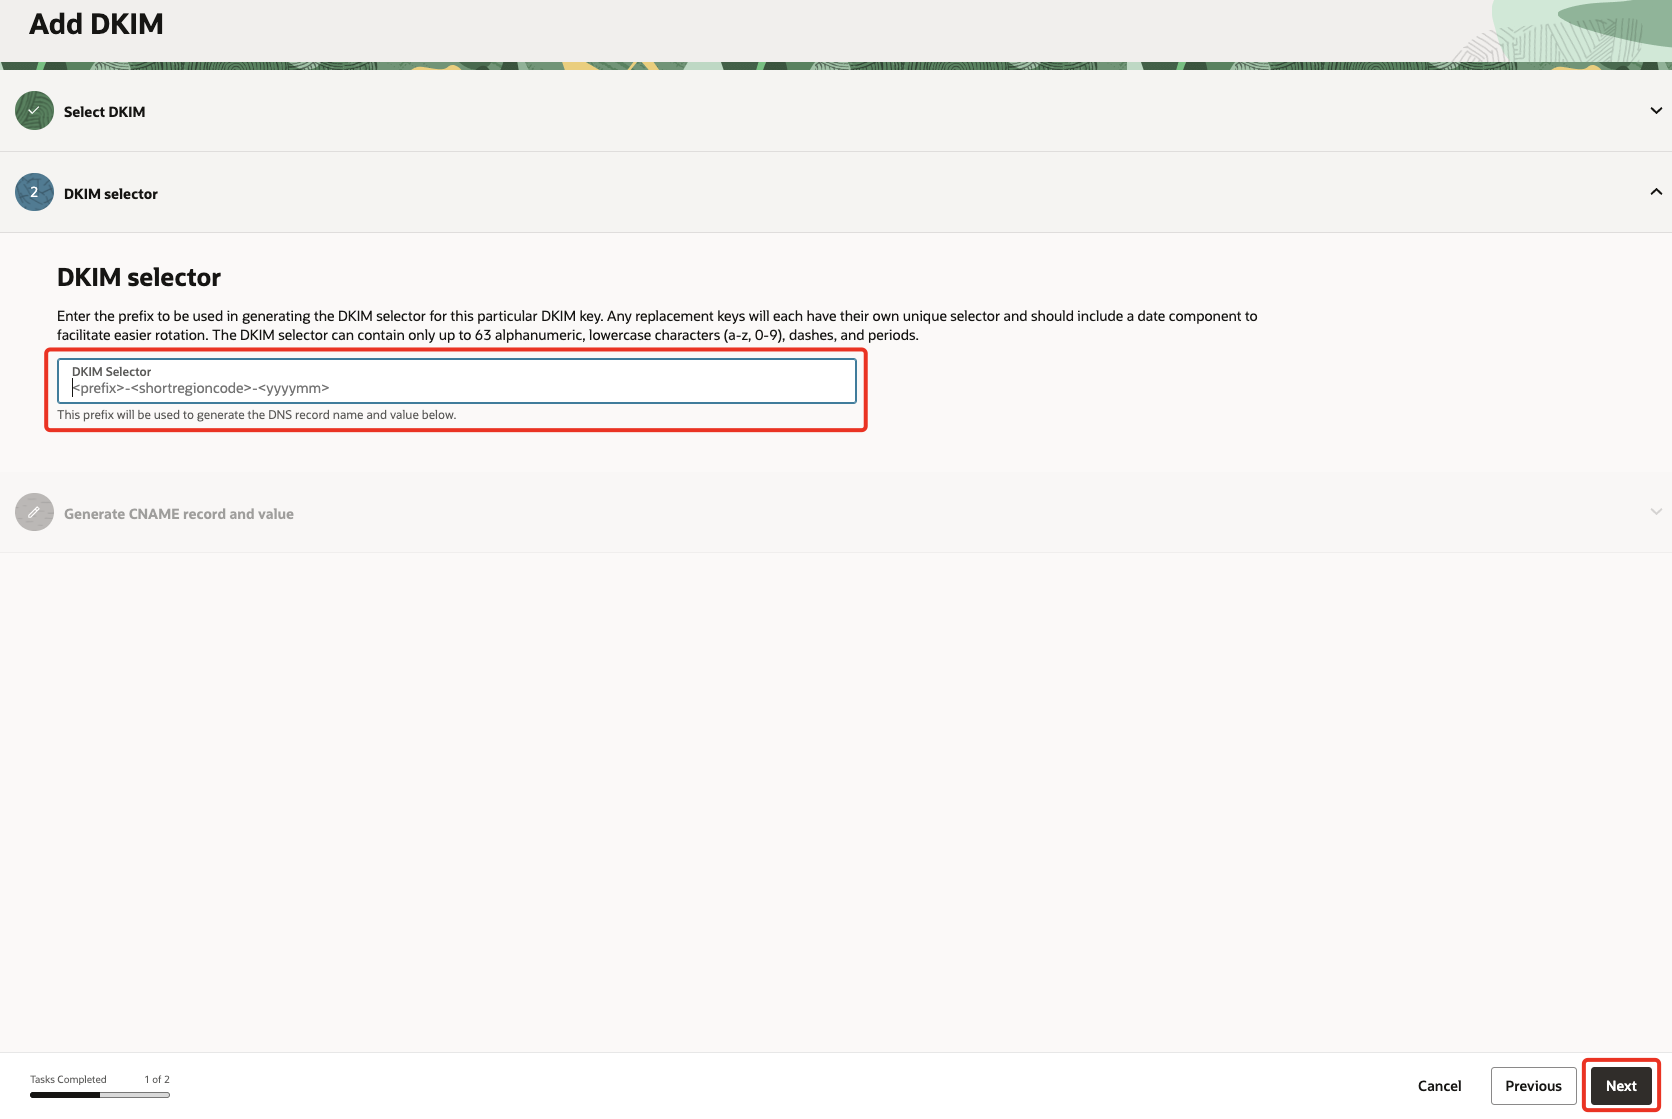
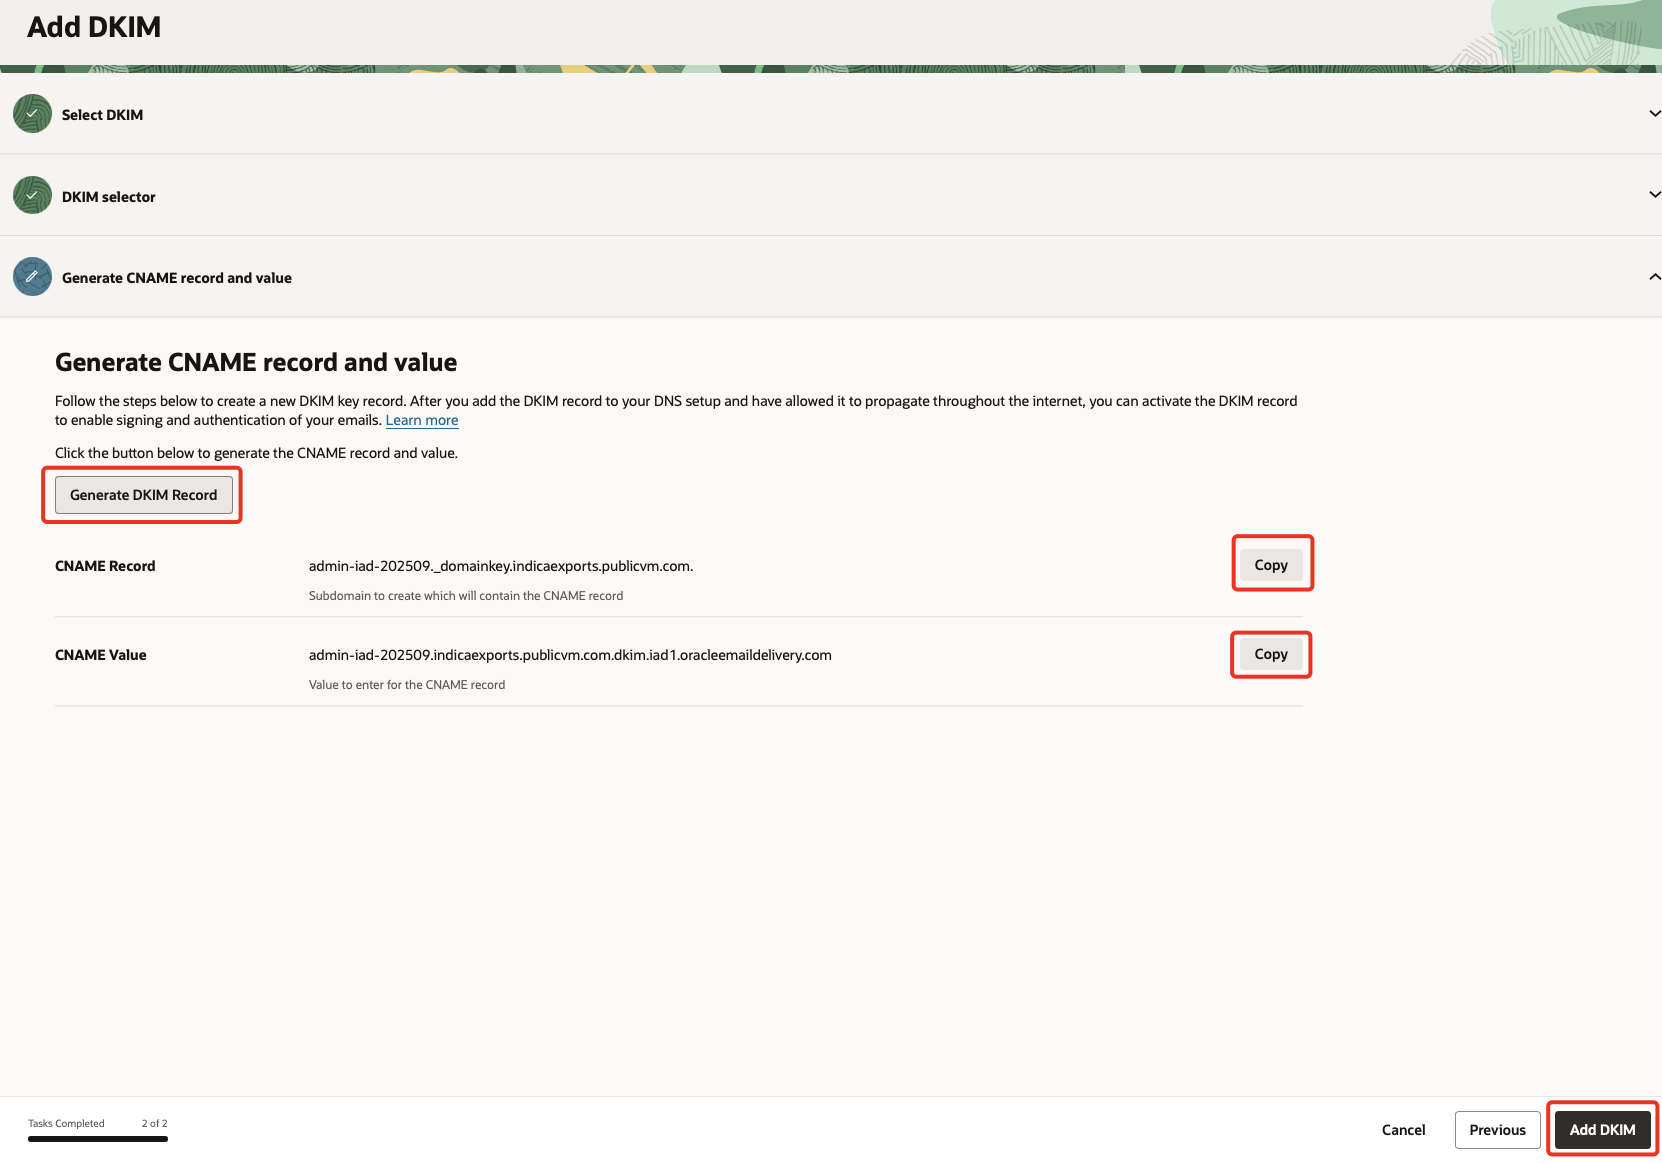
The below example shows DKIM selector, the CNAME record & value with prefix ‘admin’ for Ashburn region created in September 2025.DKIM Selector admin-iad-202509CNAME Record admin-iad-202509._domainkey.xxx.inCNAME Value admin-iad-202509.xxx.in.dkim.ord1.oracleemaildelivery.com -
Click on Generate DKIM Record & make note of the values. Once done, click Add DKIM.
SPF for TXT record
-
Based on your region, find the SPF details in Configuring SPF.
-
For our lab we are using Ashburn/US, therefore the SPF record will be the below.
v=spf1 include:rp.oracleemaildelivery.com ~all -
This will be the TXT record, make note of the value.
Note:
Customer DNS Statuswill show asNeeds Attention,DKIM Signing Statuswill show asInactiveandSPF Configuredwill appear asNo. This is normal as we are yet to update these records in our DNS for OCI to query & validate.
Section 3: Updating the DNS records
-
Logon to the domain registrar/provider where DNS can be managed.
Note: For the purpose of this tutorial, we are using a sub-domain from a provider that also offers DNS management.
-
Create CNAME & TXT records for your domain & publish the changes.

-
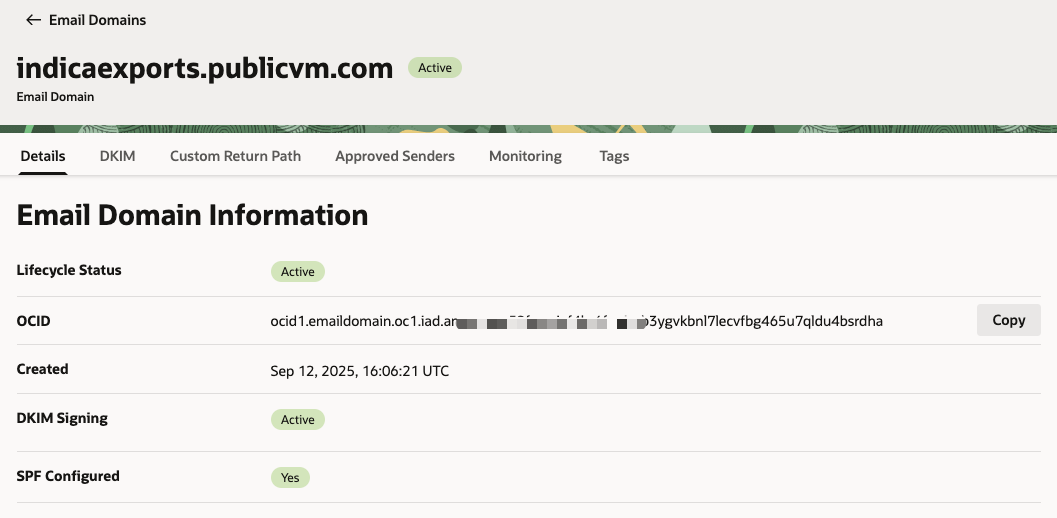
After sometime the email domain should show the DKIM & SPF status as
Active. This step usually takes time & depends on the provider.
Section 4: Creating an approved sender
-
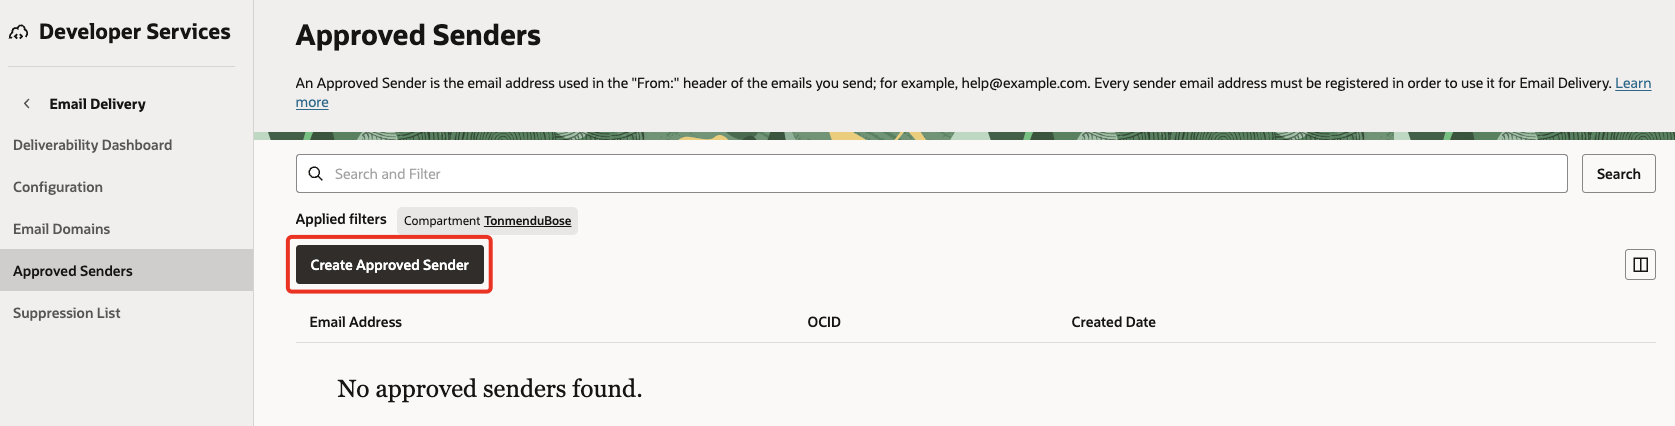
Navigate to Developer Services, then goto Email Delivery and click Approved Senders.
-
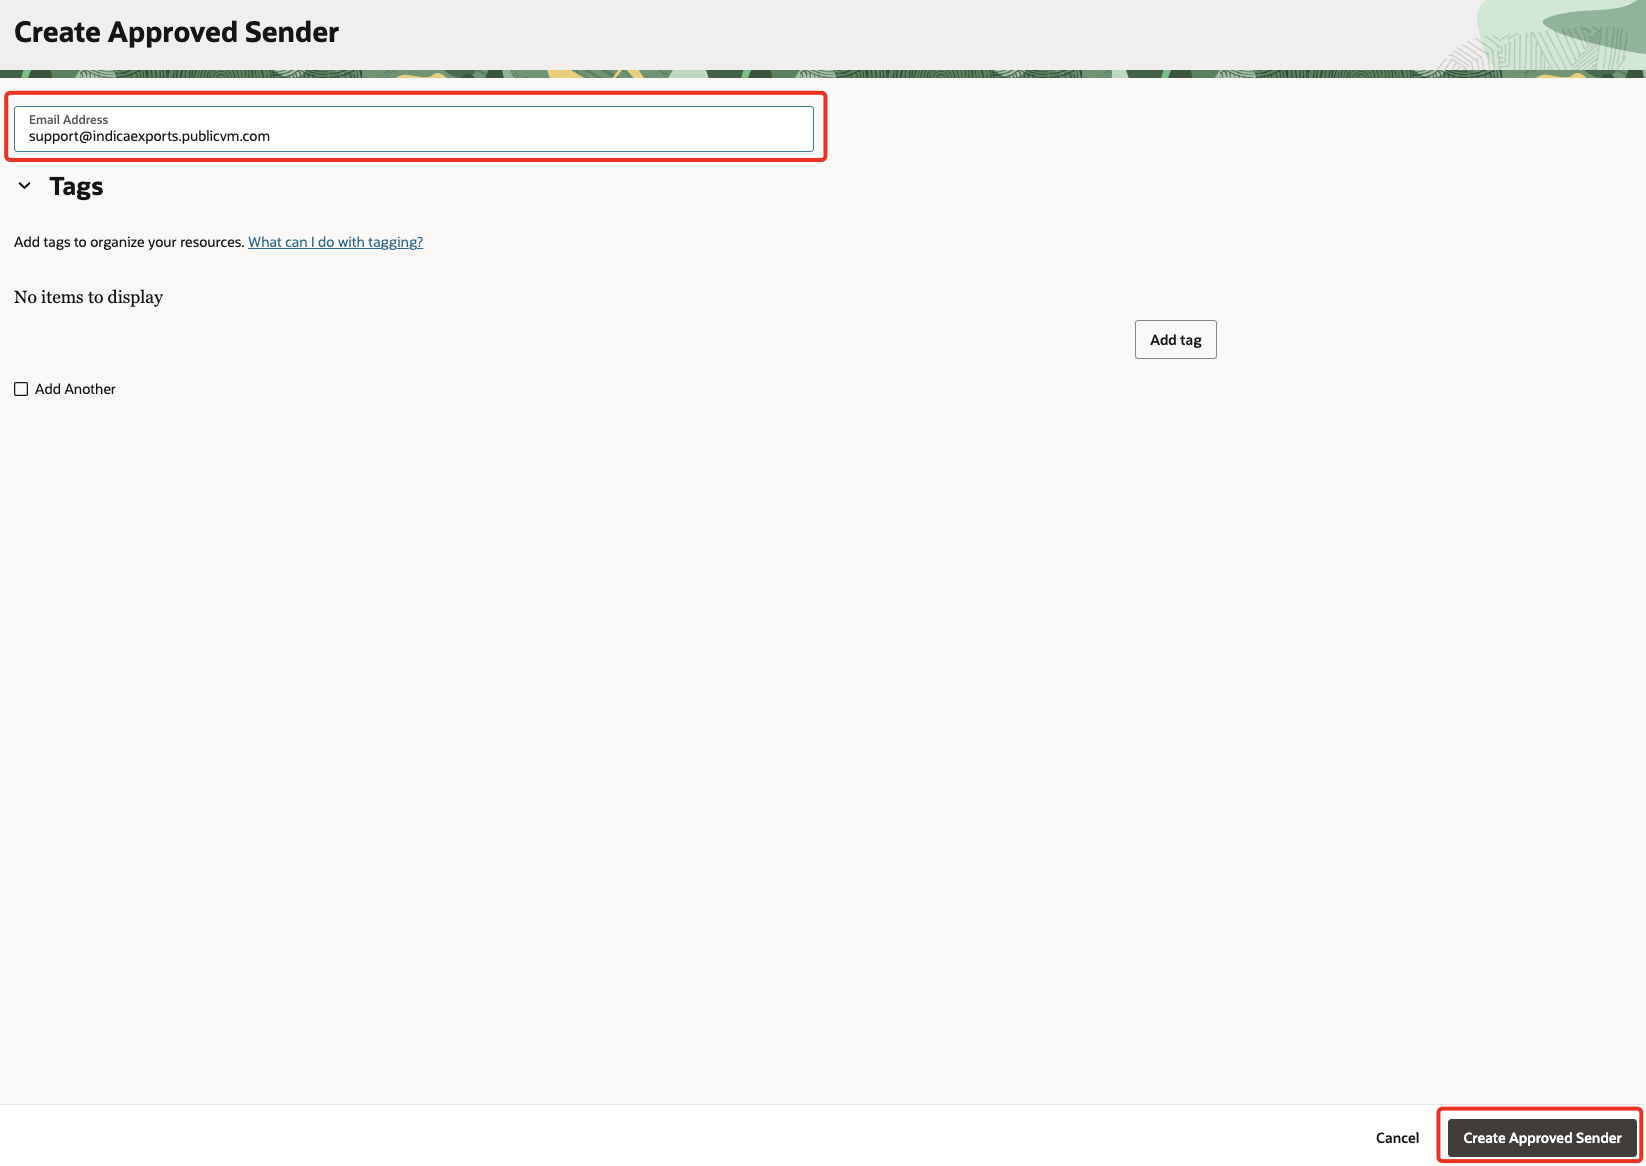
Click on Create Approved Sender.
-
Provide the email address that includes your active domain. Then click Create Approved Sender.
Section 5: Test & validate email delivery
If an application or service supports SMTP protocol, a service user with SMTP credentials can be used to authenticate against the regional SMTP endpoint. Below is an example that uses Python SDK and a service user with SMTP credentials to send an email. Read more on Creating SMTP Credentials.
# python script for sending SMTP configuration with Oracle Cloud Infrastructure Email Delivery
import smtplib
import email.utils
from email.message import EmailMessage
import ssl
# Replace with the approved sender
SENDER = 'support@indicaexports.publicvm.com'
SENDERNAME = 'INDEPL Support'
# Replace with the "To" address
RECIPIENT = 'targetrecepient@domain.com'
# Replace with SMTP username
USERNAME_SMTP = 'ocid1.user.oc1..XXX@ocid1.tenancy.oc1..XXX.k3.com'
# Replace with file path for SMTP credential is defined
PASSWORD_SMTP_FILE = '/Users/XXX/ociemail.config'
# If you're using Email Delivery in a different region, replace the HOST value with an appropriate SMTP endpoint.
# Use port 25 or 587 to connect to the SMTP endpoint.
HOST = "smtp.us-ashburn-1.oraclecloud.com"
PORT = 587
# The subject line of the email.
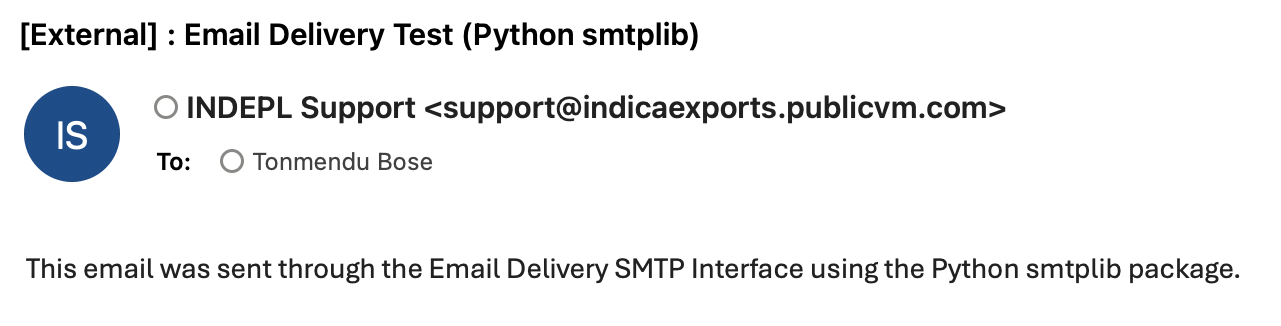
SUBJECT = 'Email Delivery Test (Python smtplib)'
# The email body for recipients with non-HTML email clients.
BODY_TEXT = (
"This email was sent through the Email Delivery SMTP "
"Interface using the Python smtplib package."
)
# get the password from a named config file ociemail.config
with open(PASSWORD_SMTP_FILE) as f:
password_smtp = f.readline().strip()
# create message container
msg = EmailMessage()
msg['Subject'] = SUBJECT
msg['From'] = email.utils.formataddr((SENDERNAME, SENDER))
msg['To'] = RECIPIENT
# make the message multi-part alternative, making the content the first part
msg.add_alternative(BODY_TEXT, subtype='text')
# Try to send the message.
try:
server = smtplib.SMTP(HOST, PORT)
server.ehlo()
# most python runtimes default to a set of trusted public CAs that will include the CA used by OCI Email Delivery.
# However, on platforms lacking that default (or with an outdated set of CAs), customers may need to provide a capath that includes our public CA.
server.starttls(context=ssl.create_default_context(purpose=ssl.Purpose.SERVER_AUTH, cafile=None, capath=None))
# smtplib docs recommend calling ehlo() before & after starttls()
server.ehlo()
server.login(USERNAME_SMTP, password_smtp)
# our requirement is that SENDER is the same as From address set previously
server.sendmail(SENDER, RECIPIENT, msg.as_string())
server.close()
# Display an error message if something goes wrong.
except Exception as e:
print(f"Error: {e}")
else:
print("Email successfully sent!")
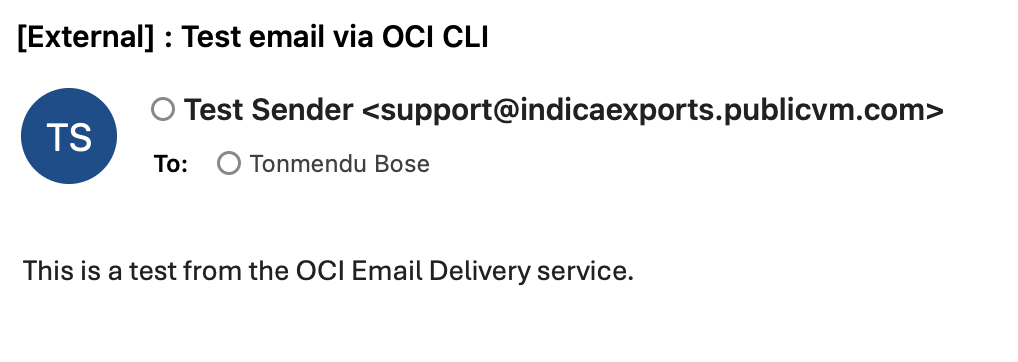
Alternately, direct integration with Email Delivery data plane API can also achieved. Below is an example that uses OCI CLI with a standard user & API keys. Read more on Using the OCI CLI.
    oci email-data-plane email-submitted-response submit-email \
        --recipients '{
            "to": [
            { "email": "targetrecepient@domain.com" }
            ]
        }' \
        --sender '{
            "compartmentId": "compartmentOCID",
            "senderAddress": {
            "email": "approvedsender@domain.com",
            "name": "Test Sender"
            }
        }' \
        --subject "Test email via OCI CLI" \
        --body-text "This is a test from the OCI Email Delivery service."
Conclusion
Having a verified sender can help in improving deliverability, strengthening email security & reducing email spoofing.