Fleet Application Management simplifies the management of system life cycles and the operation of resources deployed on OCI. Fleet Application Management provides a centralized platform to automate tasks, validate compliance, and enhance operational efficiency across an enterprise.
In this blog, we provide step-by-step instructions for using this service to patch Oracle databases deployed on OCI. We patch a set of Oracle Base Database service databases, but the instructions apply for Oracle Cloud databases deployed on ExaDB-D and ExaDB-C@C.
Note: In this blog we are using the OCI console. You can also use OCI Command Line Interface or REST APIs:
Pre-requisites
We assume you already enabled Fleet Application Management in your tenancy, and you belong to an IAM group that has been granted the necessary privileges to use the service, as described in the documentation here: Requirements and Access for Fleet Application Management.
The next step is to onboard the service as described in the documentation here: Onboarding Fleet Application Management.
Overall Flow
- Task 1: Create a cloud database fleet.
- Reference: Create a fleet.
- Taske 2: Patch your cloud database fleet to bring it into compliance.
- Reference: Fleet Compliance in Fleet Application Management.
Task Details
Task 1: Create a cloud database fleet
- In OCI console, navigate to “Observability & Management”->”Fleet Application Management”->”Fleets”.
- Click “Create Fleet”.
- Provide a name and description for your fleet.
- Fleet type: “Environment”. We want to include both database and clusterware homes in the same fleet, so we choose “Environment” rather than “Product”.
- Product Stack: Oracle Database.
- Environment Type: Choose your environment. We are using Stage.
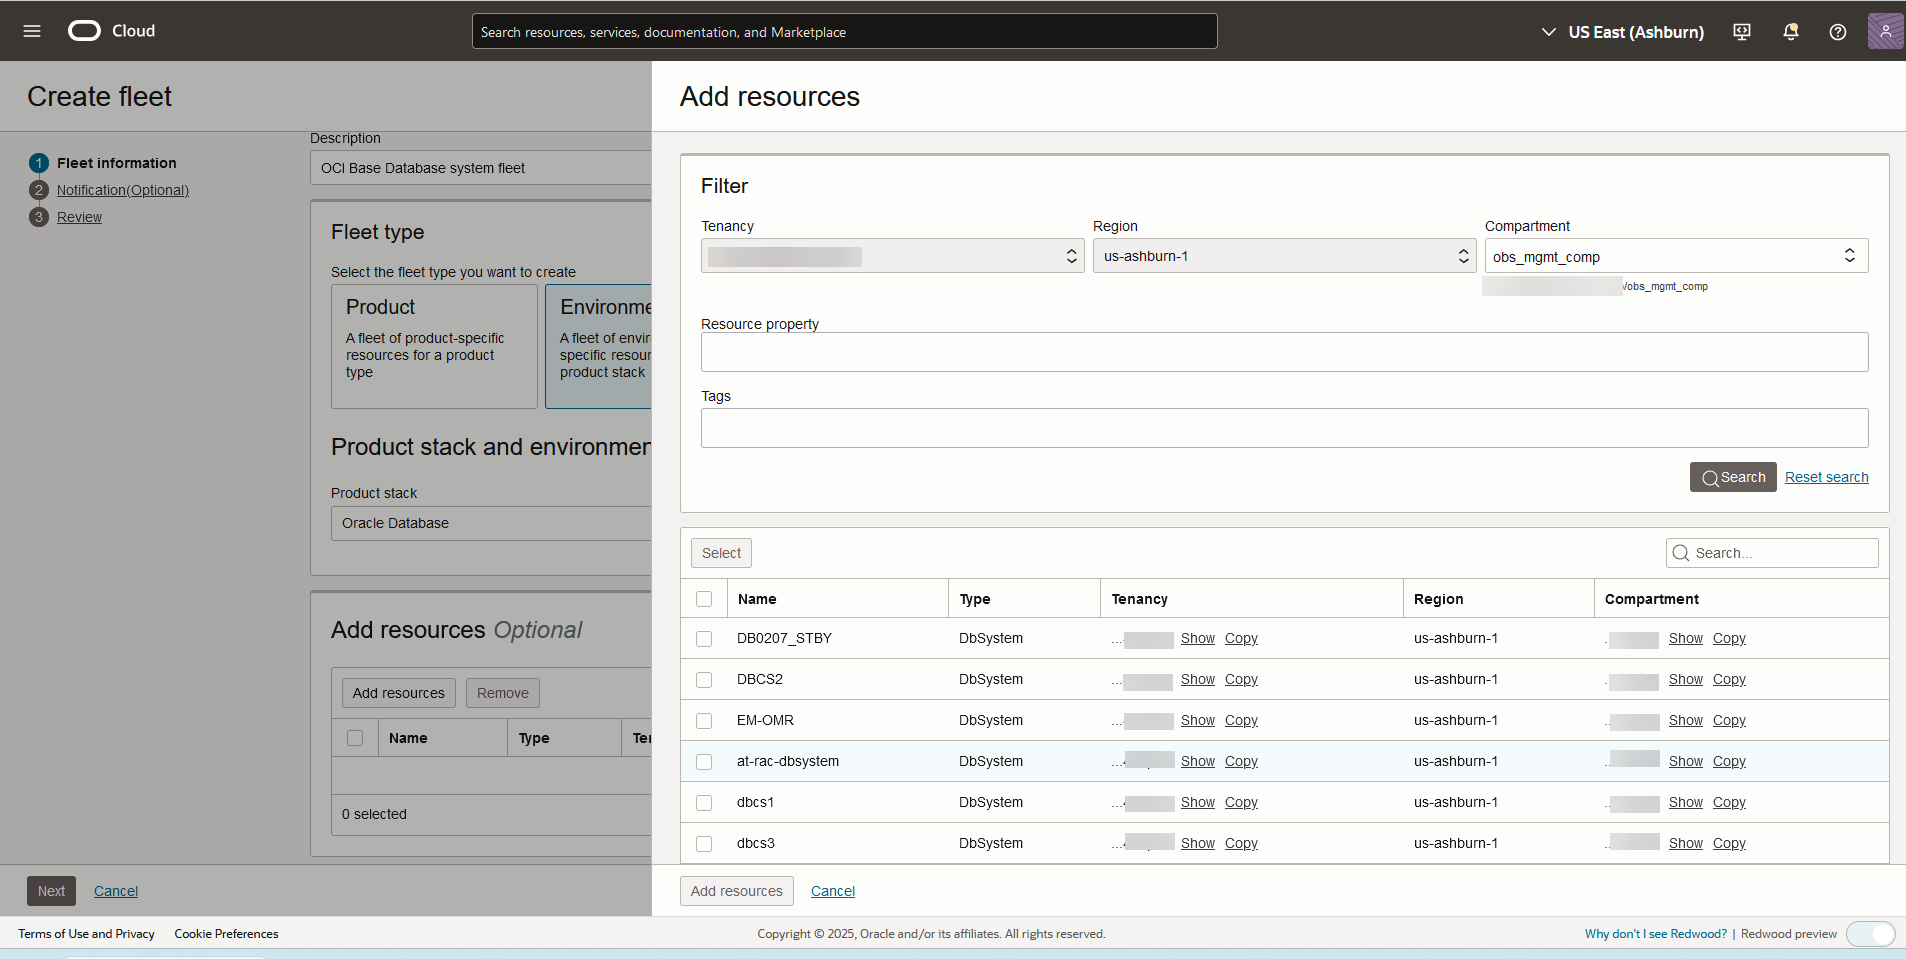
- Click “Add Resources”.
- Select your compartment. Specify any properties or tags if needed. We’re not specifying these for this blog.
- Click “Search”. A list of database systems in the compartment appears.
- Select the systems to include in the fleet and click “Select”.
- Click Add Resources.
-
Create Fleet
-
- Leave “Resource credentials – Optional” unchecked. These are not needed for this operation.
- Check “Enable auto confirm for targets – Optional” to allow taregts to be auto confirmed.
- Click Next.
- On the notification screen, select a notification topic and preference if needed. We’re skipping notification for this blog.
- Click Next to review, then click “Submit”.
- The fleet homepage opens and shows “Resource addition in progress”. It takes a few minutes for the database systems to show under “Resources” on the fleet homepage. The status then changes to “Discovery in Progress”, which takes a few more minutes. In this phase, Fleet Application Manegent discovers the database and clusterware Oracle Homes.
-

Fleet Resources 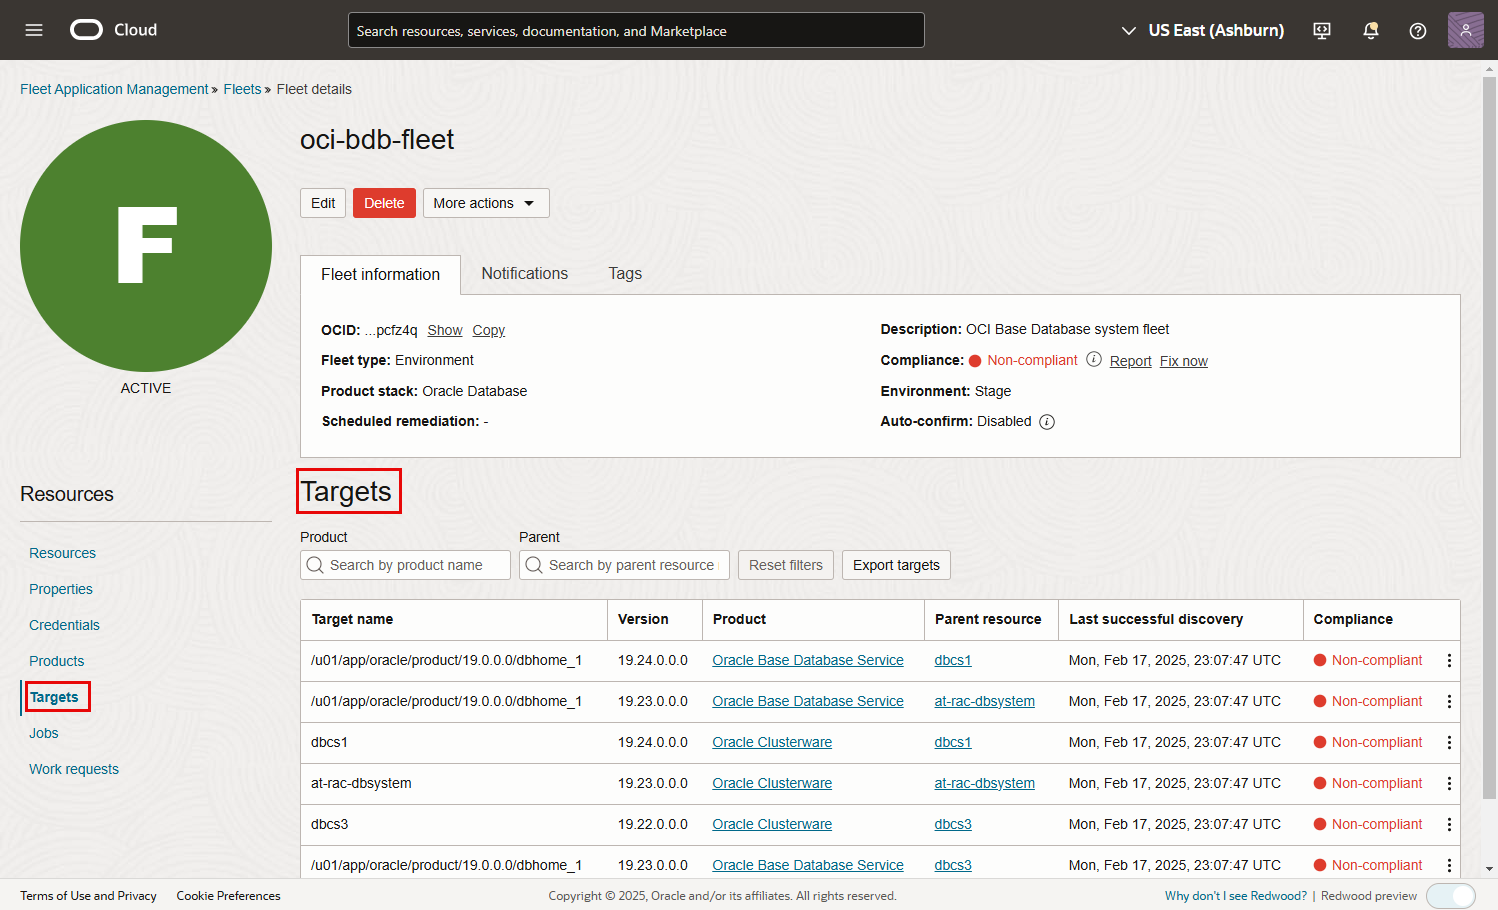
Fleet Targets
-
- On the Targets screen, select one of the Oracle Homes and click on the 3 dots to the right. Click “View missing patches”.
-
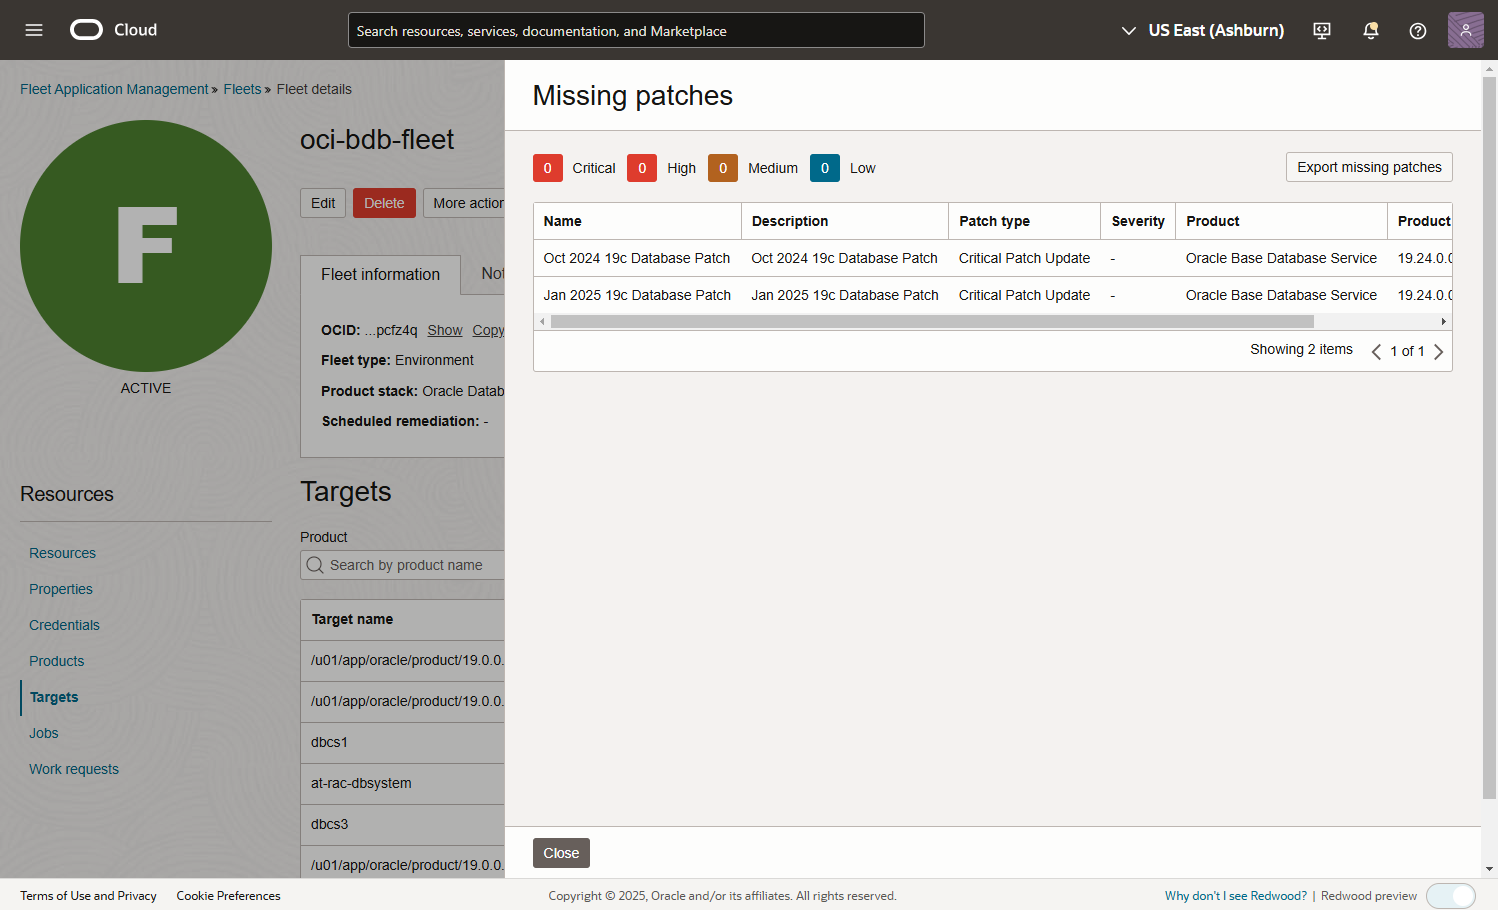
Missing Patches
-
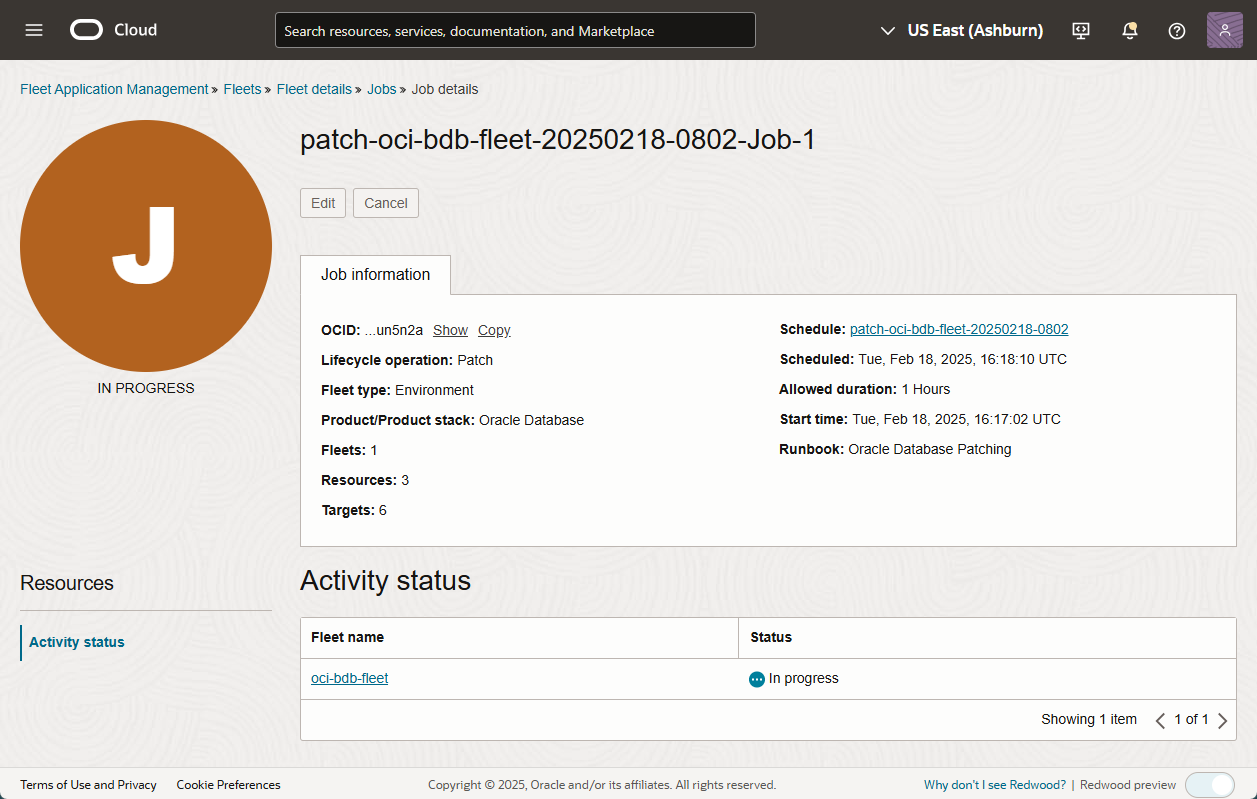
Task 2: Patch your cloud database fleet
- On the fleet homepage, “Fleet Information” tab, click “Fix now” next to “Compliance”.
- Provide a job name, and select “Oracle Database Patching” runbook.
-

Compliance Fix
-
- Click Next.
- On the parameters screen, click Next.
- On the review screen, click “Create”. This submits the patching job.
- To monitor the job, navigate to “Fleet Application Management”->”Lifecycle Management”->”jobs”.
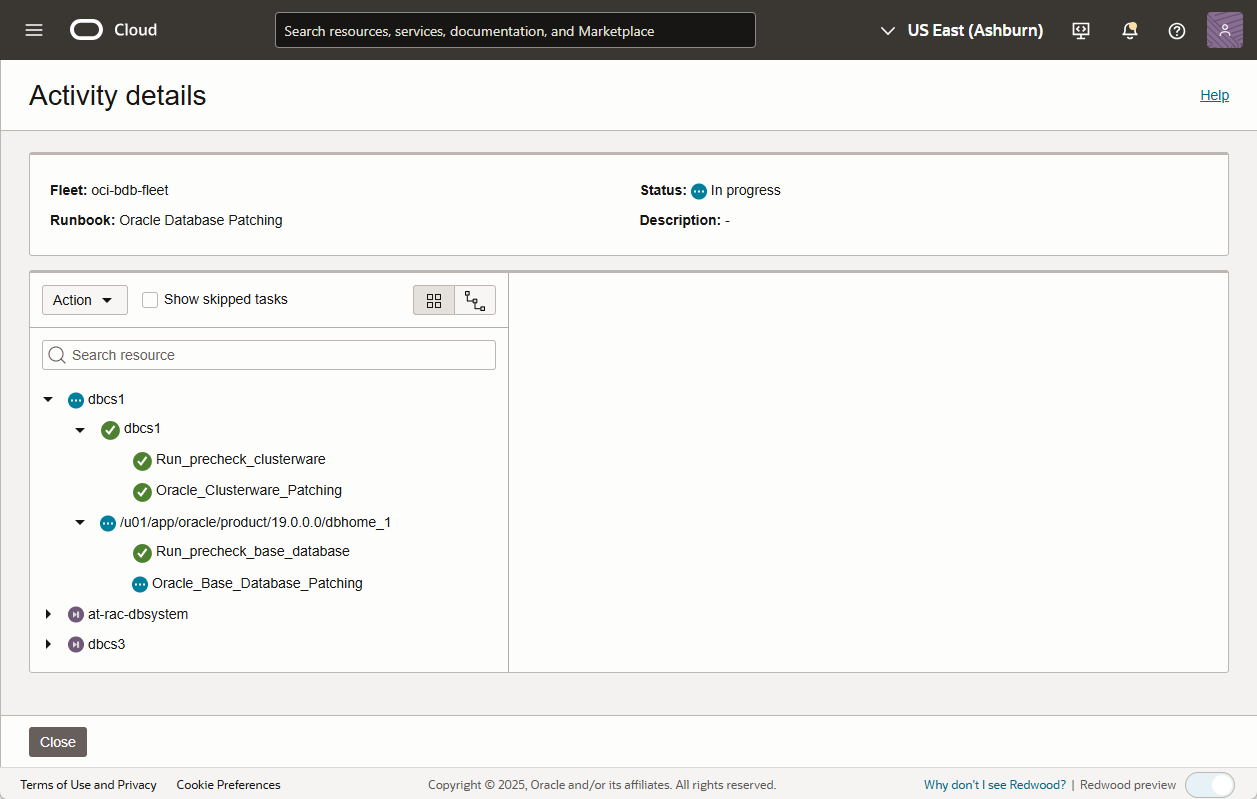
- If you encounter any errors, click on the task that failed to see the cause. When you fix the issue, access the job, click on the activity. On the “Activity details screen”, under “Actions”, click on “Retry failed tasks”.
The fleet is now compliant:
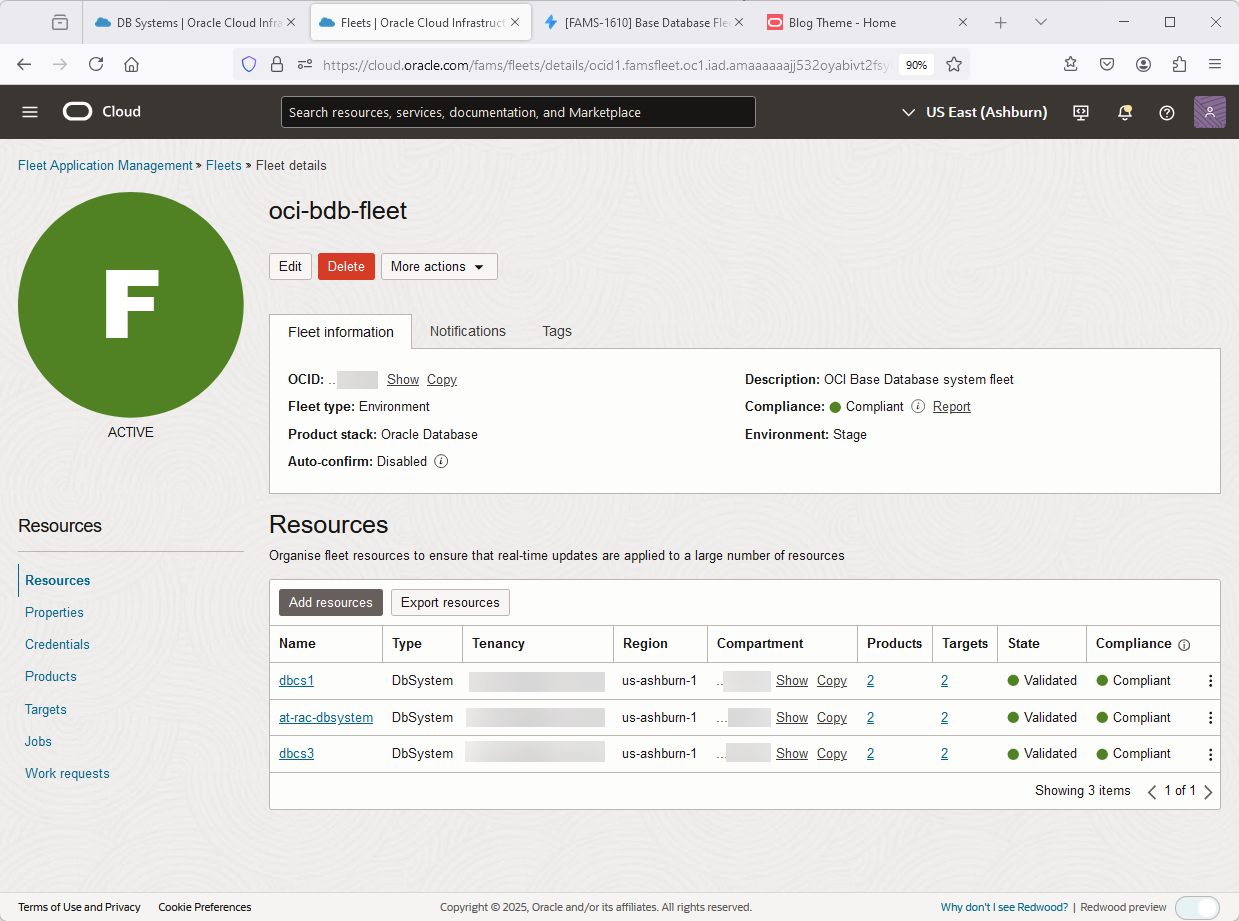
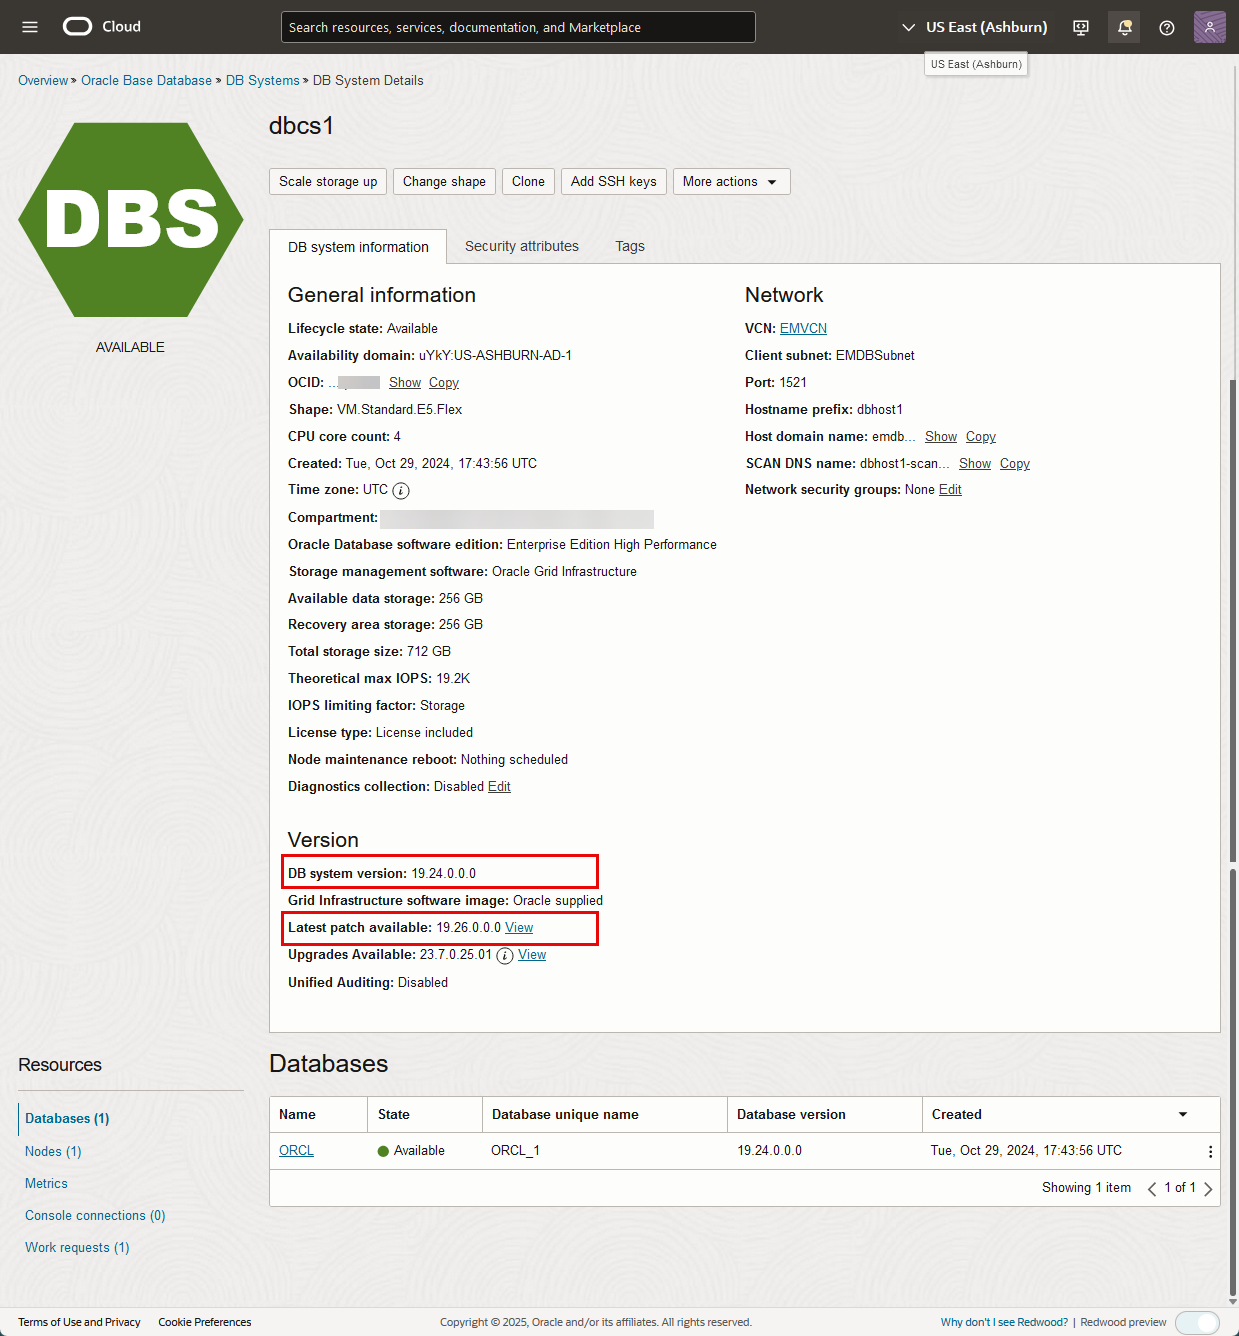
We can also check one of the database systems before and after patching: