Intro
The OCI Load Balancer provides a way to scale your web architecture without extra administrative overhead. There may be times when you want to redirect web clients away from your service during times of service maintenance or failure. With the load balancer ruleset, you can leverage OCI Object Storage to cloud natively redirect clients to a web splash page! In this blog, we’ll show you the exact steps to enable this feature along with how to expand this service.
Prerequisites
Understanding of OCI Load Balancers
Understanding of OCI Load Balancer Redirects
Agenda
The scenario in this blog will use a public-facing OCI load balancer listening on HTTP port 80 with two backend web servers. We will also use OCI object storage to host our splash page HTML file. This file will be privately shared with the OCI load balancer with the use of a pre-authenticated request.
Steps
- Create a Public Load Balancer
- Create Object Storage Bucket
- Upload Splash Page HTML file
- Create Load Balancer Rule Set
Create a Public Load Balancer
On the OCI Console top left menu, hover over the Networking section, select Load Balancers, then select Create Load Balancer. Keep the default Load Balancer selection, and click Create Load Balancer once more:
- Give your Public Load Balancer a descriptive name, choose Public visibility, and public IP address type:
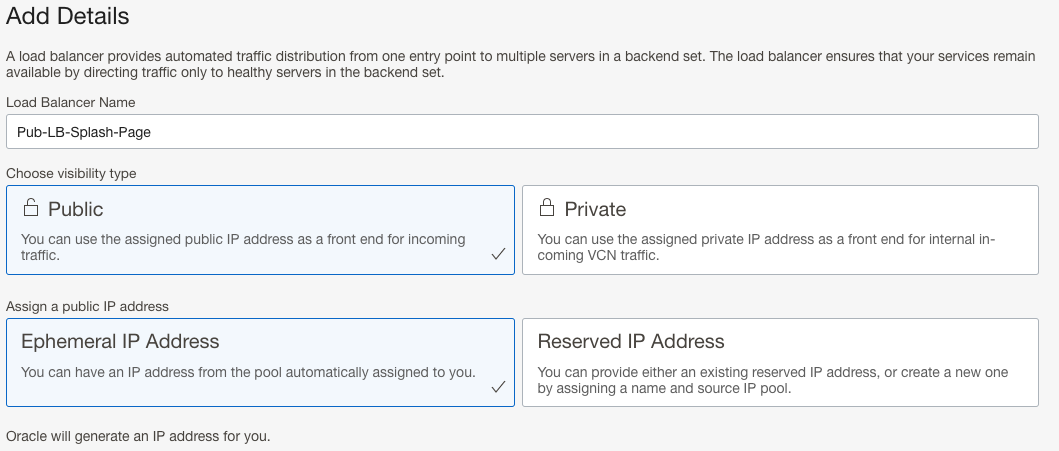
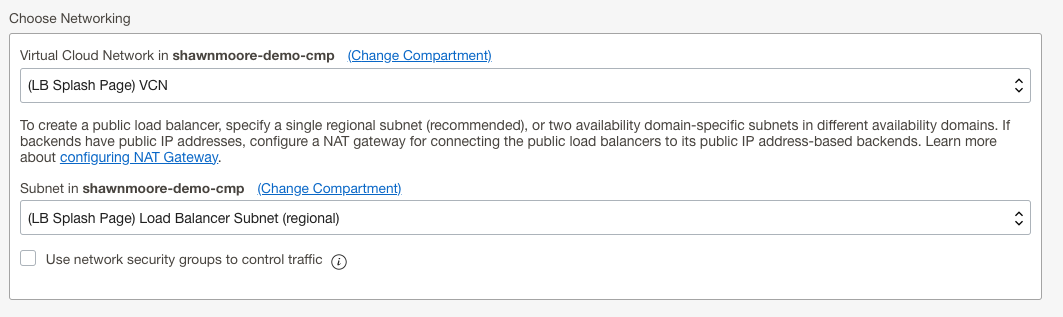
- Select the appropriate, size, VCN, and public subnet for the resource then click next:
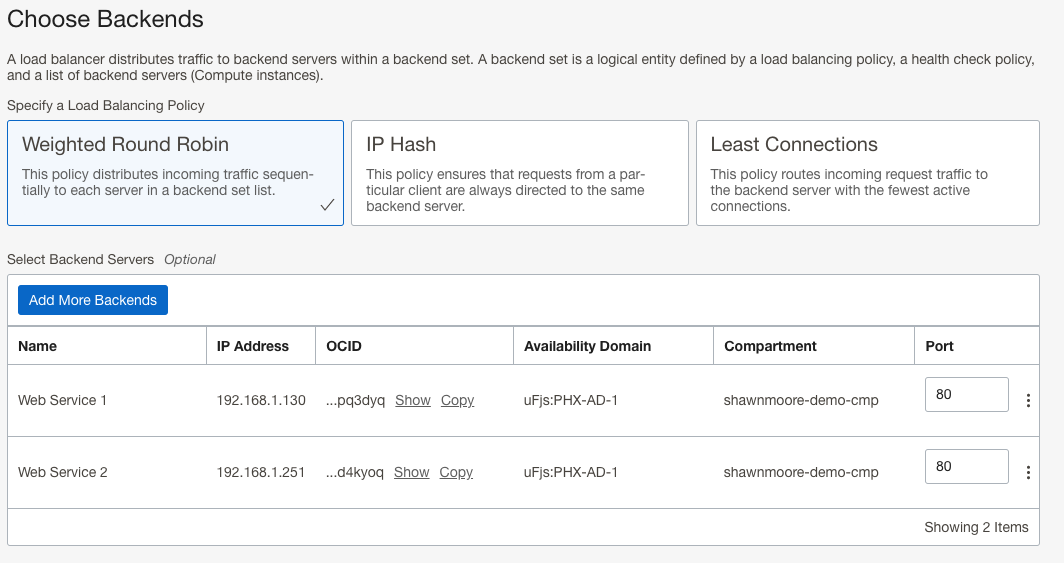
- On the Choose Backends page, chose your load balancing policy then configure the “Add More Backends” section. Keep all other defaults then click next:
- Give the default Listener a descriptive name, and select HTTP for the traffic type. We’ll configure a Listener Rule Set for the Splash Page redirect after creating the Load Balancer; click next.
- Set up logging options then click Submit to create the load balancer.
Create Object Storage Bucket
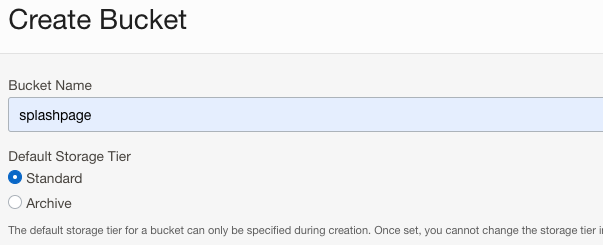
From the console’s top left hamburger menu, hover over the Storage section, then select Object Storage & Archive Storage. If a Bucket to store your Splash Page file doesn’t exist, click Create Bucket:
- Give your Bucket a descriptive name and keep the defaults, select Create:
Upload Splash Page HTML file
- Click on the new or existing Object Storage Bucket you’ve created and click Upload to your Splash Page HTML file. For this example, we created a static HTML document with only text content.
- By default, your Object Storage Bucket will be set to private visibility. This prevents the general public from accessing any of your storage objects without explicit permission. An IAM policy or pre-authorization request is needed to access the storage objects. I used a pre-auth request by performing the following:
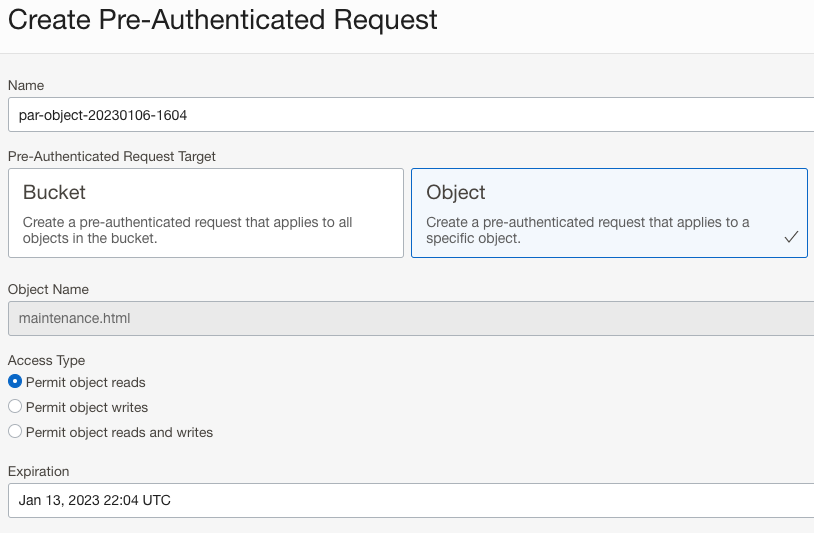
- Upload the HTML file, click the 3 dots icon to the right of the object and select Create Pre-Authenticated Request:
- Give your Pre-Auth a name and keep the default Access Type “Permit object reads”
- Select an object expiration date
Configure Load Balancer Rule set
Head back to the Public Load Balancer you created earlier. On the left Resources menu, select Rule Sets followed by the Create Rule Set button:
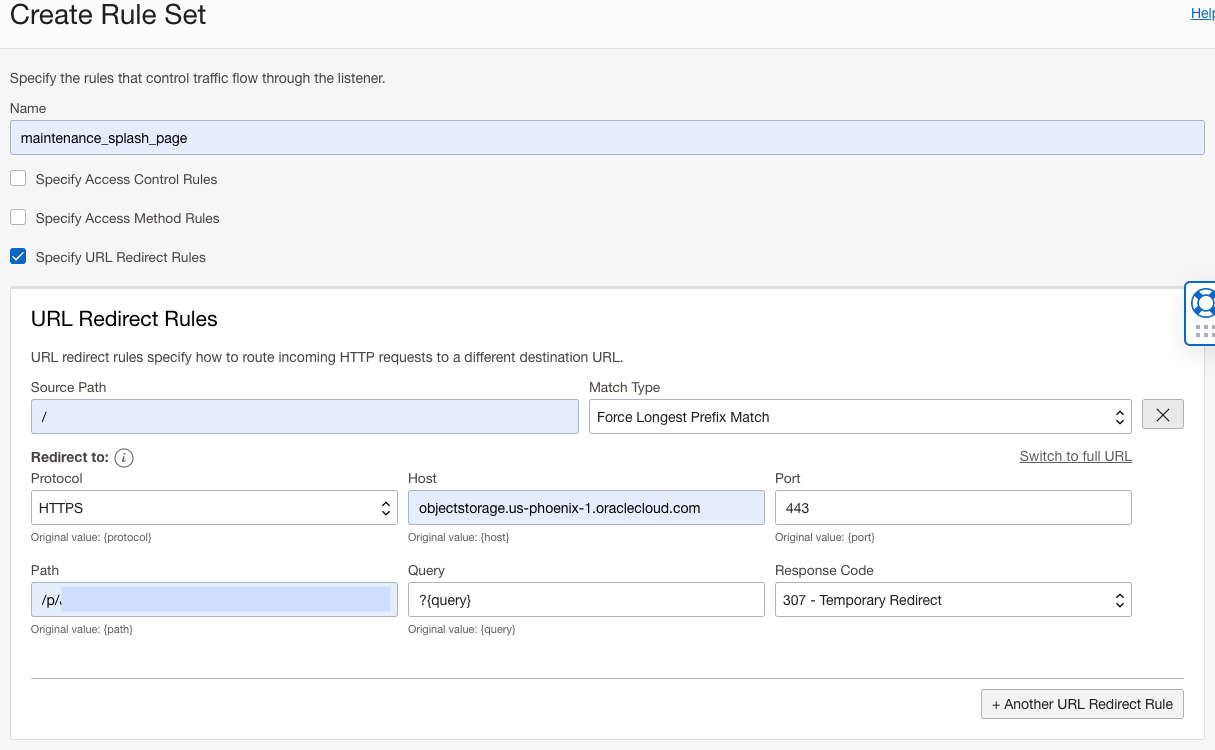
- Specify a descriptive rule set name, and then select “Specify URL Redirect Rules”
- In the URL Redirect Rules section, provide the following info
- Source Path: /
- Redirct to Protocol: 443
- Host: objectstorage.{region}.oraclecloud.com
- Port: 443
- Path: /{Pre-Auth path} (listed after object storage hostname)
- Query: ?{query}
- Response Code: 307 – Temporary Redirect
Test Results
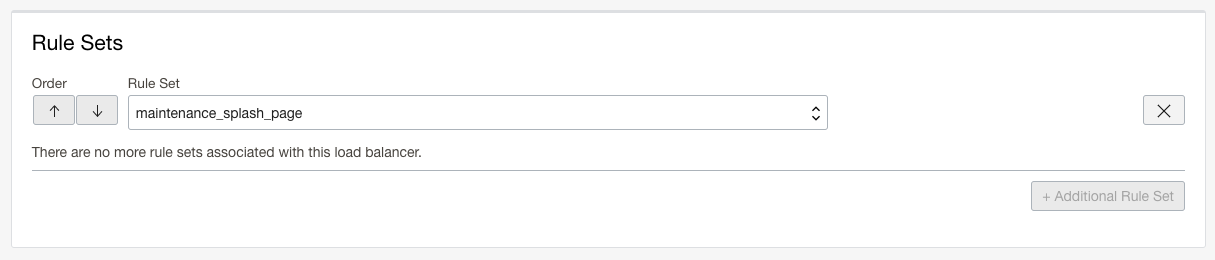
Whenver we want to enable the redirect to the splash page, we need to enable it on the Load Balancer listener. This can be performed by editing the Listener and then selecting the Rule Set we created earlier:
You’re now redirected to the splash page as shown:

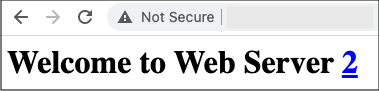
Once we’re done with the redirect, we can remove the Rule Set from the Listener. After updating, confirm that the Load Balancer is sending web client traffic to the back-end web servers:
Access to Web Server 1

Access to Web Server 2
Conclusion
With this simple configuration, we’ve enhanced the functionality of the OCI Load Balancer. This can be expanded upon by automating the redirect process with the use of functions. Whenever there’s an unexpected service outage, a notification is sent to the function to enable the ruleset we’ve created.
The architecture for this design is located here.