Introduction
In this blog, I will configure the Equinix side to connect two Oracle Cloud Infrastructure (OCI) Regions using Equinix Infrastructure. This solution can replace the OCI Remote Peering Connection (RPC) and has all the benefits of Equinix SLAs.
Please go here for the main page.
Please go here for the OCI side configuration, which is the first part of this blog series.
Please go here for the Network EDGE Virtual Device configuration, the last part of this blog series.
For this connectivity model, we will use:
– Two FastConnects with Equinix as a Partner.
– One Equinix Network Edge Device.
– Two Equinix Connections.
– The Equinix Fabric infrastructure.
In this blog, we will use the following technologies:
– Equinix as a Partner – for more information, please access official documentation at https://docs.equinix.com/en-us/Content/Interconnection/Fabric/connections/Fabric-oracle-fast-connect.htm
– Equinix Network EDGE Virtual Device – for more information, please access official documentation at https://docs.equinix.com/en-us/Content/Interconnection/NE/user-guide/NE-create-device.htm
Prerequisites
In this blog, we will cover how to configure the Equinix Infrastructure. To do this, we will need the following resources already provisioned and configured:
1. VCNs – in our case, we will have a VCN in the Ashburn region with 10.10.0.0/16 CIDR and another VCN in the Phoenix region with 10.20.0.0/16 CIDR with all routing and Security List / Network Security Groups to allow connectivity between Ashburn and Phoenix CIDR Blocks
2. 2 DRGs – in our case, one DRG in Ashburn and one DRG in Phoenix with VCN attachments and routing in place to allow traffic between Ashburn VCN and Phoenix VCN
3. 2 Compute VMs – in our case, one compute VM in Ashburn with IP 10.10.10.193 and one in Phoenix with IP 10.20.10.165
4. Access to the Equinix portal to provision and Order required components.
5. Prepare and have all the needed data handy to configure this solution. In our case, what I have prepared is:
# Ashburn VCN CIDR = 10.10.0.0/16
# Ashburn subnet = 10.10.10.0/24
# Ashburn Compute instance IP = 10.10.10.193
# Ashburn Fastconnect BGP subnet = 172.16.0.0/30
# Phoenix VCN CIDR = 10.20.0.0/16
# Phoenix subnet = 10.20.10.0/24
# Phoenix Compute instance IP = 10.20.10.165
# Phoenix Fastconnect BGP subnet = 172.16.0.4/30
# Equinix BGP ASN = 133937
# Oracle BGP ASN = 31898
Solution Description
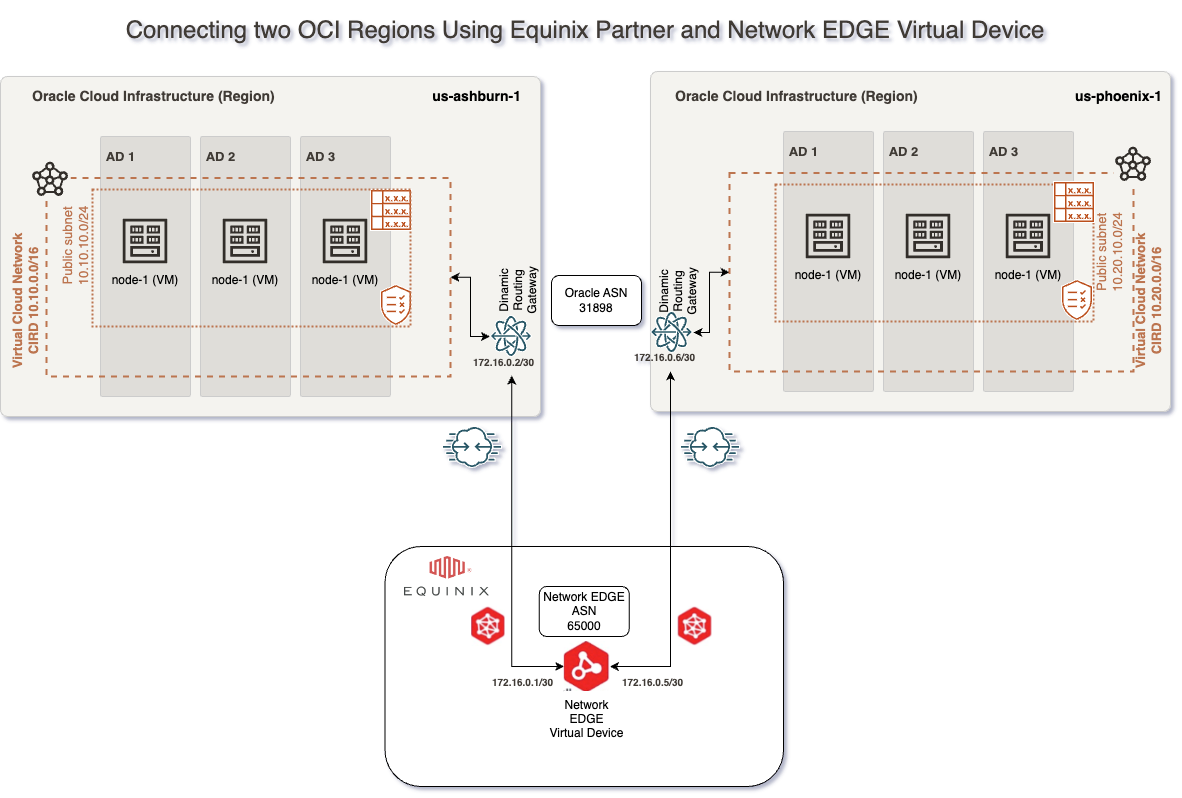
This solution does not focus on redundancy, and the connectivity will be based on this network diagram:
This blog will focus on how we can configure the Equinix Fabric, which can be done by following the following steps:
a. Access the Equinix Fabric at https://fabric.equinix.com. Log in with your credentials, go to the Network Edge tab, and click Create Virtual Device.

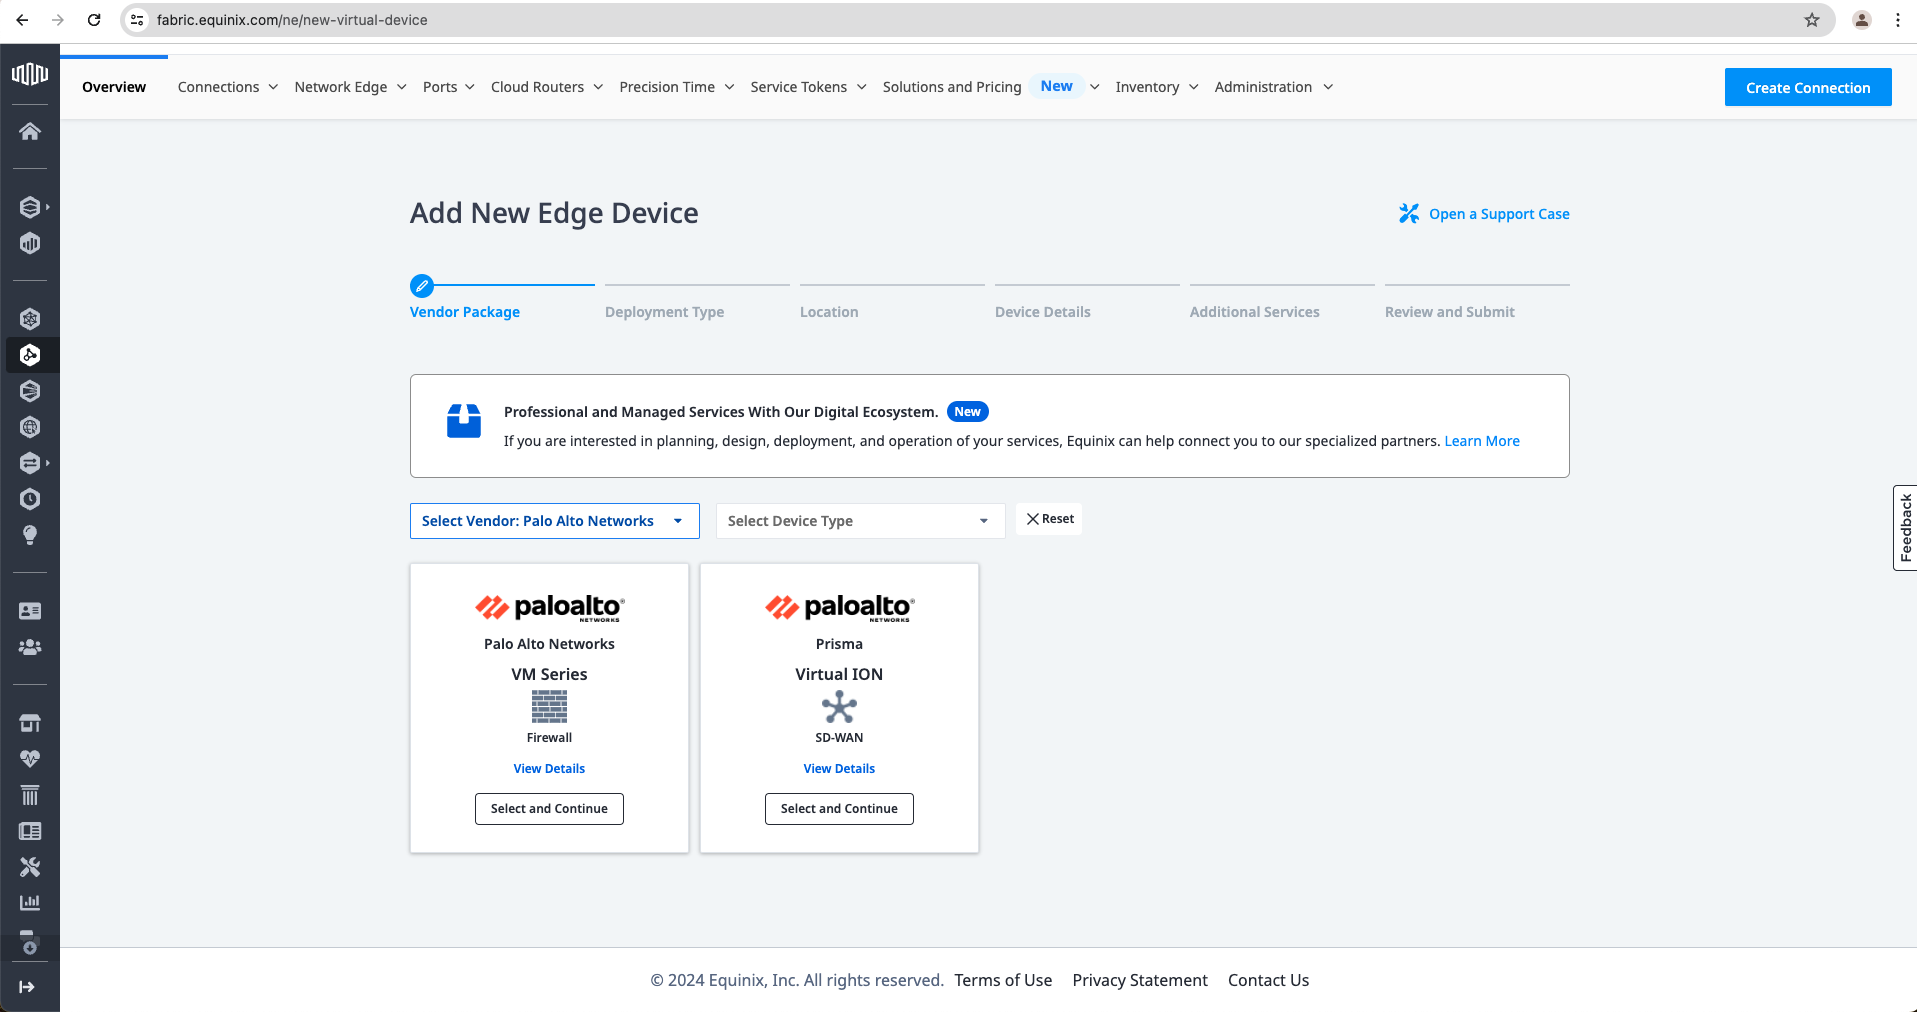
b. Select a vendor and a device. In my case, I have selected Palo Alto Networks as a Vendor and Palo Alto Networks VM Series as a Device, but you can choose anything from the list. Click Select and Continue.
c. Select Deployment Type. In my case, I have selected “Single Device” since we will not cover any redundancy aspects of this use case. Click Begin Creating Edge Devices

d. Select a location where the device is created. In my case, I have chosen Dallas. Also, on this page, you need to select the Billing Account. Now click Next: Device Details.

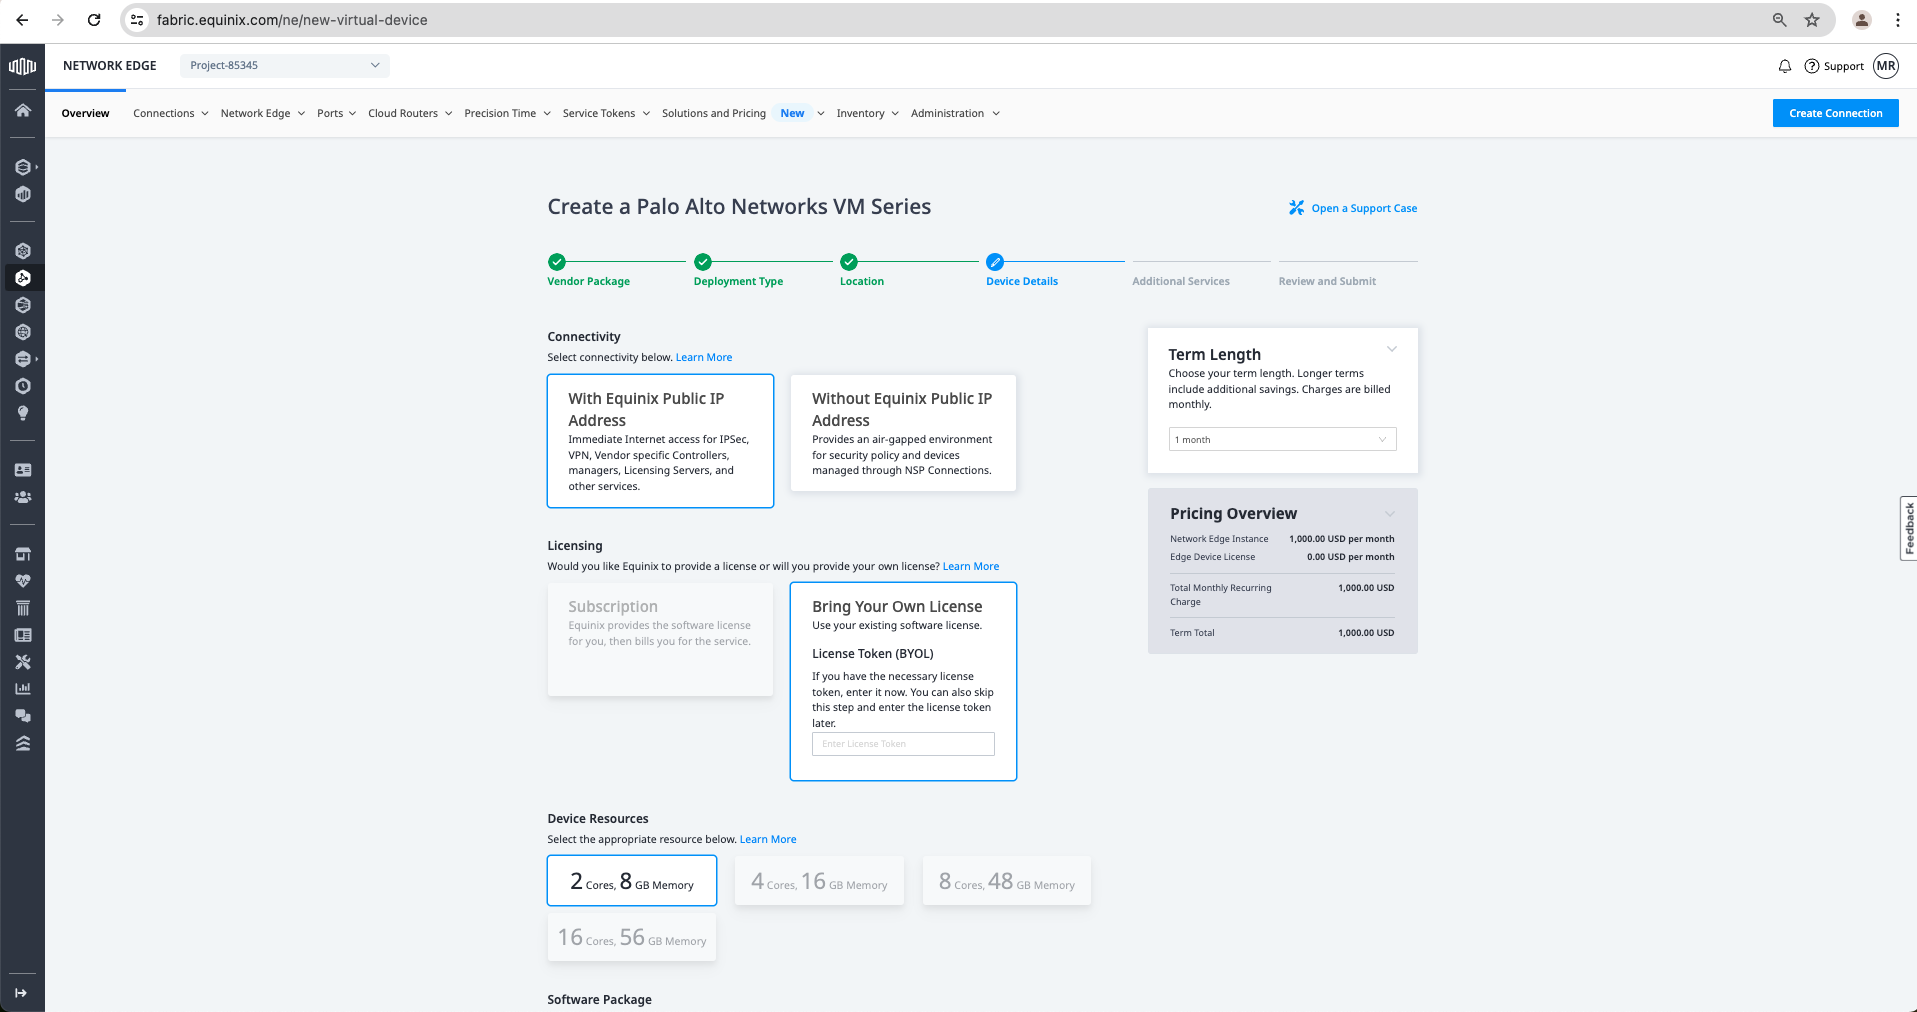
e. On this page, we need to provide the following configuration details of the Palo Alto VM Series Device:
- Connectivity details. I have chosen “With Equinix Public IP Address;
- Licensing Details. I have used “Bring Your Own License”;
- Device Resources. I have selected two cores, 8 GB of memory;
- Software Package. I choose VM-100;
- Software Version. I selected 11.0.2;
- Device Details: I have used “OCIRegions-Demo” for the device name and “ociregions-demo” for the hostname prefix;
- Interfaces. I used the default “10 interfaces” and I have left the selection of the interfaces used on the default setting “Automatically select the next available interface on my devices”;
- On the device status notification, I have added my email;
- On “Term Length,” I have chosen the minimum period of 1 month, but you can select another desired period from the drop-down menu;
- Optionally, if you have it, you can fill in “Purchase Order Number” and/or “Order Reference/Identifier”.
Now you can click “Next: Additional Services”.


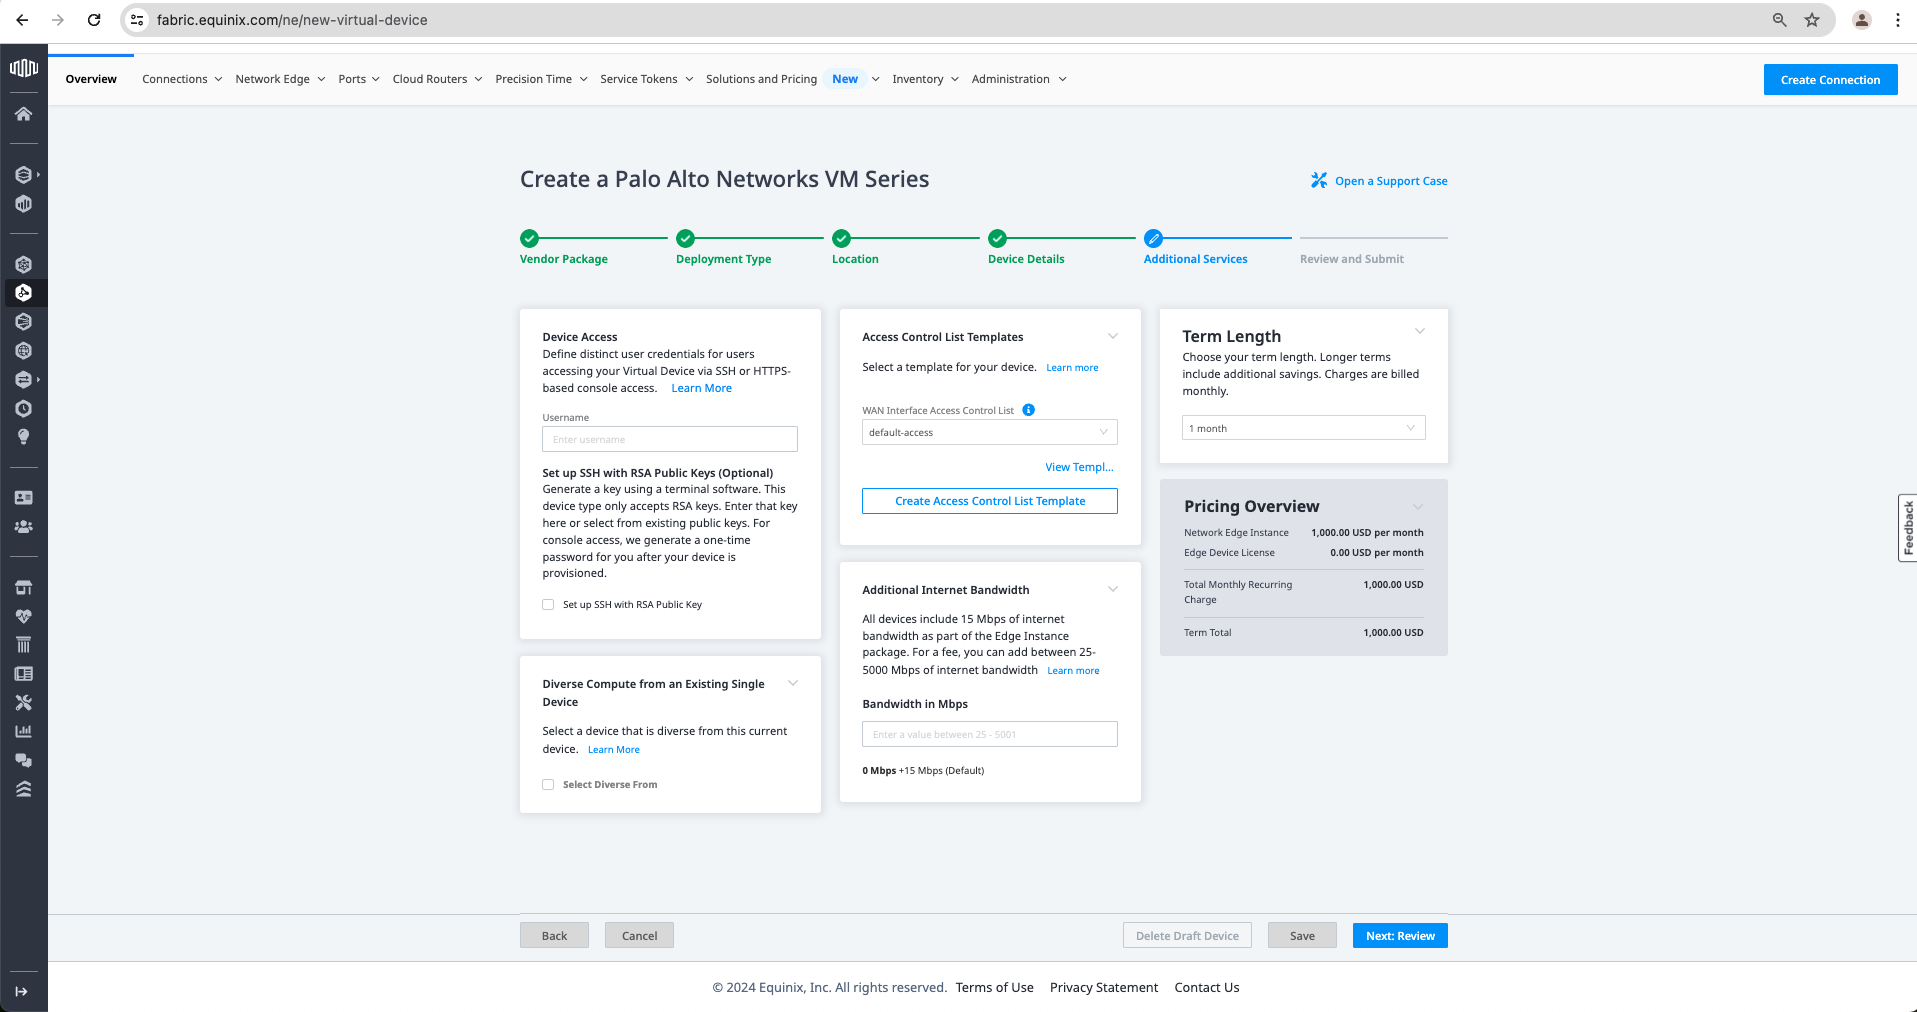
f. Now, we need to add the additional services:
- Device access is where you add the desired username for device access, and you can also add the RSA Public Key;
- Access Control template to manage what IPs have access to the device;
- Diverse Compute from an Existing Single Device. This is if you have one device and want to be sure that this device is not landing on the same infrastructure;
- Additional Internet Bandwidth. Equinix offers 15 Mbps internet access for free by default, but if you need more, you can add more here.
Now, after I have added the required details, I will click “Next: Review”.
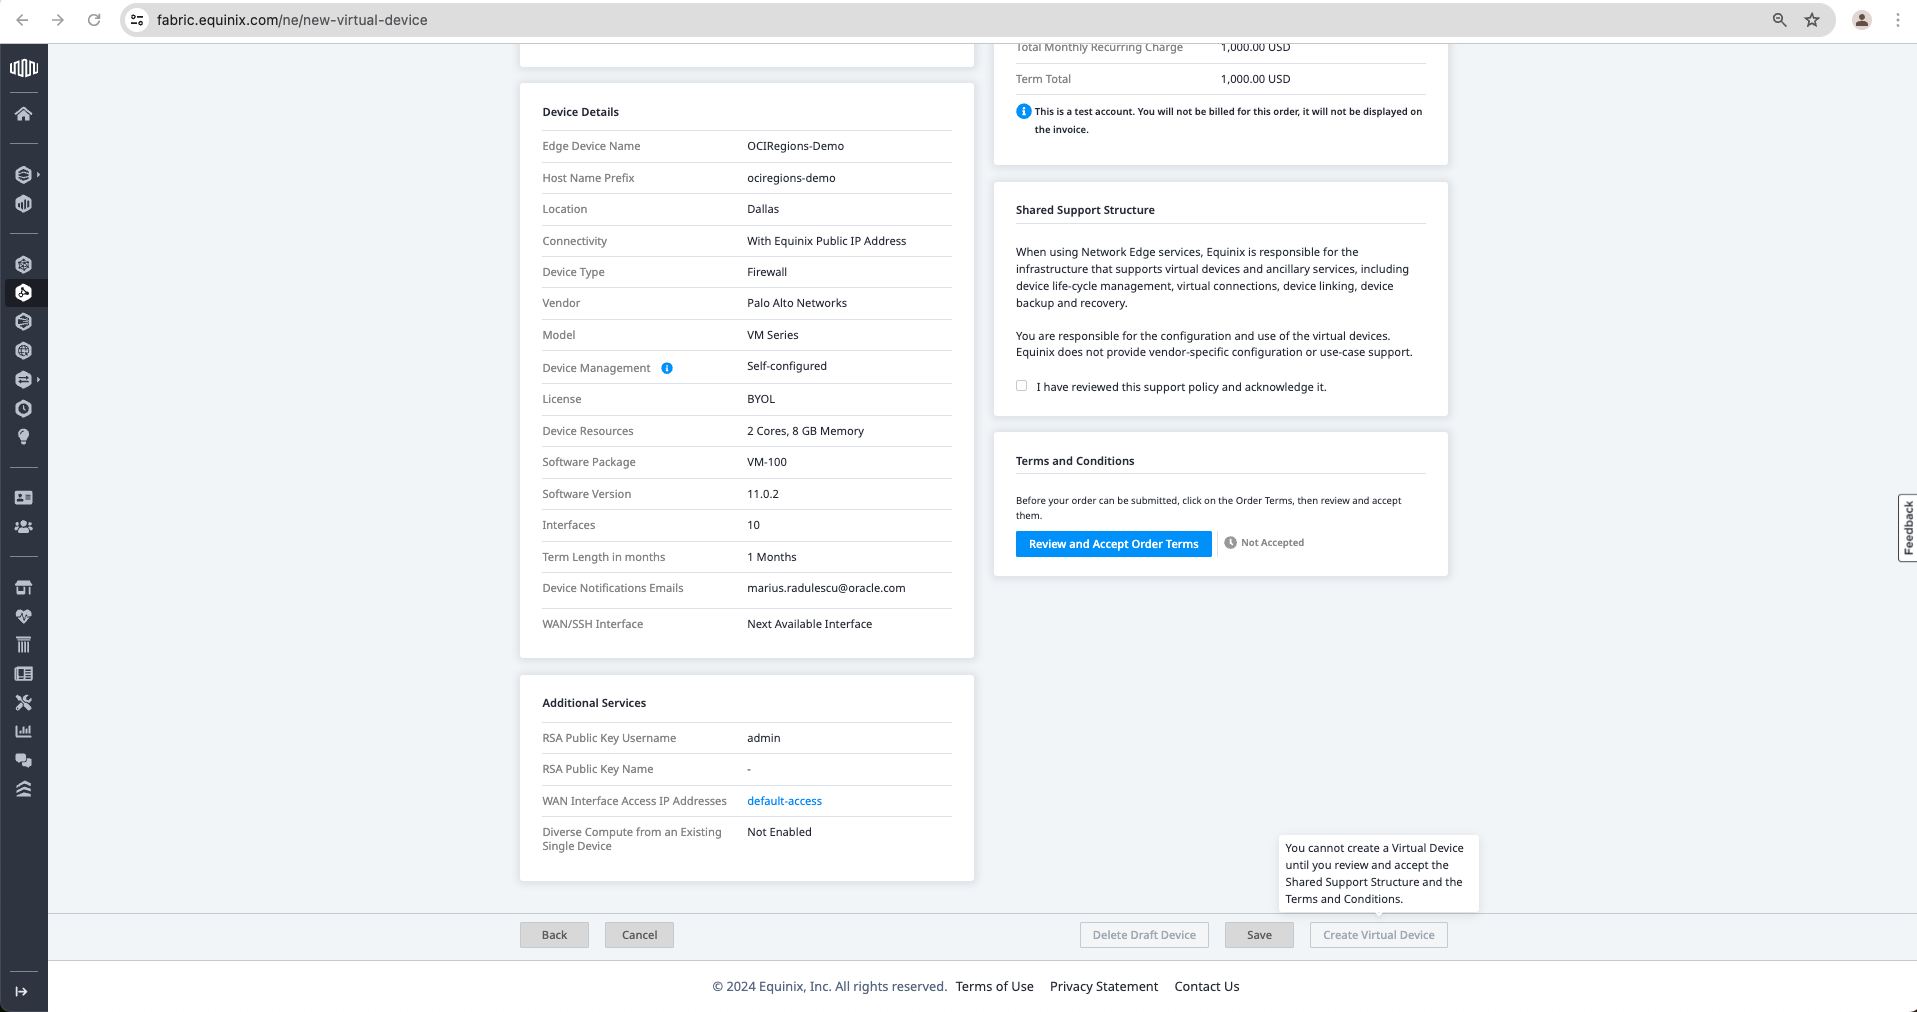
g. On this page, I am reviewing all details to ensure that they are correct; I confirm that I have reviewed and acknowledged the “Shared Support Structure” and reviewed and accepted the “Terms and Conditions.” After I have done all this, I can click on “Create Virtual Device.”

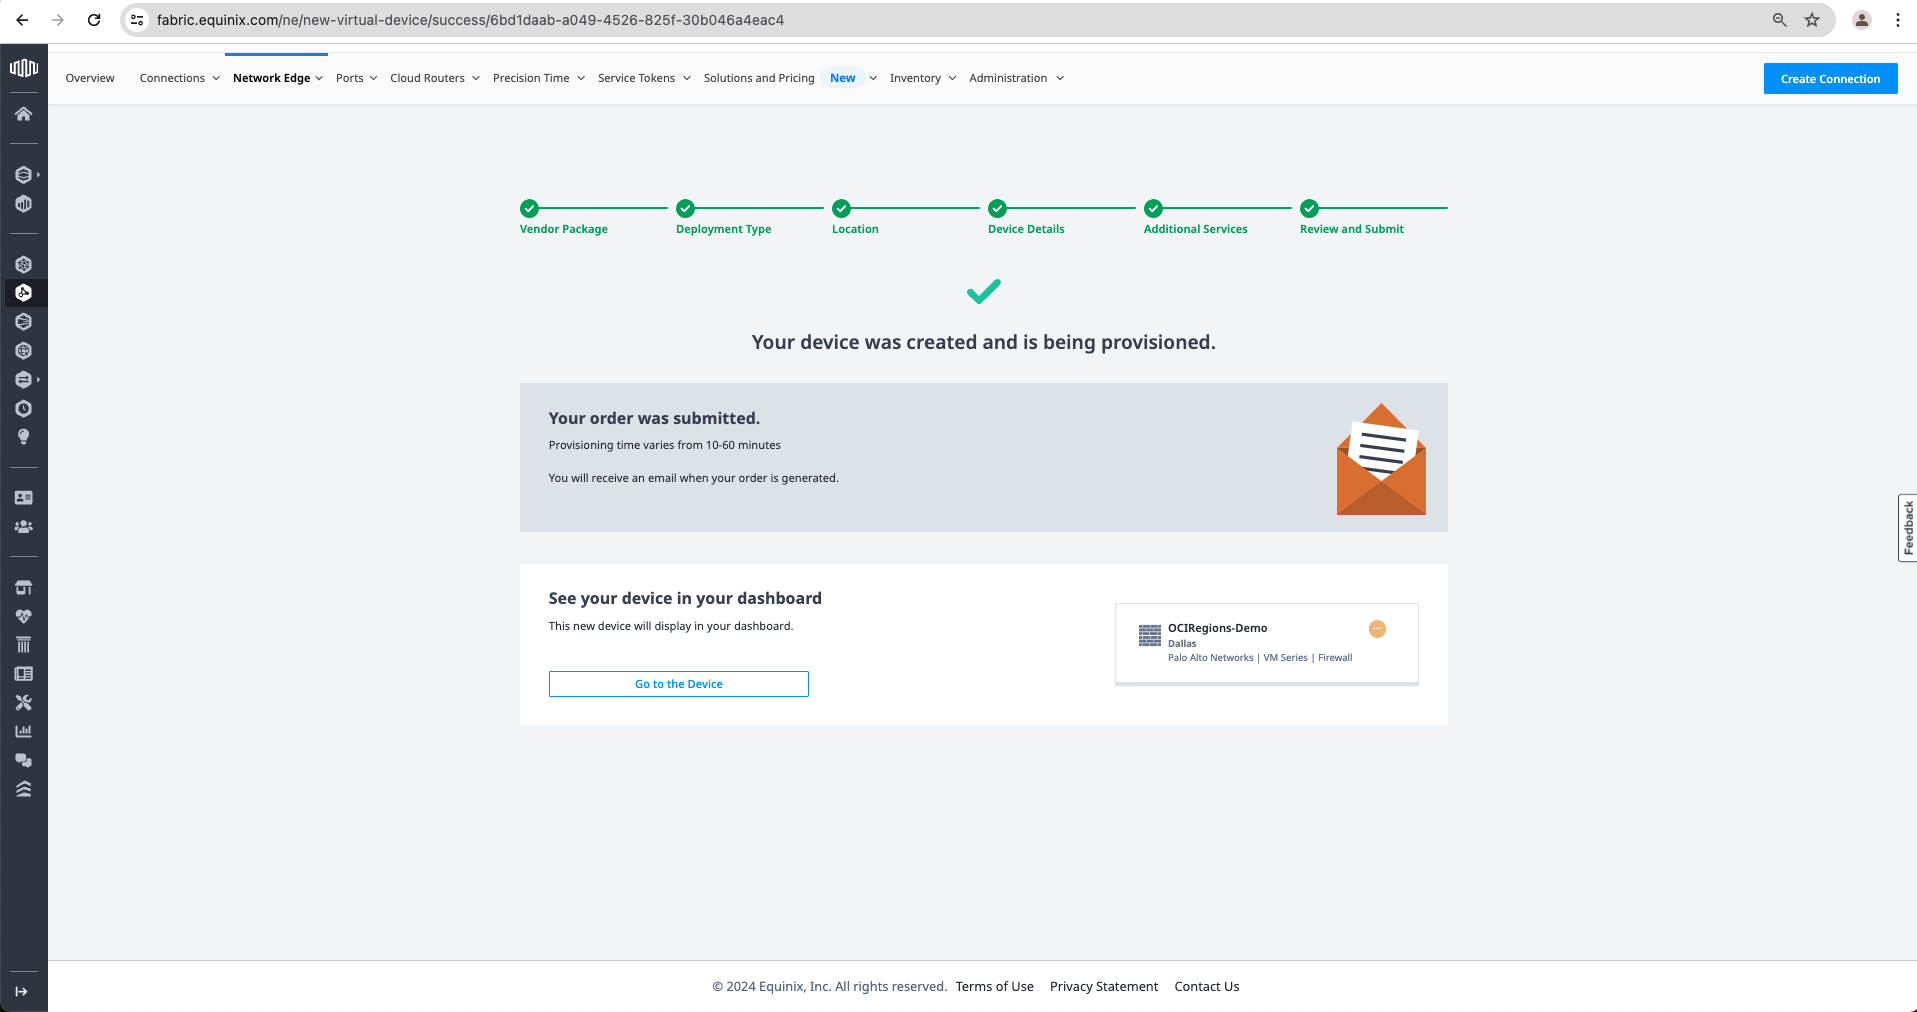
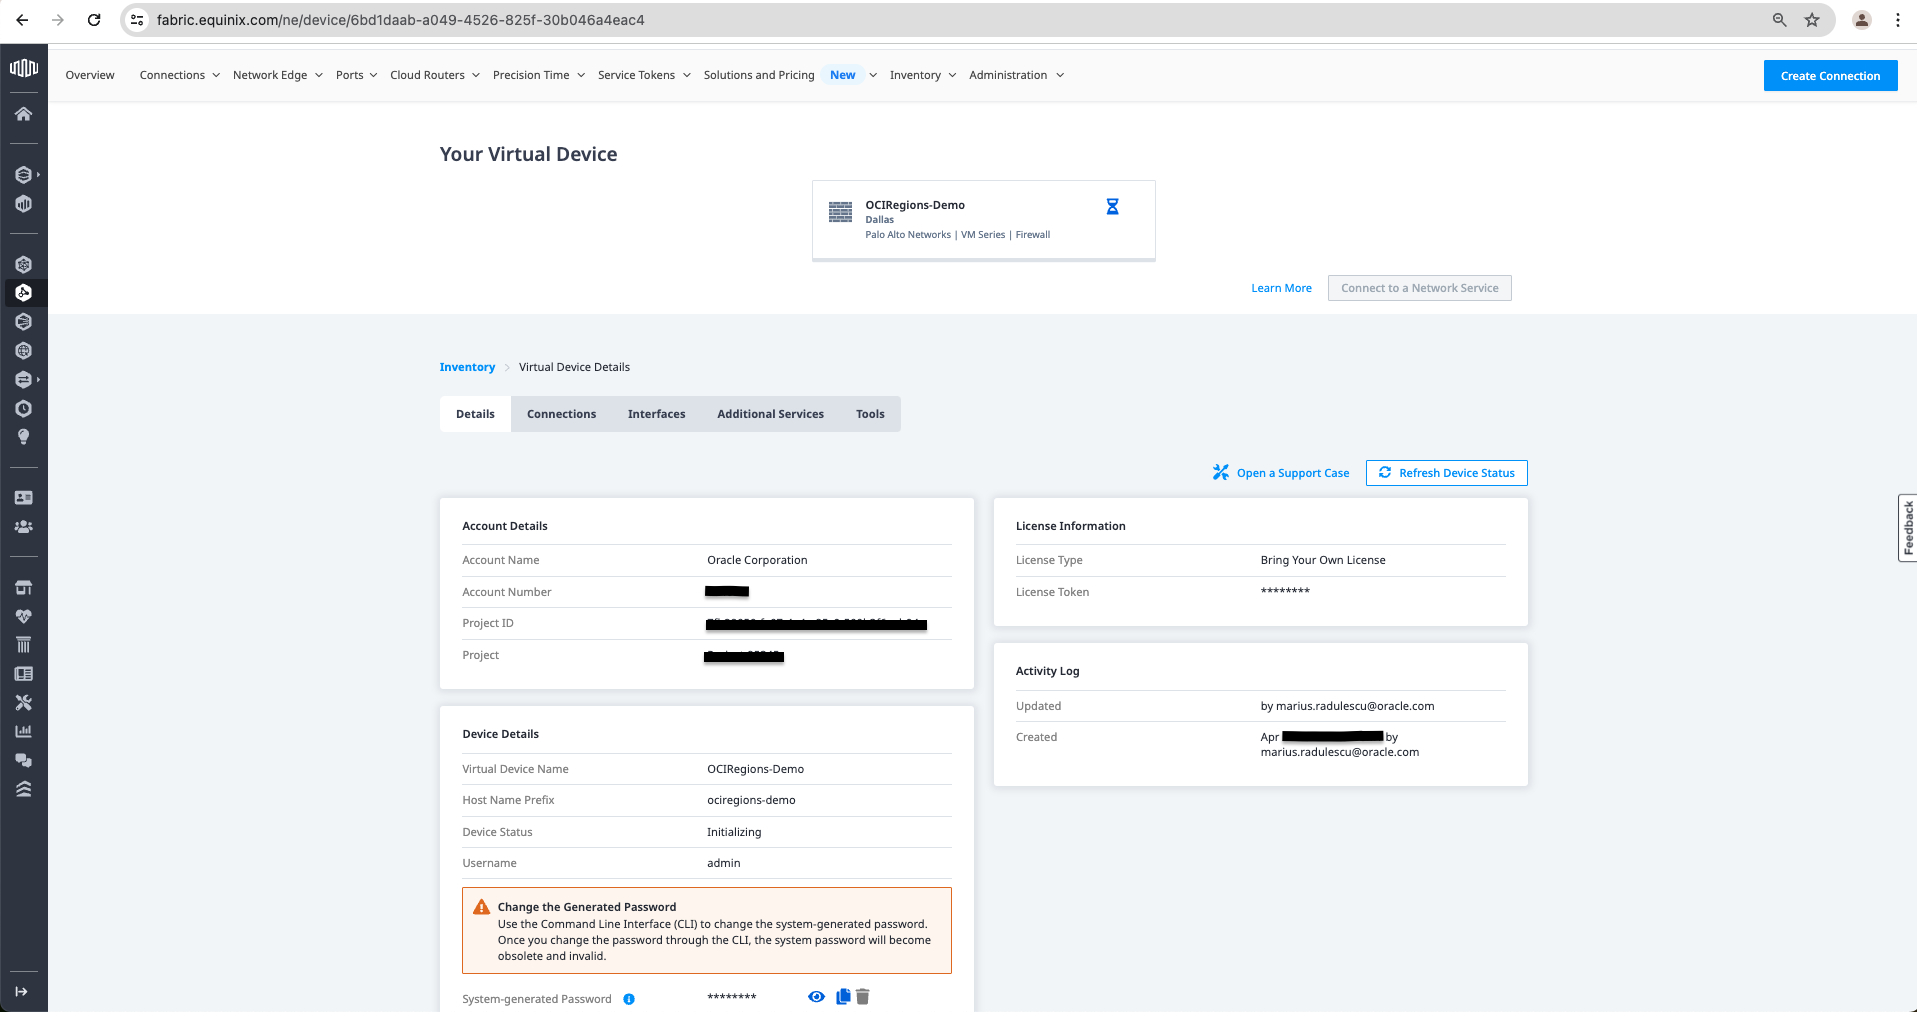
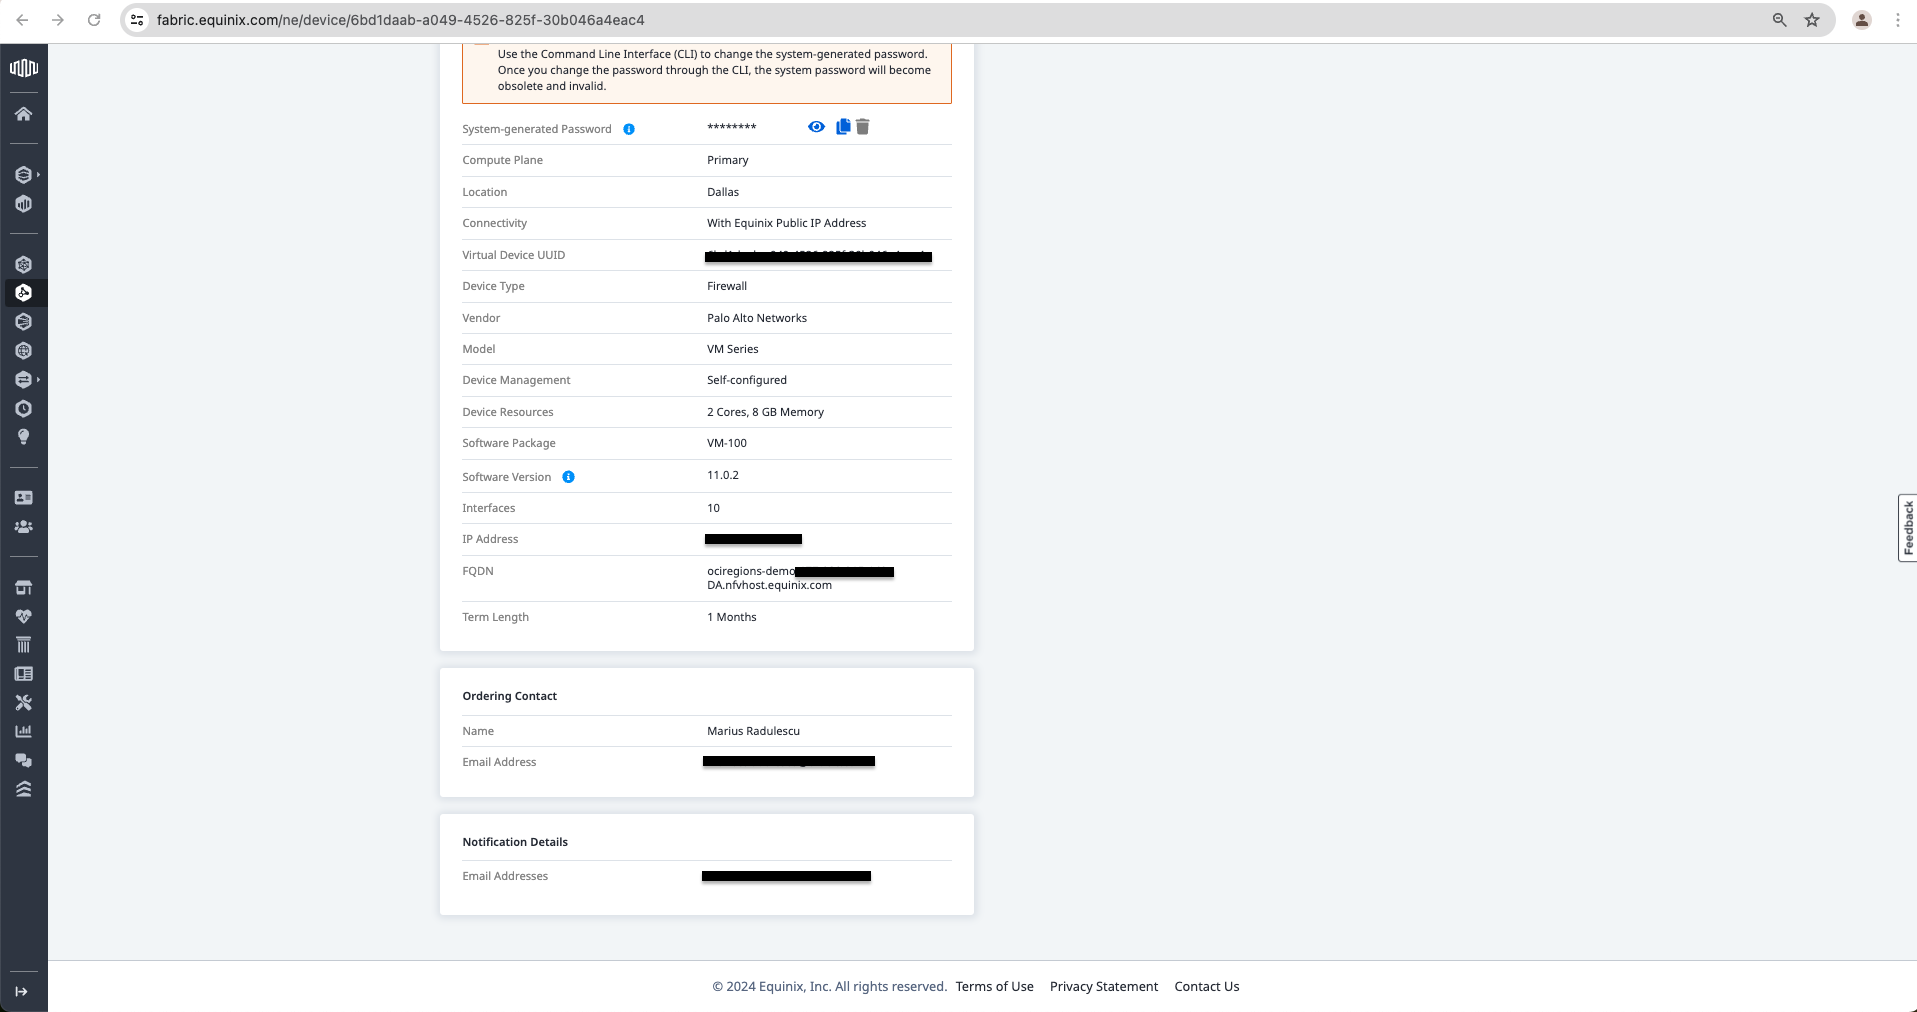
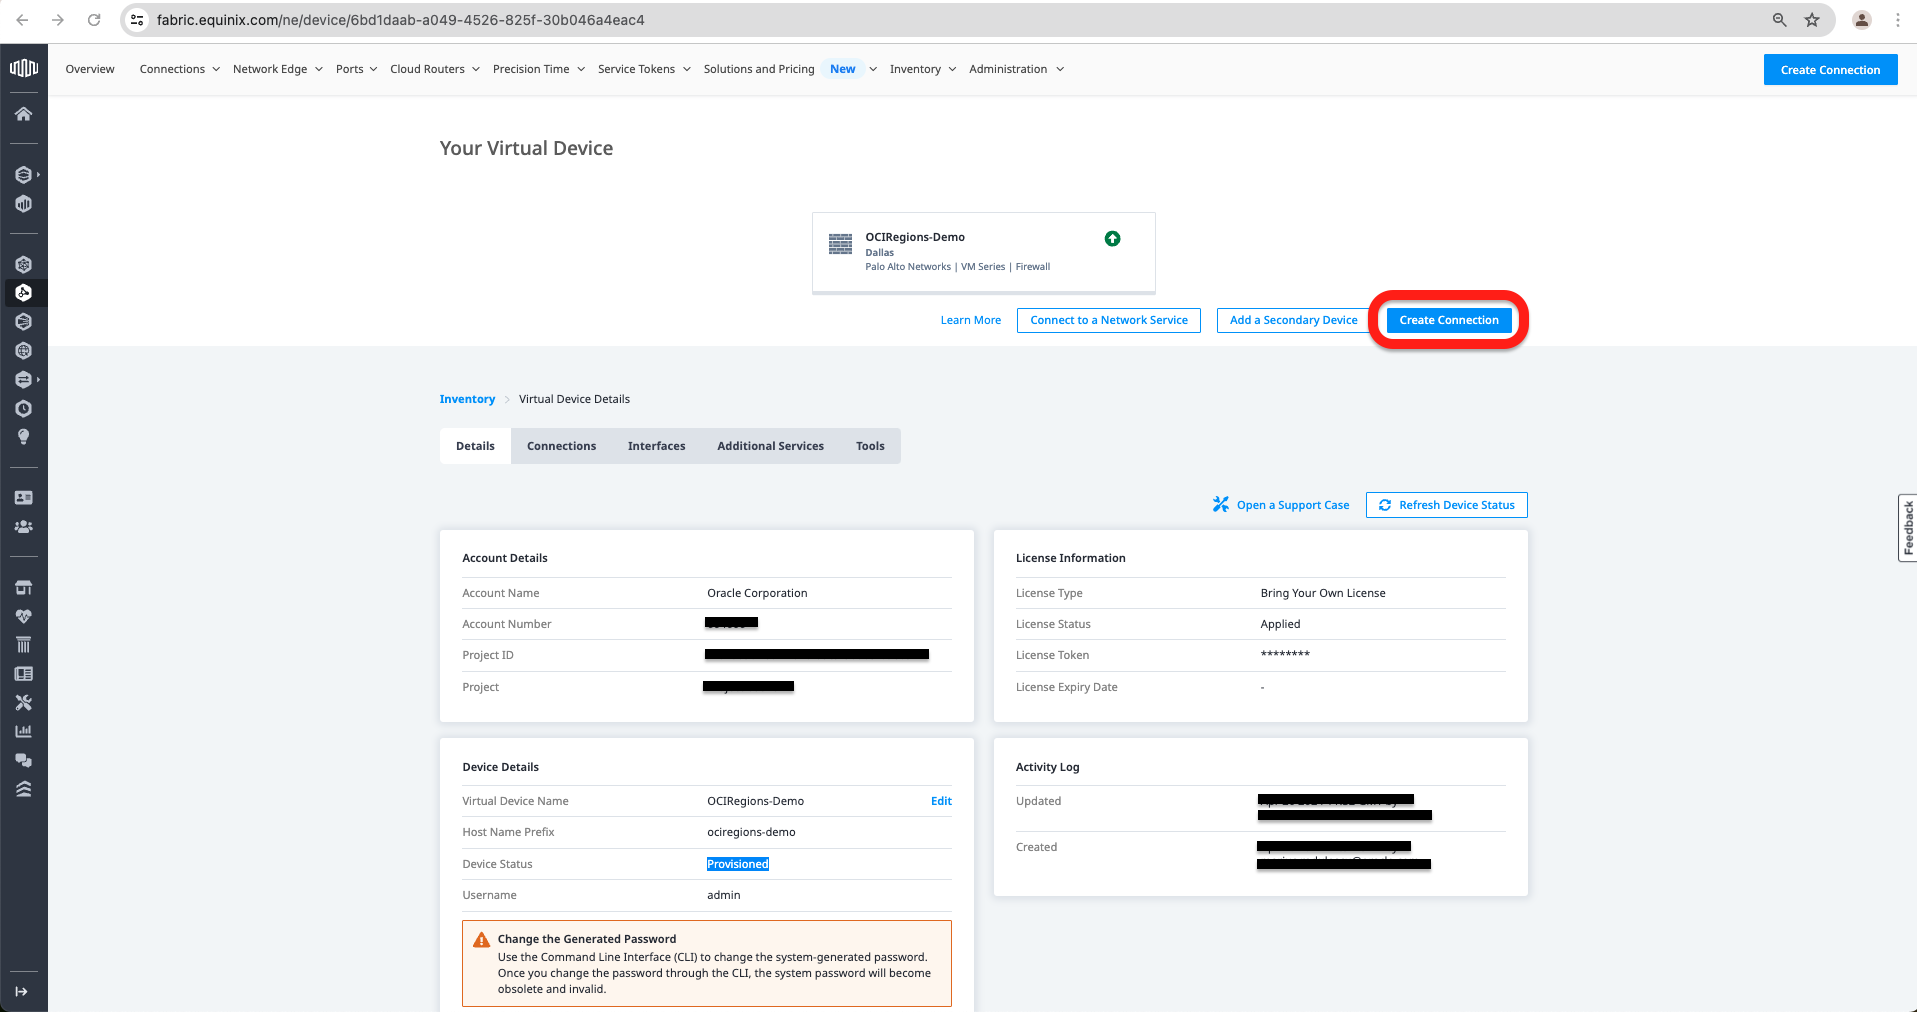
h. I got a message that the device was created. If I click “Go to the Device,” I will see the device’s details and status. The initial status is “Initializing,” and it will move to “Provisioning.” Once it reaches the status “Provisioned,” we can move to create the Connections to OCI by clicking on “Create Connection”.
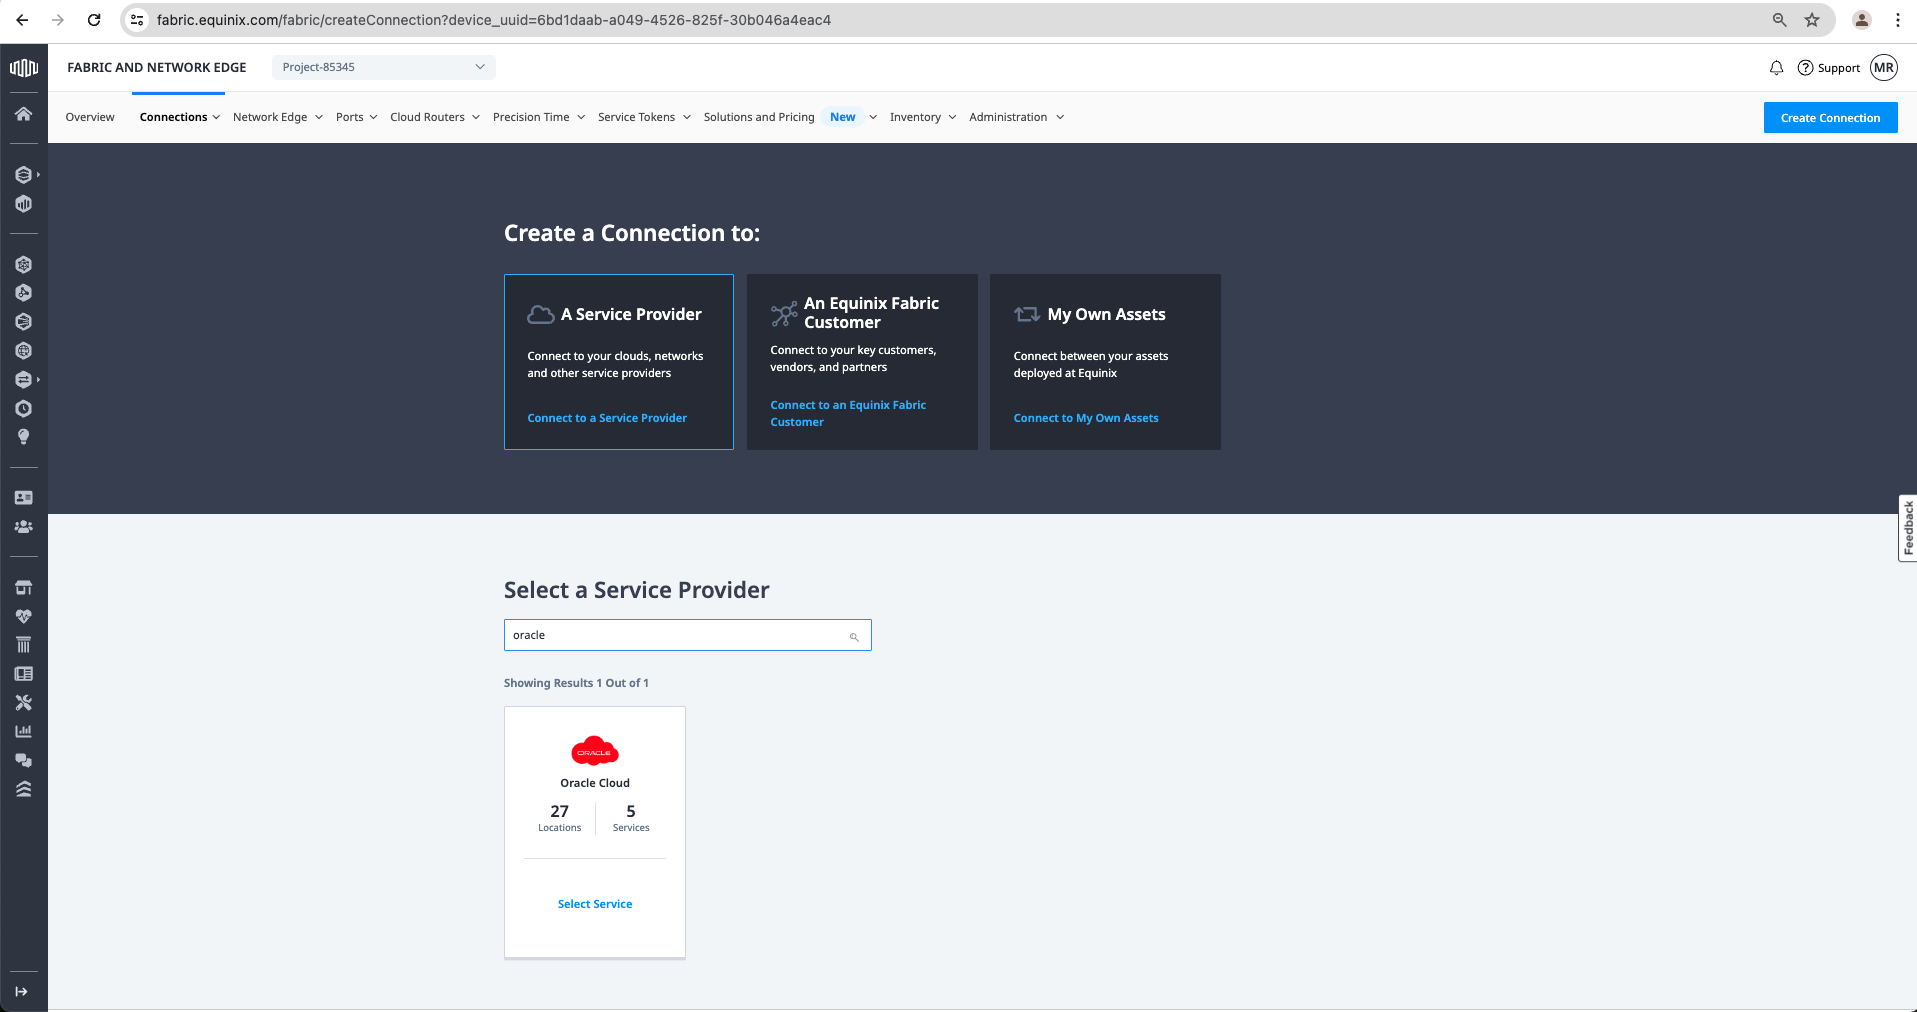
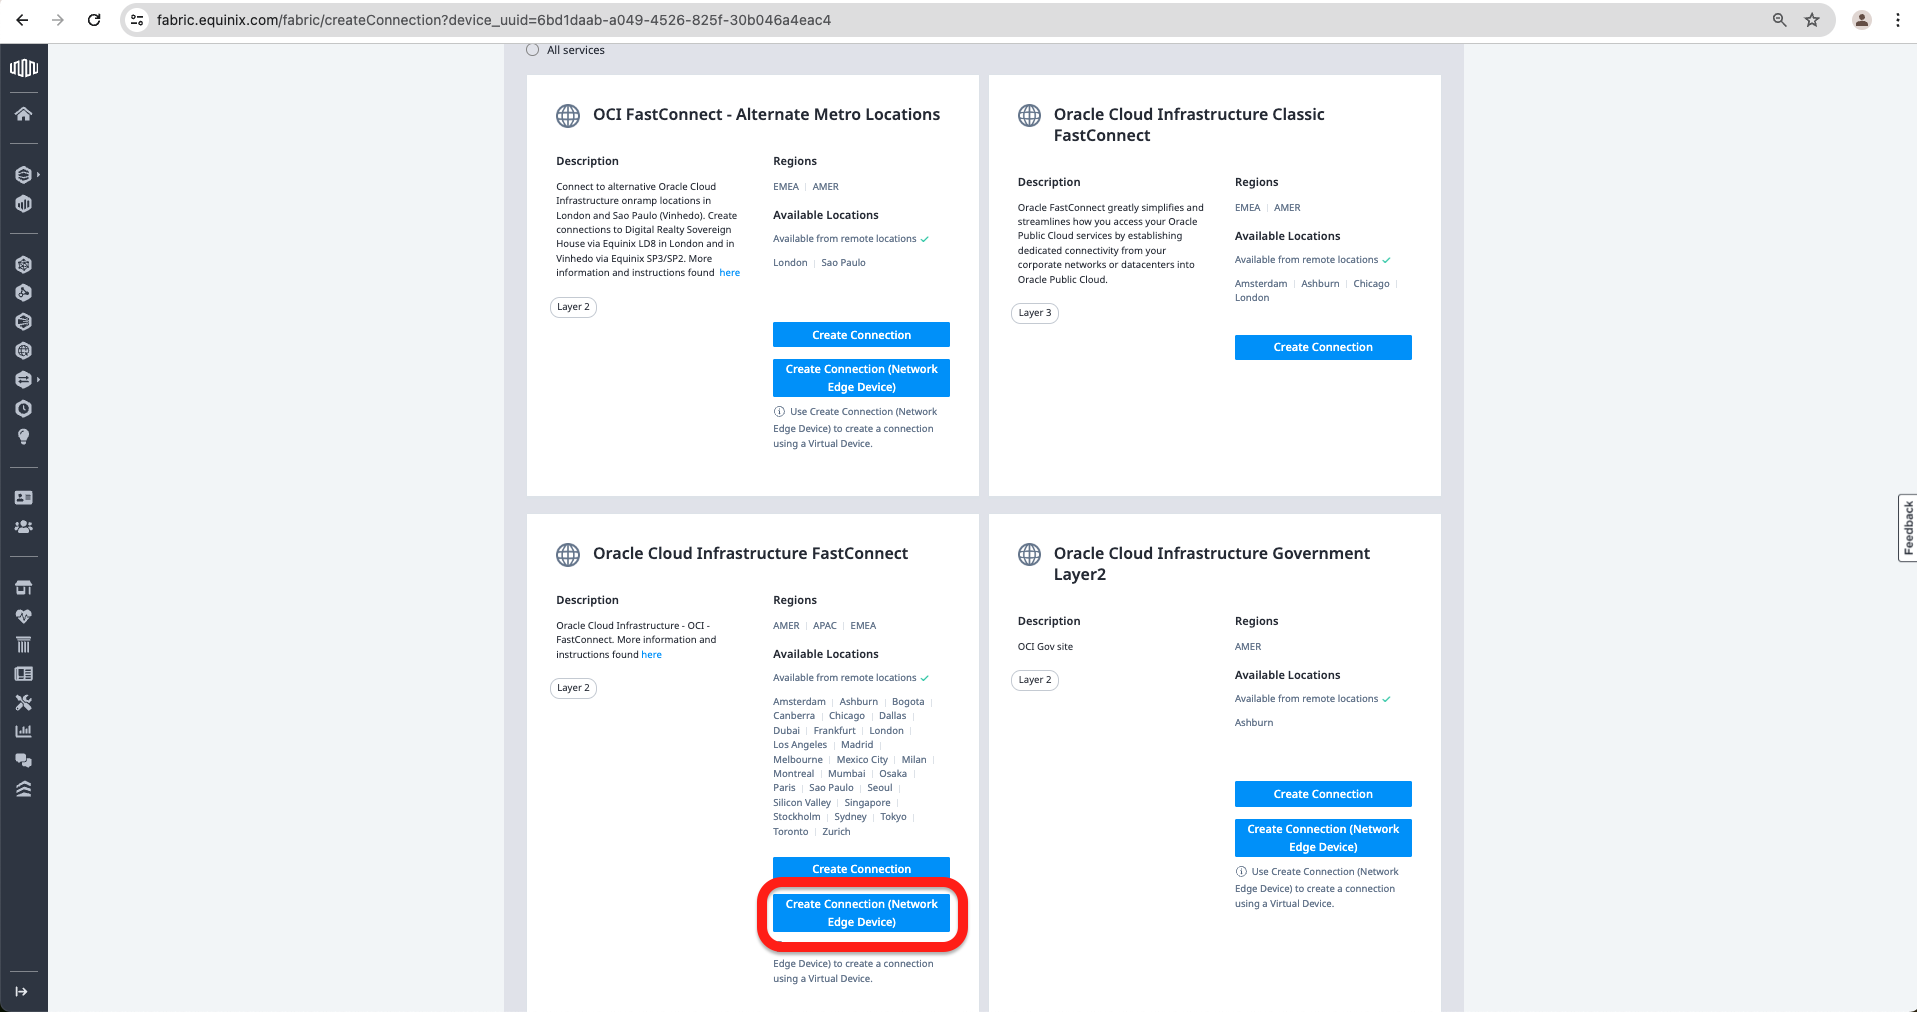
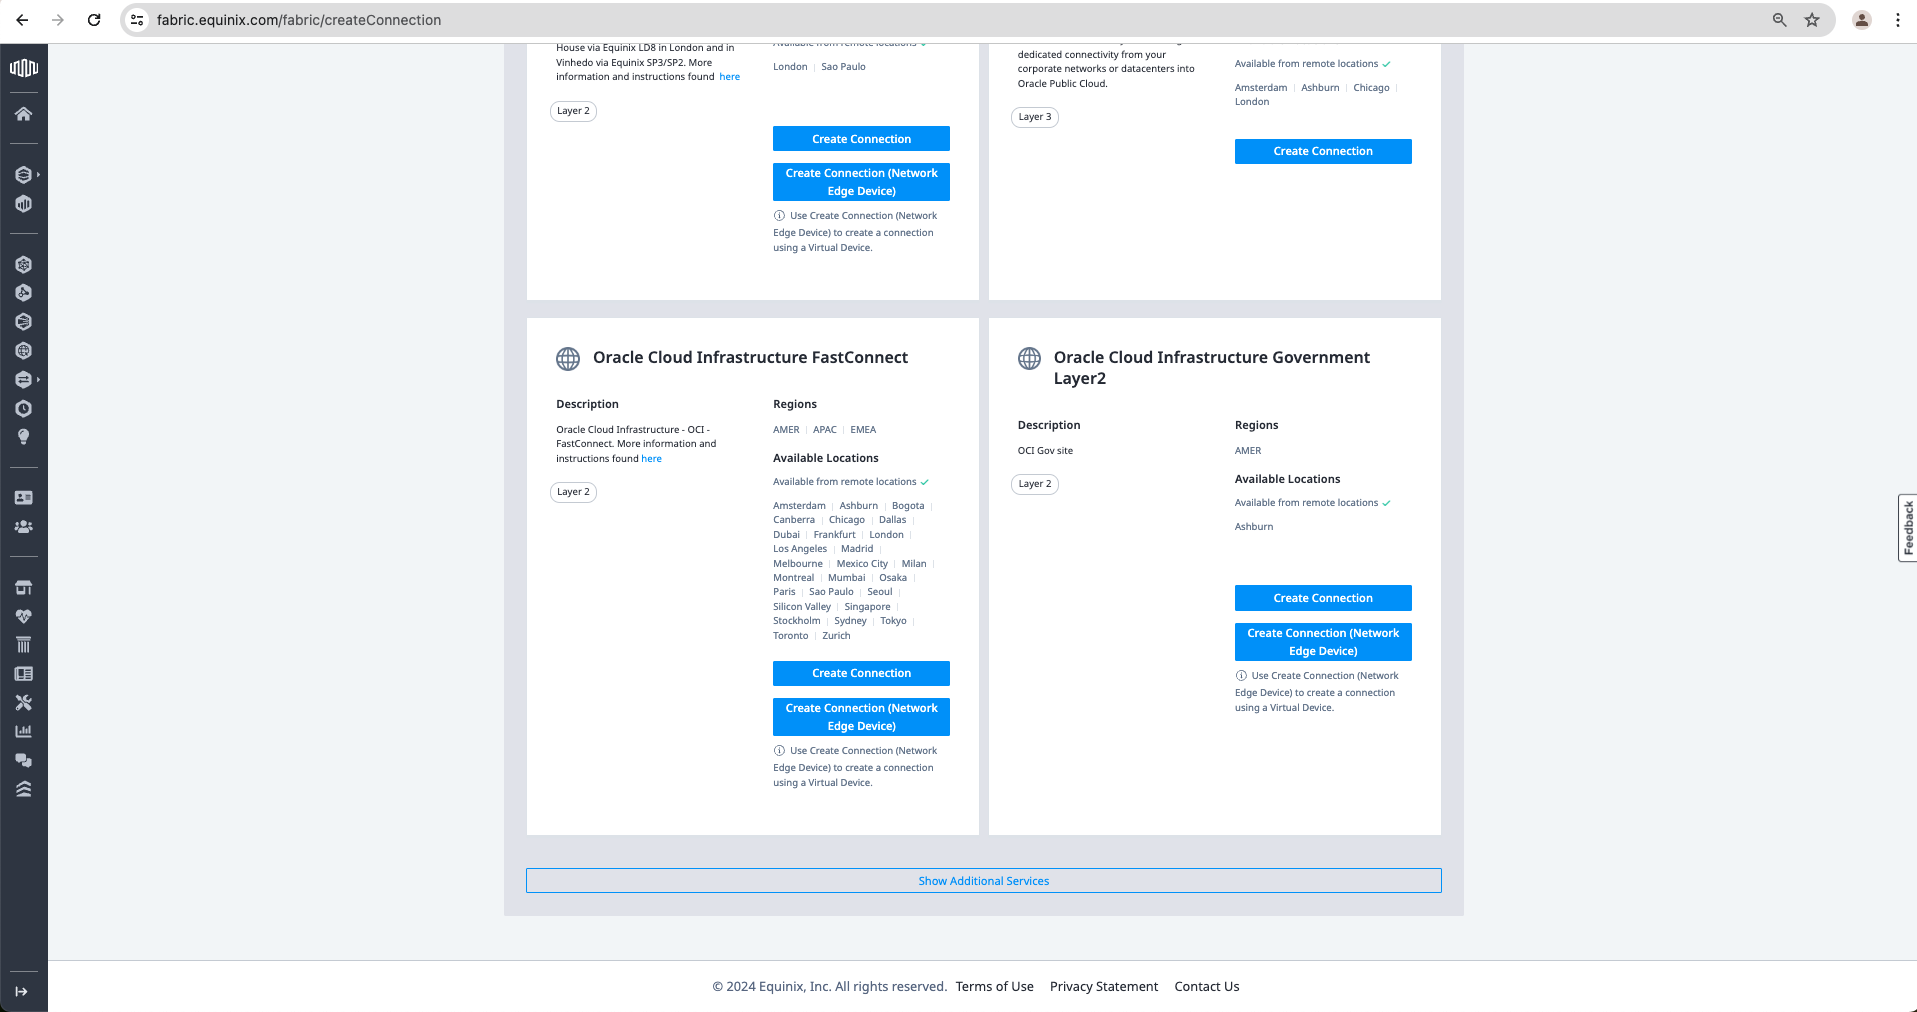
i. On the next page, select “A Service Provider” in the search box, search for Oracle, and click “Select Service”, scroll down and choose under “Oracle Cloud Infrastructure FastConnect” the “Create Connection(Network Edge Device)”
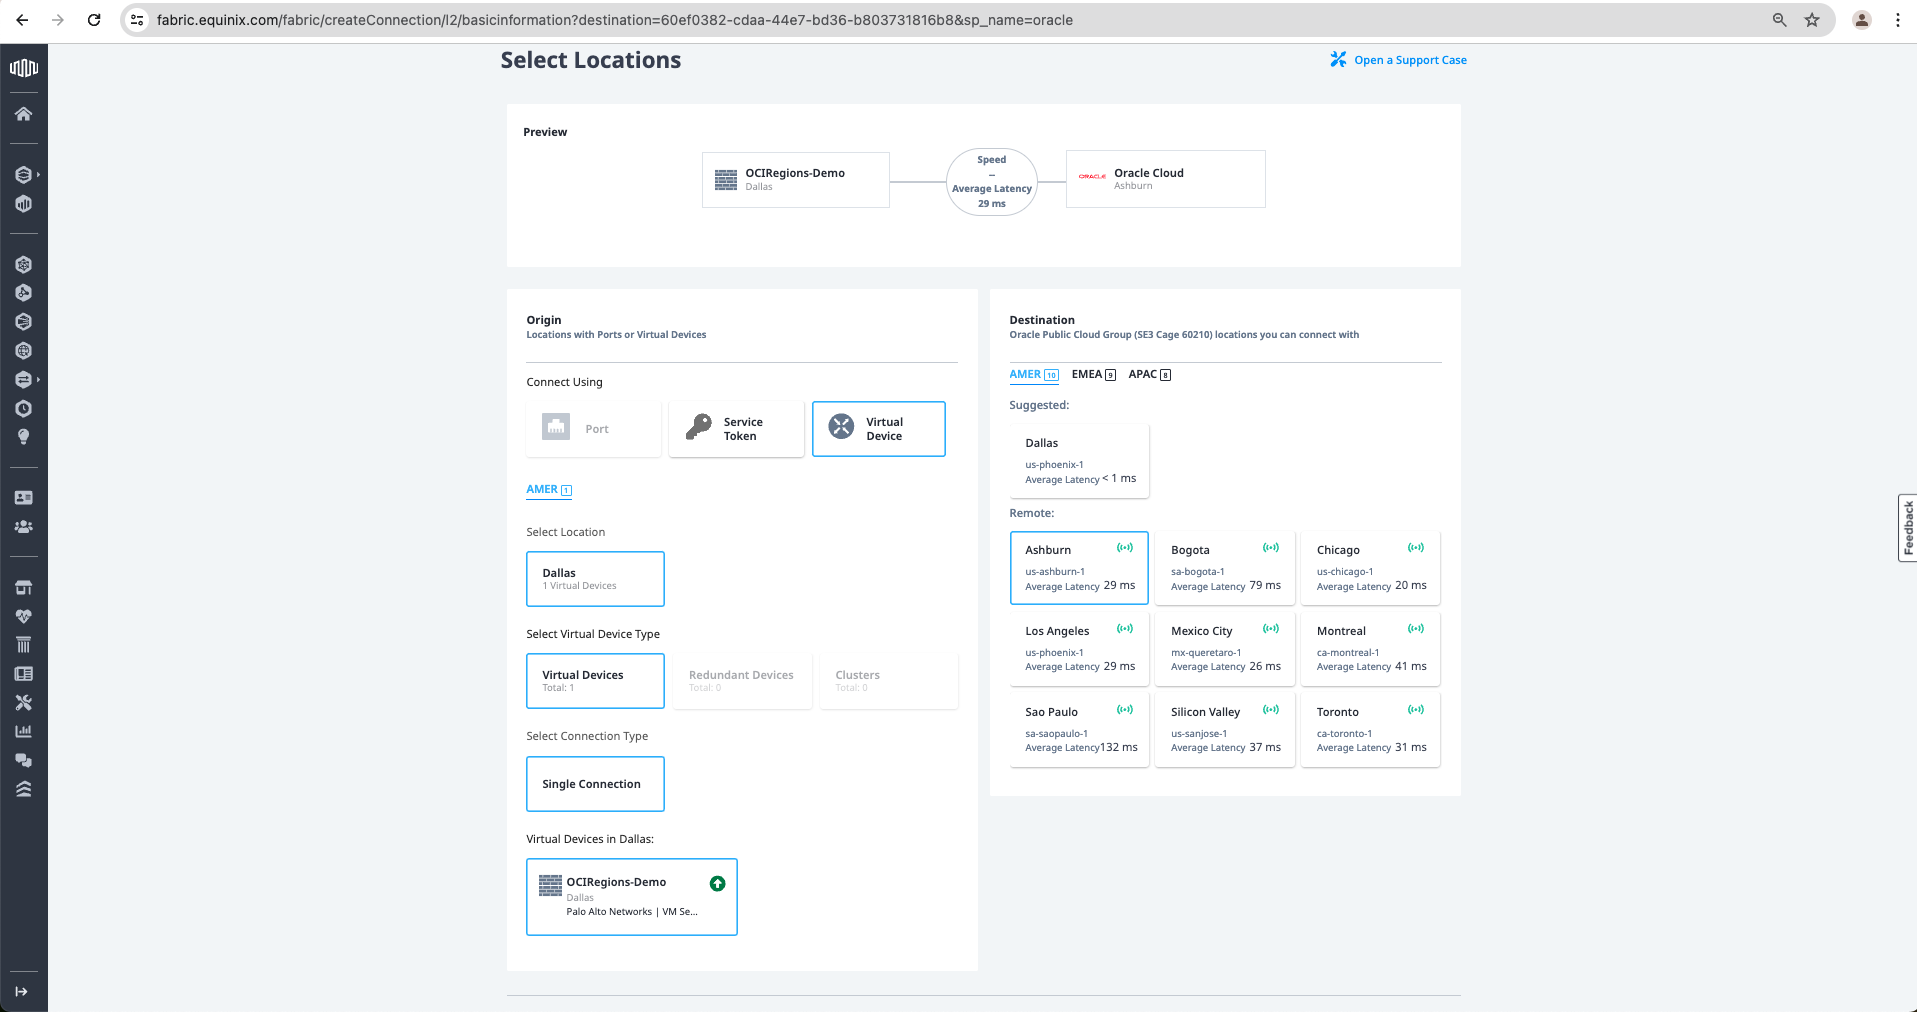
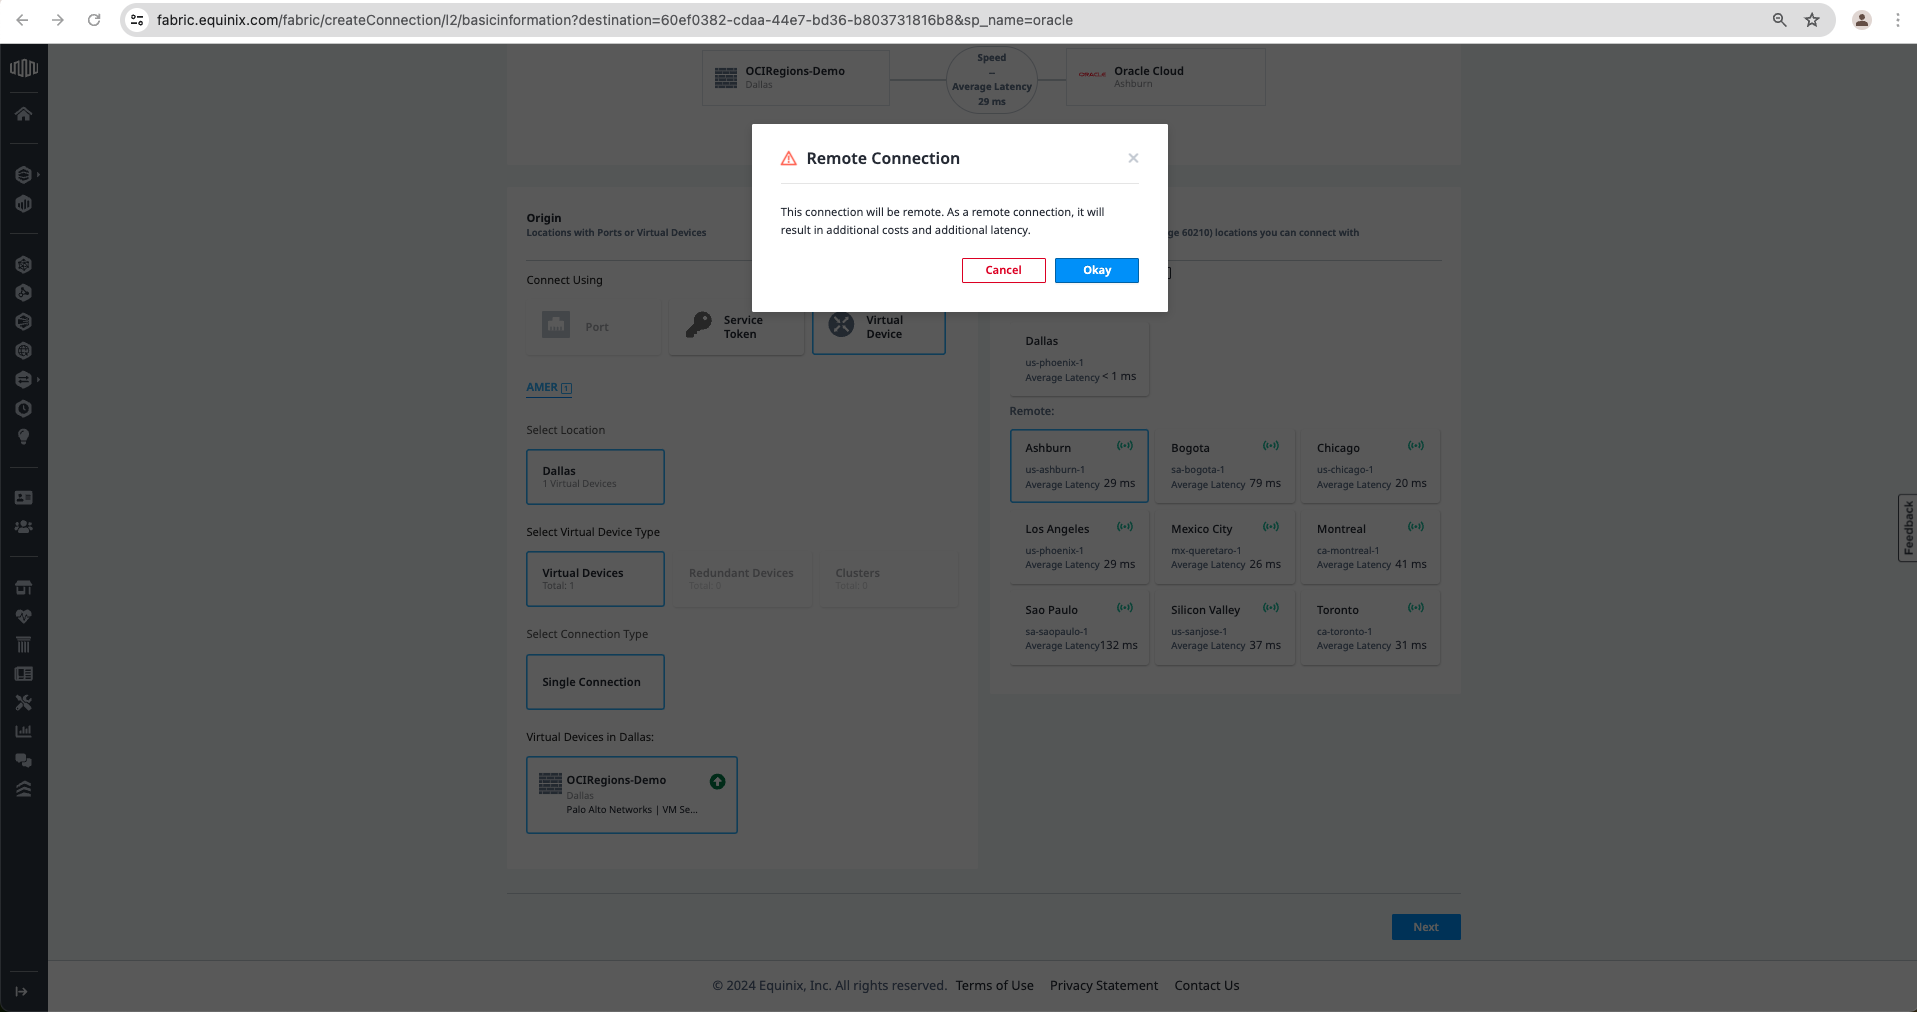
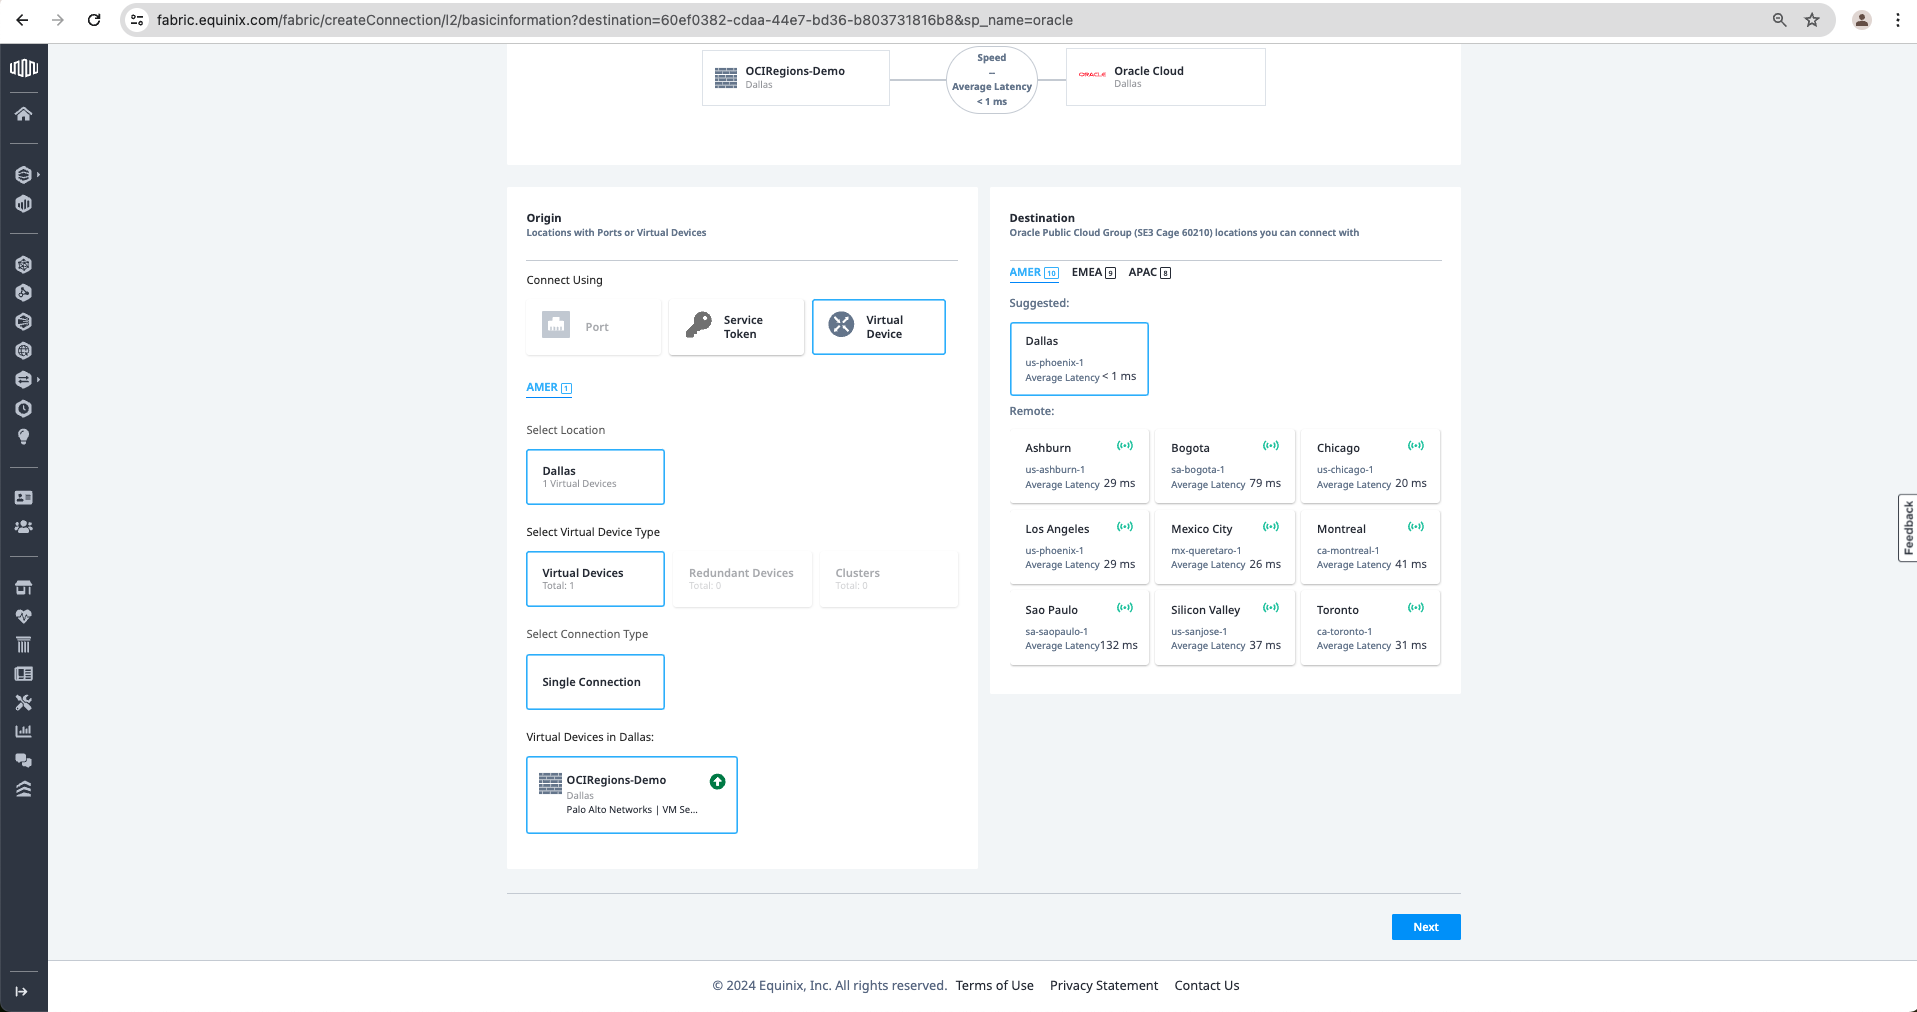
j. Now on the left, select Connect Using “Virtual Device”, Select Location “Dallas”, Select Virtual Device Type “Virtual Devices”, Select Connection Type “Single Connection” and Virtual Devices in Dallas “OCIRegions-Demo”. On the Right, Equinix has a suggestion as a “Dallas” location, and this can be used to connect to the OCI Phoenix region. Still, for the OCI Ashburn Region, we should select Ashburn under the Remote section. This time, I will use Remote Ashburn as a Destination. Click Next. It will warn that the connection will be a Remote connection; click Okay.
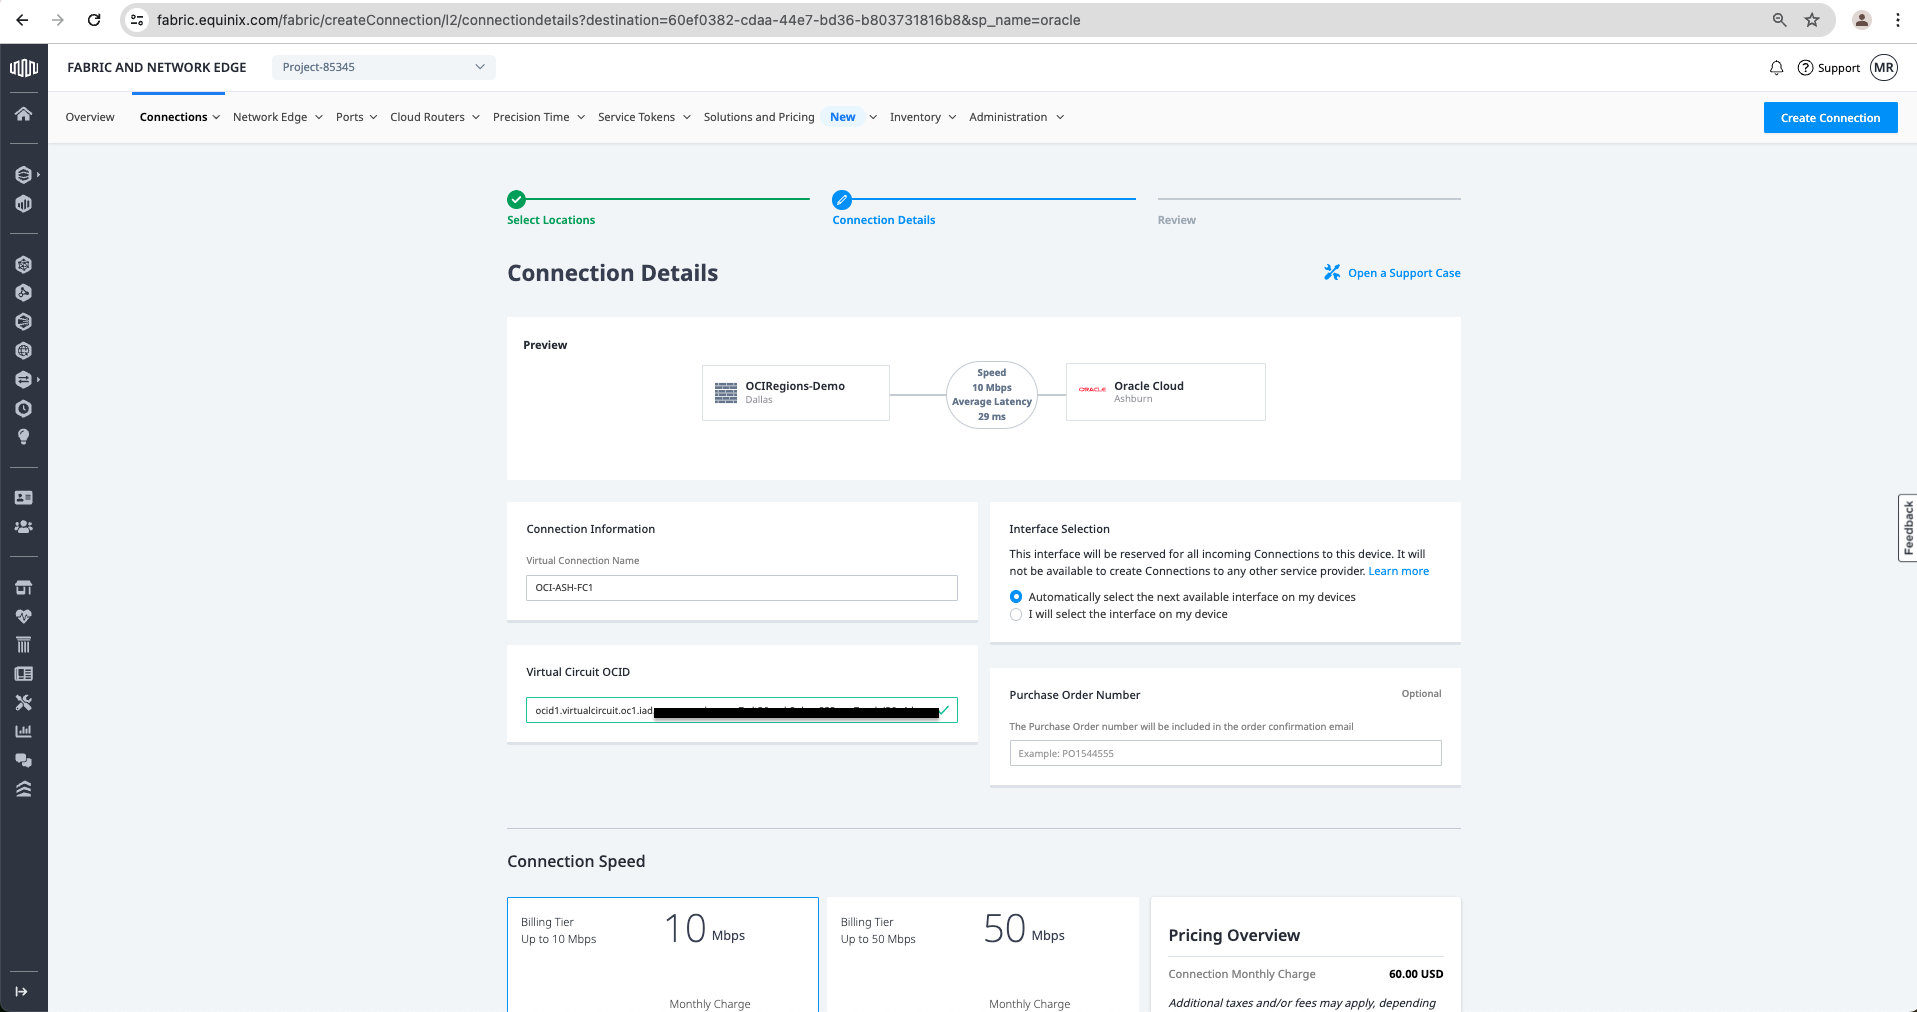
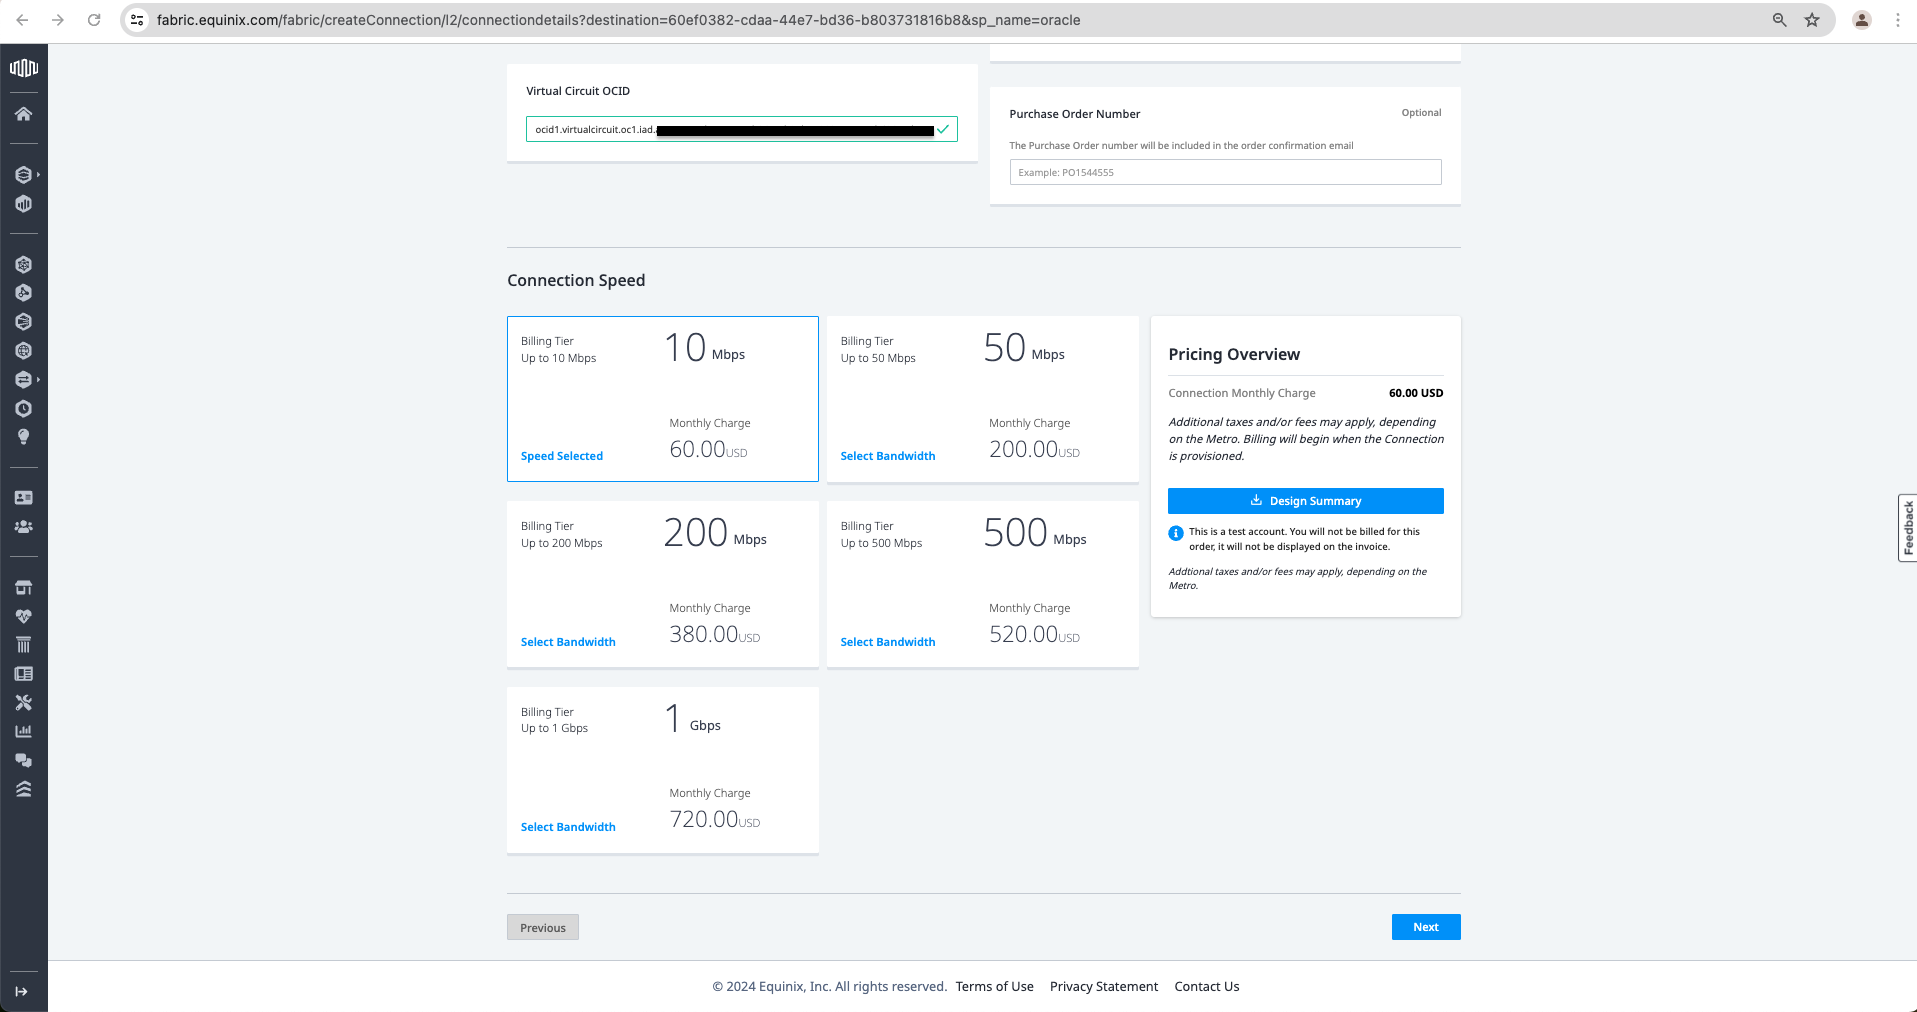
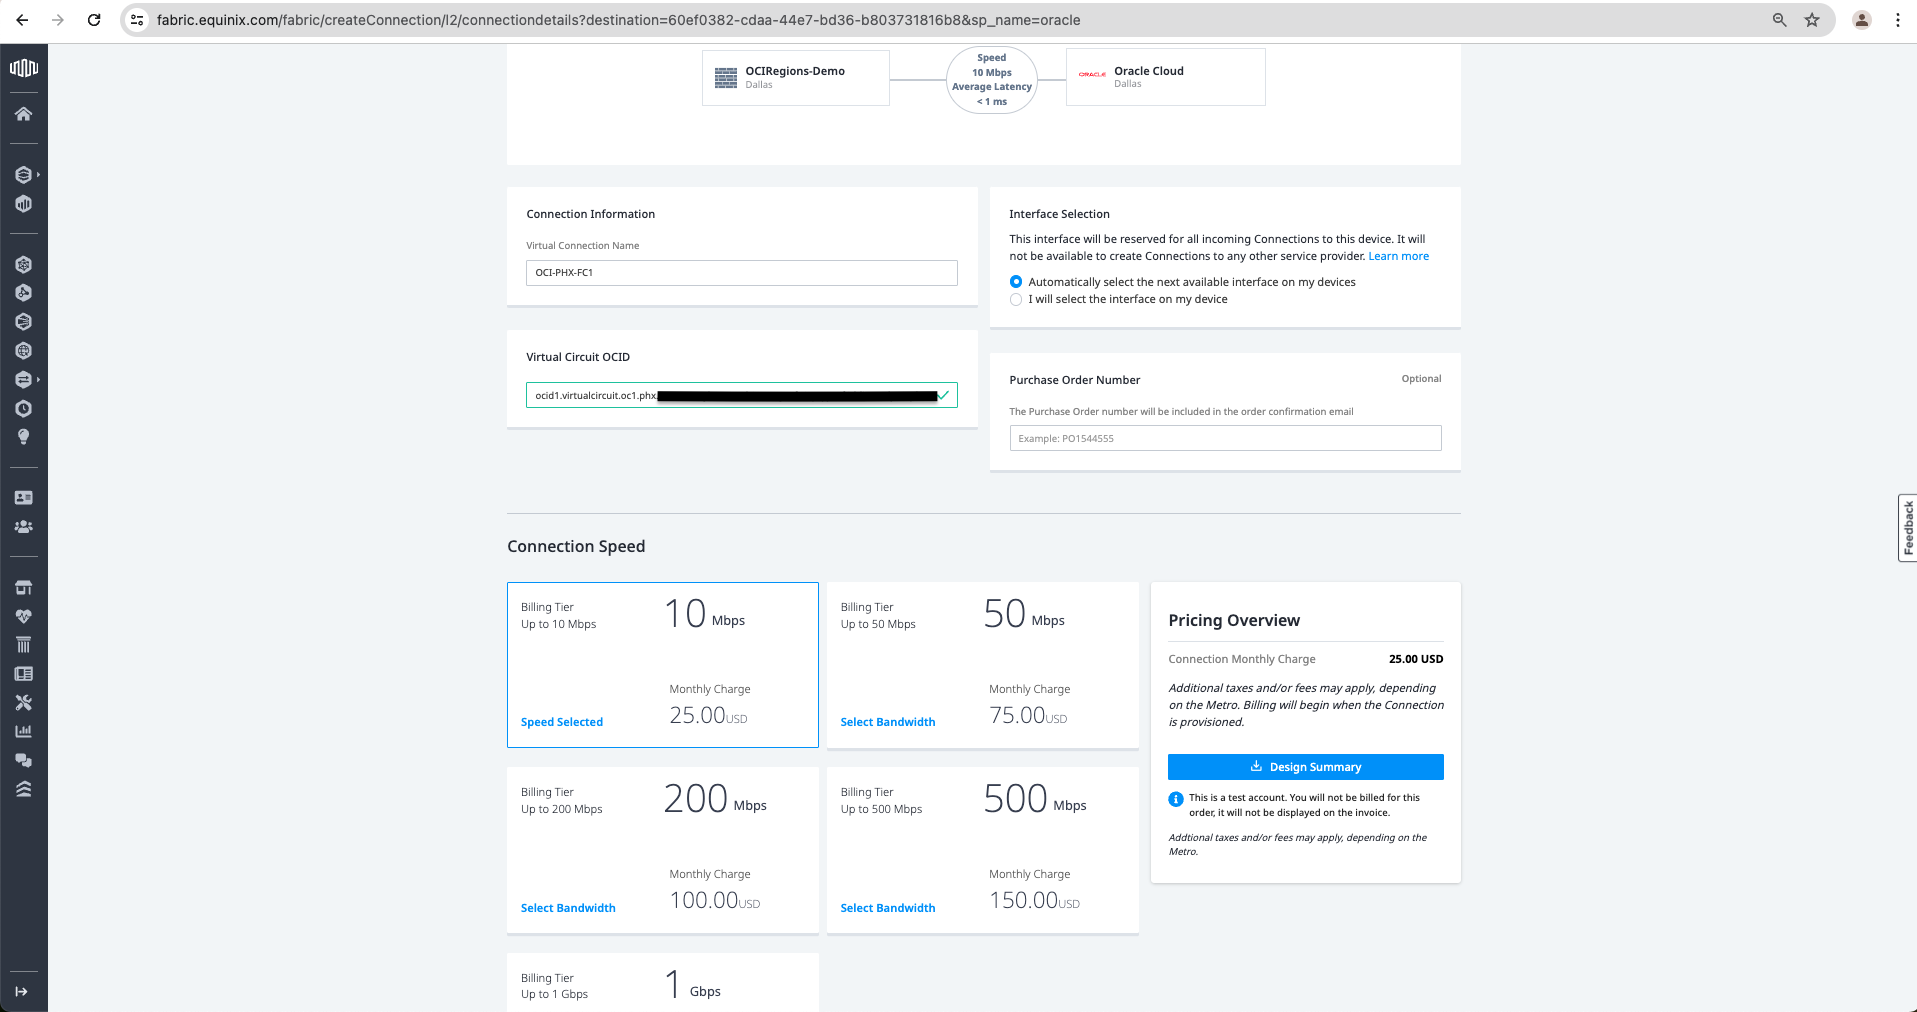
k. Give a Virtual Connection Name, add the Virtual Circuit OCID that can be taken from OCI Console under FastConnect in Ashburn Region, Select the required Speed and click Next.
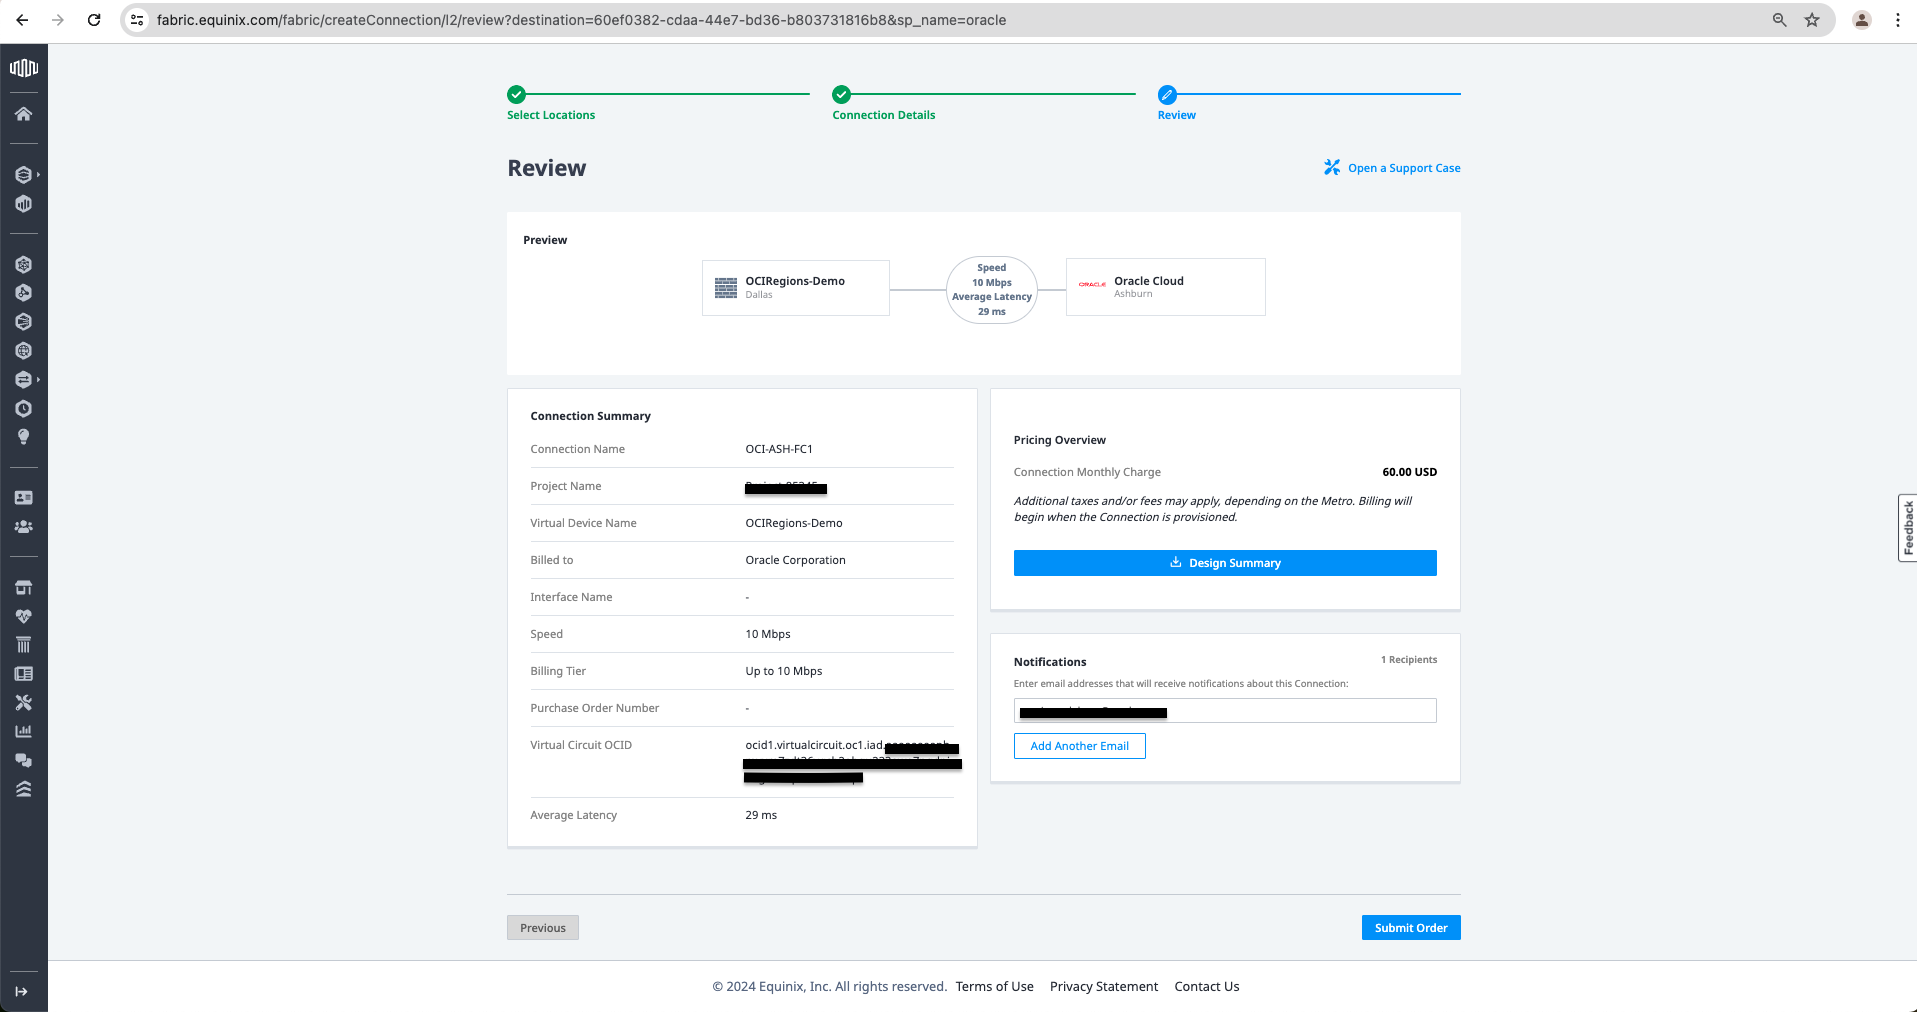
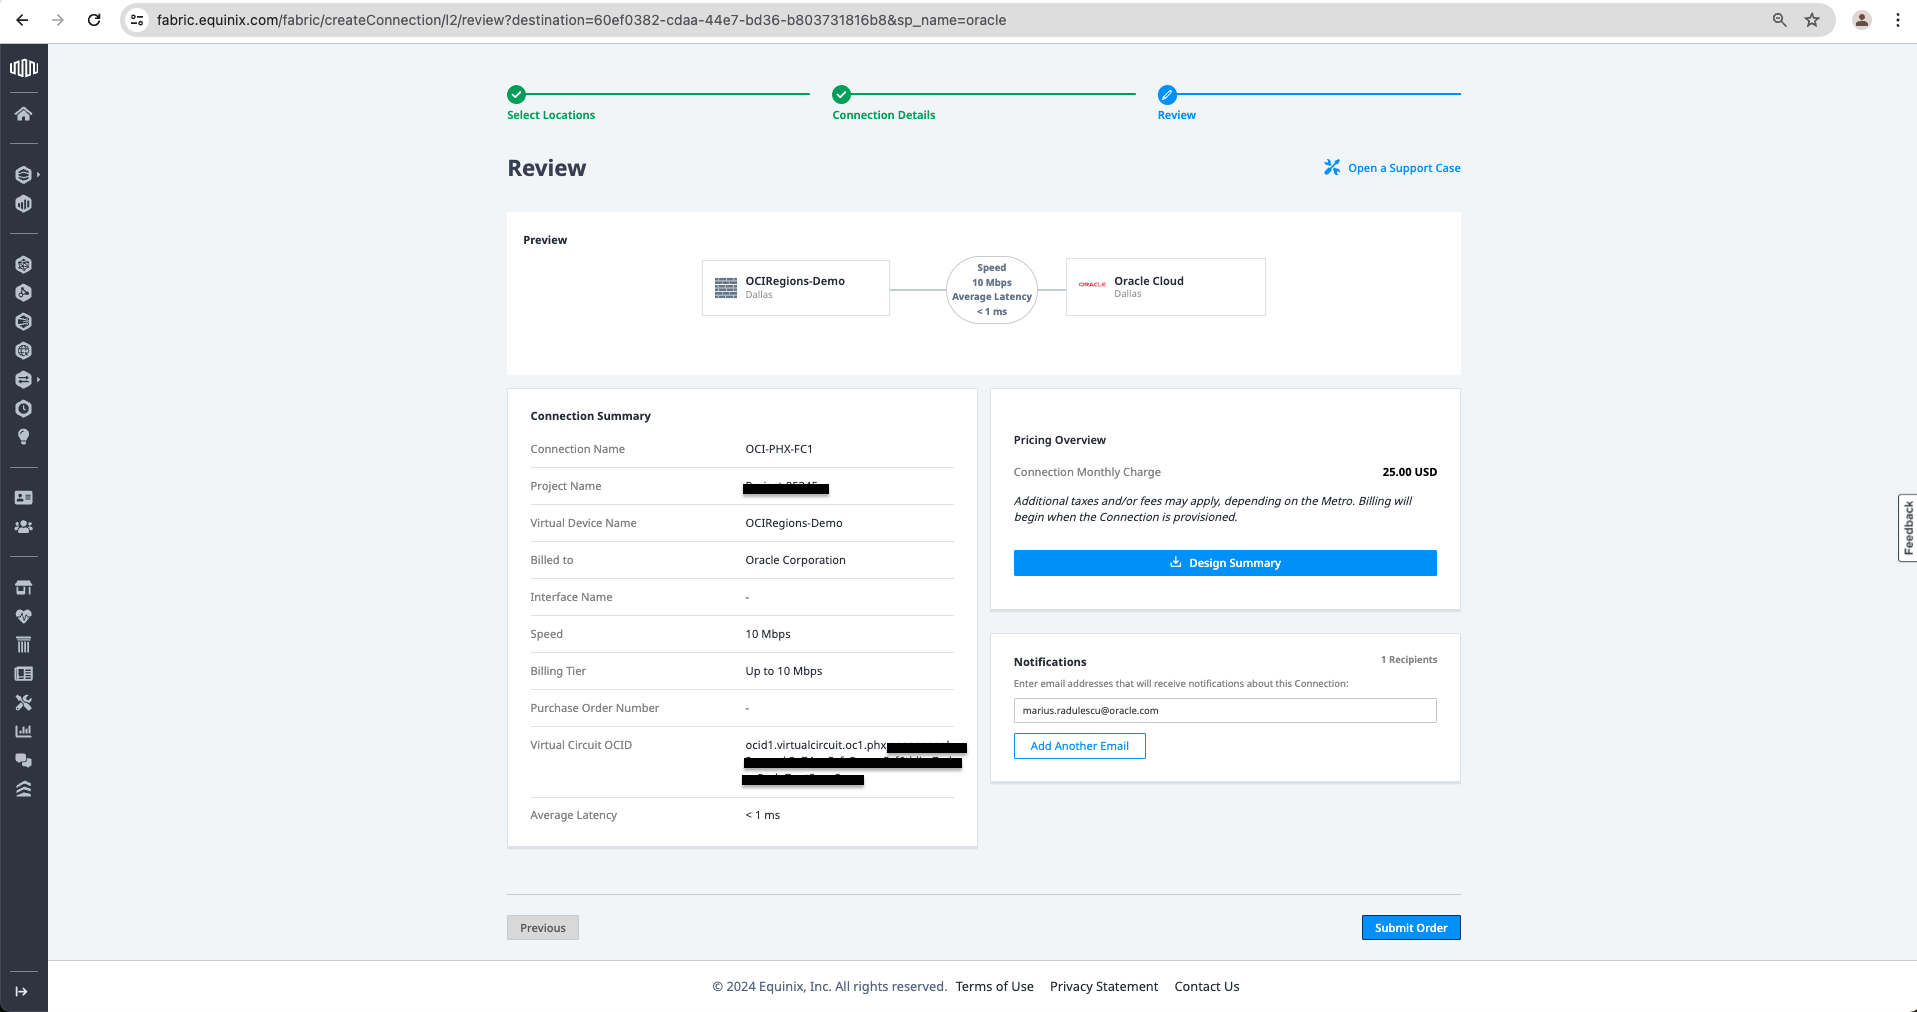
l. Review Order and click Submit Order.
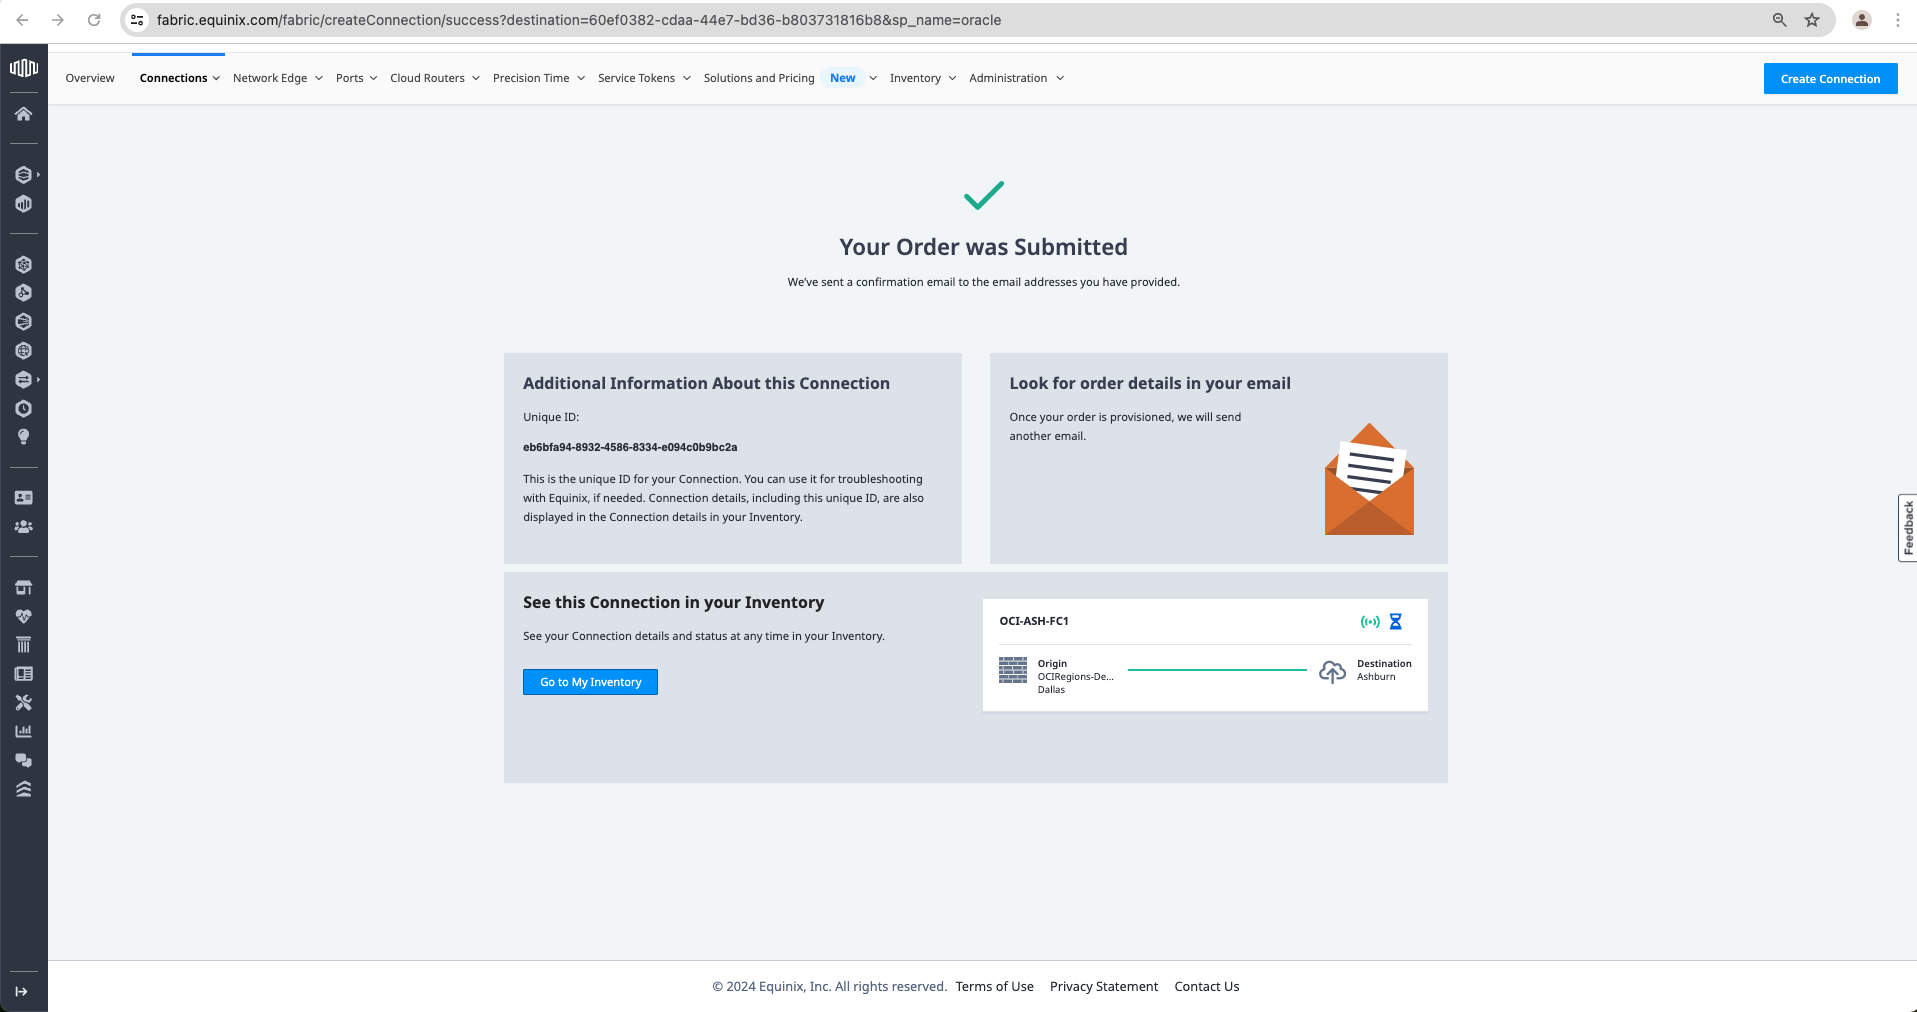
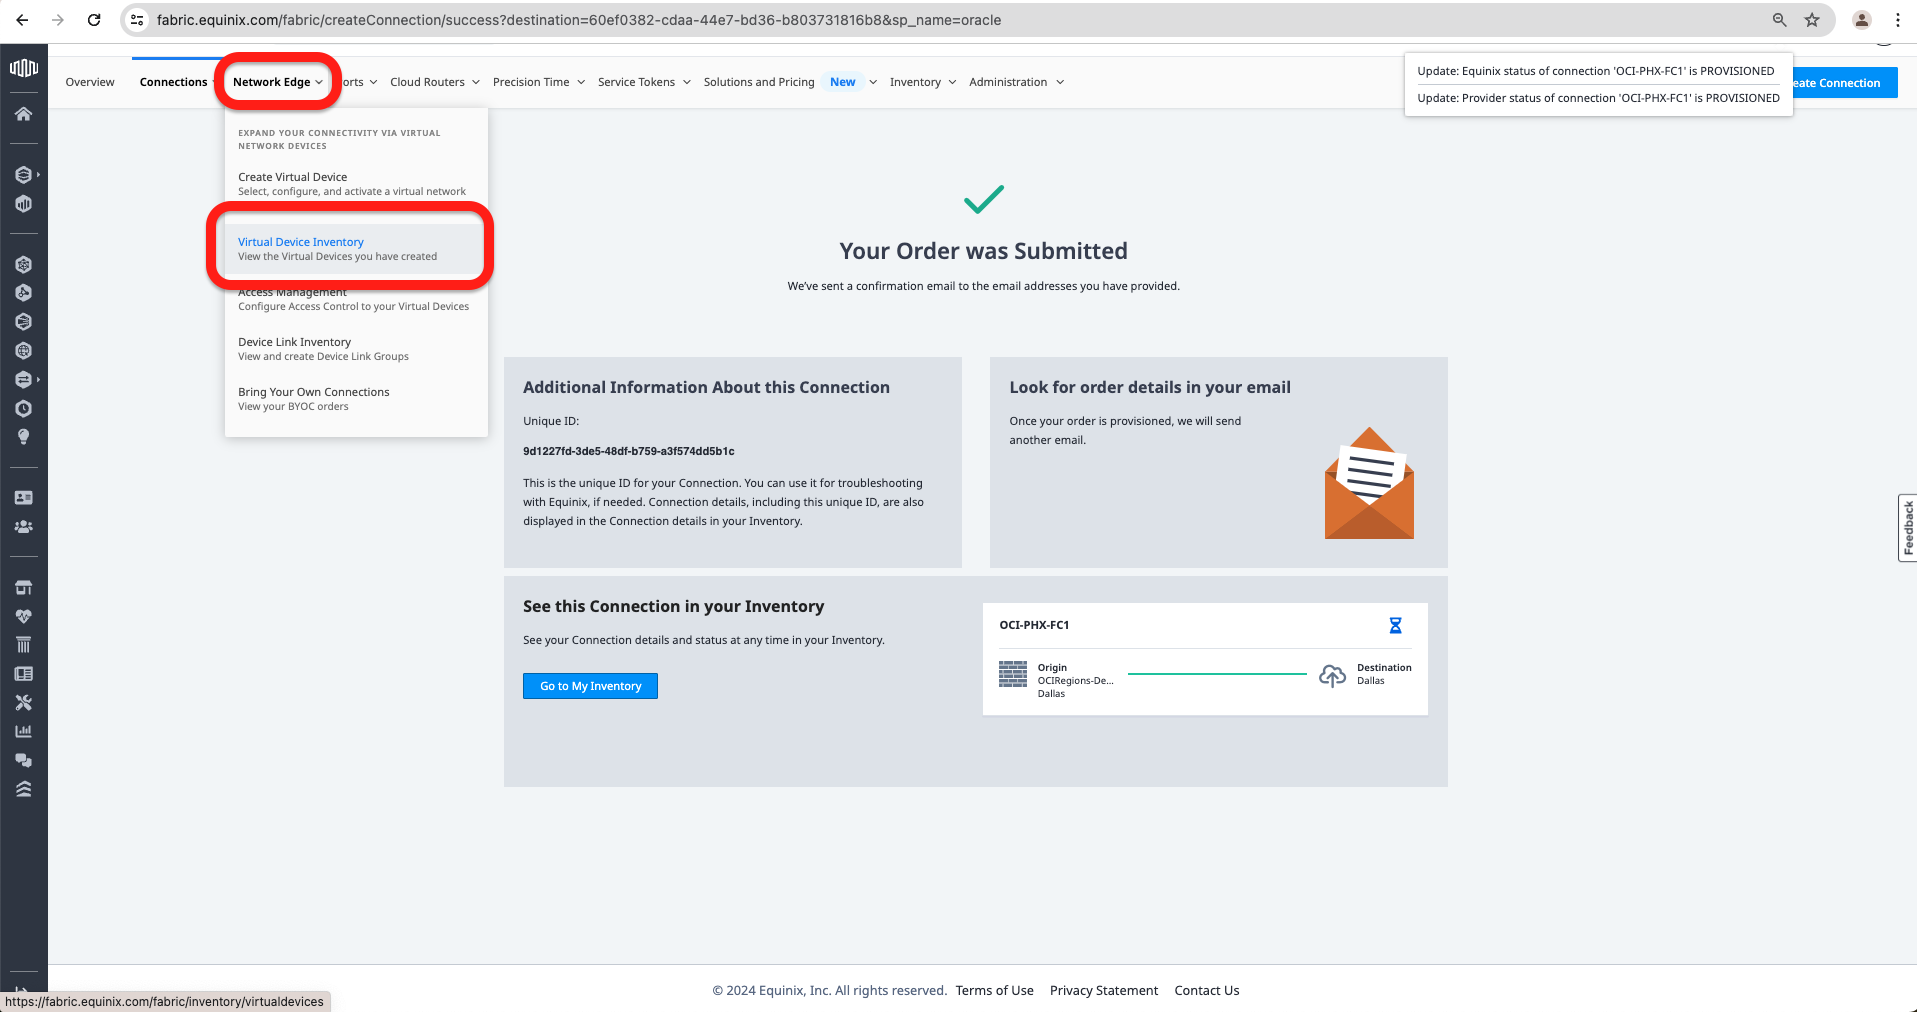
m. At this point, we will get the confirmation that the order has been submitted.
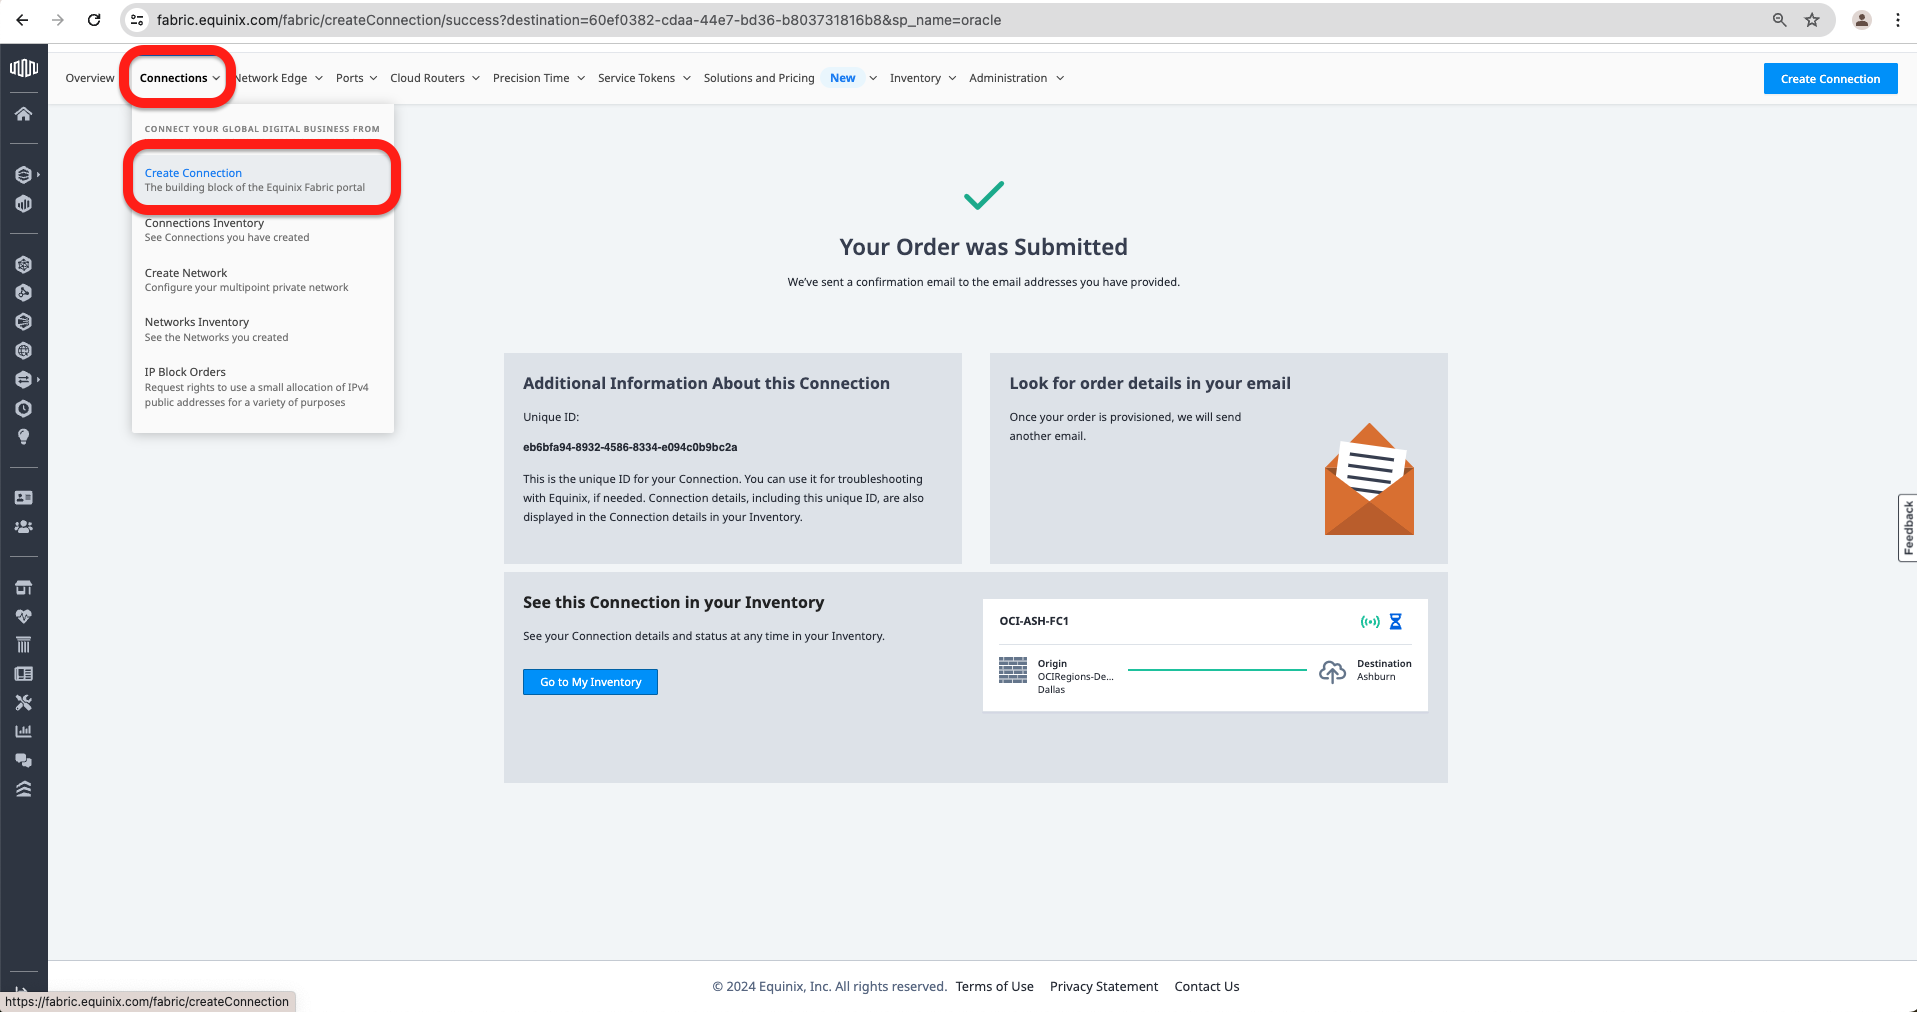
n. I will create the second connection to the OCI Phoenix region by going to the Connections Tab and clicking Create Connection. After that, I will repeat the steps from i. to l. using OCI Phoenix region OCID. Once the order is submitted, I will go to the Network Edge Tab and click on Virtual Device Inventory.

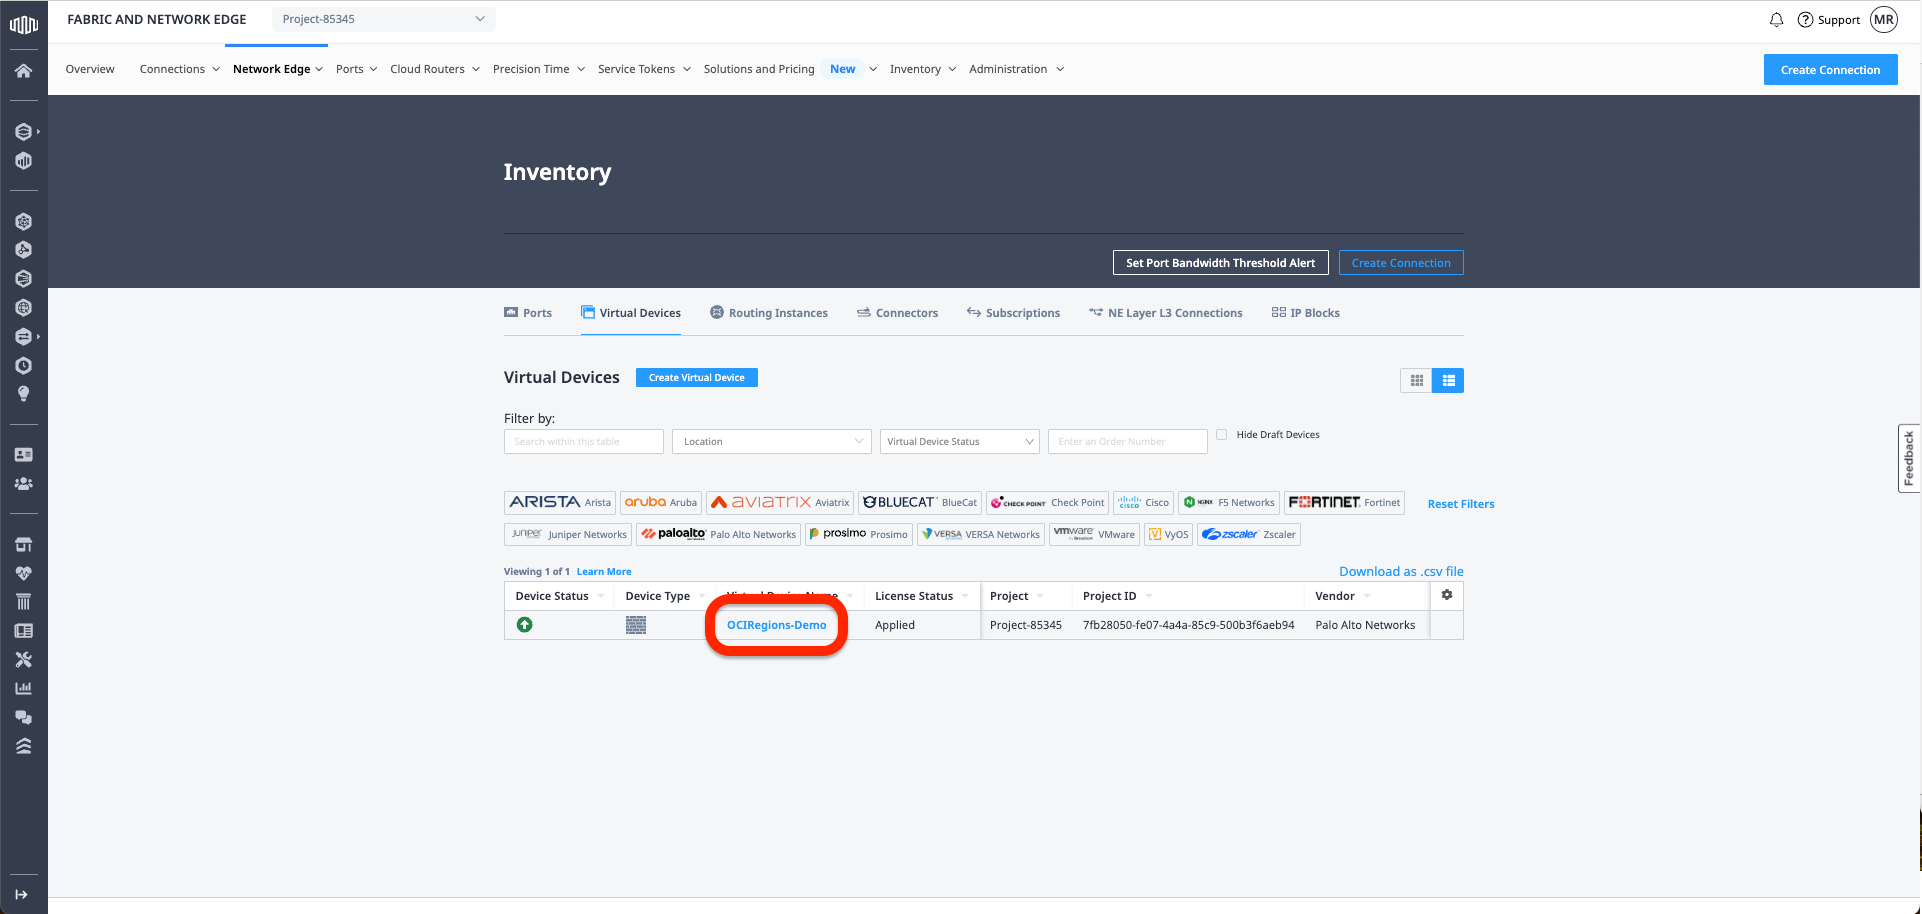
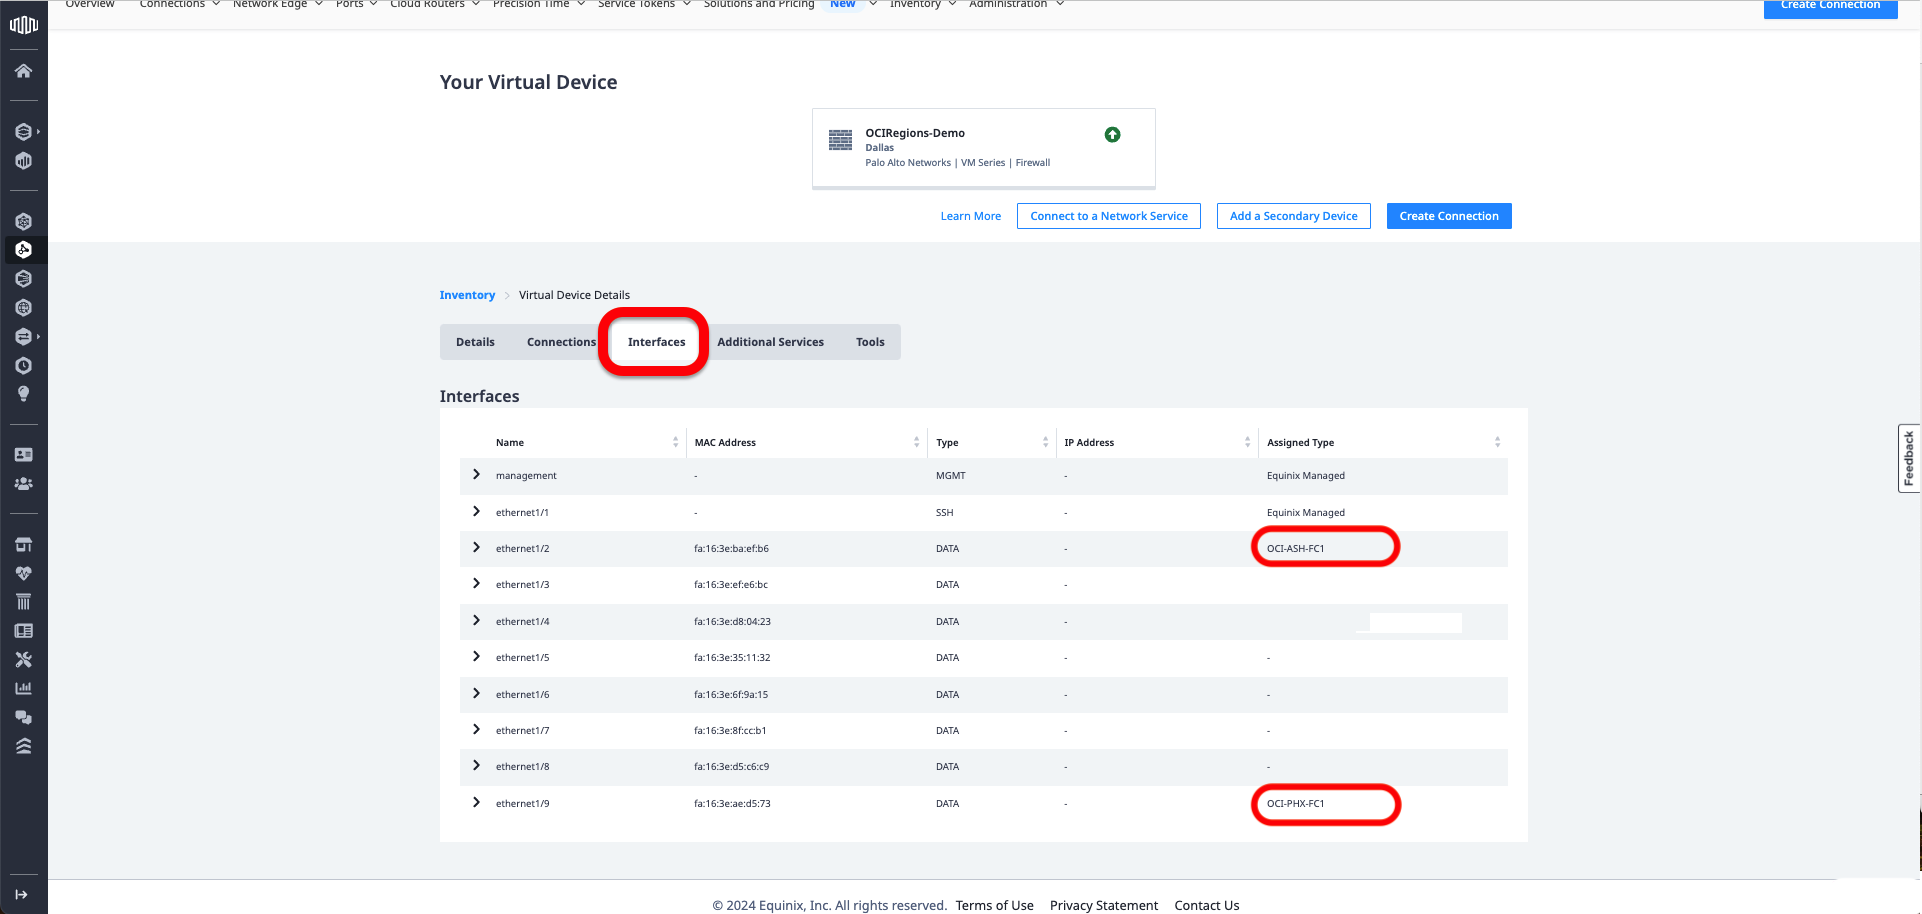
o. I will go to the Virtual device I created earlier.
p. I will verify the Interfaces Tab to see if the interfaces for OCI-PHX-FC1 and OCI-ASH-FC1 are there.
This concludes our configuration for Equinix Infrastructure. The next blog in the series can be found here.
I hope you enjoyed this blog. Thank you for reading!