Introduction
There are two interesting new features just released in Oracle Process Automation, Print Form action and Upload Form activity. With the Print Form action, OPA customers can easily create a physical paper trail of forms in PDF for record keeping. The Upload Form activity allows customers to automatically upload a form as an image or PDF file to Oracle HCM Document of Records. This blog provides an example of generating paper trails in OPA. The example only uses the Print Form action. The Upload Form activity works very similarly to the Print Form action.
A common OPA use case is automating multi-level approval processes that are frequently required in business processes. The approval details such as who approved or rejected at what time is captured digitally in OPA. However, many customers also require phisical documents of such information for various purposes. This blog will use a simple employee transfer use case to demonstrate the usage of the Print Form action.
Business Scenario Description
A business has implemented an OPA process to manage employee transfer. In this process, an employee has been transfered to a different location with a new manager. The process has been started and has been approved by two supervisors. Now, they need a form in this OPA process for a final review. The final review form needs to show the changes made to the employee and approval details. The reviewer should be able to print the form in PDF and save it for record keeping. A sample of the final review form is shown below.
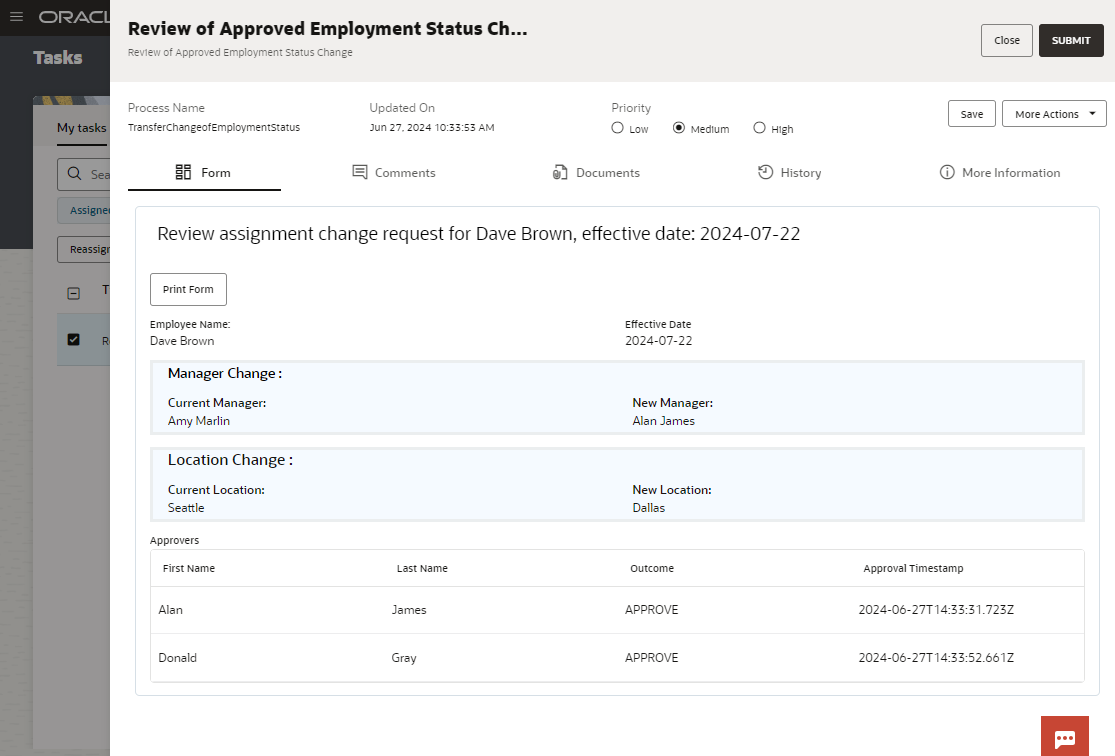
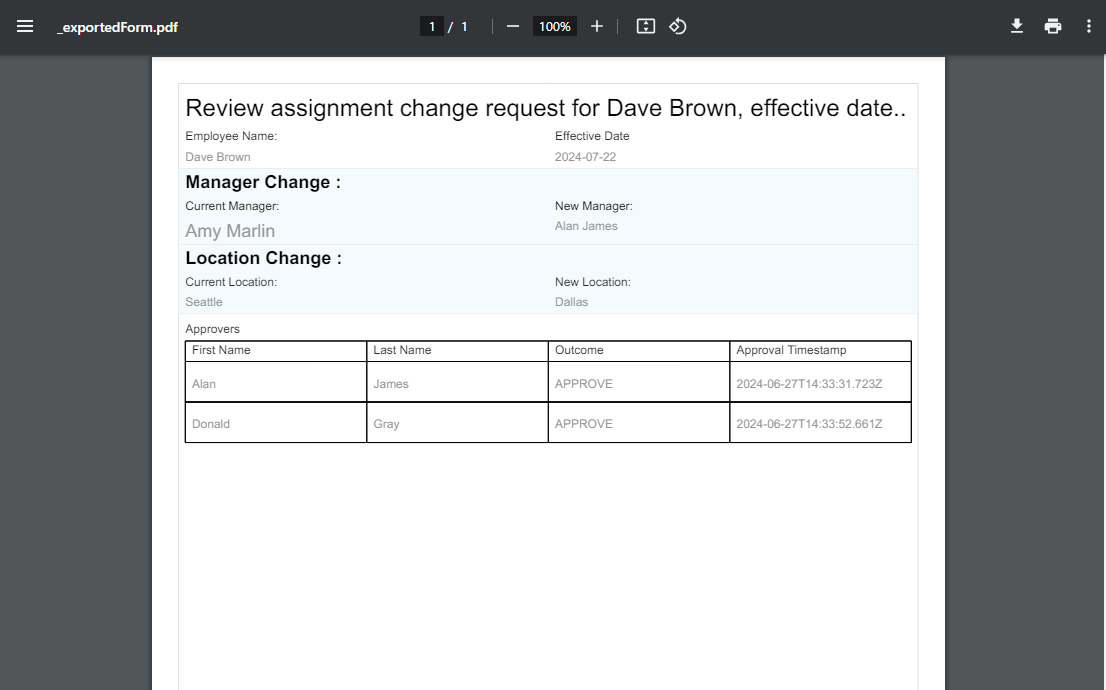
The reviewer can click on the Print Form button to export the form to a PDF as shown below.
Implementation Details
This section describes imlementation details step by step.
Create Data Types
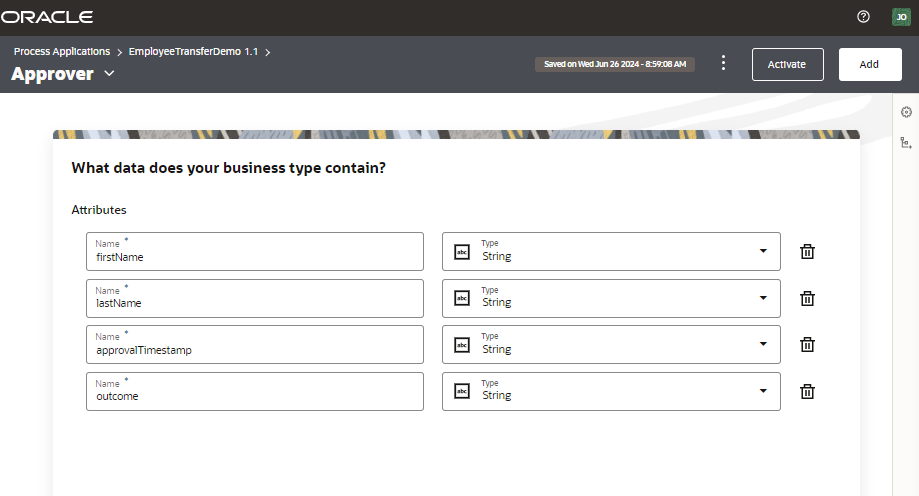
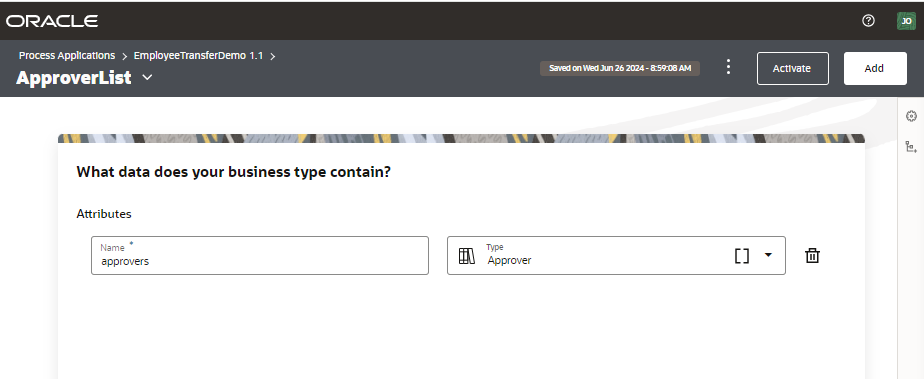
Two data types are needed to capture approval information. The Approver type contains individual approval information and the ApproverList type contains a list of all approvers.
Capture Approval Information
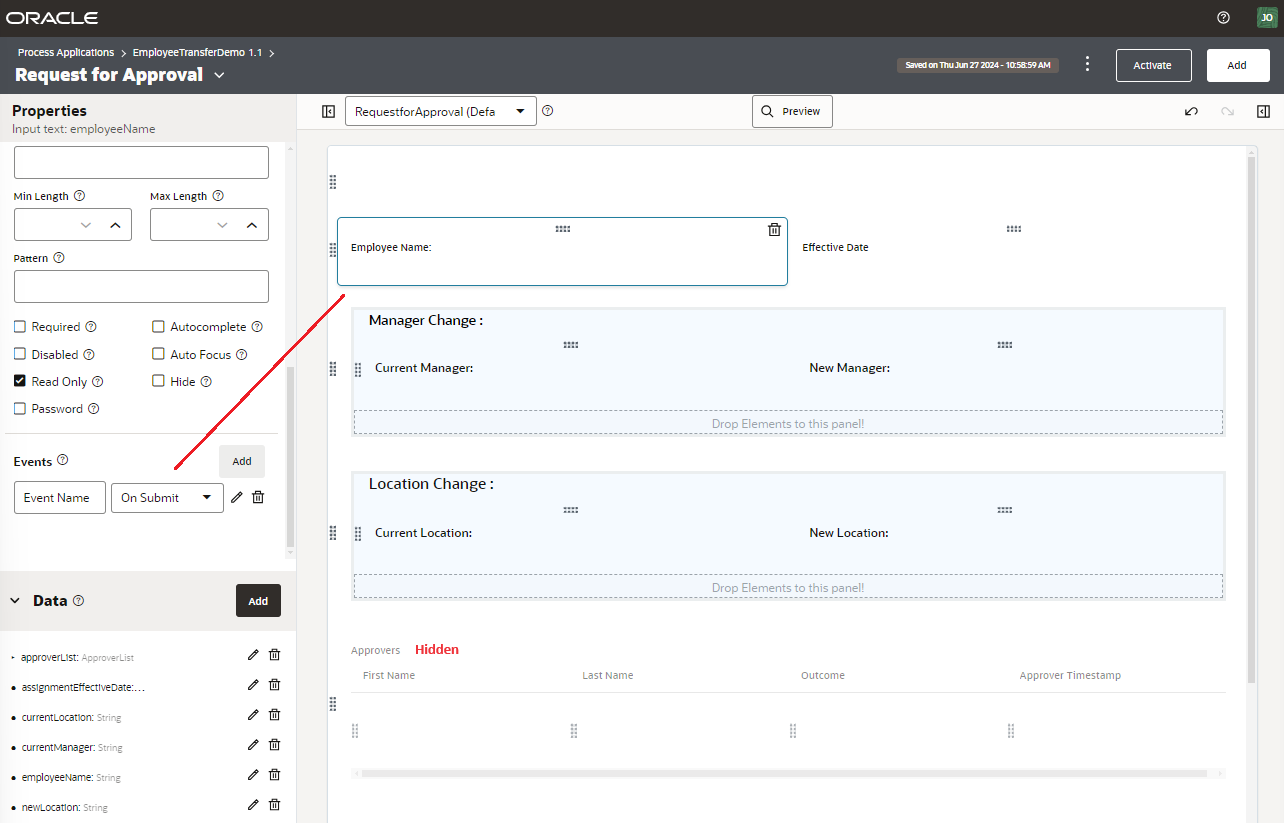
One way to capture the approval information is to use the OnSubmit event on any of the controls on the form used for requesting for approval. The following image shows a request for approval form. Note the final review form shown above is a presentation of the request for approval form. In the request for approval form, the approval table is hidden and there is no Print Form button. For our example, we will use the OnSubmit event on the Employee Name control. The Approvers table is bound to the ApproverList data type.
Inside the OnSubmit Event
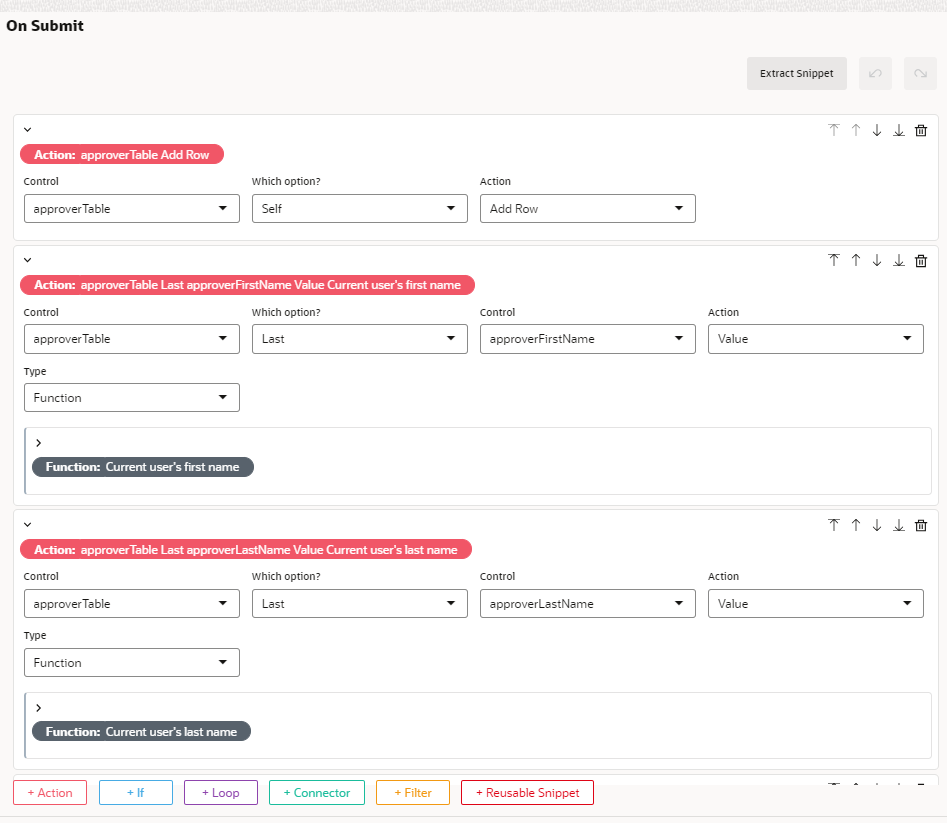
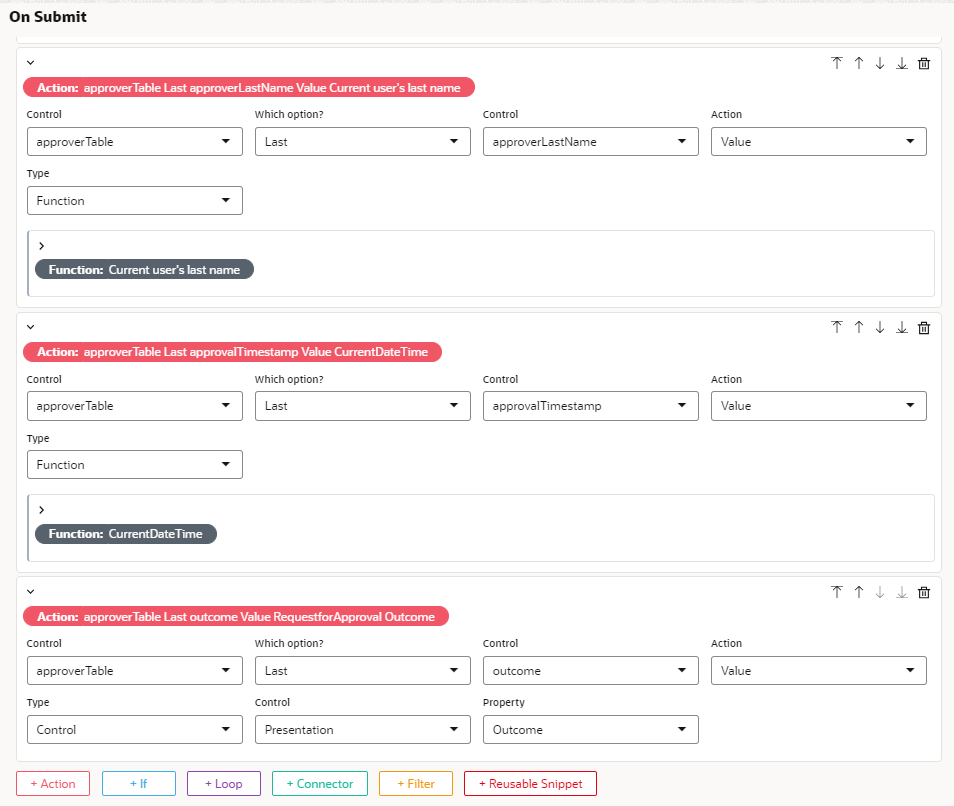
In the OnSubmit event, we will first add a row to the Approvers table. Then, we will configure an appropriate value for each column in the last row of the table.
Configure Output Data Mapping
Once the all approvals are completed, we will need to capture the form information including the approver list by mapping them to various process variables.

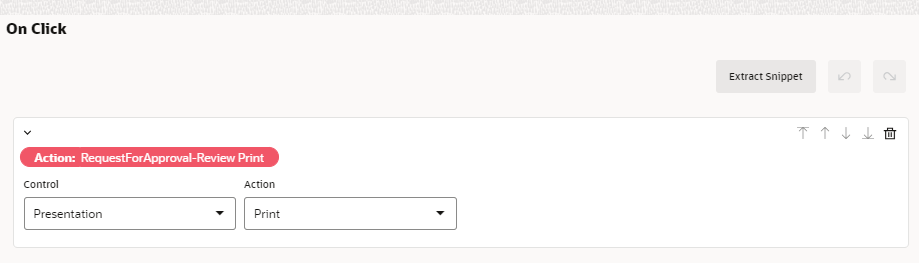
Set Up Print Form Button in the Review Form
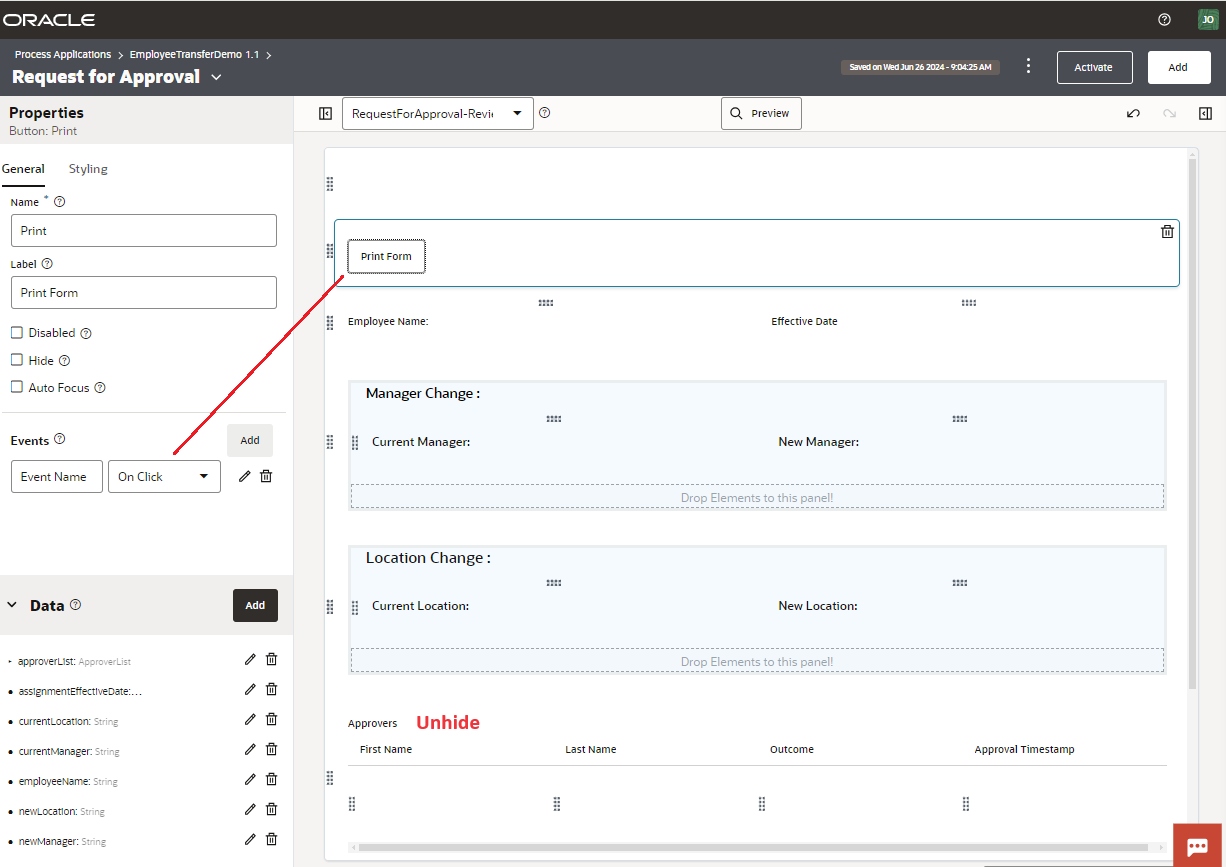
In our example, the final review form is a presentation of the request for approval form. In the final review form, the Approvers table is visible. A Print Form button is also added. Configuring the Print Form button to print the form is straight forward as shown below.
This completes the implementation of printing a final review form with all approval information details. One final note, input data mapping needs to too be completed on the human task where the final review form is used.