Introduction
Oracle Fusion Data Intelligence platform is the next generation of Oracle Fusion Analytics Warehouse built for Oracle Fusion Cloud Applications, bringing together business data, ready-to-use analytics, and prebuilt AI and machine learning (ML) models to deliver deeper insights and accelerate the decision-making process into actionable results.
Oracle Fusion Analytics provides the following ways to extend with additional data sources.
1. Descriptive flexfield extensions in Oracle Cloud Applications are automatically extend to the Oracle Fusion Analytics data model.
2. Load external data into the same data model as your Oracle Cloud Applications data using Fusion Analytics’ data augmentation connectors or any data integration tool of your choice. Use the Fusion Analytics’ extension framework to customize the semantic model.
3. Connect to external data sources via native connectors or to data files leveraging the self-service capabilities of the underlying Oracle Analytics Cloud platform.
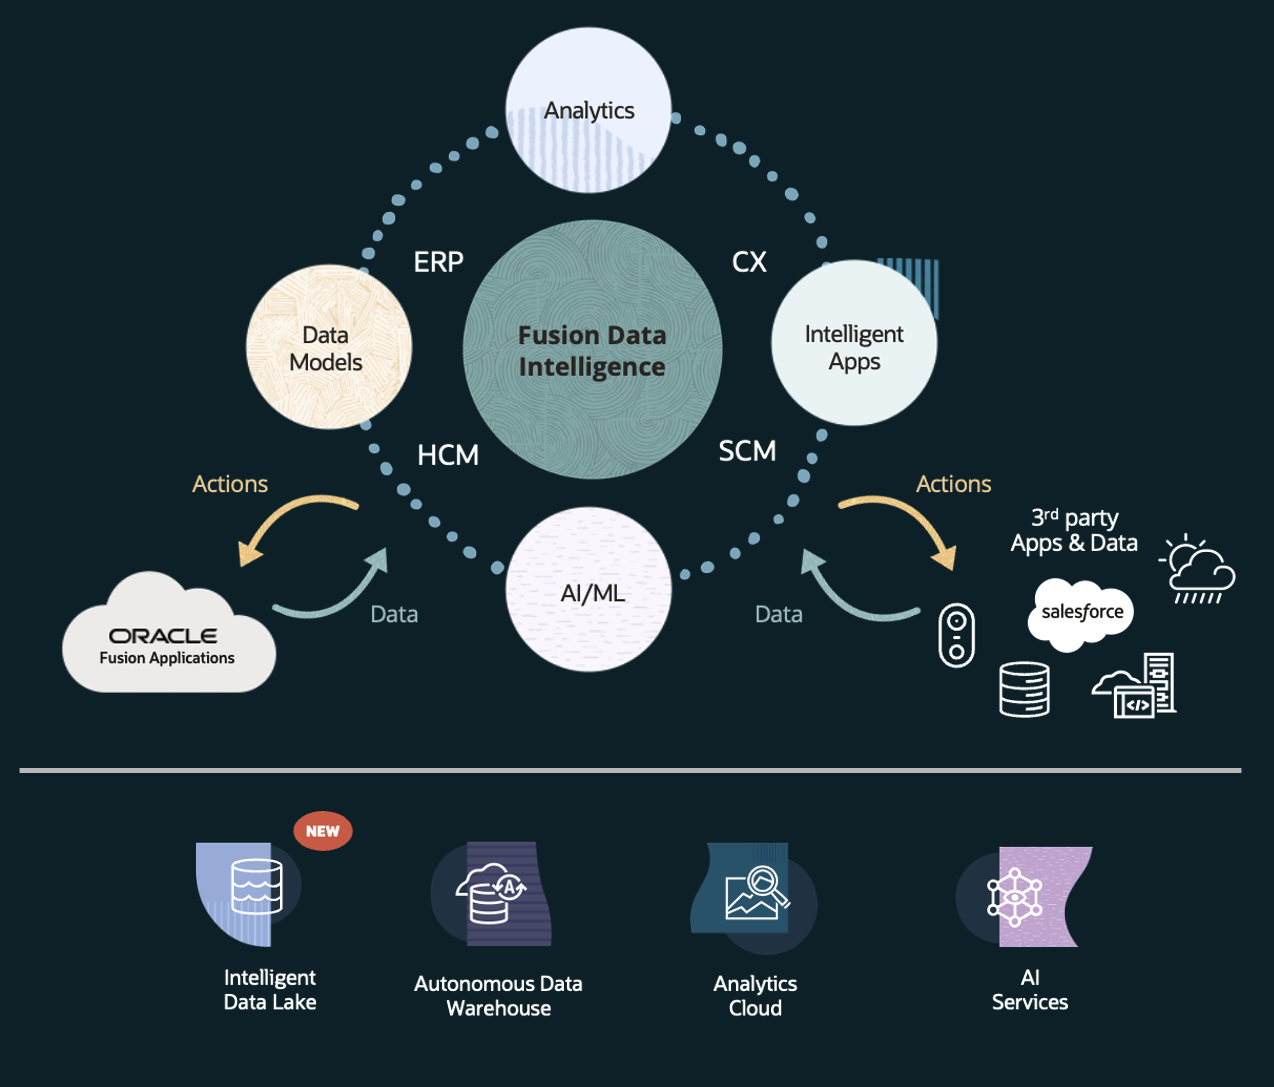
Leveraging the Extensibility Platform, we integrated weather data to help us to identify potential impacts on our Supply Chain Management (SCM). This allows us to take proactive measures to prevent delivery delays or stock disruptions.
In this blog, we will cover:
- Source Weather Data
- Data Modelling
- Data Visualizations
Disclosure: The data used is demo data from Fusion Apps.
Source Weather Data
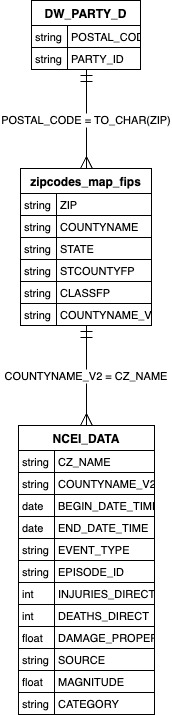
We used publicly avaialble weather data from the National Centers for Environmental Information (NCEI).
For this use case, I loaded the data using SQL Developer online under the OAX_USER schema. Depending on your weather dataset, you might need to enrich with additional external data. Since, I’m using weather data from the USA, I needed a way to connect to postal codes (from the DW Party) with the NCEI data. To bridge this gap, I used a supplemental dataset containing both FIPS codes and postal codes.
Data Modelling
To add a new dimension to existing star schemas, I used the Semantic Model Extension to modify current models and join them with weather data. Specifically, I updated the models for SCM Transfer Orders, SCM Sales Orders, and SCM Picking and Shipping.
I’ll walk you through the process using the SCM Sales Orders model. You can then repeat the same steps for the SCM Transfer Orders and SCM Picking and Shipping models.
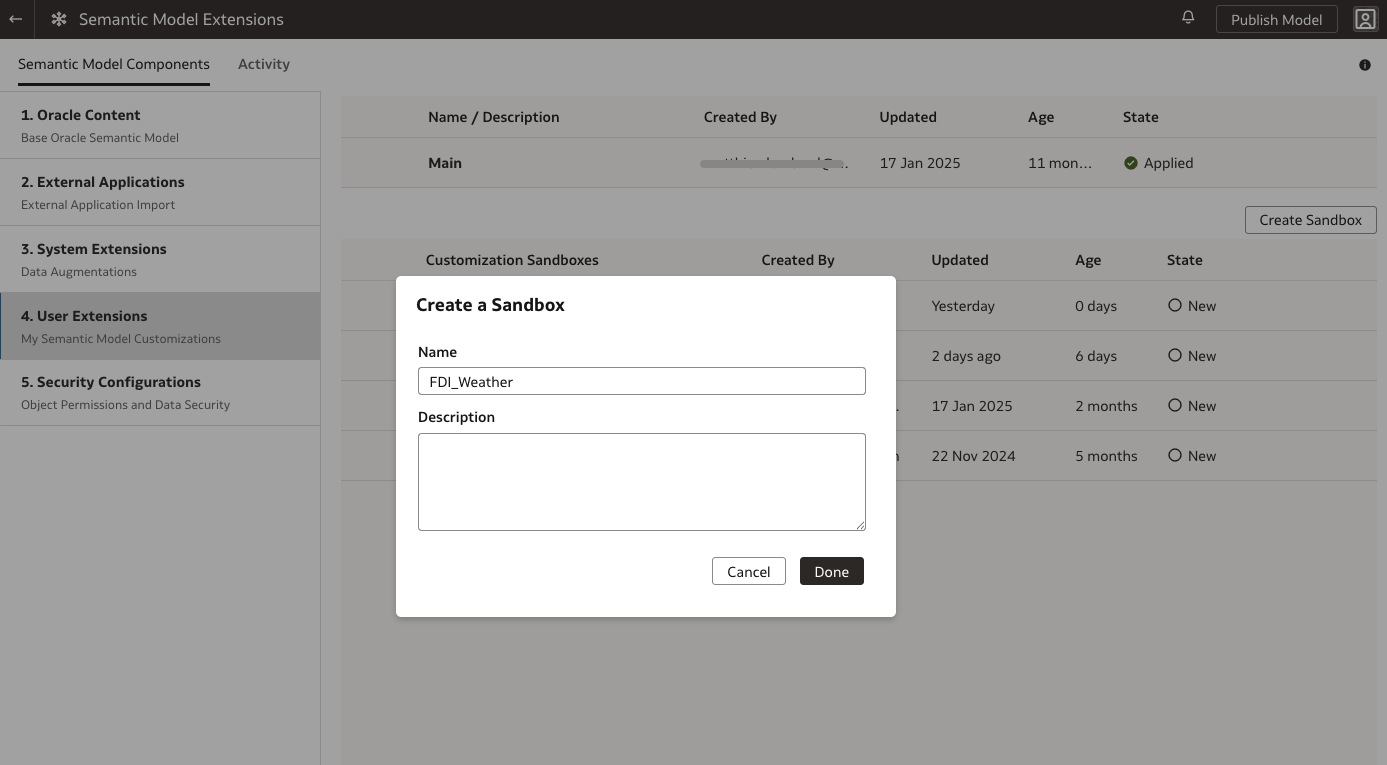
Step 1: Create a New Sandbox
You only need to create a sandbox once. There’s no need to repeat this step for the other models.
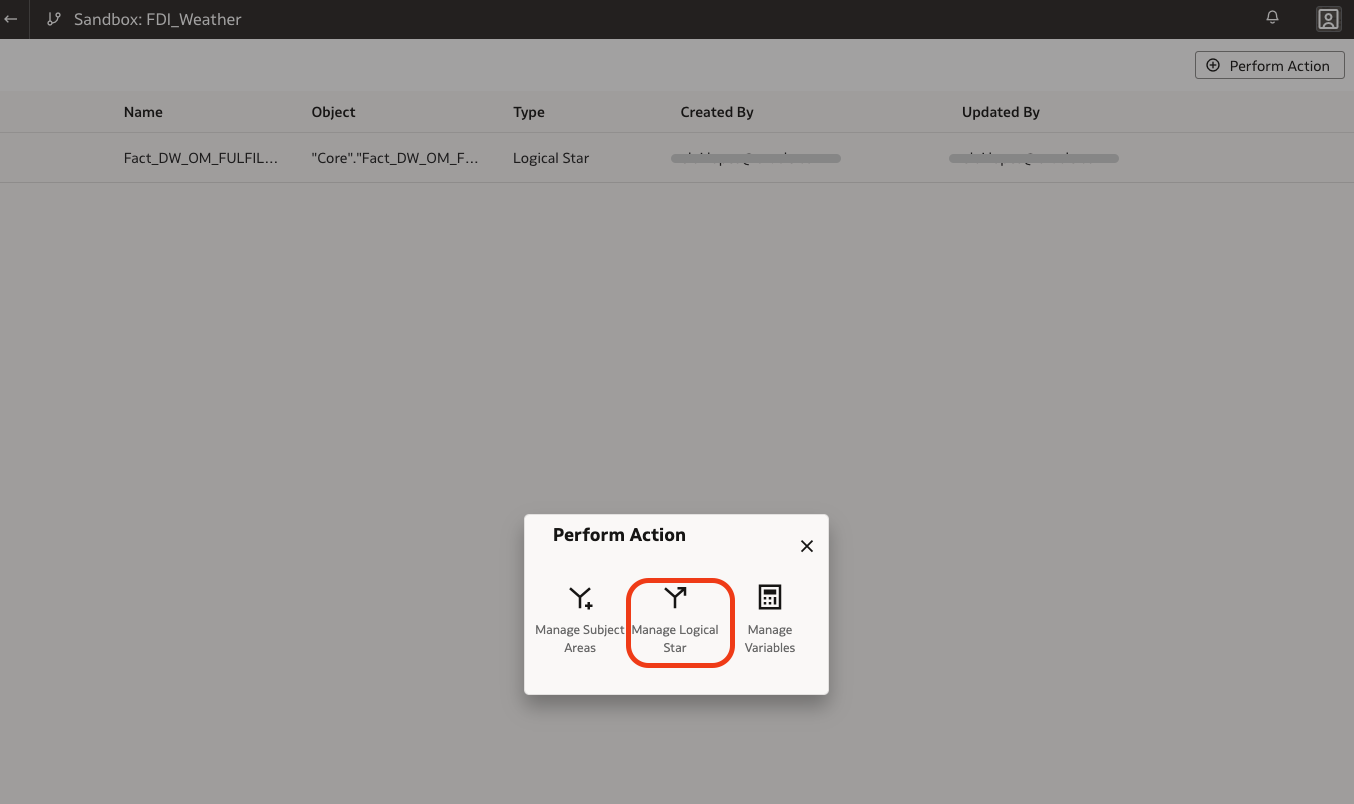
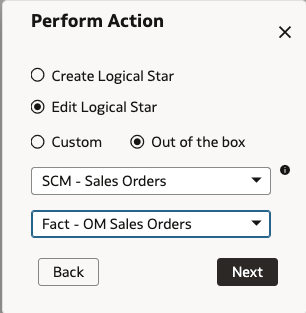
Step 2: Manage the Logical Star
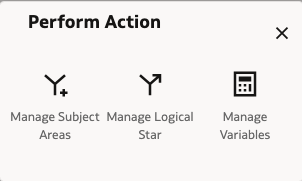
Click “Perform Action” Manage Logical Star:
Step 3: Select the Logical Star
Choose the Logical Star for SCM Sales Orders:
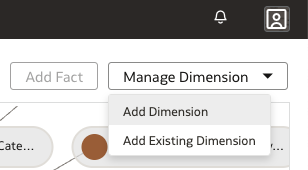
Step 4: Add a New Dimension
Click Manage Dimension Add Dimension:
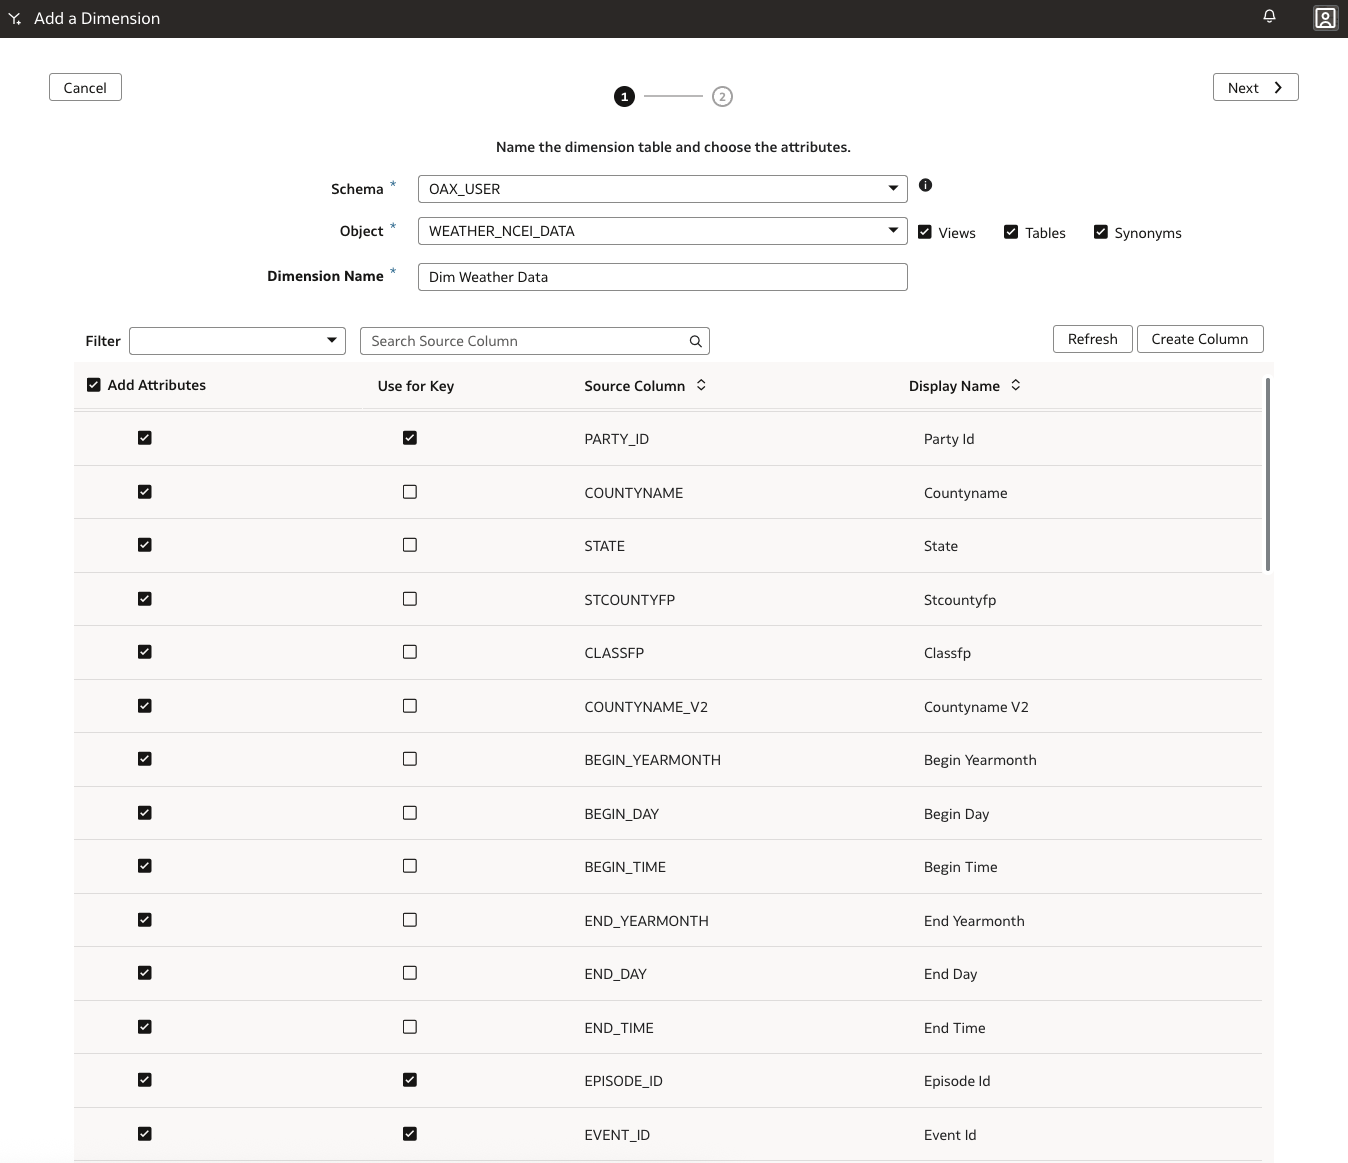
Step 5: Select the Weather Data Table
Choose OAX_USER and the weather data table (in this example: WEATHER_NCEI_DATA). Then, define a name for the new dimension.
Step 6: Add a Hierarchy
Create a hierarchy for your new dimension table.

Modifying the Logical Fact Table
Now, update the logical fact table to include the Party ID column. The column name will vary depending on the fact table. I’ve listed the relevant names below.
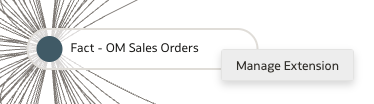
Step 7: Manage Extensions
Right-click the fact table and select Manage Extension.
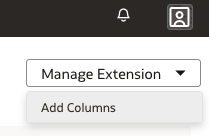
Step 8: Add Columns
Click the top-right menu → Manage Extension → Add Columns.
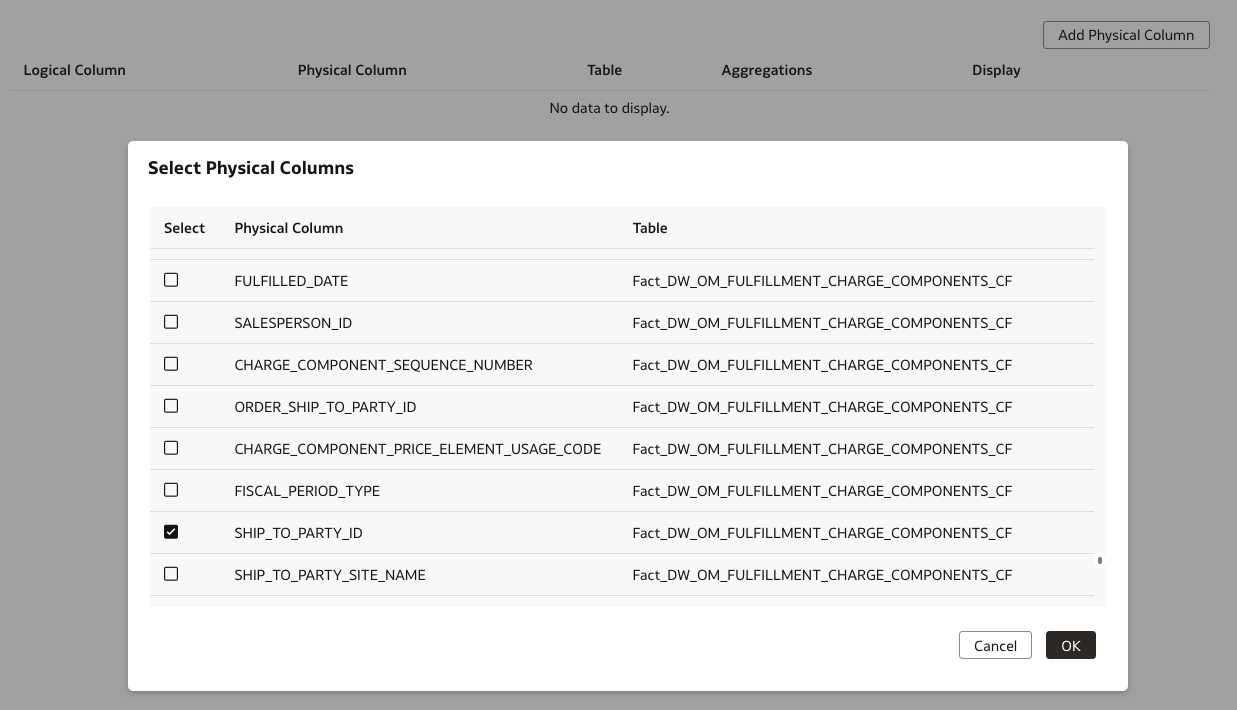
Step 9: Add Physical Column
Select Add Physical Column, choose SHIP_TO_PARTY_ID and click OK.
Step 10: Define Logical Column
Map the logical column and click Finish.

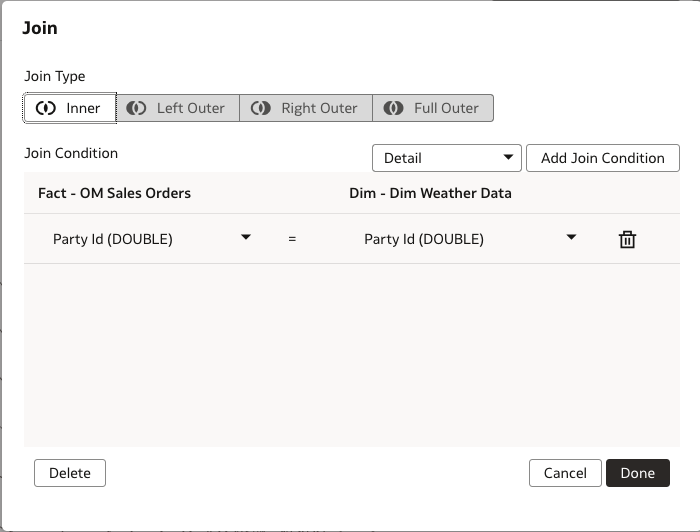
Step 11: Add a Join
Connect the fact table to weather dimension by joining on Party ID columns:
This completes the updates for the SCM Sales Orders Logical Star. Repeat these steps for the other models, using the following Party ID columns:
| Model |
Party ID Column |
| SCM Sales Orders |
SHIP_TO_PARTY_ID |
| SCM Transfer Orders |
CHANGE_PARTY_ID |
| SCM Picking and Shipping |
FULFILL_LINE_SHIP_TO_PARTY_ID |
Subject Areas
Step 12: Edit Subject Area
Click Perform Action Manage Subject Areas:
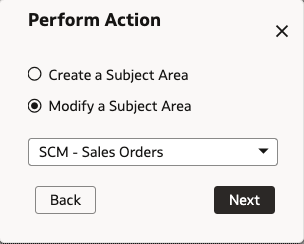
Step 13: Modify Subject Area
Click Modify a Subject Area:
Step 14: Add Weather Data Columns
Navigate to Management Elements Manage New Customizations:
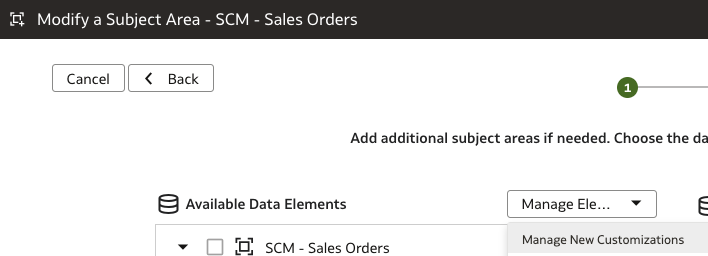
From here, simply select the desired columns from the Weather Data dimension and click Add.
Repeat these steps for the other two subject areas as well.
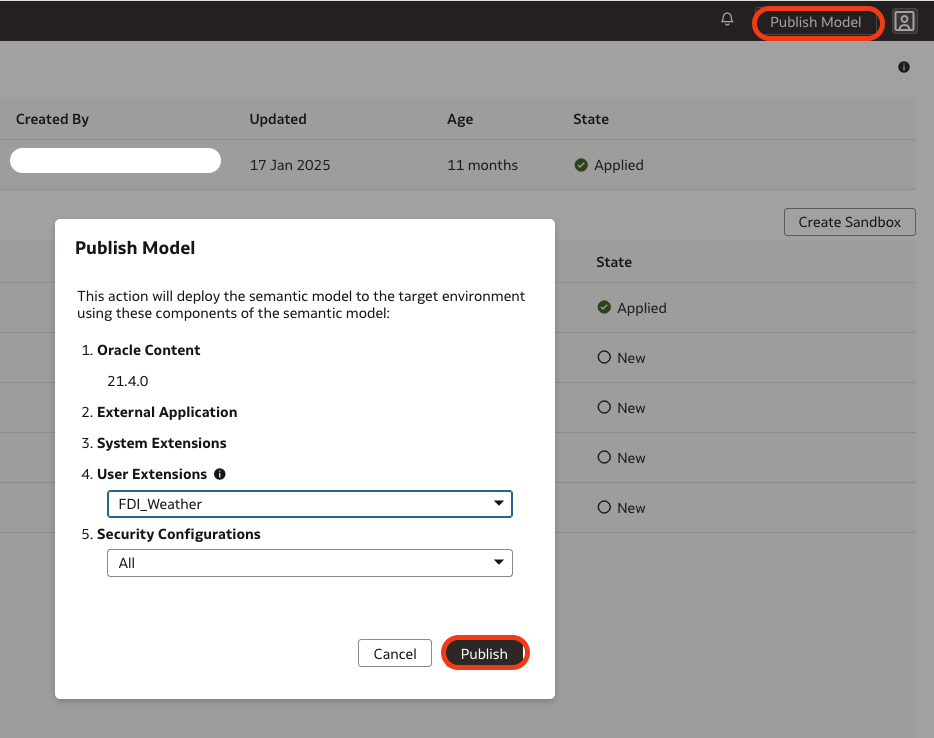
Apply and Publish Model
Click Apply Changes and then Publish Model. Before publishing the model check the Activity tab to ensure the “Apply Changes” completed successfully.

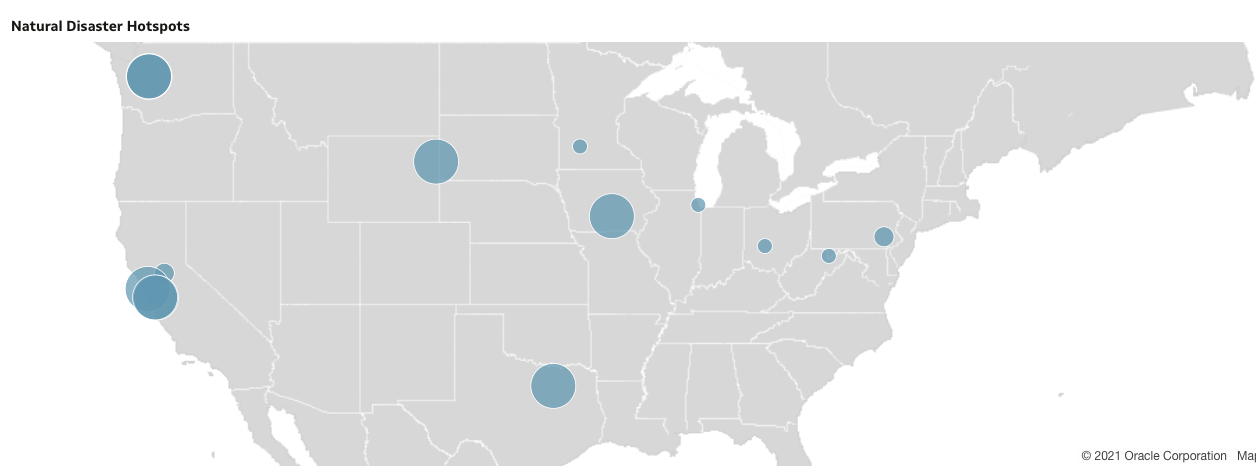
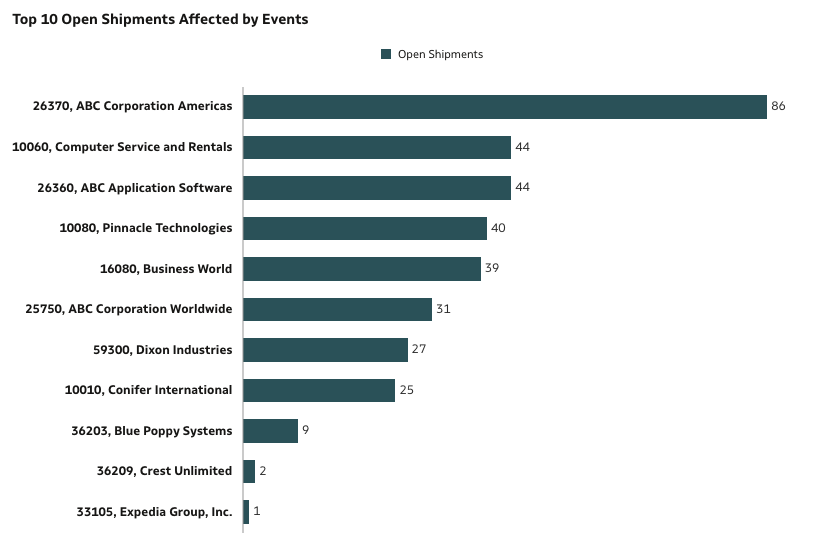
Data Visualizations
The last step is to create some visualization to analyze the relation between the weather data like natural disasters and SCM Orders, Stocks etc.

Conclusion
By extending Oracle Fusion Analytics with external sources like weather data, businesses can gain deeper insights beyond traditional reporting. Its flexible integration capabilities enable organizations to enrich analytics with real-world context. As shown in our Supply Chain Management example, incorporating weather data supports proactive, data-driven decisions that reduce disruptions and enhance operations.