Introduction
The tag line for NVIDIA RAPIDS is “GPU Accelerated Data Science”. The three areas for acceleration are data, ML, and network/graph via Pandas, SciKit-Learn, and NetworkX. The core idea is to move these from CPU to GPU processing and retain the established Python development APIs.
There are numerous resources available to get started with RAPIDS. This blog will chronicle my specific example of installing and running RAPIDS on a single desktop Ampere GPU.with 8G. One of the features of RAPIDS is simple scaling over multi-GPU memory and processing. You can work with modest sized datasets and models on a desktop, then move easily to cloud services with hundreds of GPUs and Terabyte datasets.
Setup
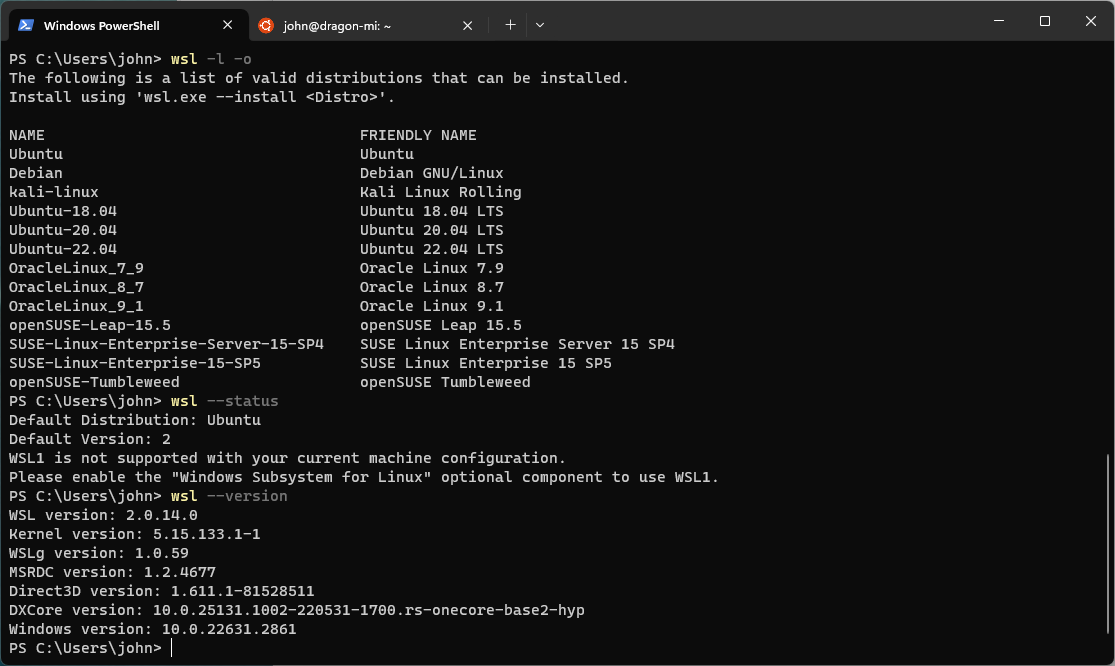
Available NVIDIA GPU hardware nominally means a Linux or Windows desktop or laptop, I tried both and will outline a Windows based setup. Saying we’re setting up on Windows is a bit misleading since the GPU hardware hosting and management (GPU driver management) is in Windows and the RAPIDS development environment setup is in Linux via WSL (Windows Subsystem for Linux). Driver management and GPU resource monitoring is easiest on Windows while the Python/Jupyter/conda development environment requires Linux. WSL provides access to a number of Linux distributions, Ubuntu, Debian, Kali, Oracle Linux, openSUSE. Ubuntu is a good choice for RAPIDS and is also the default distribution for WSL

GPU Driver
Install the GPU driver directly from NVIDIA. Also install GeForce Experience to track and install driver updates.

WSL
In Windows PowerShell with admin access, enter “wsl –install” and restart Windows. Ubuntu is the default distribution, which will serve our purpose.
conda
Log in to the WSL virtual machine (create a user and password on the first login).
Setting up RAPIDS requires conda, so first install a conda implementation, Miniconda3 for example.
   $ wget https://repo.anaconda.com/miniconda/Miniconda3-latest-Linux-x86_64.sh
    $ bash Miniconda3-latest-Linux-x86_64.sh
RAPIDS
Use the RAPIDS release selector to obtain a conda environment creation command, for example:
   $ conda create --solver=libmamba -n rapids-23.12 \
    $ -c rapidsai -c conda-forge -c nvidia rapids=23.12 python=3.10 cuda-version=12.0
Activate the environment
$ conda activate rapids-23.12
and install cuda-toolkit in the conda environment
   $ wget https://developer.download.nvidia.com/compute/cuda/repos/wsl-ubuntu/x86_64/cuda-keyring_1.1-1_all.deb
    $ sudo dpkg -i cuda-keyring_1.1-1_all.deb
    $ sudo apt-get update
    $ sudo apt-get -y install cuda-toolkit-12-3
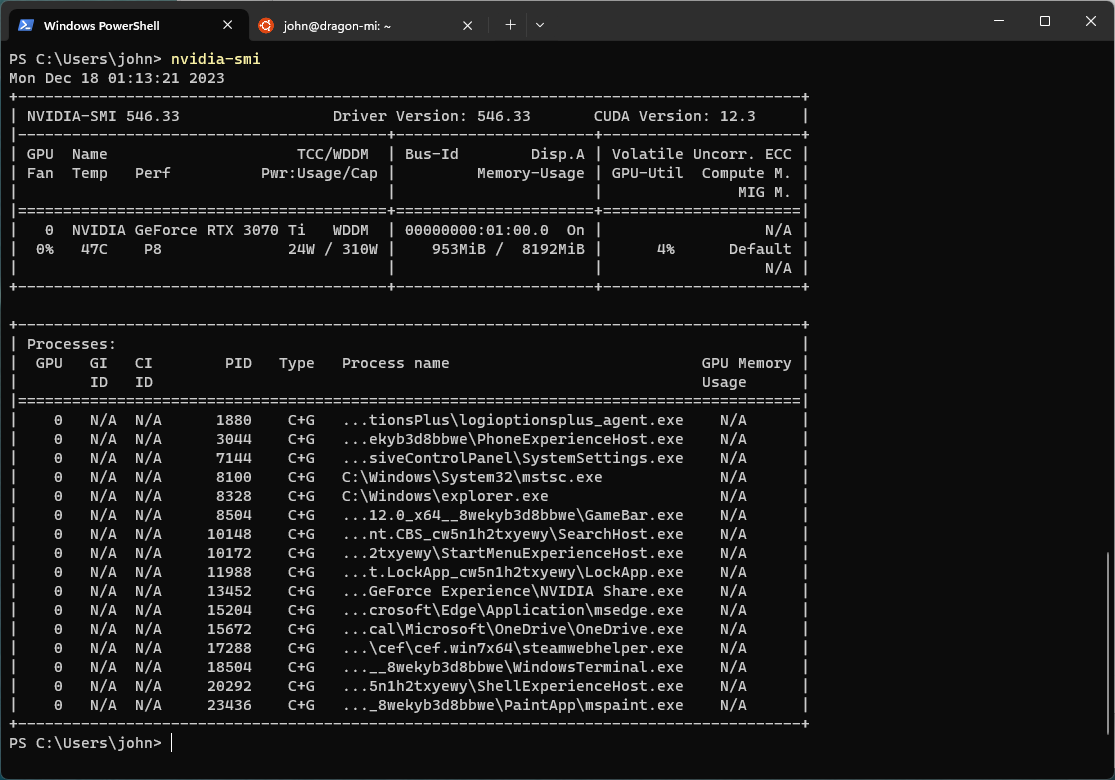
Check the status using
$ nvidia-smi
$ nvcc --version
Notebooks
In order to run notebooks in the environment, install Jupyter (and JupyterLab, if desired). The Jupyter server will run on port 8888 of the WSL host and browse to http://localhost:8888/lab to access.
Conclusion
RAPIDS is a versitile, scalable platform to move data preparation and processing from CPU to GPU. Windows is a convenient host to do small to medium projects on NVIDIA GPU equipped desktops and laptops. Next time we will look at examples of of data preparation with Pandas and cuDF.