Introduction
In this post I will go over the new Microsoft Sentinel Connector called “Oracle Cloud Infrastructure (via Codeless Connector Framework)” to integrate with OCI Streaming; the current Microsoft connector “Oracle Cloud Infrastructure (using Azure Functions)” has been deprecated. If you wish to use the depracted connector view the tutorial here. A few customer’s have expressed interest in using the new Microsoft connector which is in ‘Preview’ mode. So I took this opportunuty to integrate this in our test environment and share the details. But first, lets review the high level steps:
1) Create Stream/Stream Pool
2) Add a Log Group as a source in Connector Hub
3) Connect to the stream created in step 1 and verify data can be consumed
4) In Azure Sentinel integrate the new Connector module with OCI Streaming
Details
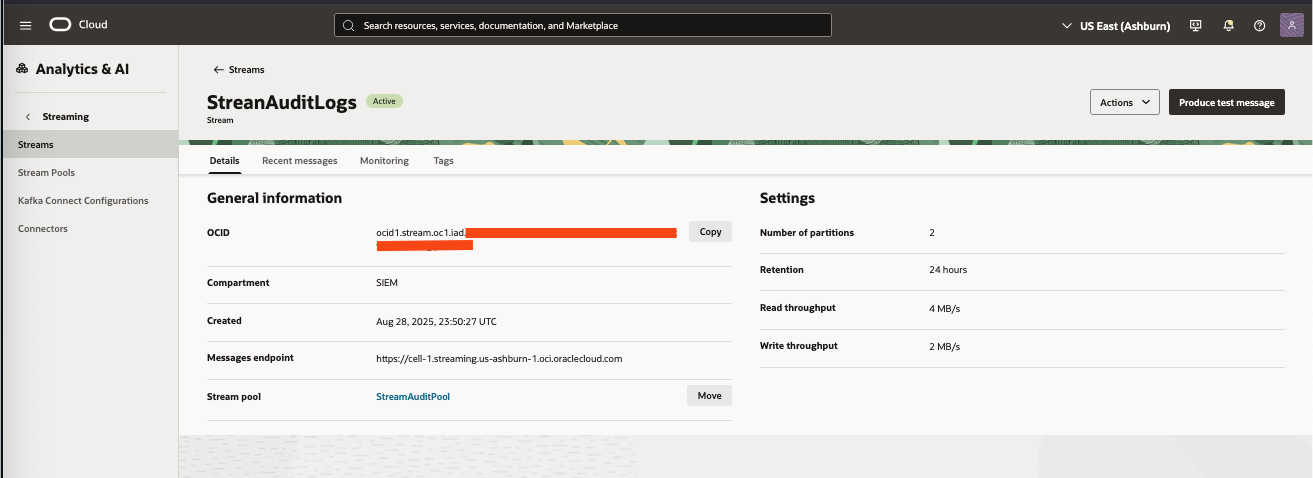
Step 1 – Create Stream/Stream Pool
Create the stream/stream pool under the OCI Streaming service. Here is a link to the OCI documentation to Create a Stream. Once completed take note of the details page, you will need this infomration when configuring the connector in Microsoft.
Step 2 – Add a Log Group as a source in Connector Hub
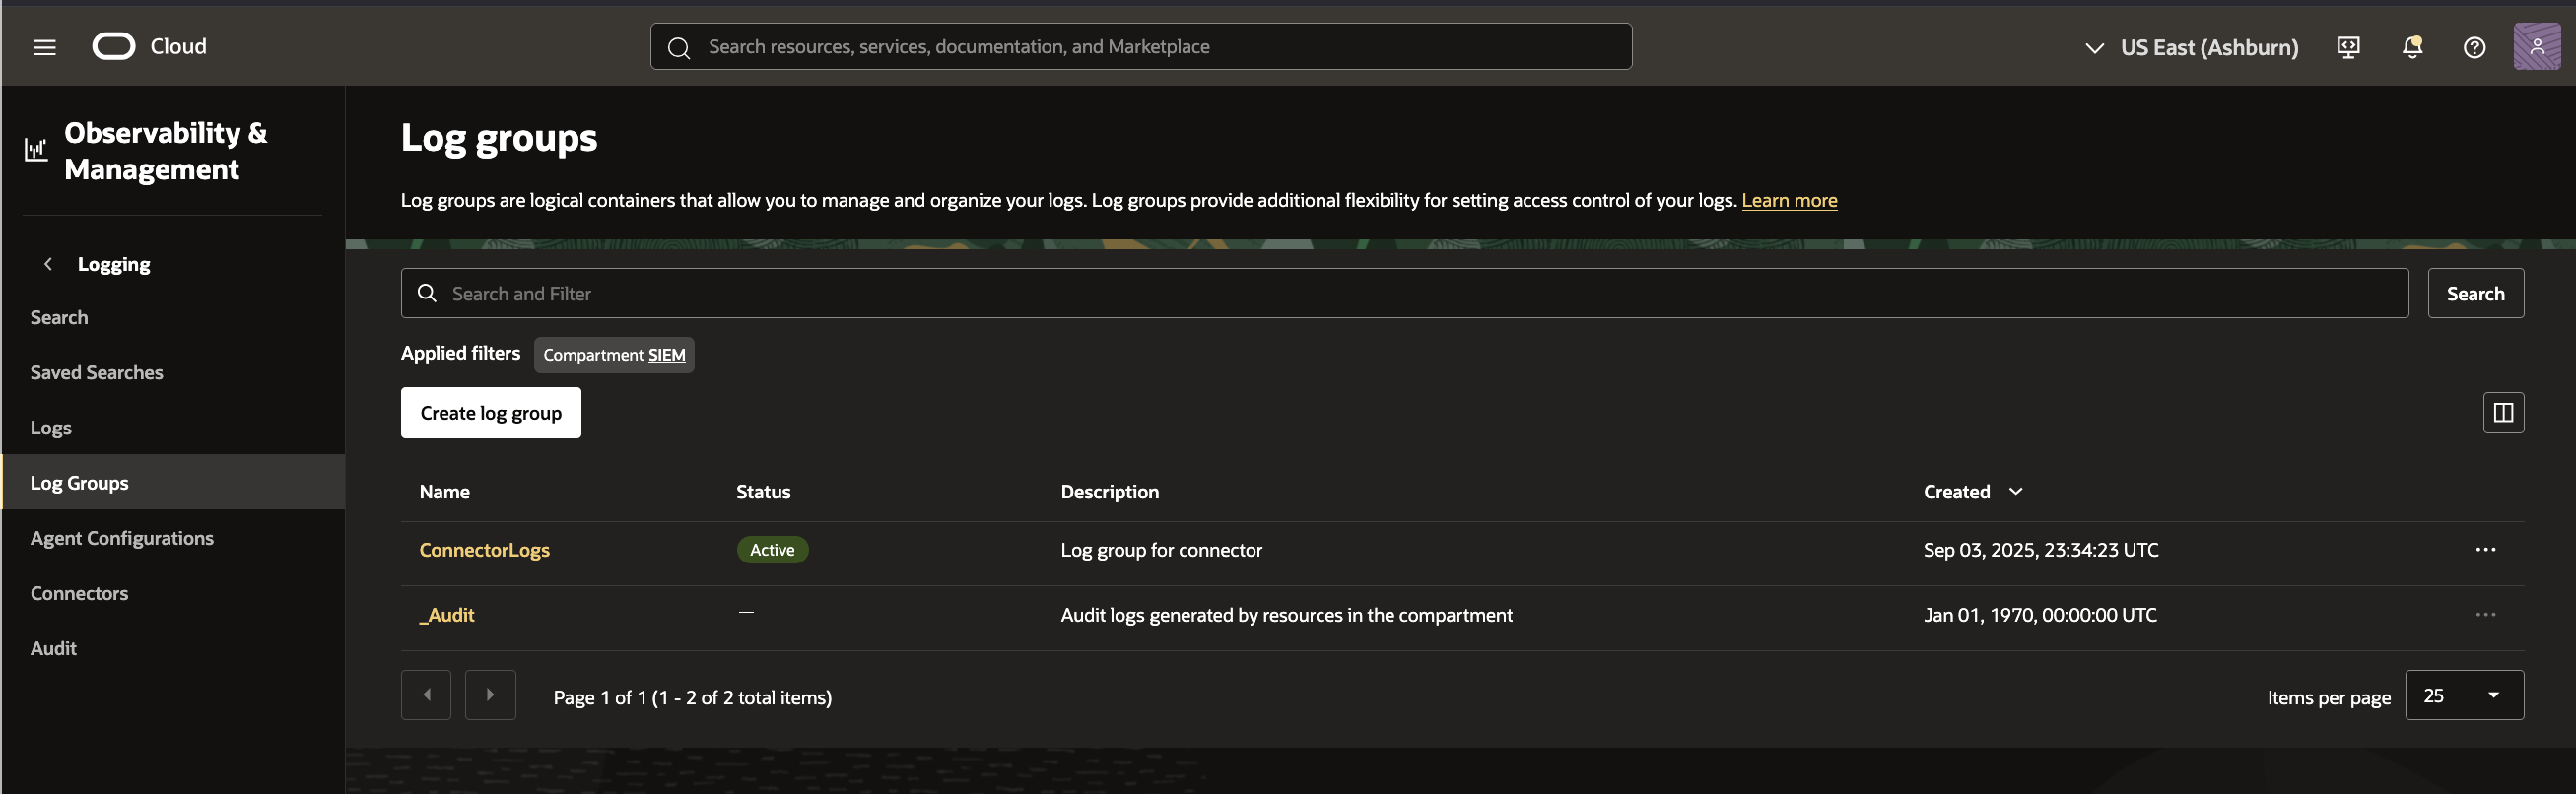
For simplicity I will add the default audit log group called ‘_audit’ to a connector in OCI Logging Service. You can, of course, create your own Log Group with custom logs. The default audit logs can be foiund underr Observability & Management–>Logging–>Log Groups as shown here:
Now lets add the _audit log group as the source in the connector:
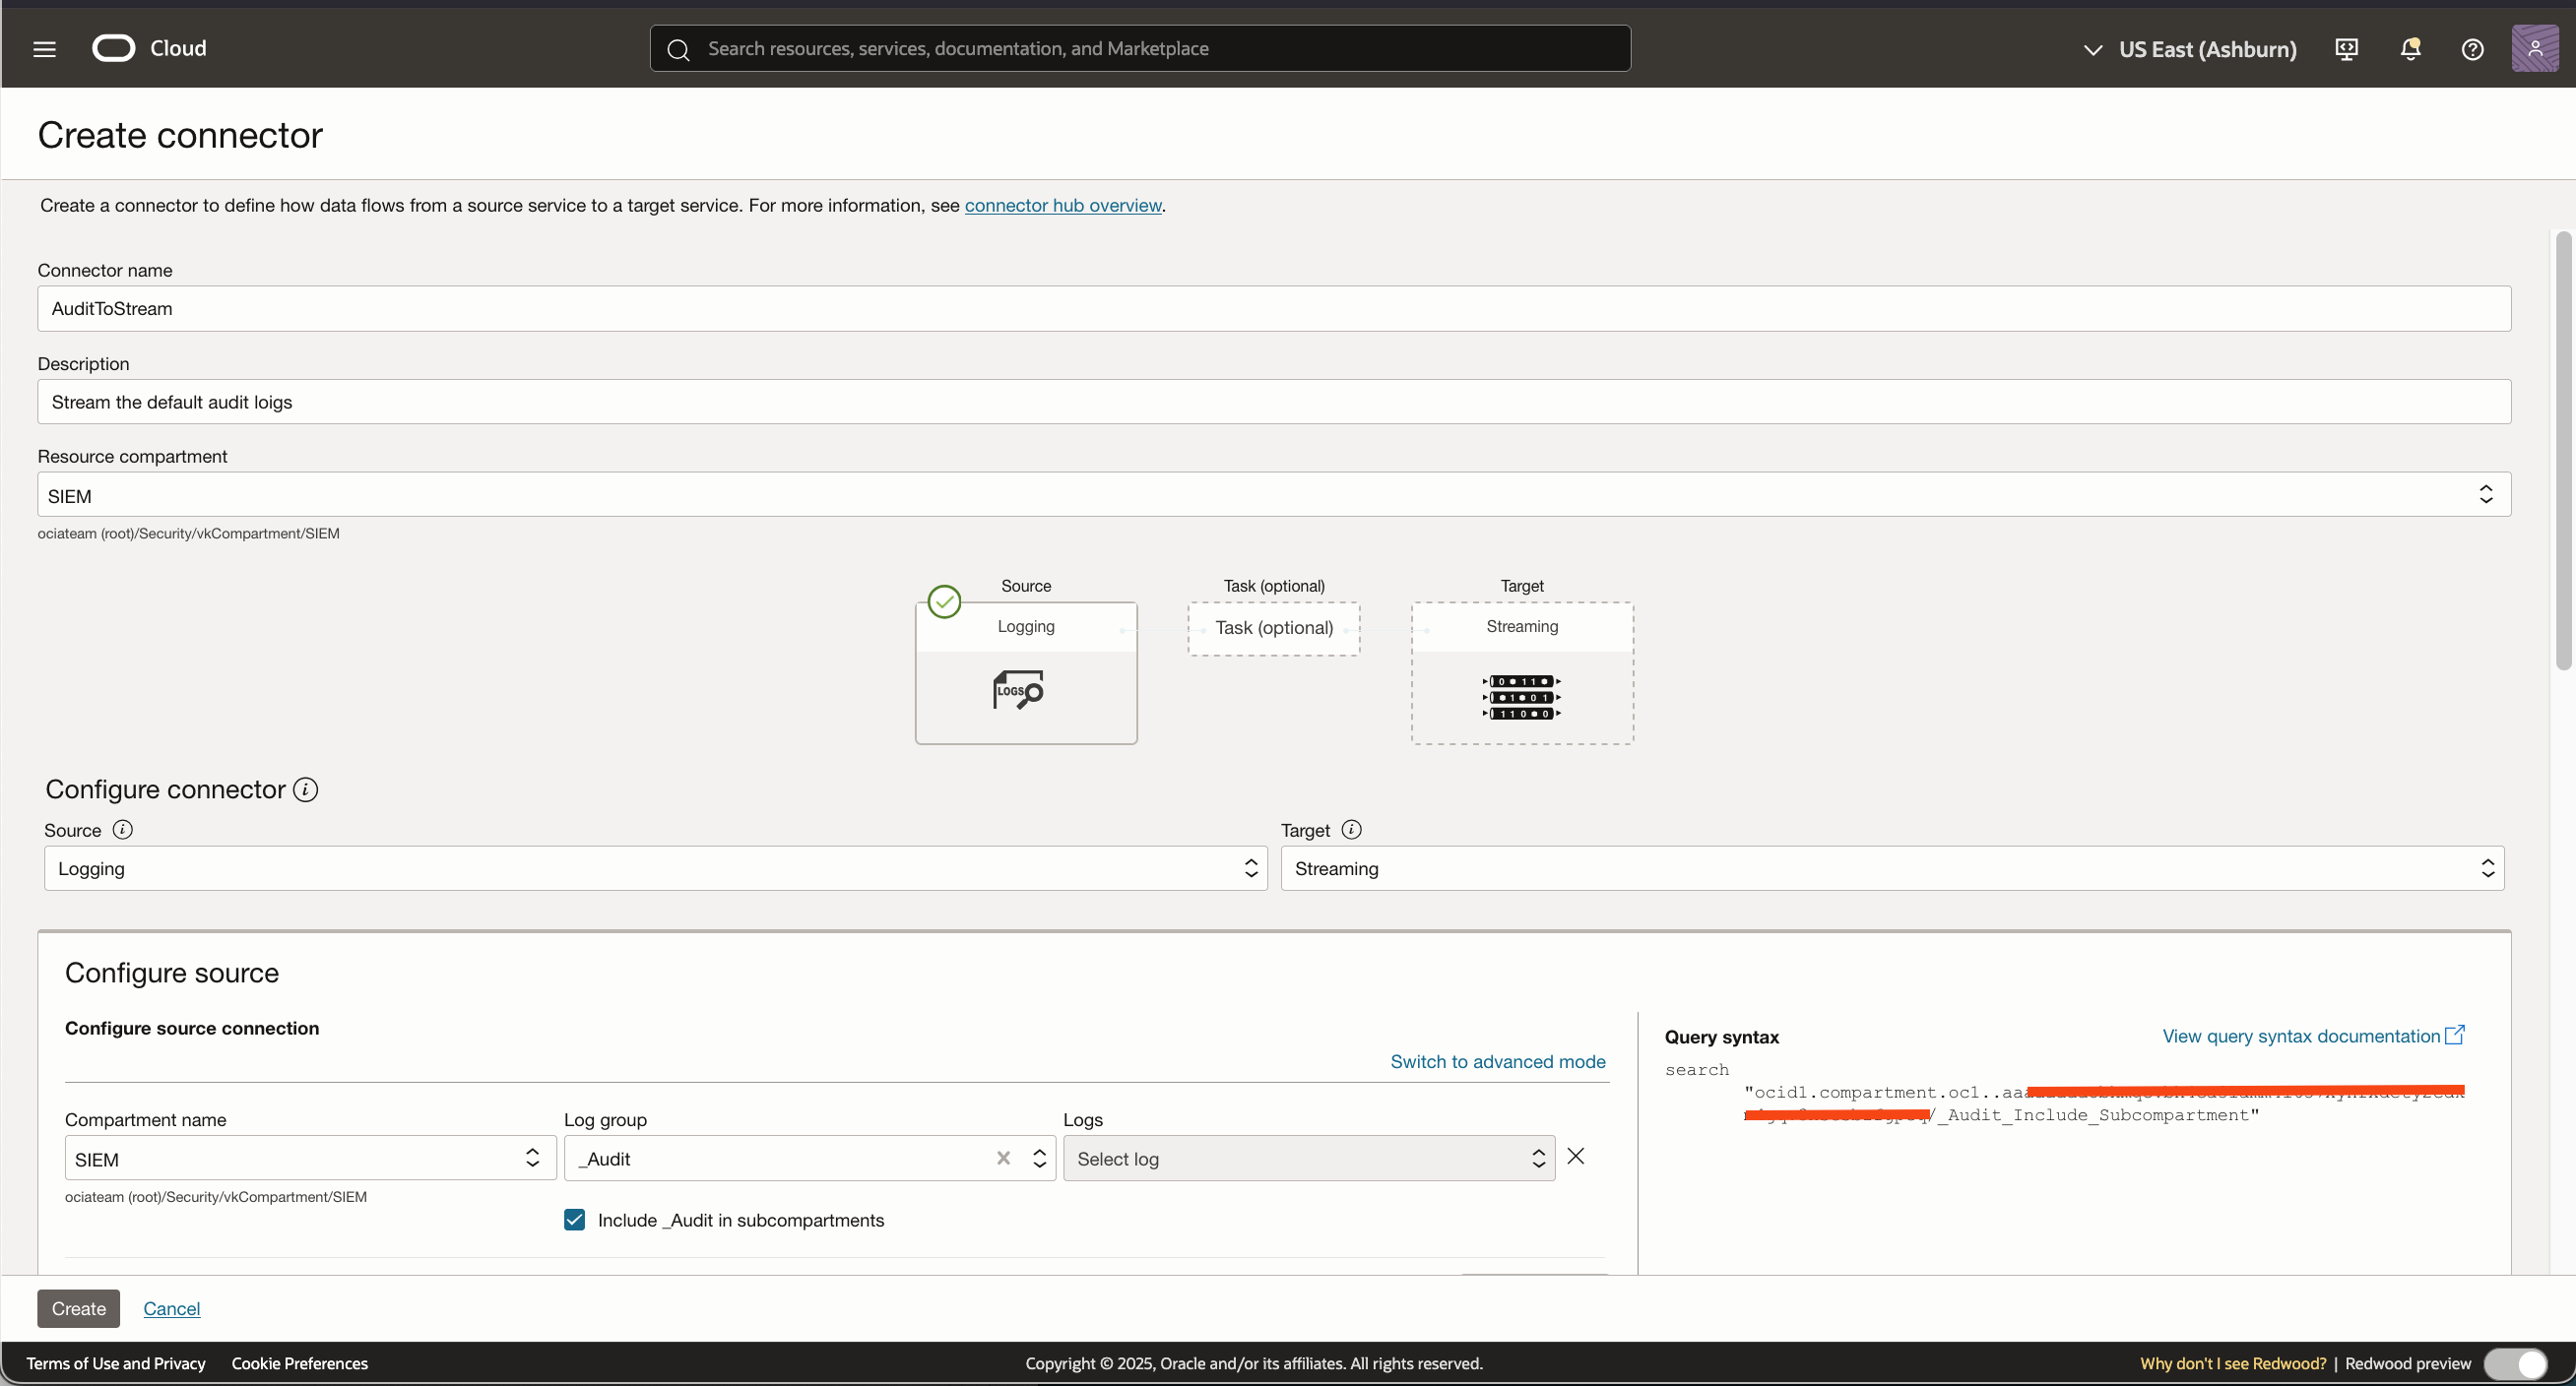
Then we will add the target stream we created in steo 1 to the connector:
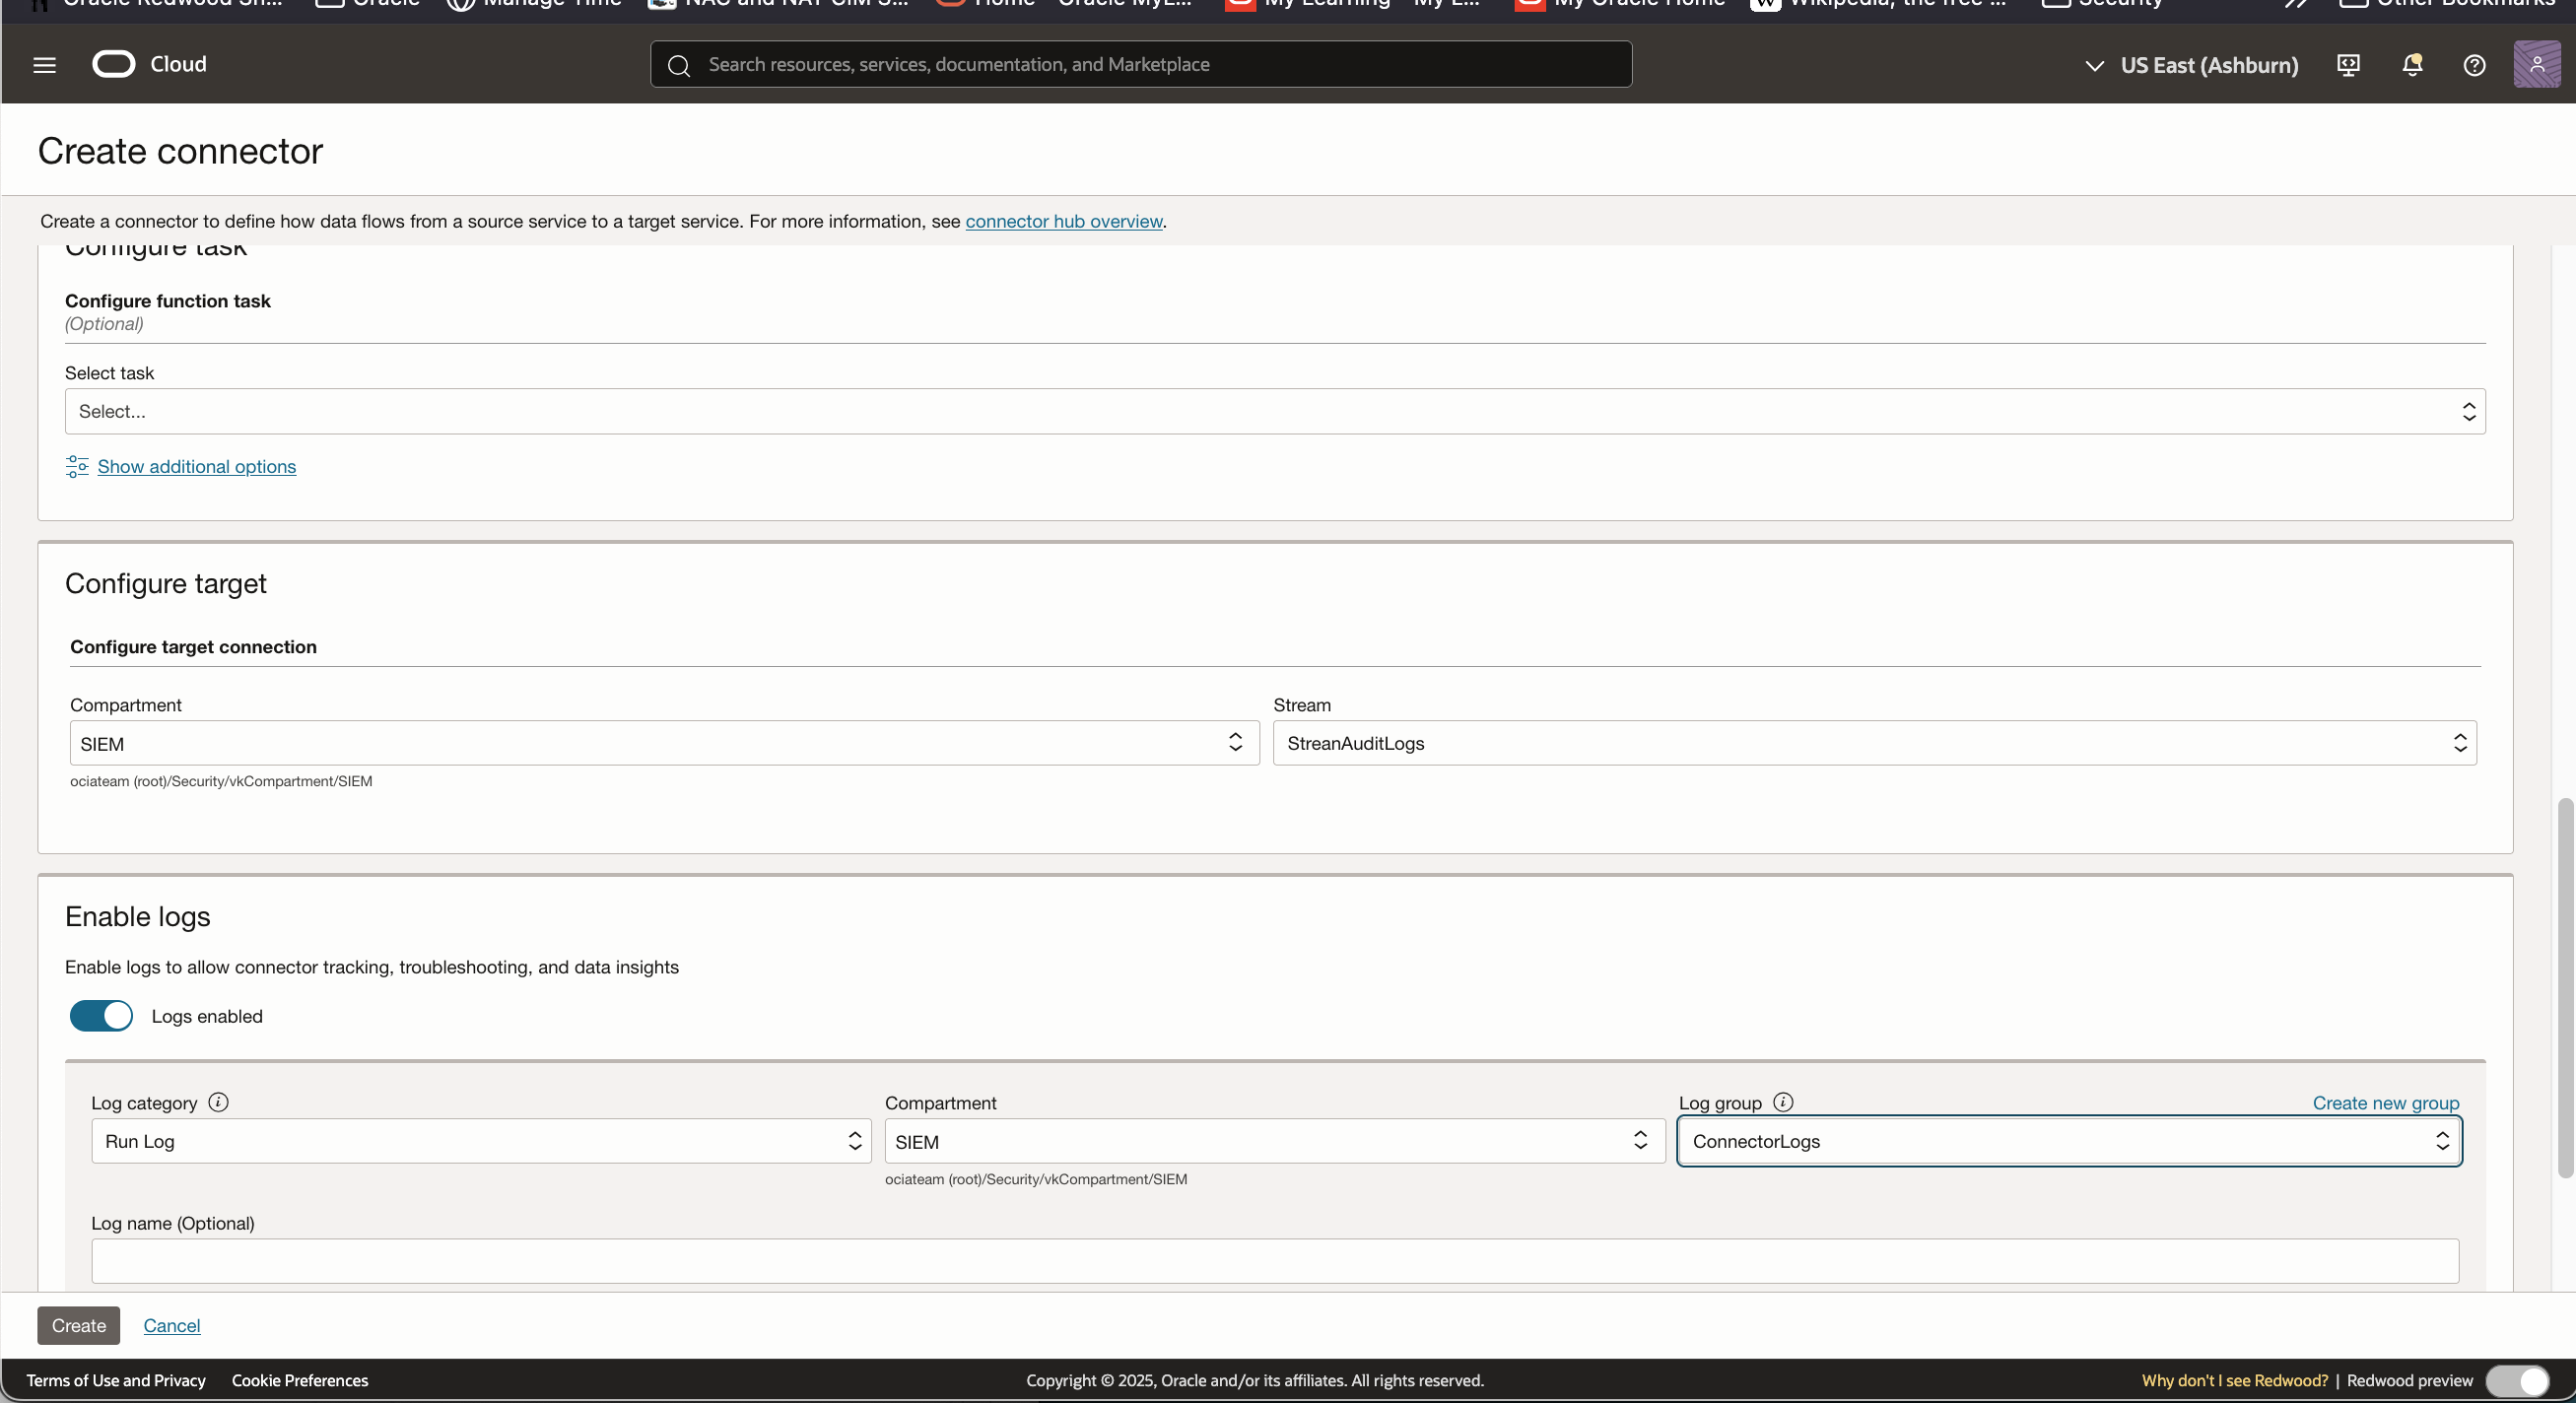
It is recommended that you enable Run logs for troubleshooting purposes and send them to a different log group.
Step 3 – Connect to the stream created in step 1 and verify data can be consumed
In a few minutes you should be able to go the the steam resource and view the data coming in from the audit logs:

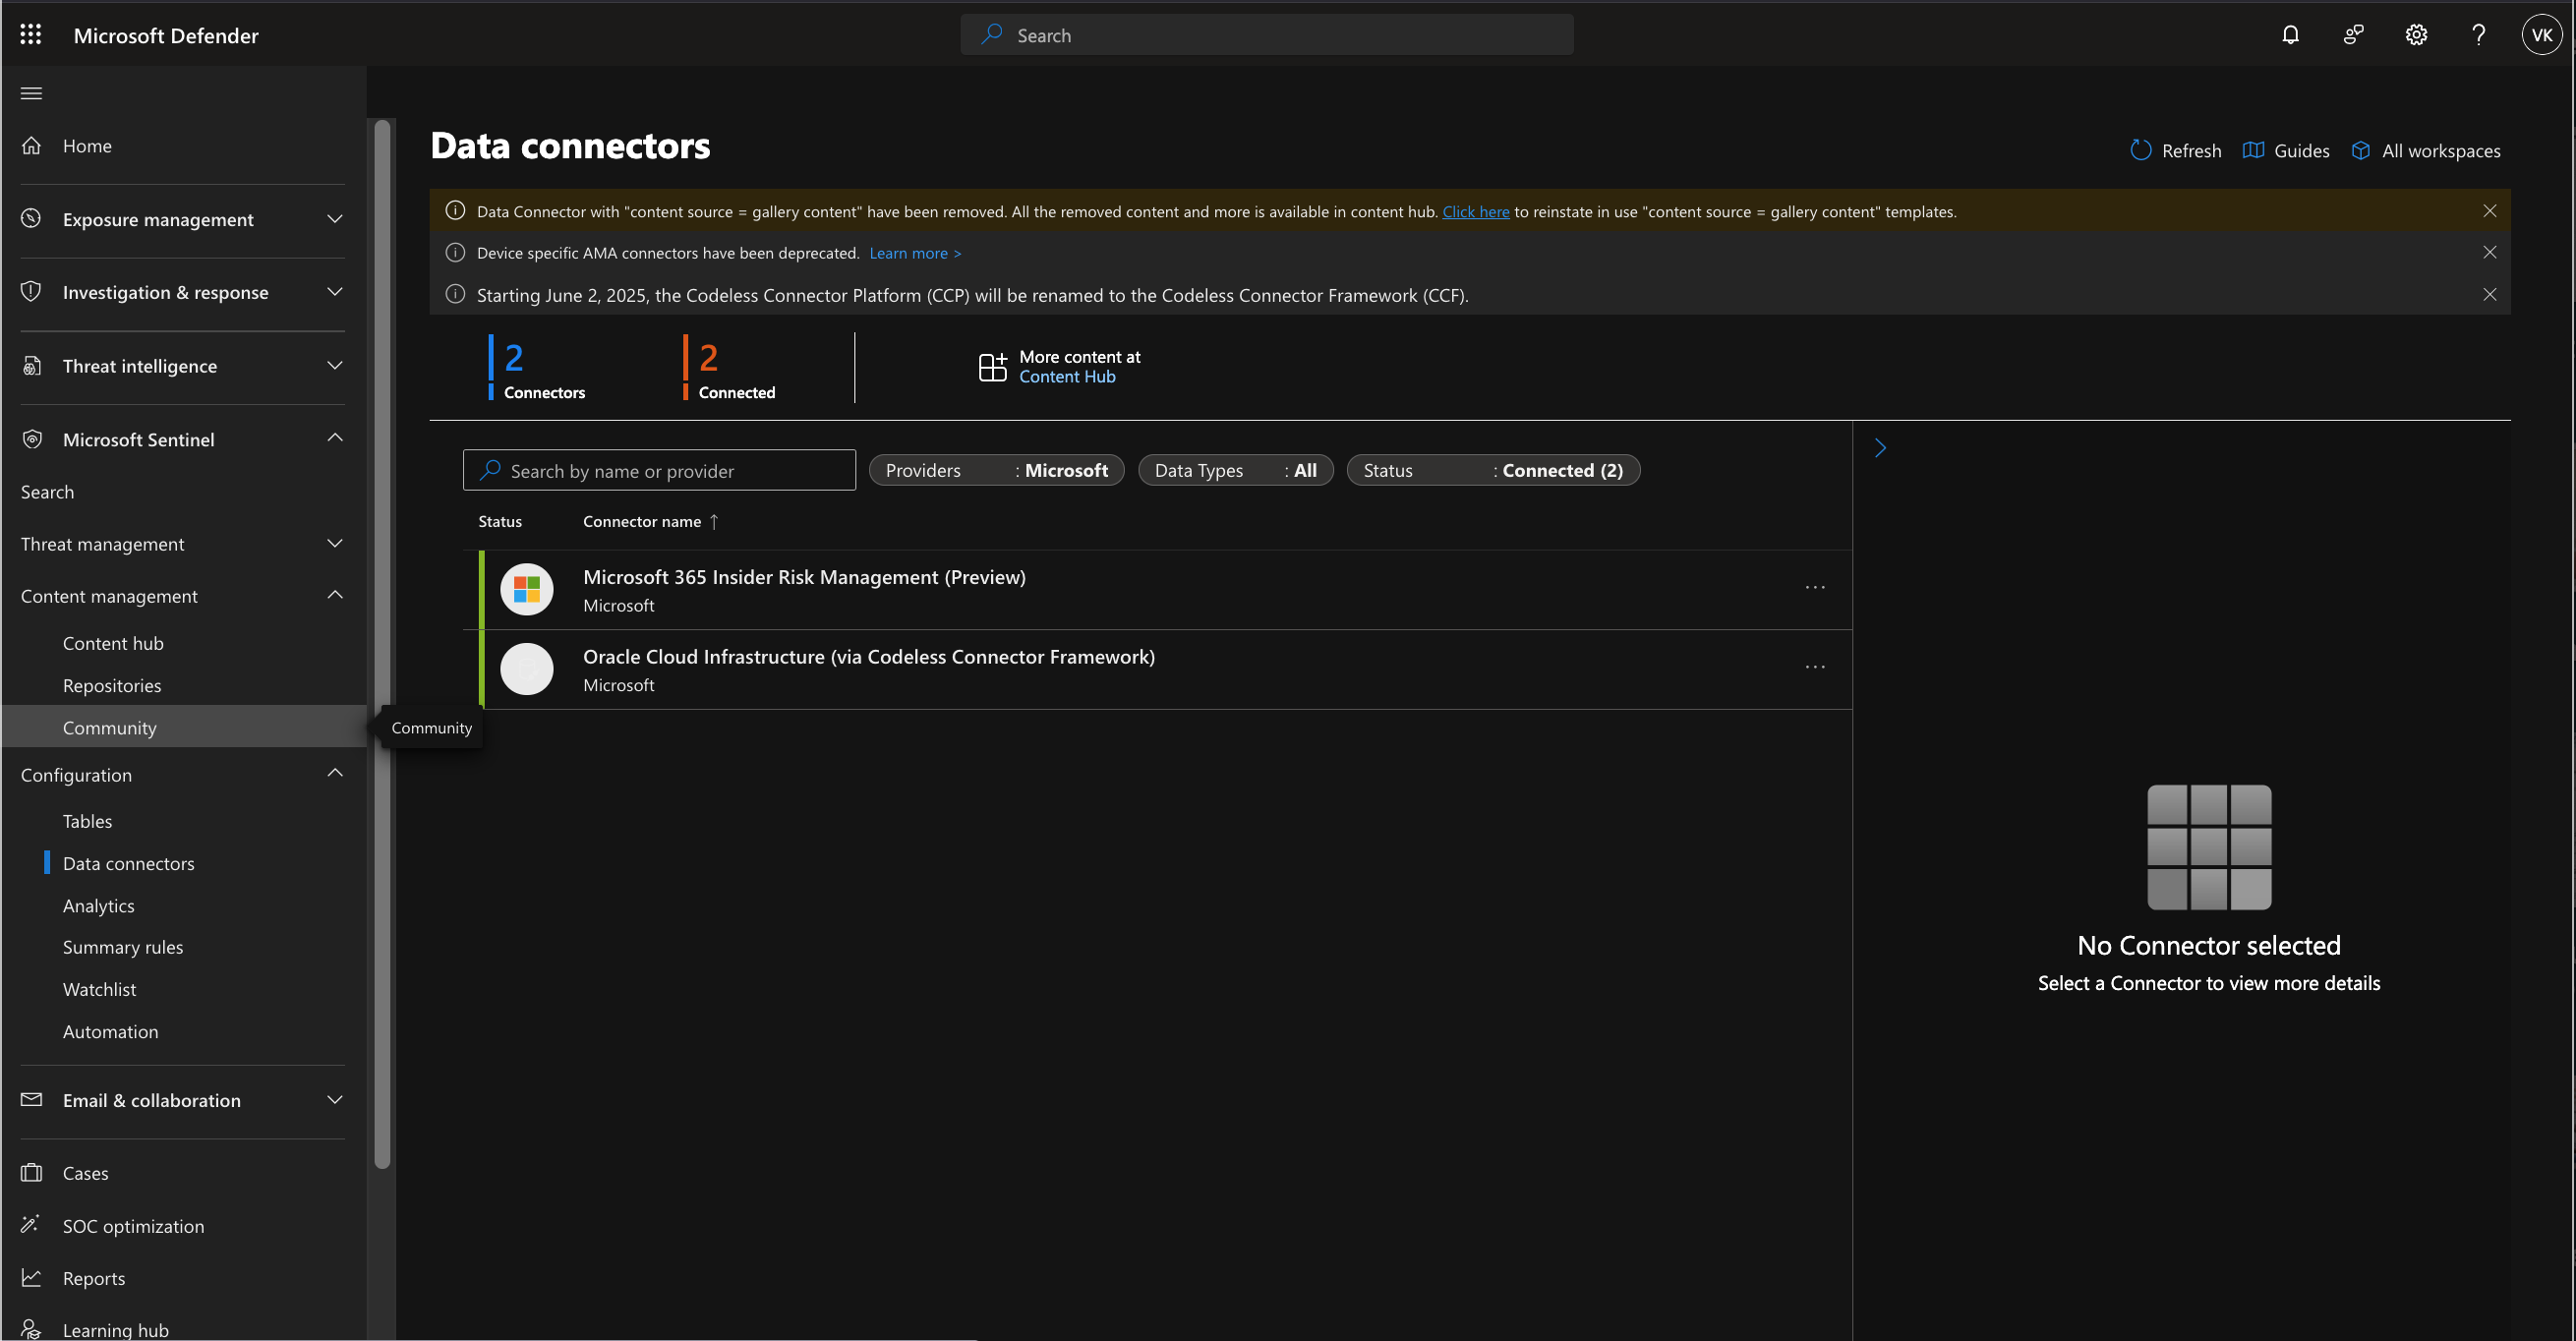
Step 4 – In Azure Sentinel integrate the new Connector module with OCI Streaming
Once we verify that data is generated, the next step is to configure Sentinel to consume the stream.
This post will not go into details on how to add a Sentinel application or the connector module via Microsoft Defender; but when that step is completed you shouuld see a screen like the following:
Here is the configuration parametes of the new module form to access the OCI stream created above:
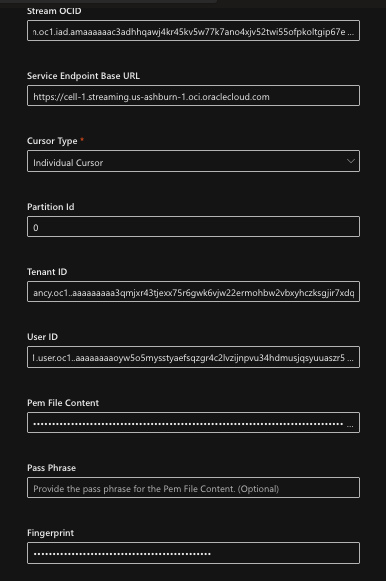
Lets take a look at the parameters in detail:
Stream OCID
On the main details page for your stream, copy the Stream OCID and paste it here.
Server Endpoint Base URL
On the main details page for your stream, use the ‘Messages Endpoint’ value. See image from Step 1.
Cursor Type
Set to ‘Individual Cursor’.
Partition ID
The value of Partition ID depends on how many partitions you have setup in OCI streaming. For example, if you created two partitions you can enter ‘0’ or ‘1’.
Tenant ID
This is the tenancy OCID in OCI. This can be obtained in Tenancy Explorer under Governance & Administration within OCI.
User ID
The User’s OCID. I recommend that you create a service account just for this integration with a least privilege policy. The minimum permission you will require is a STREAM_CONSUME under the ‘stream-pull’ resource-type; see the detains ” target=”_blank”>here.
This will require a policy like:
allow <myGroup> to use stream-pull in compartment <compartment name>
Next\you will need to generrate an API Signing Key for this user. You can get the detals here.
Pam File Content
Once you create the API key down load the private key, copy the text and paste the value in this field.
—–BEGIN PRIVATE KEY—–
MIIBIjANBgkqhkiG9w0BAQE…
…
—–END PRIVATE KEY—–
Passphrase
This is an optional field and can be left blank. The Pass Phrase is not set when using the OCI console to create the API key pair.
Fingerprint
Once the key pair is generated, extract the fingerprint value and paste it in this field.
Now click on “Connect” at the bottom once you have entered all the values in the form. If there are no errors, it will take a few monies before. you see some data as shown here:
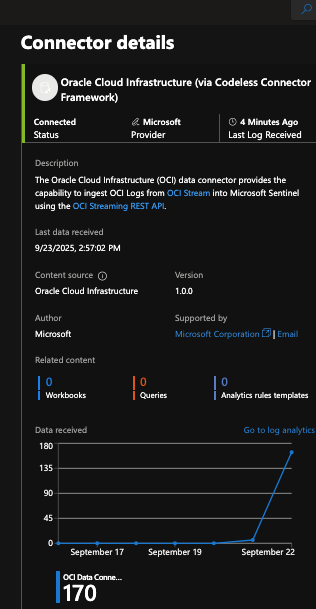
Done! You now can use the log analysis tools to analyze your data from the OCI audit logs.
Thanks for reading!