In today’s multi-cloud era, organizations adopt multiple cloud providers to take advantage of best-in-class services. A common challenge in this model is managing user identities across different cloud platforms for efficient access control.
Recently, I worked with a customer who wanted to use their existing Google Cloud IAM identities and groups to access Oracle Cloud (OCI) resources. Instead of manually recreating users and groups in OCI, they aimed to leverage their existing Google cloud IAM identities and define access controls within OCI IAM to control who can perform what actions on which OCI resources. This requires integrating OCI IAM with Google Workspace Cloud IAM.
Integrating Googe Cloud IAM with OCI IAM involves three steps:
- Synchronize Google IAM users & groups with OCI IAM (via Google Workspace Authoritative Sync)
- Create OCI IAM policies based on Google IAM groups (for Authorization)
- Set up federation between Google Cloud and OCI IAM, allowing users to log in to OCI with Google IAM credentials (for Authentication).
This blog provides a detailed information for configuring the first two steps outlined above (i.e. configuring Google Workspace Cloud IAM as an authoritative source of users and defining OCI IAM policies for access control). For setting up federation between Google and OCI, please refer to this blog article.
Let’s dive in and get started!
What Do You Need ?
- OCI IAM Account: Must have the Identity Domain Admin or Security Admin role and permissions to create & manage OCI IAM policies.
- Google Cloud IAM Admin Account: Should have the necessary authorization to manage users and groups.
Google Cloud IAM : Create a Service Account in Google Cloud IAM
The objective of this step is to create a service account in Google Cloud IAM with the required permissions to read users and groups, which will later be used for integration with OCI IAM.
Enable Admin SDK API:
- Log in to https://console.cloud.google.com/
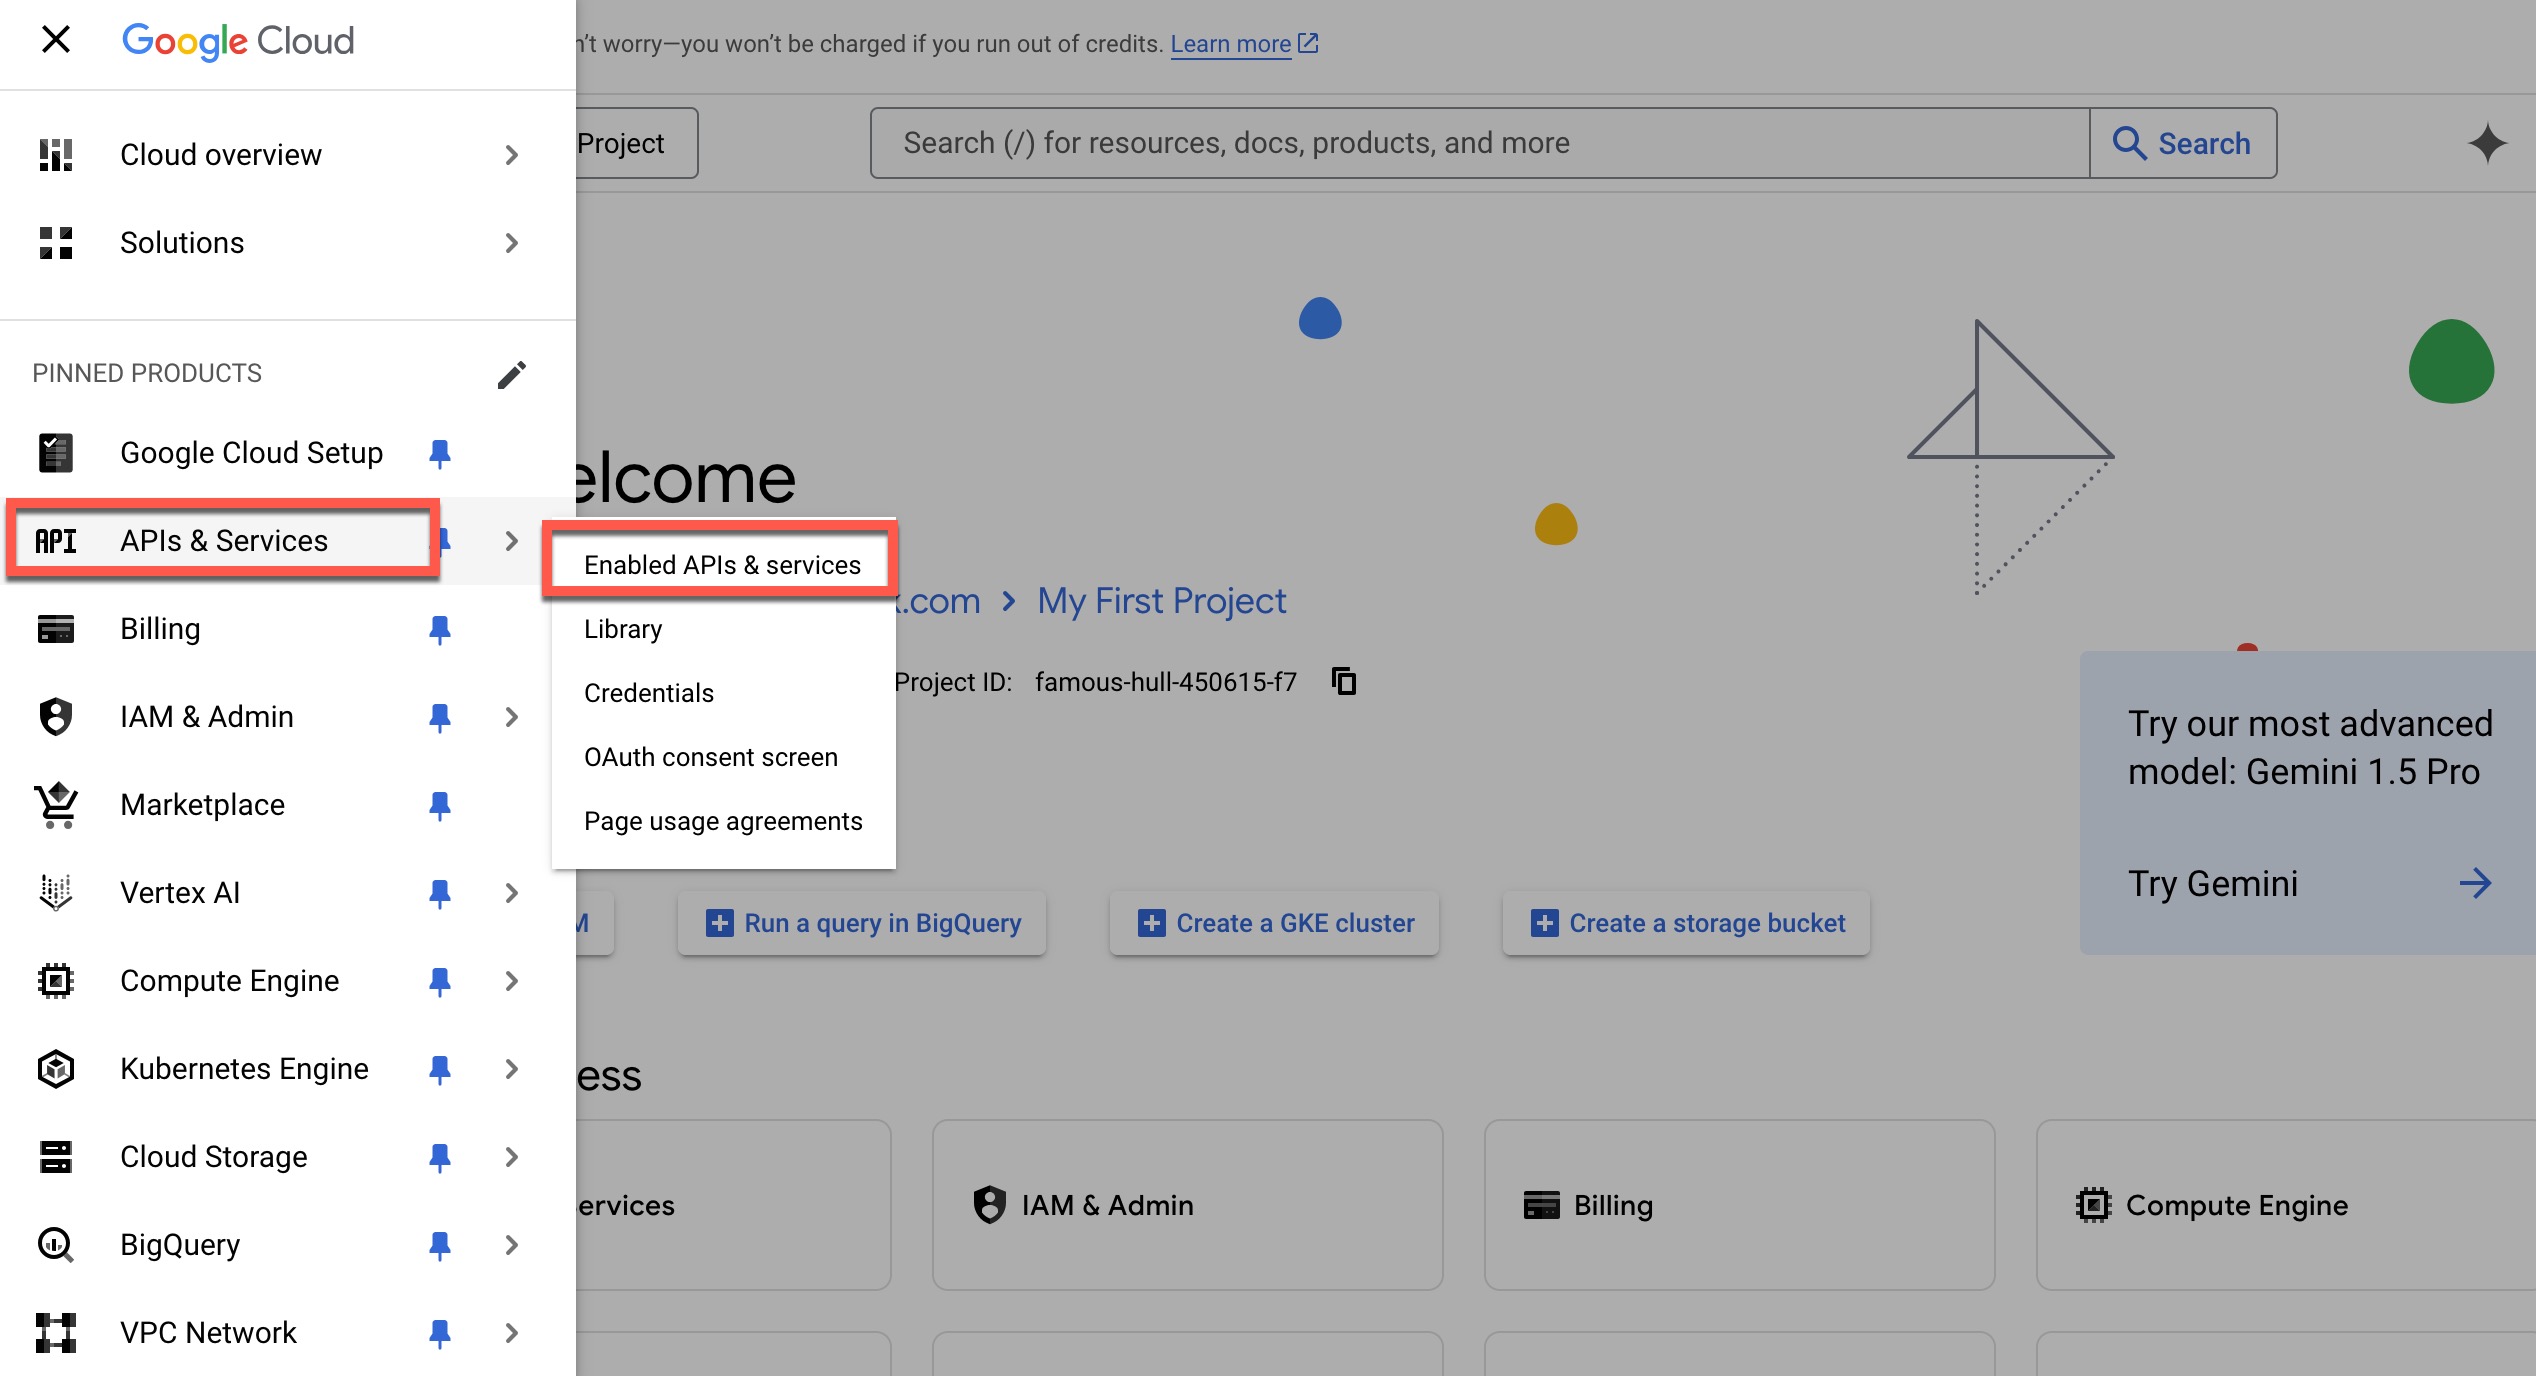
- Open the navigation menu and click on APIs & Services. Then, click on Enabled APIs & Services.
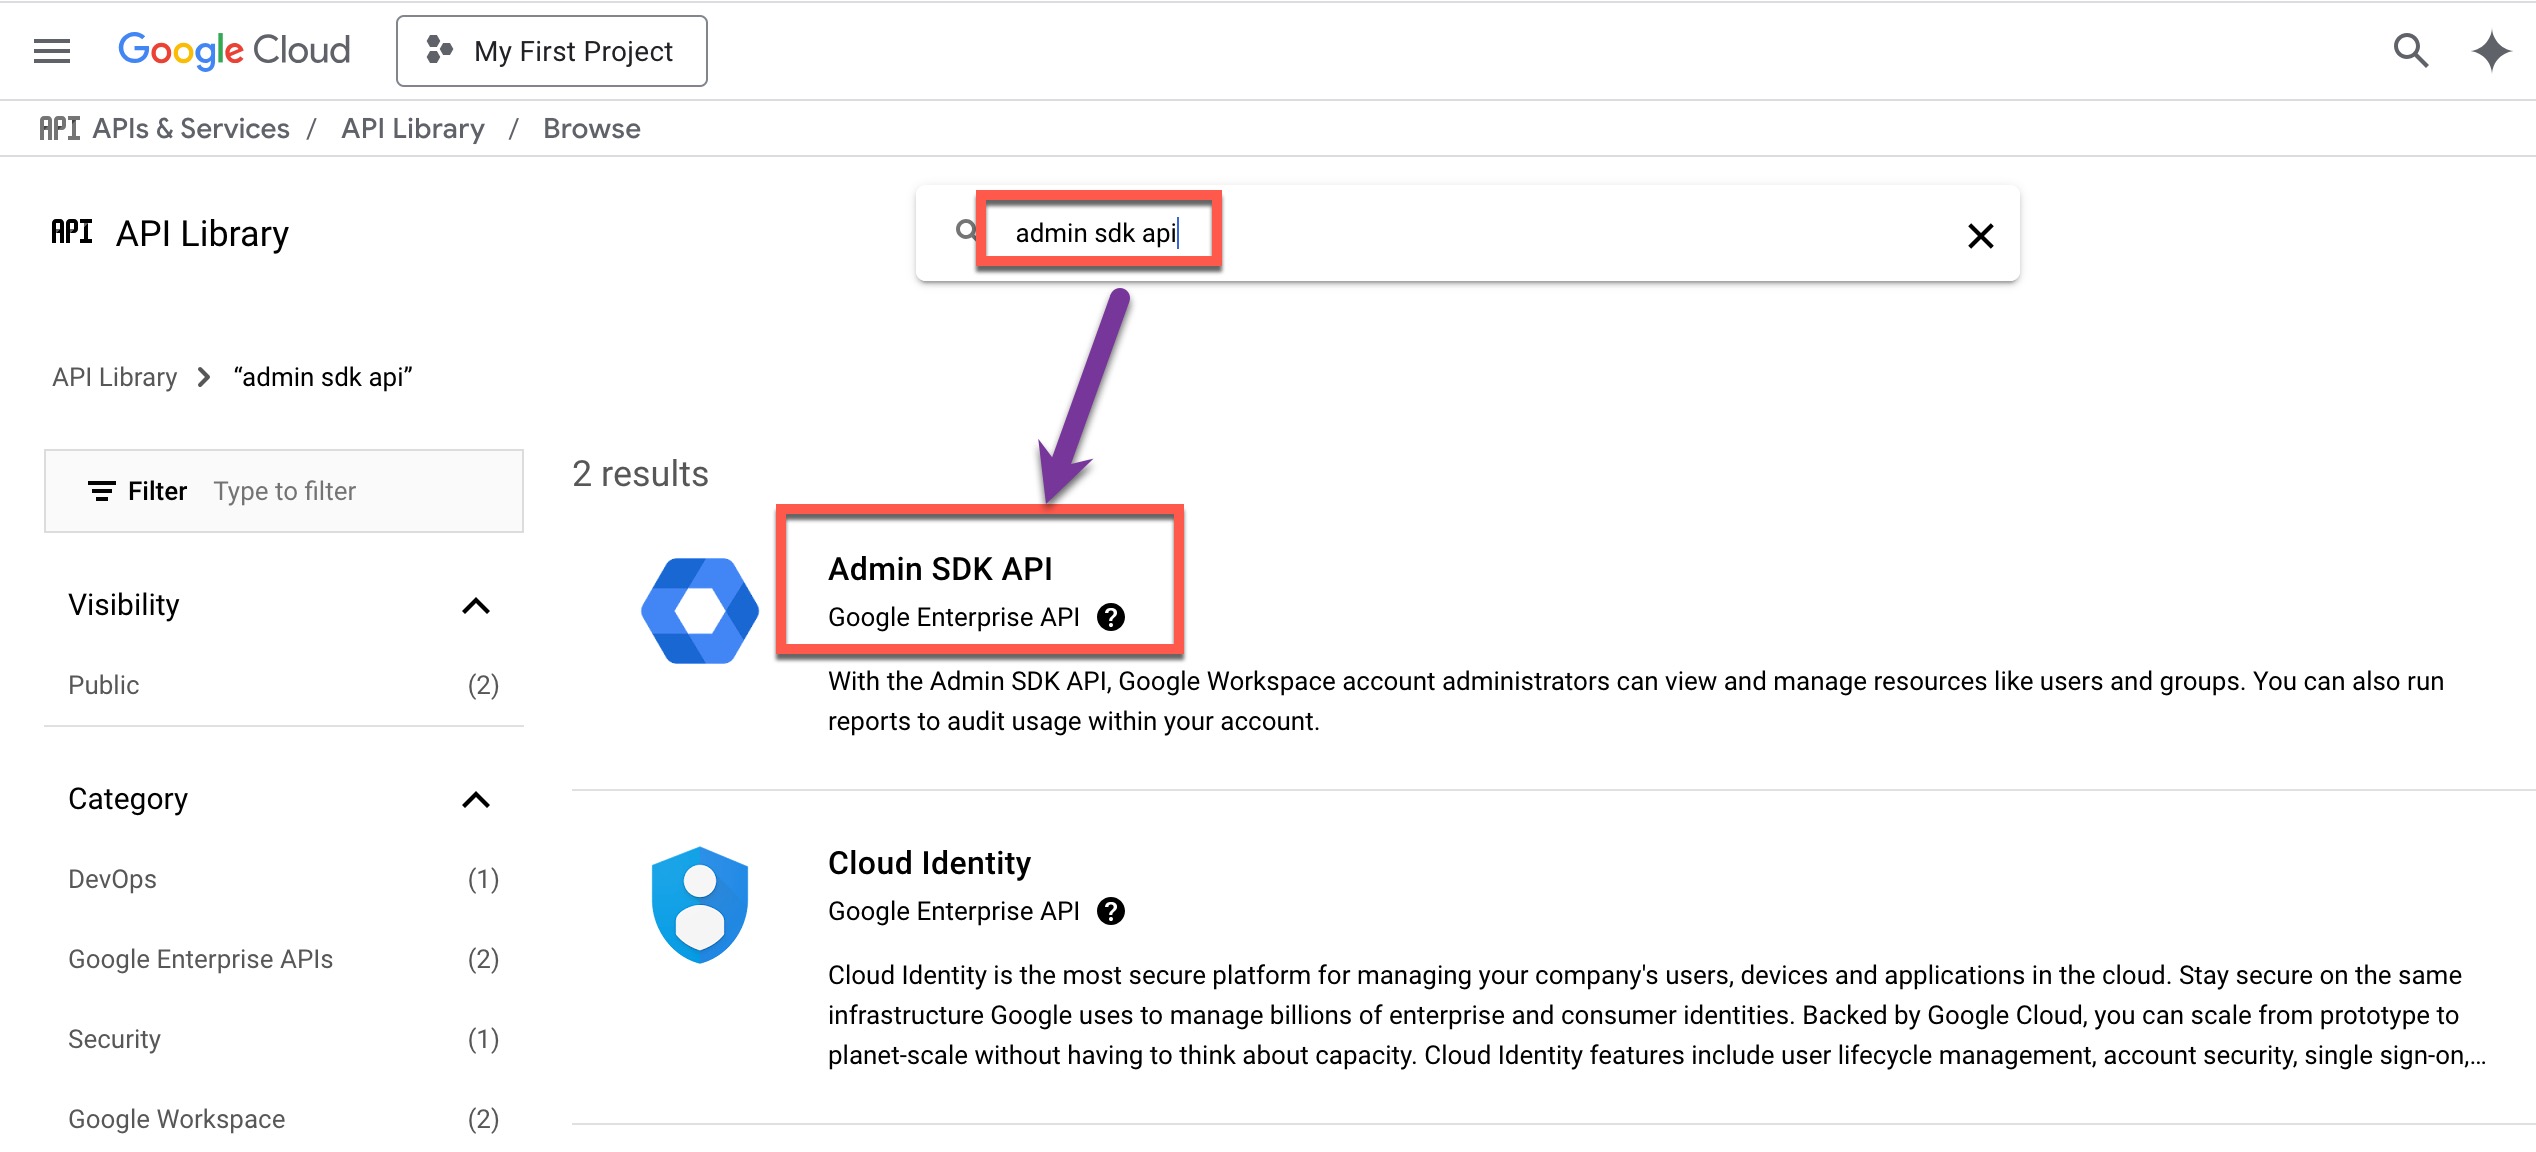
- In the search bar, type Admin SDK API and click Search.
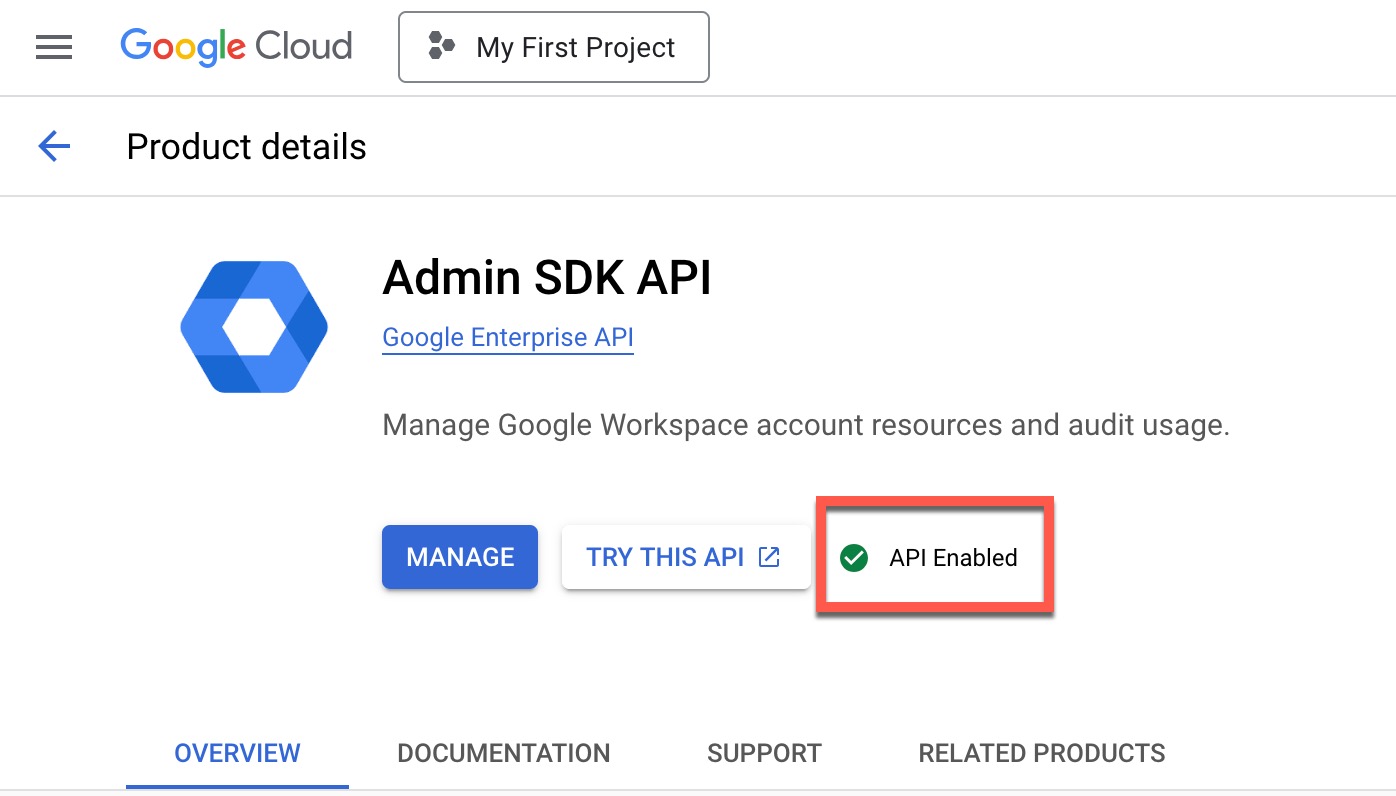
- From the search results, click Admin SDK API, then click Enable.
Create a Service Account:
- Log in to https://console.cloud.google.com/
- Open the navigation menu and click on APIs & Services, then click Credentials.
- Under Service Accounts, click on Manage Service Accounts.
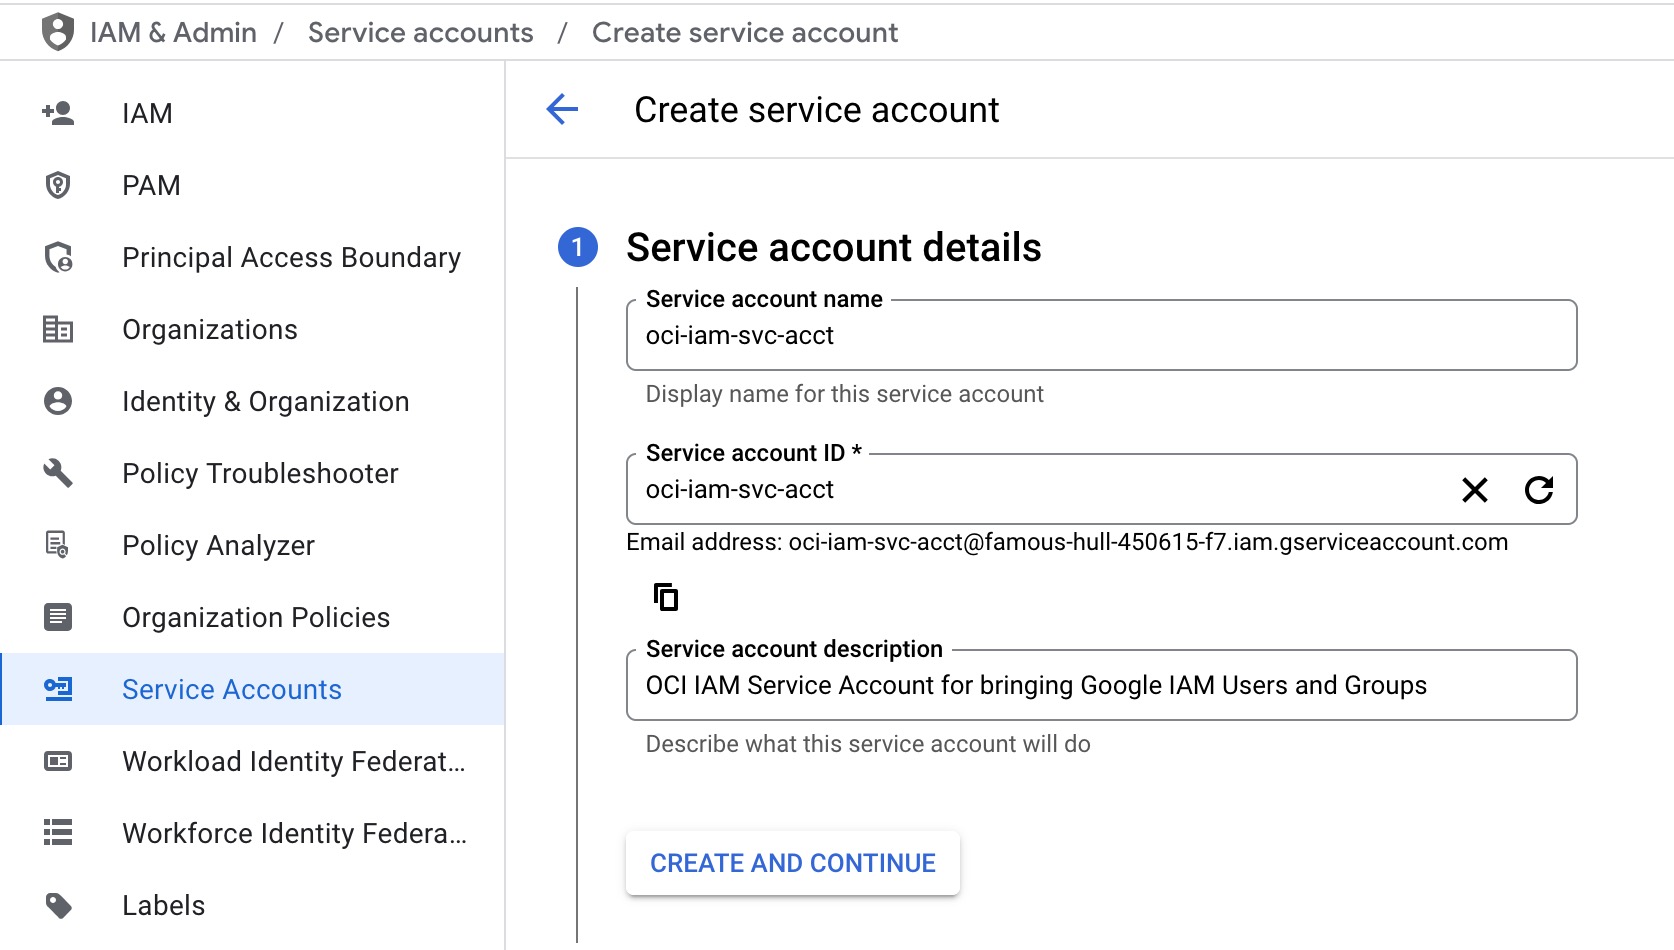
- Click CREATE SERVICE ACCOUNT.
- Update the service account details as required, then click CREATE AND CONTINUE.
- Click DONE.
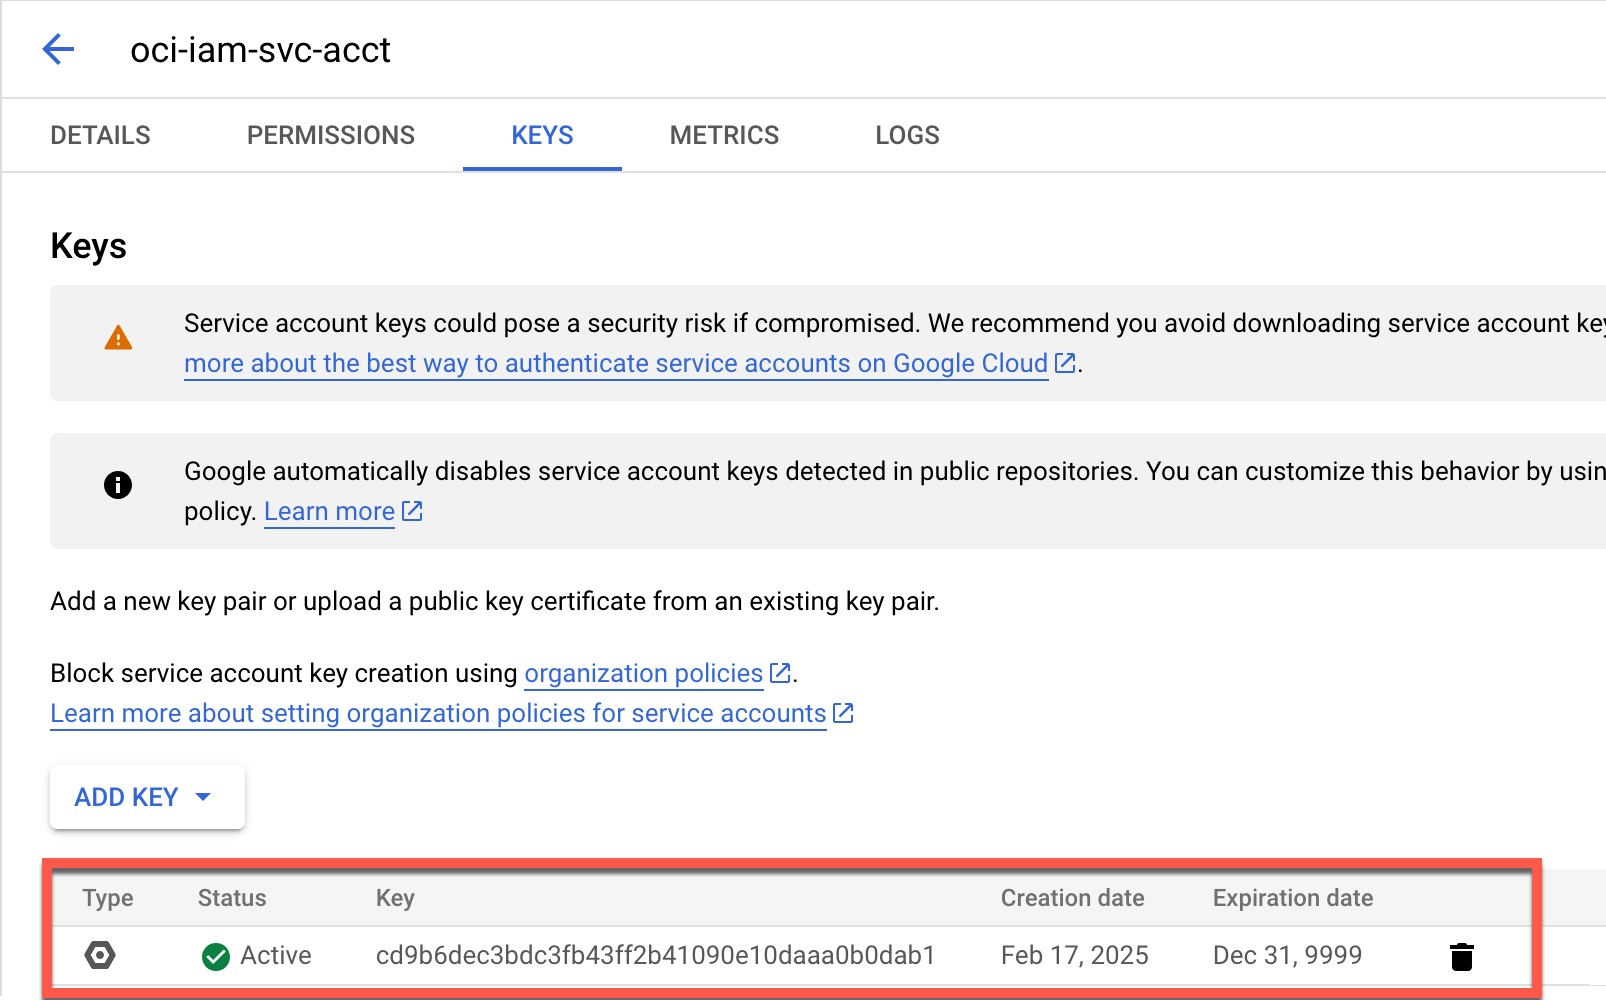
- The console will display a list of service accounts. Click the one created above.
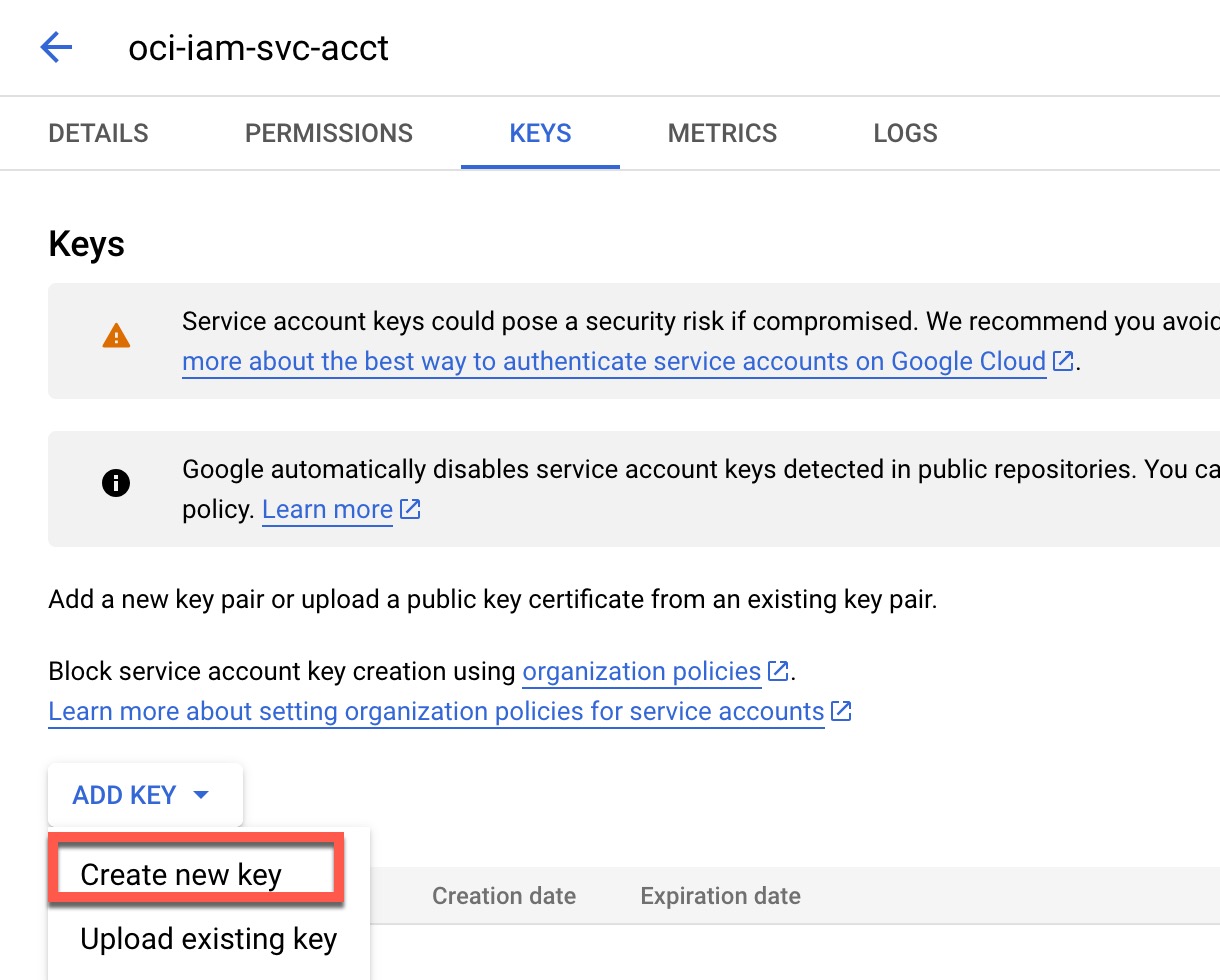
- Click the KEYS tab, and under ADD KEY, click Create New Key.
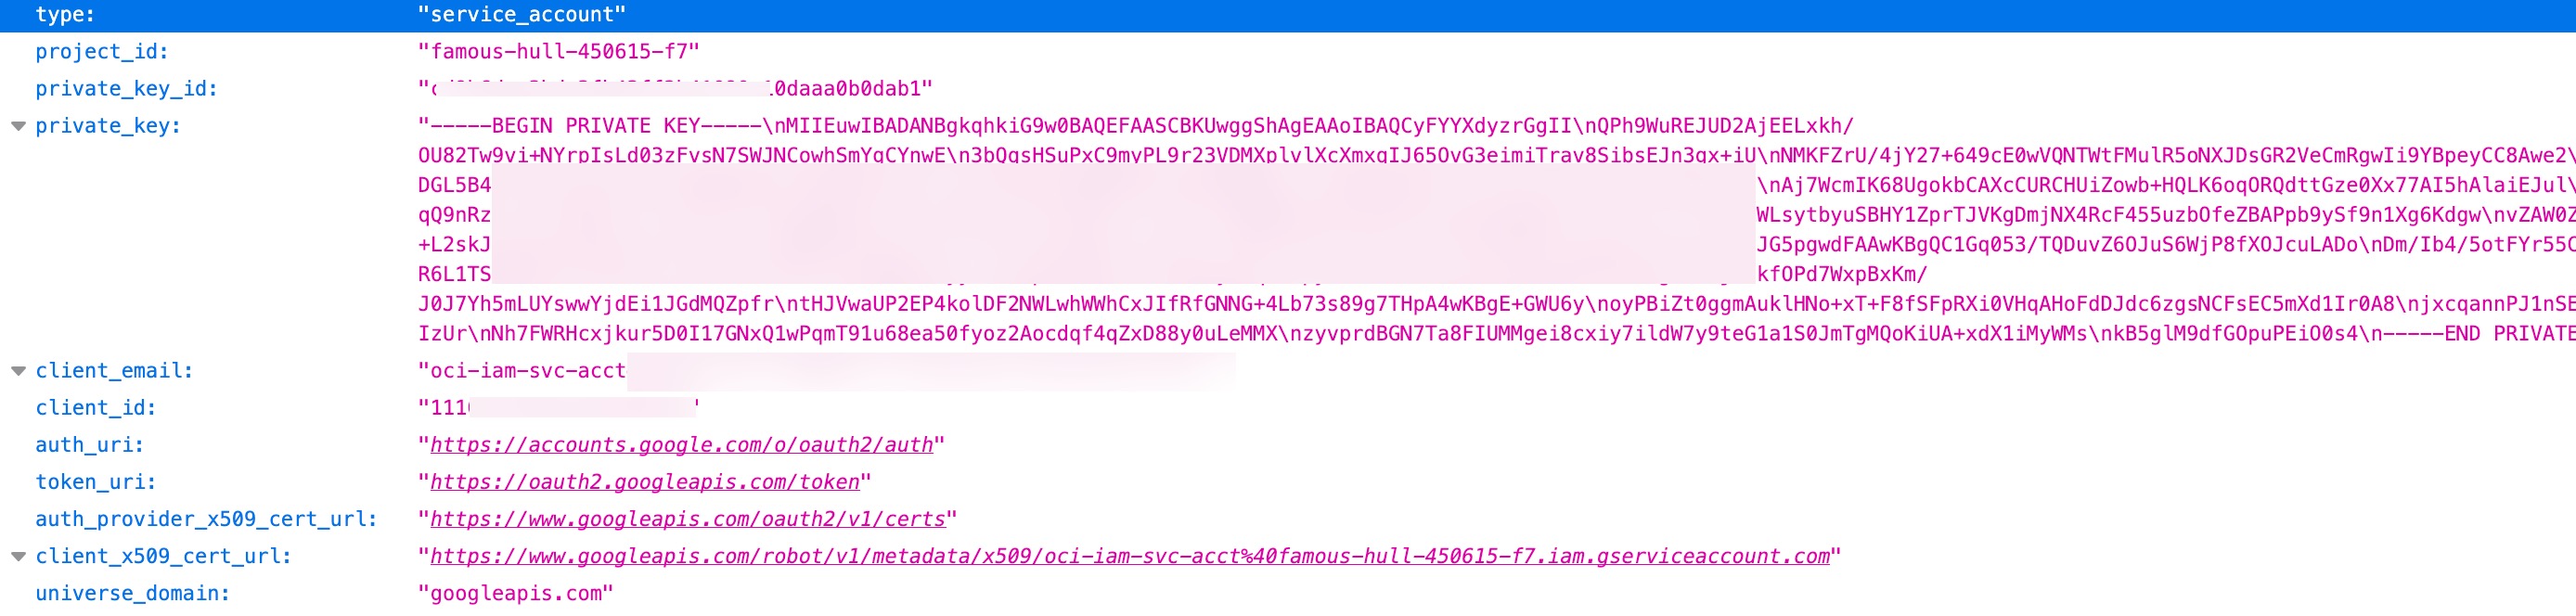
- Select JSON and click CREATE. Save the JSON file.
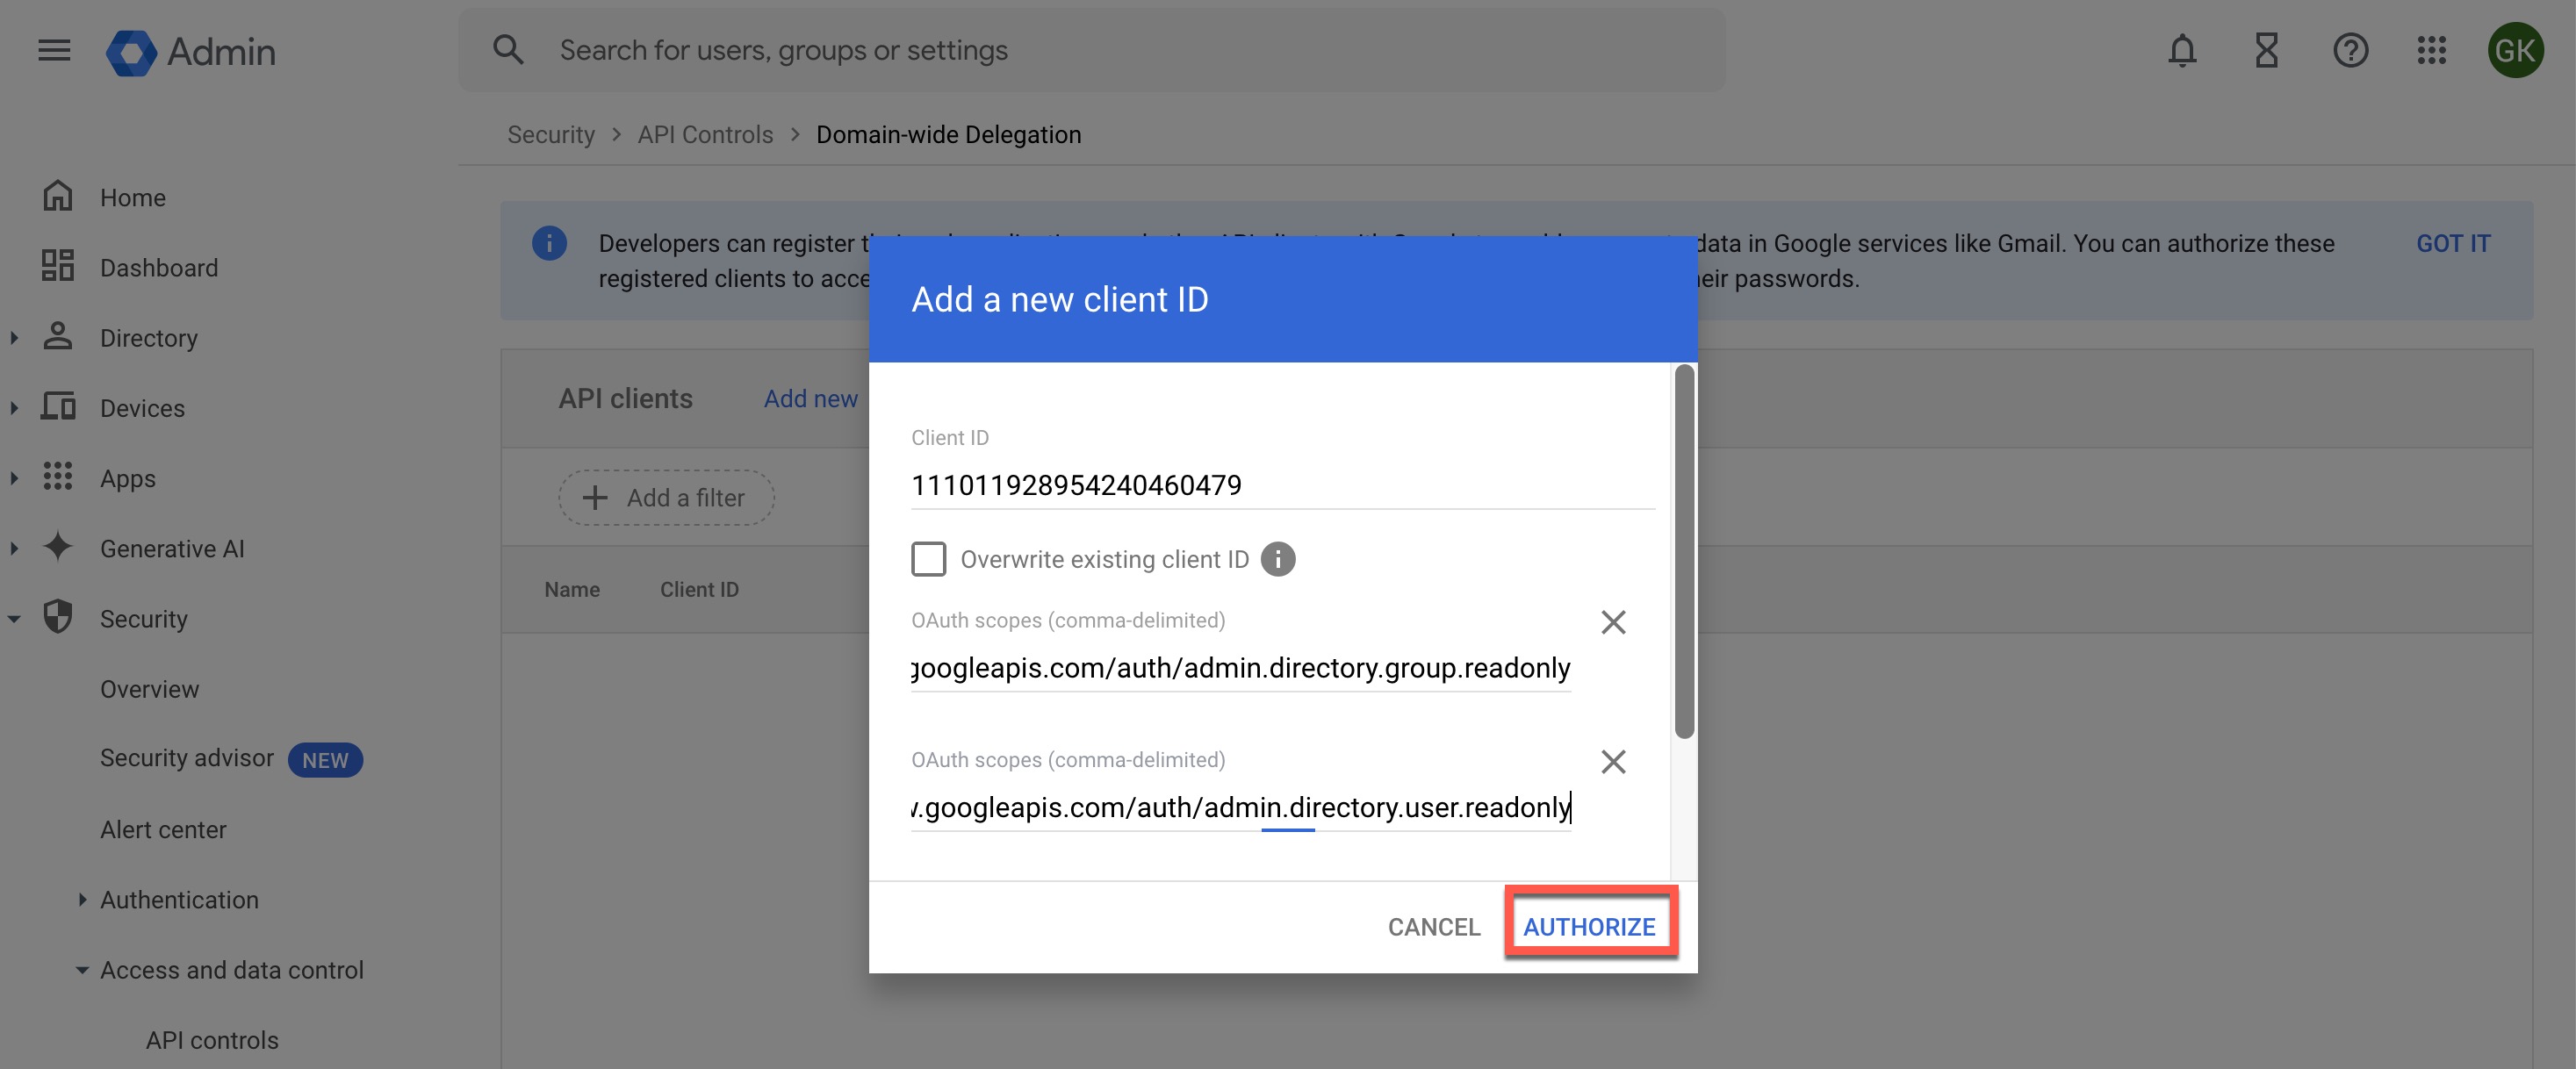
Configure Domain-Wide Delegation:
- Log in to https://admin.google.com/
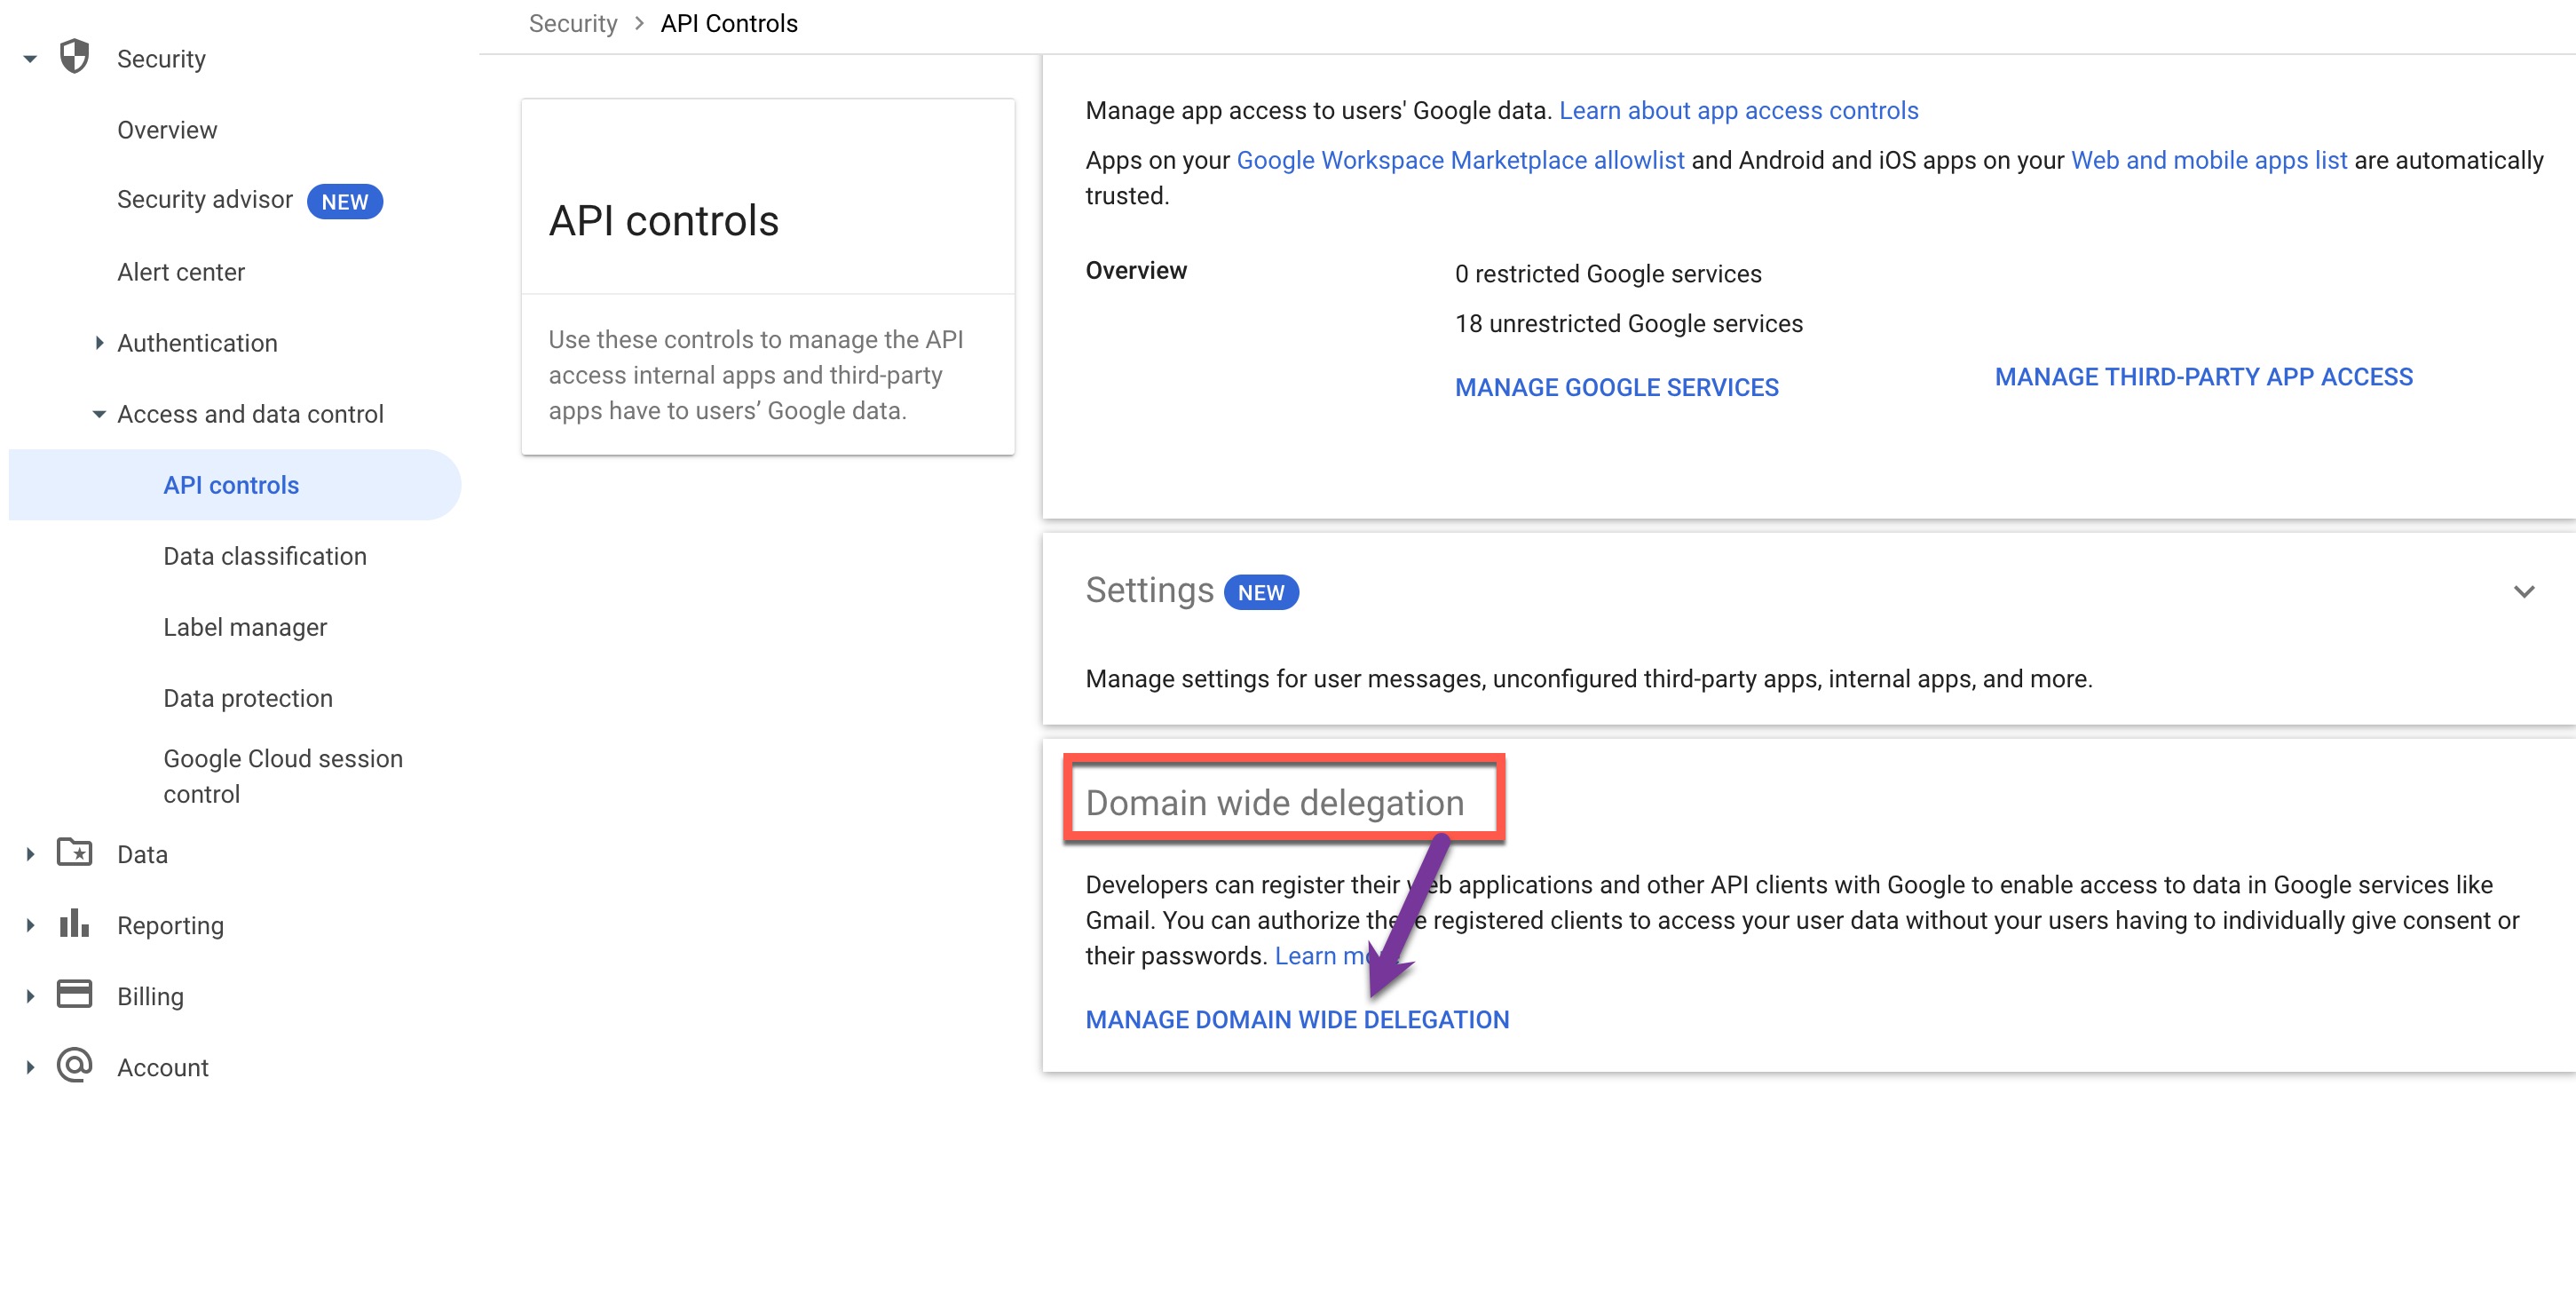
- Open the navigation menu and click Security. Under Access and Data Control, click API Controls.
- Click MANAGE DOMAIN-WIDE DELEGATION.
- Click Add New.
- Paste the client_id value from the downloaded JSON file.
- Enter the following scopes:
- https://www.googleapis.com/auth/admin.directory.group.readonly (To retrieve group, group alias, and member information)
- https://www.googleapis.com/auth/admin.directory.user.readonly (To retrieve users or user aliases)
- Click AUTHORIZE.

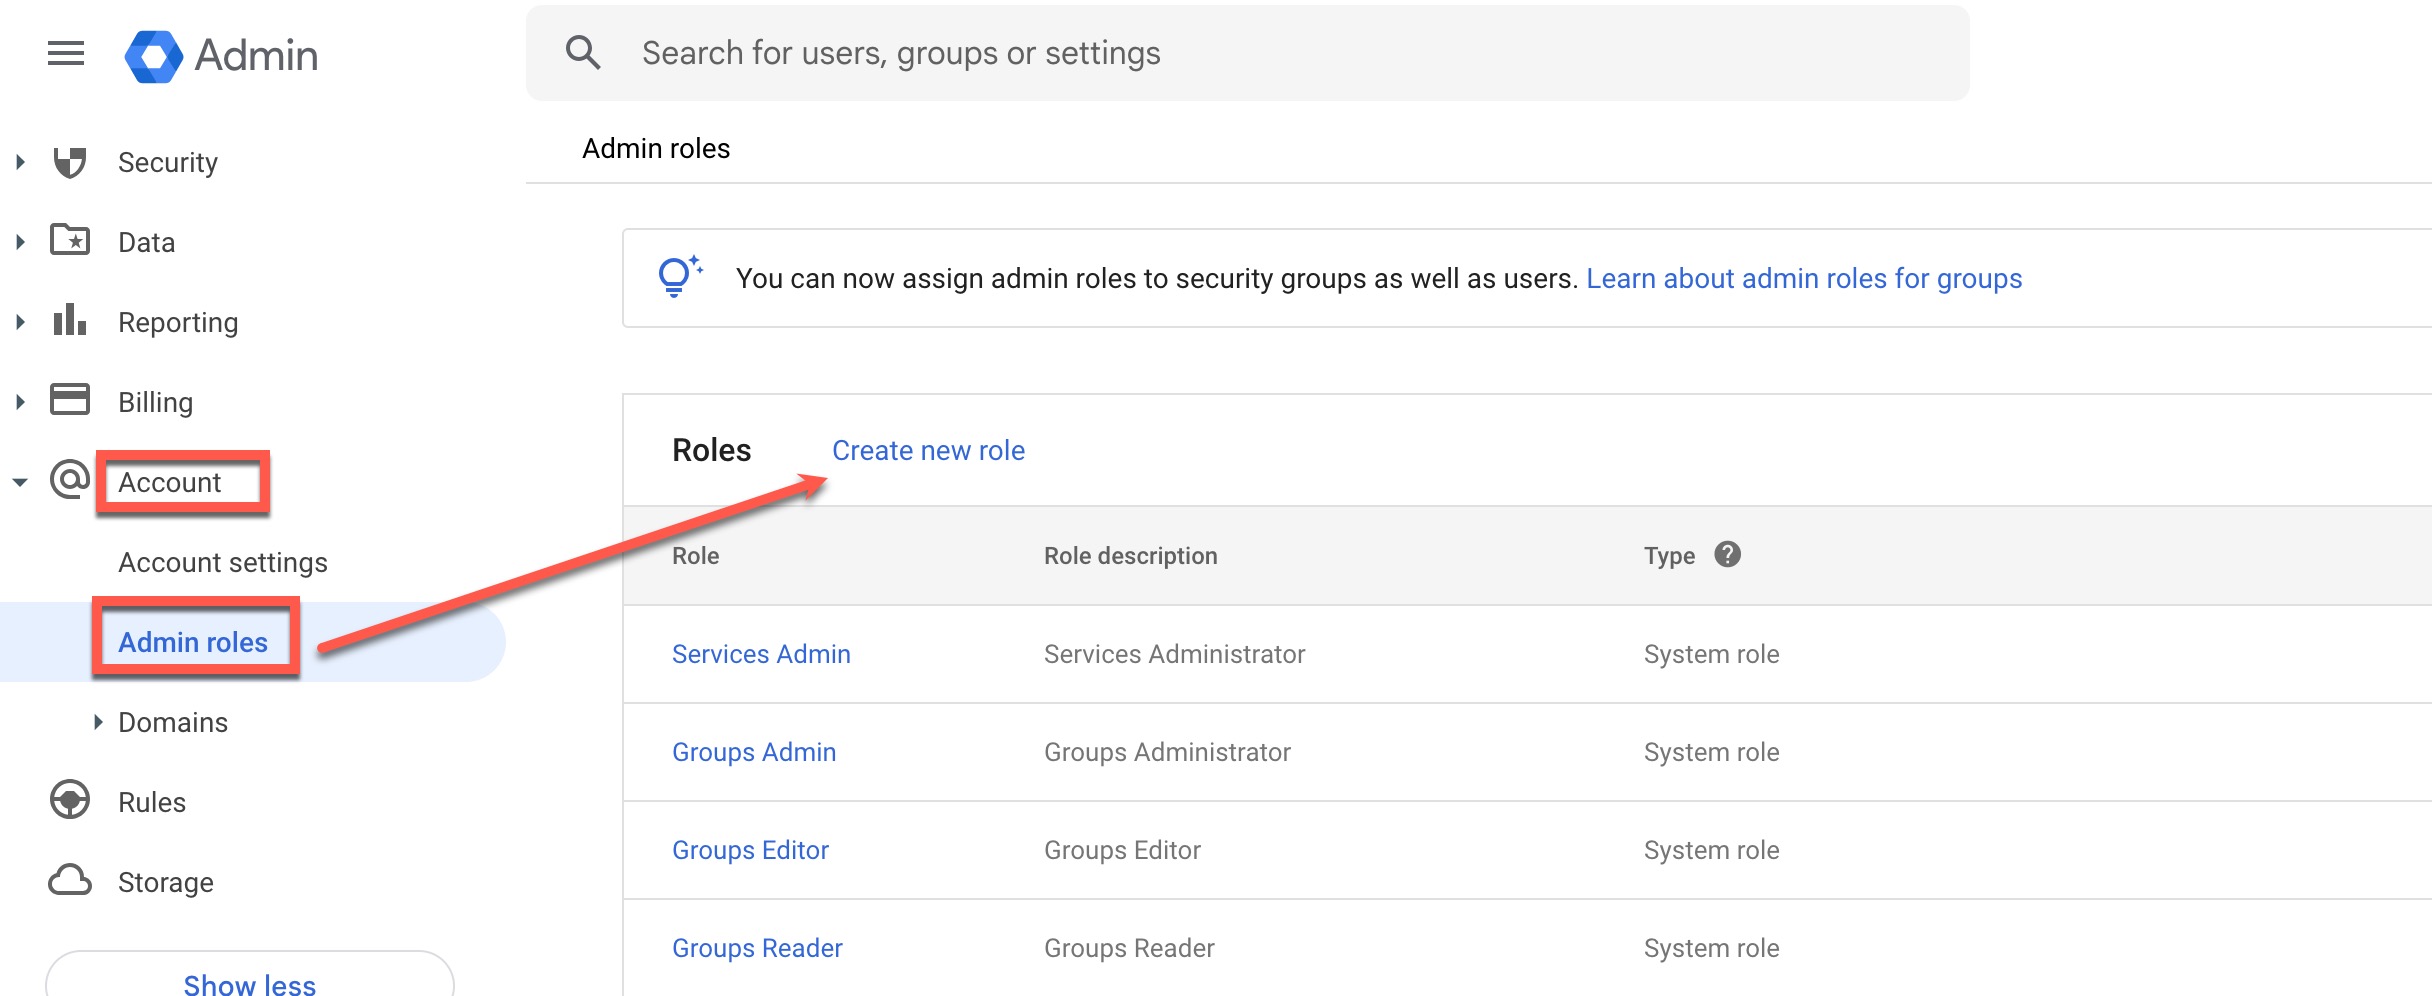
Create Admin Role:
- Log in to https://admin.google.com/
- Open the navigation menu. Under Account, click Admin Roles.
- Click Create New Role.
- Update the role details and click CONTINUE.
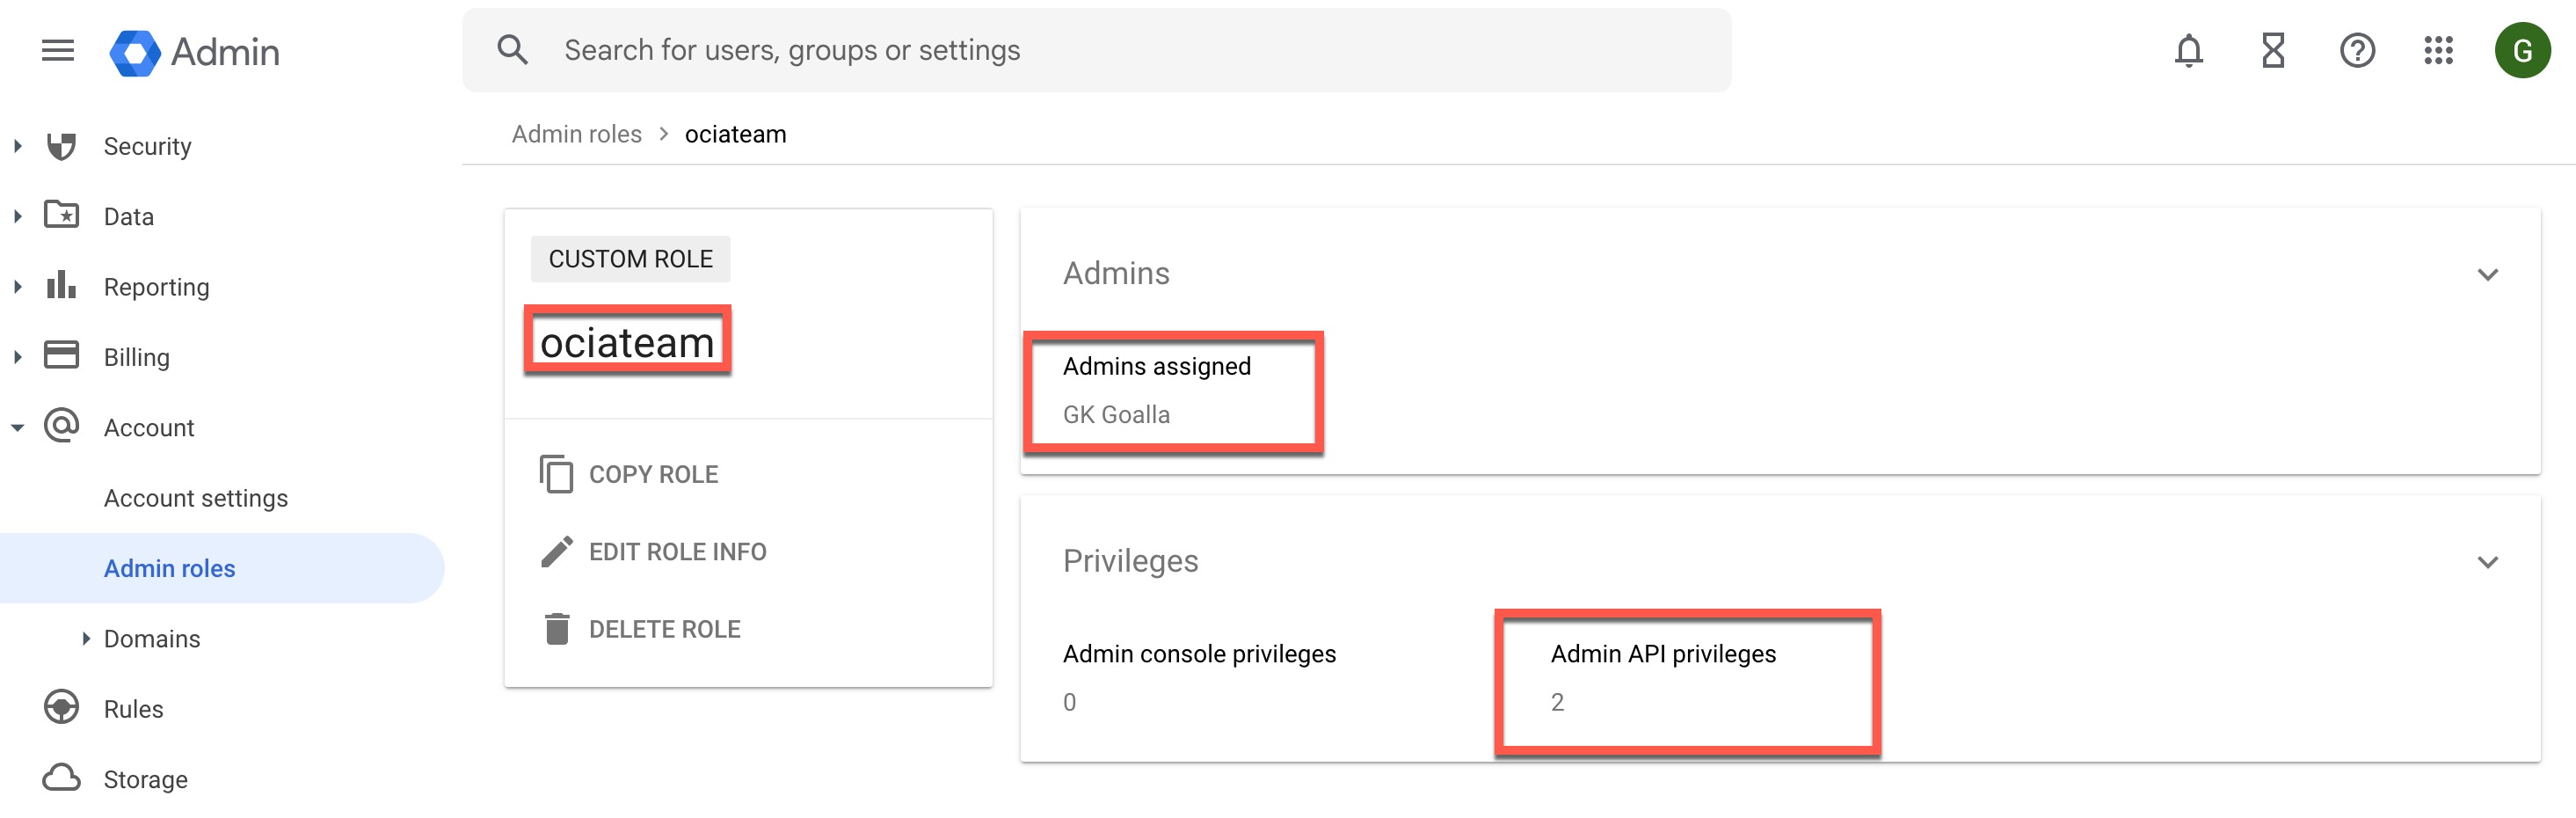
- Under Select Privileges, scroll down to Admin API Privileges.
- Under Admin API Privileges, select Read under Users and select Read under Groups.
- Click CONTINUE.
- Click CREATE ROLE.
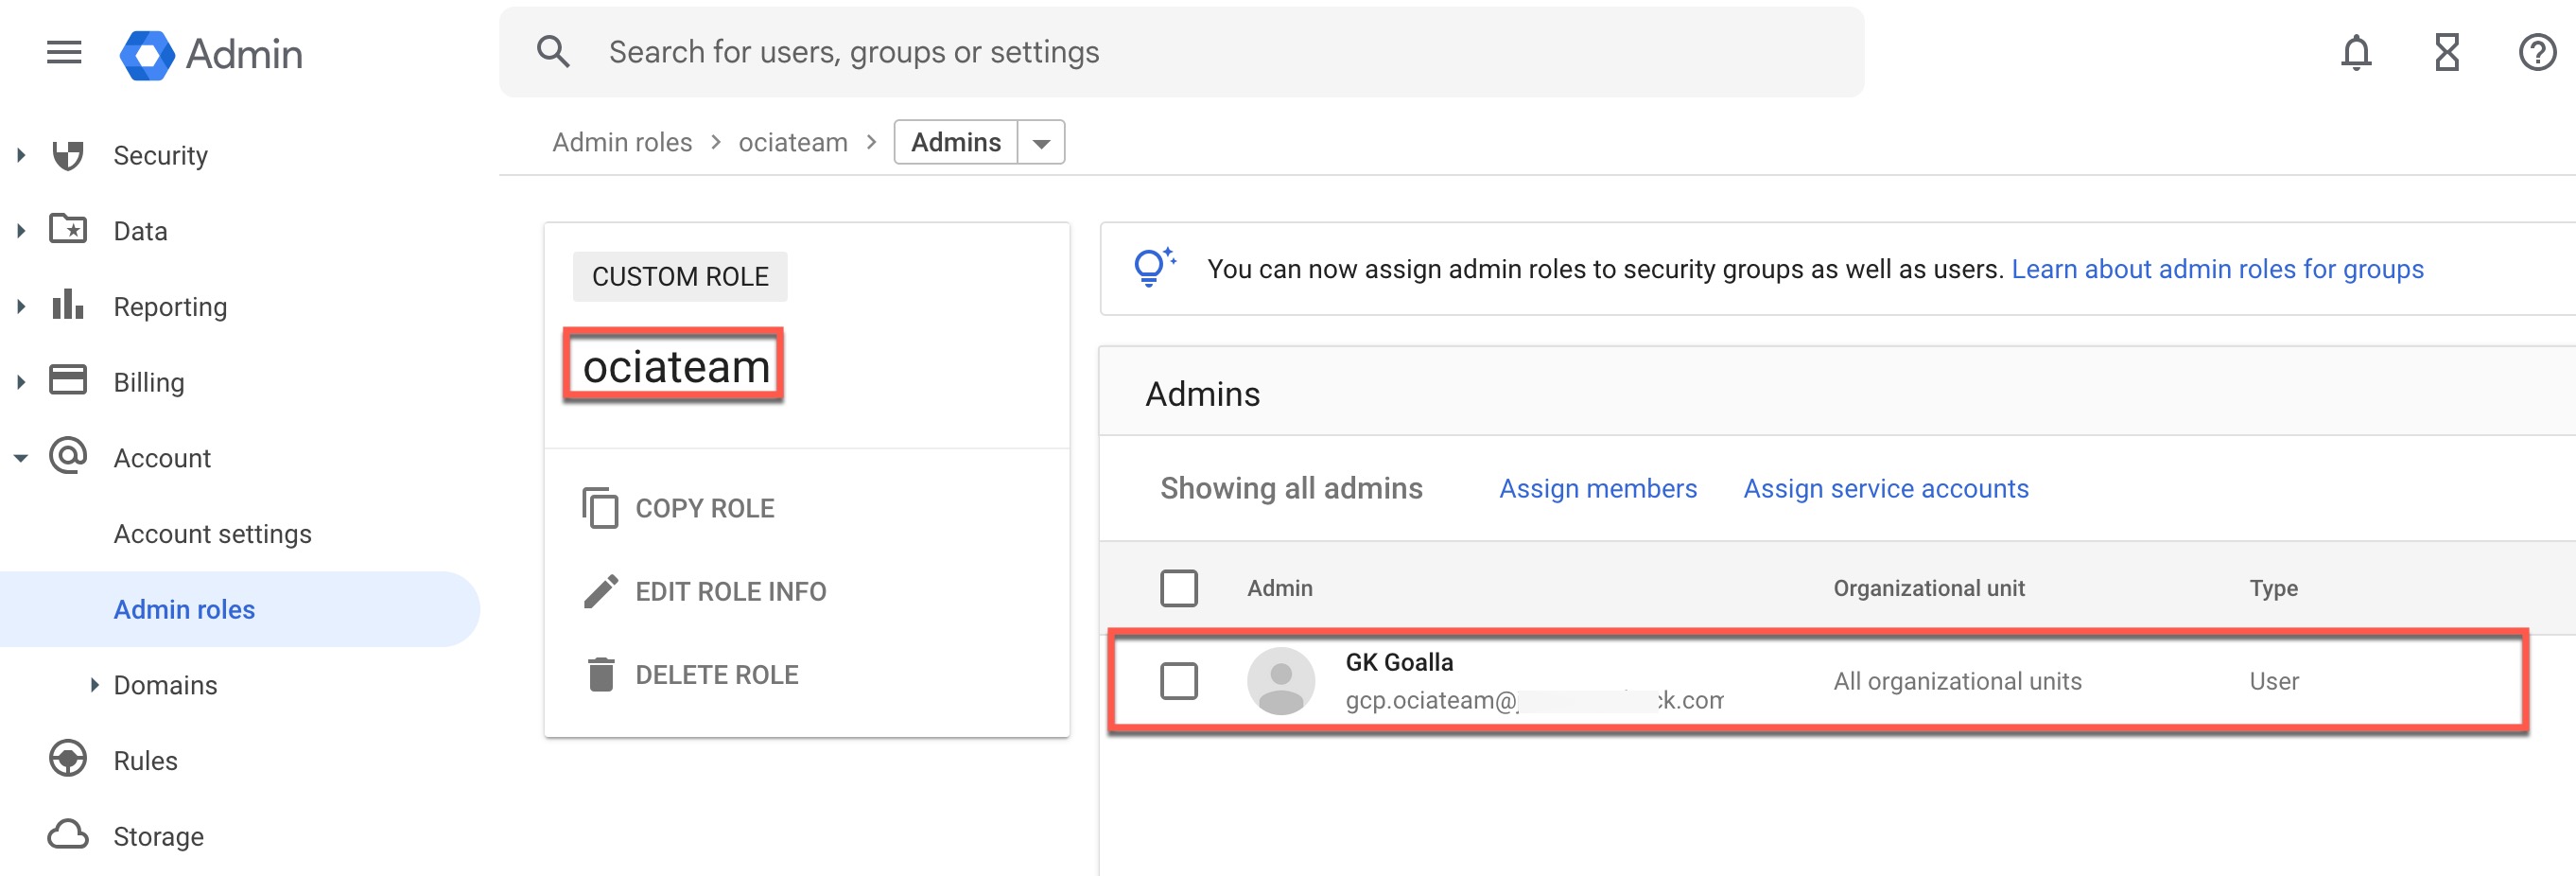
- Click Assign Members.
- In the search box, enter the name of the user you want to assign this role to. You can assign an existing user or create a new user to assign.
- Click the user’s name from the search results and click ASSIGN ROLE.
Note: You’ll need this user’s email when configuring Google Workspace in OCI IAM.
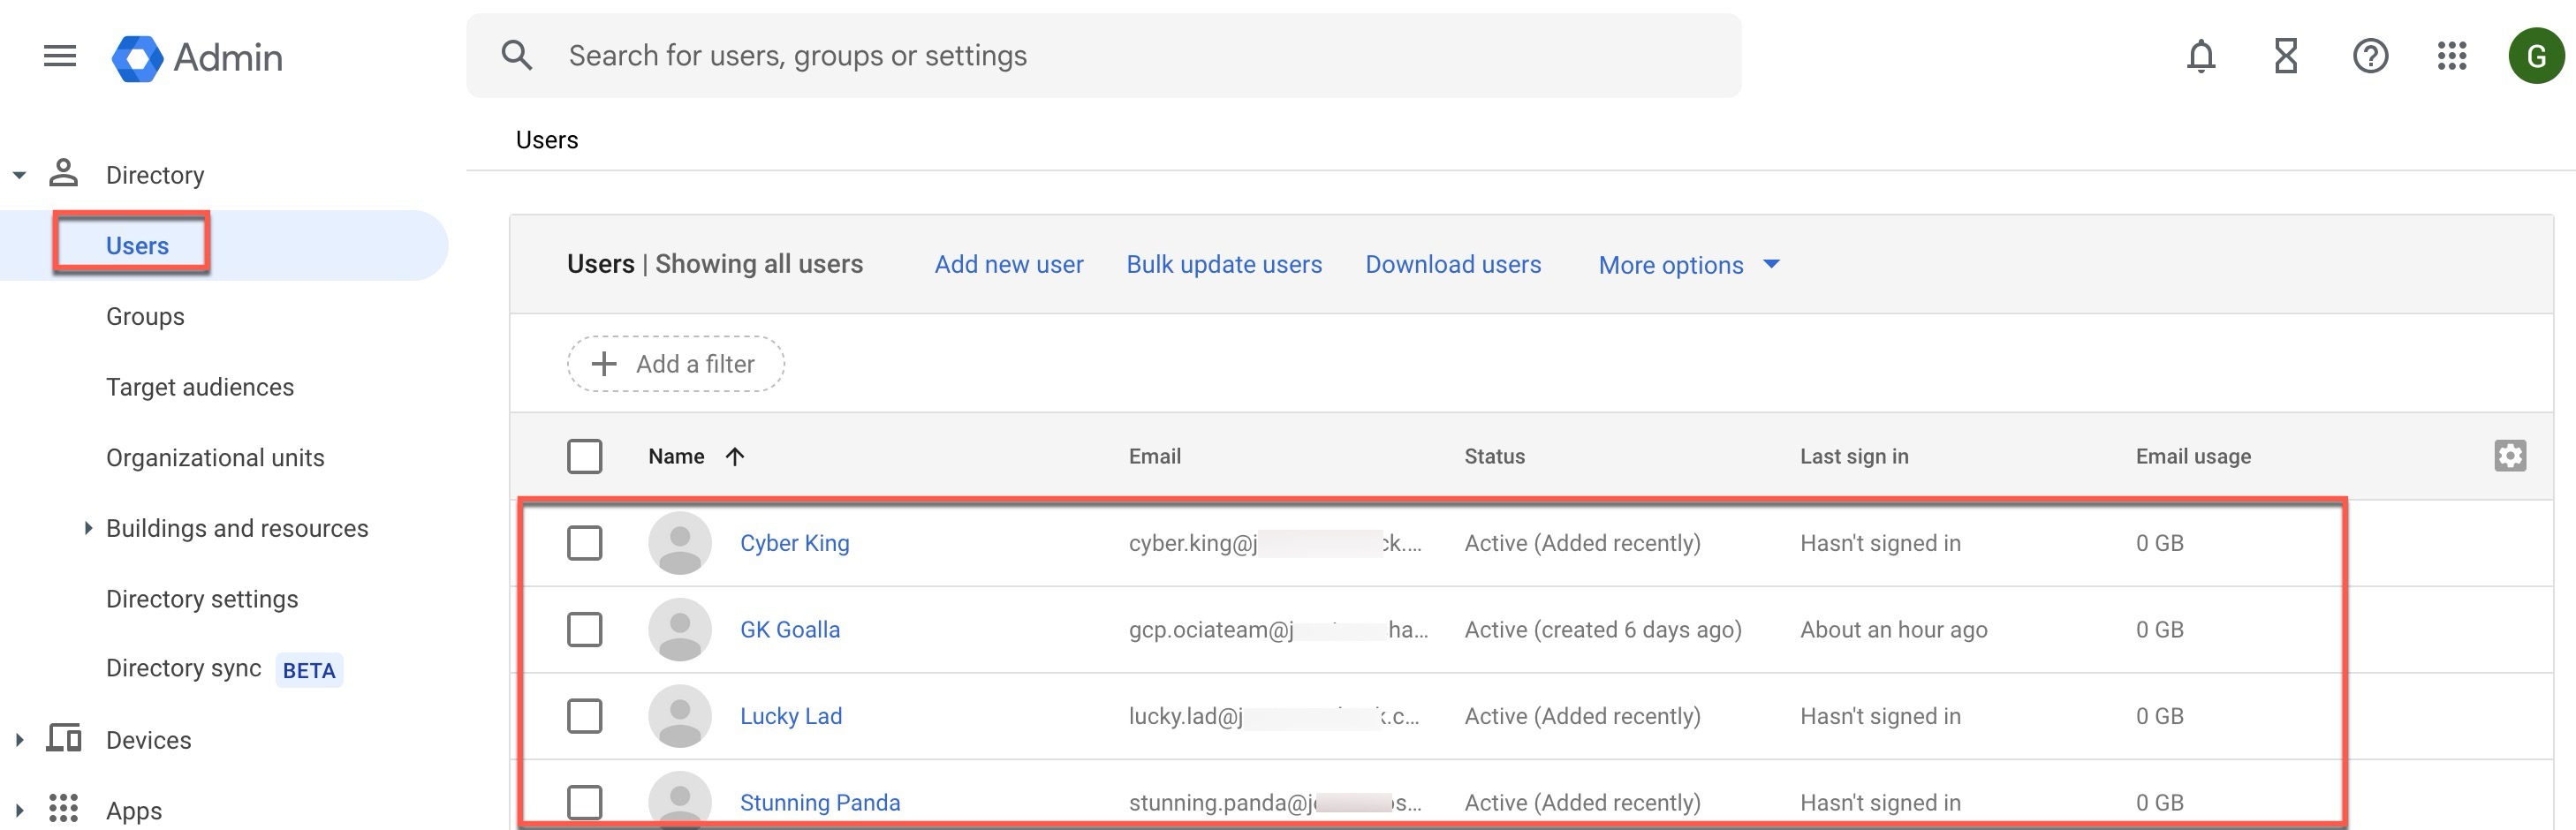
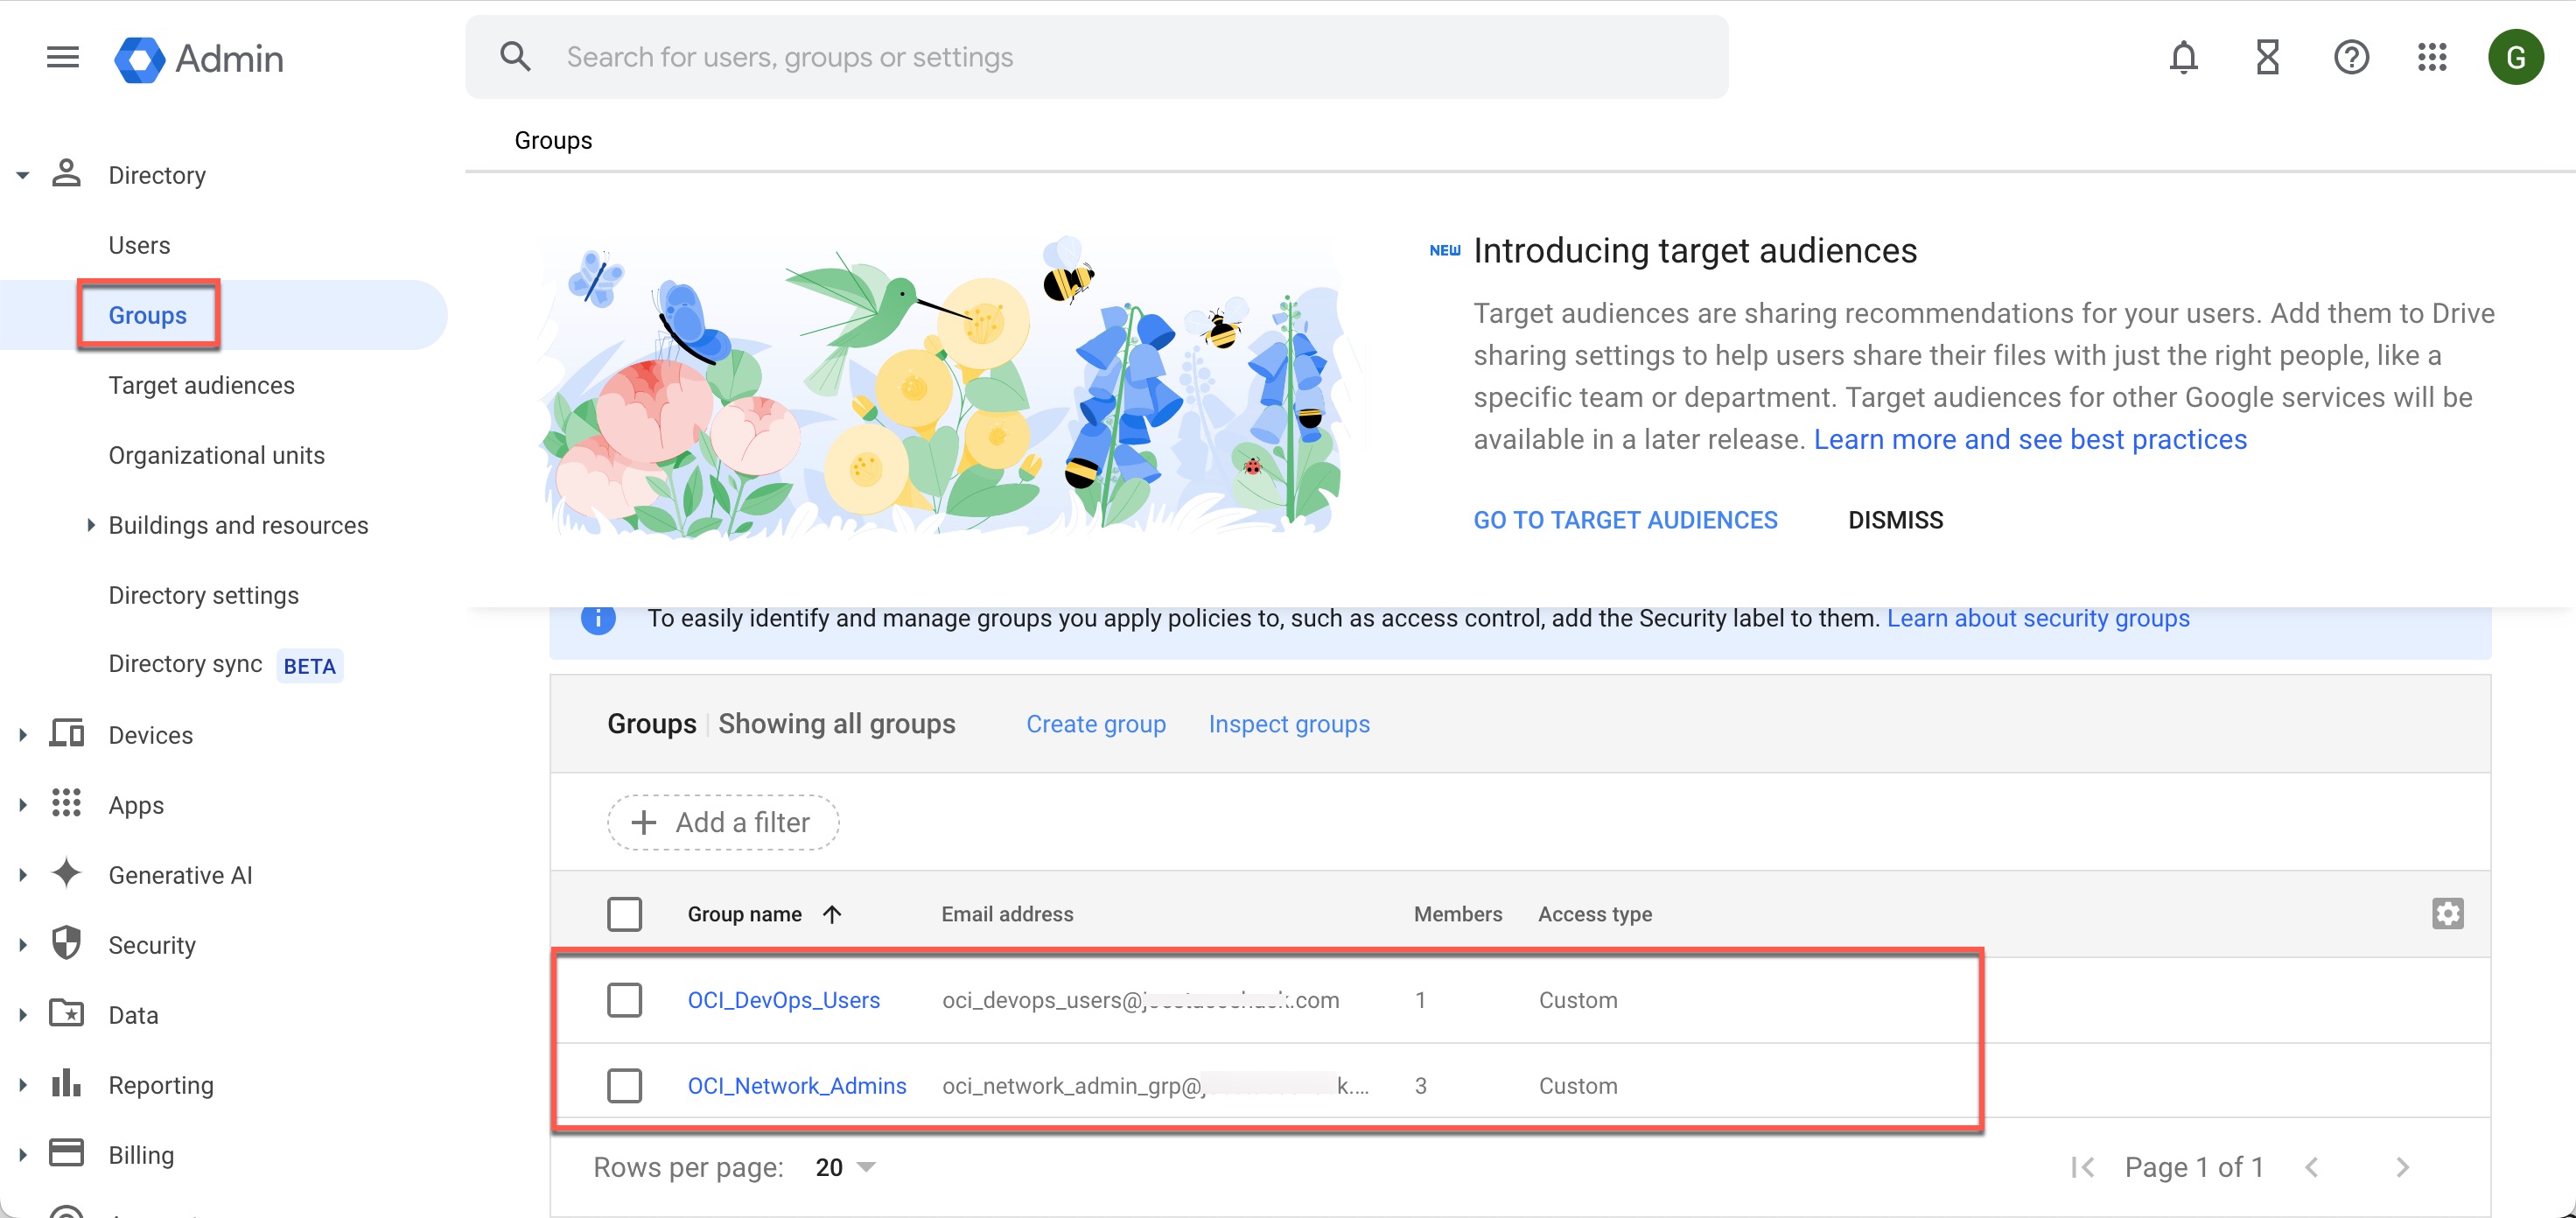
Review Google Clould IAM Users, Groups and User-Group Memberships (Optional):
This step involves reviewing the current users, groups, and group memberships that you have in Google Cloud IAM. It is entirely optional.
OCI IAM: Setting up Google Cloud IAM as the Authoritative Source in OCI IAM (Identity Domain)
The goal of this step is to onboard the Google Workspace application in OCI IAM to enable the authoritative synchronization of users, groups and user-group memberships from Google cloud IAM to OCI IAM (Identity Domain).
Onboard and Activate Google Workspace Application in OCI IAM:
- Log in to OCI Console https://cloud.oracle.com
- Open the navigation menu and click on Identity & Security. Under Identity, click Domains.
- Click the name of the identity domain you want to work with. Then, click Integrated Applications.
- Click Add Application.
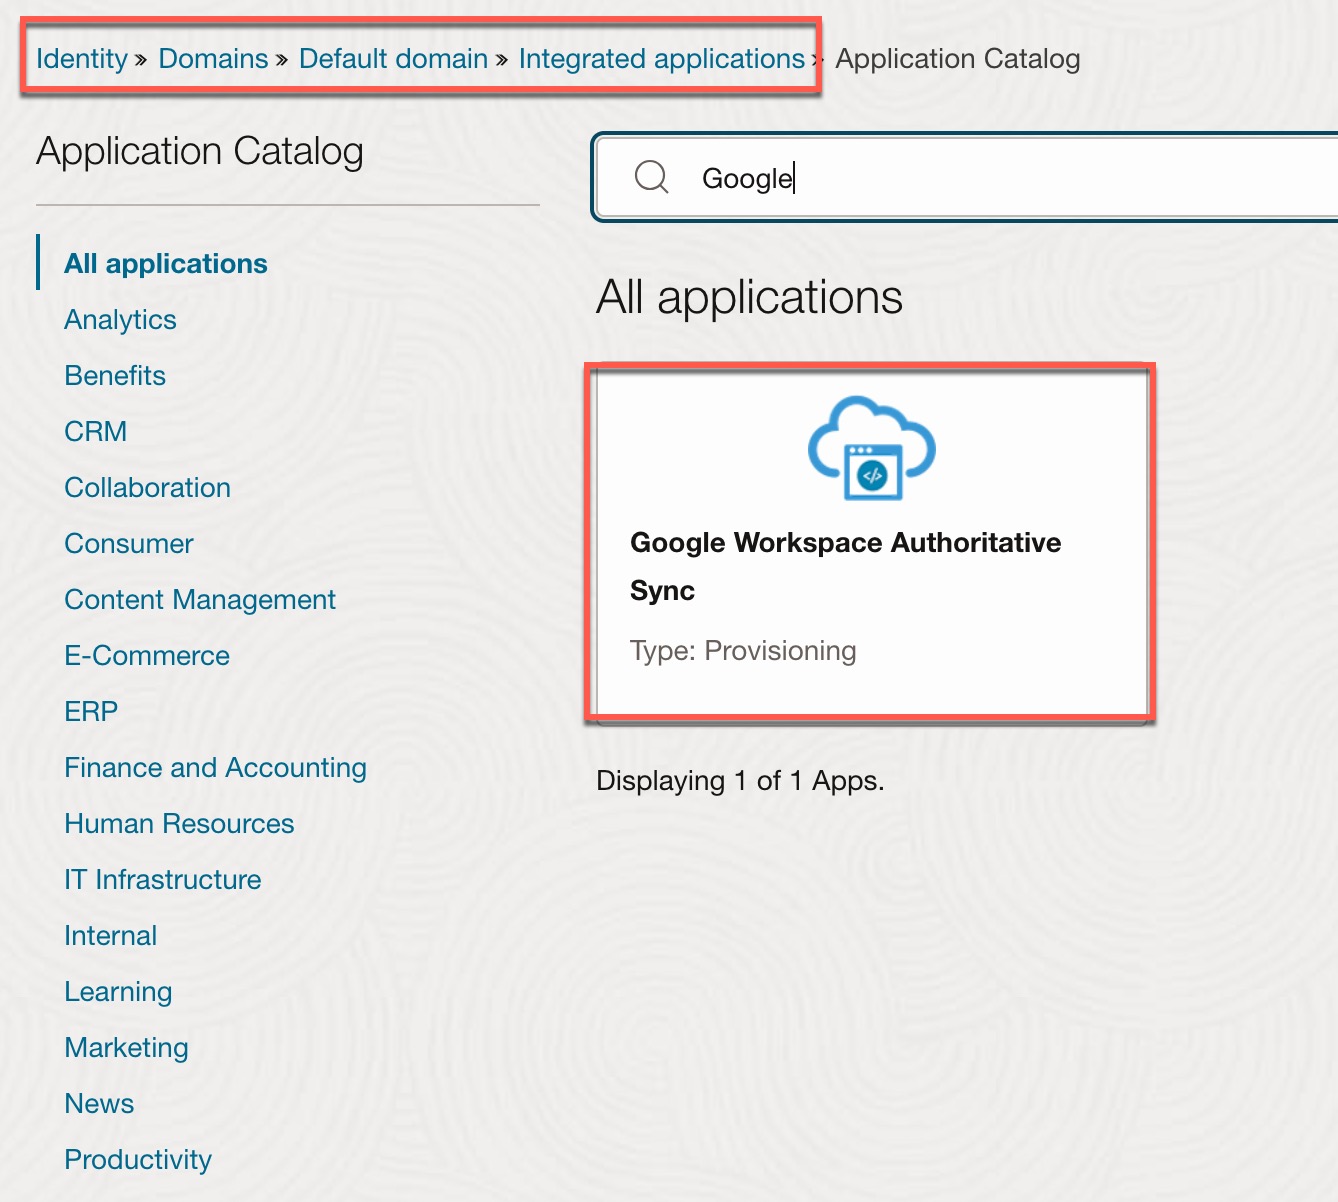
- In the Add Application window, click Application Catalog, then click Launch App Catalog.
- Find and select the Google Workspace Authoritative Sync application.
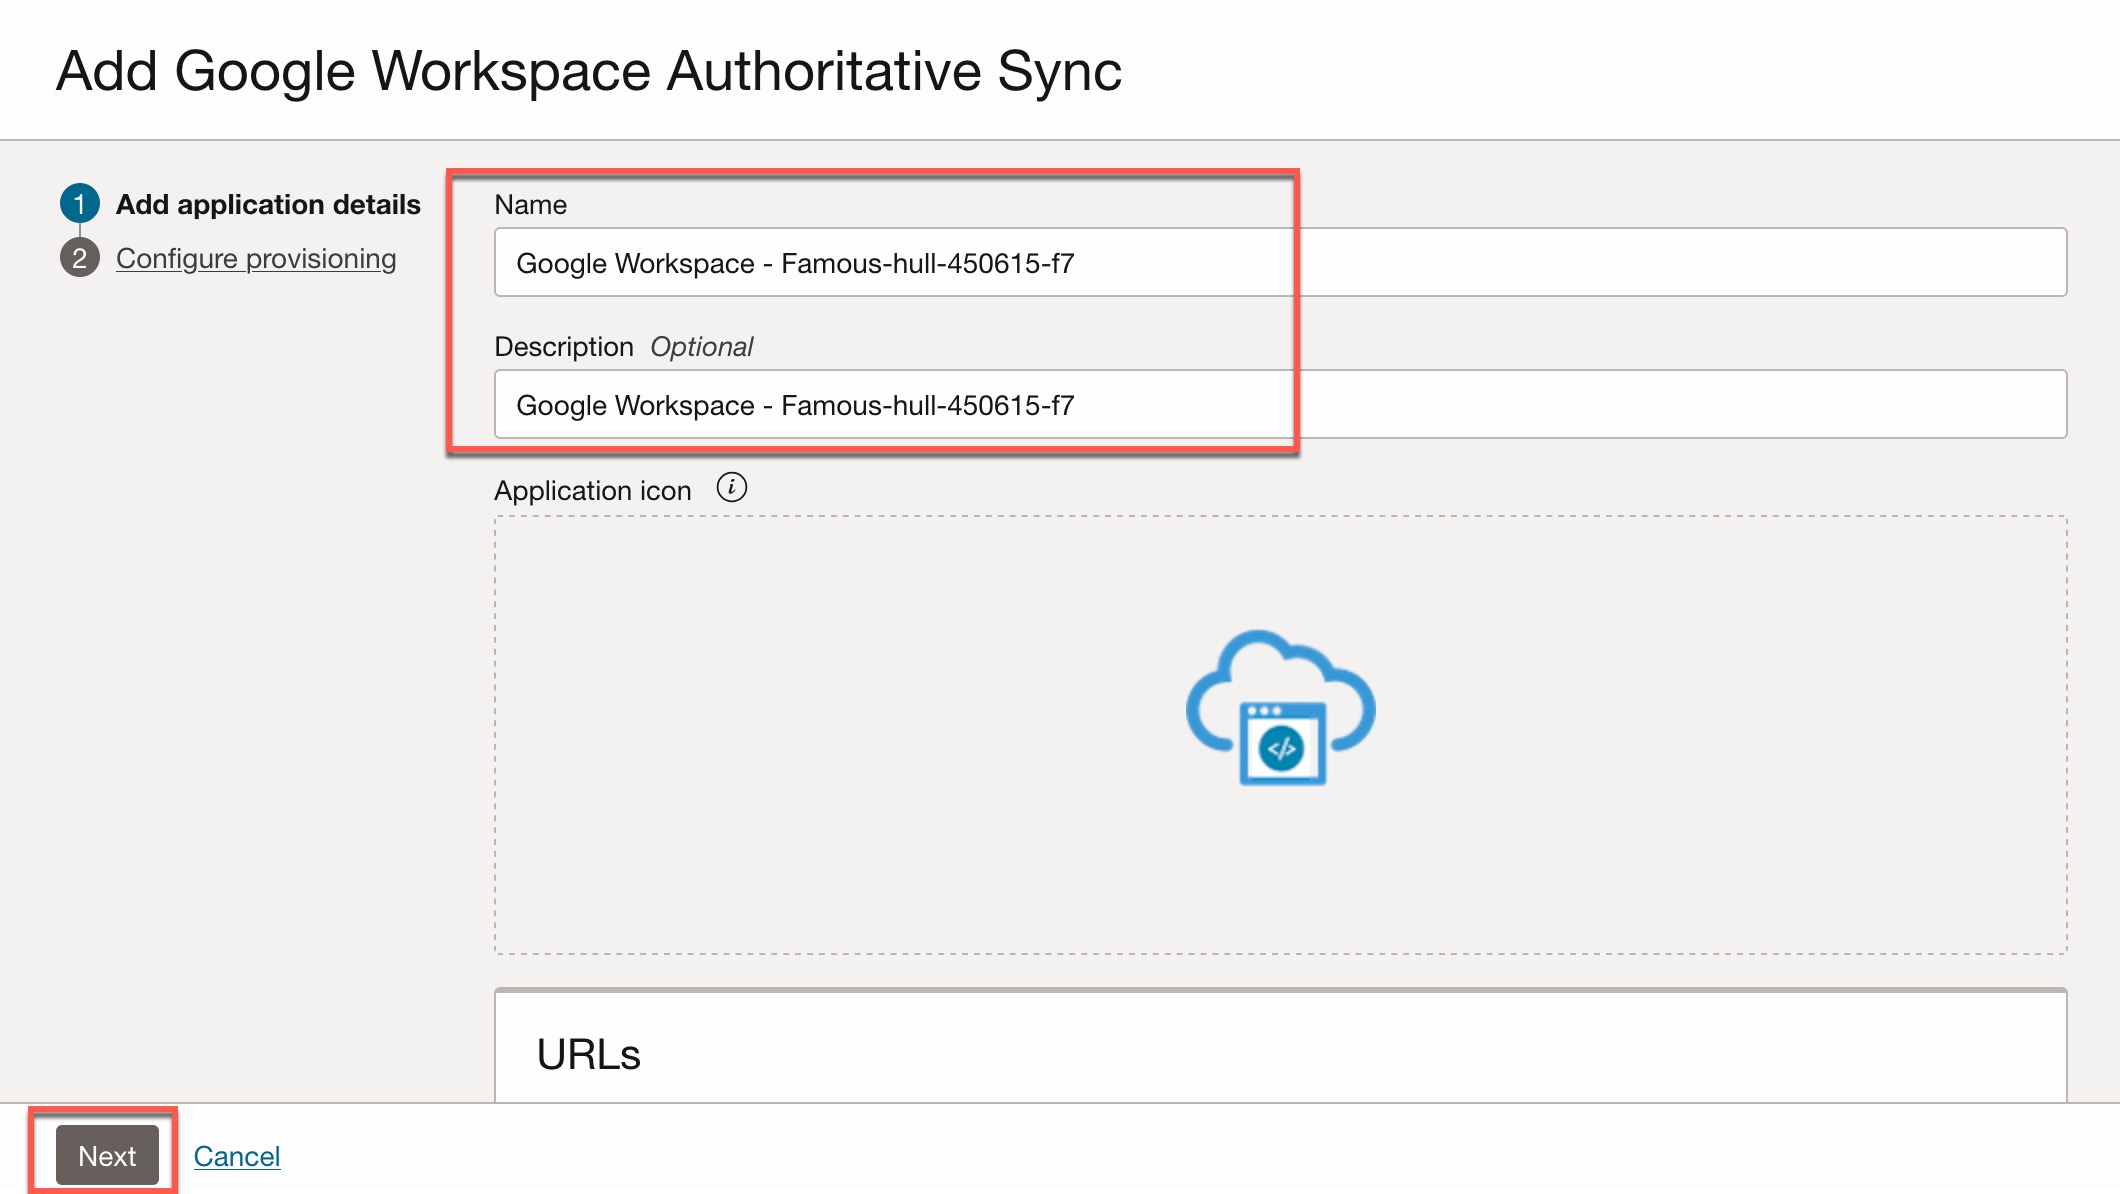
- Update any application details as necessary, then click Next.
- Turn on Enable Provisioning and confirm.
- Provide the required details (See below screenshot and details of the each field you need to provide). Click on “Test Connectivity” to verify the connectivity.
- Under Select Provisioning Operations, select Authoritative Sync.
- Turn on Enable Synchronization, accept default values and click Finish.
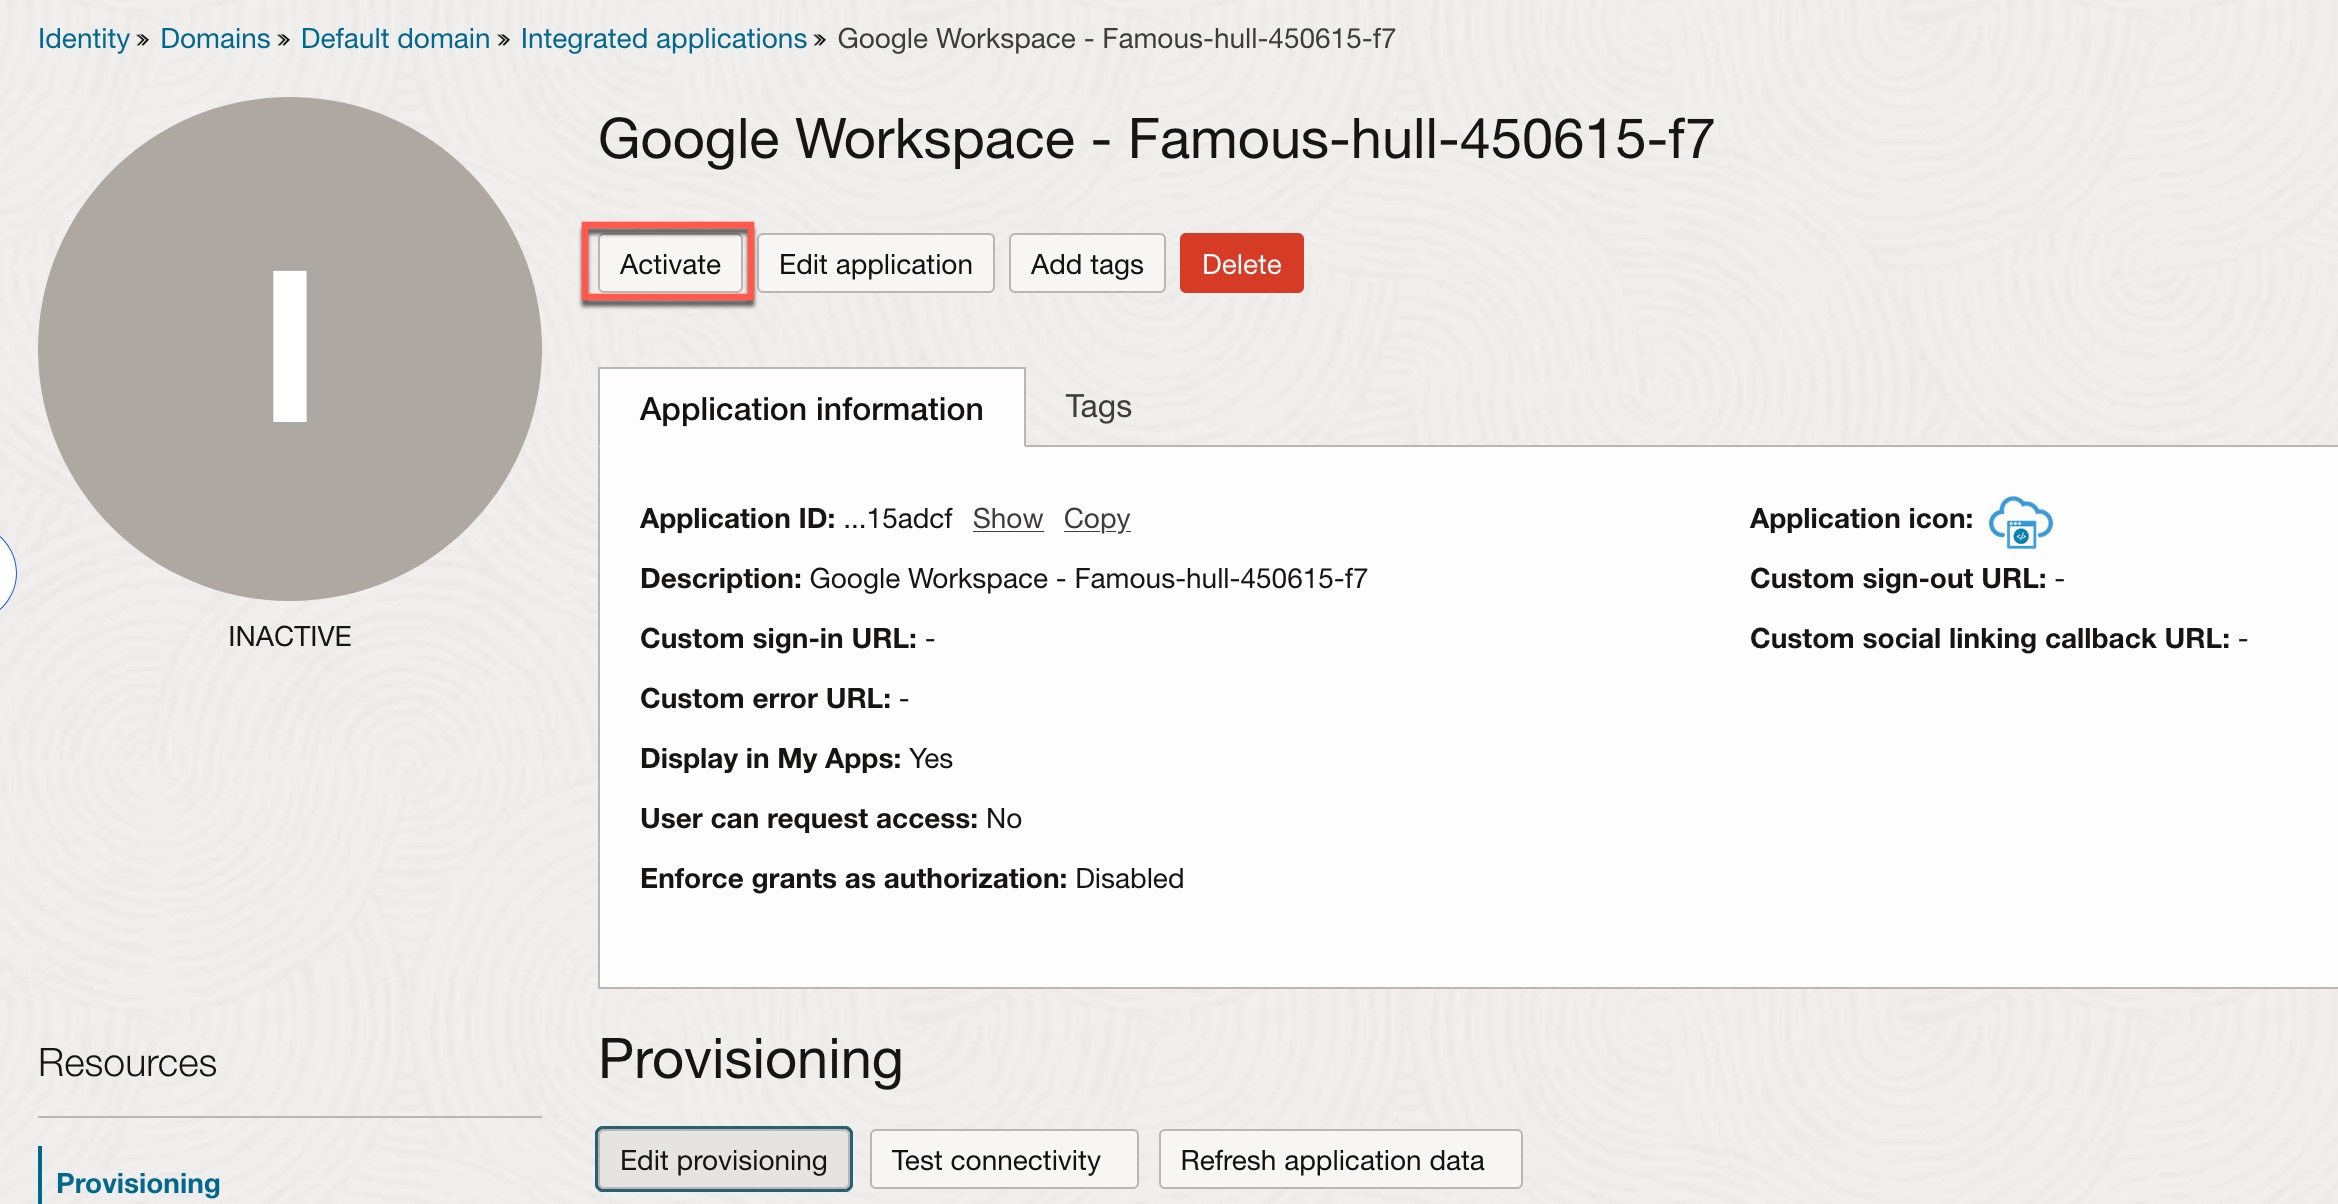
- Click Activate, then click Activate Application.
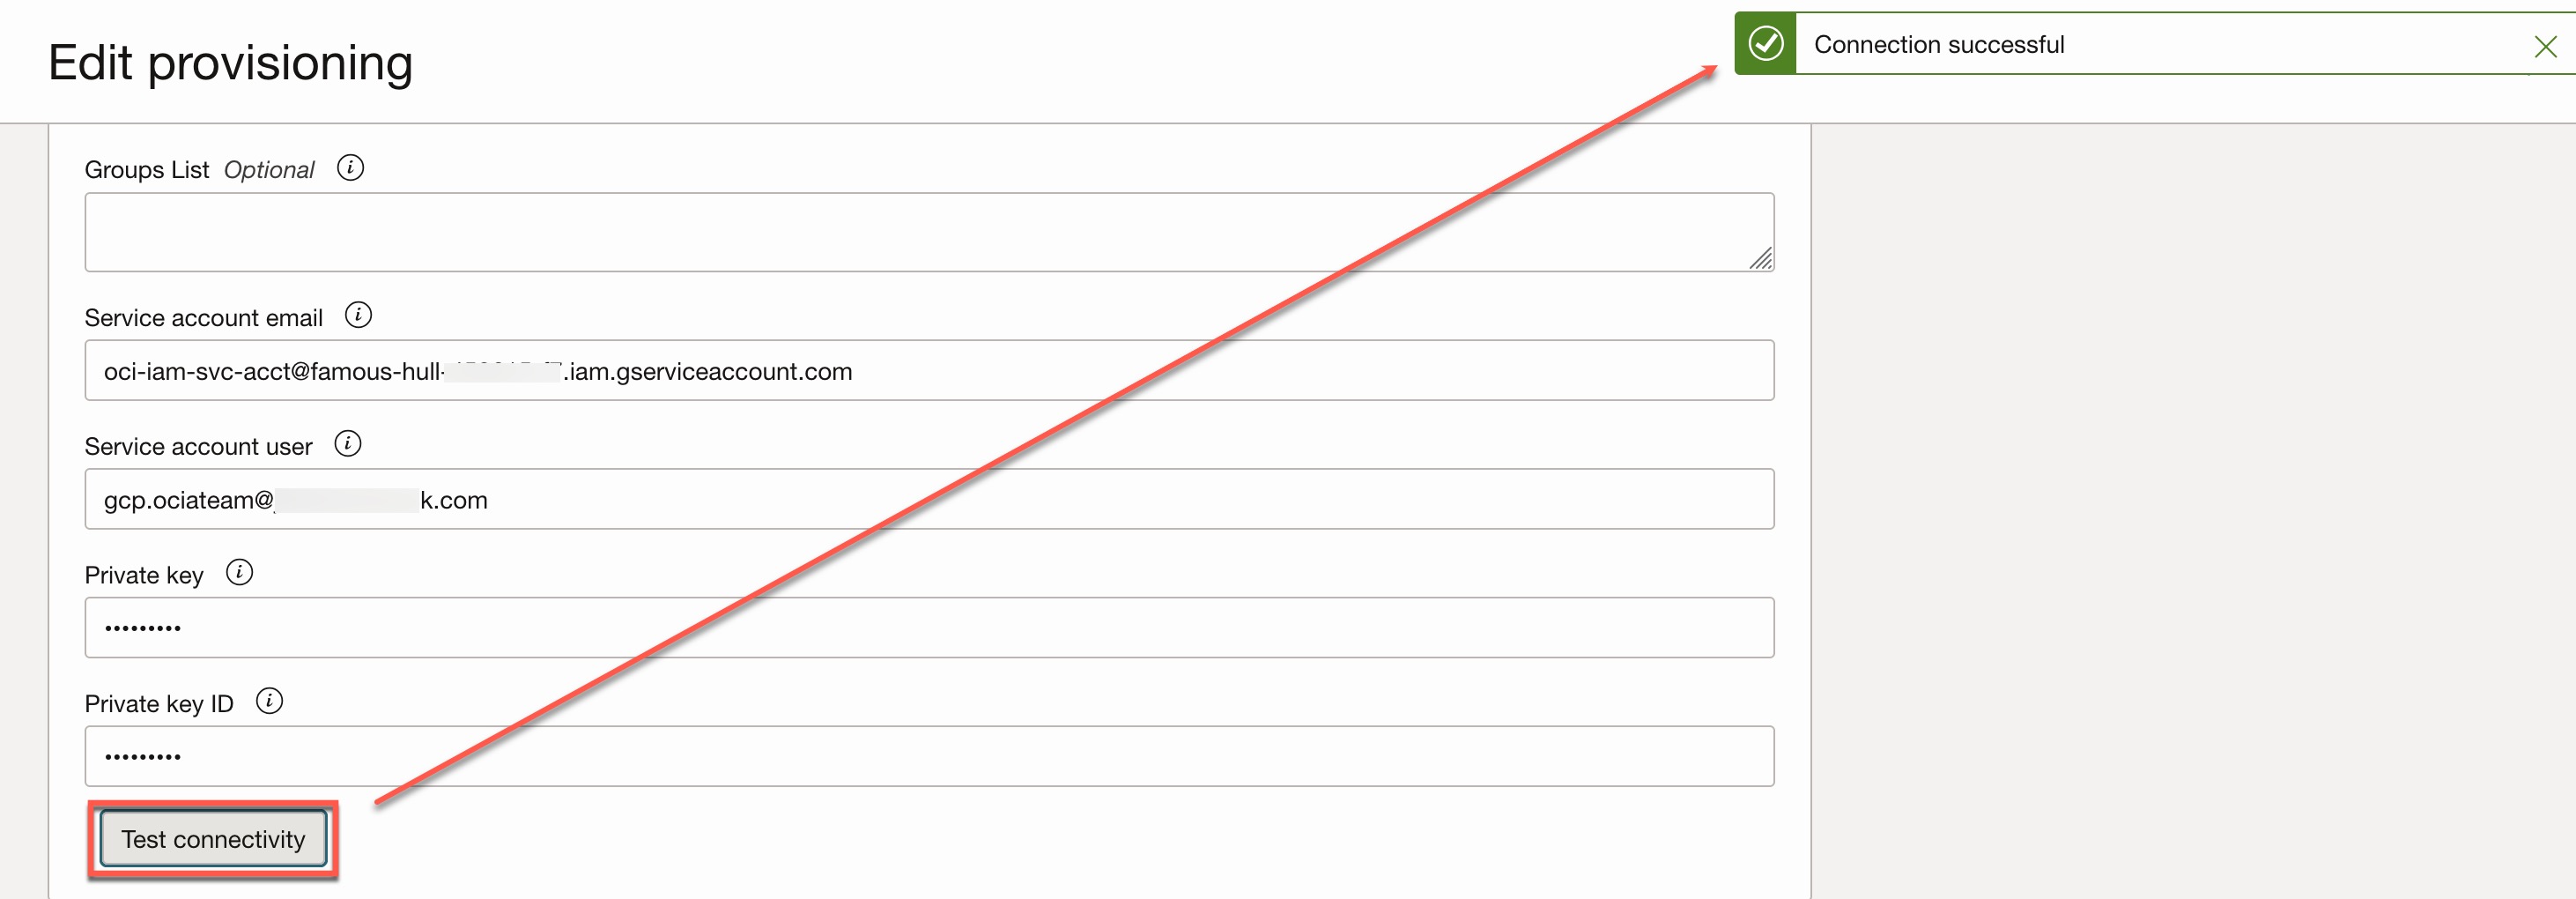
- Group List (Optional): Provide the list of the groups (comma-separated values) to synchronize users belonging to those groups. If no list is provided, then it syncs all users, groups, and user-group memberships.
- Service account email: Enter the client_email value from service account JSON file.
- Service account user: Provide the email of the user assigned the Admin Role during the Create Admin Role step.
- Private key: Enter the private_key value from the service account JSON file, including the full key block (–BEGIN PRIVATE KEY– … –END PRIVATE KEY–\n).
- Private key ID: Enter the private_key_id value from the service account JSON file.
Synchronize Users and Groups from Google IAM:
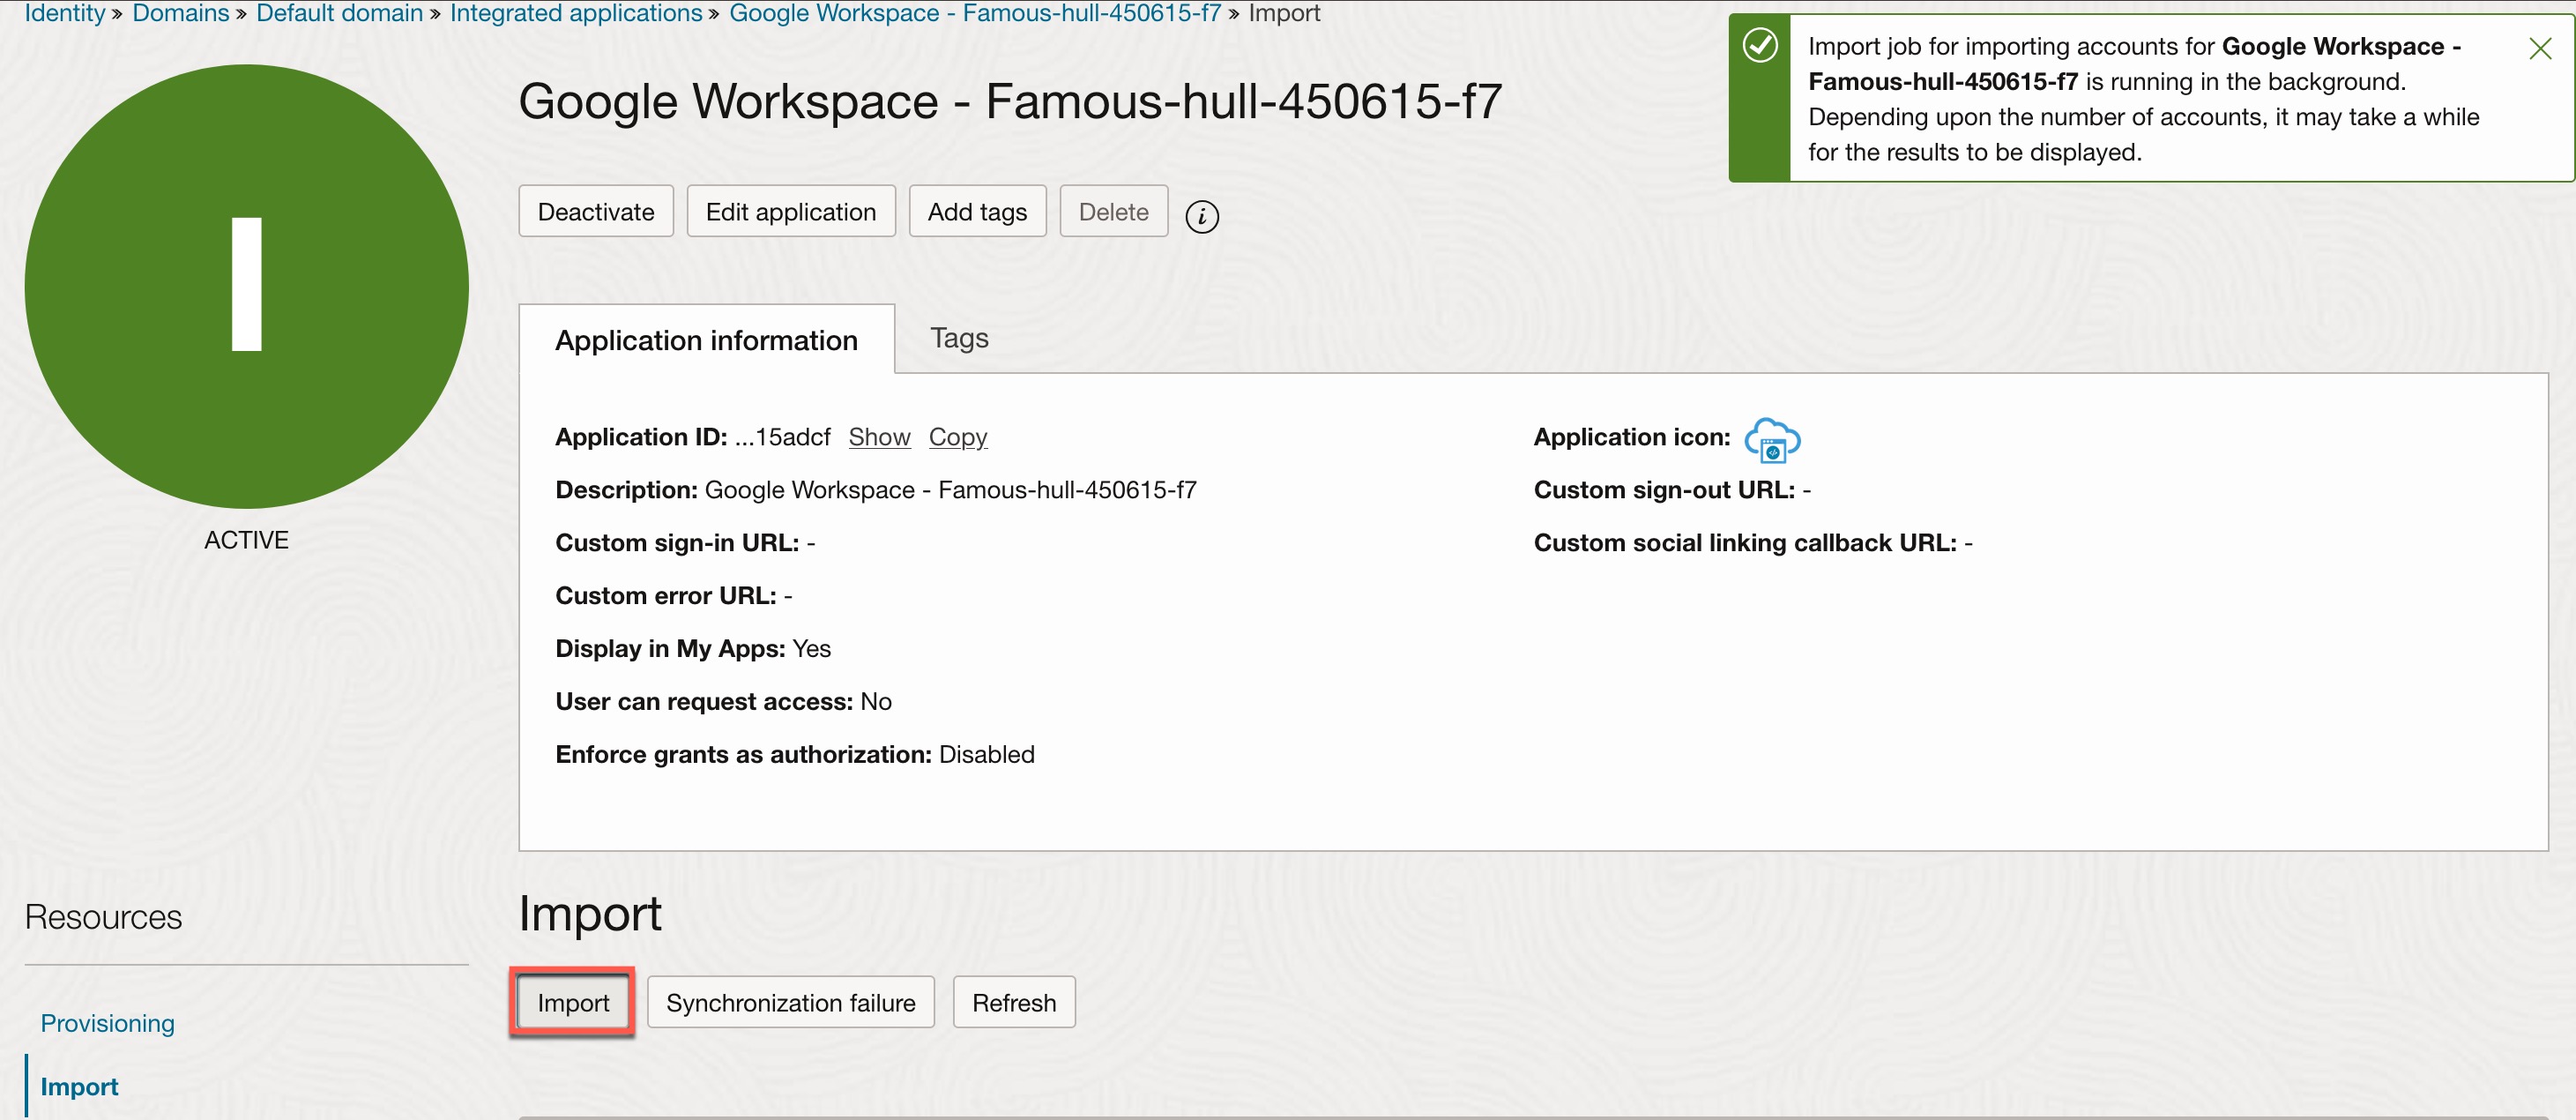
- Open the Google Workspace application that you just created and activated.
- Under Import, click the Import button.
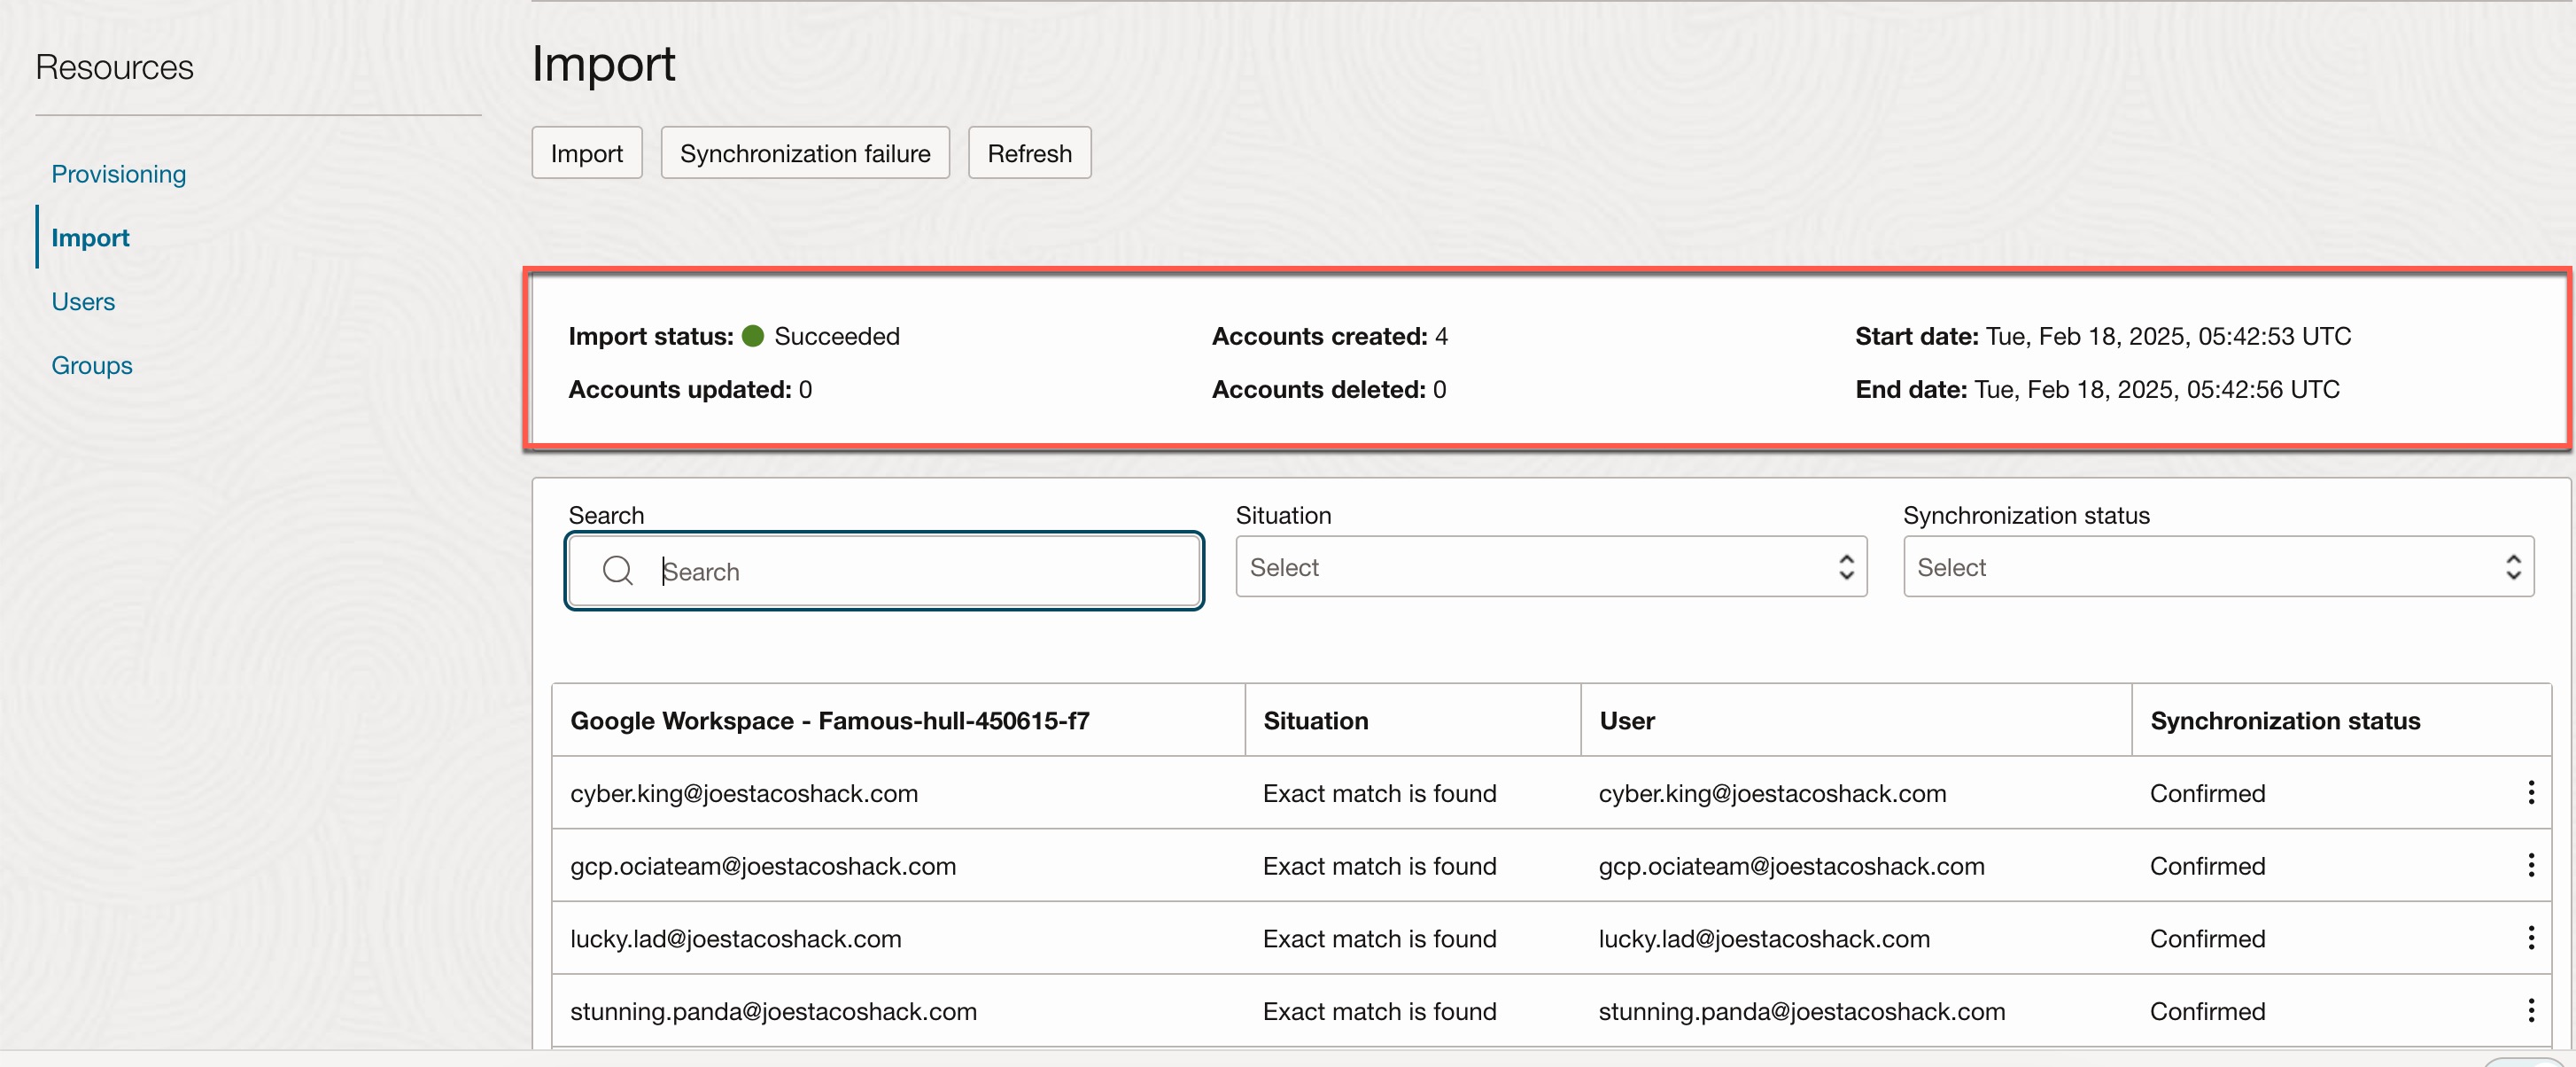
- Upon a successful import, you will see the number of accounts created from Google IAM to OCI IAM.
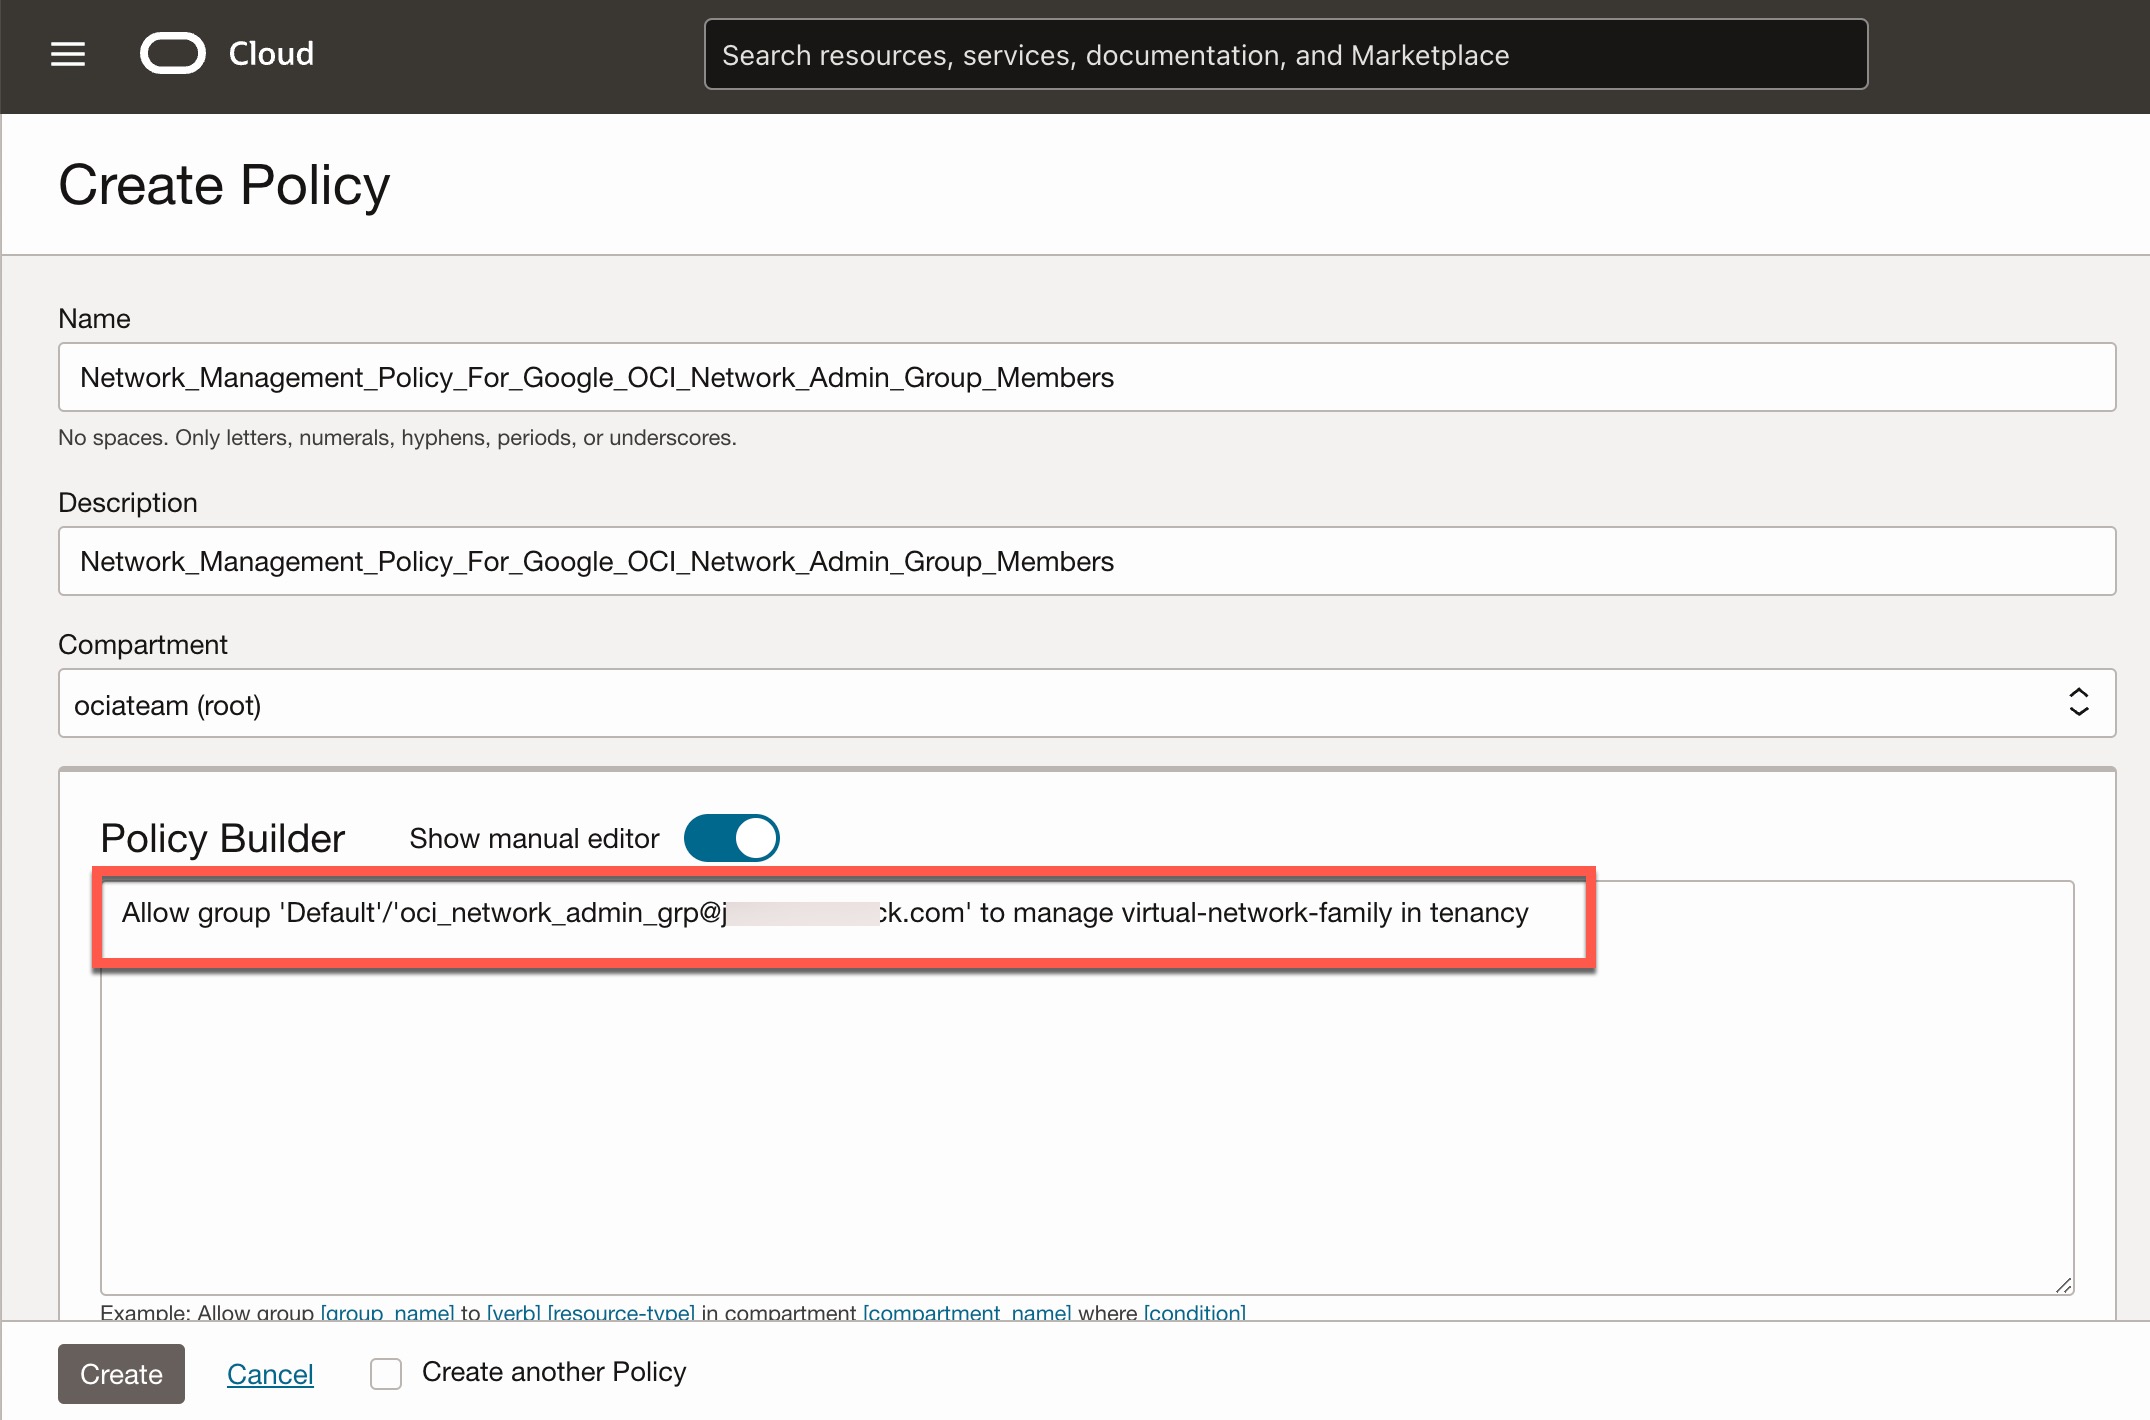
Define the necessary OCI IAM policies for Google IAM groups.
You can now define OCI IAM policies based on Google IAM groups to manage access and permissions for Google IAM users in OCI. Here’s a quick example granting members of the Google IAM group “oci_network_admin_grp@xxxx” permission to manage all network-related resources in OCI.
This completes the integration of Google Cloud IAM with OCI IAM, enabling user synchronization and defining access controls for those users and groups in OCI IAM. As mentioned at the beginning, in order to allow your users to log into OCI with Google IAM credentials, you need to set up the SAML 2.0 federation between Google and OCI IAM.
Key Points to Remember:
- Google Workspace does not support incremental synchronization.
- The sync process runs every 6 hours behind the scenes and cannot be auto-scheduled based on your preference.
- If a 6-hour interval is too long, you can manually trigger the sync process by navigating to the Google Workspace app in OCI IAM, selecting Import, and clicking “Import.”
- To refresh reference application data, including entitlements and permissions,go to the Google Workspace application in OCI IAM, select Provisioning, and click “Refresh Application Data.” This refresh doesn’t initiate a sync of Google IAM users.
- This integration does not support nested groups in Google IAM.
Final Thoughts:
OCI is highly flexible when it comes to integrating with other IAM vendors. It supports various identity integration (provisioning and federation) options, enabling organizations to leverage their existing IAM solutions, such as Google Cloud IAM or Microsoft Azure AD or Okta, to manage access to OCI resources without the need for duplicate user management. This interoperability ensures a seamless and centralized approach to identity management across multiple cloud platforms.
