Consulting Solutions Architect, Business Intelligence
Background
* This blog was last tested on OAC 105.8.0-133 (Version 5.8) + ADW 18c *
Write-back is powerful feature that has been available in Oracle Business Intelligence (OBI) since its early inception. It was made available in Oracle Analytics Cloud (OAC) in Release 105.2 – March 2019.
Note: Currently write-back is not supported with Data Gateway (DG) using an on-premises databases. This blog will be updated if / when on-premise support becomes available.
Write-back currently supports ADW as well as ATP and Public Oracle Databases in OCI.
This article walks through the steps to configure write-back with OAC and an Autonomous Data Warehouse (ADW). That said, the concepts covered are relevant to on-premise versions of OBI and any other supported data-sources. Currently write-back is only available in Analysis and Dashboards (accessed from Classic Home).
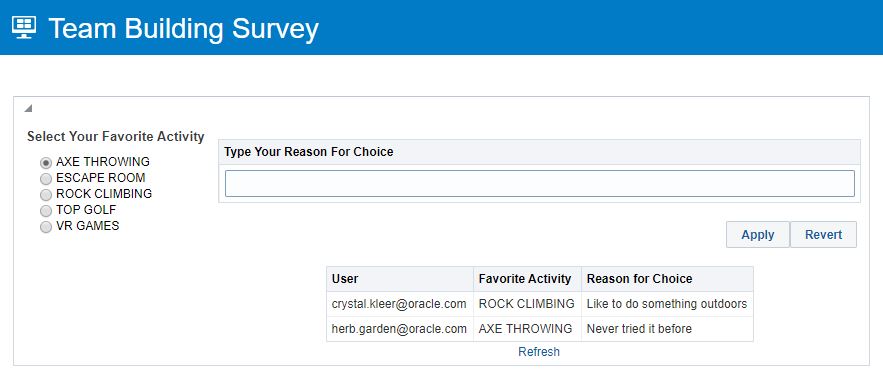
The blog example is a “Team Building Survey” published by a manager asking the team to vote on their preferred team building activity. Team members must annotate / provide comment on the reason for their choice. Team members may override their choice at any time. Only the most recent selection is displayed on the Dashboard.
Sample Write-Back Table with Comments Column
1a) Create the demonstration WRITE_BACK_ANNOTATIONS table below or take an existing table and add the WRITEBACK_COMMENTS & WRITEBACK_DATE fields.
Update an existing table by adding new Comments and Date columns:
ALTER TABLE OAC_USER.WRITE_BACK_ANNOTATIONS ADD (WRITEBACK_COMMENTS VARCHAR(200), WRITEBACK_DATE DATE DEFAULT SYSDATE);
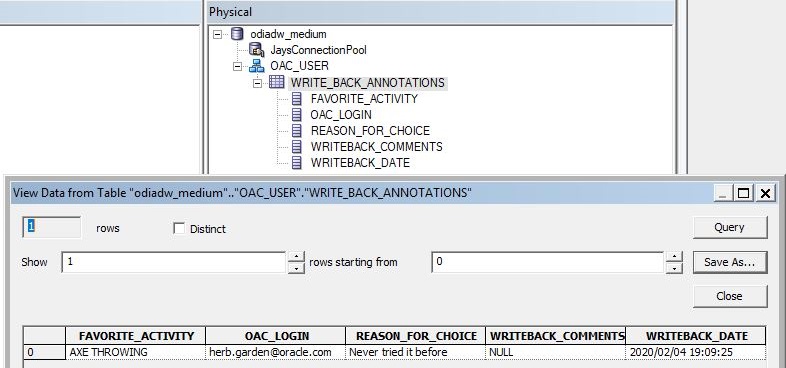
1b) In order for this example to work one sample starter row must be added to the table:
INSERT INTO OAC_USER.WRITE_BACK_ANNOTATIONS(OAC_LOGIN,FAVORITE_ACTIVITY,REASON_FOR_CHOICE) VALUES (‘herb.garden@oracle.com’,’AXE THROWING’,’Never tried it before’);
COMMIT;
SELECT * FROM OAC_USER.WRITE_BACK_ANNOTATIONS;
1c) Confirm that the database user configured in the OAC RPD Physical Layer Connection Pool has permissions to write/update the WRITE_BACK_ANNOTATIONS table.
Import new Write-Back table or add new Comments column in RPD
An RPD is required to configure write-back. Follow this A-Team blog for steps on “Creating an Oracle Analytics Cloud RPD Connection to the Autonomous Data Warehouse”.
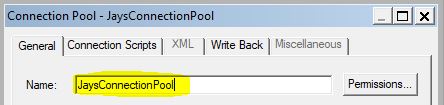
2a) Rename the Connection Pool to something unique. Removing the spaces makes it easier to reference.
* It is very important that no other Connection Pool shares this name – as writeback won’t know what Connection Pool to use and fail *
2b) Import the WRITE_BACK_ANNOTATIONS table or update the existing table with the new columns.
2c) Confirm the new table or column data can be viewed from the RPD.
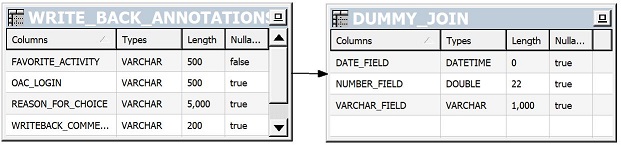
2d) The RPD has a requirement that all tables must be joined to at least one other. Create a dummy table if needed. Join to the dummy table in both the “Physical Layer” and “Business Model and Mapping”.
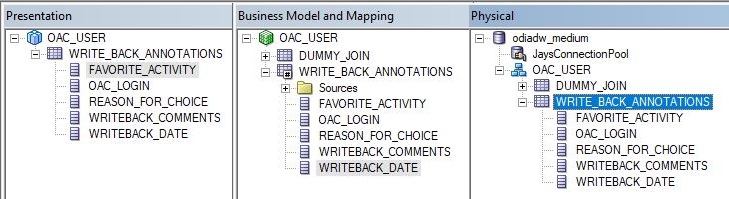
2e) Drag the WRITE_BACK_ANNOTATIONS to the “Business Model and Mapping” and “Presentation” layers.
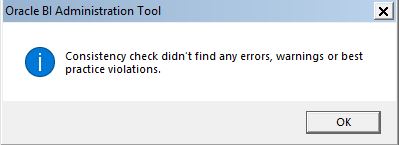
2f) Run -> Check Global Consistency -> Confirm the RPD is free of errors.
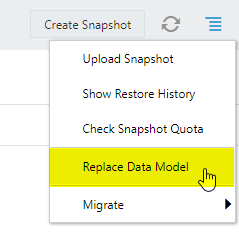
2g) Replace the “Data Model” with the new RPD changes.
Data Model Setup
Begin by reviewing Oracle Support Doc: “OAC/OAC-Classic : Is it Possible to Configure Write-back in OAC” (Doc ID 2381947.1)
The Support Doc contains a link to the OAC write-back documentation. At the time of publishing, the latest version of the OAC write-back doc could be found here.
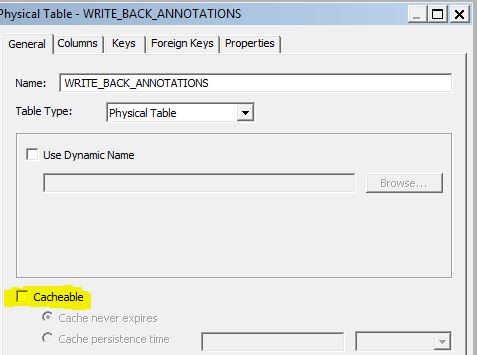
3a) Disable Cache on the Physical Table. i.e. Double-click WRITE_BACK_ANNOTATIONS. Uncheck Cacheable.
3b) In the Business Model double-click the logical column WRITEBACK_COMMENTS and check “Writeable”.
This field will act as the input field to collect the team member comments.
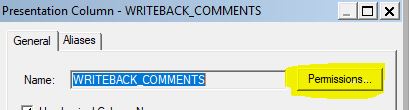
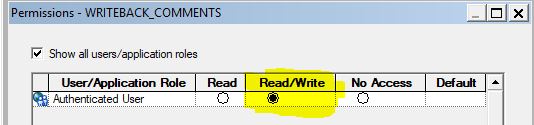
3c) In the Presentation layer, double-click WRITEBACK_COMMENTS -> click Permissions -> check Read/Write.
3d) Upload the Repository changes to the Cloud or Replace the Data Model from the Service Console.
Grant OAC Privileges
An Administrator must perform this step.
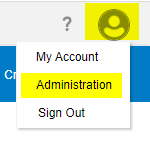
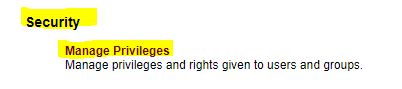
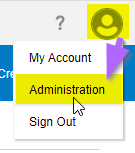
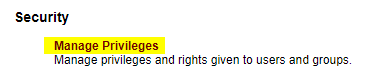
4a) Go to Classic home -> Administration -> Security -> Manage Privileges -> Write Back.
* Grant ‘Write Back to Database’ to Authenticated User.
* Grant ‘Manage Write Back’ to BI Service Administrator.
Build Analysis
5a) Add Columns to Analysis
* Add all four columns from the WRITE_BACK_ANNOTATIONS table to the Criteria.
* Add a column to capture the login username: Formula = USER()
* Add a column to capture the selected activity value collected from the Dashboard Prompt Presentation Variable: Formula = ‘@{p_activities}’
* Add a column to calculate the most recent entry date for each user: MAX_WRITEBACK_DATE
Formula = MAX(“WRITE_BACK_ANNOTATIONS”.”WRITEBACK_DATE” BY “WRITE_BACK_ANNOTATIONS”.”OAC_LOGIN”)
* Rename the columns as desired (if they were not already re-named in the Presentation Layer).
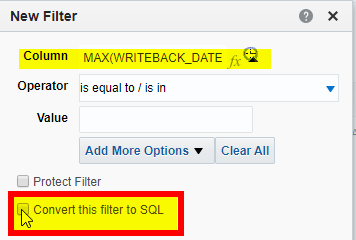
5b) Add a Filter to only show the most recent selection made.
MAX(“WRITE_BACK_ANNOTATIONS”.”WRITEBACK_DATE” BY “WRITE_BACK_ANNOTATIONS”.”OAC_LOGIN”) = “WRITE_BACK_ANNOTATIONS”.”WRITEBACK_DATE”
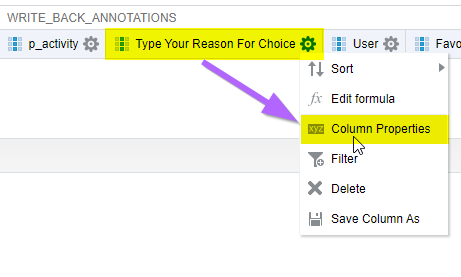
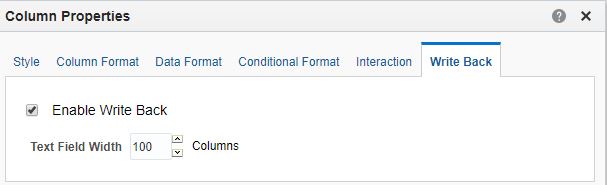
5c) Enable write-back on the WRITEBACK_COMMENTS column.
Click on the Column cog -> select Column Properties -> click the Write-Back tab -> Check “Enable Write Back” -> Set Text Field Width
Create 2 Tables:
* The first table will be used to collect feedback from the user and used to write-back.
* The second table will be used to display the results that have been inserted or updated.
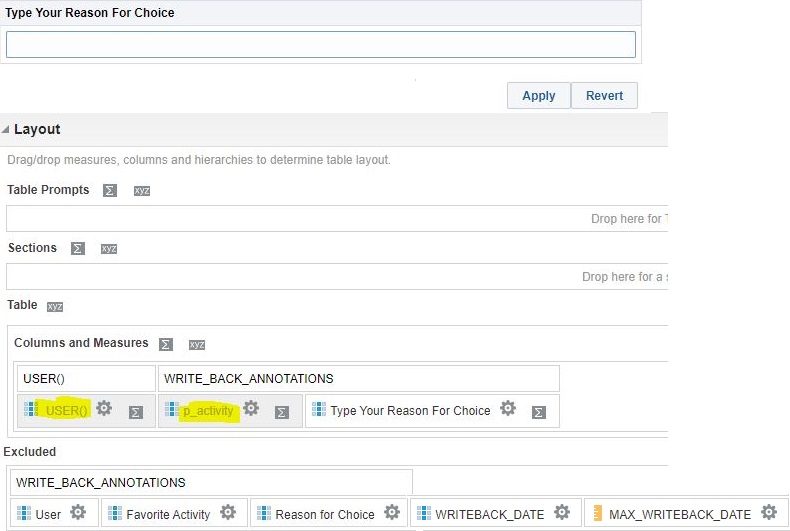
5d) Table 1:
* Add: USER(), p_activity, and “Type Your Reason For Choice” [WRITEBACK_COMMENTS].
* Hide: USER(), and p_activity.
* Exclude all other columns.
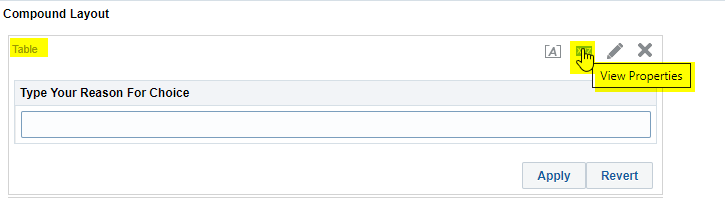
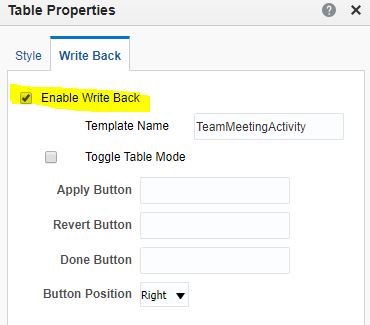
5e) Enable Write-back on Table1
* From the Results Tab -> Click on “XYZ” “View Properties” -> Select the “Write Back” tab -> Check “Enable Write Back”.
* Enter a Template Name that will be referenced in the Write-Back XML template.
* Uncheck “Toggle Table Mode”.
5f) Table 2
* Add: “User” [OAC_LOGIN], “Favorite Activity” [FAVORITE_ACTIVITY], and “Reason For Choice” [REASON_FOR_CHOICE].
* Hide: USER(), p_activity, and “Type Your Reason For Choice” [WRITEBACK_COMMENTS].
* Exclude all other columns.
5g) Save the Analysis
Create Dashboard Prompt
6a) Create a Dashboard Prompt that will list the choice of activities to vote on.
* The Dashboard Prompt will store the selected activity in a Presentation Variable <p_activities>.
* The value of the Presentation Variable will then be added to the Analysis and available for write-back to read/write.
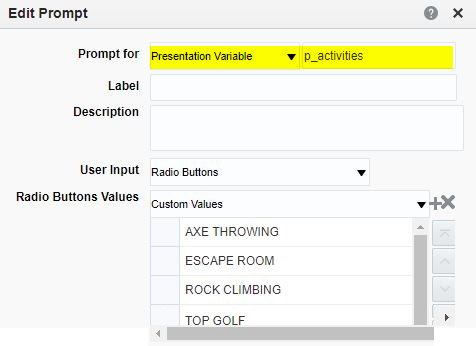
* Create a Variable Prompt (Create Dashboard Prompt -> New -> Variable Prompt).
* Set “Prompt for” = “Presentation Variable”.
* Name the Presentation Variable p_activities.
* Hide the Label by typing a space in the Label field.
* Set “User Input” to “Radio Buttons”
* Add the list of Activities as “Custom Values”:
AXE THROWING ESCAPE ROOM ROCK CLIMBING TOP GOLF
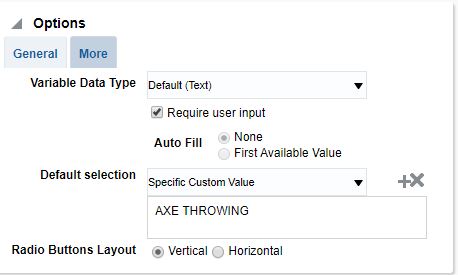
* Check “Require User Input”
* Set a “Default Selection”
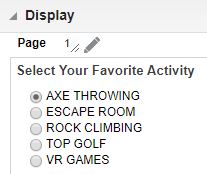
* Prompt example:
Build Dashboard
7a) Add the Dashboard Prompt and Analysis to the Dashboard
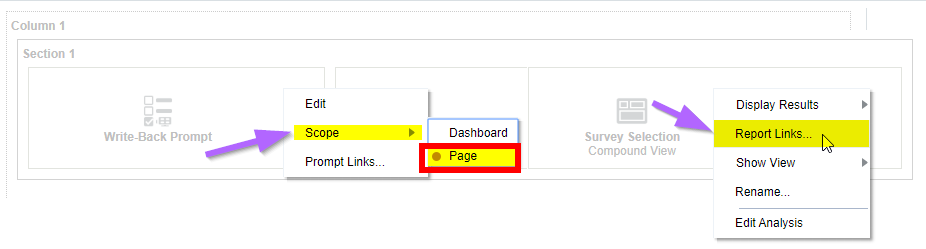
7b) It is good practice to set the Dashboard Prompt Scope=Page, to avoid it being referenced by another Dashboard Page.
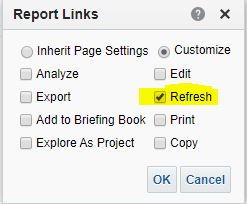
7c) Set Report Links as desired. It is recommended to always display Refresh – in case the page doesn’t automatically refresh due to caching issues.
Build/Test INSERT/UPDATE Statements
In this example the UPDATE is not being used. An UPDATE example is provided below if needed.
In this example a new row is always inserted. However, only the most recent row per team member login is displayed on the Dashboard.
Test the INSERT statement before using it in the Write-Back Template.
INSERT INTO OAC_USER.WRITE_BACK_ANNOTATIONS(OAC_LOGIN,FAVORITE_ACTIVITY,REASON_FOR_CHOICE) VALUES (‘me@oracle.com’,’ROCK CLIMBING’,’I love the outdoors’);
Test the UPDATE statement before using it in the Write-Back Template.
UPDATE WRITE_BACK_ANNOTATIONS SET FAVORITE_ACTIVITY = ‘ESCAPE ROOM’,REASON_FOR_CHOICE = ‘Changed my mind’ WHERE OAC_LOGIN =’me@oracle.com’
Write-back Template
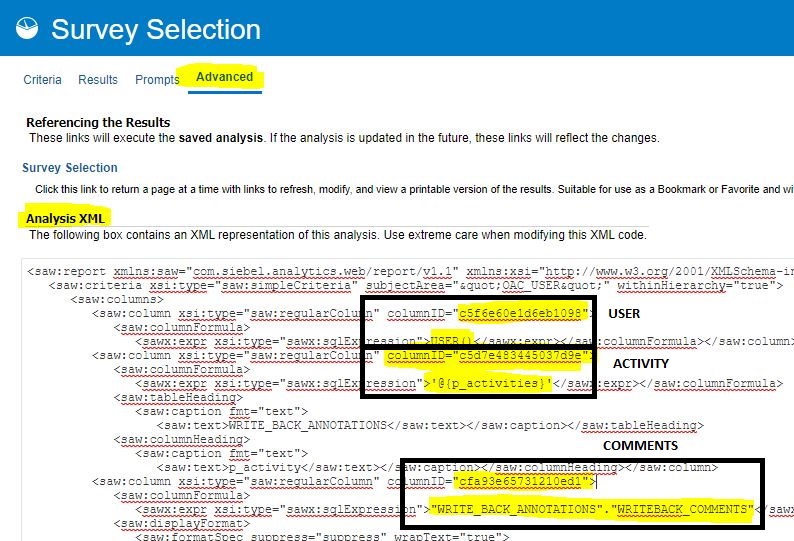
9a) Get ColumnID’s
Step 2 in the OAC write-back documentation provides a sample write-back template.
The sample template references columns as: @{c0},@{c1},’@{c2}’.
Note: This only works for columns that have write-back enabled on the table column properties as shown below.
If write-back is enabled you can reference the columns as:
VALUES(@0,@1,’@2′,’@3′)
SET ABC=@5 WHERE EFG=@1 AND HIJ=’@3′
Do not include the “c” or parenthesis { } when referencing by position. Surround strings and dates with single quotes. No quotes on numerical values.
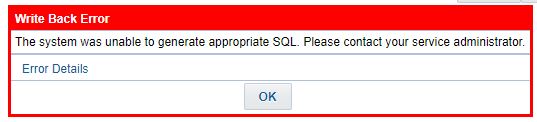
If you receive the following error it is most likely related to needing to reference the columns by columnID.
Write Back Error – The system was unable to generate appropriate SQL. Please contact your service administrator.
The OBI documentation also states that the use of columnID is preferred over column position.
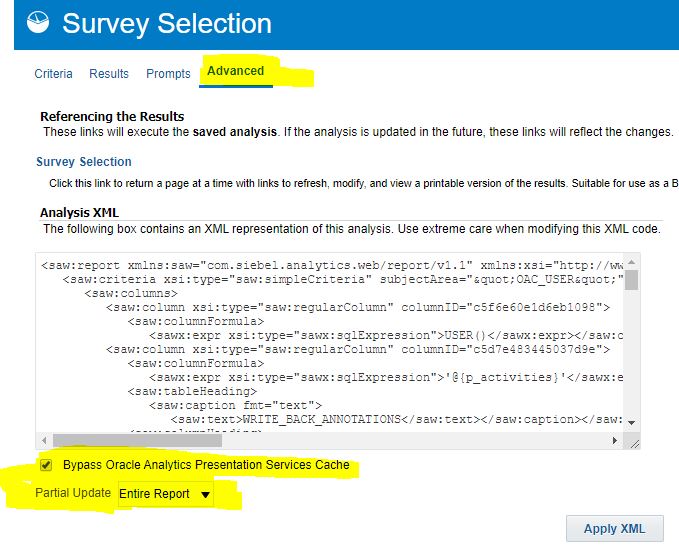
The columnID can be found in the Advanced tab of the Analysis under Analysis XML.
9b) Update Write-Back Template Properties
* Update “WebMessage name=” to match name specified in Analysis Table Properties Write-Back Tab (Step 5d).
* Update “writeBack connectionPool” to the name of the write-back Connection Pool defined in the Physical Layer of the RPD (Step 2a).
* Update <insert> with the INSERT SQL previously tested (Step 8).
* Update <update> with the UPDATE SQL previously tested (Step 8).
* Replace hard-coded strings with variable ColumnID’s copied from Advanced tab of Analysis -> Analysis XML (Step 9a).
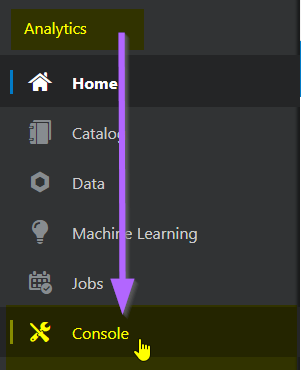
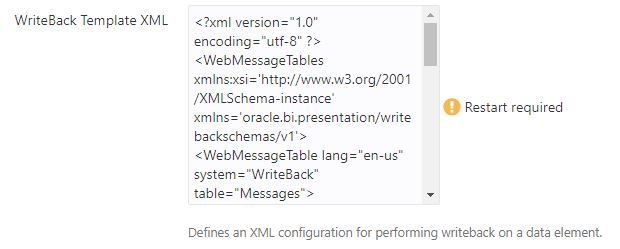
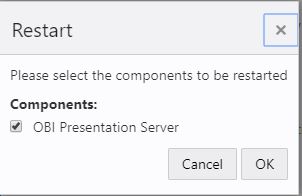
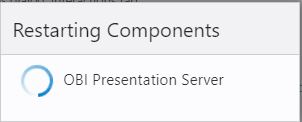
From the Analytics DropDown Menu (top left) select Console -> System Settings -> Scroll to WriteBack Template XML -> Paste in the XML text -> Restart the OBI Presentation Server
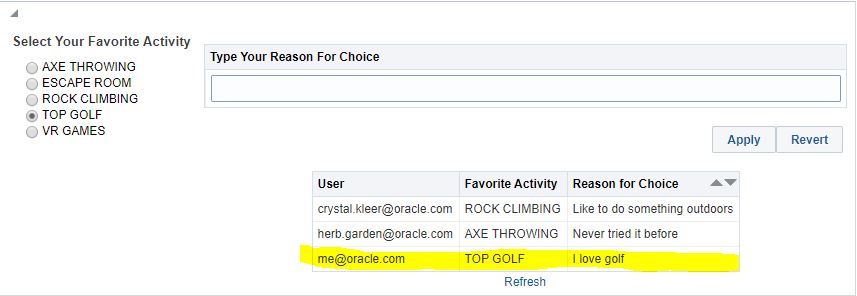
Test Write-Back Dashboard
Test adding a new record and overriding an existing one.
The results should update after hitting Apply without having to hit Refresh.
If hitting refresh is required to see the updated results – check “Bypass Oracle Analytics Presentation Services Cache” and set “Partial Update” = “Entire Report” on the Analysis Advanced Tab.
Write-Back Permissions
Open Classic Home -> Manage Privileges -> Write Back -> Write-back access can be controlled though granting or removing roles and users.
Want to Learn More?
Click here for “Deploying Write-back in OAC” documentation.
Click here for OBIEE 12.2.1.1.0 “Configuring for Write Back in Analyses and Dashboards”.
Click here for more A-Team Oracle Analytics Cloud (OAC) Blogs.
Summary
This article walked through the steps to configure write-back with OAC and ADW. Write-back was made available in Oracle Analytics Cloud (OAC) starting from Release 105.2 in March 2019. The blog demonstrates how to use write-back to collect survey results with annotations from OAC users. Other OAC Classic topics covered in the blog include: Variable Prompts, Presentation Variables, RPD Data Model Properties, Disabling Cache, Managing OAC Privileges, SQL Statements, and Advanced SQL Filters.
Authors
Jay Pearson
Consulting Solutions Architect, Business Intelligence