Introduction
The Fusion Application offers multi-lingual support to cater to customers operating in various languages. In this blog post we’re focusing on adding a multi-lingual support in Fusion Applications Social Network Integration (FASNI) visual builder app. It serves as an exhaustive guide for developers using VBCS, with the goal of integrating multi-lingual capabilities. Please ensure you download the latest version of FASNI V2 before proceeding, as the steps outlined in the blog are applicable to V2 version.
Shay Shmeltzer has authored a blog post detailing the process of making VB applications multilingual, with nearly half of the steps applicable to the FASNI VB App. I would recommend to go through Shay’s blog and video first before proceeding further. We will explore the technical steps required to enable it.
Step 1: Language Translation File Preparation
All static text has already been transformed into translatable strings in the FusionColloborationUI visual builder app and deployed as part of the initial version. You will need to navigate to the VB app settings and download all English strings in JSON format. Then, create additional files for fusion-supported languages (es, fi, fr). For guidance on creating additional language files and uploading them to the VB app, please refer Shay’s blog.

Fig 1 VB: Translation Files
Upon uploading the files, you will observe their presence in the “strings” folder within the VB app. For each language, a corresponding folder will be created containing the respective file.
Step 2: Configure locale in FusionColloborationUI APP
Shay’s blog provides instructions on adding a localization section in the app-flow.json file and configuring the locale to retrieve the language value from a localStorage variable. In the FusionCollaborationUI VB app, we also need to include a localization section, but the locale will obtain its value from the fusion application passed as a URL parameter. The following code illustrates this process.
"localization": {
    "locale": "{{ (new URLSearchParams(window.location.search).get('locale')) || 'en' }}"
  }
Create an application-level variable “locale” for storing the language preference derived from the URL. Configure it as an input parameter, enable pass on URL (checkbox), and set its default value to “en” (English).
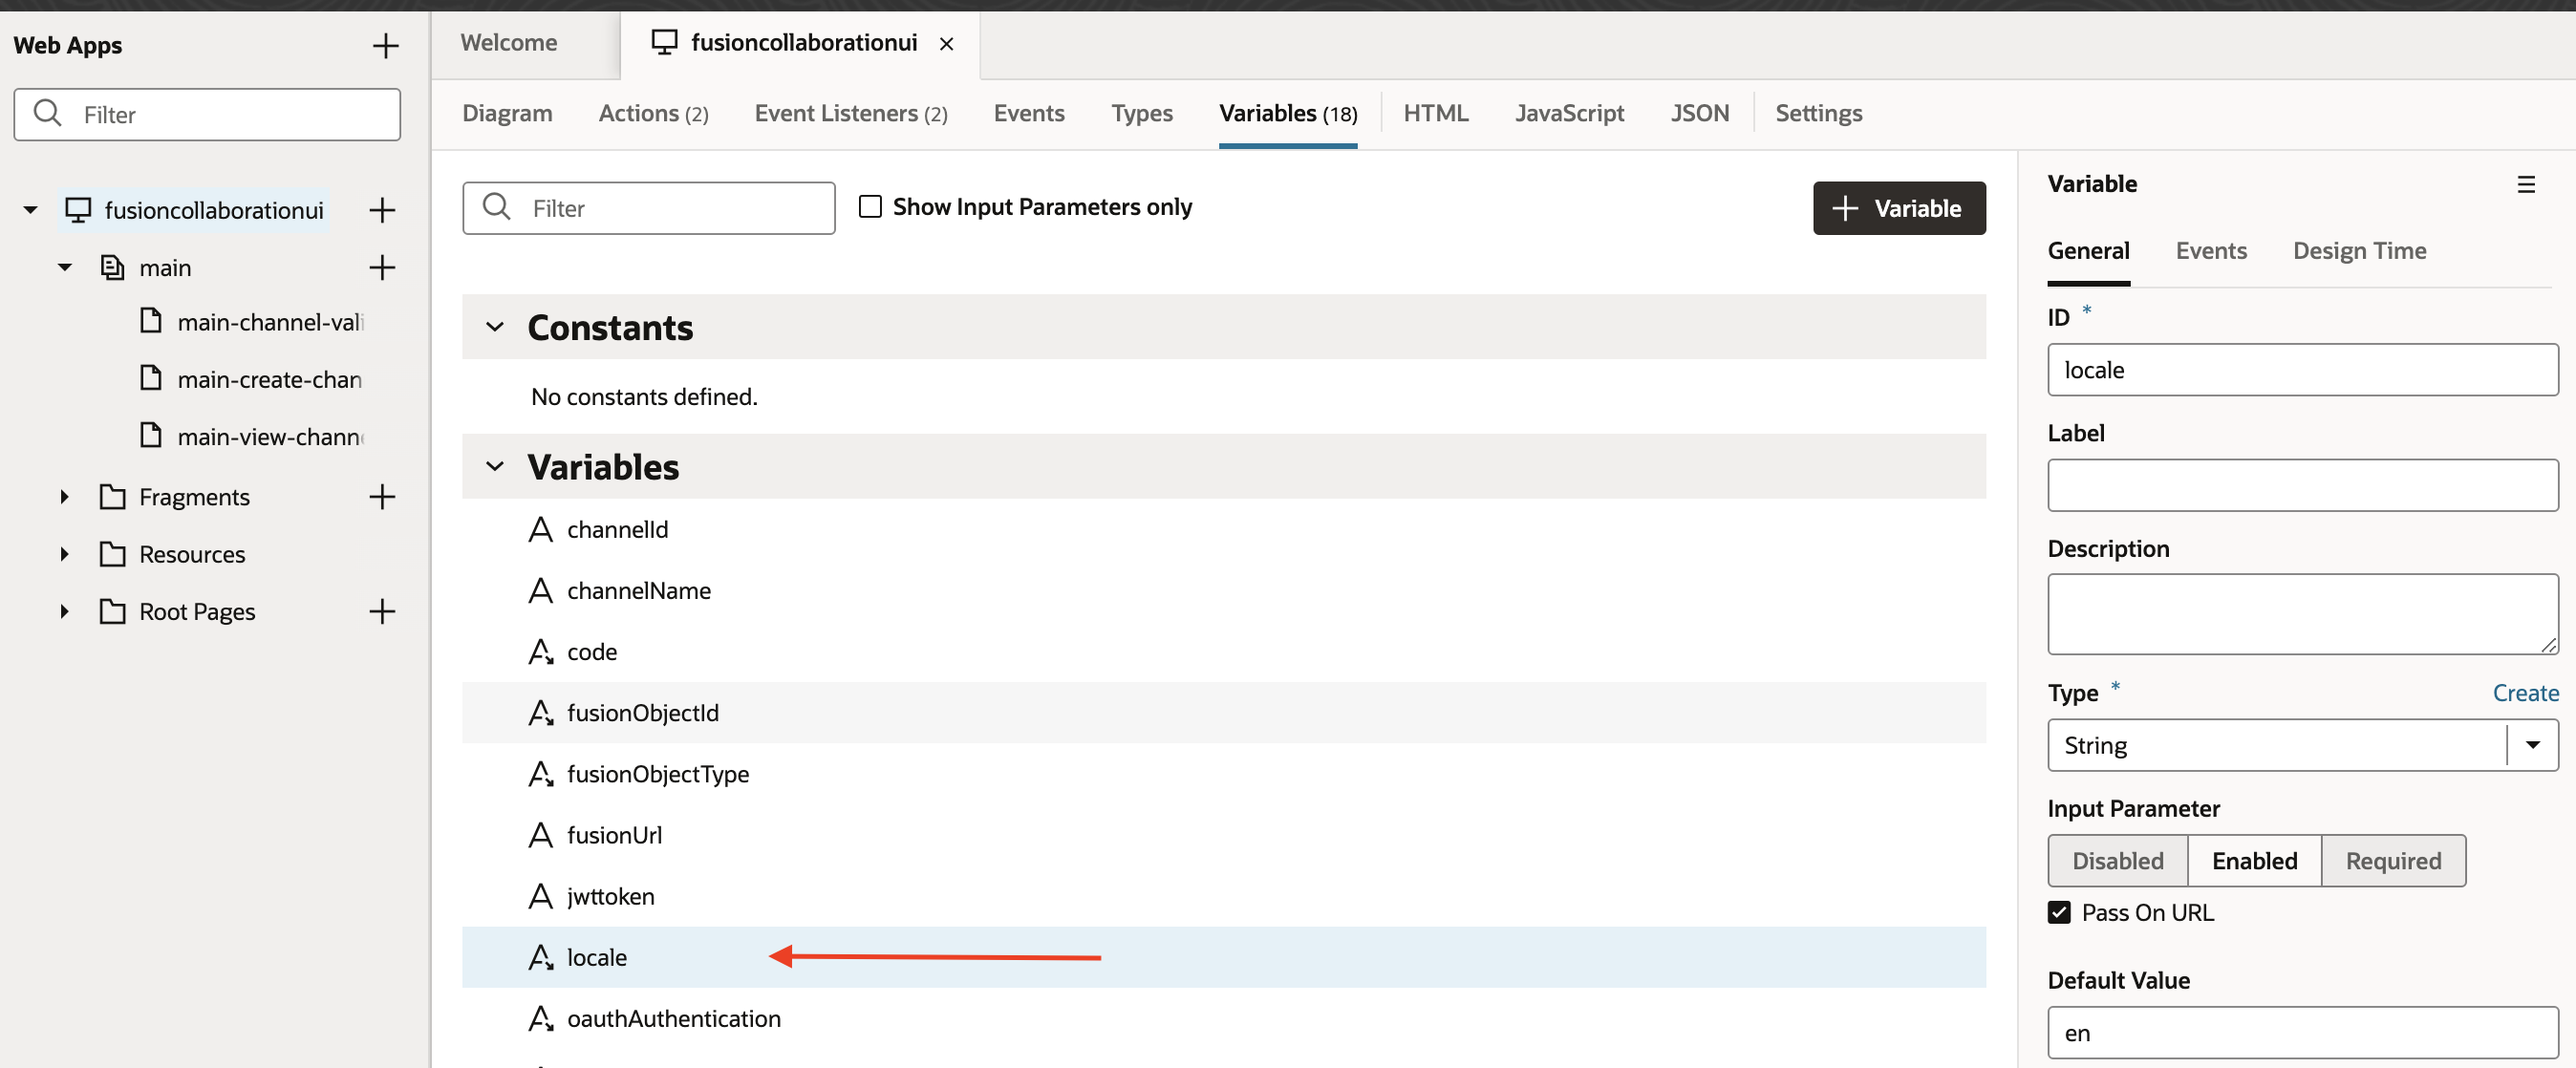
Fig 2 VB: Application Level Variable
Open the app_vbenter_getjwt action chain at application level, then modify the Actions.openUrl function by incorporating the locale parameter. The updated code appears as follows.
await Actions.openUrl(context, {
  url: "https://" + $application.variables.oauthIdcsBaseUrl +
    "/oauth2/v1/authorize?response_type=code" +
    "&client_id=" + $application.variables.oauthClientId +
    "&code_challenge=" + $application.variables.oauthCodeChallenge +
    "&scope=" + $application.variables.oauthScope +
    "&redirect_uri=" + encodeURI("https://"+window.location.hostname+window.location.pathname)+
    "&state="+JSON.stringify(state)+
    "&locale="+$application.variables.locale,
});
Open the refreshApp action chain in main-create-channel and main-channel-validation-msg pages (screenshot below) then modify the Open URL activity by incorporating the locale parameter. The updated code appears as follows.
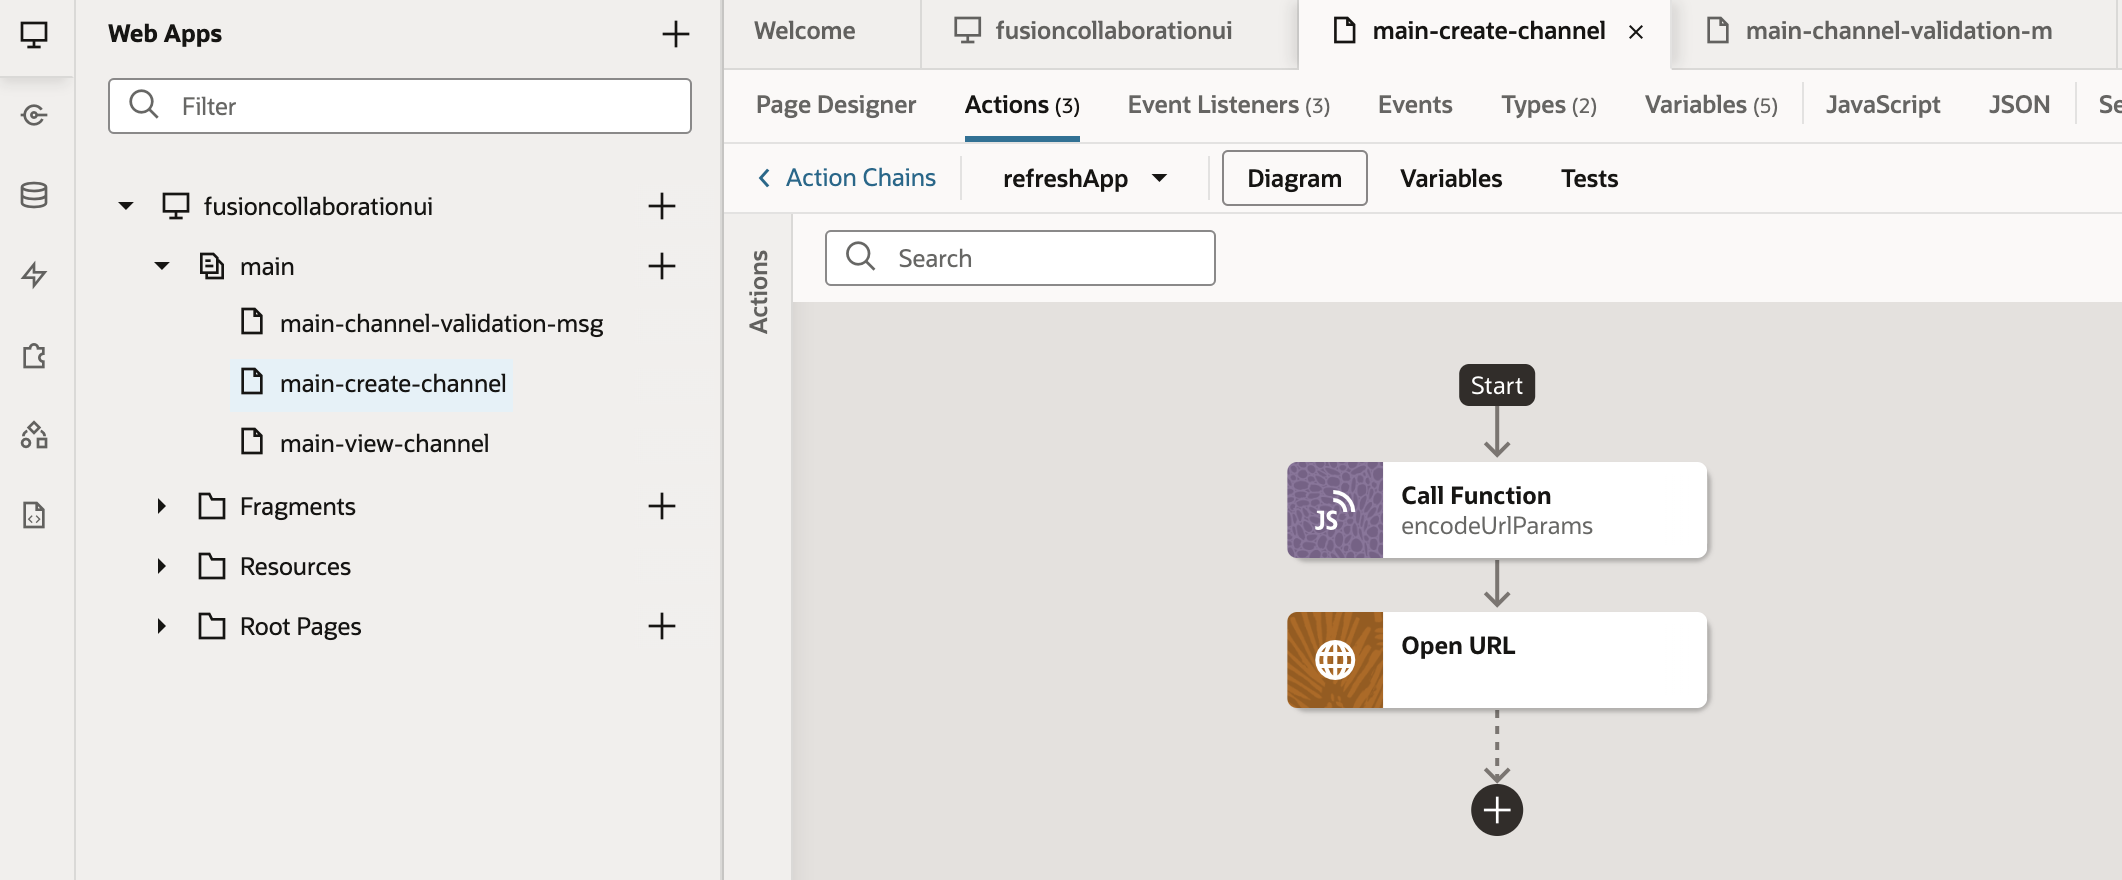
Fig 3 VB: refreshApp Action Chain
window.vbInitConfig.VB_SERVER+ window.vbInitConfig.CONTEXT_ROOT + "/" + window.vbInitConfig.APP_URL_PREFIX+ "/" + window.vbInitConfig.APP_ID+ "/"+ window.vbInitConfig.APP_VERSION+ "/"+ window.vbInitConfig.APP_PATH+"/?fusionObjectType="+$application.variables.fusionObjectType+"&fusionObjectId="+$chain.results.callEncodeUrlParams+"&oauthAuthentication="+$application.variables.oauthAuthentication+"&showAdaptiveCard="+$application.variables.showAdaptiveCard+"&showHeader="+$application.variables.showHeader+"&locale="+$application.variables.locale
Step 3: User language in Fusion Application
Users of Fusion Application have default language associated but they have the option to change the language for the current session. Language modification within the Fusion application can be achieved by clicking on the User icon, selecting the “Set Preference” option, and then choosing “Language” under General Preference, as shown in the image below. Users can select their preferred language for the default or current session.

Fig 4 Fusion : Set User Preferences

Fig 5 Fusion : Set User Language
The locale of the language for the current session is stored in the expression language #{facesContext.viewRoot.locale.language}. It can also be derived from adf.context.getLocale() groovy script. If the user changes the language during the active session, the expression language & groovy script are also updated with the new language locale.
Having determined how to obtain the Fusion language locale, the subsequent step is to pass it to the VB app. To accomplish this, modifications need to be made in the FusionCollaborationJS VB App to accommodate the additional parameter and adjust each Fusion object using page composer to transmit the user’s language locale.
Step 4: FusionCollaborationJS Changes
Open the fasni.js file.
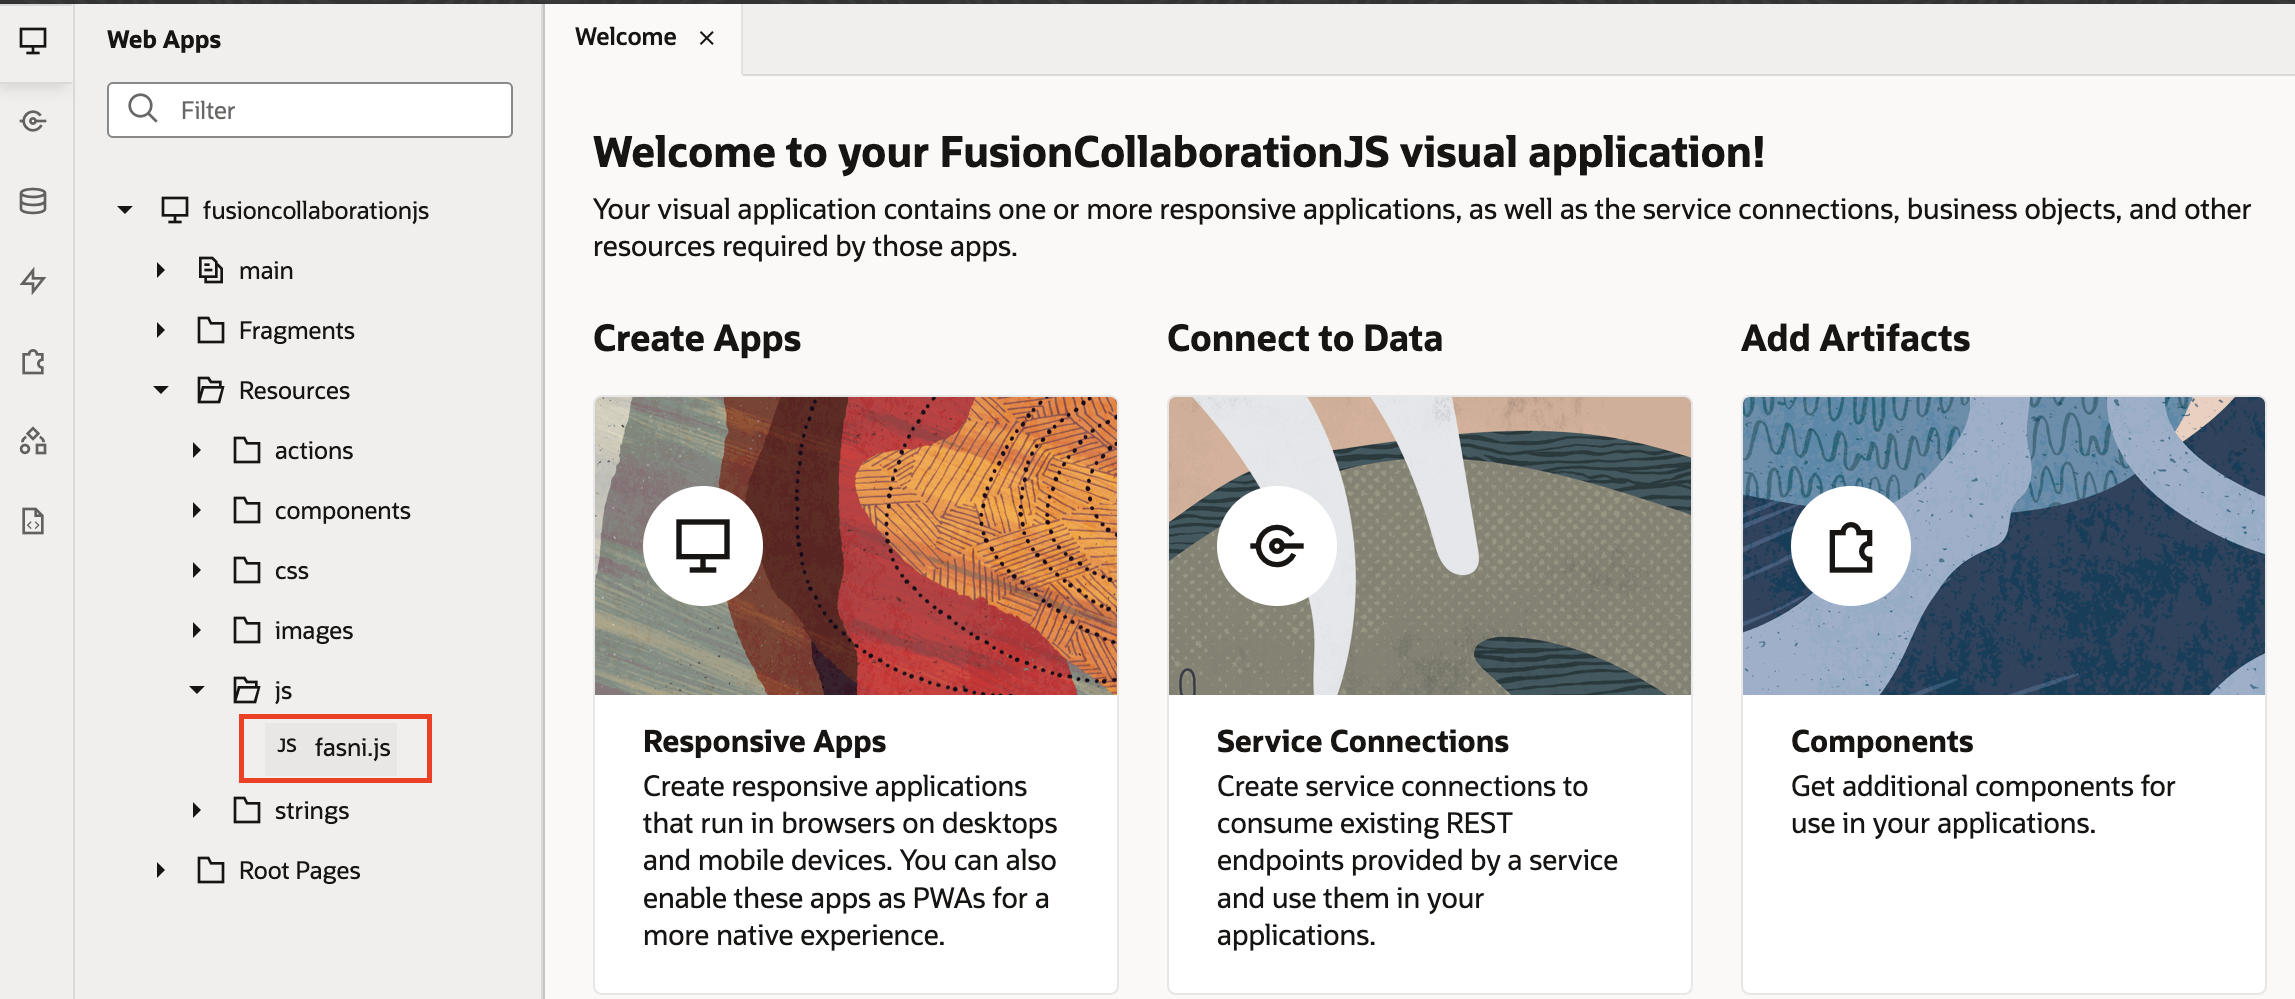
Fig 6 VB : fasni.js File
Modify openFASNI function and add locale as additional parameter, this covers the all the fusion objects. The locale is derived from input type added at global page template, we will talk about it in page composer level changes.
const openFASNI = function(objectType, objectId) {
  try {
    let base_url = vbcshostname+fasniappuri;
    let locale = document.getElementById("fasni-locale");
    document.getElementById("socialiFrame").src = base_url + "?oauthAuthentication=false&fusionObjectType=" + encodeURIComponent(objectType) + "&fusionObjectId=" + encodeURIComponent(objectId) + "&locale=" + encodeURIComponent(locale);
    document.getElementById("socialSidenav").style.width = "700px";
  }
  catch(err) {
    // in any error case: don't open the social side nav panel
  }
}
Step 5: Page Composer Changes
Login into fusion application, create a sandbox and and click on home icon. Activate the page composer and search for the MS Teams Integration code integrated at the global page template level, create the input type as hidden and assign the value from the EL #{facesContext.viewRoot.locale.language}. The screenshots below illustrate the modifications made at global page template, this locale is extracted within the fasni.js file to generate the VB App URL, incorporating the language parameter.

Fig 7 Fusion : Global Page Template
Step 6: App Composer Changes
Login into fusion application, create a sandbox and and click on home icon. Activate the App composer and navigate to each object page (i.e. opportunity) containing the MS Teams layout. Edit the script in MS Teams layout and add the locale parameter from the EL adf.context.getLocale(). The screenshots below illustrate the modifications made for opportunity objects. The similar changes are required for each object utilizing App composer to integrate this solution.

Fig 8 Fusion : Opportunity Object
Styling Fusion Applications Social Network Integration Visual Builder App
The FASNI VB app is built using the Redwood theme, allowing you to customize the default Redwood style by applying custom CSS. Shay has written another blog post detailing this process.
Conclusion
This blog post aims to assist developers in implementing multi-lingual support within the Fusion Applications Social Network Integration (FASNI) visual builder app. The VB app will dynamically adjust to the user’s language preference set in the Fusion application.
I would like to acknowledge the assistance I received from Maximilian Froeschl & Angelo Santagata for the compilation of this blog.
Additional Details
We have published the blog series on A-Team chronicles explaining the overall architecture of FASNI and its implementation.
Blog Series: Oracle Fusion Applications Integration with Microsoft Teams