Consulting Solutions Architect, Business Intelligence
* This blog was last tested on ODI V12.2.1.4 + Fusion 20D (11.13.24.10.0) + ADW 19c *
Background
This article walks though the steps to configure Oracle Data Integrator on Oracle Cloud Marketplace (ODI) with Business Intelligence Cloud Connector (BICC) to replicate data from Fusion SaaS into an Autonomous Data Warehouse (ADW) database.
This blog is the first in a series covering topics on how to utilize Oracle ETL / Data Integration tools to extract data from various data sources. Future blog topics will cover extracting from: Oracle SaaS Applications, Oracle on-premise applications (e.g. EBS), and other Oracle applications such as Responsys, Eloqua.
Business Intelligence Cloud Connector (BICC) Prerequisite:
* Before starting this blog, first setup Oracle Fusion SaaS Business Intelligence Cloud Connector (BICC) to use Oracle Cloud Infrastructure (OCI) Object Storage by following the steps in this prerequisite blog.
User/Policy/Key Requirements:
* It is strongly recommend to configure OCI, BICC, and ODI with a local (non-Federated) user.
* The local OCI user must be granted these policies: “read buckets in compartment” and “manage objects in compartment”.
Fusion Requirements:
* Fusion Applications must be 19C (11.13.19.07.0) or higher.
* The Fusion user must be a local non-federated user – and granted the ORA_ASM_APPLICATION_IMPLEMENTATION_ADMIN_ABSTRACT role or a role that includes it.
Autonomous Database Requirements:
* BICC writes View Objects extracts to Object Storage. Therefore, the Autonomous Database needs access to Object Storage to get to the View Objects extracts.
Oracle Data Integrator (ODI) Requirements:
* This feature is also available with ODI on-prem starting v12.2.1.3. See What’s New for more details.
Oracle Data Integrator on Oracle Cloud Marketplace (ODI) Requirements:
* Capacity for a VM.Standard2.4 shape or higher.
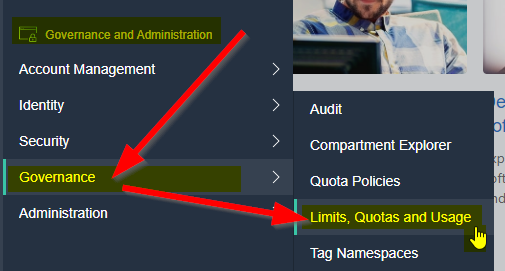
To confirm available service limits -> go to Infrastructure -> Hamburger -> Governance and Administration -> Governance -> Limits, Quotes and Usage.
Deploy Oracle Data Integrator (ODI) Stack
a) Log into the Oracle Cloud Applications Console
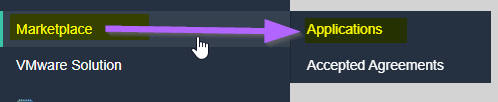
b) Hamburger (top left) -> “Marketplace” -> Click Applications
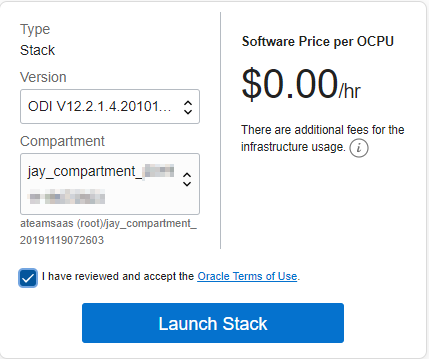
c) Filter on Type = Stack | Category = Data Integration -> Click on “Data Integration”. At the time of publishing ODI Marketplace is available for free when the target database is in OCI (DbaaS, ADW. This promotion may not always be available in the future.
d) Select the Compartment -> Review and accept the Oracle Standard Terms and Restrictions -> Click Launch Stack
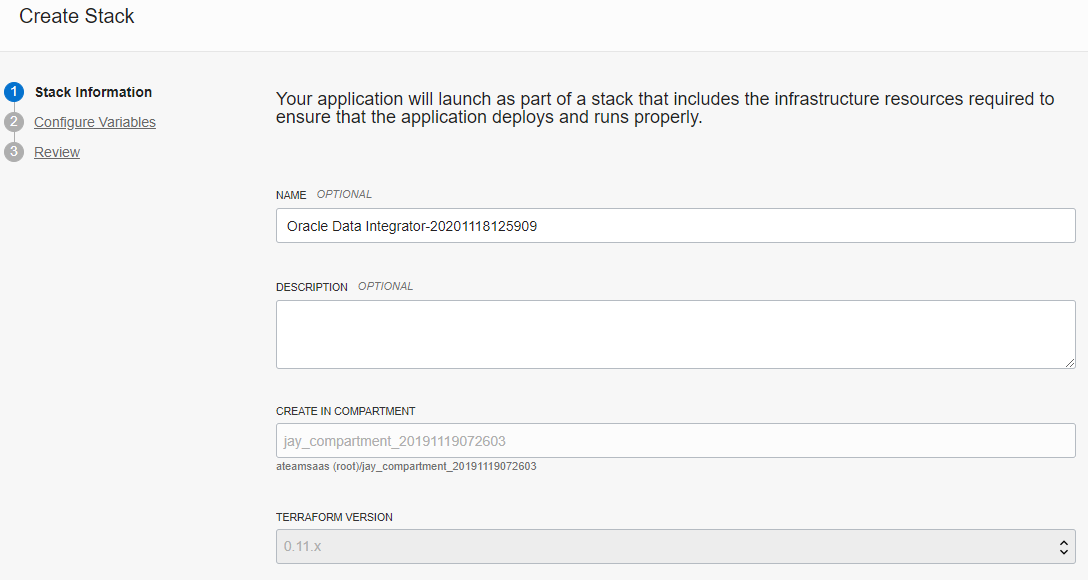
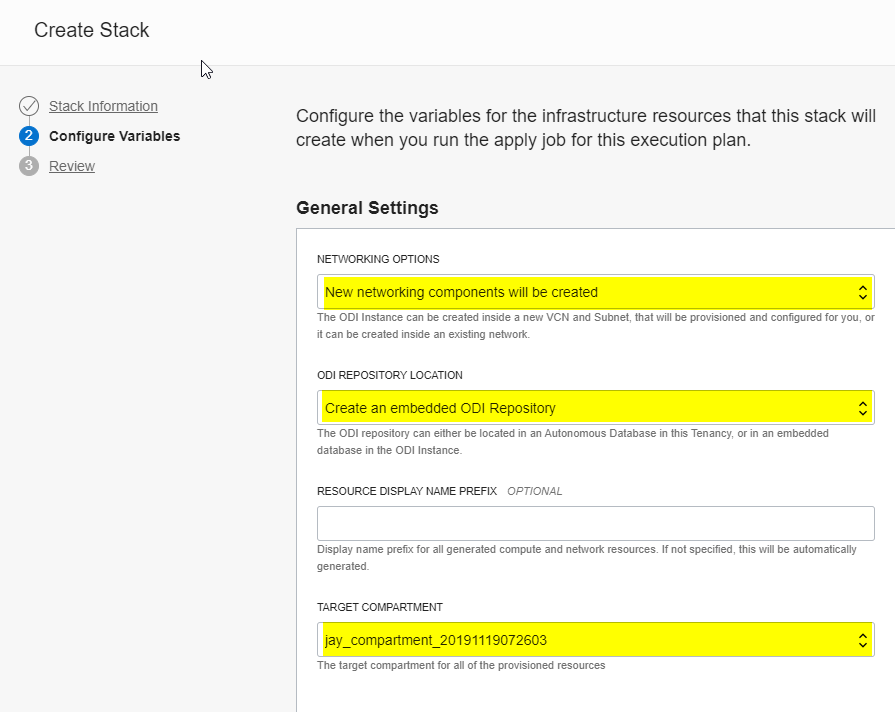
e) Change ODI name as desired or leave as default -> Click Next
f) Either create a new VCN or use an existing one -> Select an option for the ODI repository (database schema) -> Select the compartment -> Scroll down
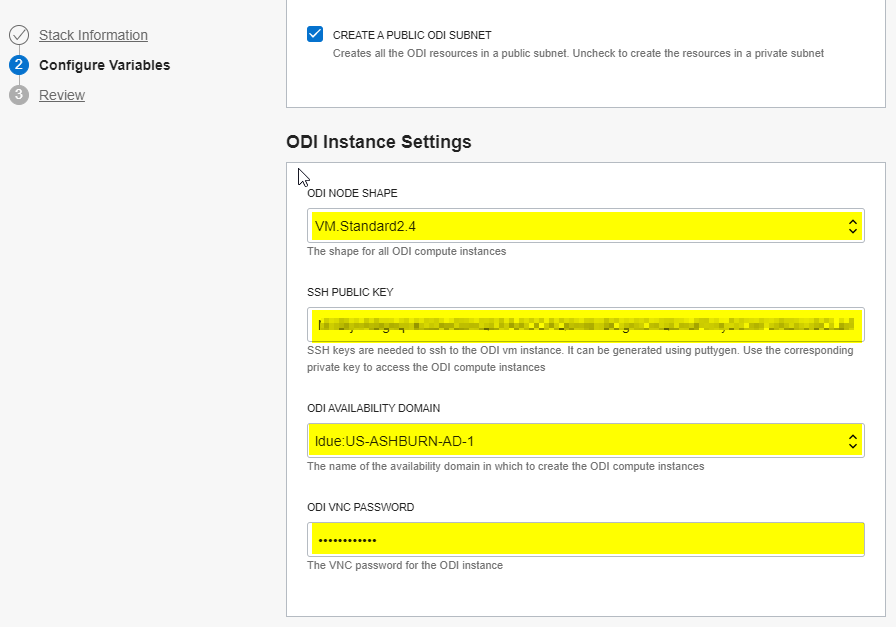
g) Scroll down -> Select ODI Note Shape (requires min of 2.4) -> Enter a SSH public key -> Select an availability zone -> Enter VNC password -> Click Next
Click here to learn how to generate the SSH Public key.
* Take a note of the ODI VNC Password
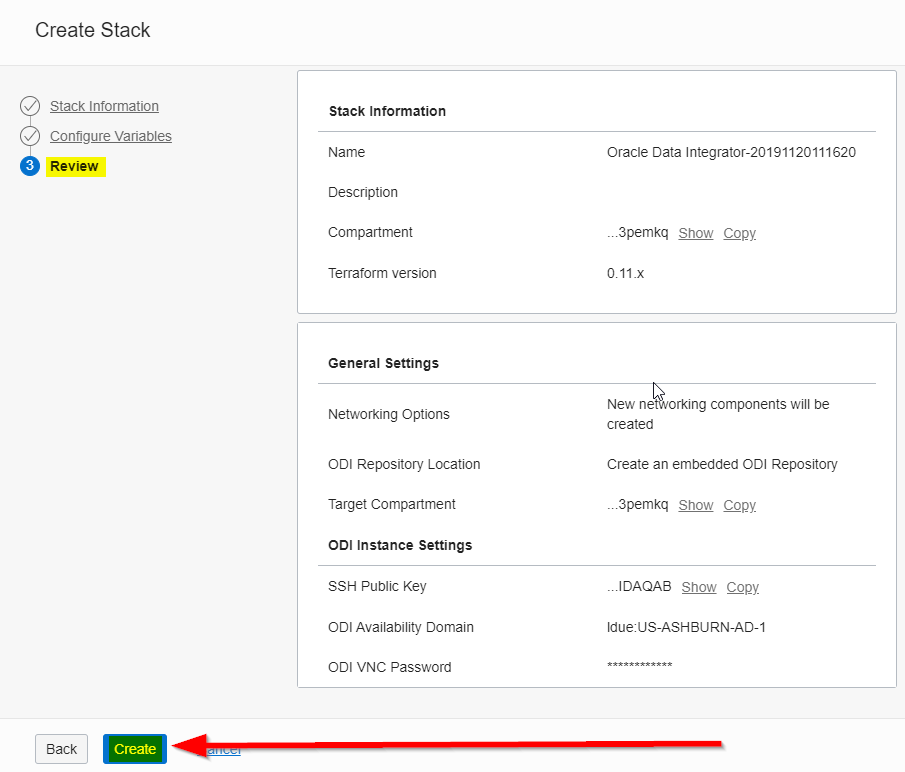
h) Review -> Click Create
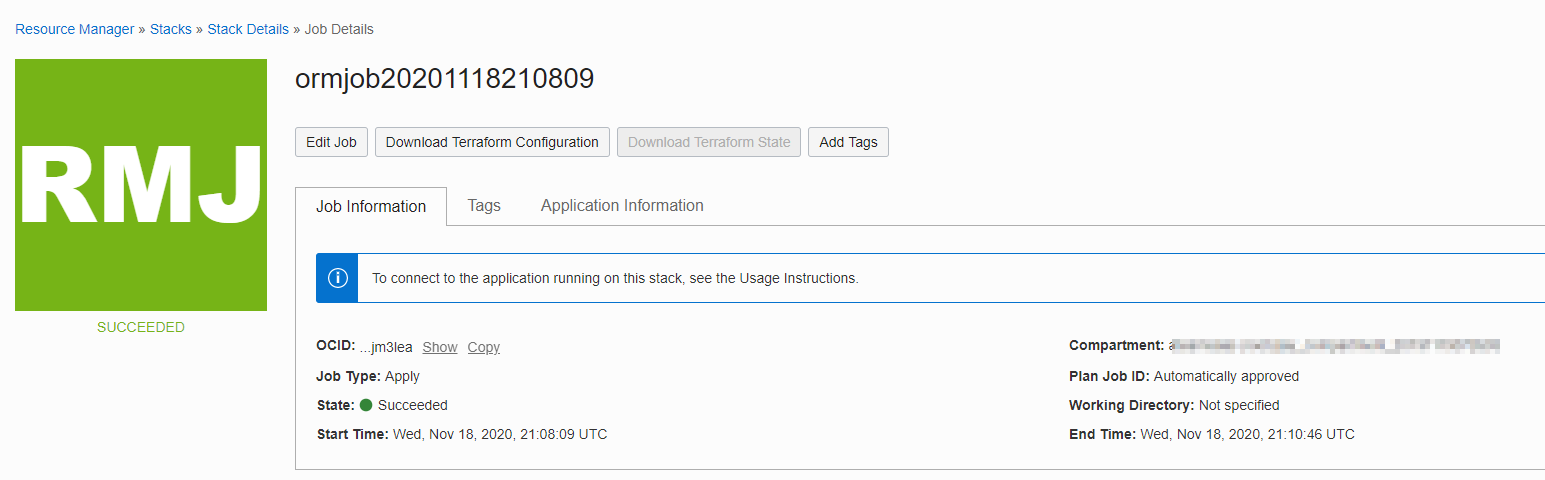
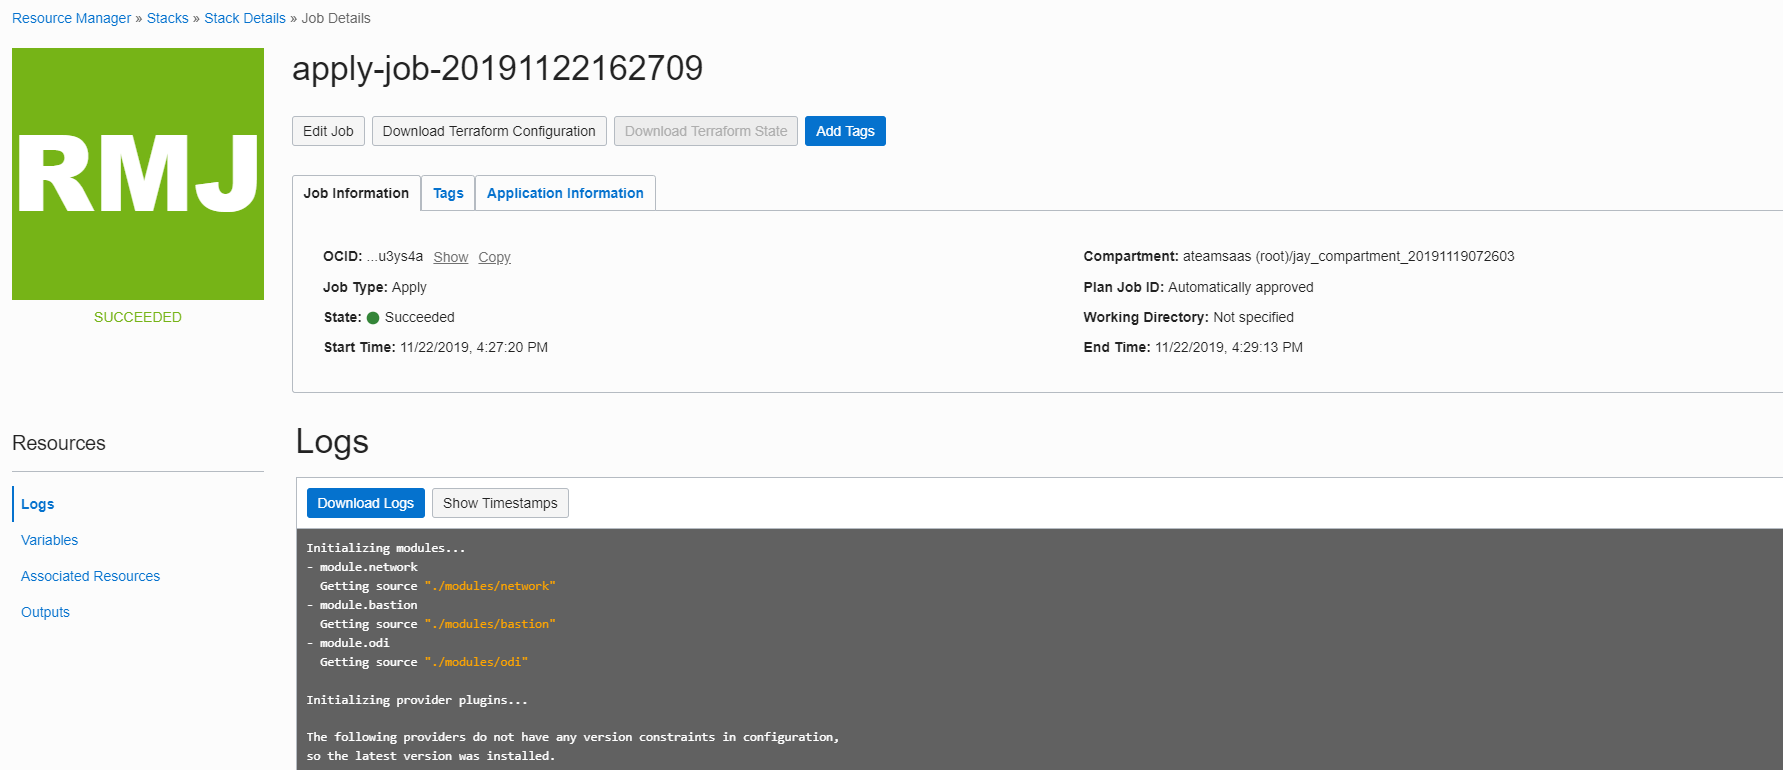
If successful, the following will be shown (under Resource Manager -> Stacks -> Stack Details -> Job Details)
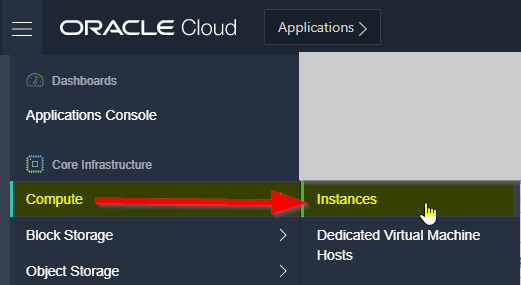
i) Check Compute -> Instances to see if the instance was created
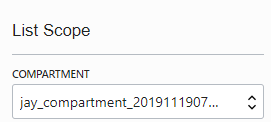
Change the scope to your compartment
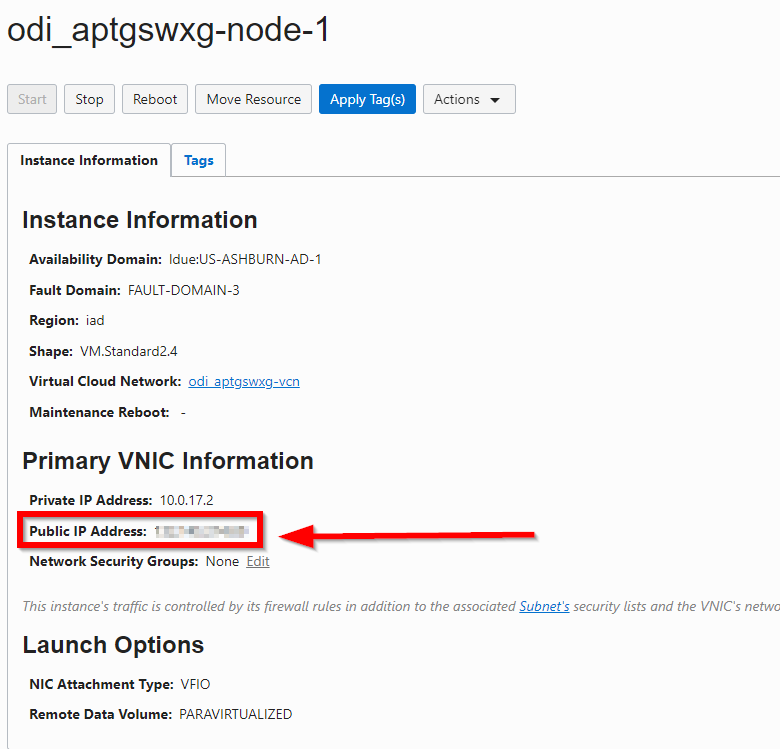
j) Click on the instance to get the details. Make a note of the Public IP to access with VNC (Port 5901).
k) In previous releases, the Instance was not automatically created. If not created automatically, go to Resources Manager to debug.
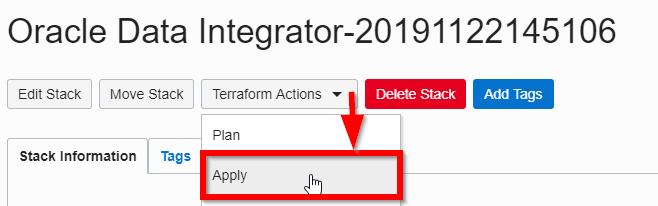
l) Under Resource Manager -> Jobs -> Click on Jobs -> If the job was started, use the logs to debug any install errors
m) If the job wasn’t started at all click Terraform -> Apply -> Monitor the logs
VNC to the Marketplace Image and Launch ODI from the Desktop
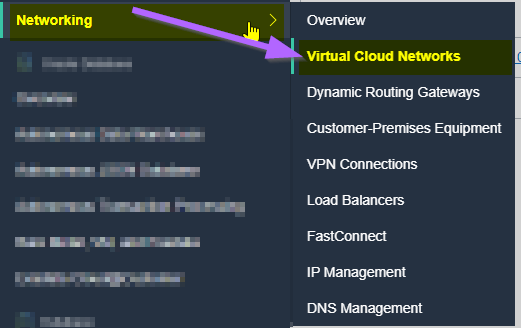
a) Confirm Port 22 is available for SSH Remote Login.
Click Networking -> Virtual Cloud Networks -> Select the compartment -> Select the ODI Virtual Cloud Network -> Select the ODI Subnet -> Select the ODI Security Lists
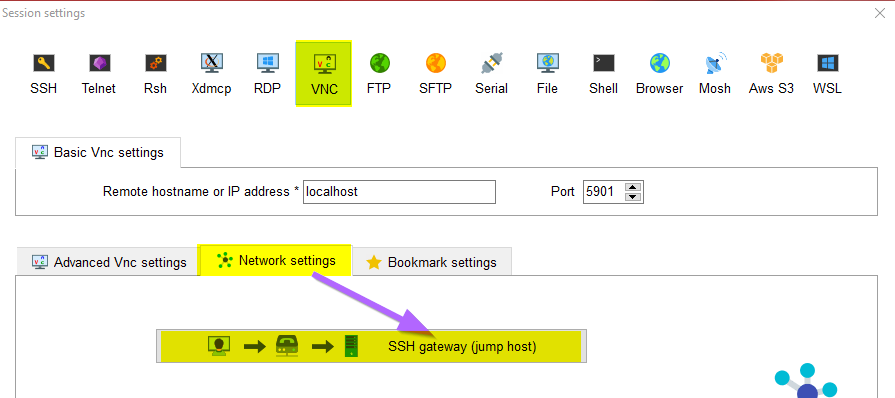
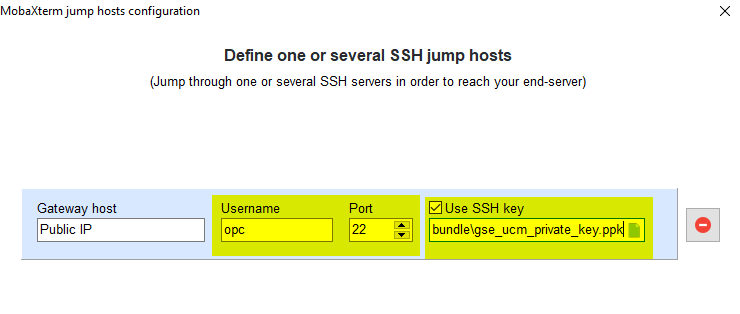
b) Connect using a VNC client using the Public IP (step 2.j) with Port 22 with the Private Key.
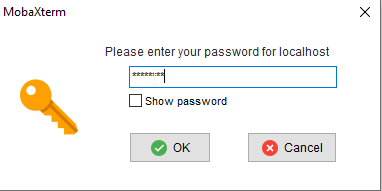
The below example is using MobaXterm. Another VNC option is to use Putty with VNC Viewer.
Enter the VNC Pwd specified on install -> OK
c) Double click on the ODI Studio icon (it initially looks like a text document) -> click Trust and Launch.
d) Connect to the repository as SUPERVISOR
By default the SUPERVISOR password will be generated by ODI and saved (but hidden) when the studio is launched.
If necessary, retrieve the SUPERVISOR password by running:
Currently it is not possible to use a Federated user for the ODI configuration.
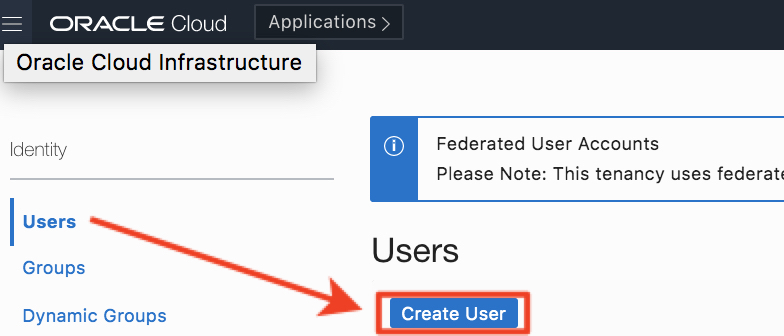
Administration privileges are required to create the local user.
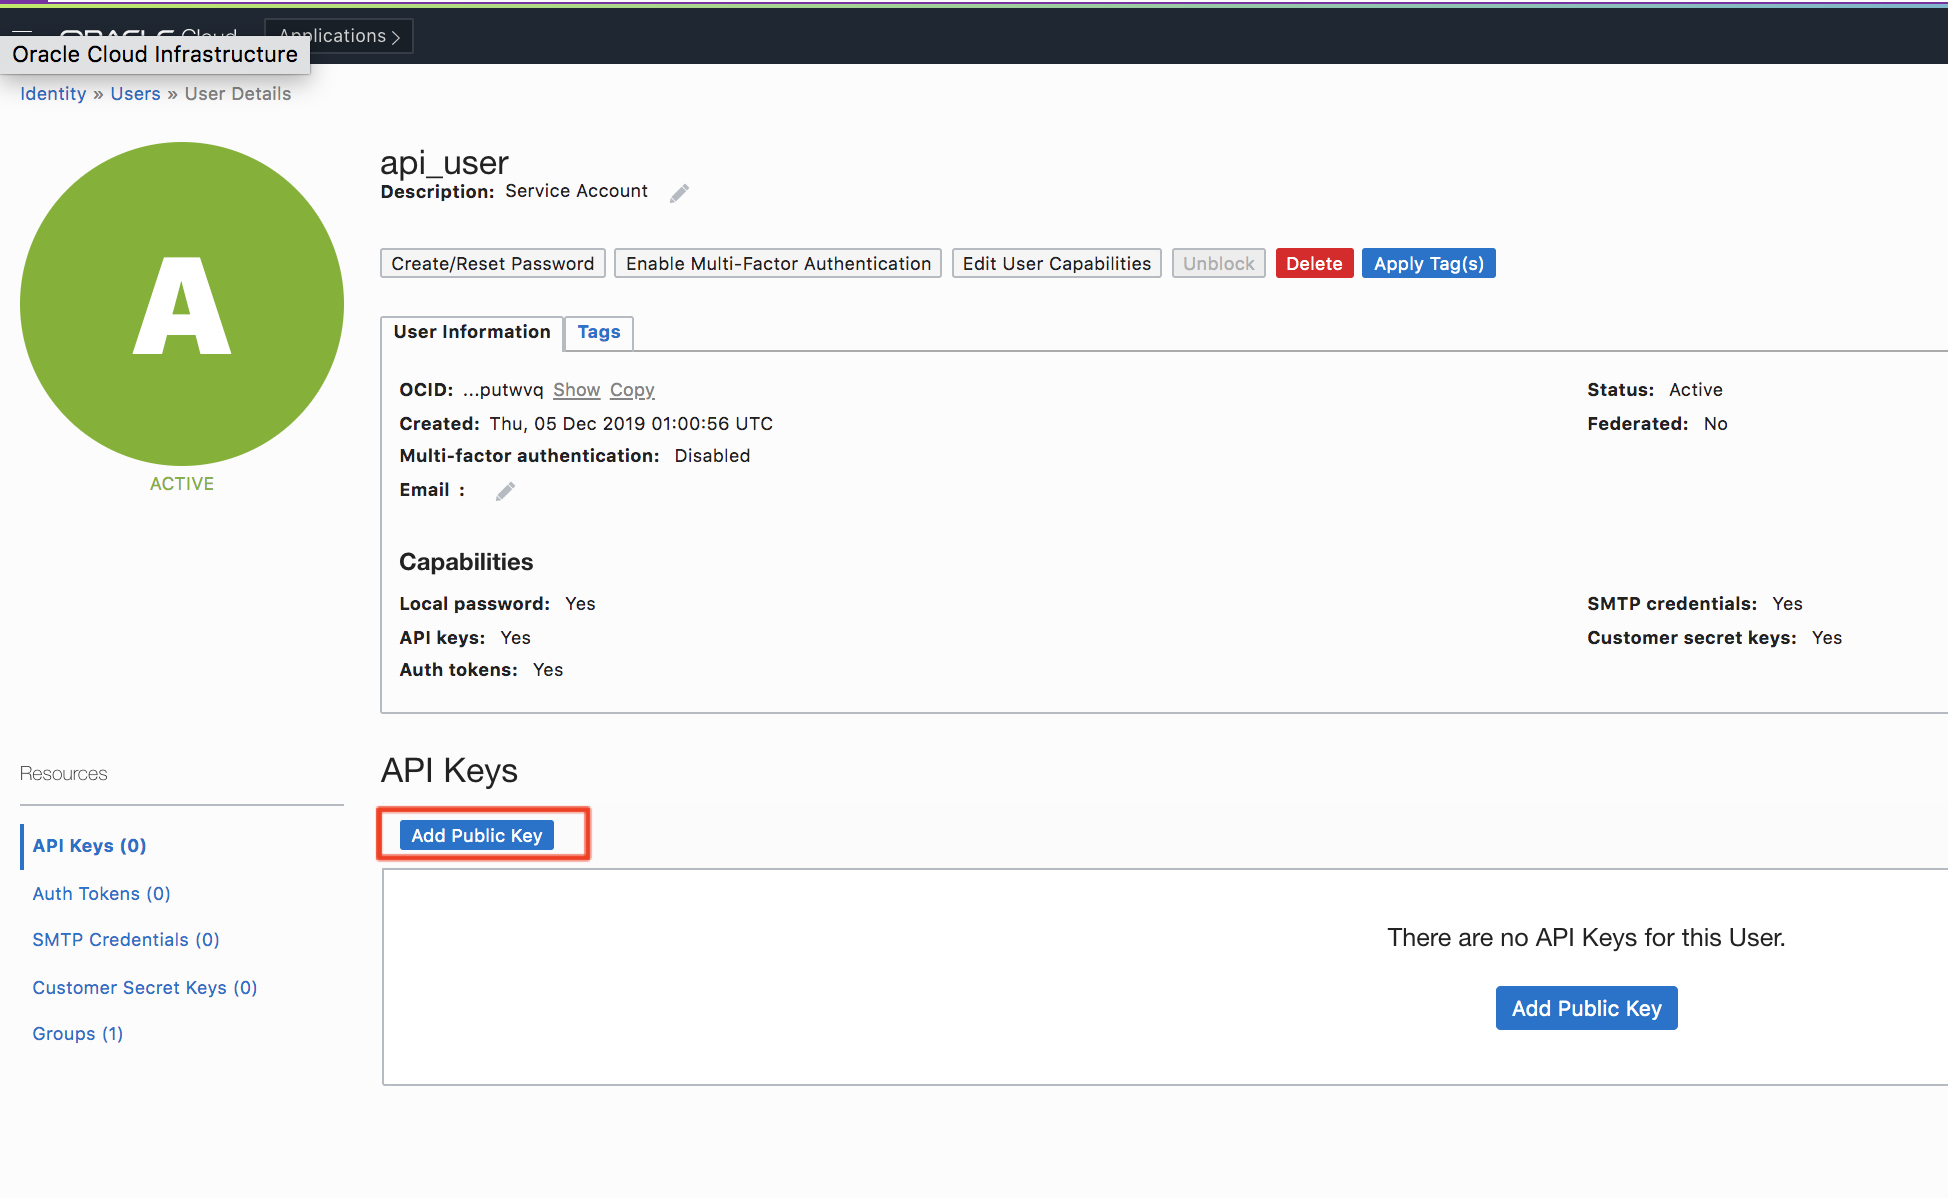
Identity > Users -> click Create User
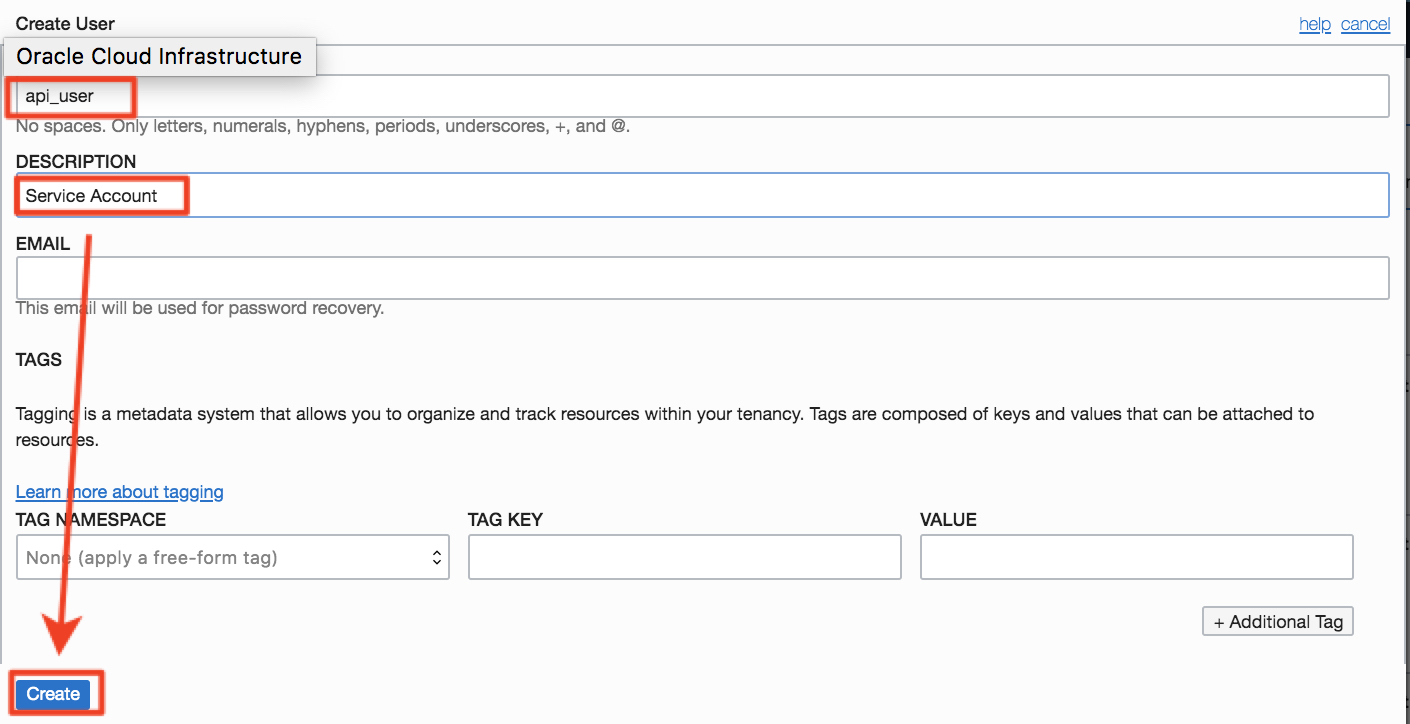
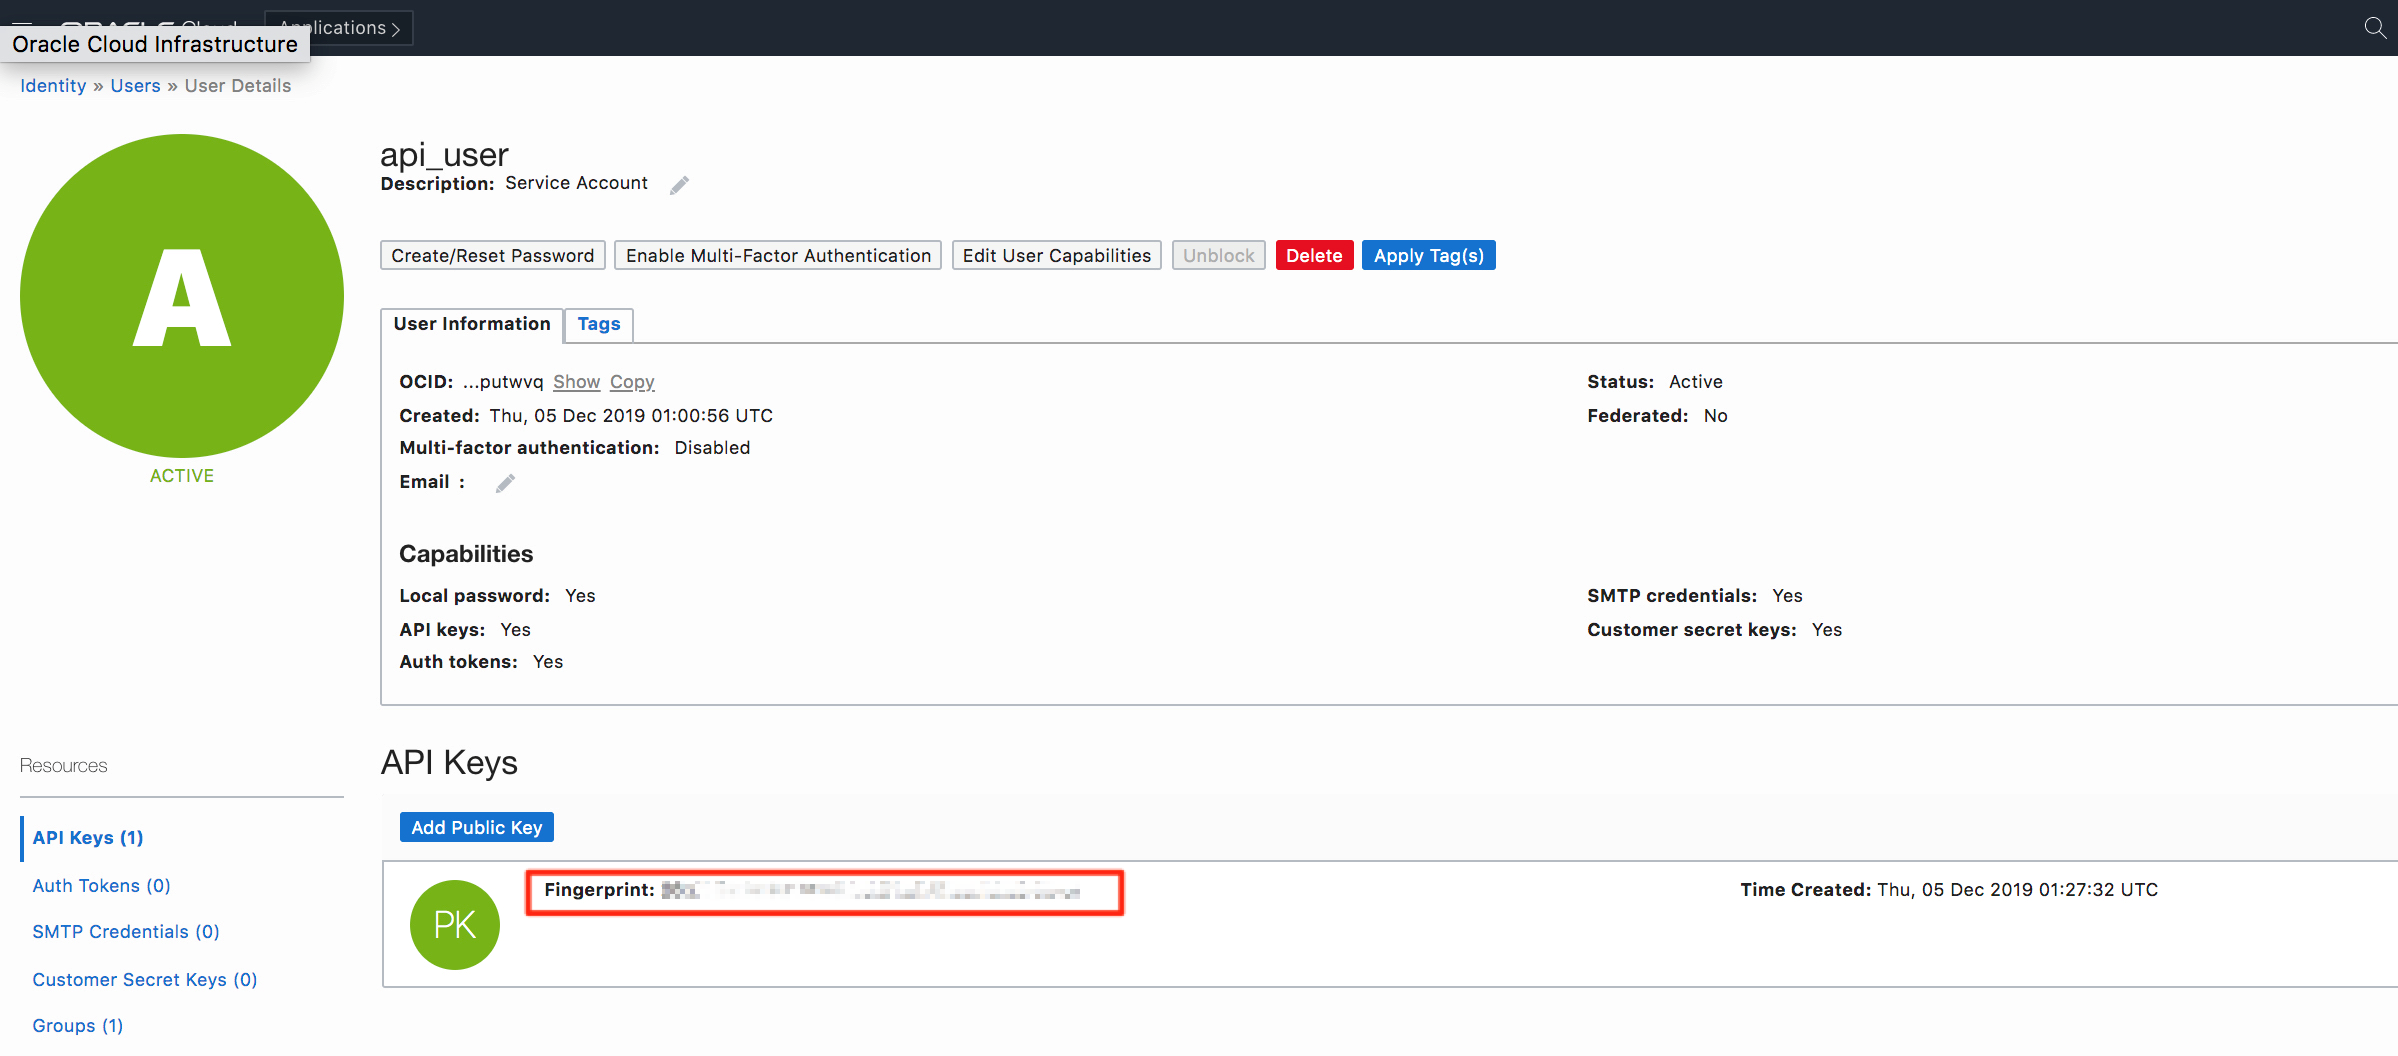
Enter a name for the user. i.e. api_user -> enter a description -> click Create
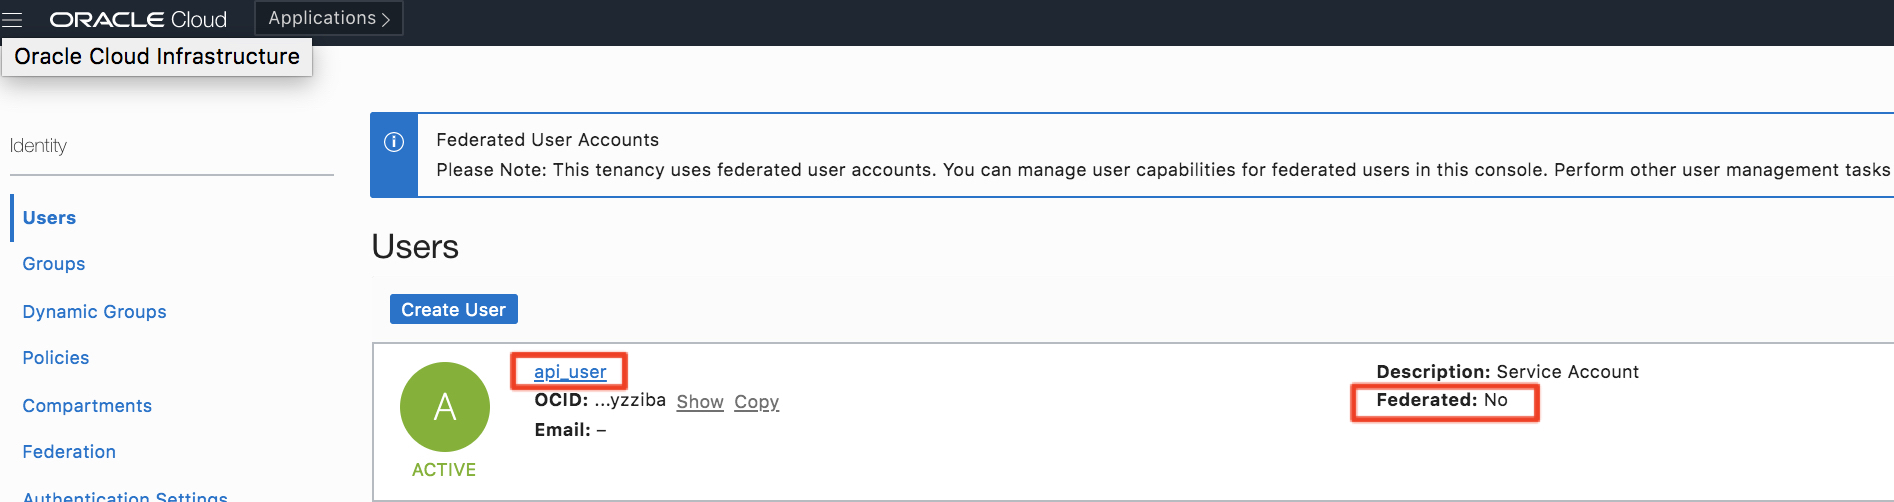
Verify that the user has been created successfully and that it is NOT a Federated user.
Use a text editor or excel to create a “Topology Definitions Table” to record the required ODI topology credentials. Saved it to secure location. See example format below.
Topology Definition Table:
User OCID
ocid1.user.oc1..****************
Tenancy
****************
Tenancy OCID:
ocid1.tenancy.oc1..****************
Tenancy Object Storage Namespace
****************
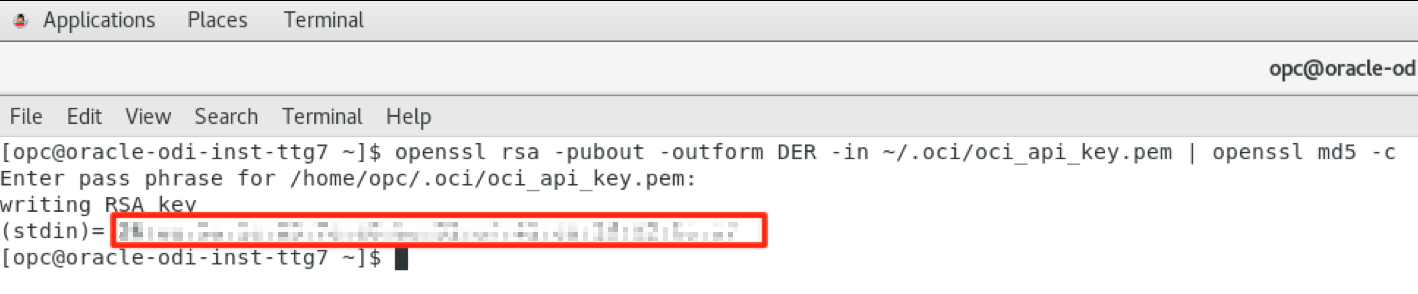
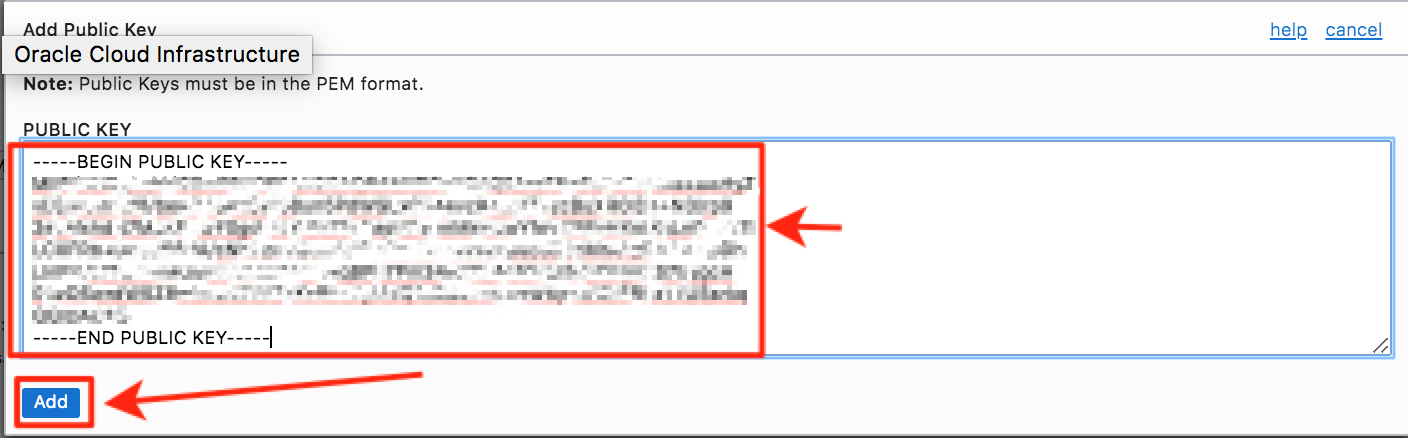
b) Create the private/public key pair
*** This key pair is NOT the SSH key that you used to access the compute instance.***
*** Instead, this key will be used to allow the OCI api_user to connect to Object Storage from ODI. ***
Summary steps are provided below on how to create the key pair. If required detailed steps can be found here.
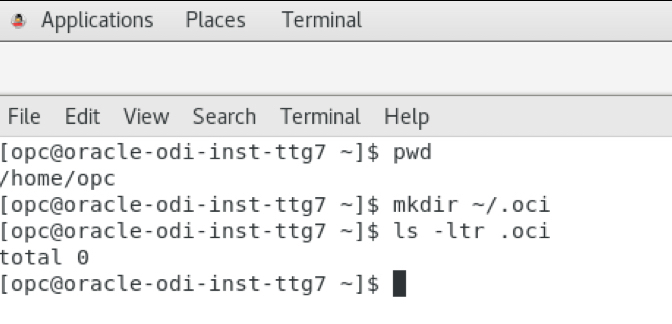
From the ODI Marketplace VM -> create an .oci directory to store the credentials:
mkdir ~/.oci
Generate the private key with the following commands:
It is highly recommended to generate the key with a passphrase.
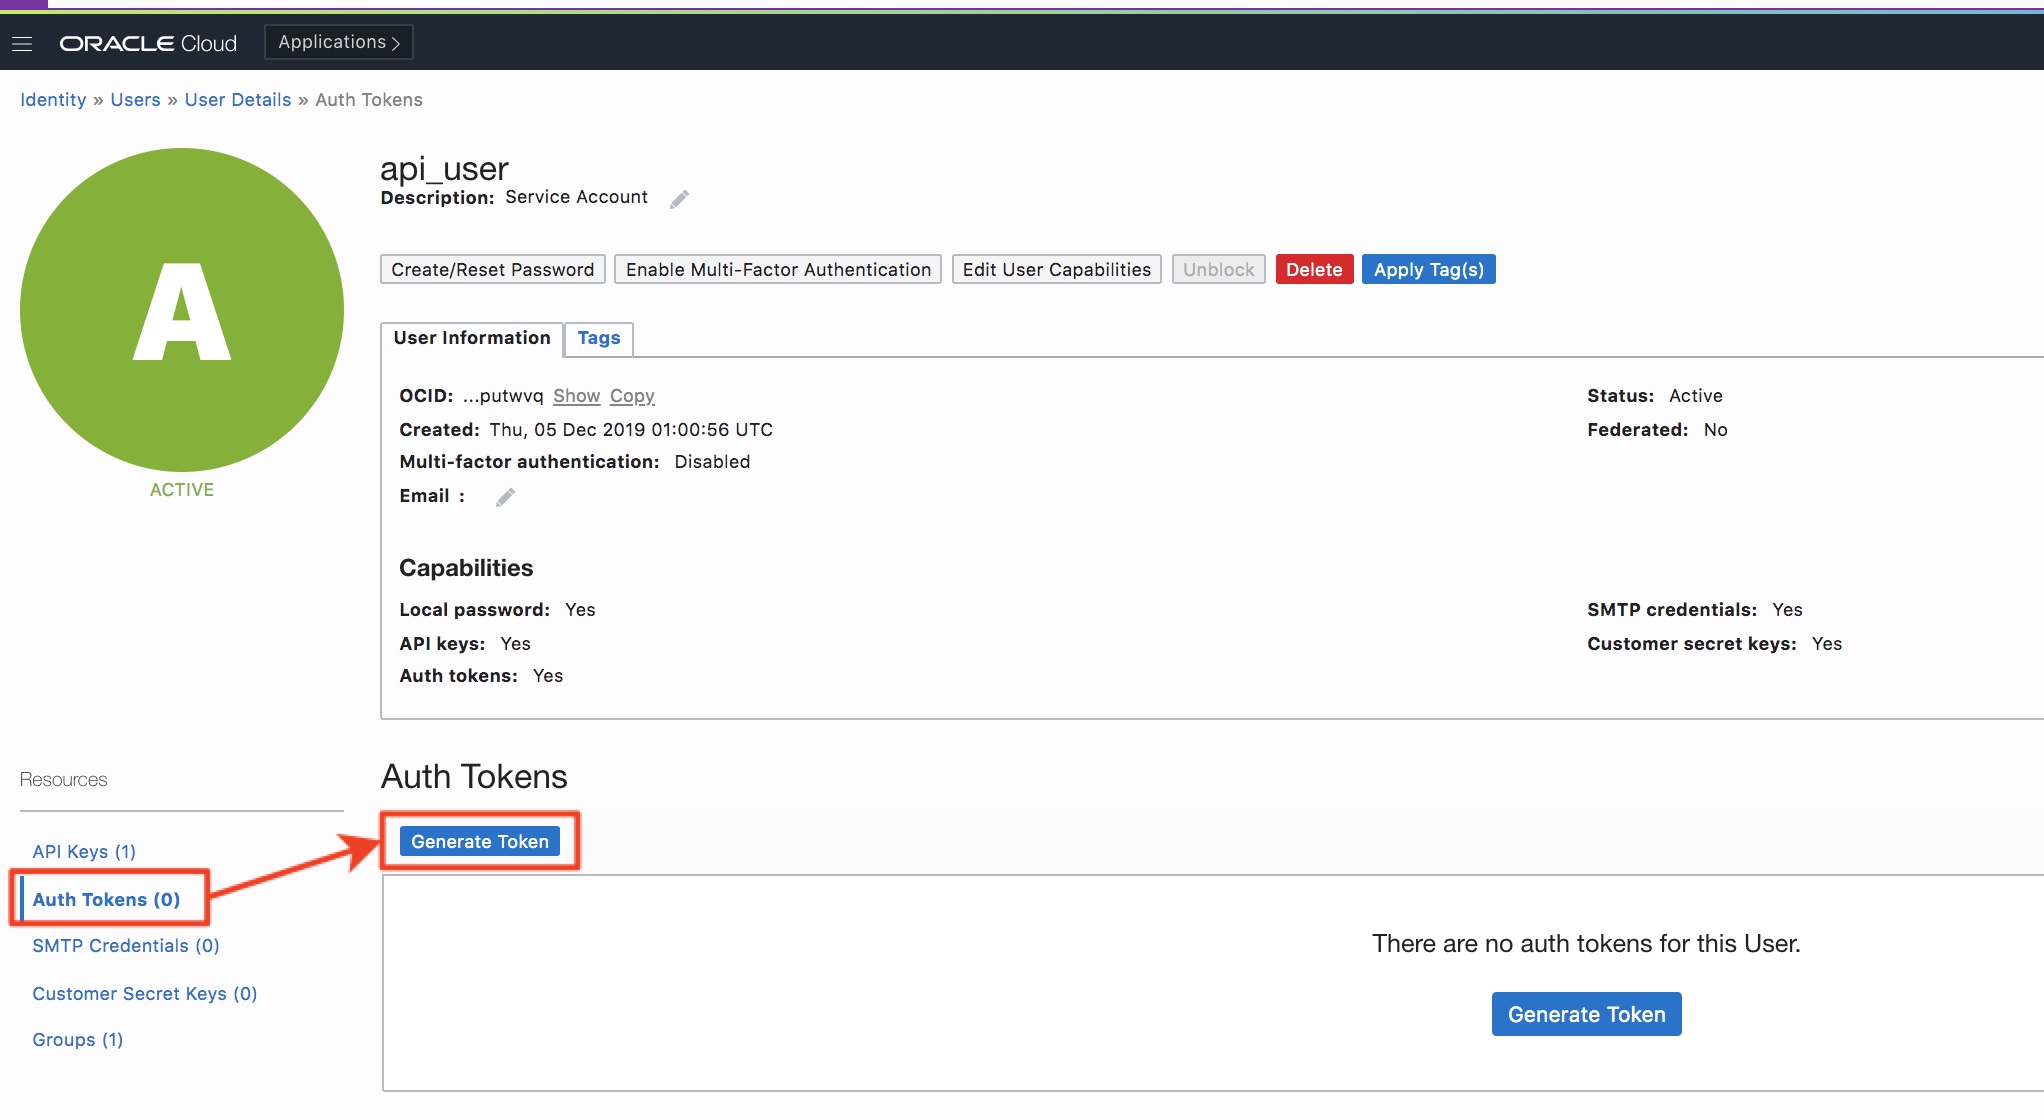
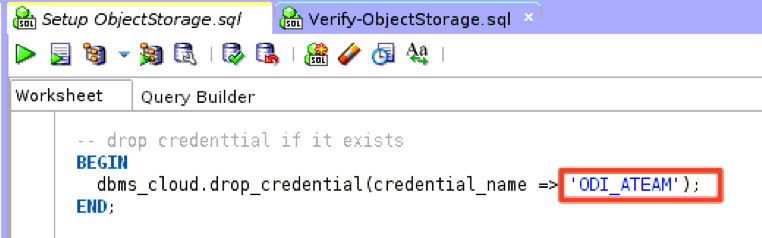
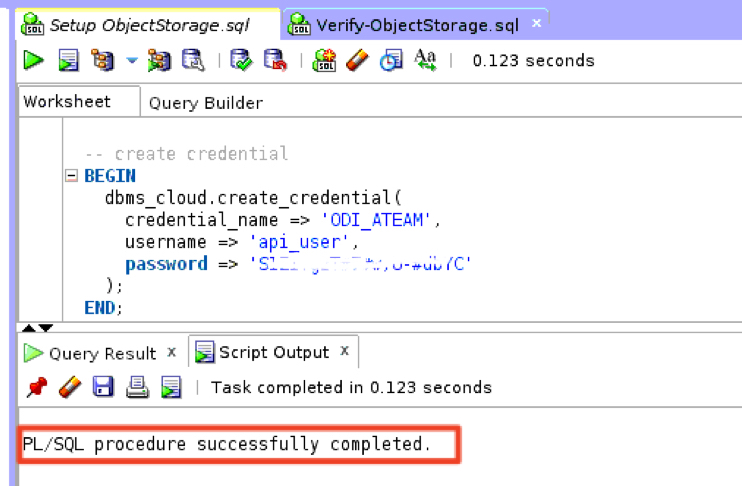
BEGIN dbms_cloud.create_credential( credential_name => ‘ODI_ATEAM’, username => ‘api_user’, password => ‘Auth Token Generated from OCI’ ); END;
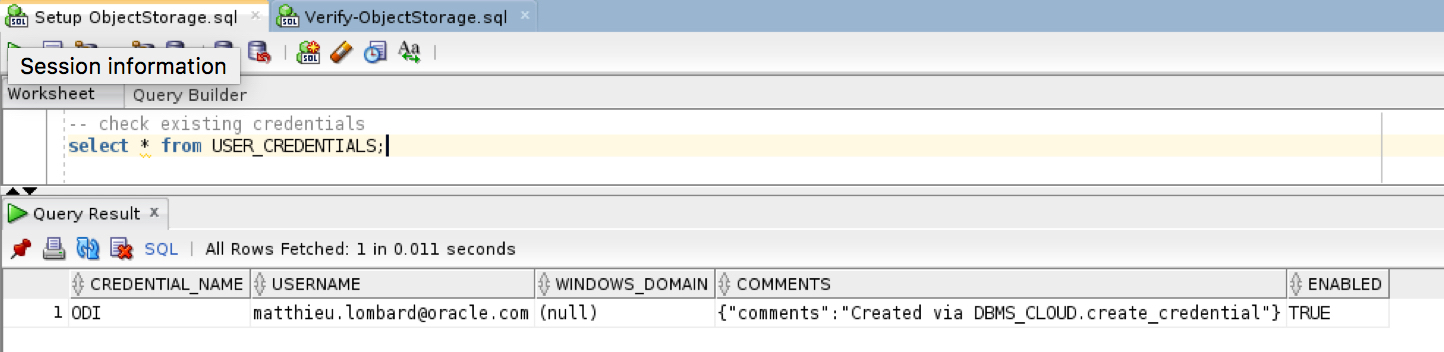
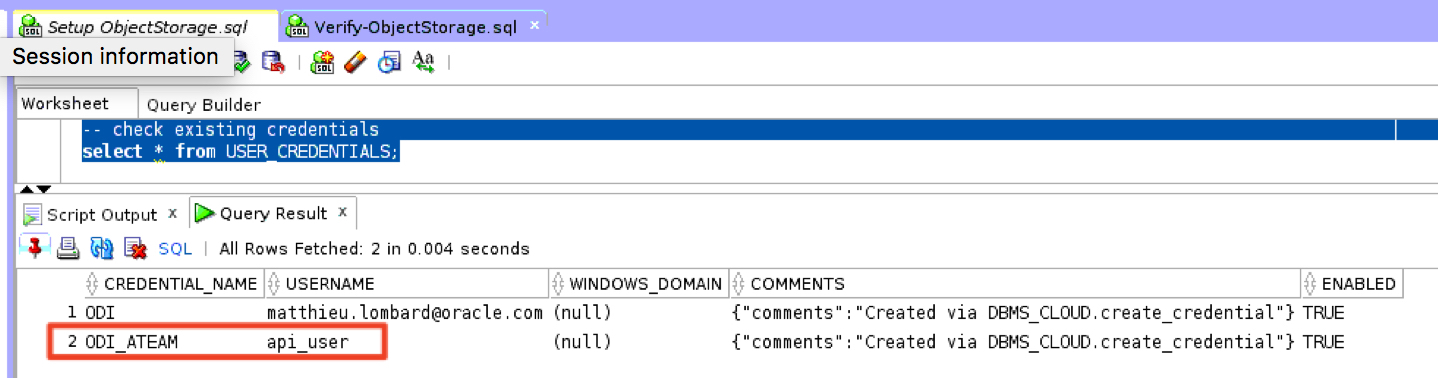
Verify the credential was created:
select * from USER_CREDENTIALS;
i) Validate the new ADW credentials
Connect to ADW with SQL Developer client or SQL Developer Web client.
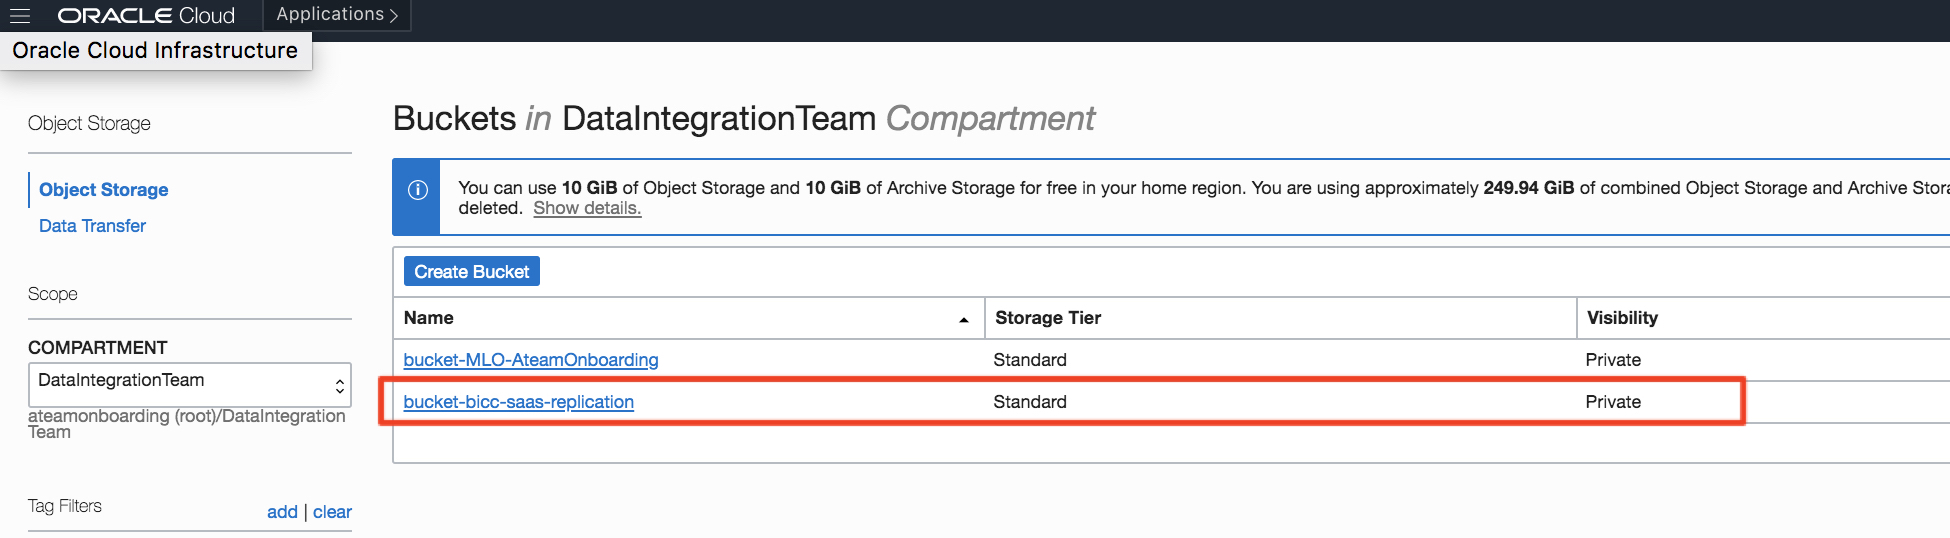
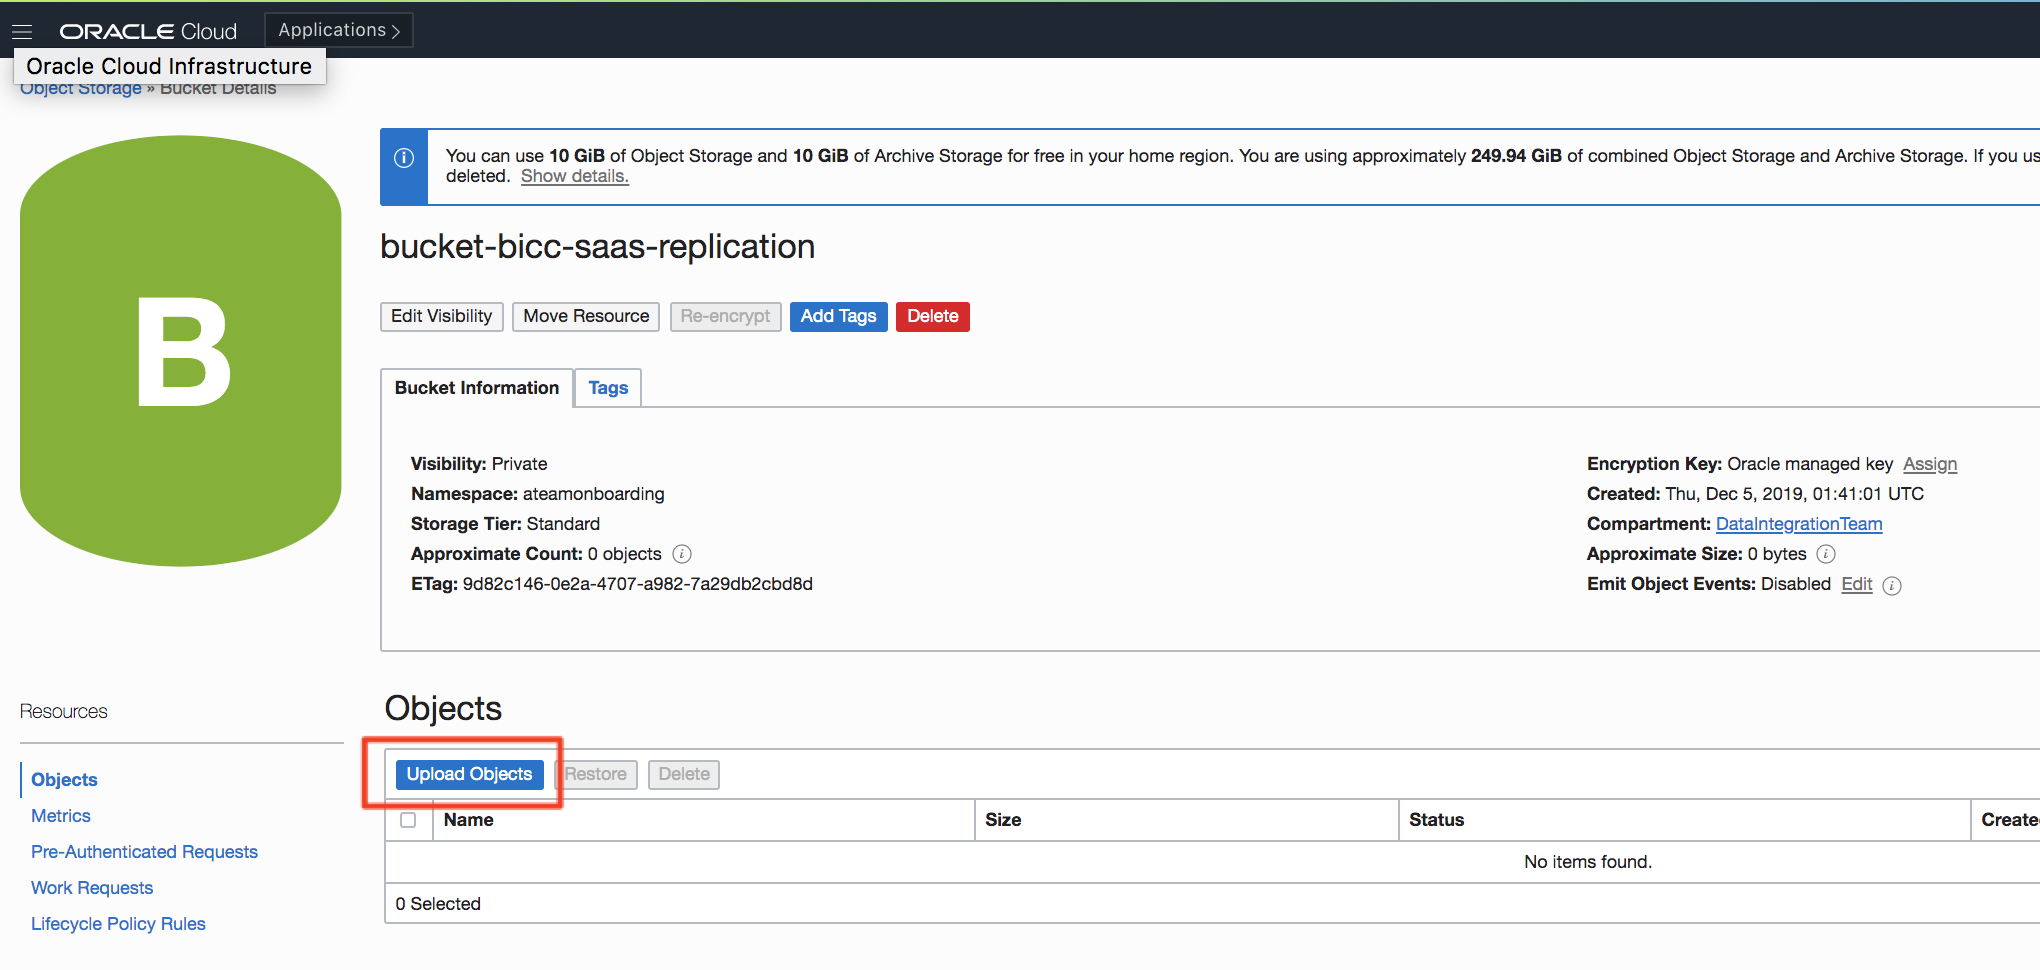
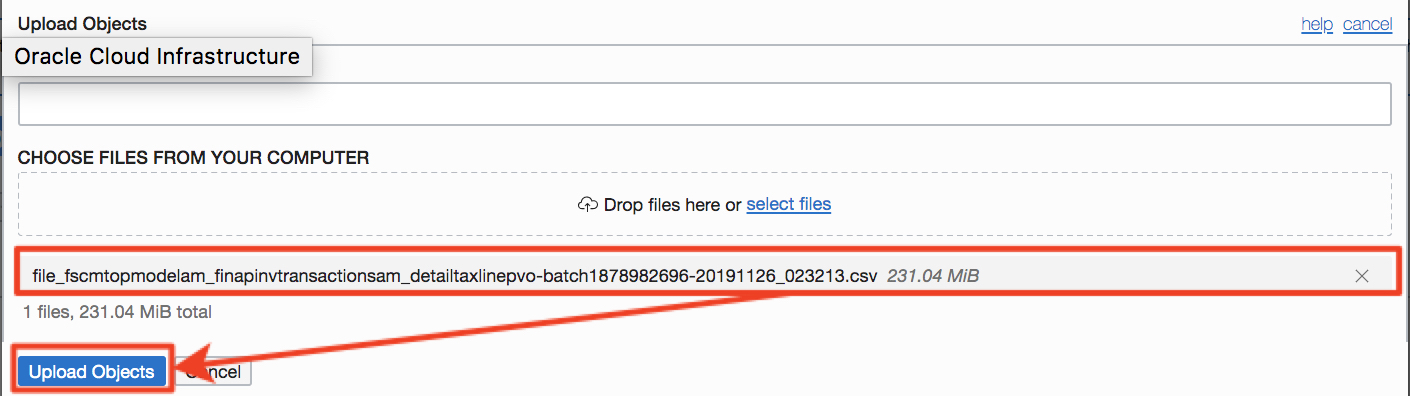
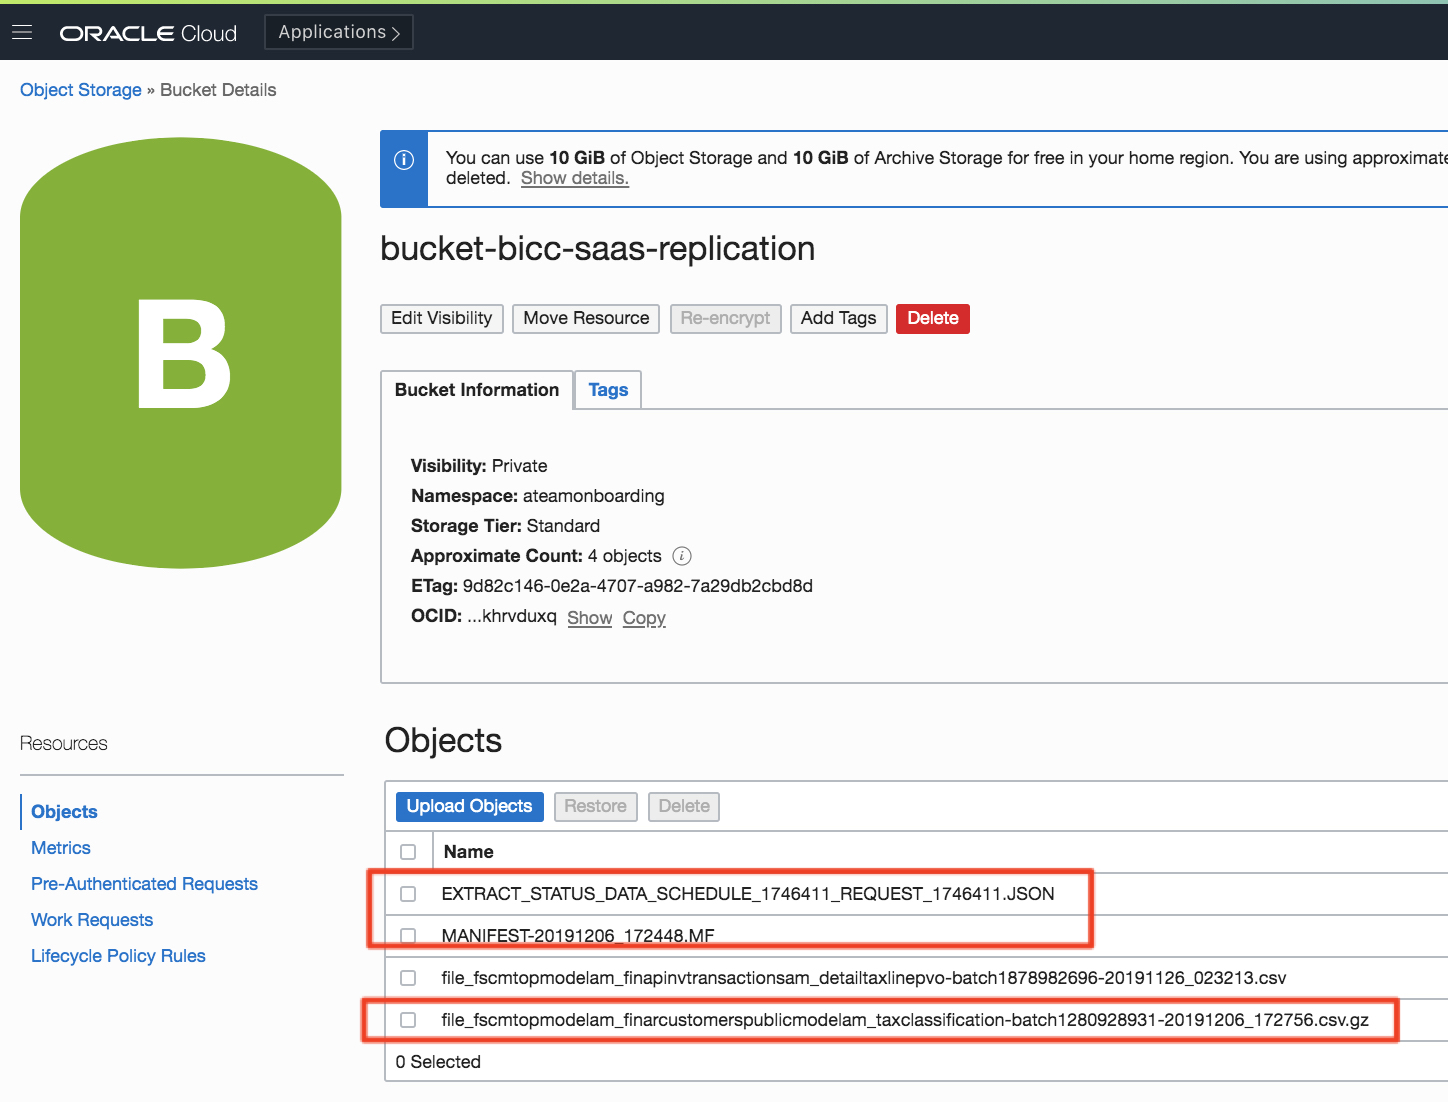
Verify the existing files are attached to the bucket:
select object_name, bytes from dbms_cloud.list_objects(‘ODI_ATEAM’,’https://swiftobjectstorage.us-ashburn-1.oraclecloud.com/v1/<TENANCY>/bucket-bicc-saas-replication/’);
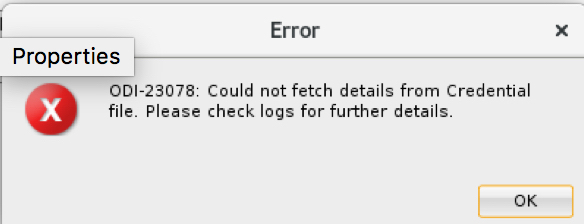
j) If needed, see (Doc ID 2468298.1) to validate the Object Storage URI and credentials are correctly set for Autonomous Data Warehouse / Autonomous Transaction Processing.
Configure ODI Topology
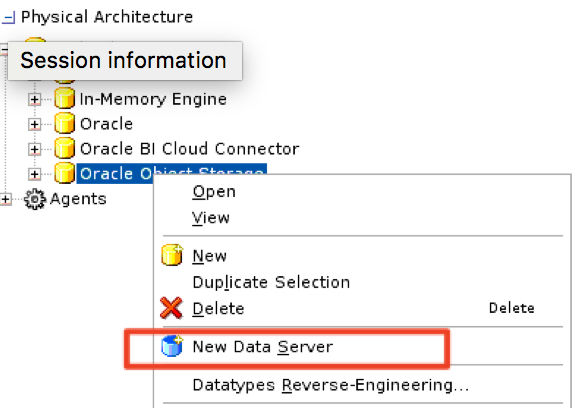
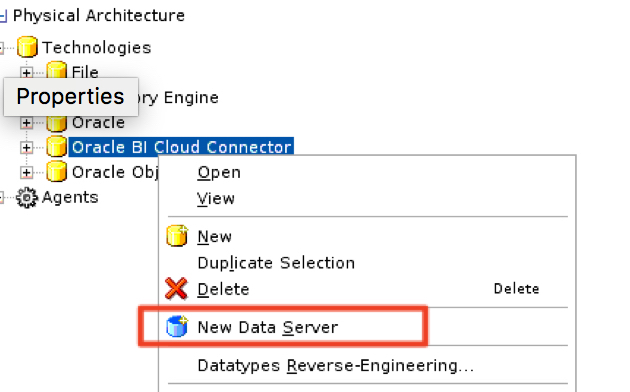
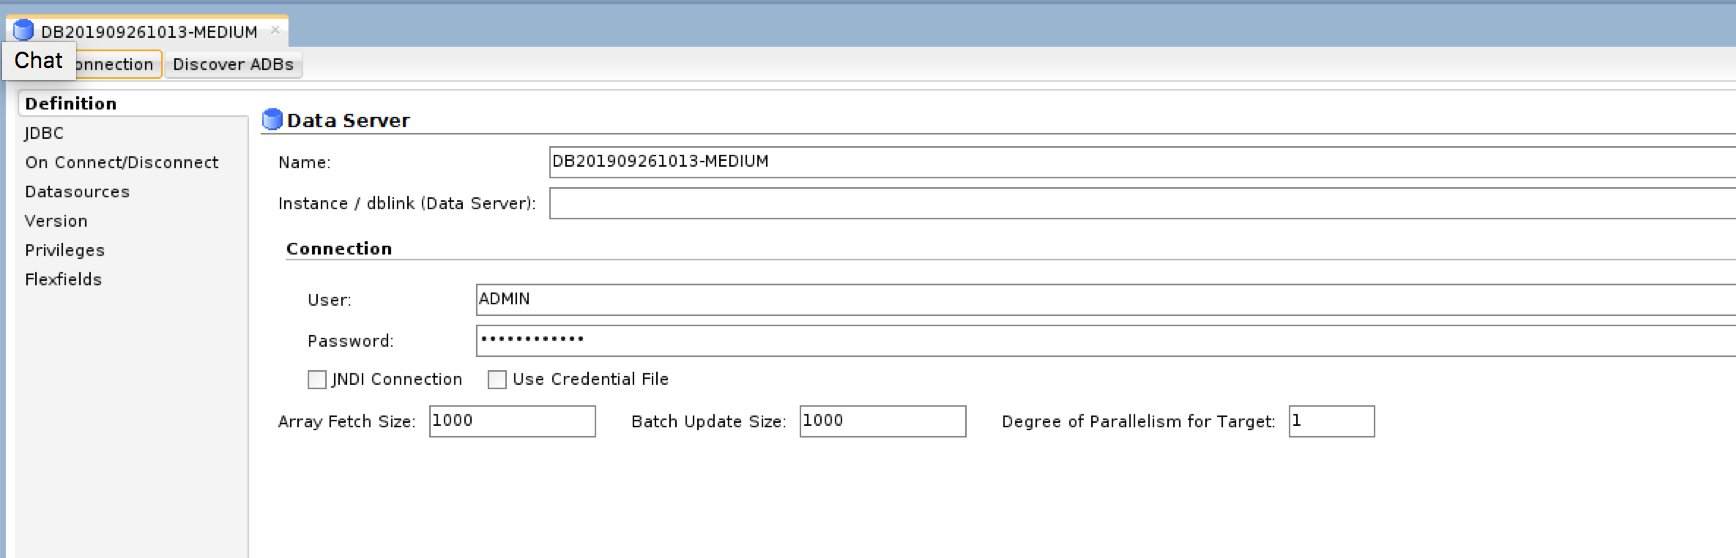
a) Create the Object Storage Physical Data Server
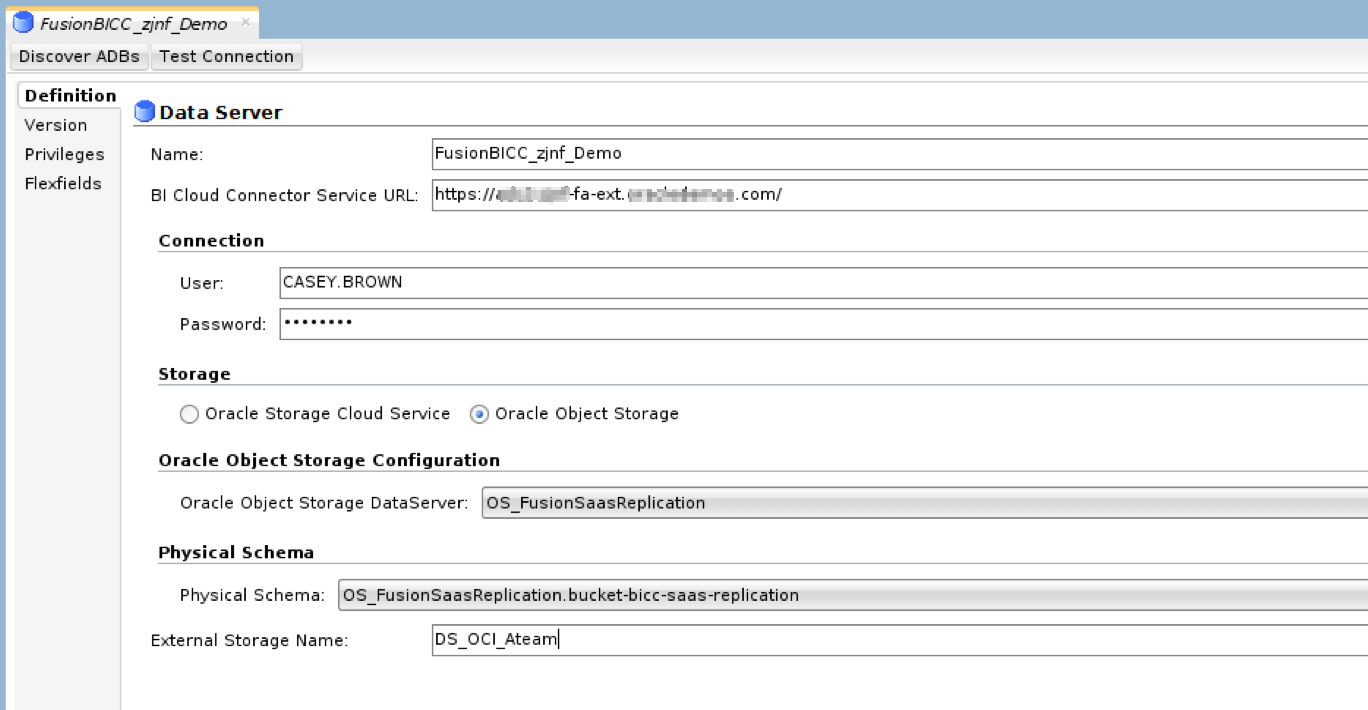
In the Physical Architecture -> right click the Oracle Object Storage Technology -> click New Data Server
Enter the information collected in the Topology Definition Table
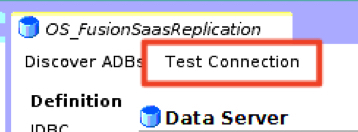
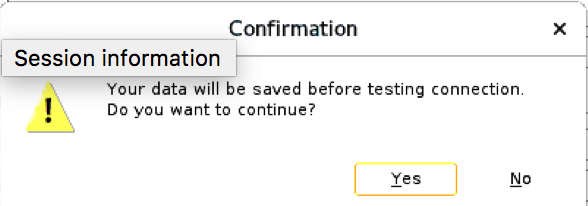
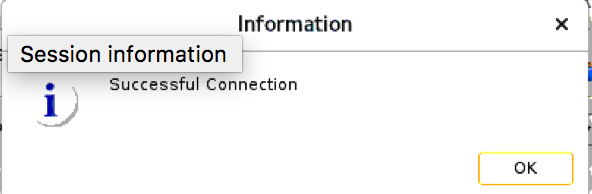
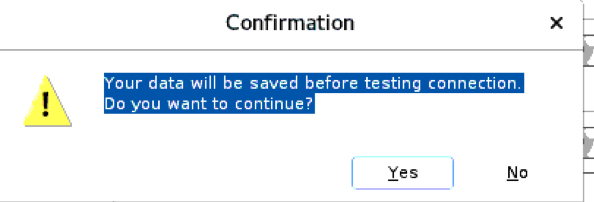
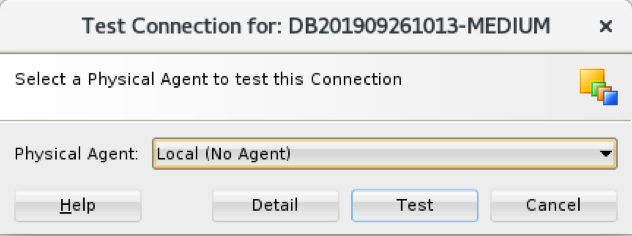
Click “Test Connection”
Click Yes to save
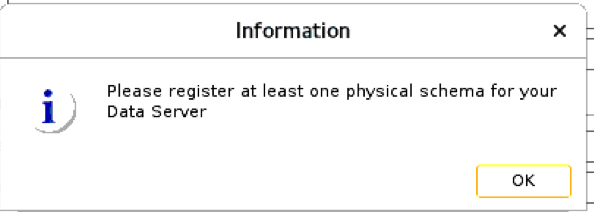
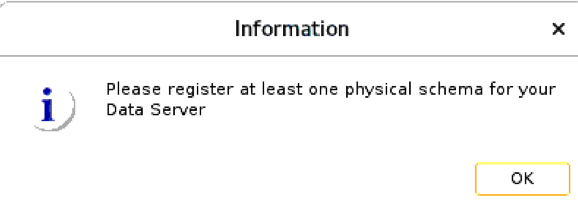
Click OK
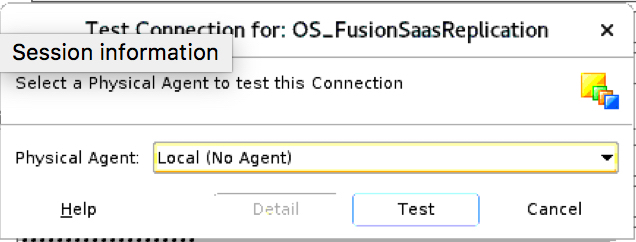
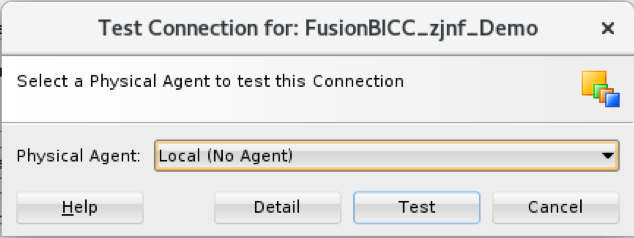
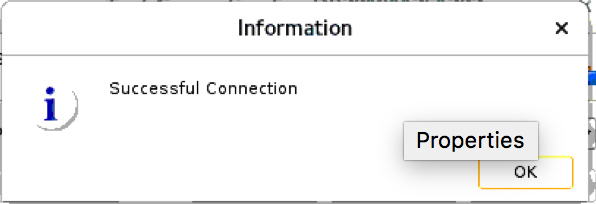
Select Local Agent -> click Test
Click OK
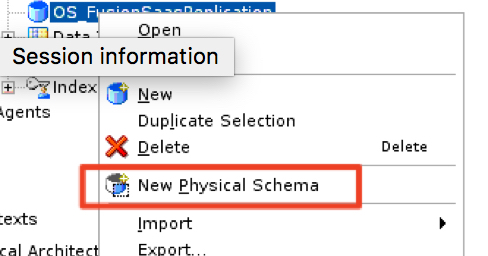
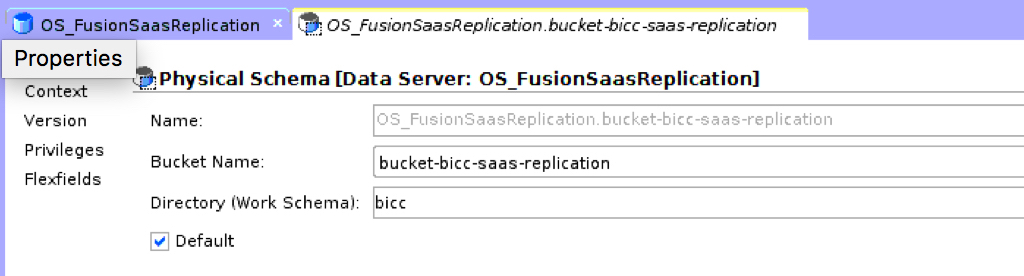
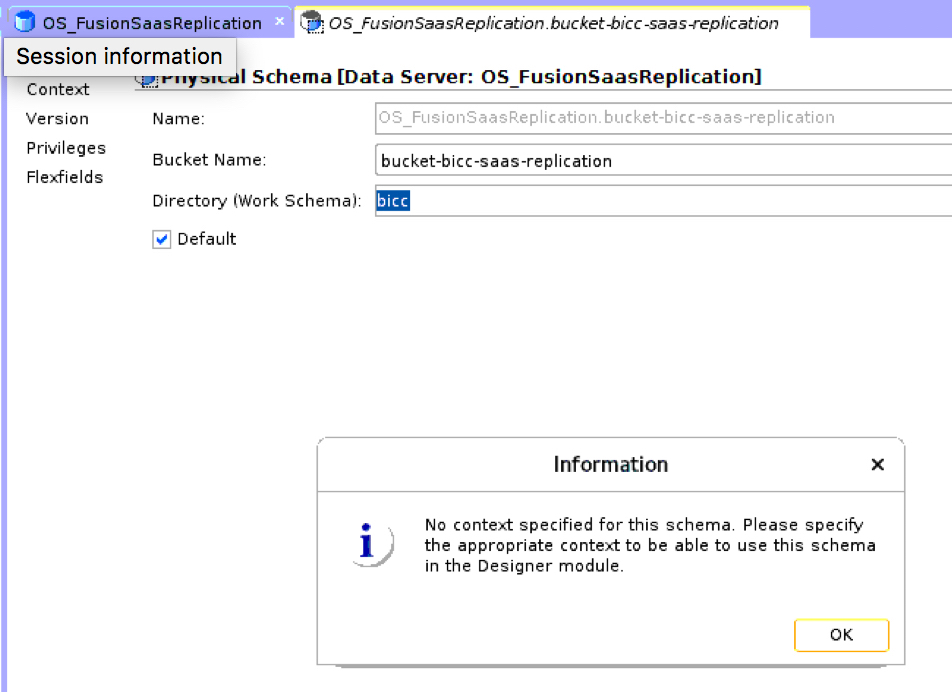
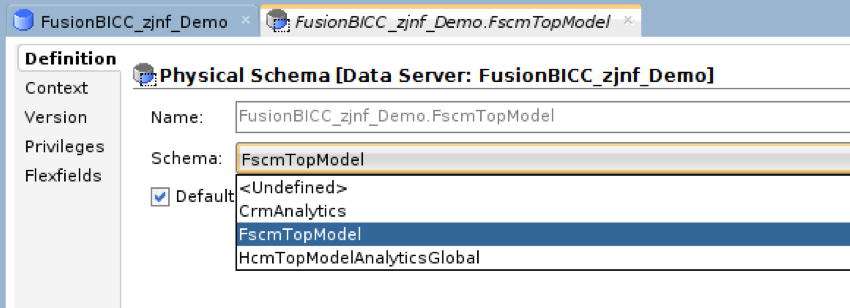
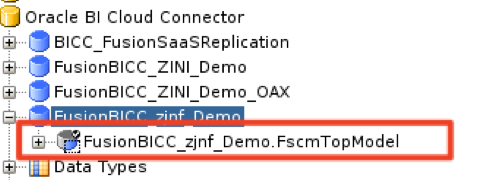
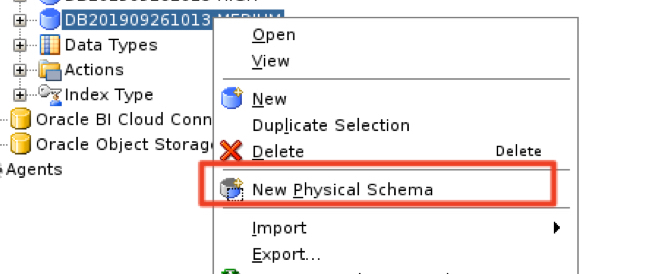
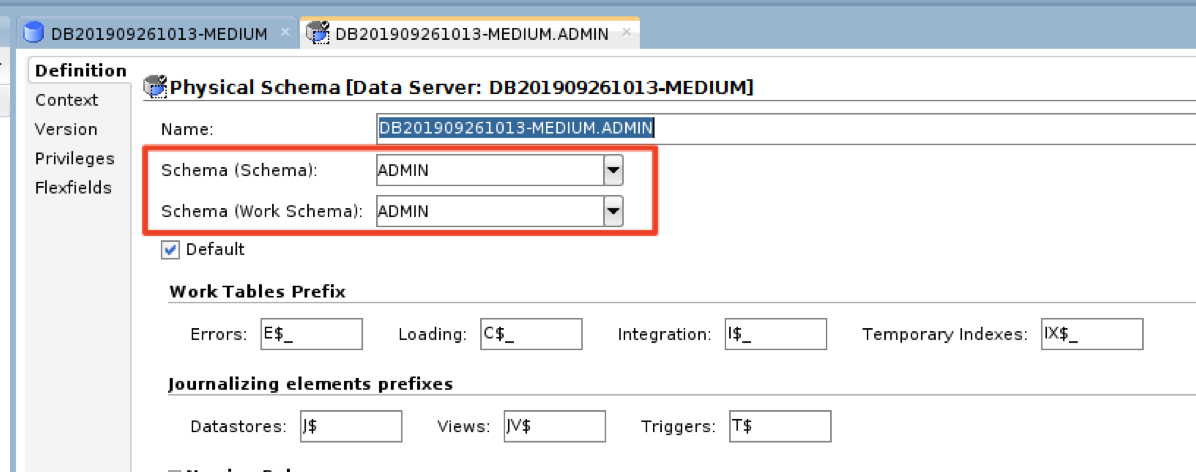
b) Create the Object Storage Physical Schema
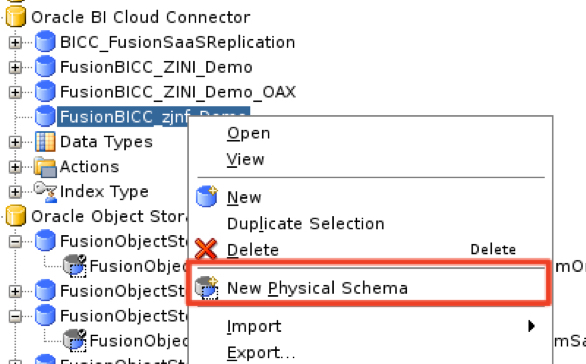
From the Physical Data Server created -> right click -> select New Physical Schema
From the Bucket Name drop-down -> select the BICC extract bucket (previously created) -> enter a work directory
Click OK to save
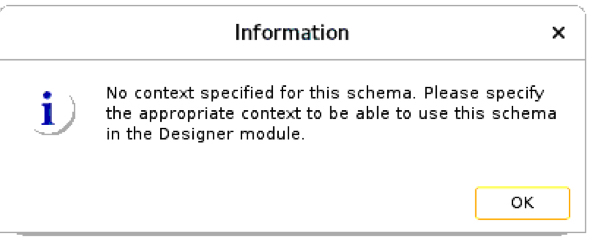
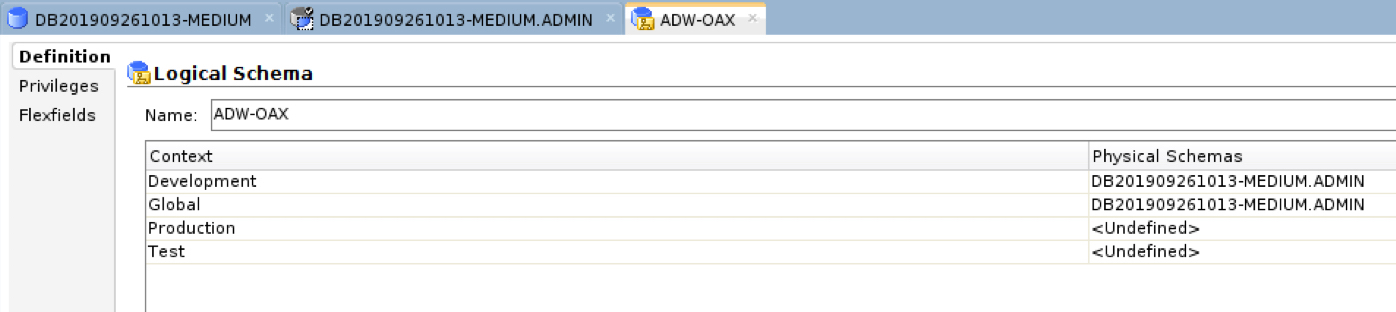
c) Create Object Storage Logical Schema and set context
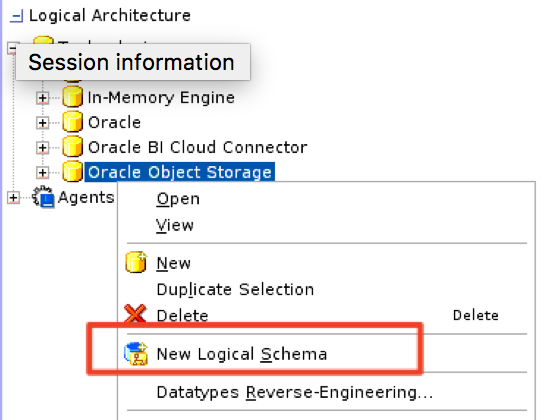
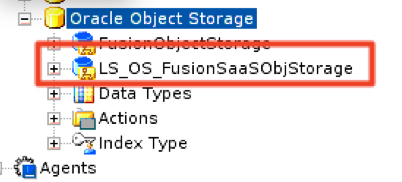
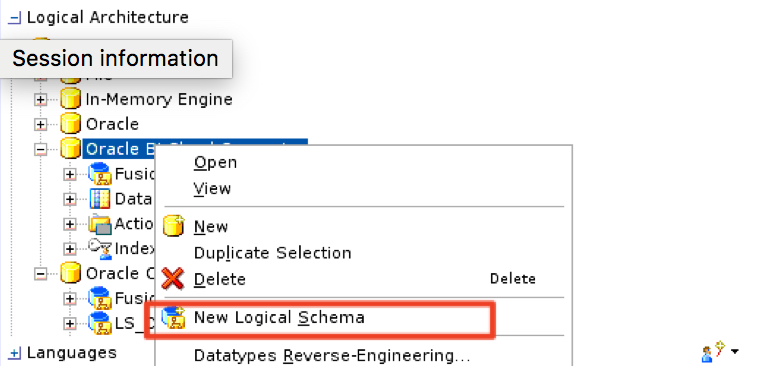
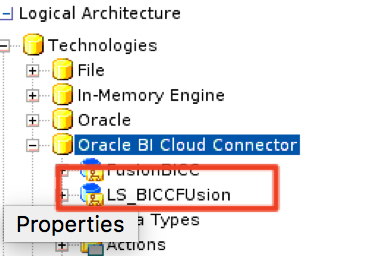
In the Logical Architecture -> right click on “Oracle Object Storage Technology” -> select “New Logical Schema”
Enter a Name -> set the Development and Global contexts to point to the “Object Storage Physical” schema previously created
Save -> Verify that the Logical Schema has been created for Object Storage
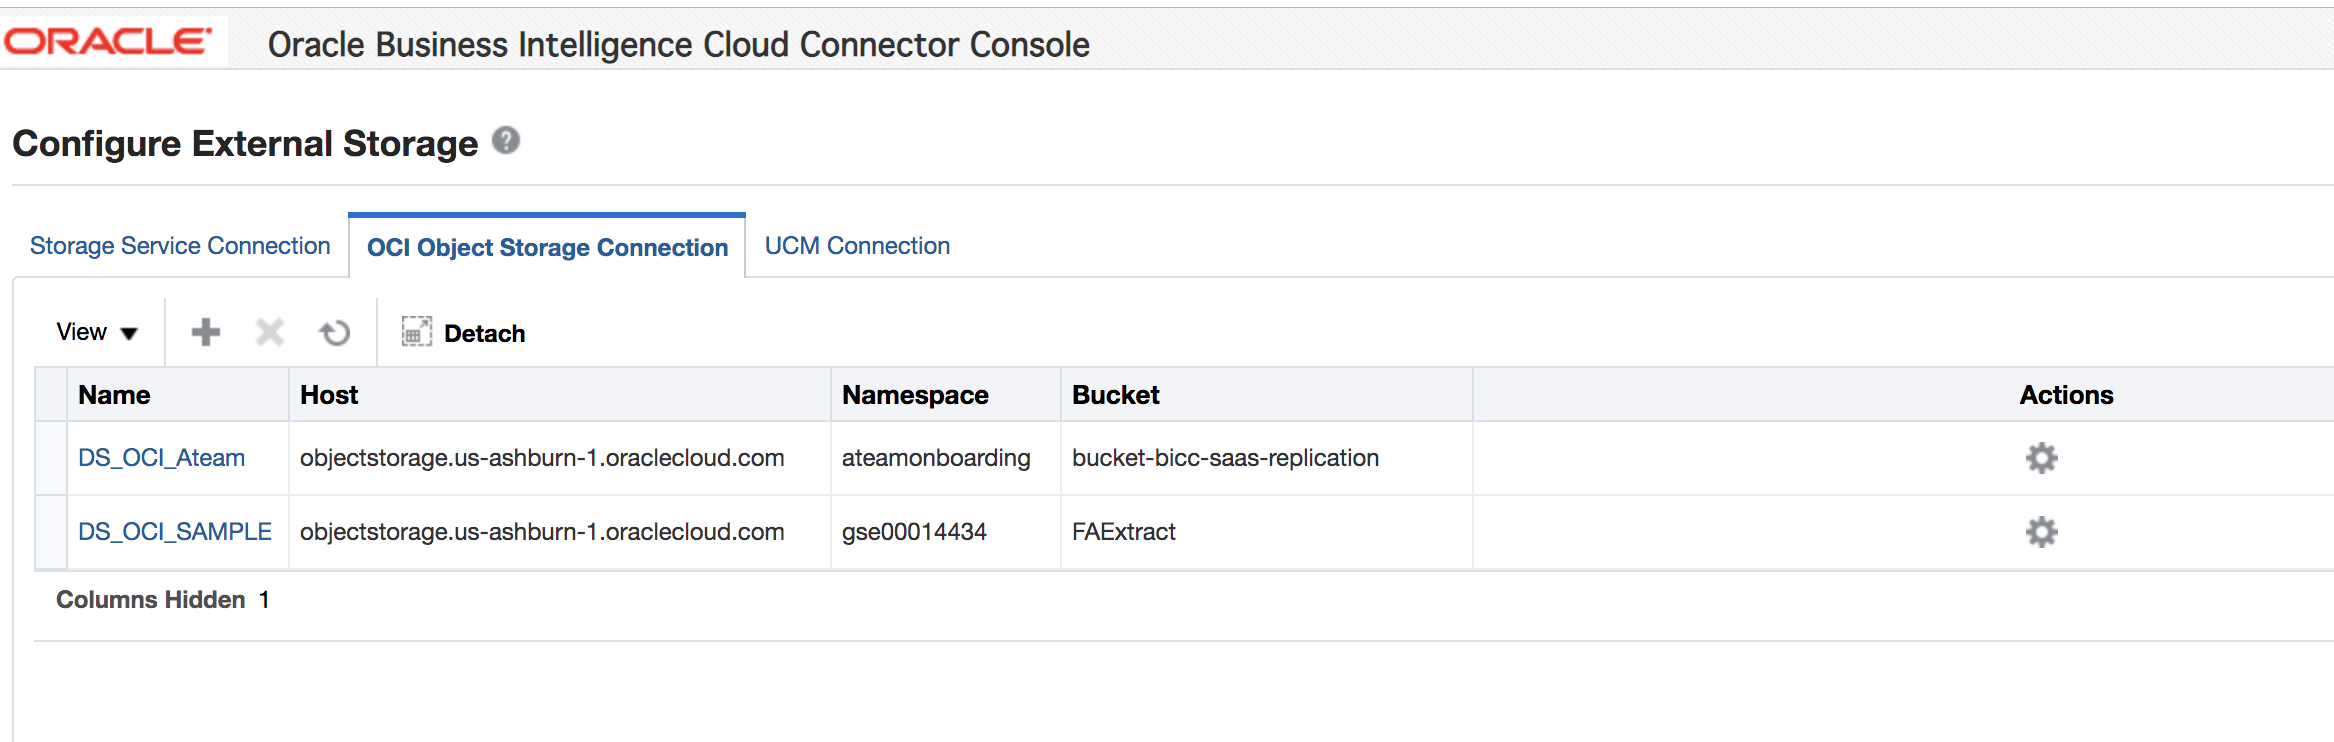
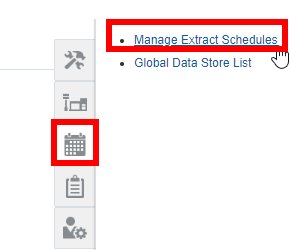
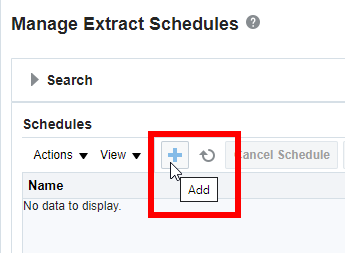
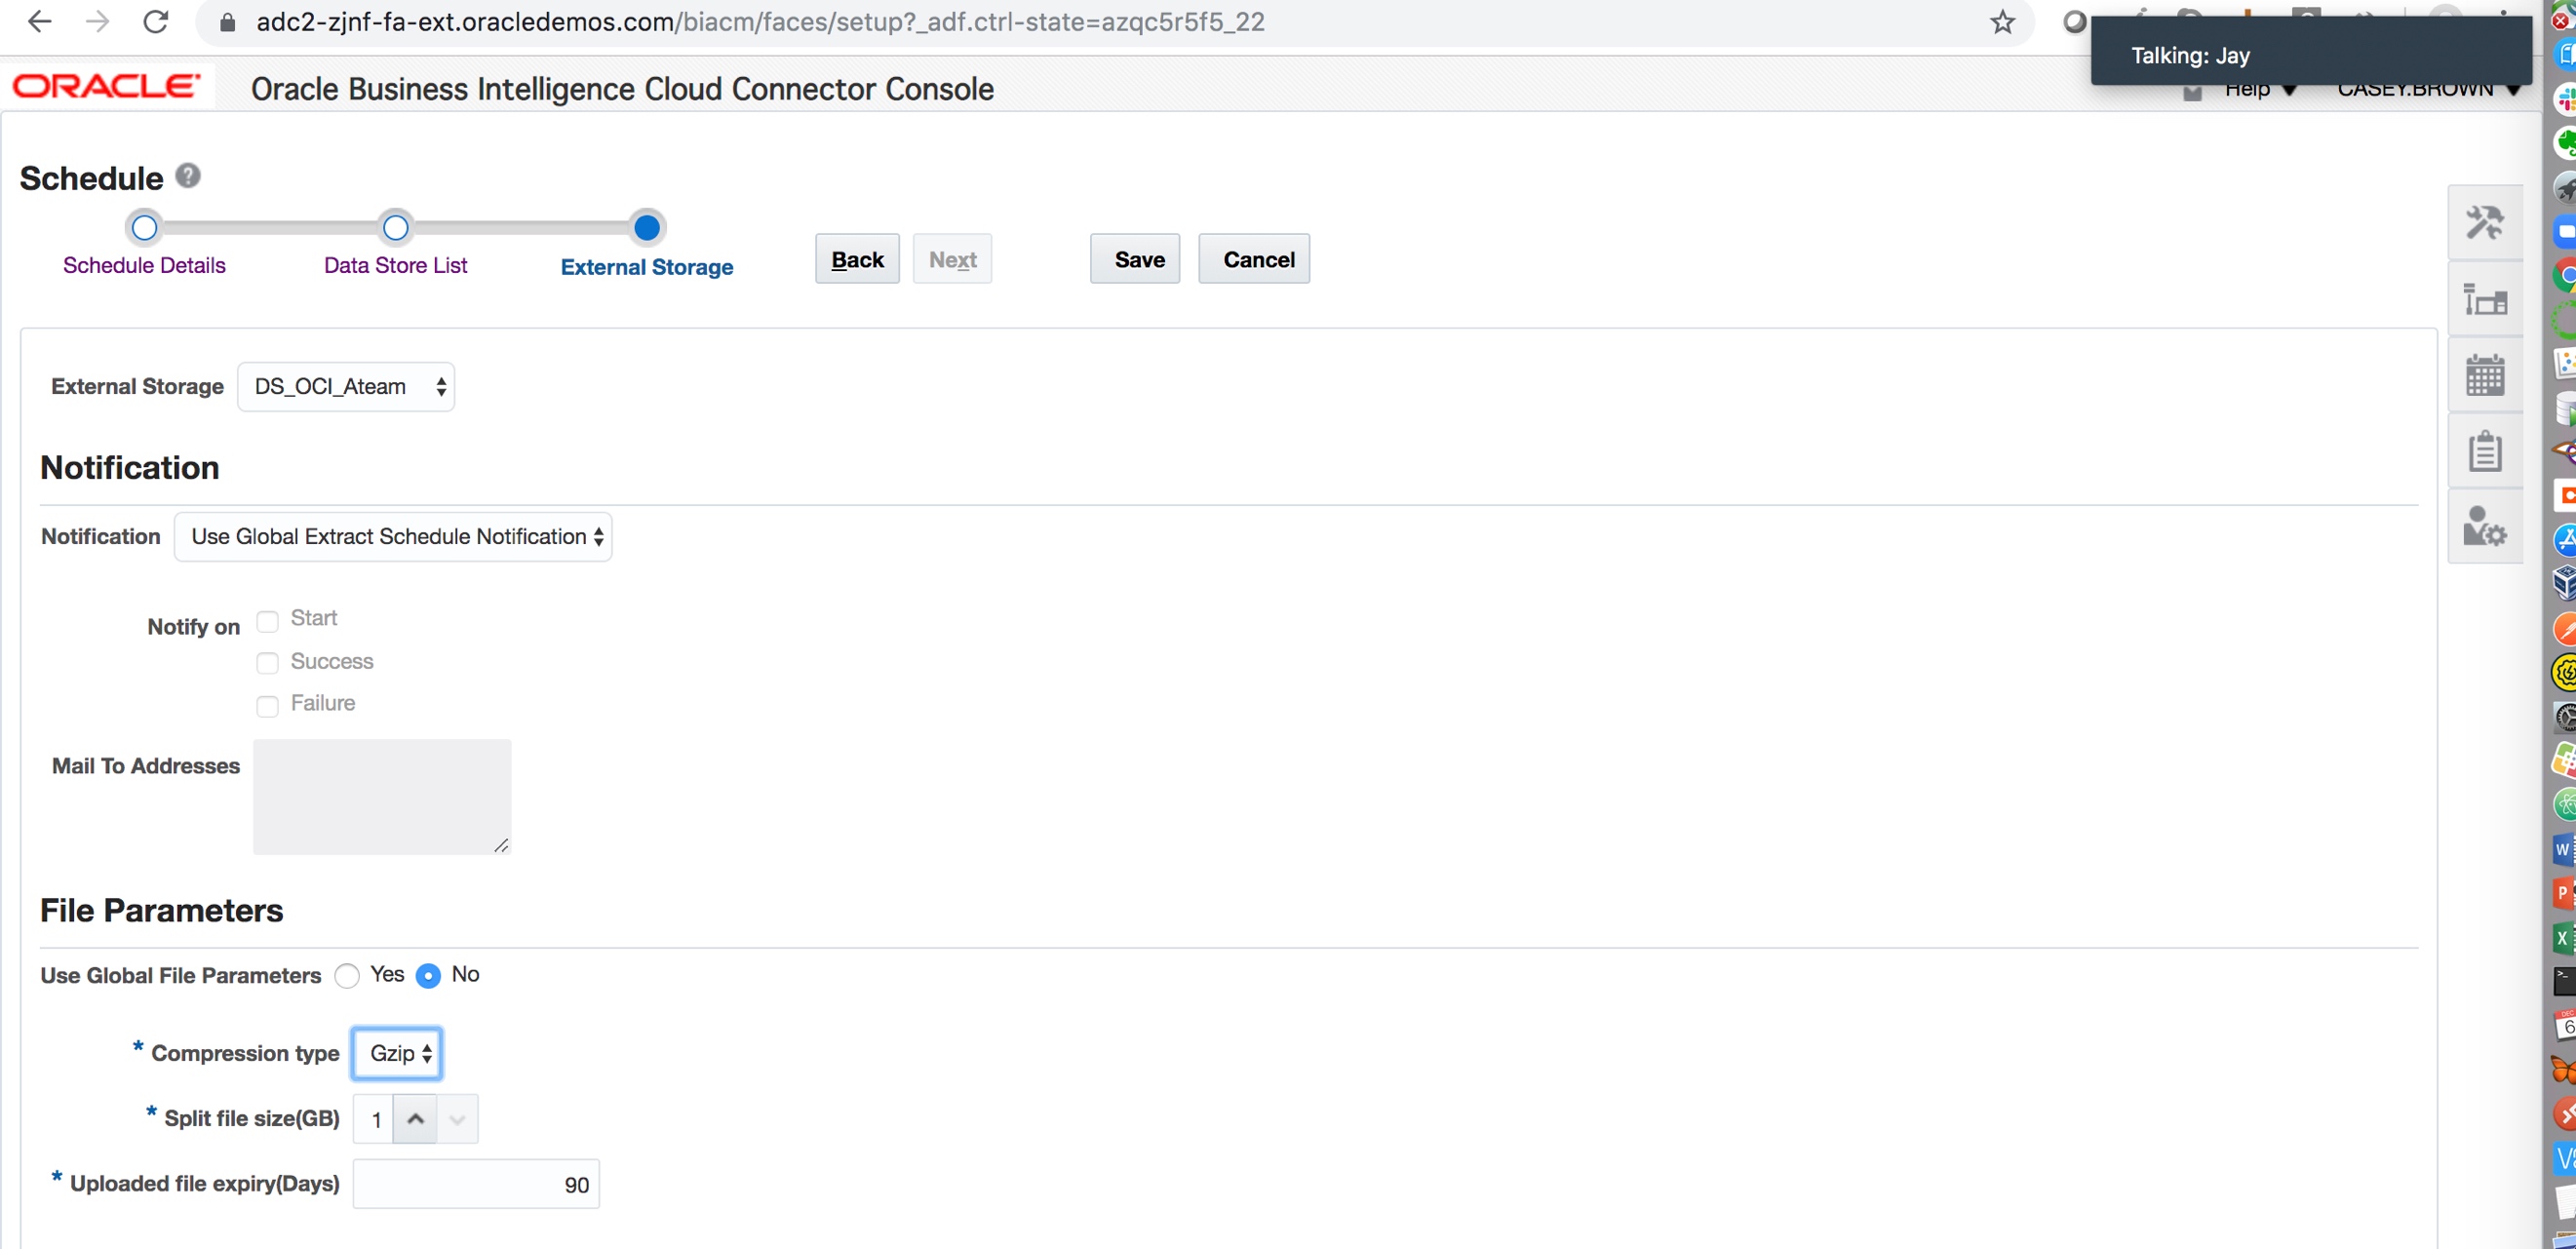
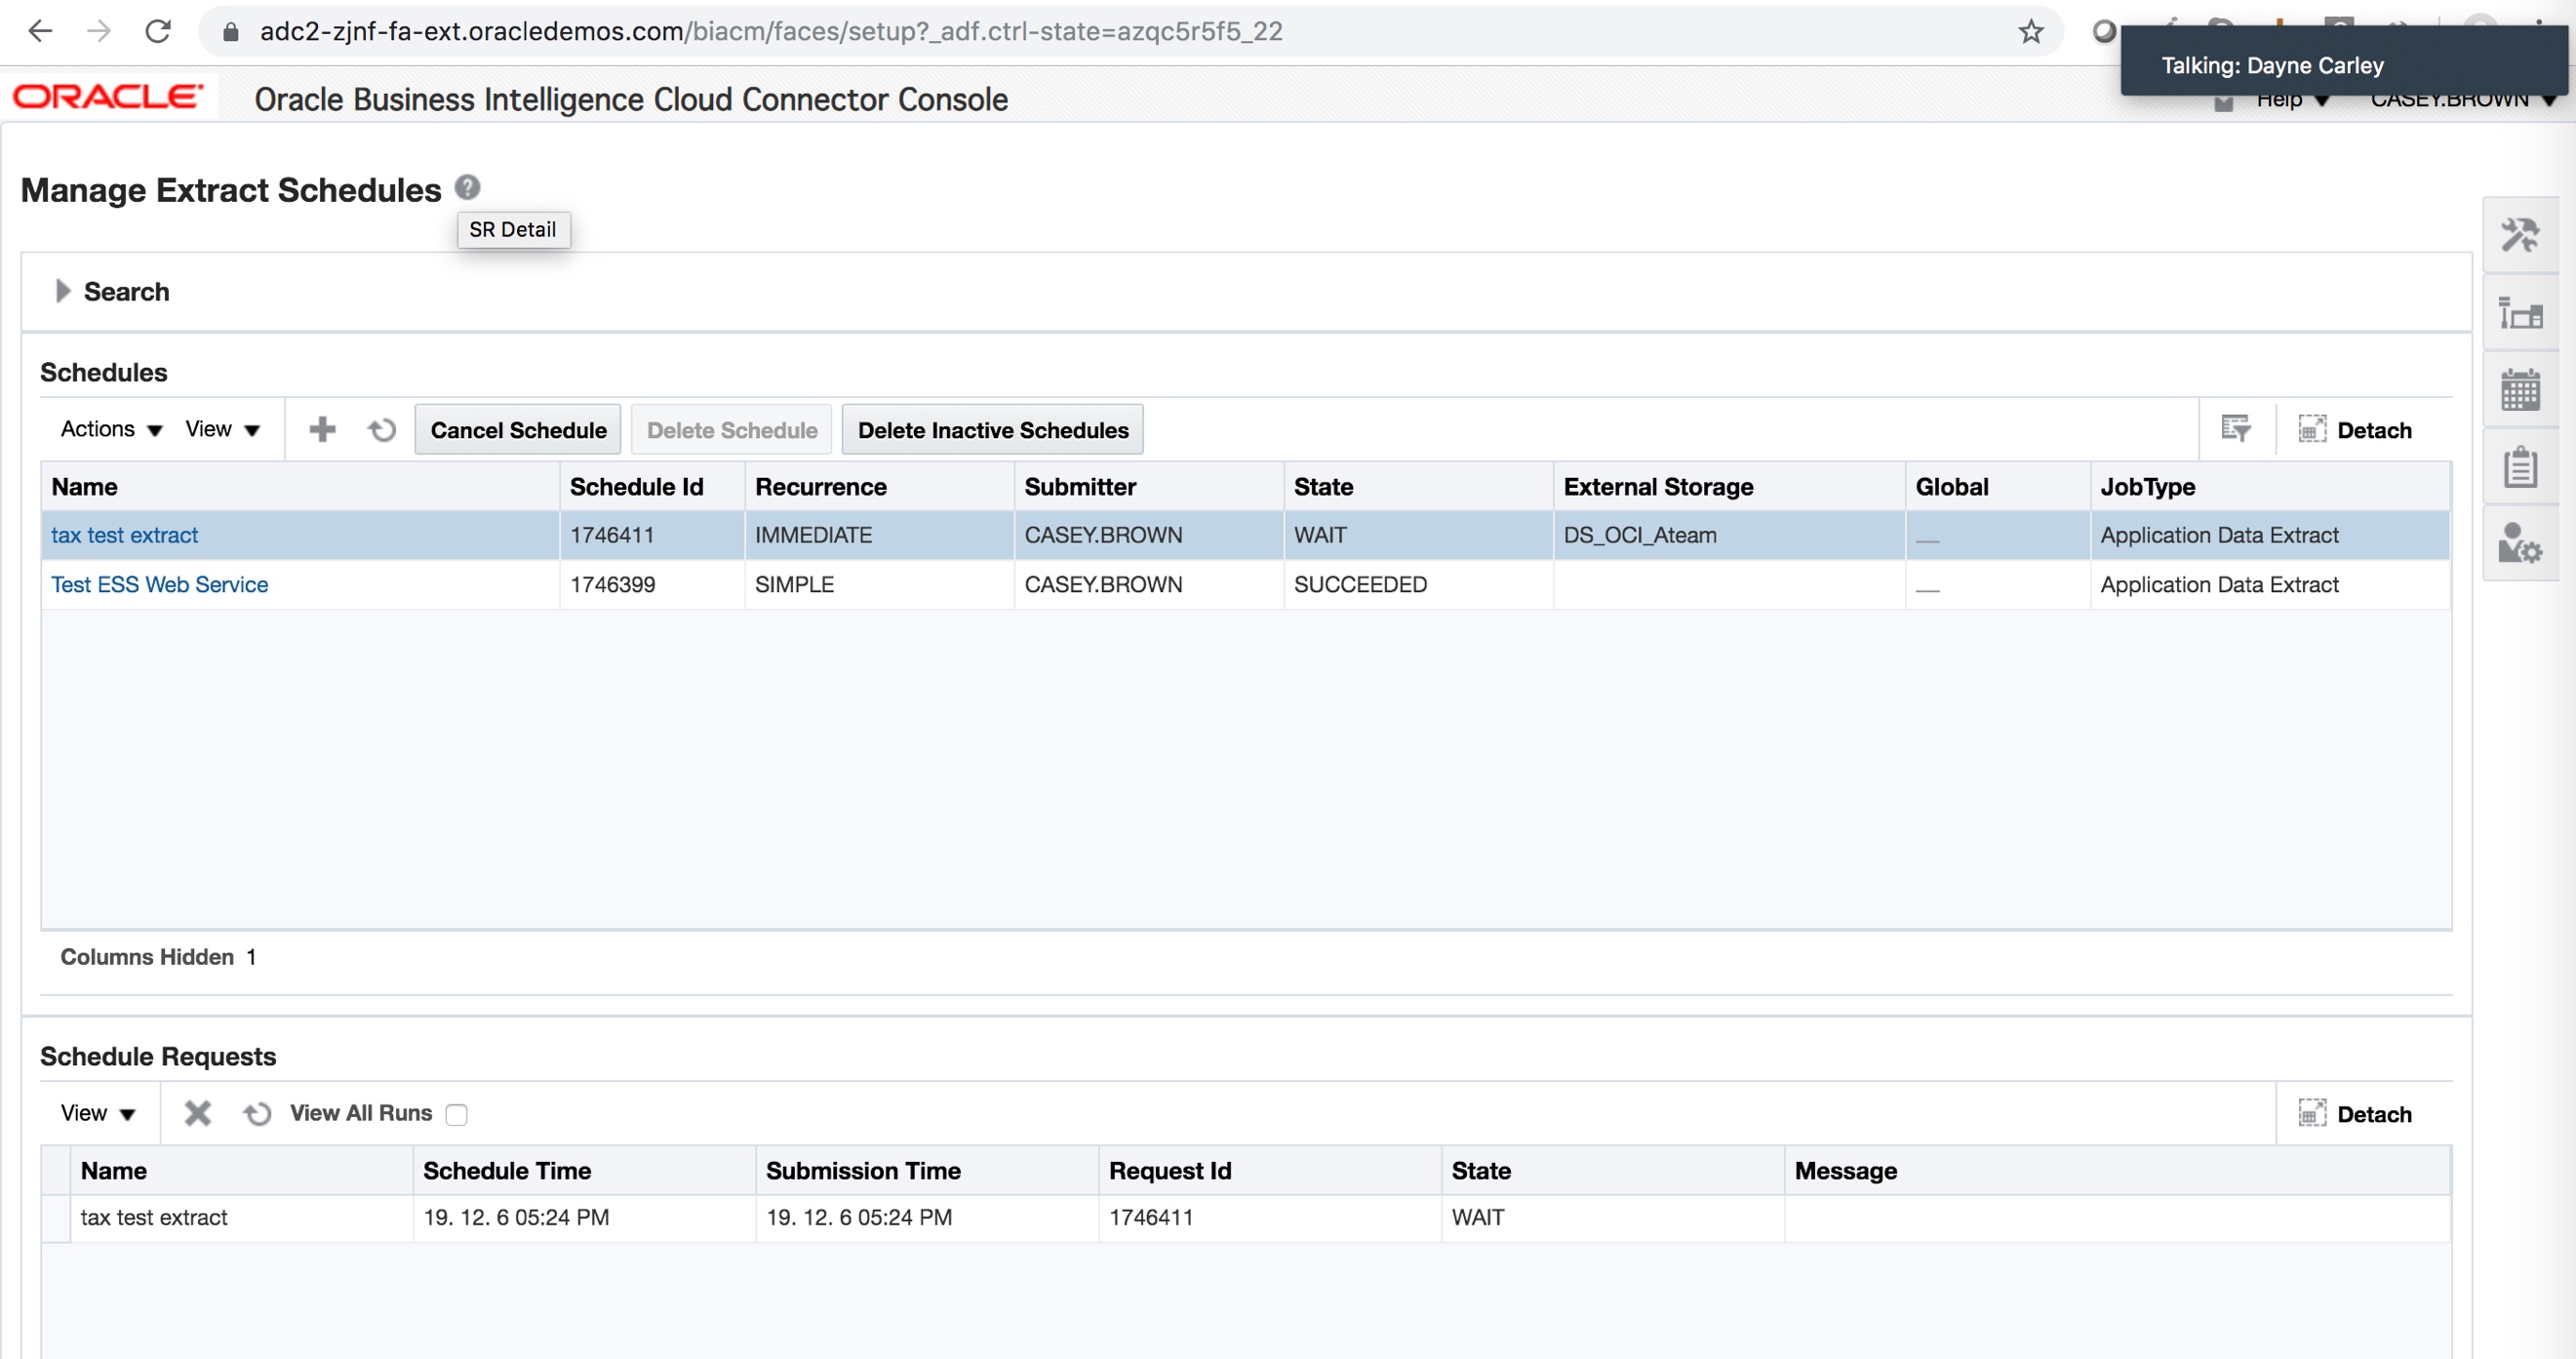
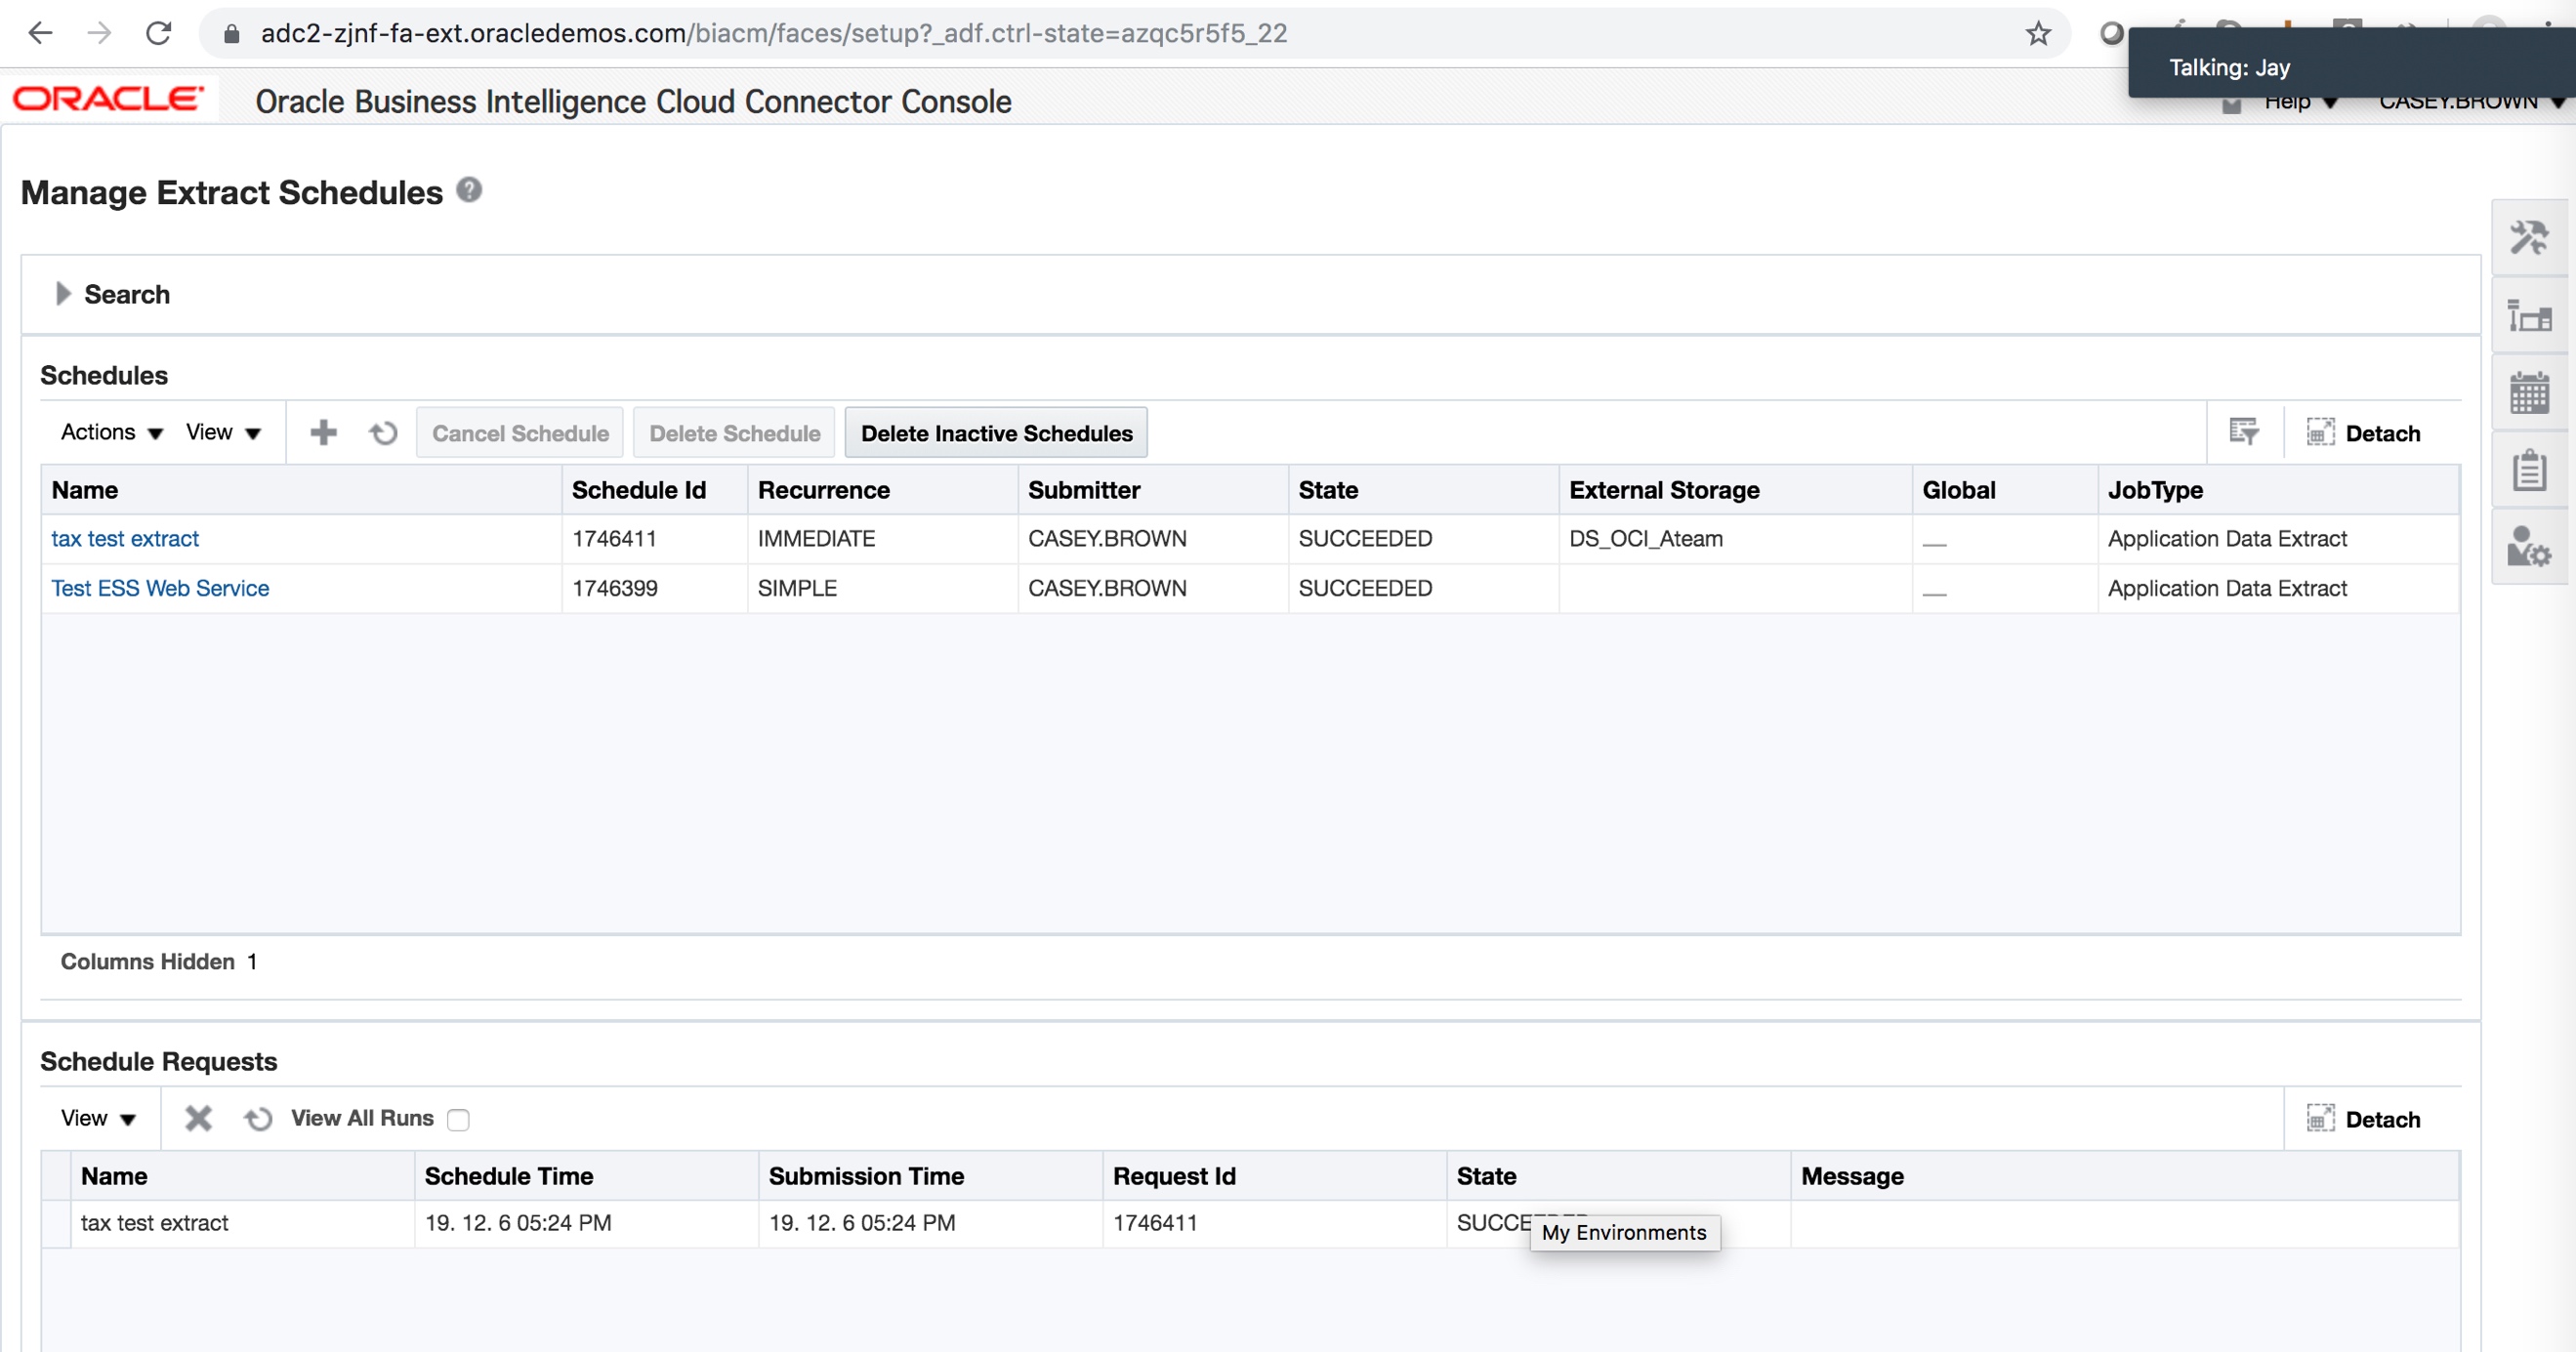
d) Verify BI Cloud Connector details and schedule a validation file extract
From Fusion -> go to the “Oracle Business Intelligence Cloud Connector Console” – https://<Fusion-Apps-host>/biacm
Copy the RKM into the VM Downloads folder using scp …
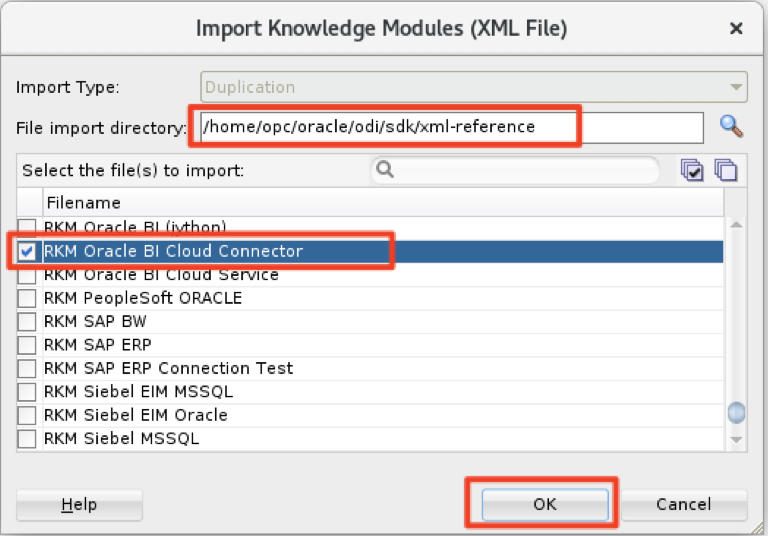
Copy the RKM BI Cloud Connector to the xml-reference folder
/home/opc/oracle/odi/sdk/xml-reference
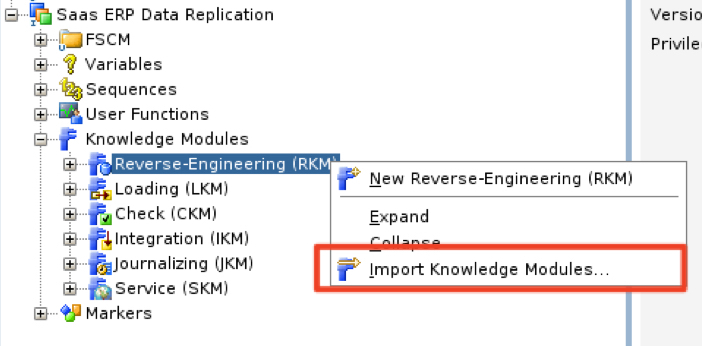
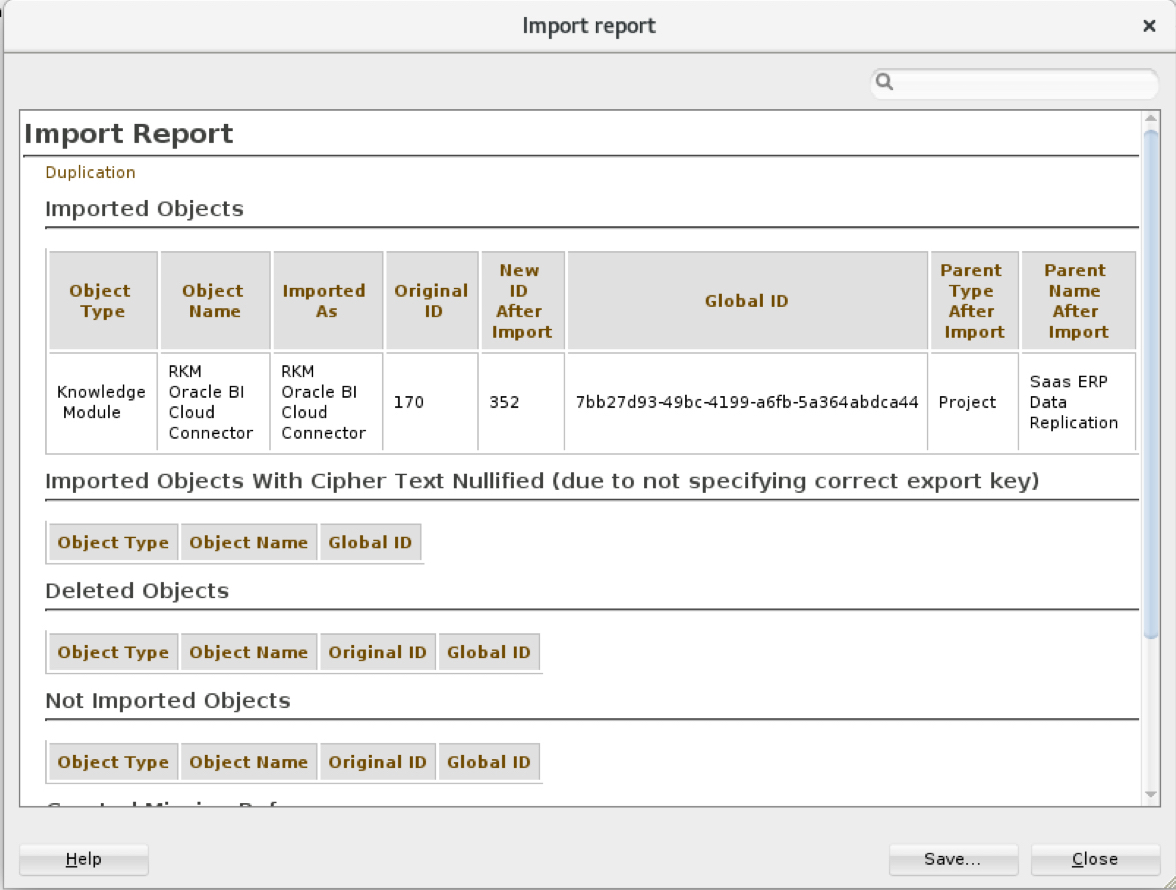
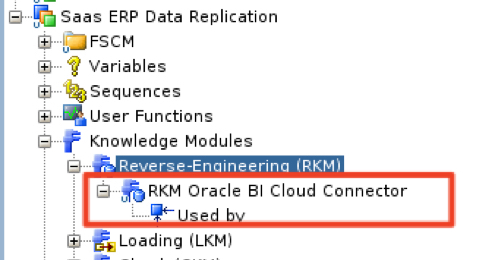
Expand the Knowledge Module tree, right click on Reverse Engineering (RKM) -> select “Import Knowledge Module”
Point the File import directory to the xml-reference folder -> select RKM Oracle BI Cloud Connector -> click OK
Wait for the import to complete -> click close
Verify that the RKM is correctly imported
c) Create the Fusion VOs Model and reverse engineer
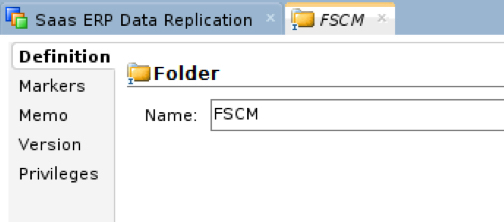
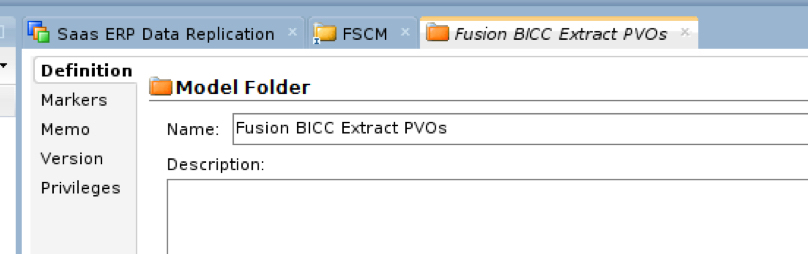
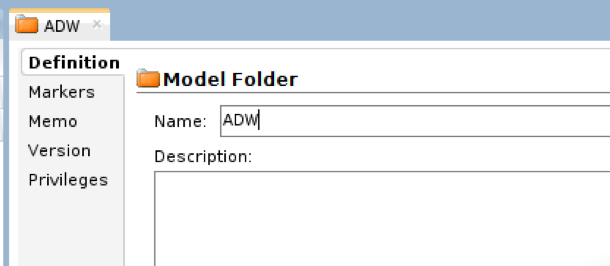
Create a Model Folder
Save
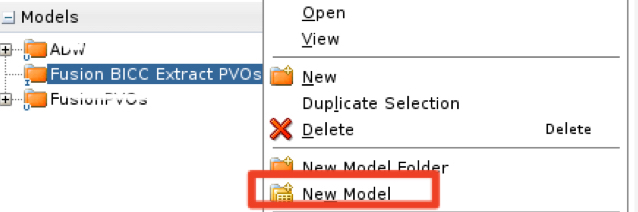
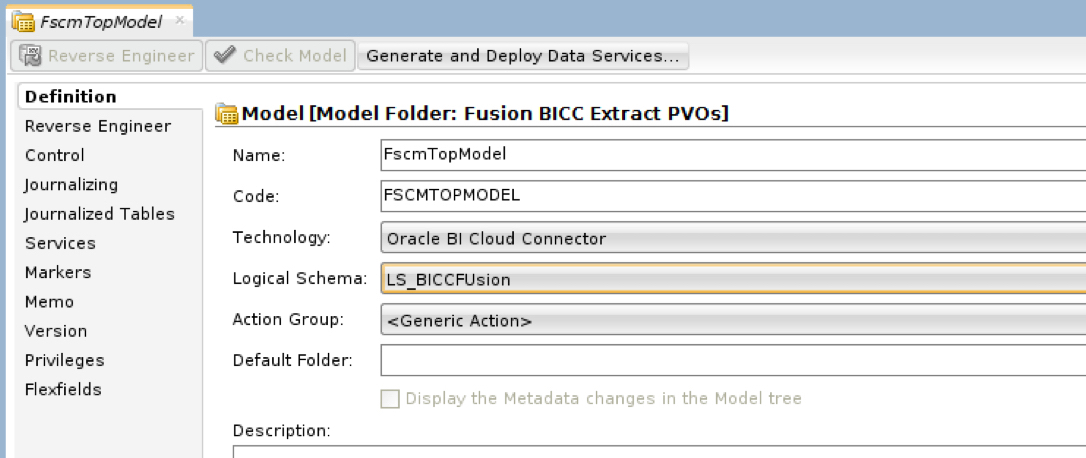
Create the Model
Enter a name -> select “Oracle BI Cloud Connector Technology” -> select the “Logical Schema” created previously
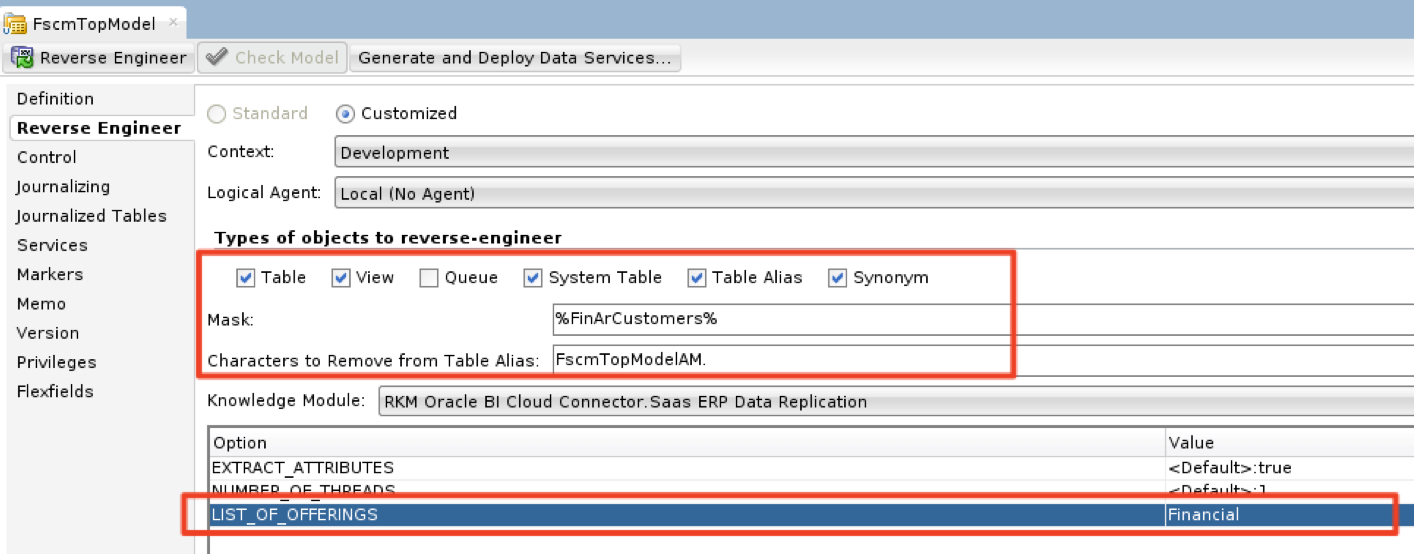
Click the Reverse Engineering tab -> enter details below.
Select Table, View, System Table, Table Alias and Synonym.
Note: be cautious of leading / trailing spaces
Mask : %FinArCustomers%
Characters to Remove: FscmTopModelAM.
LIST_OF_OFFERINGS: Financial
Save
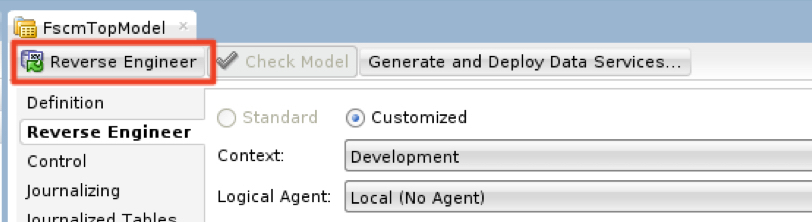
Reverse Engineer
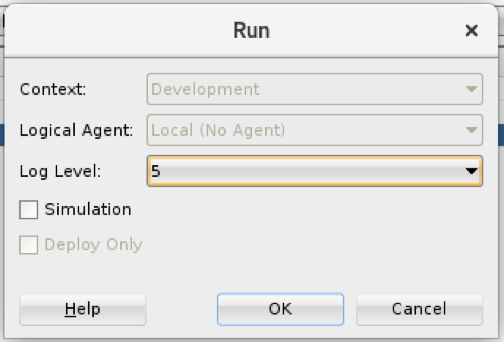
Click OK
Click OK
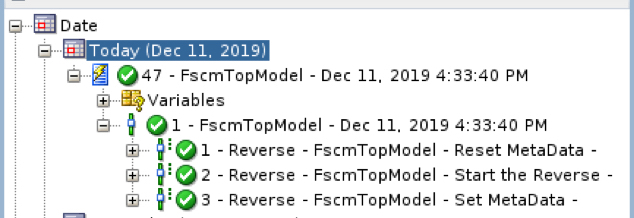
Wait for the process to complete. It may take a few minutes depending on the mask and type of PVOs being reversed engineered.
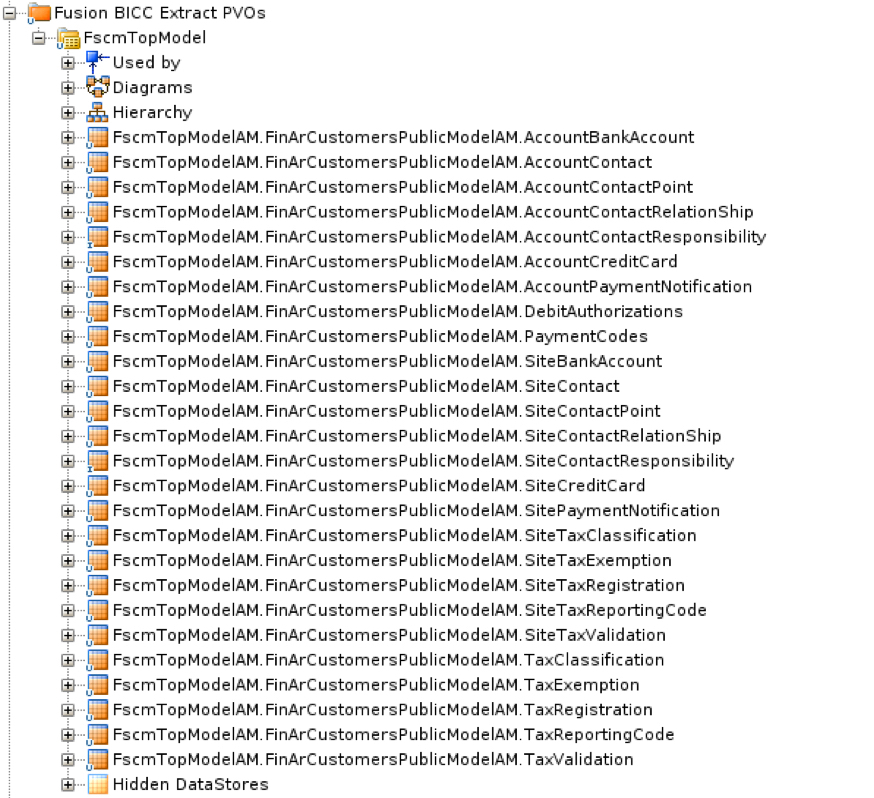
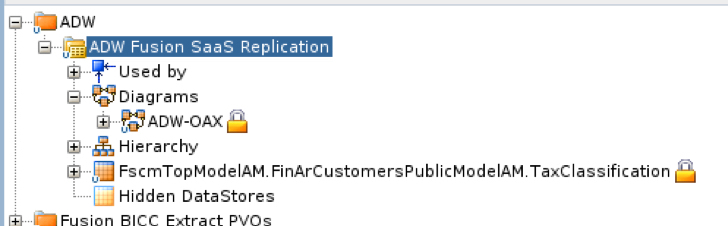
Verify that the VOs datastores are created under the Fusion VOS model
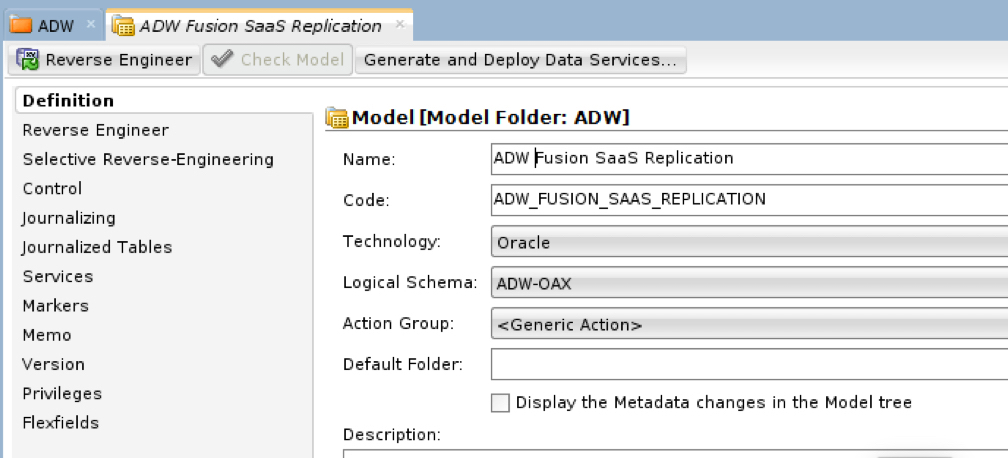
d) Create the ADW Model and Datastore
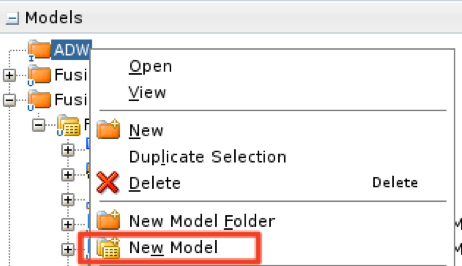
Create a new Model folder for ADW
Right Click on the ADW model folder -> select “New Model”
Select Oracle Technology -> point to the logical schema previously created.
Save
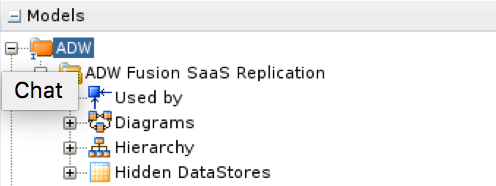
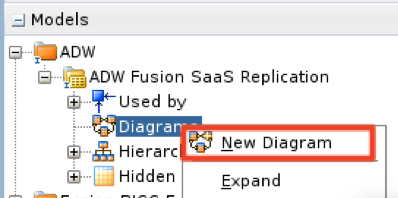
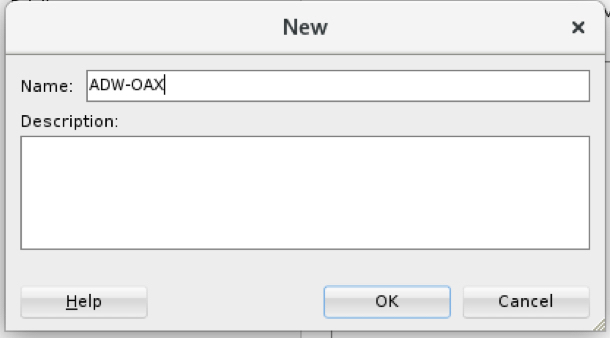
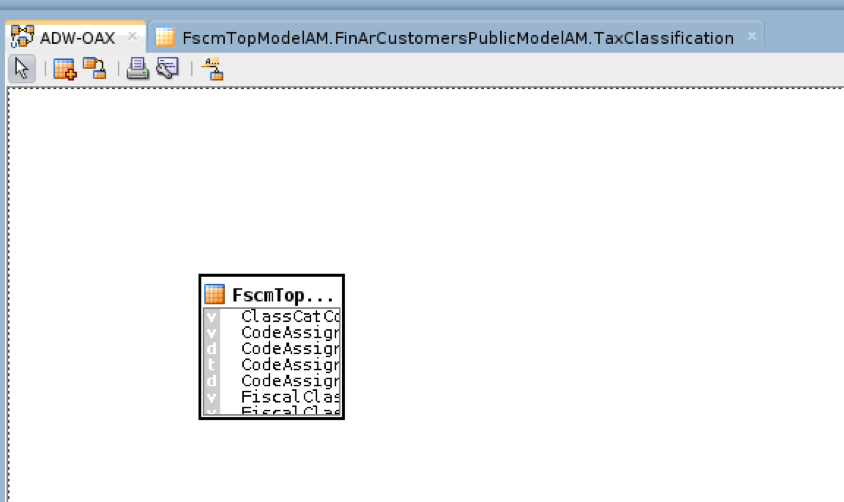
Create a new diagram under ADW
Enter a diagram name -> click OK
Dragging the objects (individually) from the FSCM model (source) to the target will simplify the datastore creation.
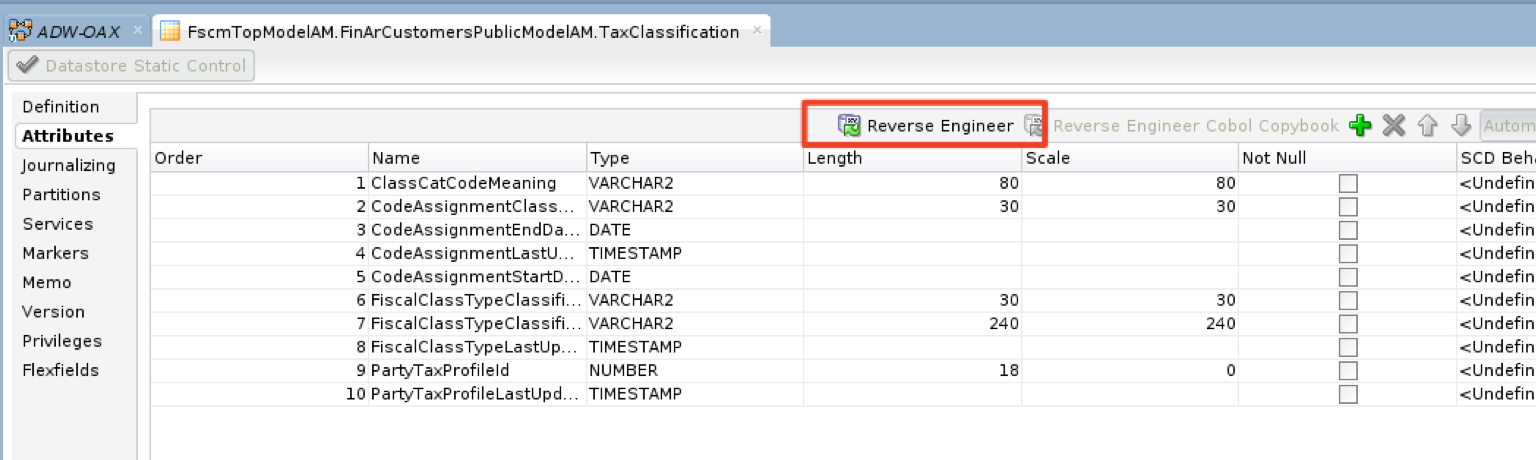
Click on Attributes
Reverse engineer to create the datastore
Verify the datastore is created
Create ODI Mapping
a) Create the mapping
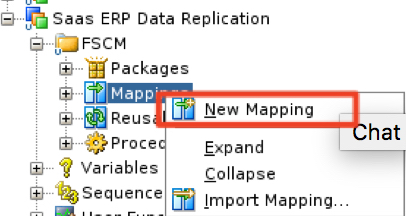
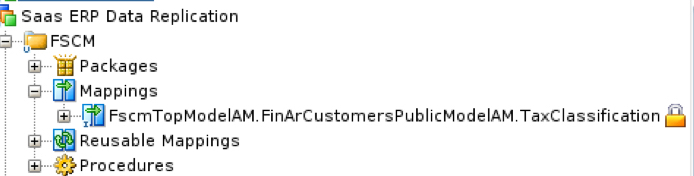
Under the FSCM folder -> right click on Mappings -> select “New Mapping”
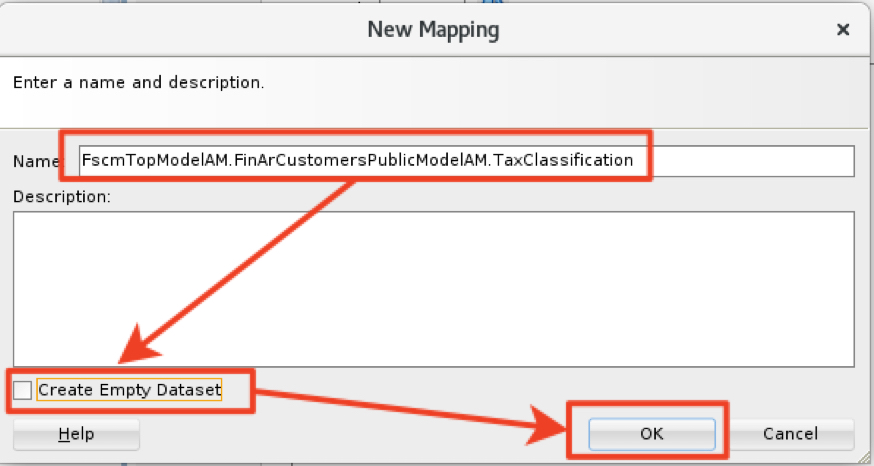
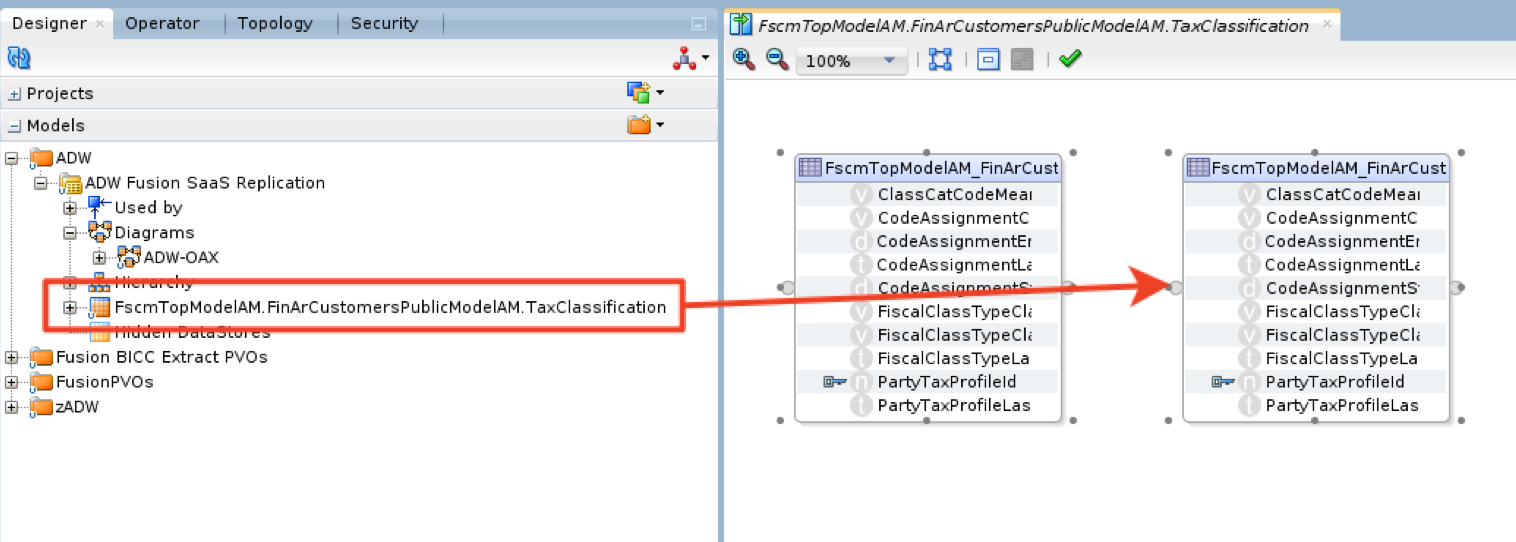
Enter a mapping name FscmTopModelAM.FinArCustomersPublicModelAM.TaxClassification
uncheck “Create Empty Dataset” -> click OK
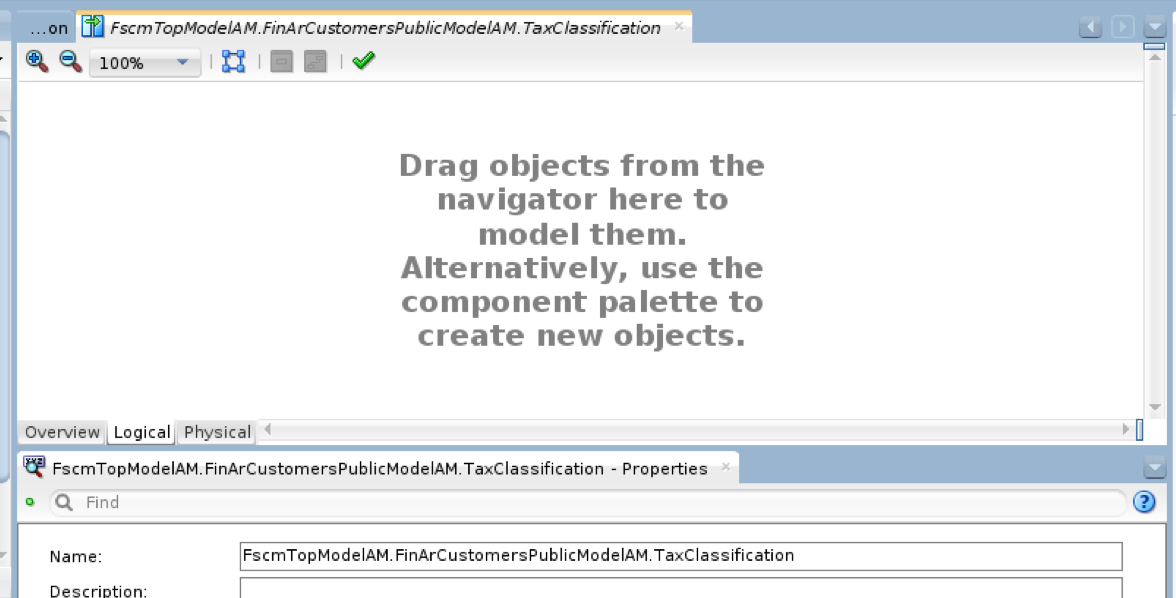
The new mapping is created
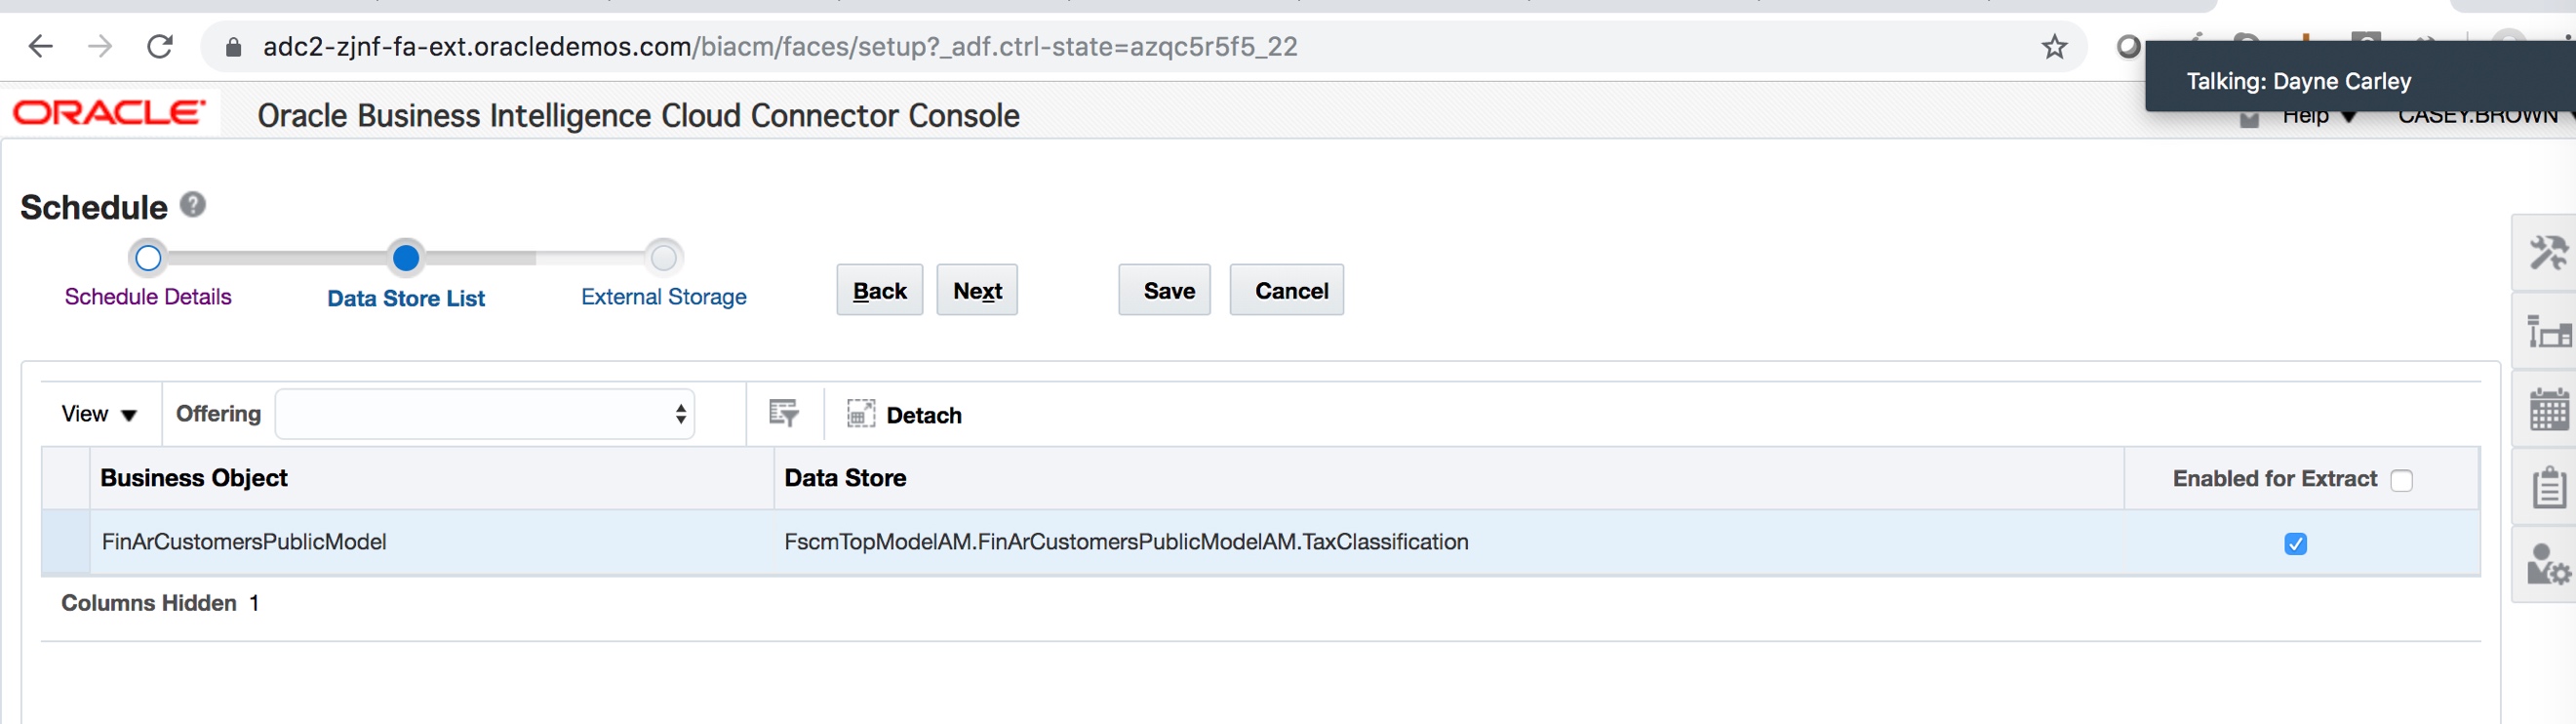
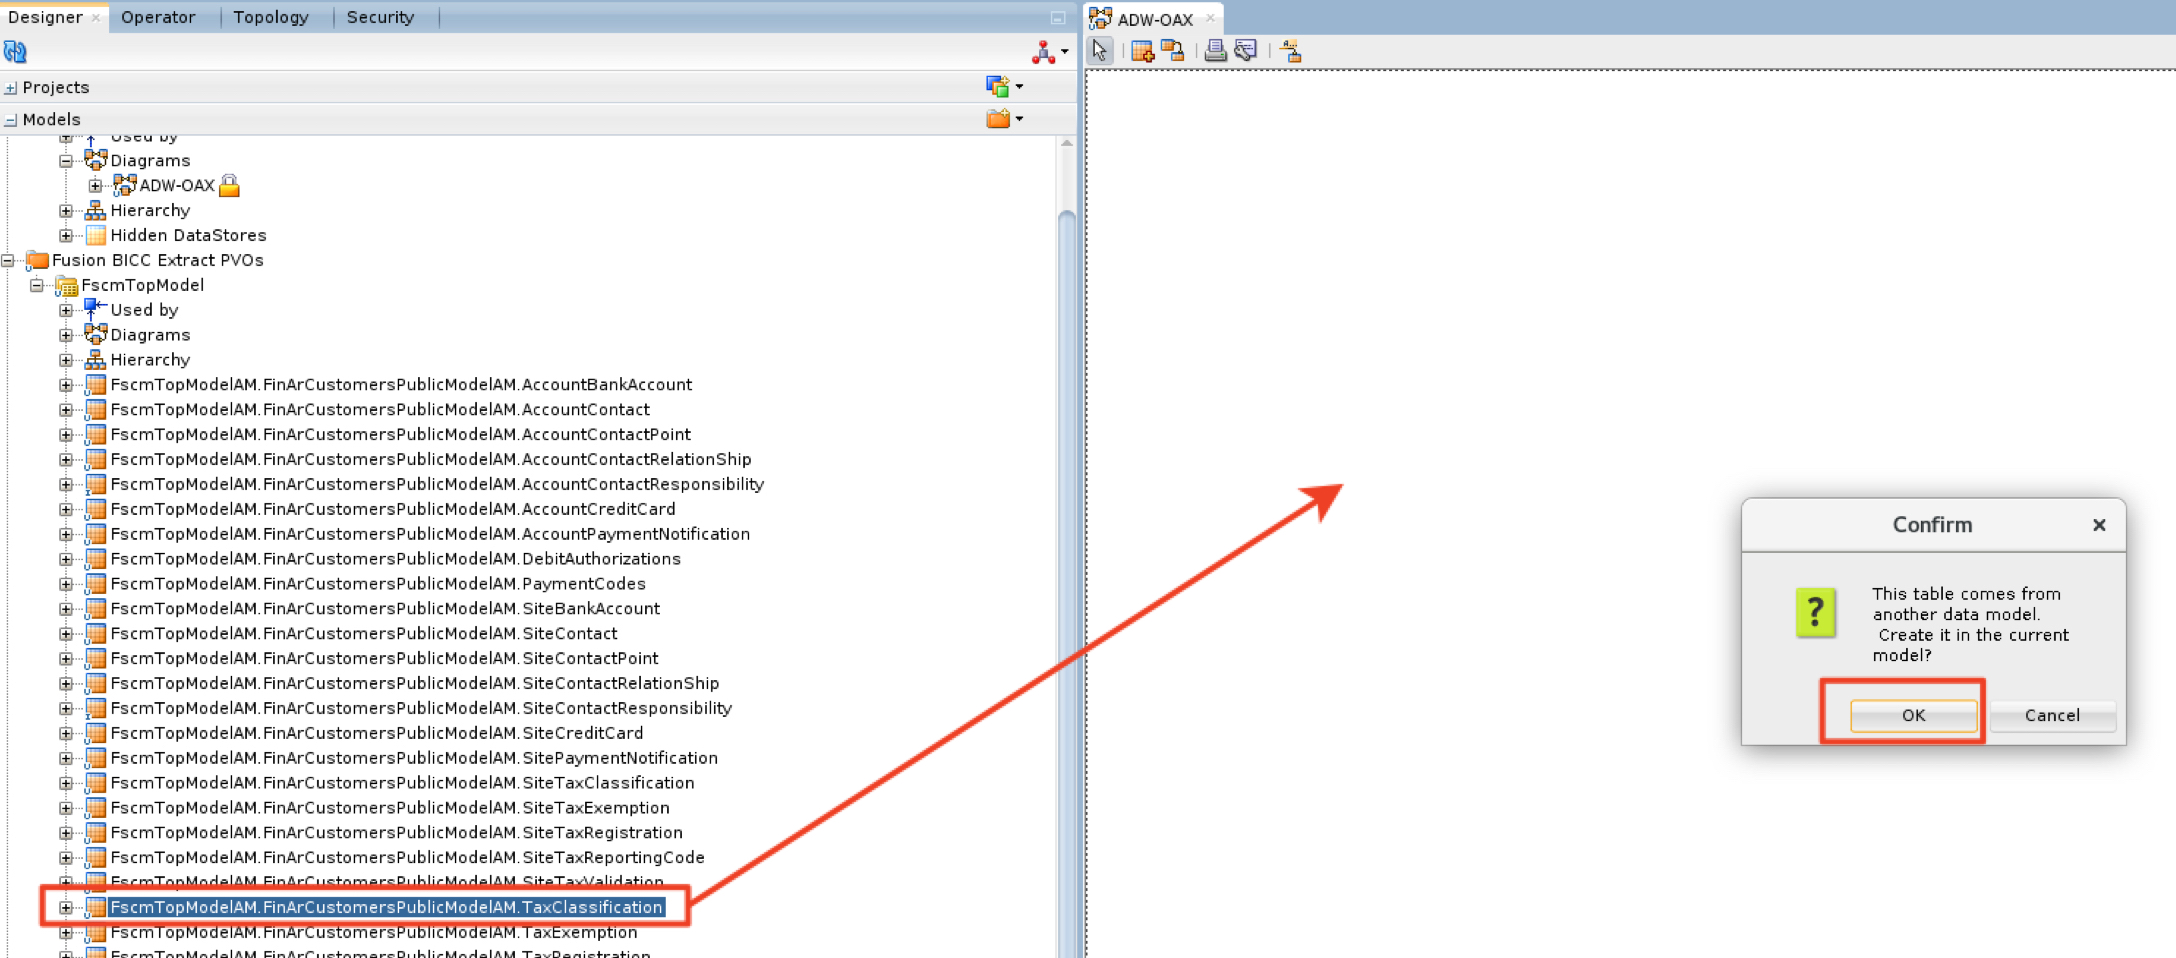
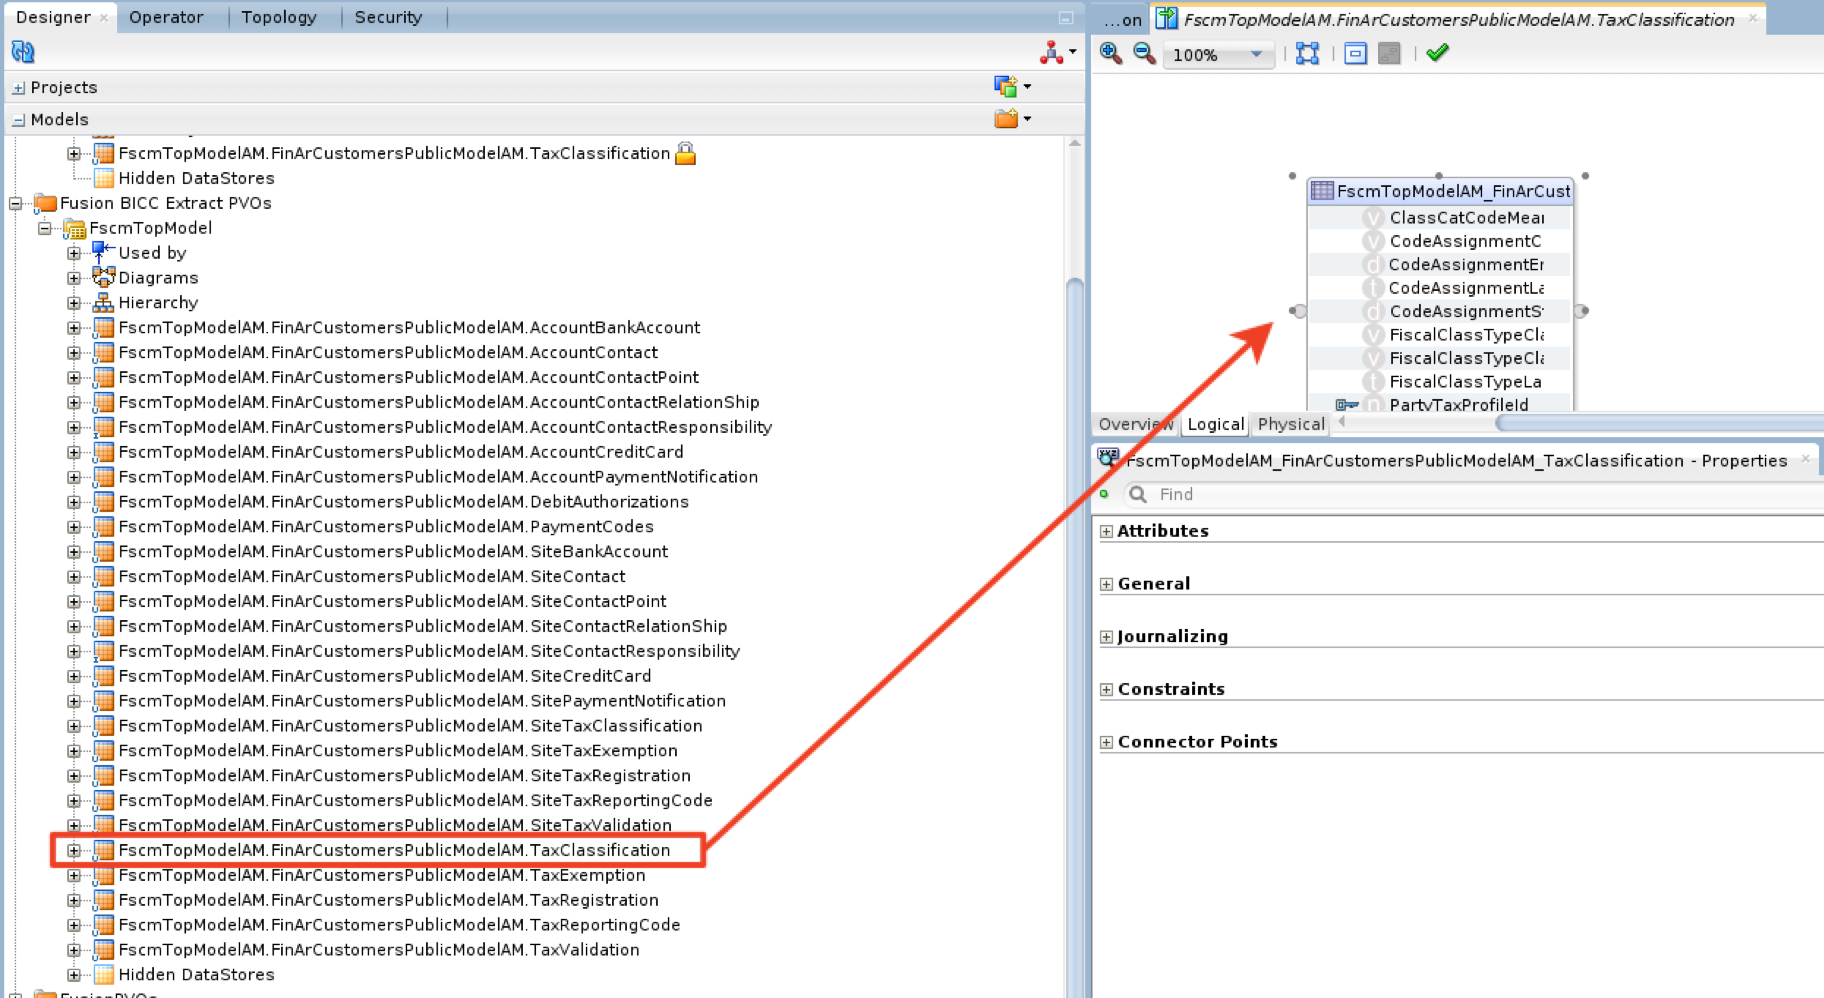
Drag and Drop the FscmTopModelAM.FinArCustomersPublicModelAM.TaxClassification datastore from Fusion BICC into the working area
Drag and drop the FscmTopModelAM.FinArCustomersPublicModelAM.TaxClassification datastore from ADW into the working area
Connect the output of the Fusion VO datastore to the ADW datastore -> click OK
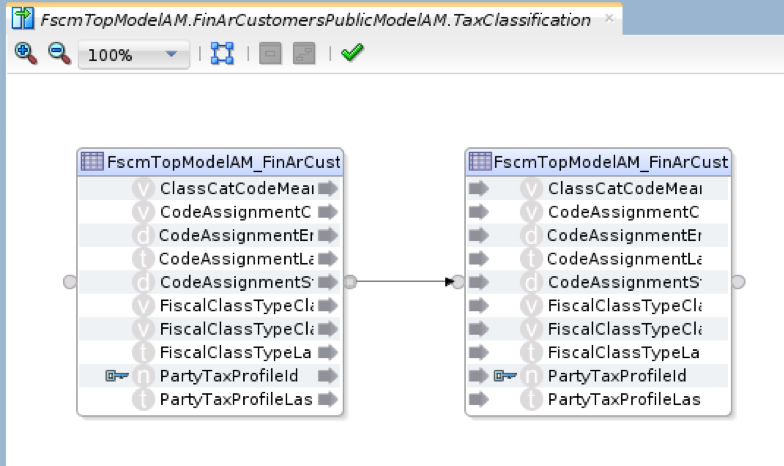
Verify the fields are mapped from source to target
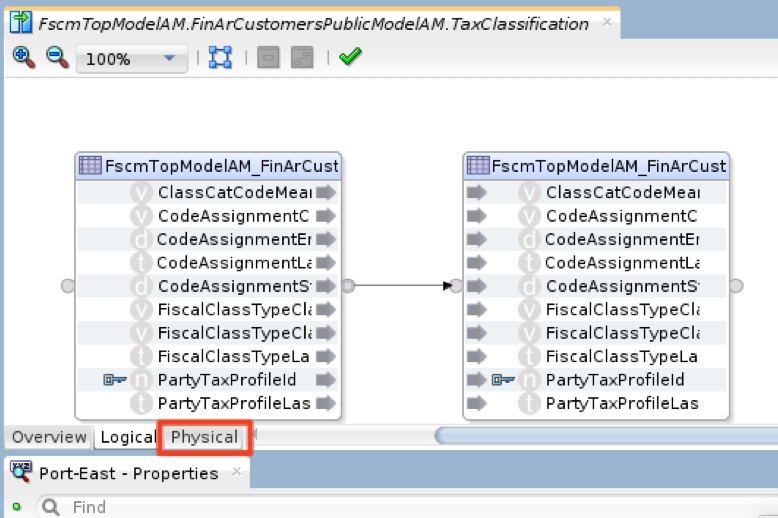
b) Set up the physical implementations
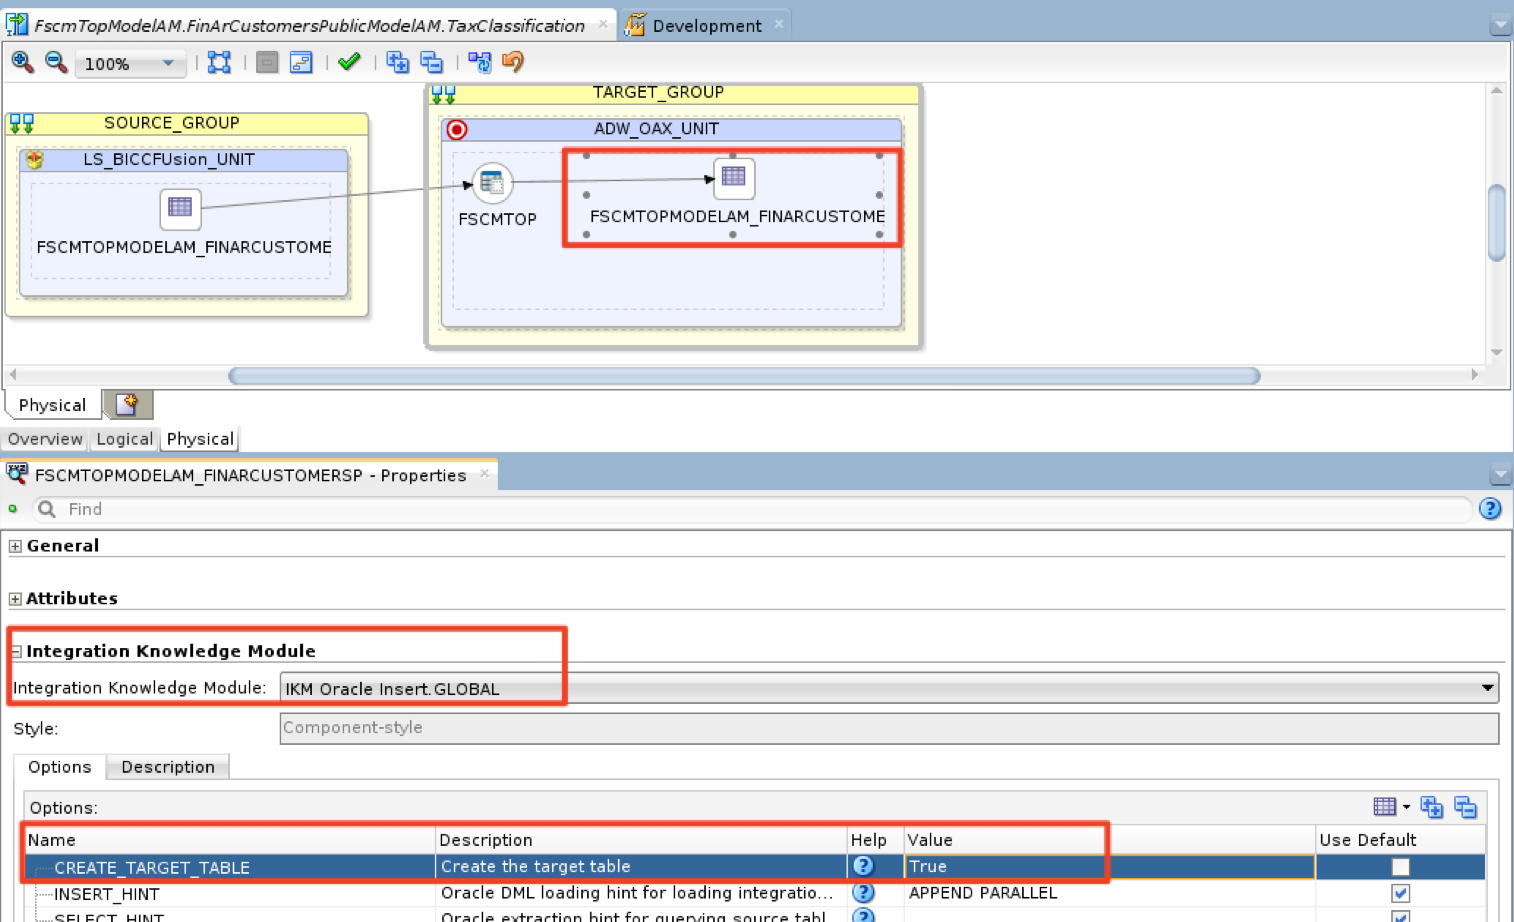
Click on Physical tab
`
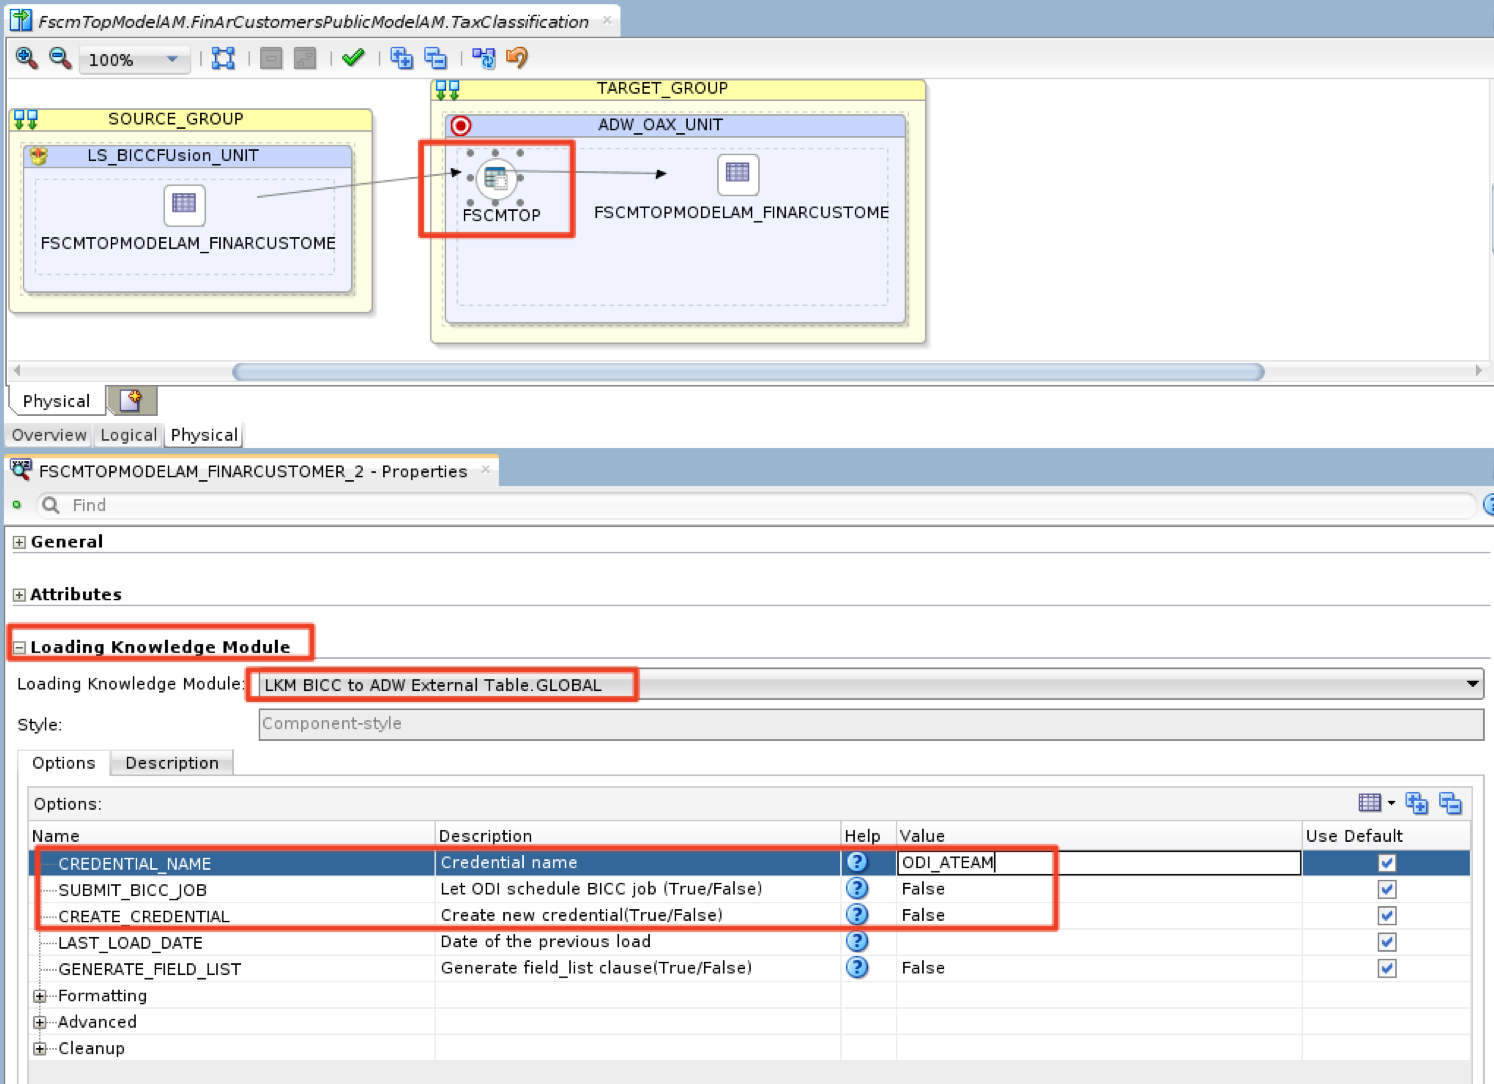
Click on the first element in the target group -> Expand the Loading Knowledge module section to choose the LKM BICC to ADW external table LKM -> Update the CREDENTIAL_NAME to ODI_ATEAM -> leave all other fields as defaults
Click the last element in the Target group -> Expand the Integration Knowledge Module section and select IKM Oracle insert -> Set the CREATE_TARGET_TABLE option to True.
Save
c) Execute the mapping
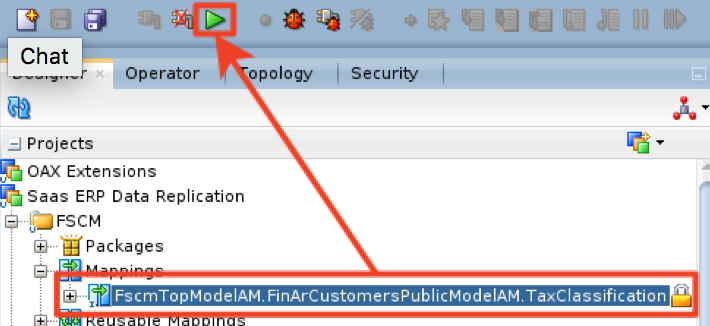
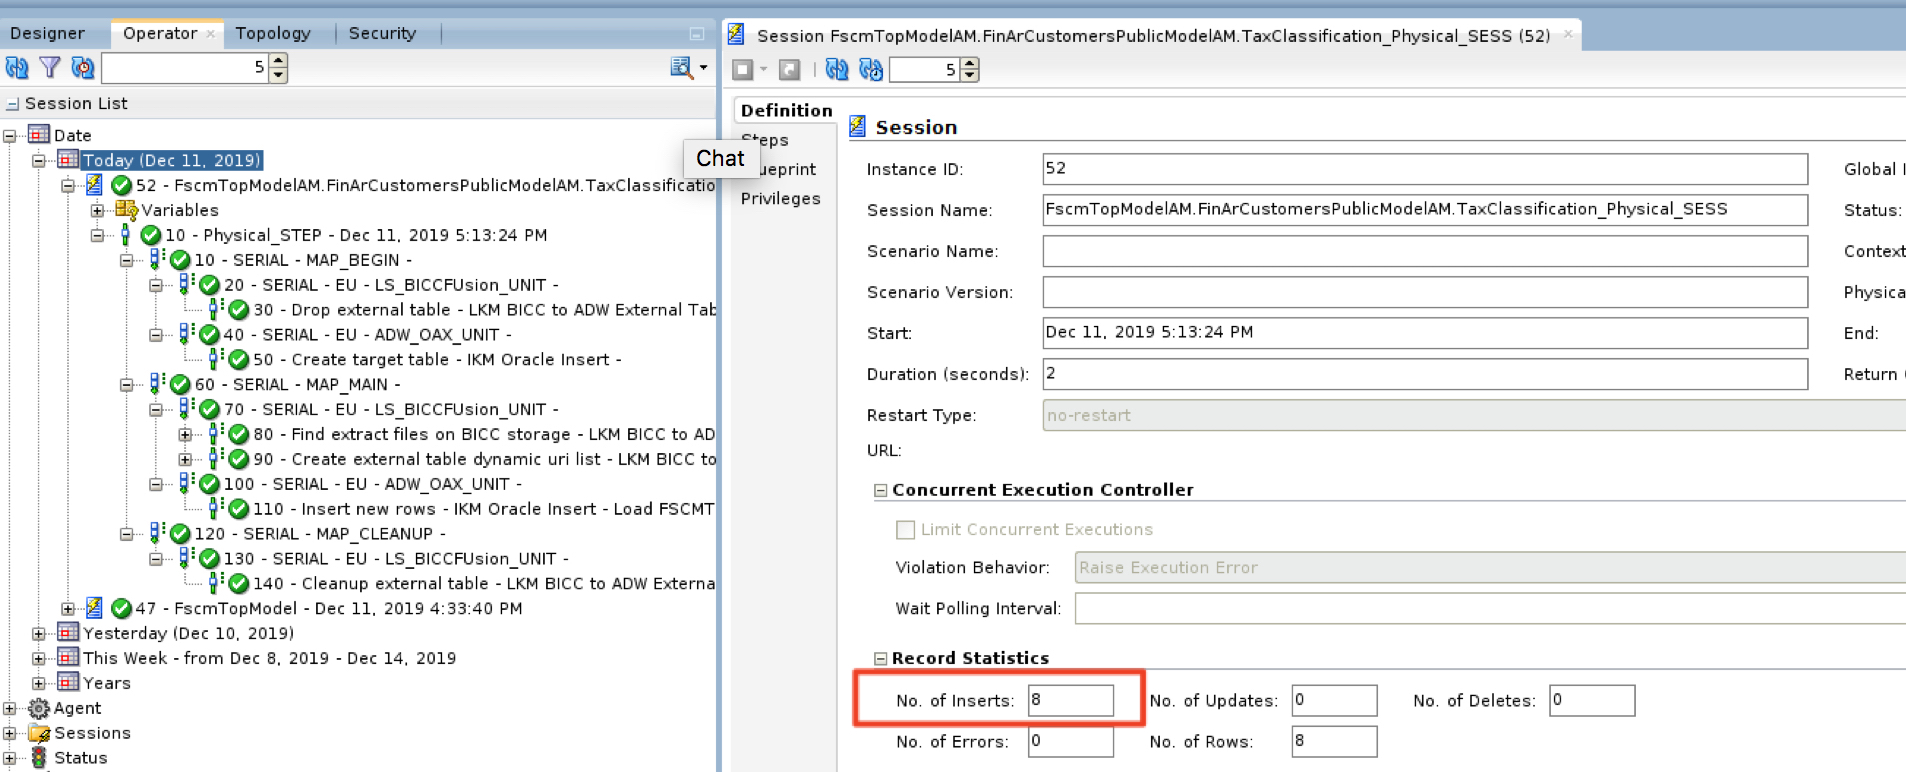
Select the mapping from the tree -> click the Execute button (green play arrow)
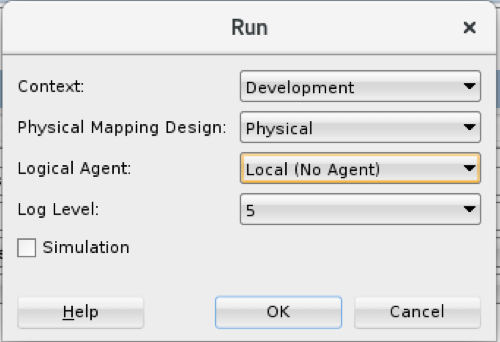
Select Context=Development -> Local Agent = Local (no Agent) -> click OK
Click OK
Wait for the session to complete -> Check the number of inserts. i.e. in this example 8 records were inserted.
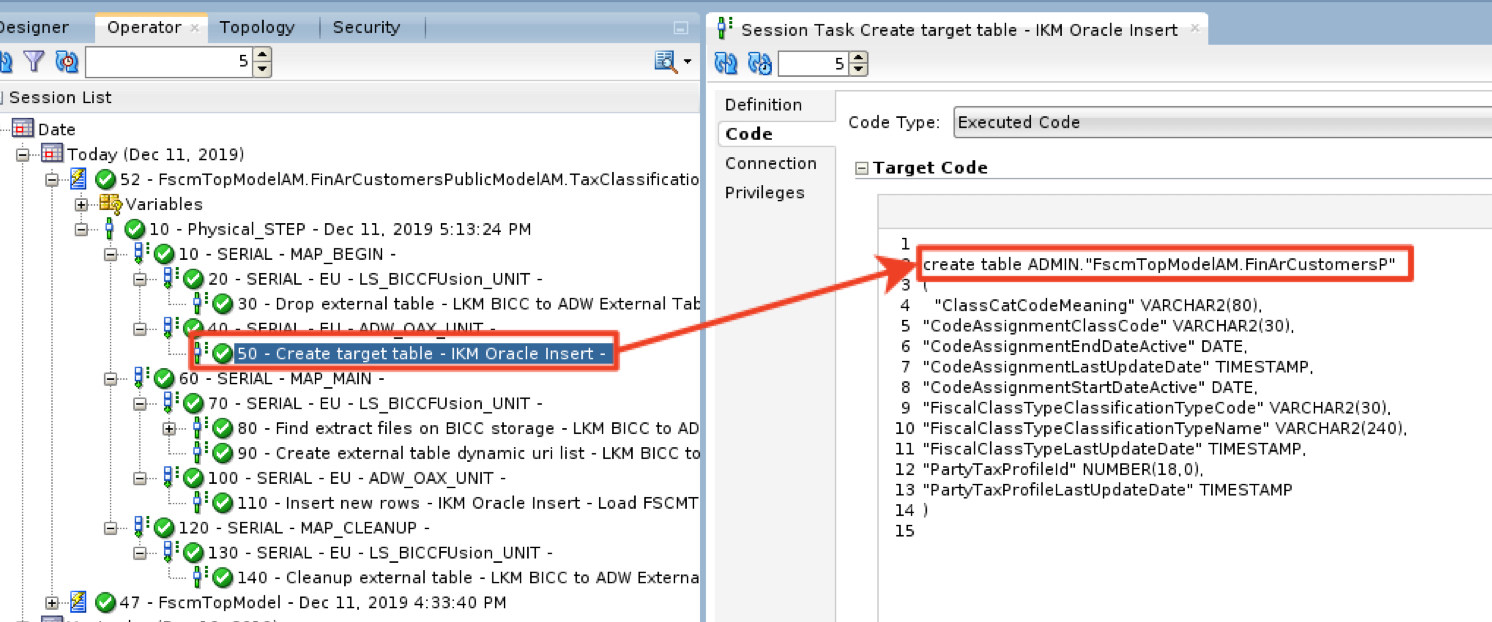
d) Verify the data has been loaded into ADW
Check the table name ODI created from the session logs
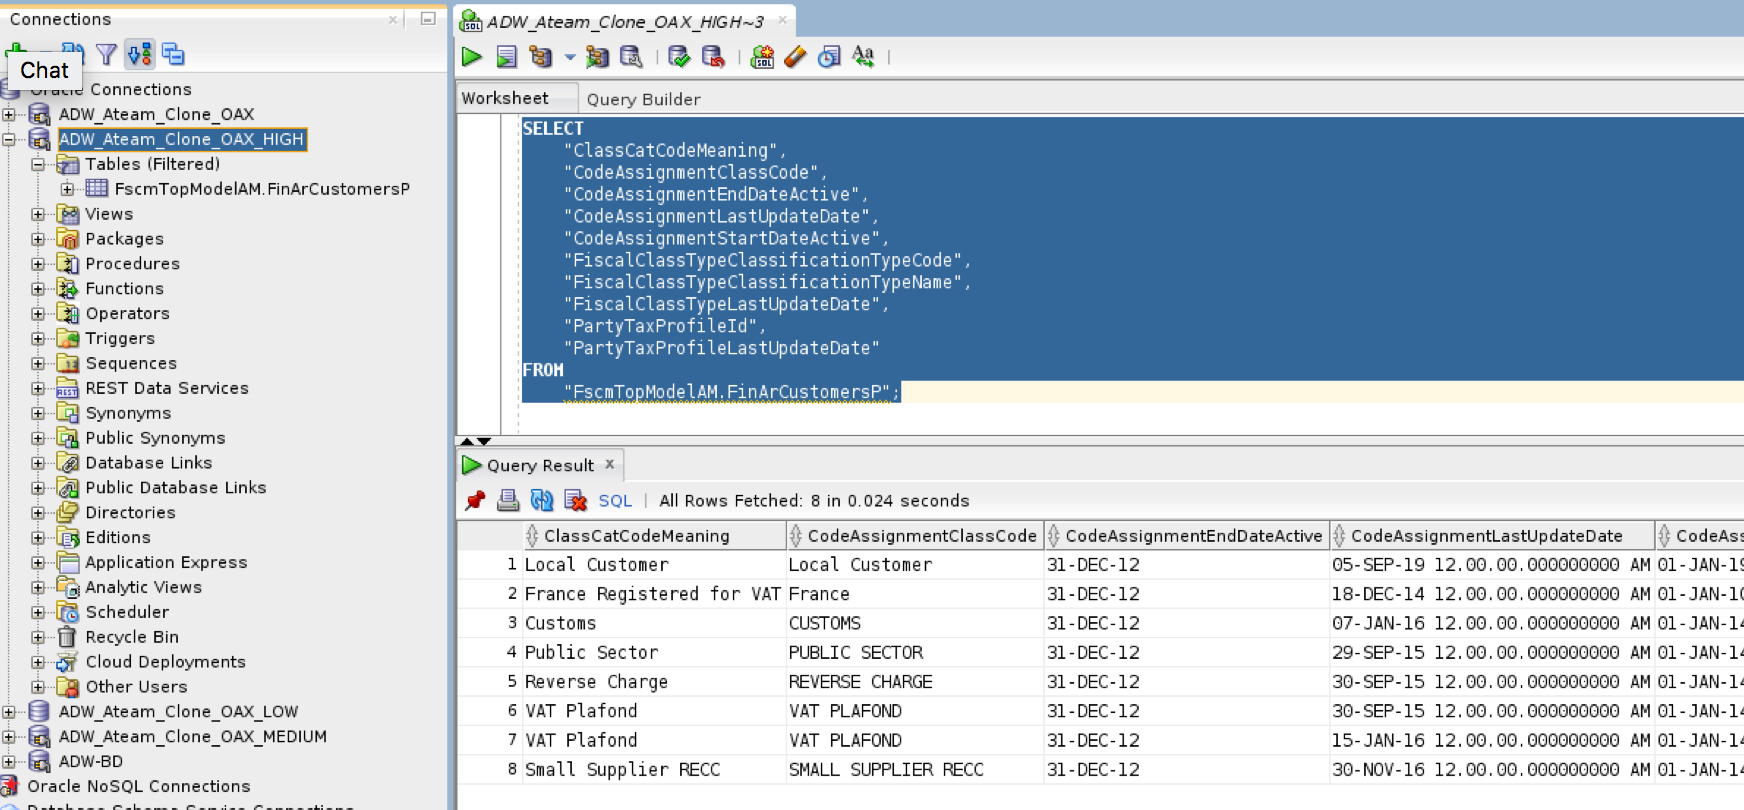
Connect to SQL Developer or SQL Developer web and execute the SQL below
SELECT
“ClassCatCodeMeaning”,
“CodeAssignmentClassCode”,
“CodeAssignmentEndDateActive”,
“CodeAssignmentLastUpdateDate”,
“CodeAssignmentStartDateActive”,
“FiscalClassTypeClassificationTypeCode”,
“FiscalClassTypeClassificationTypeName”,
“FiscalClassTypeLastUpdateDate”,
“PartyTaxProfileId”,
“PartyTaxProfileLastUpdateDate”
FROM
“FscmTopModelAM.FinArCustomersP”;
Verify that the correct number of records were loaded into ADW (i.e. in this example 8 records were loaded)
Want to Learn More?
Click here for more A-Team Oracle Data Integrator (ODI) Blogs
Click here to sign up to the RSS feed to receive notifications for when new A-team blogs are published
Click here to access the ODI Marketplace documentation library
Summary
This article walked through the steps to configure Oracle Data Integrator on Oracle Cloud Marketplace (ODI) with Business Intelligence Cloud Connector (BICC) to replicate data from Fusion SaaS into an Autonomous Data Warehouse (ADW) database.
This blog is the first in a series covering topics on how to utilize Oracle ETL / Data Integration tools to extract data from various data sources. Stay tuned for more to come!
Bookmark this post to stay up-to-date on changes made to this blog as our products evolve.
Authors
Matthieu Lombard
Consulting Solution Architect
The Oracle A-Team is a central, outbound, highly technical team of enterprise architects, solution specialists, and software engineers.
The Oracle A-Team works with external customers and Oracle partners around the globe to provide guidance on implementation best practices, architecture design reviews, troubleshooting, and how to use Oracle products to solve customer business challenges.
I focus on data integration, data warehousing, Big Data, cloud services, and analytics (BI) products. My role included acting as the subject-matter expert on Oracle Data Integration and Analytics products and cloud services such as Oracle Data Integrator (ODI), and Oracle Analytics Cloud (OAC, OA For Fusion Apps, OAX).
Jay Pearson
Consulting Solutions Architect, Business Intelligence