Set up Single Sign-On and User Provisioning between OCI IAM and OneLogin
Introduction
By setting up Single Sign-On (SSO) between OCI IAM and OneLogin, OCI administrators can seamlessly login to the OCI Console using their OneLogin credentials. Additionally, with user provisioning over RESTful APIs, real time user-sync from OneLogin to OCI can be achieved.
This integration is ideal for enterprises looking to centralize identity management, simplify access control, and maintain consistent user governance across environments. The result is a unified identity experience that enhances security, reduces administrative overhead, and streamlines user onboarding and offboarding.
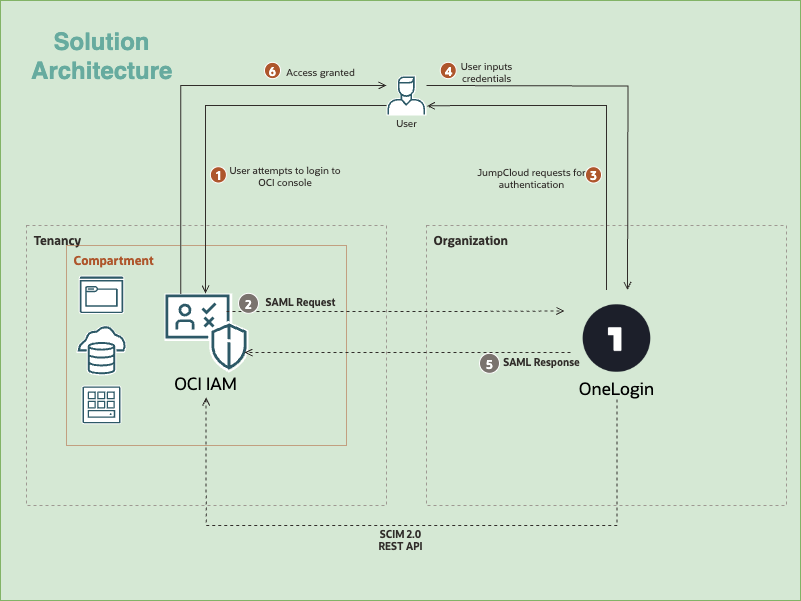
The architecture describes the process of user authentication for the OCI Console using OneLogin as the Identity Provider (IdP) via SAML 2.0.
- Login Attempt: The User attempts to log in to the OCI Console.
- SAML Request: OCI IAM (the SP) redirects the user and sends a SAML Request to OneLogin (the IdP).
- Authentication Request: The User is redirected to the IdP’s login page. The architecture shows an intermediate step where JumpCloud requests for authentication are involved, implying JumpCloud might be part of the identity management system or a broker/directory used by the Organization before reaching OneLogin.
- Credential Input: The User inputs their credentials (username and password) into the OneLogin interface.
- SAML Response: Upon successful authentication, OneLogin generates and sends a SAML Response(containing user identity details and authentication status) back to OCI IAM.
- Access Granted: OCI IAM validates the SAML Response and, if successful, grants the User access to the OCI Console and the resources within the Compartment.
- SCIM 2.0 REST API: A separate, parallel connection is indicated between OCI IAM and OneLogin. This is used for automated user and group management.
Furthermore, once SAML trust is established and identities are synced across, OCI IAM policies can be defined to setup access controls to various OCI resources. For more information, see Getting Started with Policies and Deep Dive into Tag based Oracle Cloud Infrastructure Identity and Access Management Policies.
Objectives
-
Set up SAML based SSO for access management.
-
Set up SCIM 2.0 provisioning for identity management.
-
Test and validate.
Prerequisites
-
Access to an OCI tenancy. For more information, see Oracle Cloud Infrastructure Free Tier.
-
Identity domain administrator role for the OCI IAM identity domain. For more information, see Understanding Administrator Roles.
-
A OneLogin Workforce IAM subscription.
-
An admin with ‘Super user’ privilege.
Note: The Oracle cloud app from OneLogin marketplace supports only single sign on. For user provisioning, we will use a diffent SCIM application.
Section 1: Set up SAML based SSO for Access Management
OneLogin acts as the Identity Provider (IdP), authenticating users and passing authentication tokens securely to OCI IAM, which functions as the Service Provider (SP). To set up SAML federation, metadata needs to be exchanged by both parties.
Task 1.1: Get the Service Provider Metadata from OCI IAM
The SP metadata from the OCI IAM identity domain are exported first.
-
Open a browser tab and enter the URL:
https://cloud.oracle.com. -
Enter Cloud Account Name, also referred to as the tenancy name, and click Next.
-
Select the identity domain to sign in to. This is the identity domain that is used to configure SSO, for example
Default. -
Enter the administrator credentials to log in to the OCI Console.
-
Navigate to Identity & Security, then goto Identity and click Domains. Click the name of the identity domain.
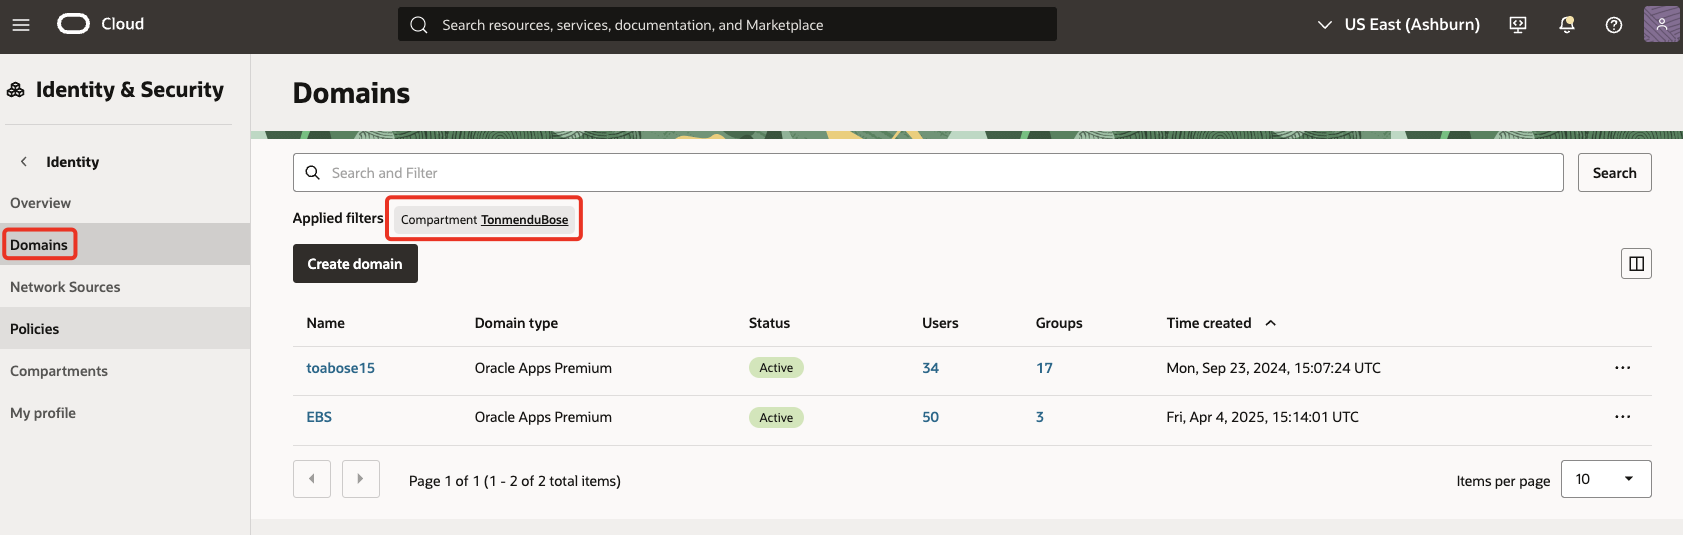
Note: If the domain is not visible, change the compartment to find the right domain.
-
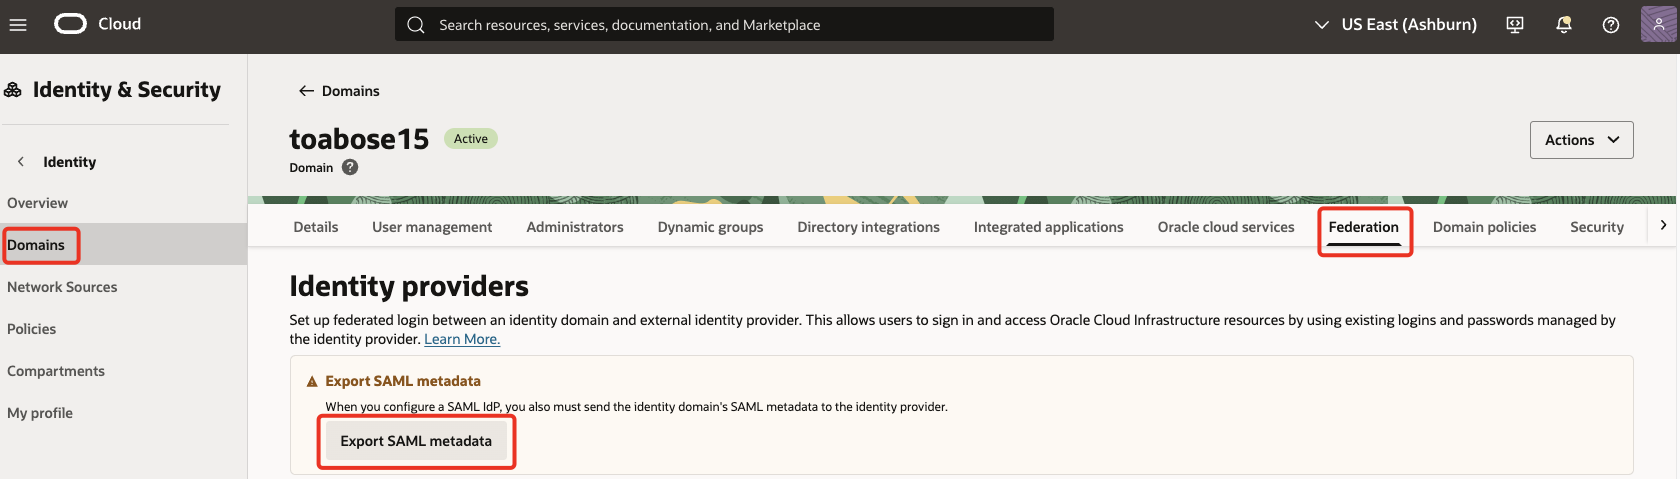
Click on Federation. Under Identity providers, click on Export SAML metadata.
-
Select Manual export & make note of the values. Sample values are listed below for reference.
Provider ID
https://idcs-XXX.identity.oraclecloud.com:443/fed
Assertion consumer service URL https://idcs-XXX.identity.oraclecloud.com:443/fed/v1/sp/ssoLogout service endpoint URL https://idcs-XXX.identity.oraclecloud.com:443/fed/v1/sp/sloLogout service return URL https://idcs-XXX.identity.oraclecloud.com:443/fed/v1/sp/slo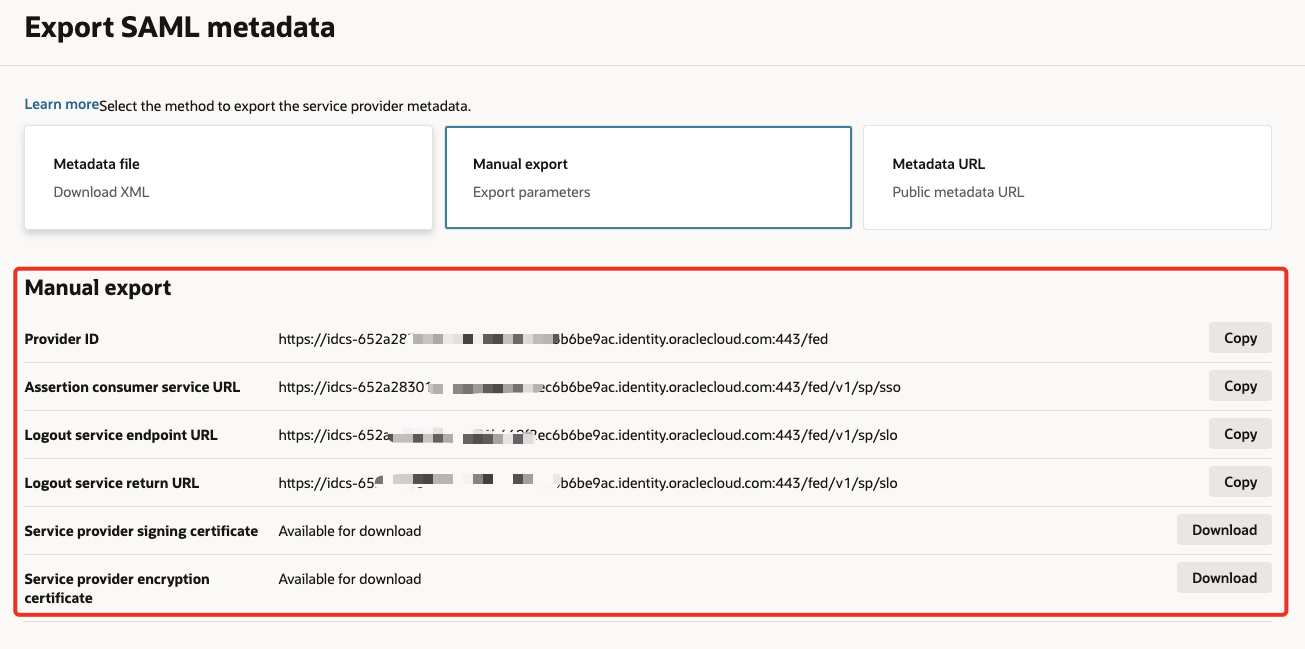
Task 1.2: Create and configure the SSO Application
SSO application is created & configured in the OneLogin portal to represent the OCI Console
-
In the browser, sign in to the OneLogin portal using the URL:
https://XXX.onelogin.com/admin2 -
Goto Administration. Under Applications, select Applications and click Add App.

-
Search & select
Oracle Identity Cloud Service. Click Save.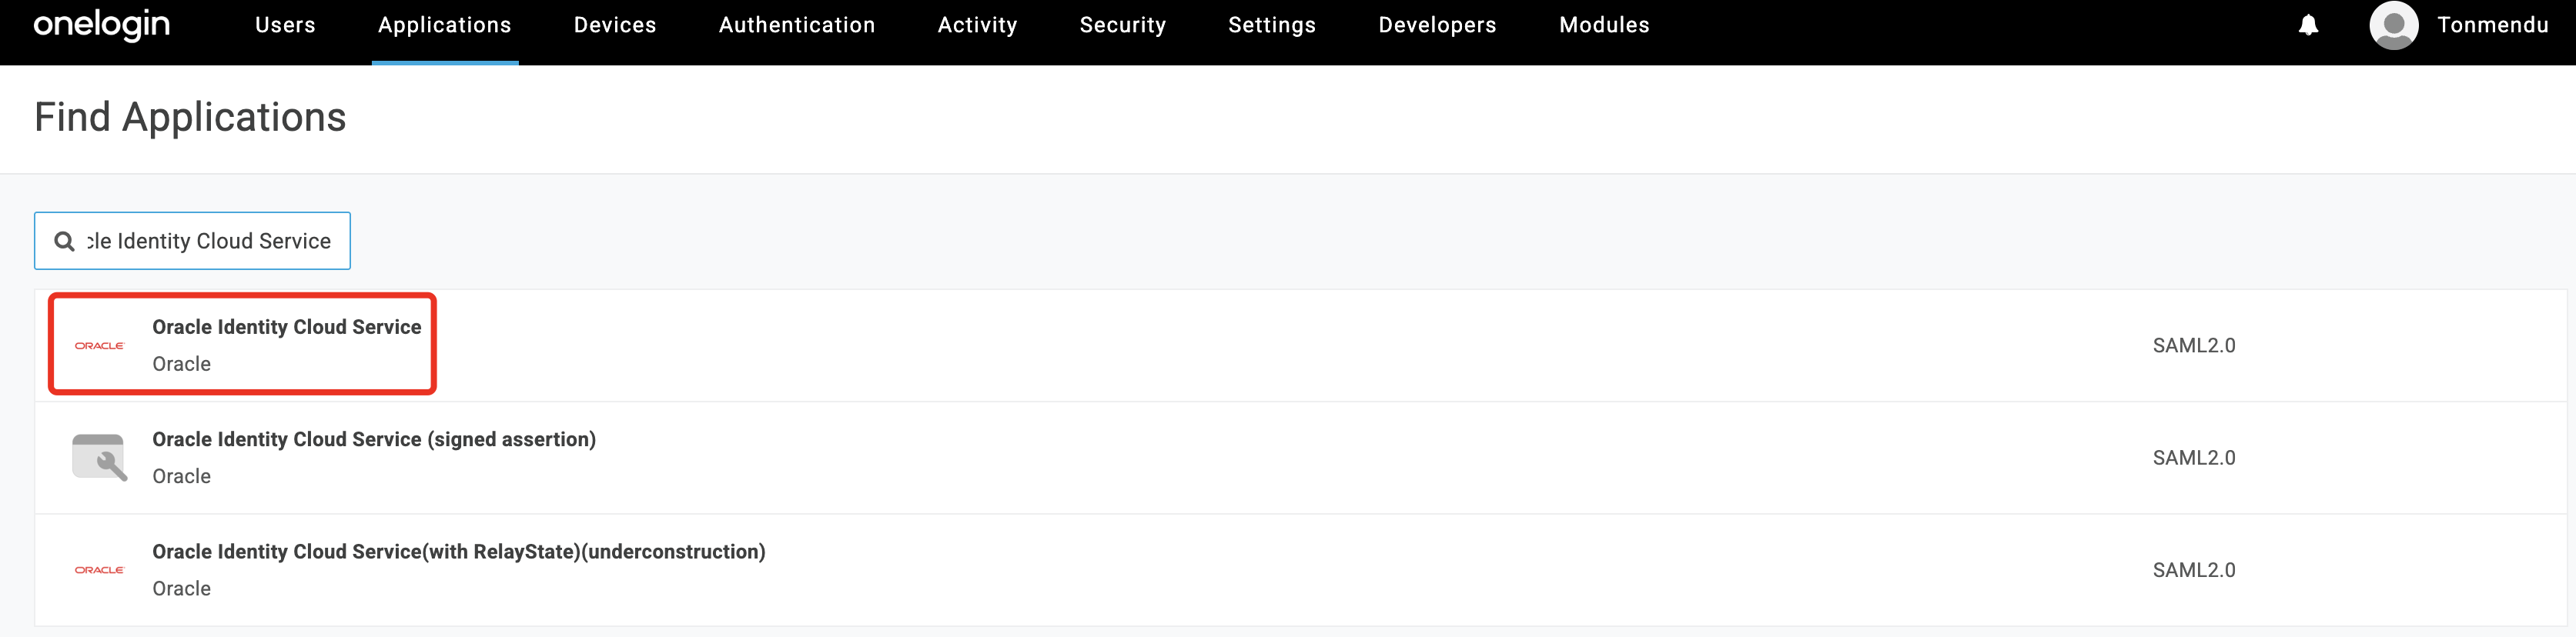
-
In the
Configurationtab, enter the values from Task 1.1.8. Click Save.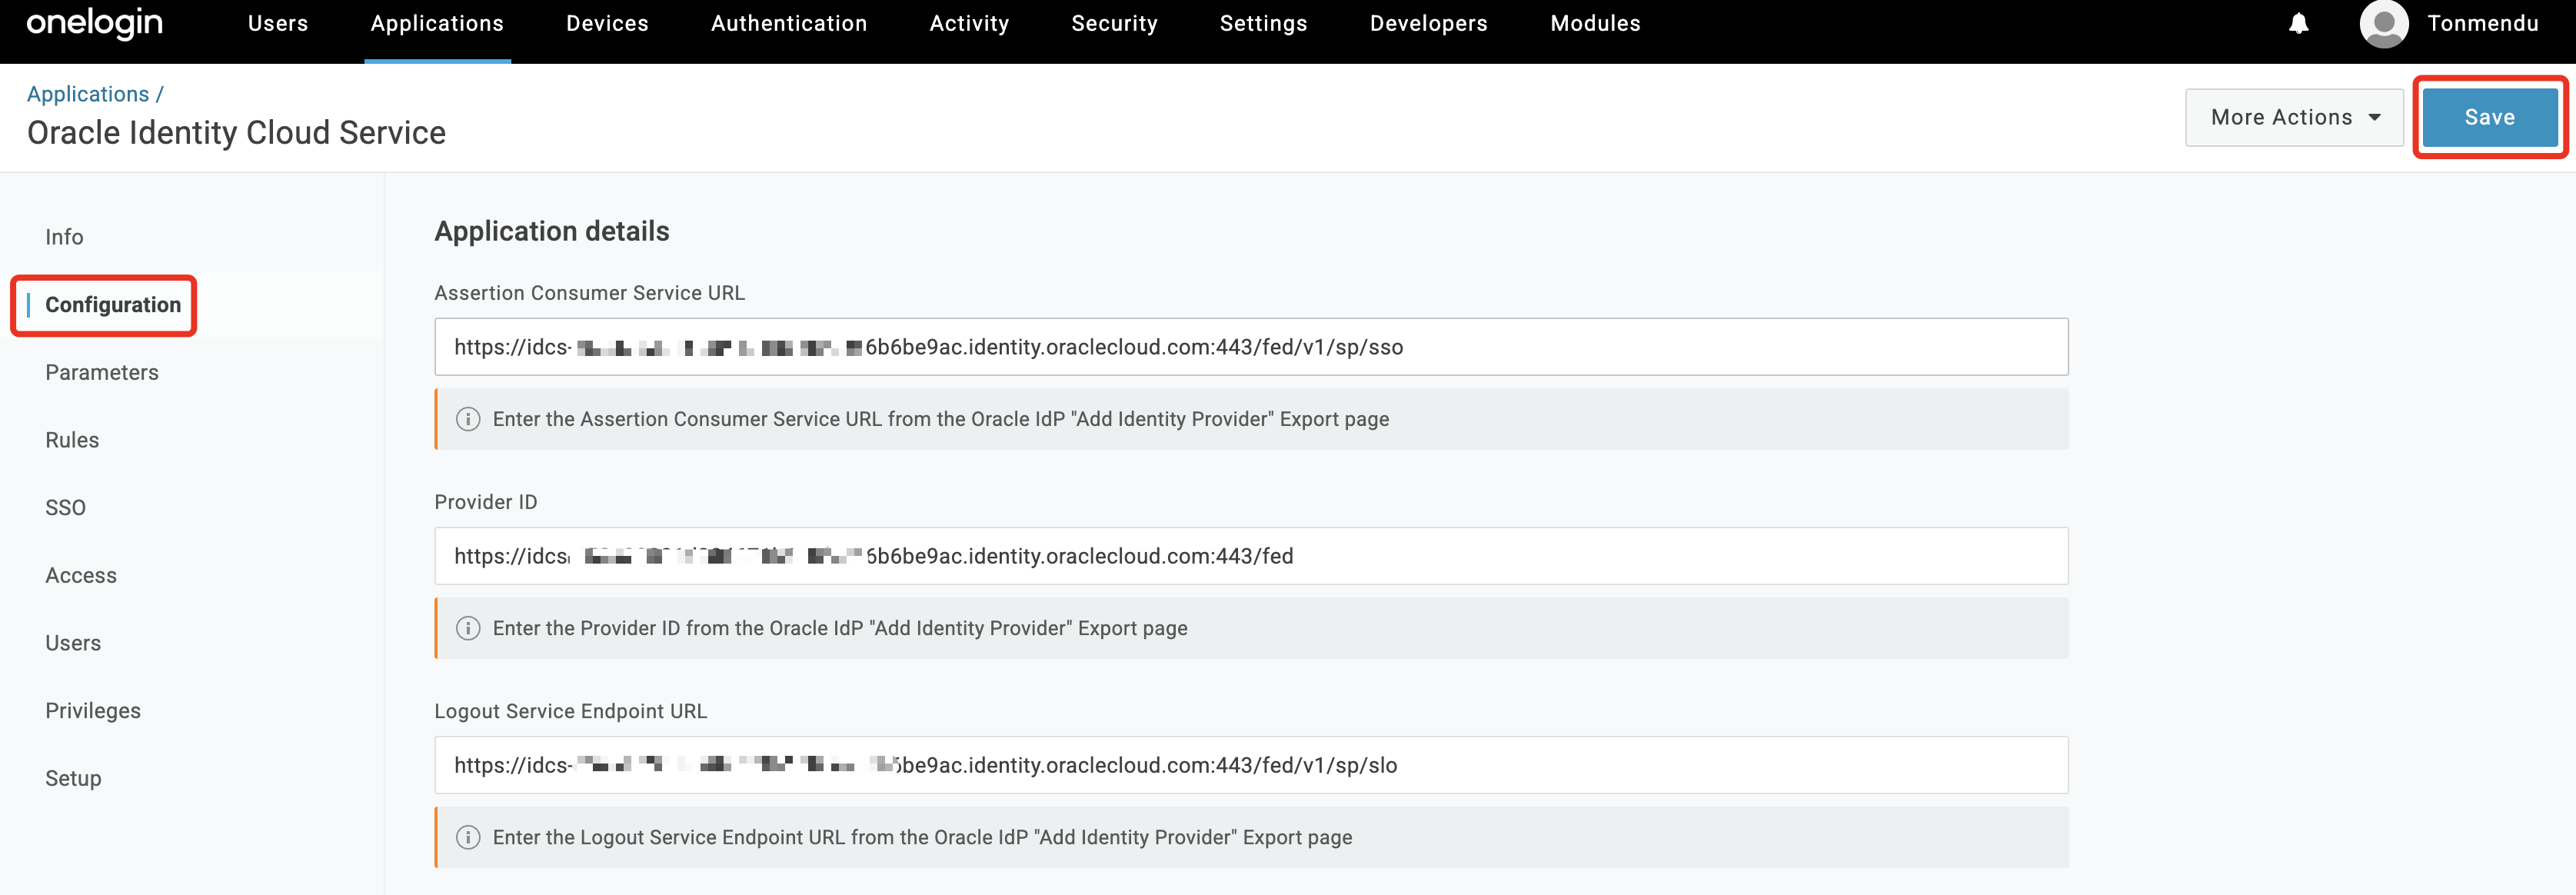
-
In the
SSOtab change theSAML Signature Algorithmto SHA-256. Click Save.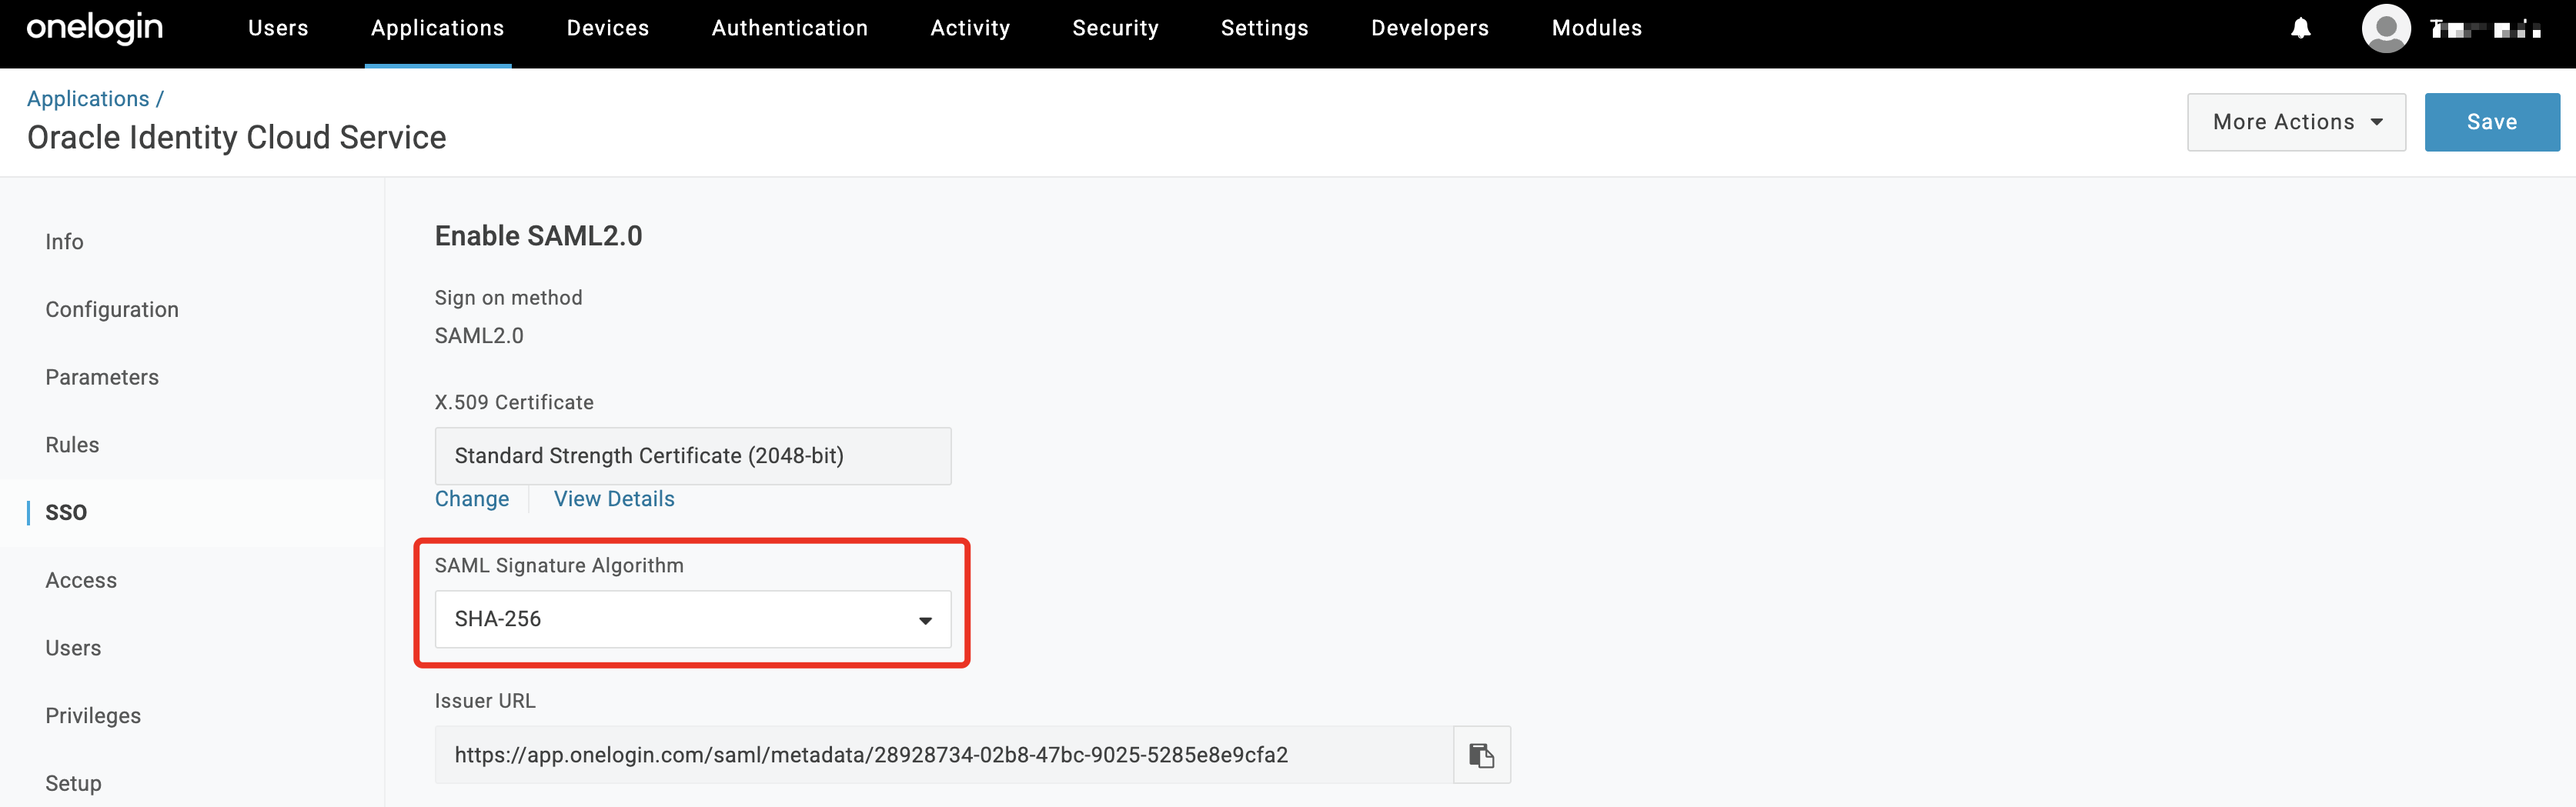
-
In the
Parameterstab, ensureNameIDis mapped to Email. This ensures that a user’s email is passed as part of the SAML subject.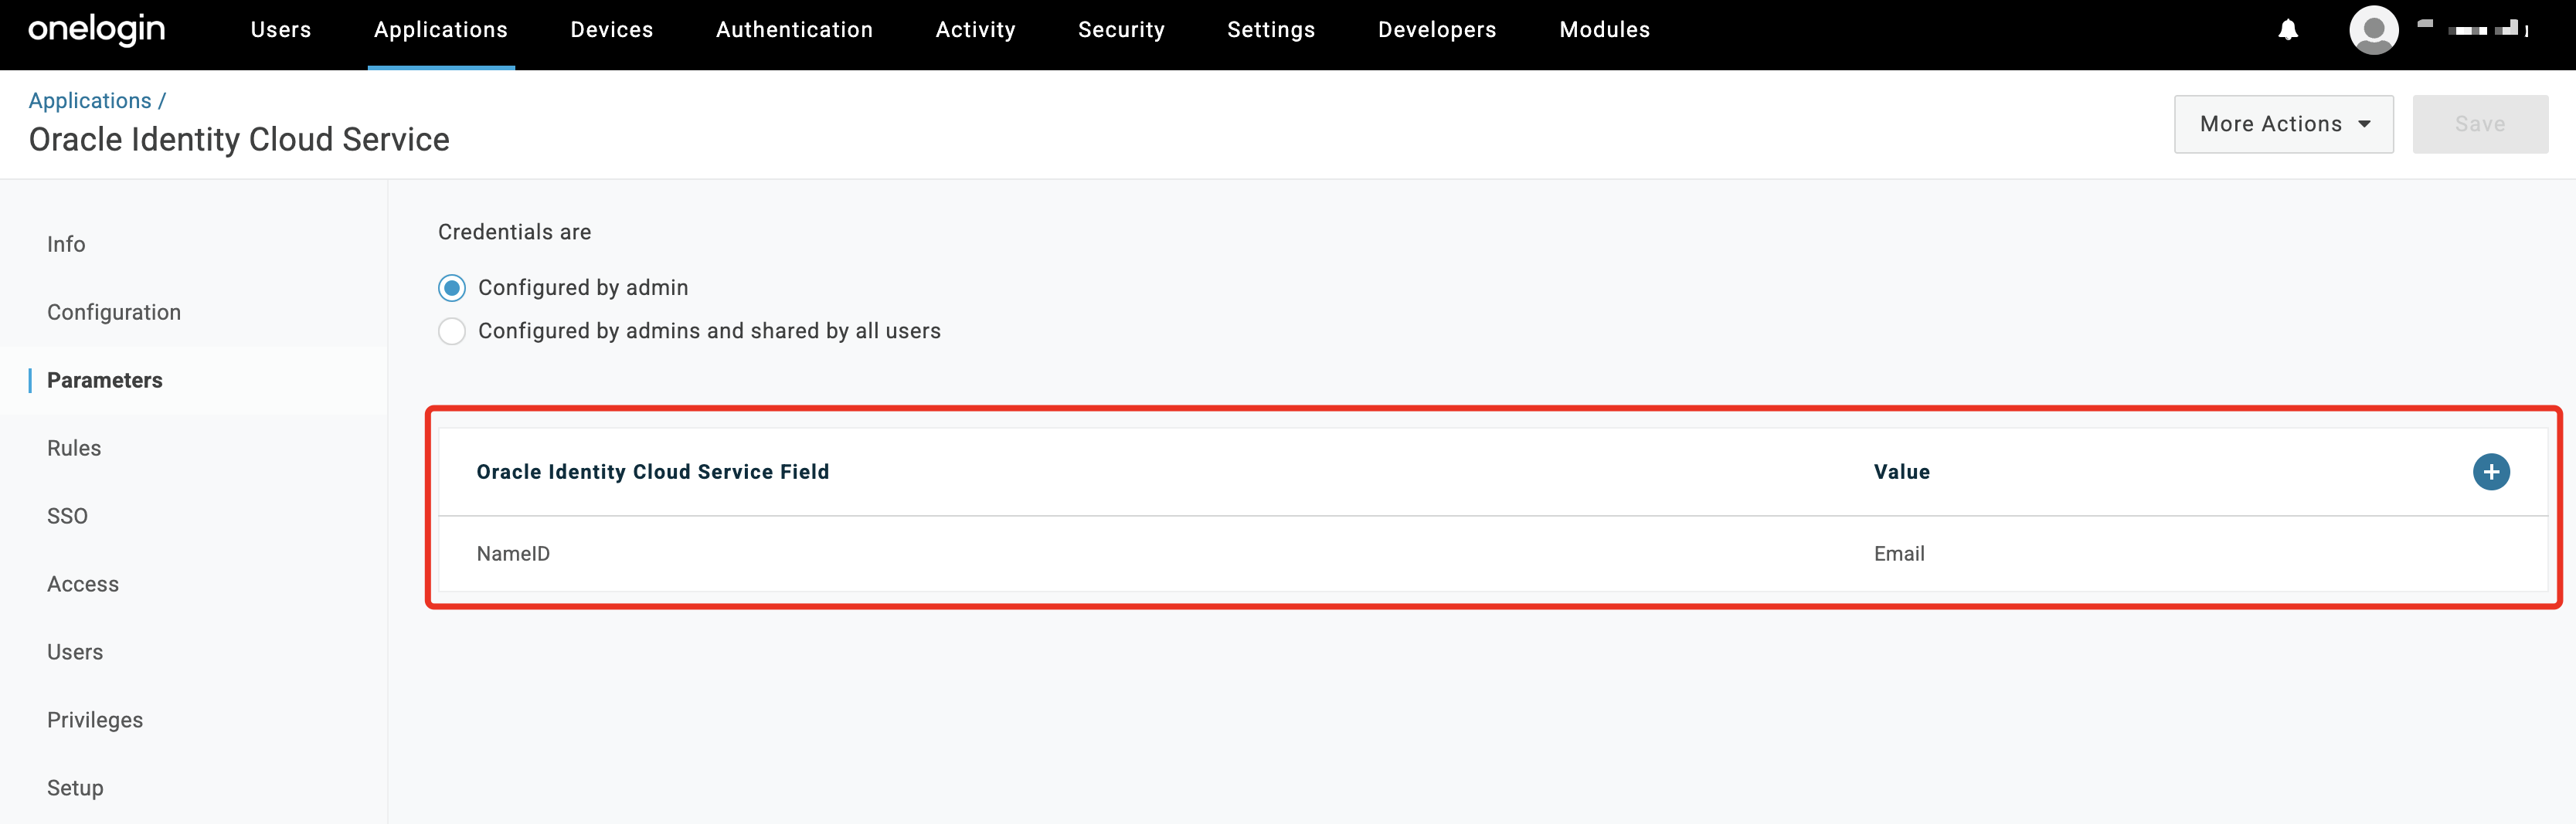
-
Under
More Actionsclick onSAML Metadata. The XML file will be downloaded locally. This is the SP metadata.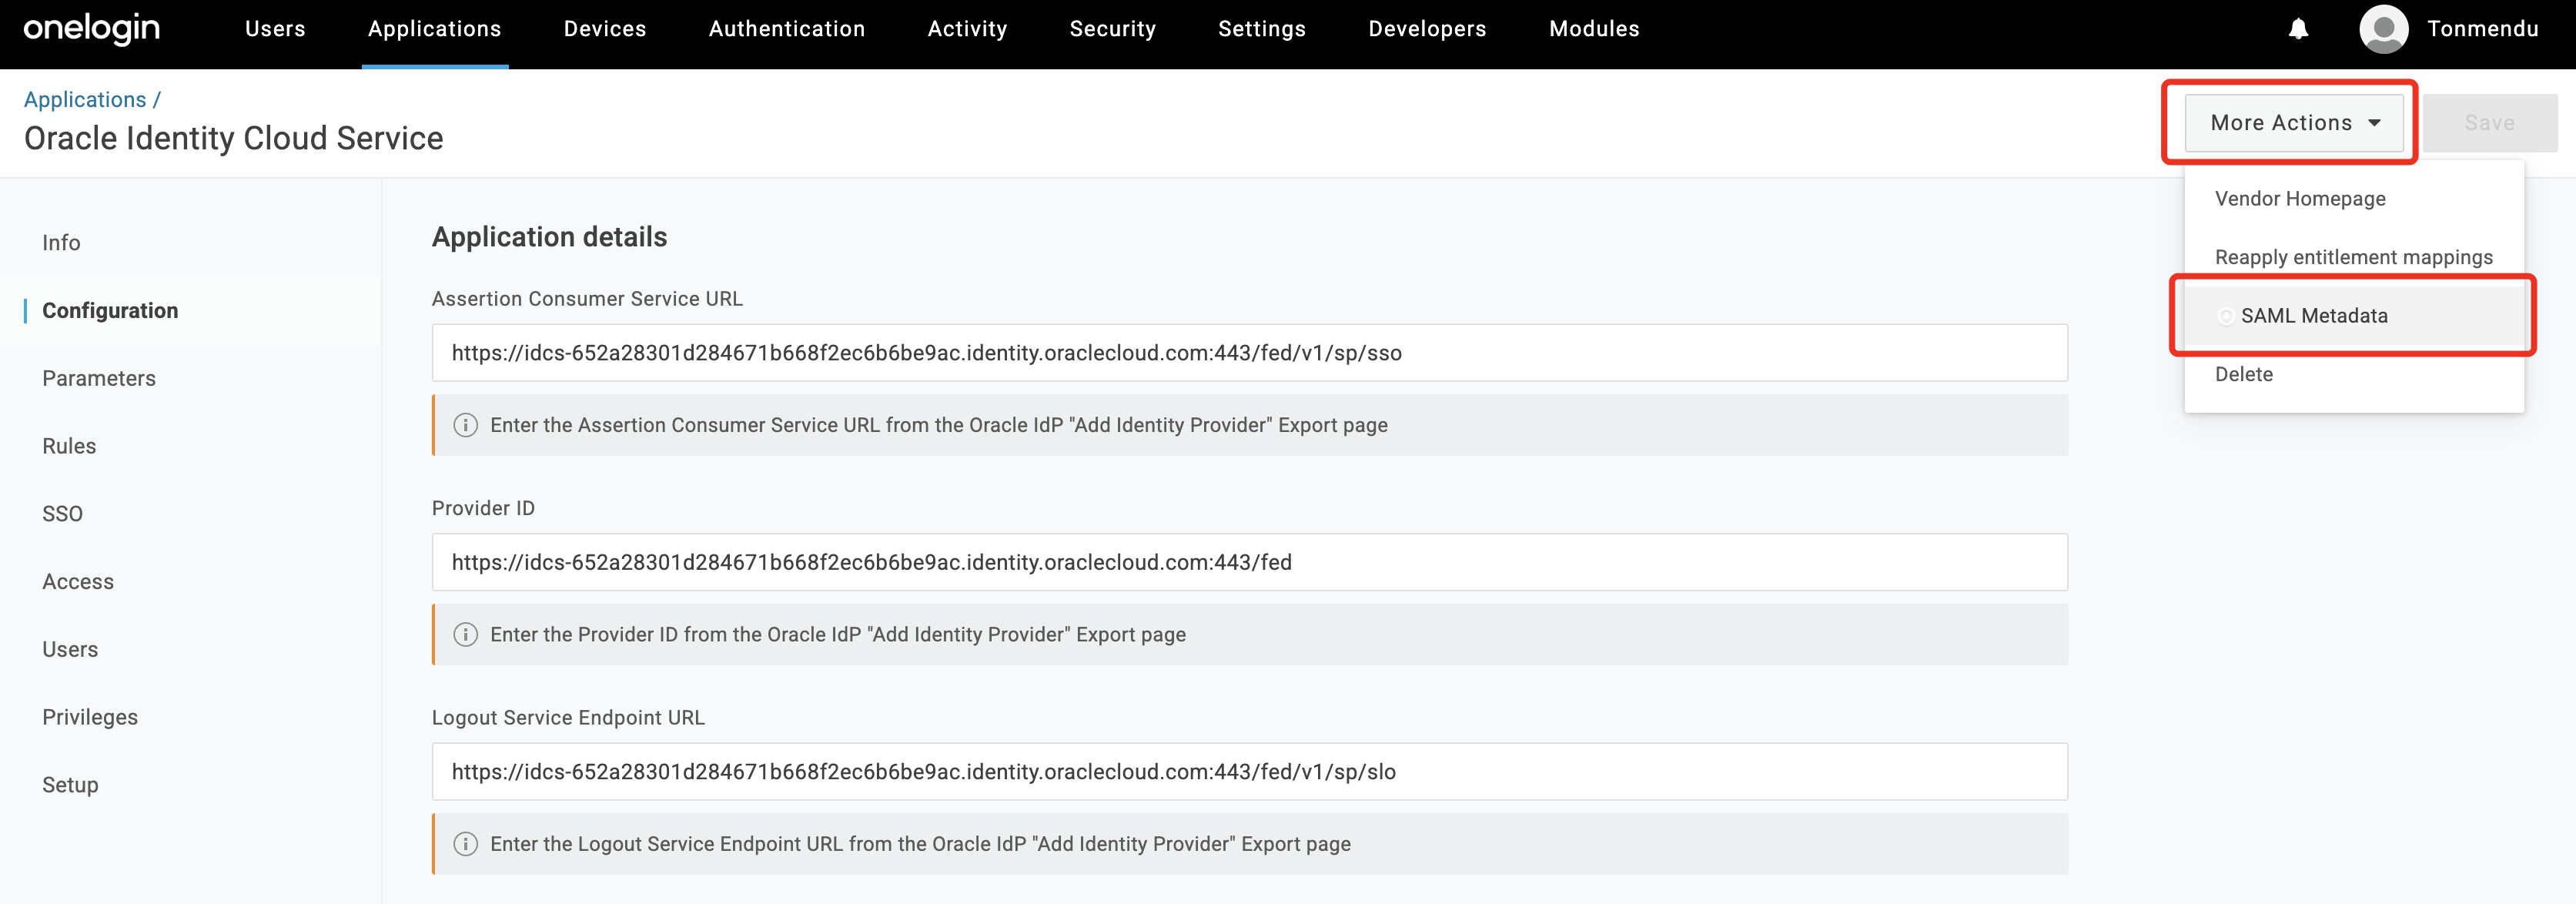
Task 1.3: Enable OneLogin as IdP for OCI IAM
A new IdP is created that represents OneLogin. Once setup, IdP policy is created to enable SSO authentication.
-
In the OCI Console, navigate to the domain & select Federation. Under
Identity providersclick on Actionsand chooseAdd SAML IdP.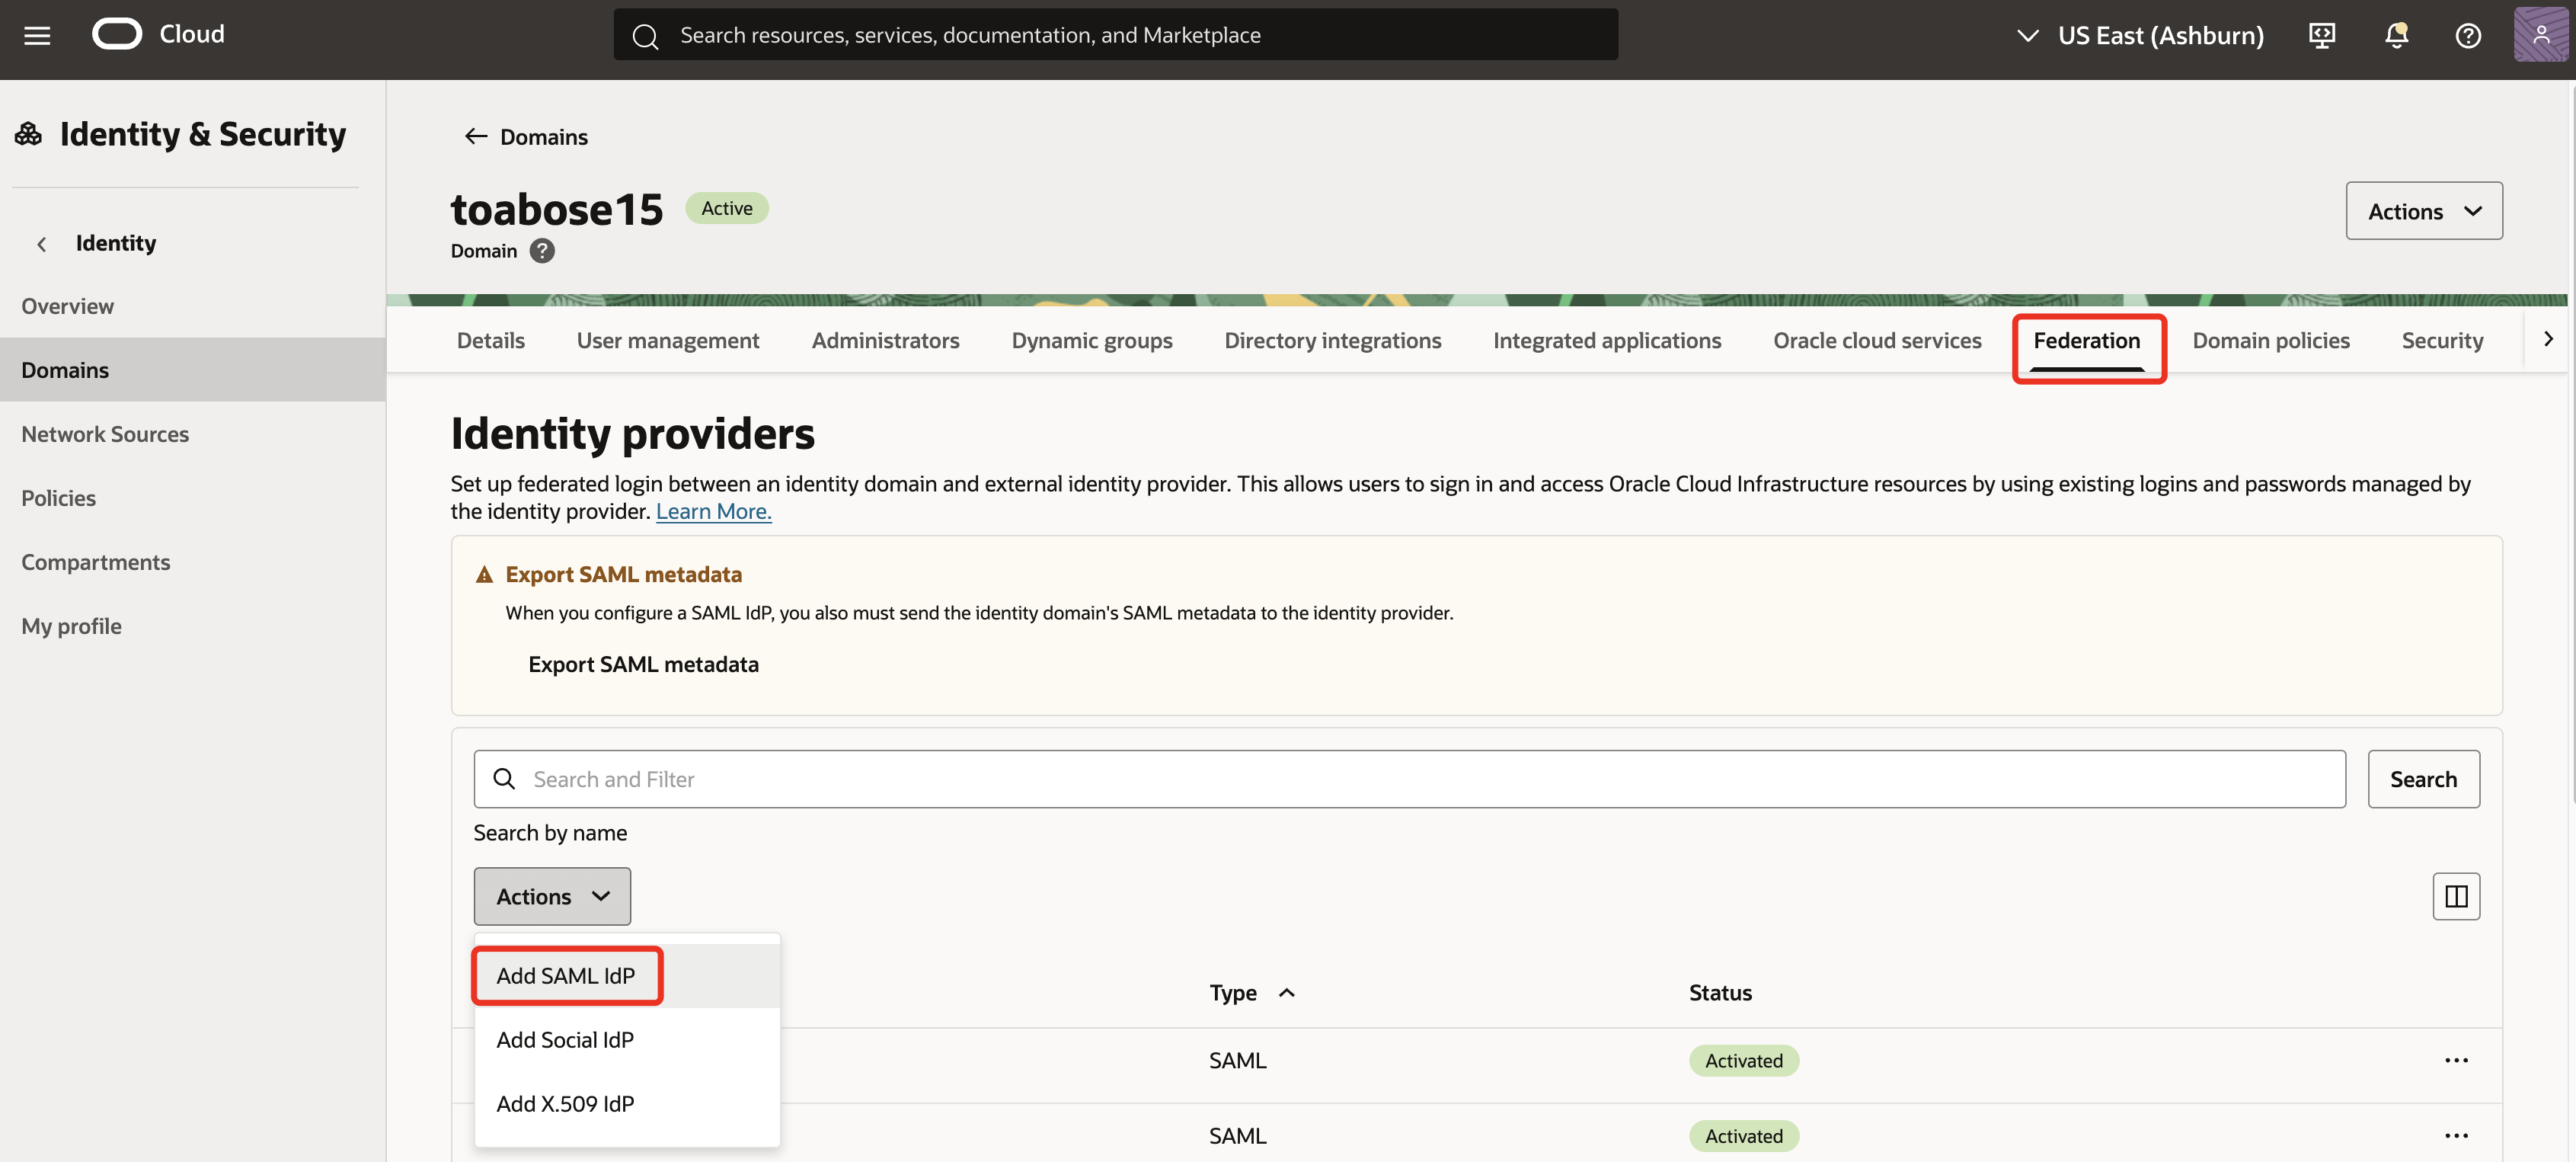
-
Enter a Name (for example,
OneLogin) for the SAML IdP and click Next.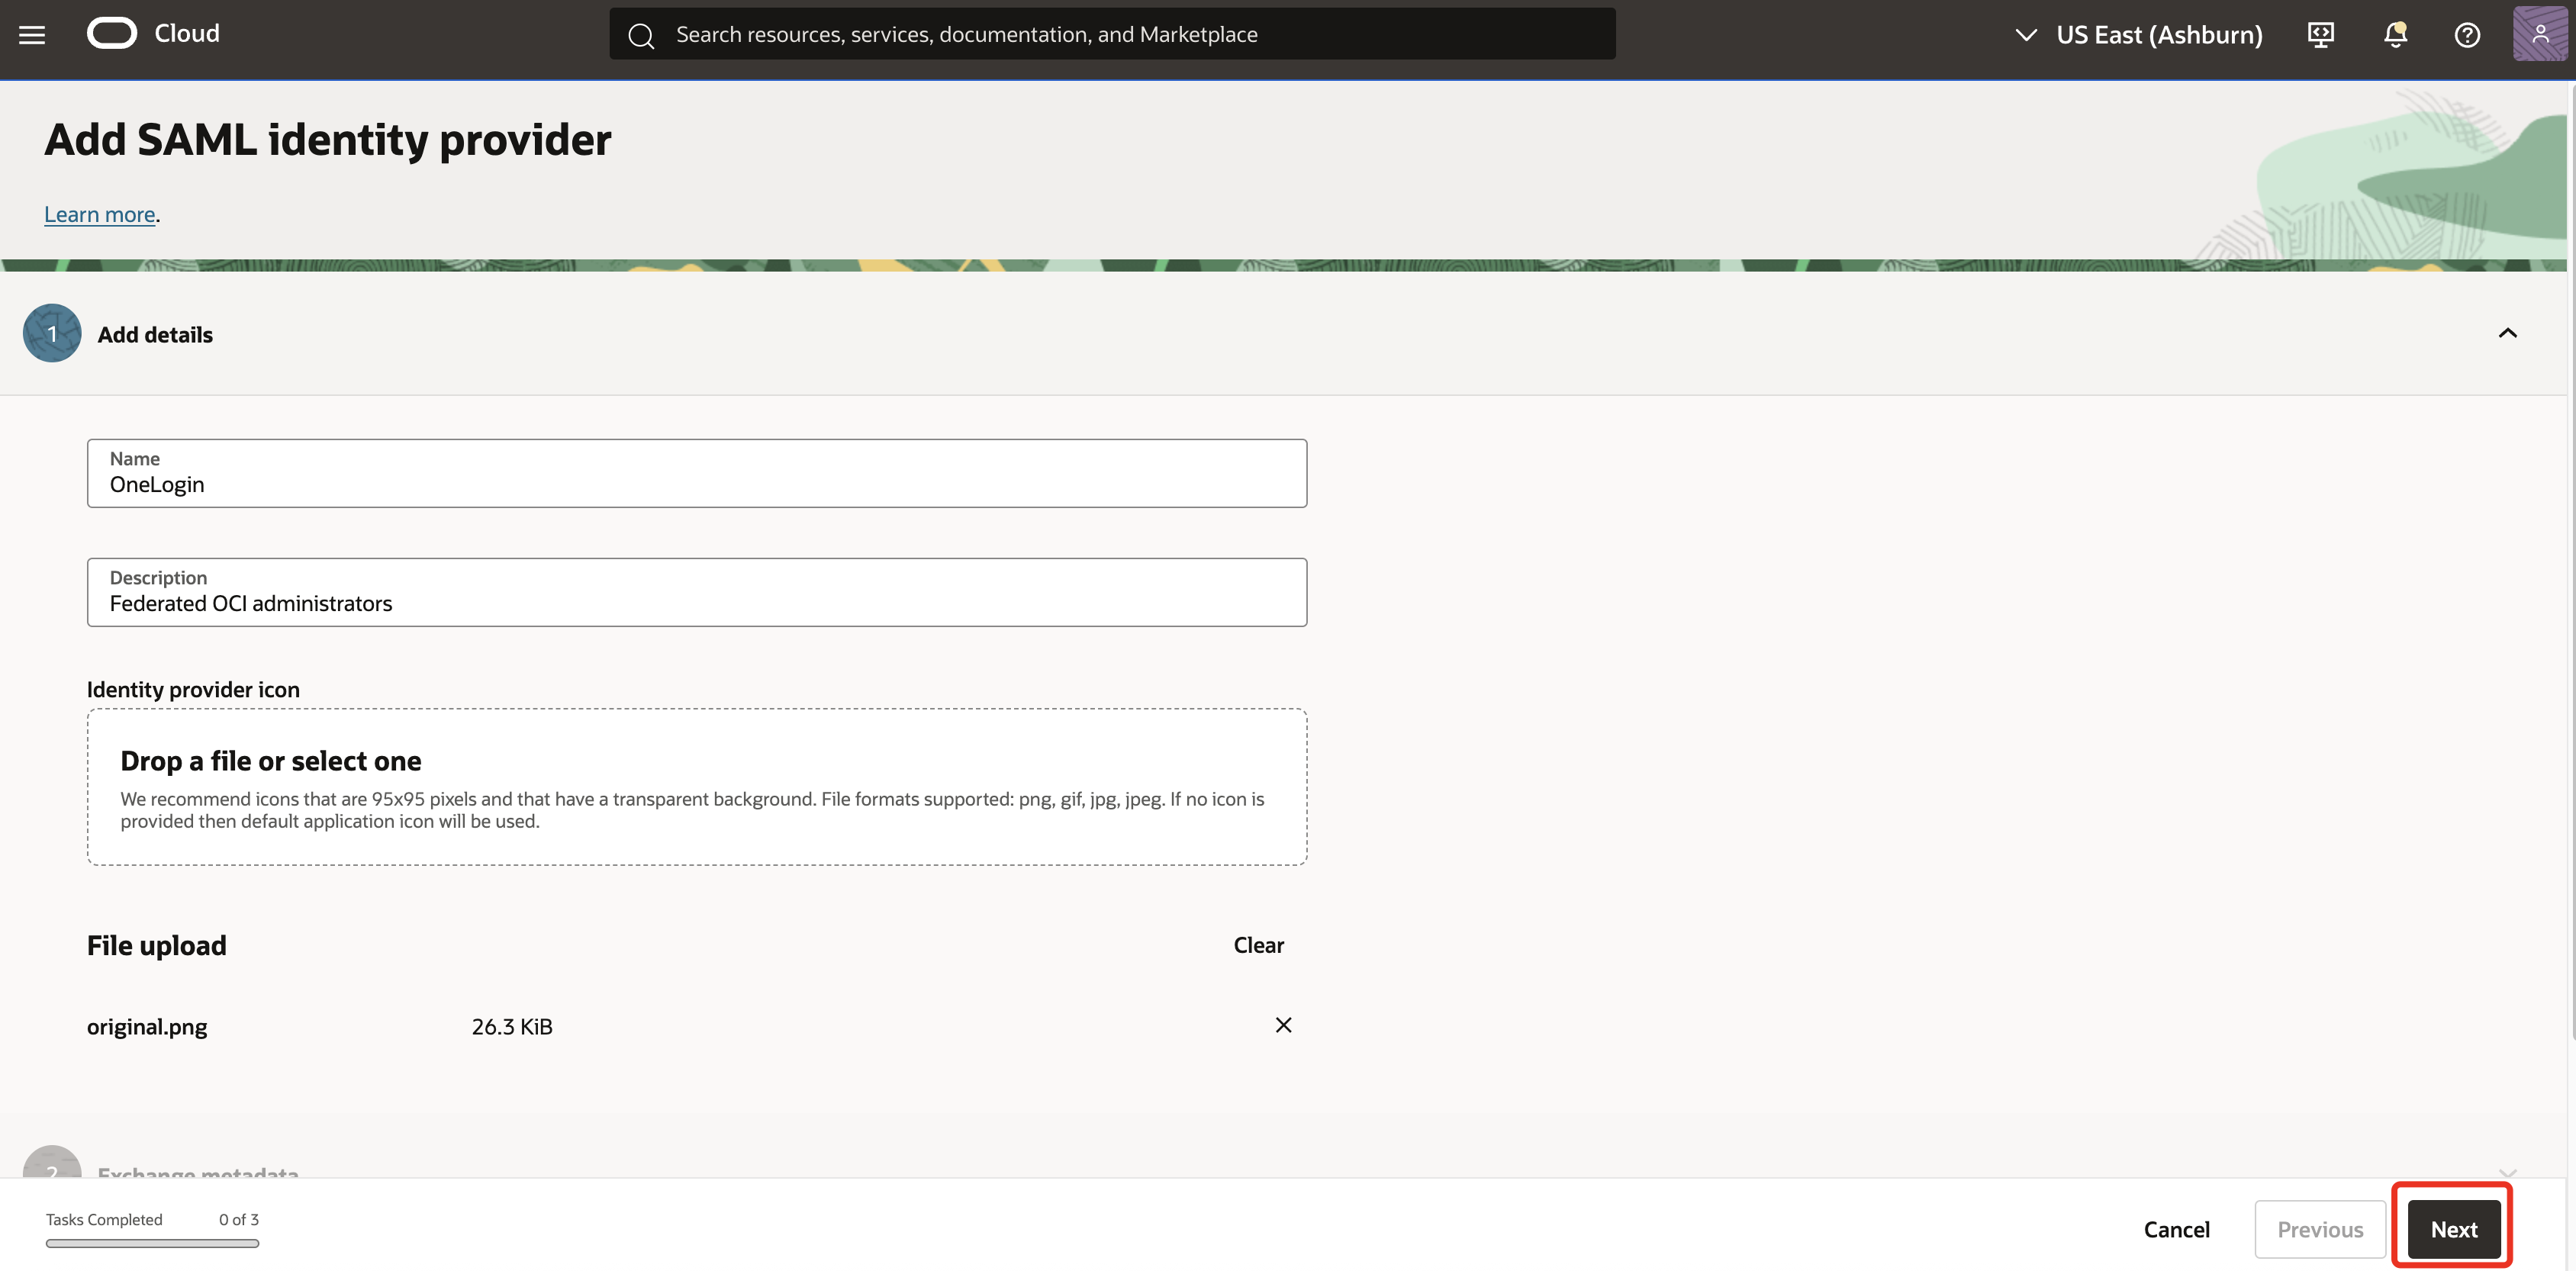
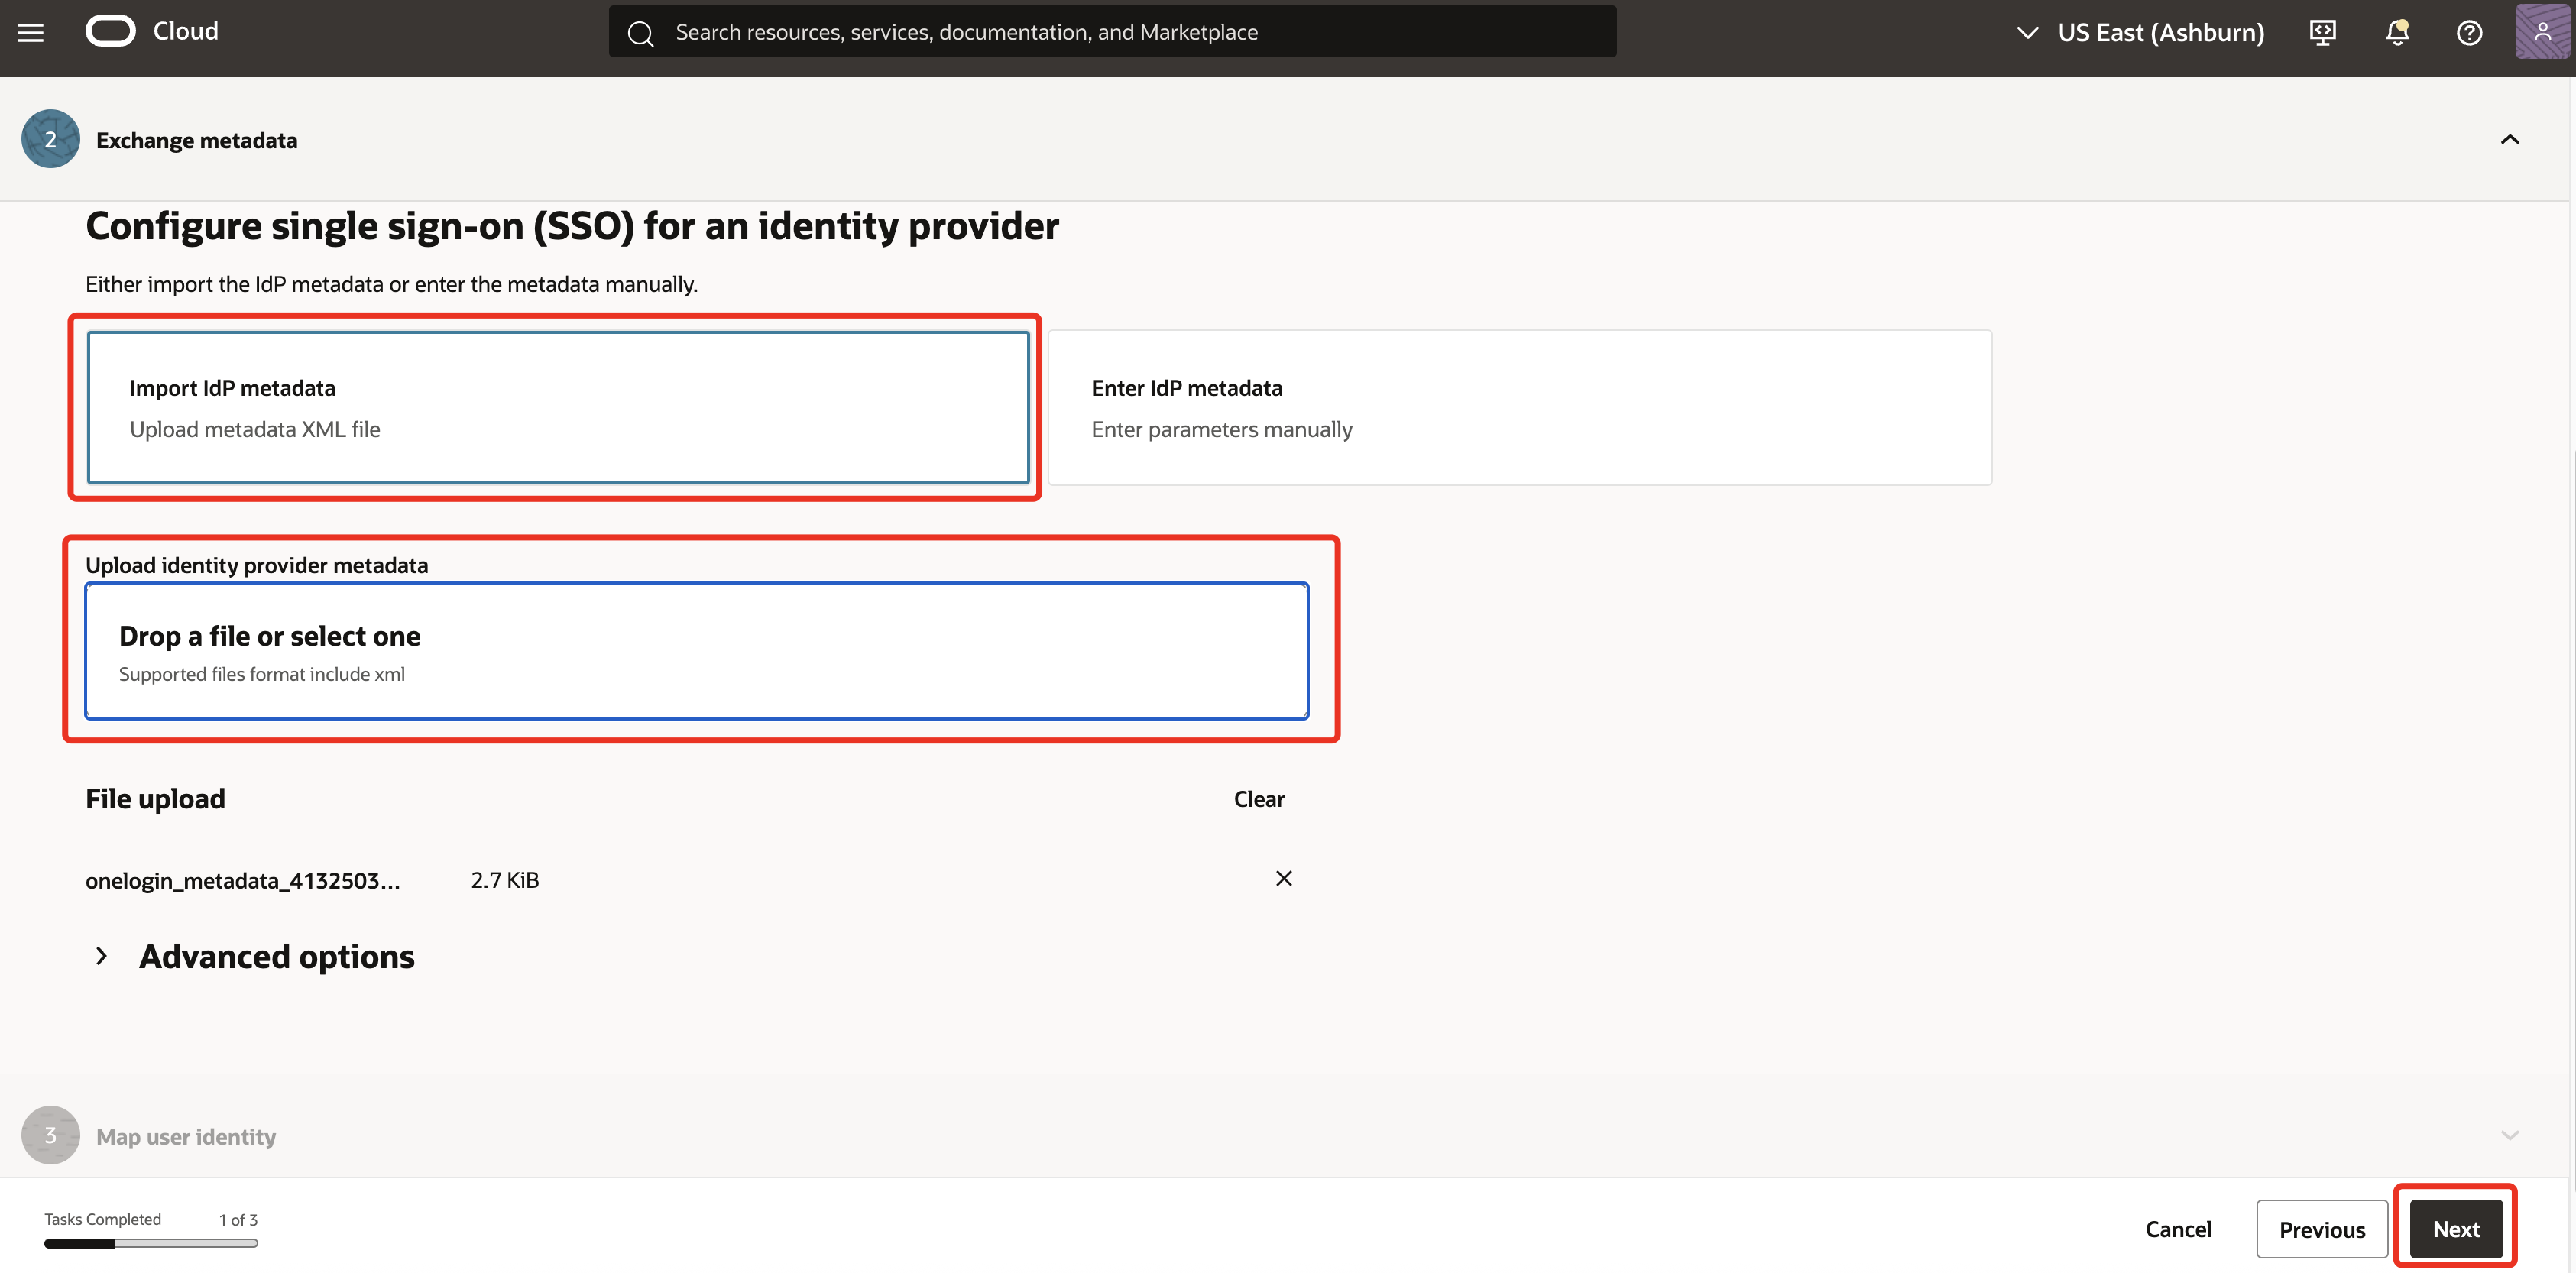
-
Ensure to select Import IdP metadata. Under Upload identity provider metadata, upload the IdP metadata from Task 1.2.7 and click Next.
-
In Map user identity, ensure the attributes are set as below.
- Requested NameID format: Select Email address.
- Identity provider user attribute: Select SAML assertion Name ID.
- Identity domain user attribute: Select Username.
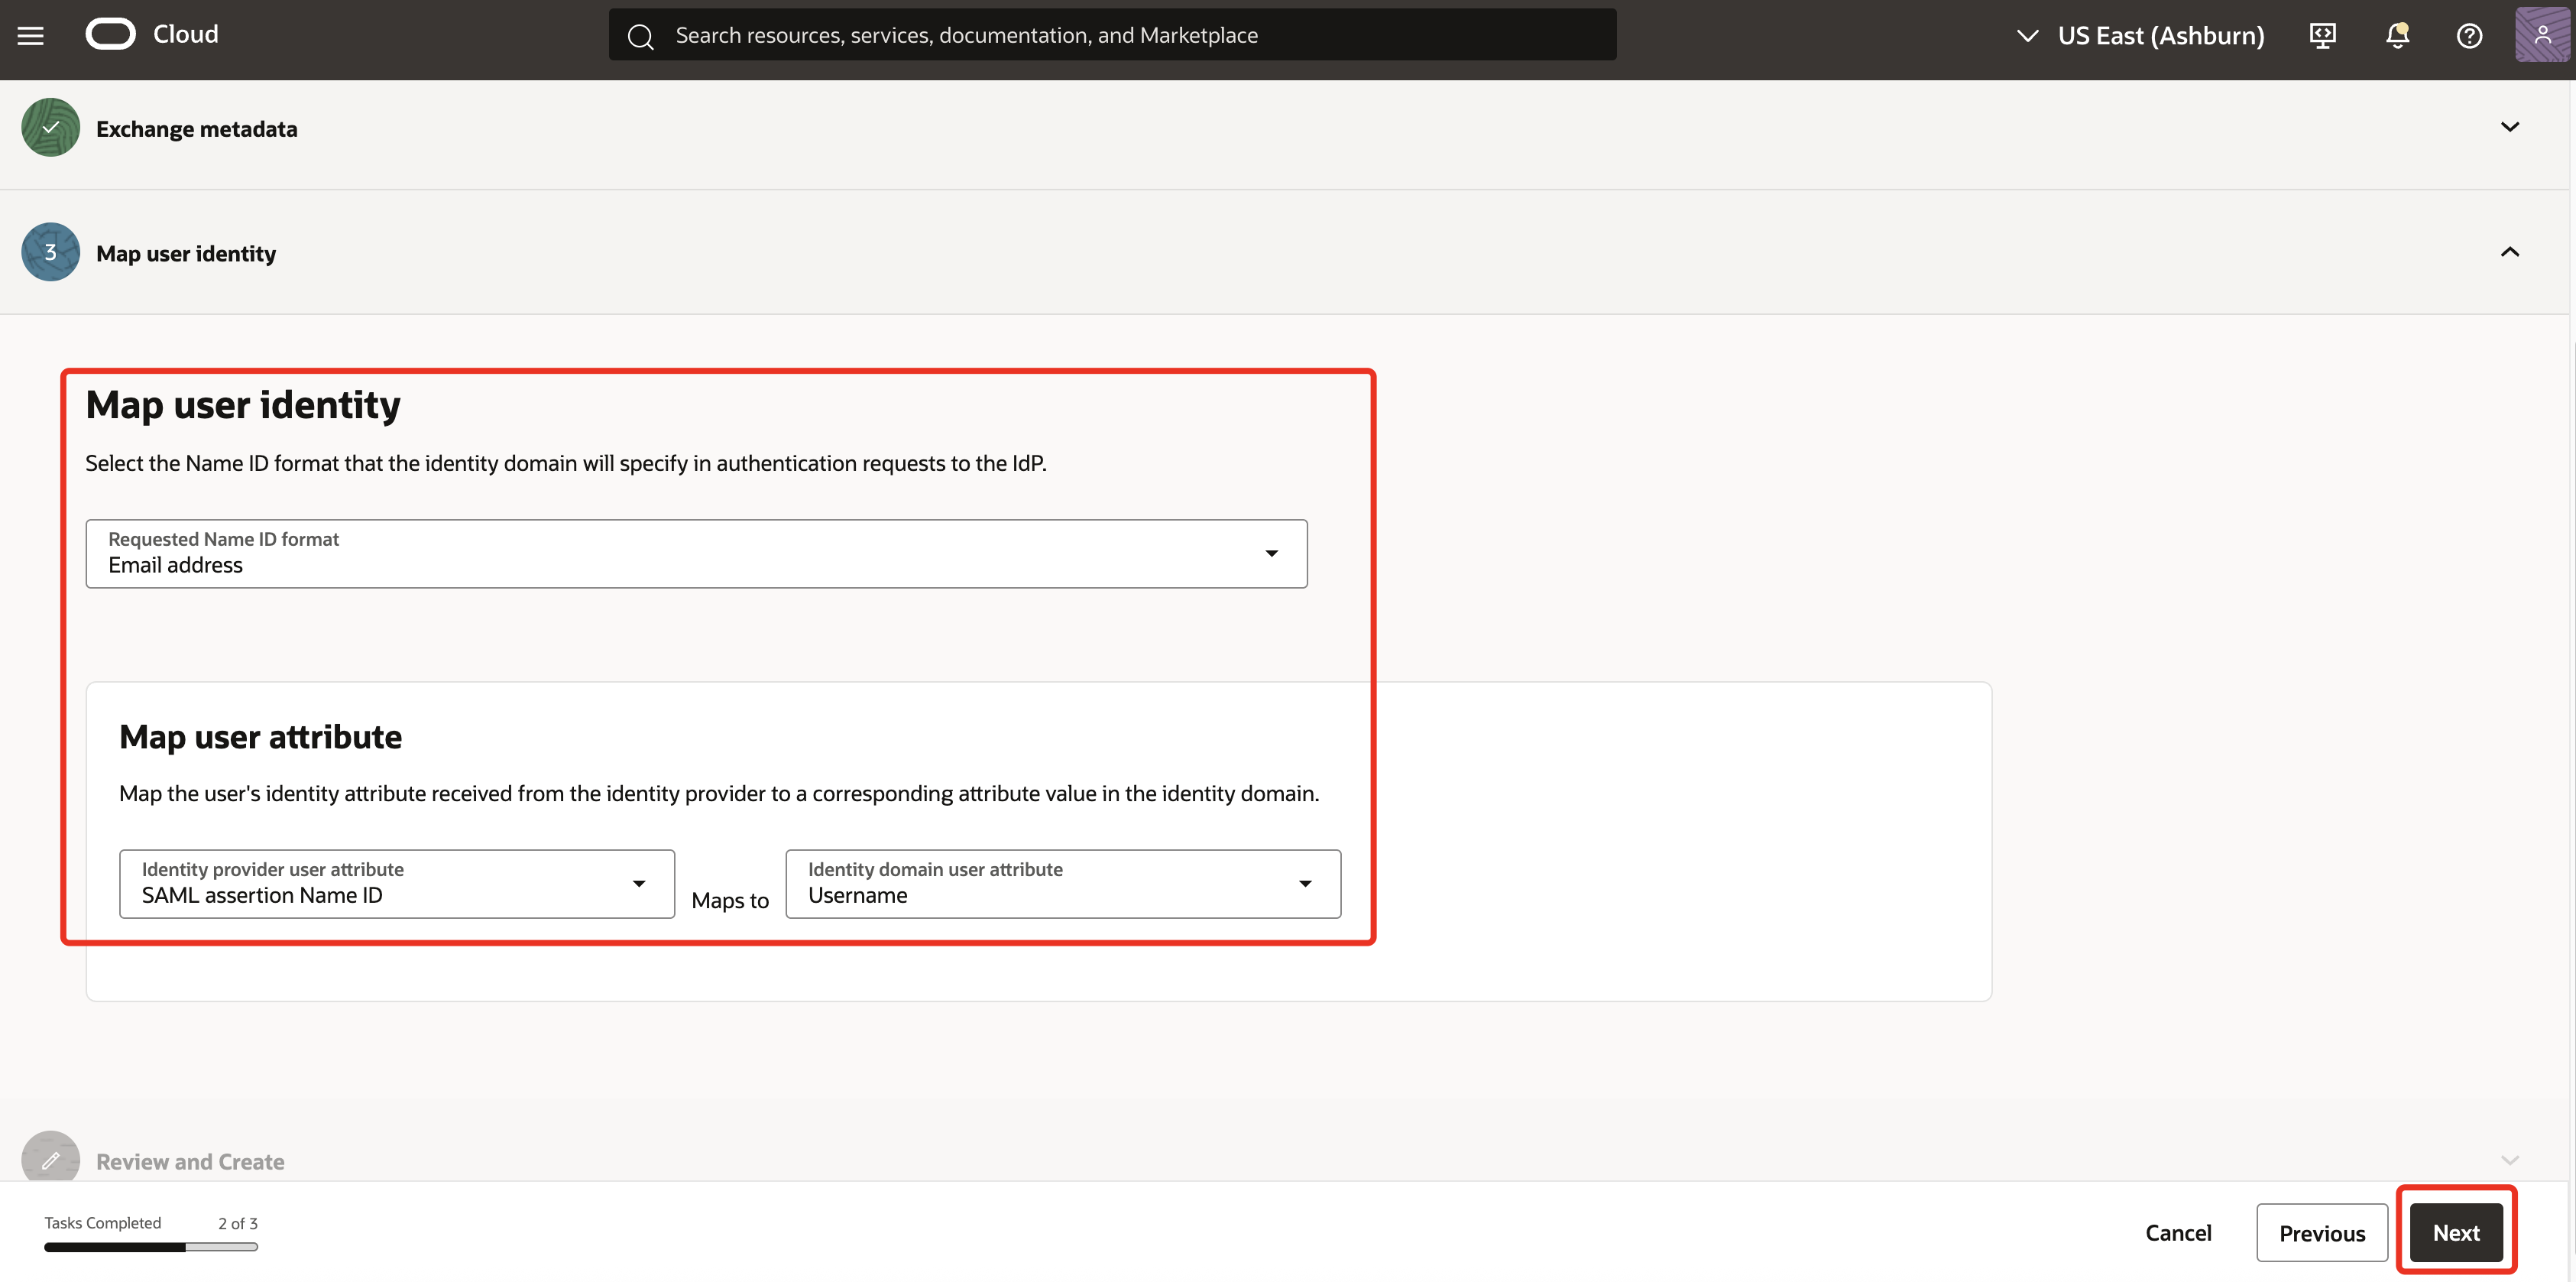
Note: The mapping of Company Email to username ensures consistency in SAML Subject/NameID and is required for SSO to work.
<saml2:Subject><saml2:NameID Format="urn:oasis:names:tc:SAML:1.0:nameid-format:unspecified">email@domain.com</saml2:NameID> -
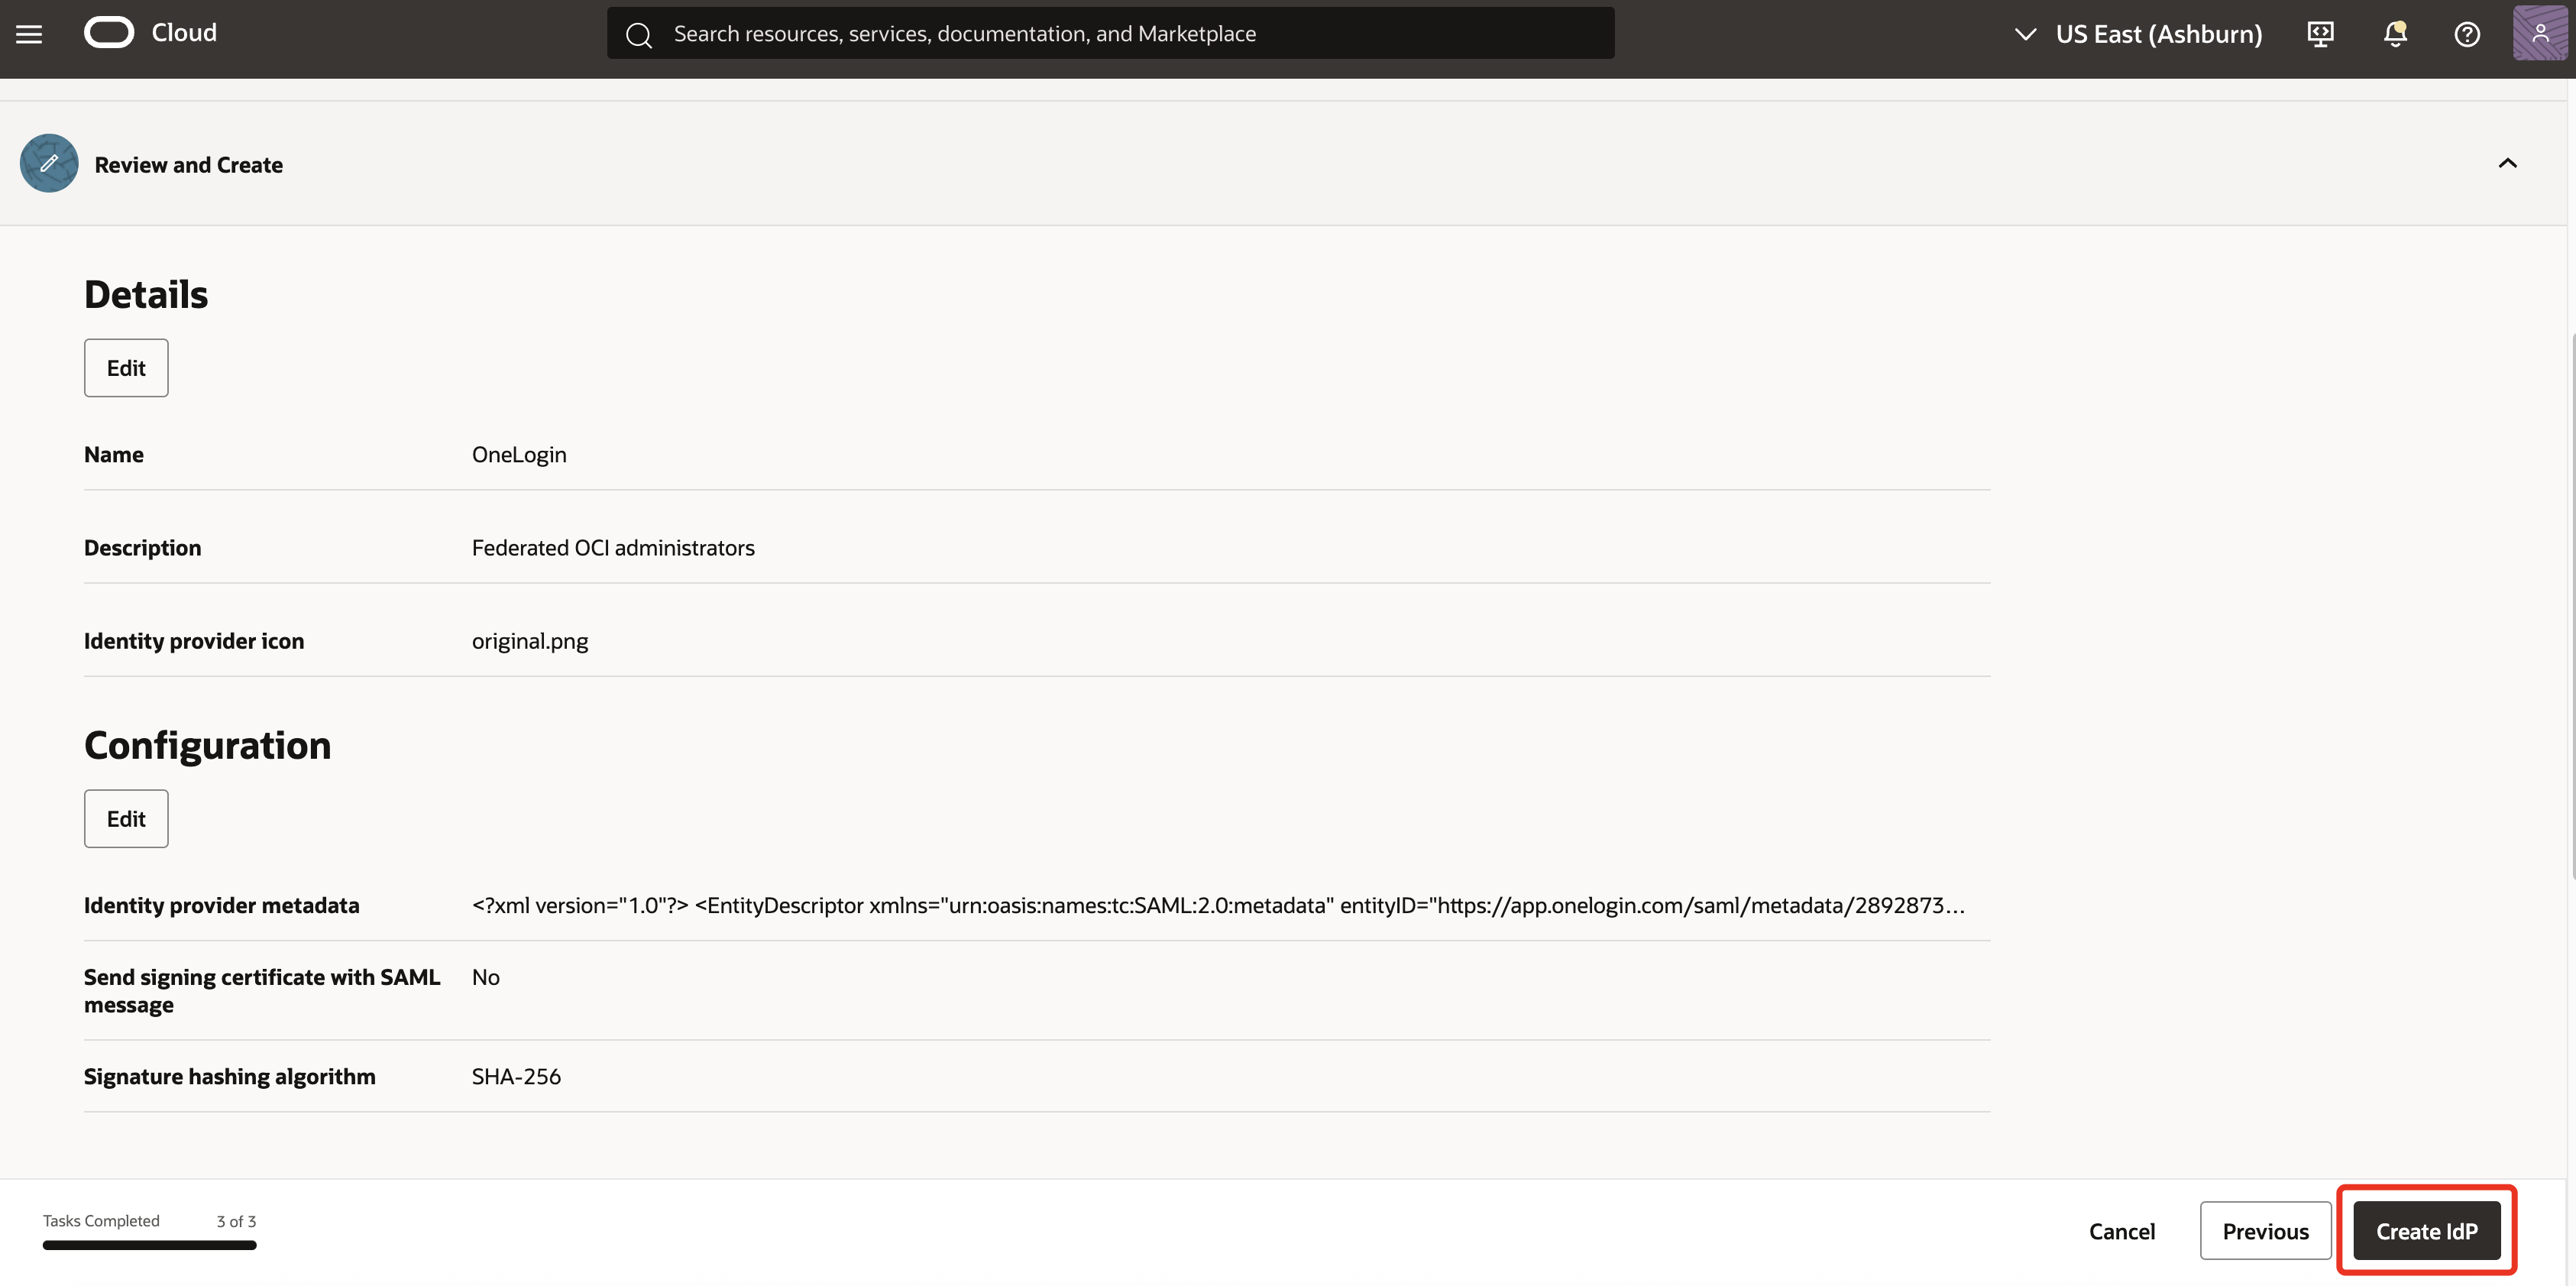
In Review and Create, verify the configuration and click Create IdP.
-
Click on Activate IdP.
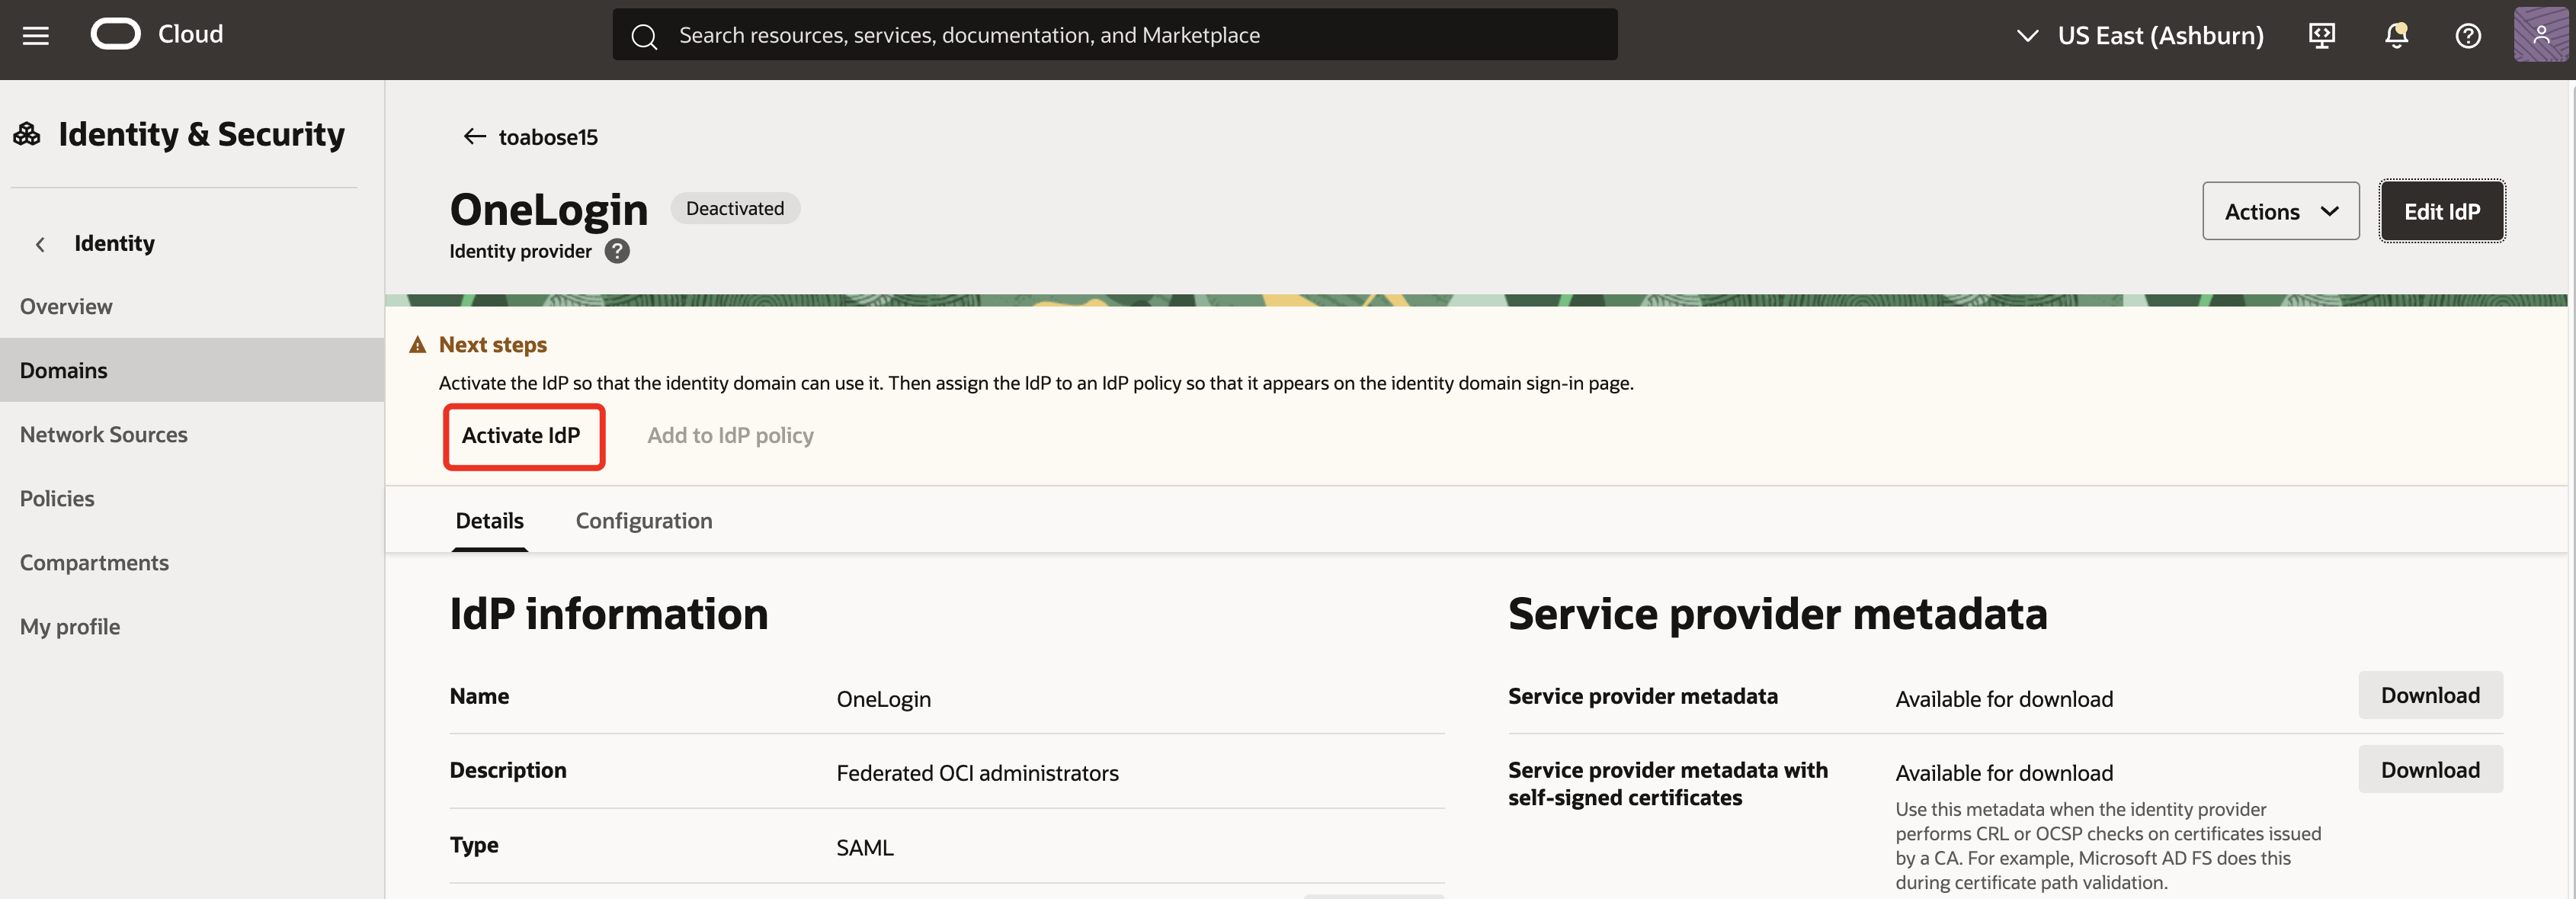
Note: Now, a new IdP policy will be created to target the OCI console app. Username-Password & OneLogin options will be allowed as authentication method. The local authentication is made available to support breakglass scenarios. The default IdP policy will continue to administer the rest of the applications on the domain.
-
In Federation tab, click Create IdP policy.
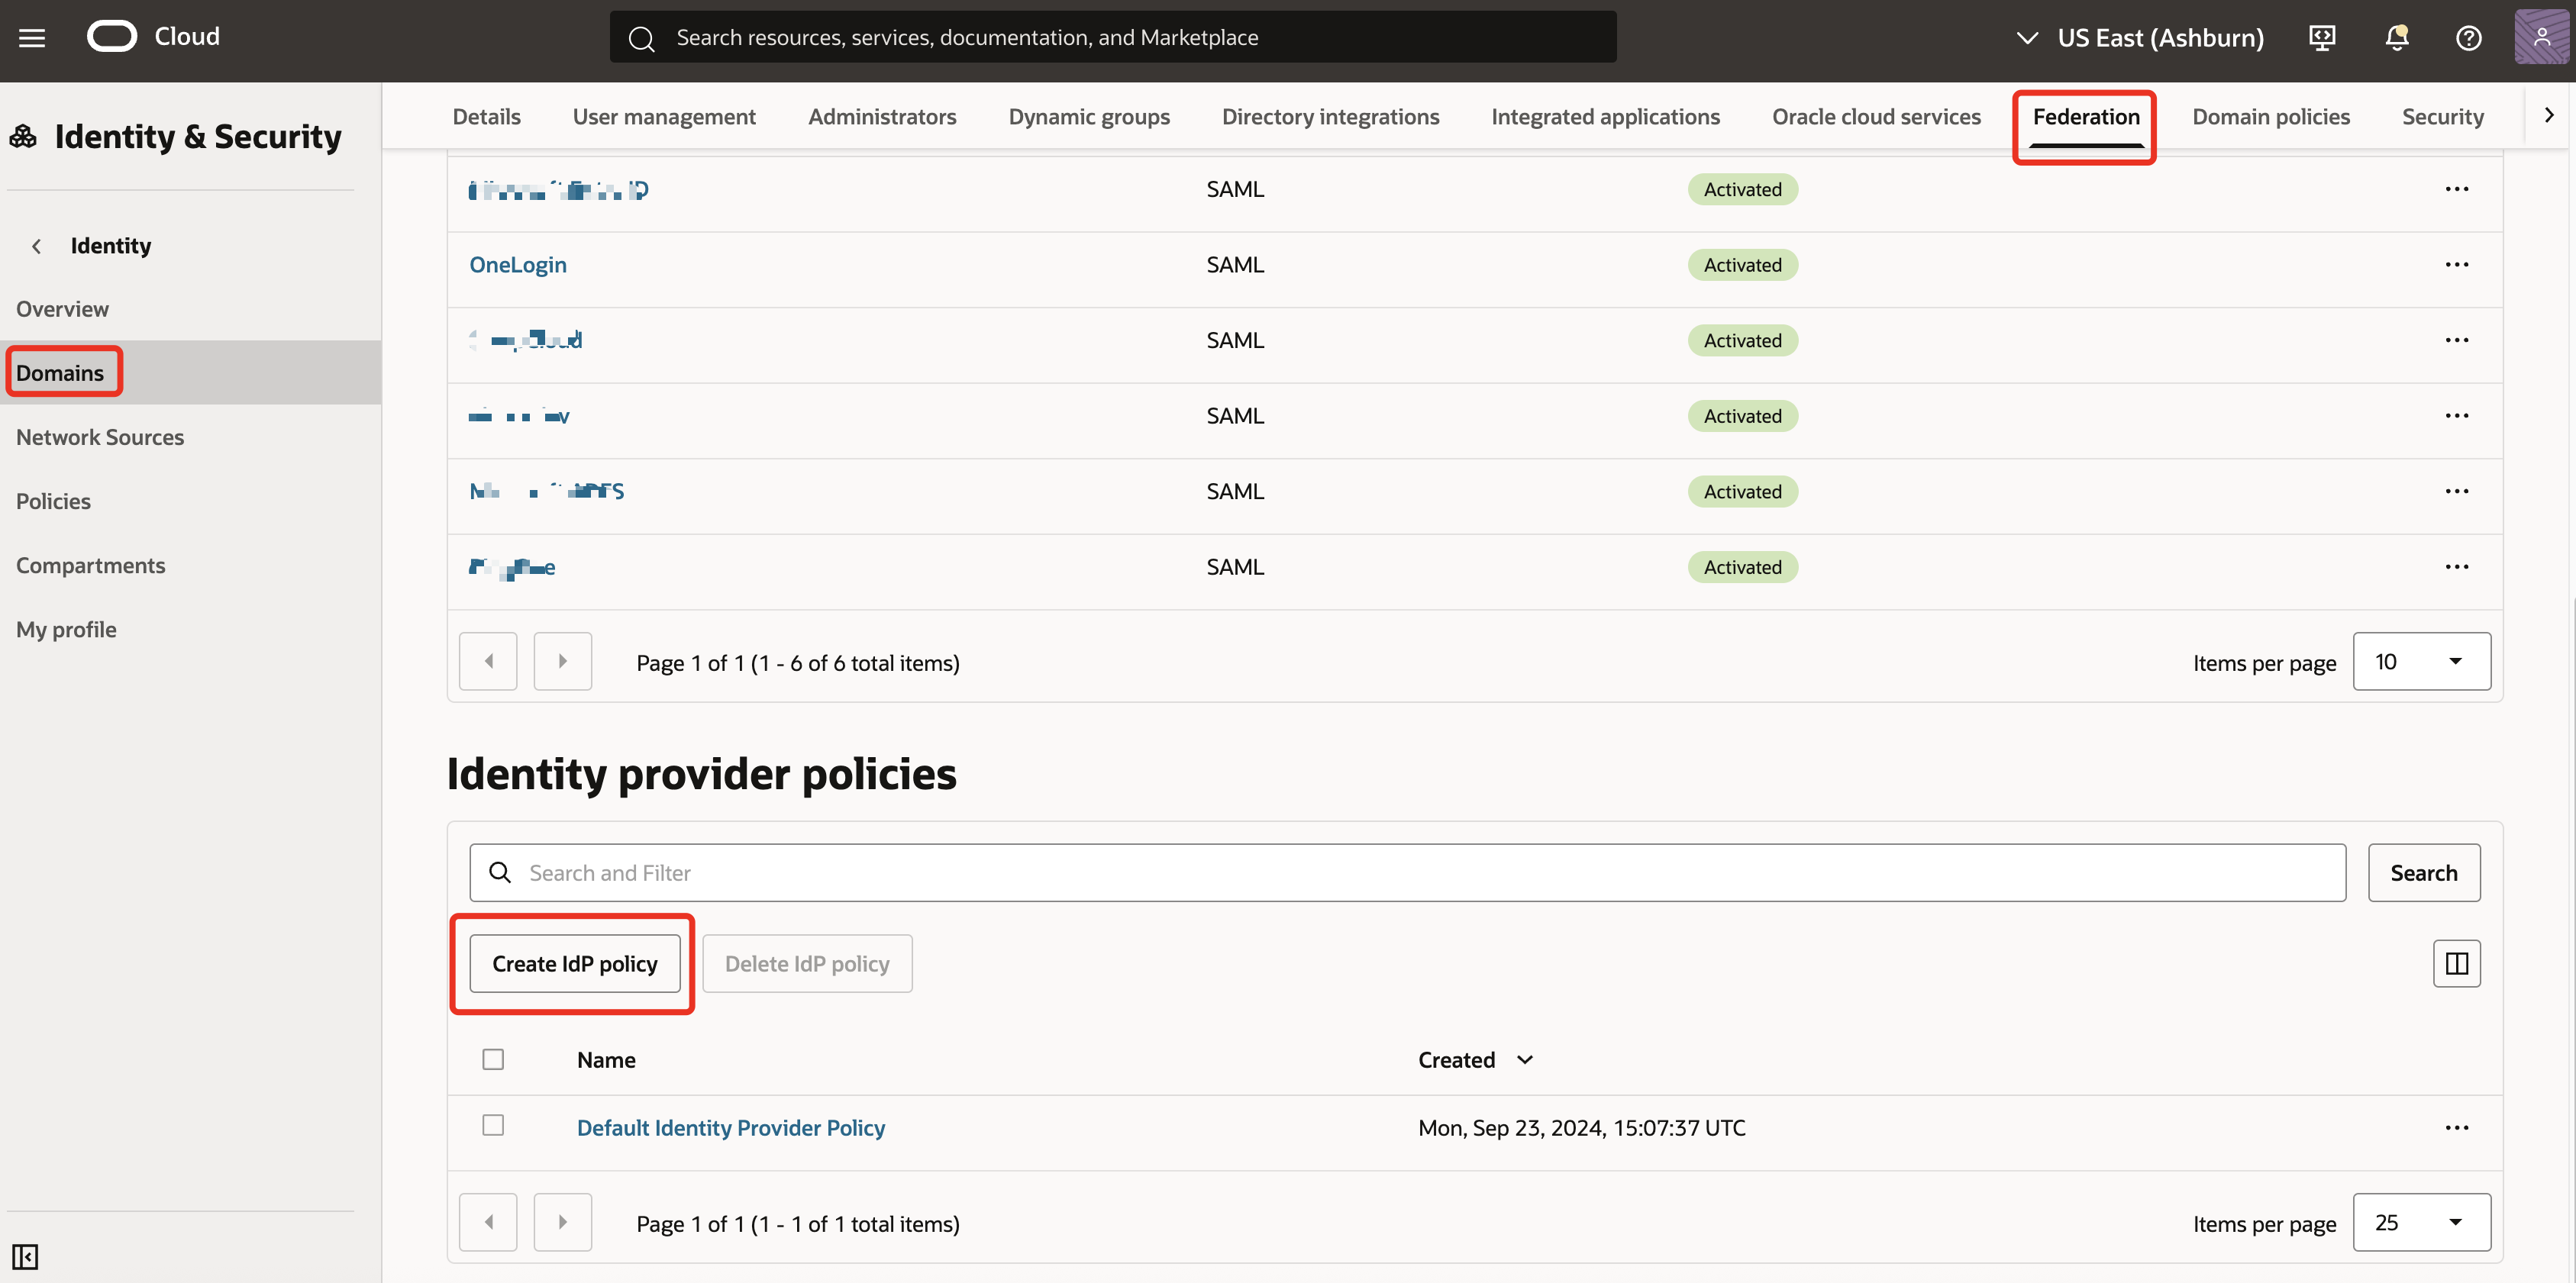
-
Enter a Name (for example,
OneLogin policy for OCI admins) and click Create identity provider policy.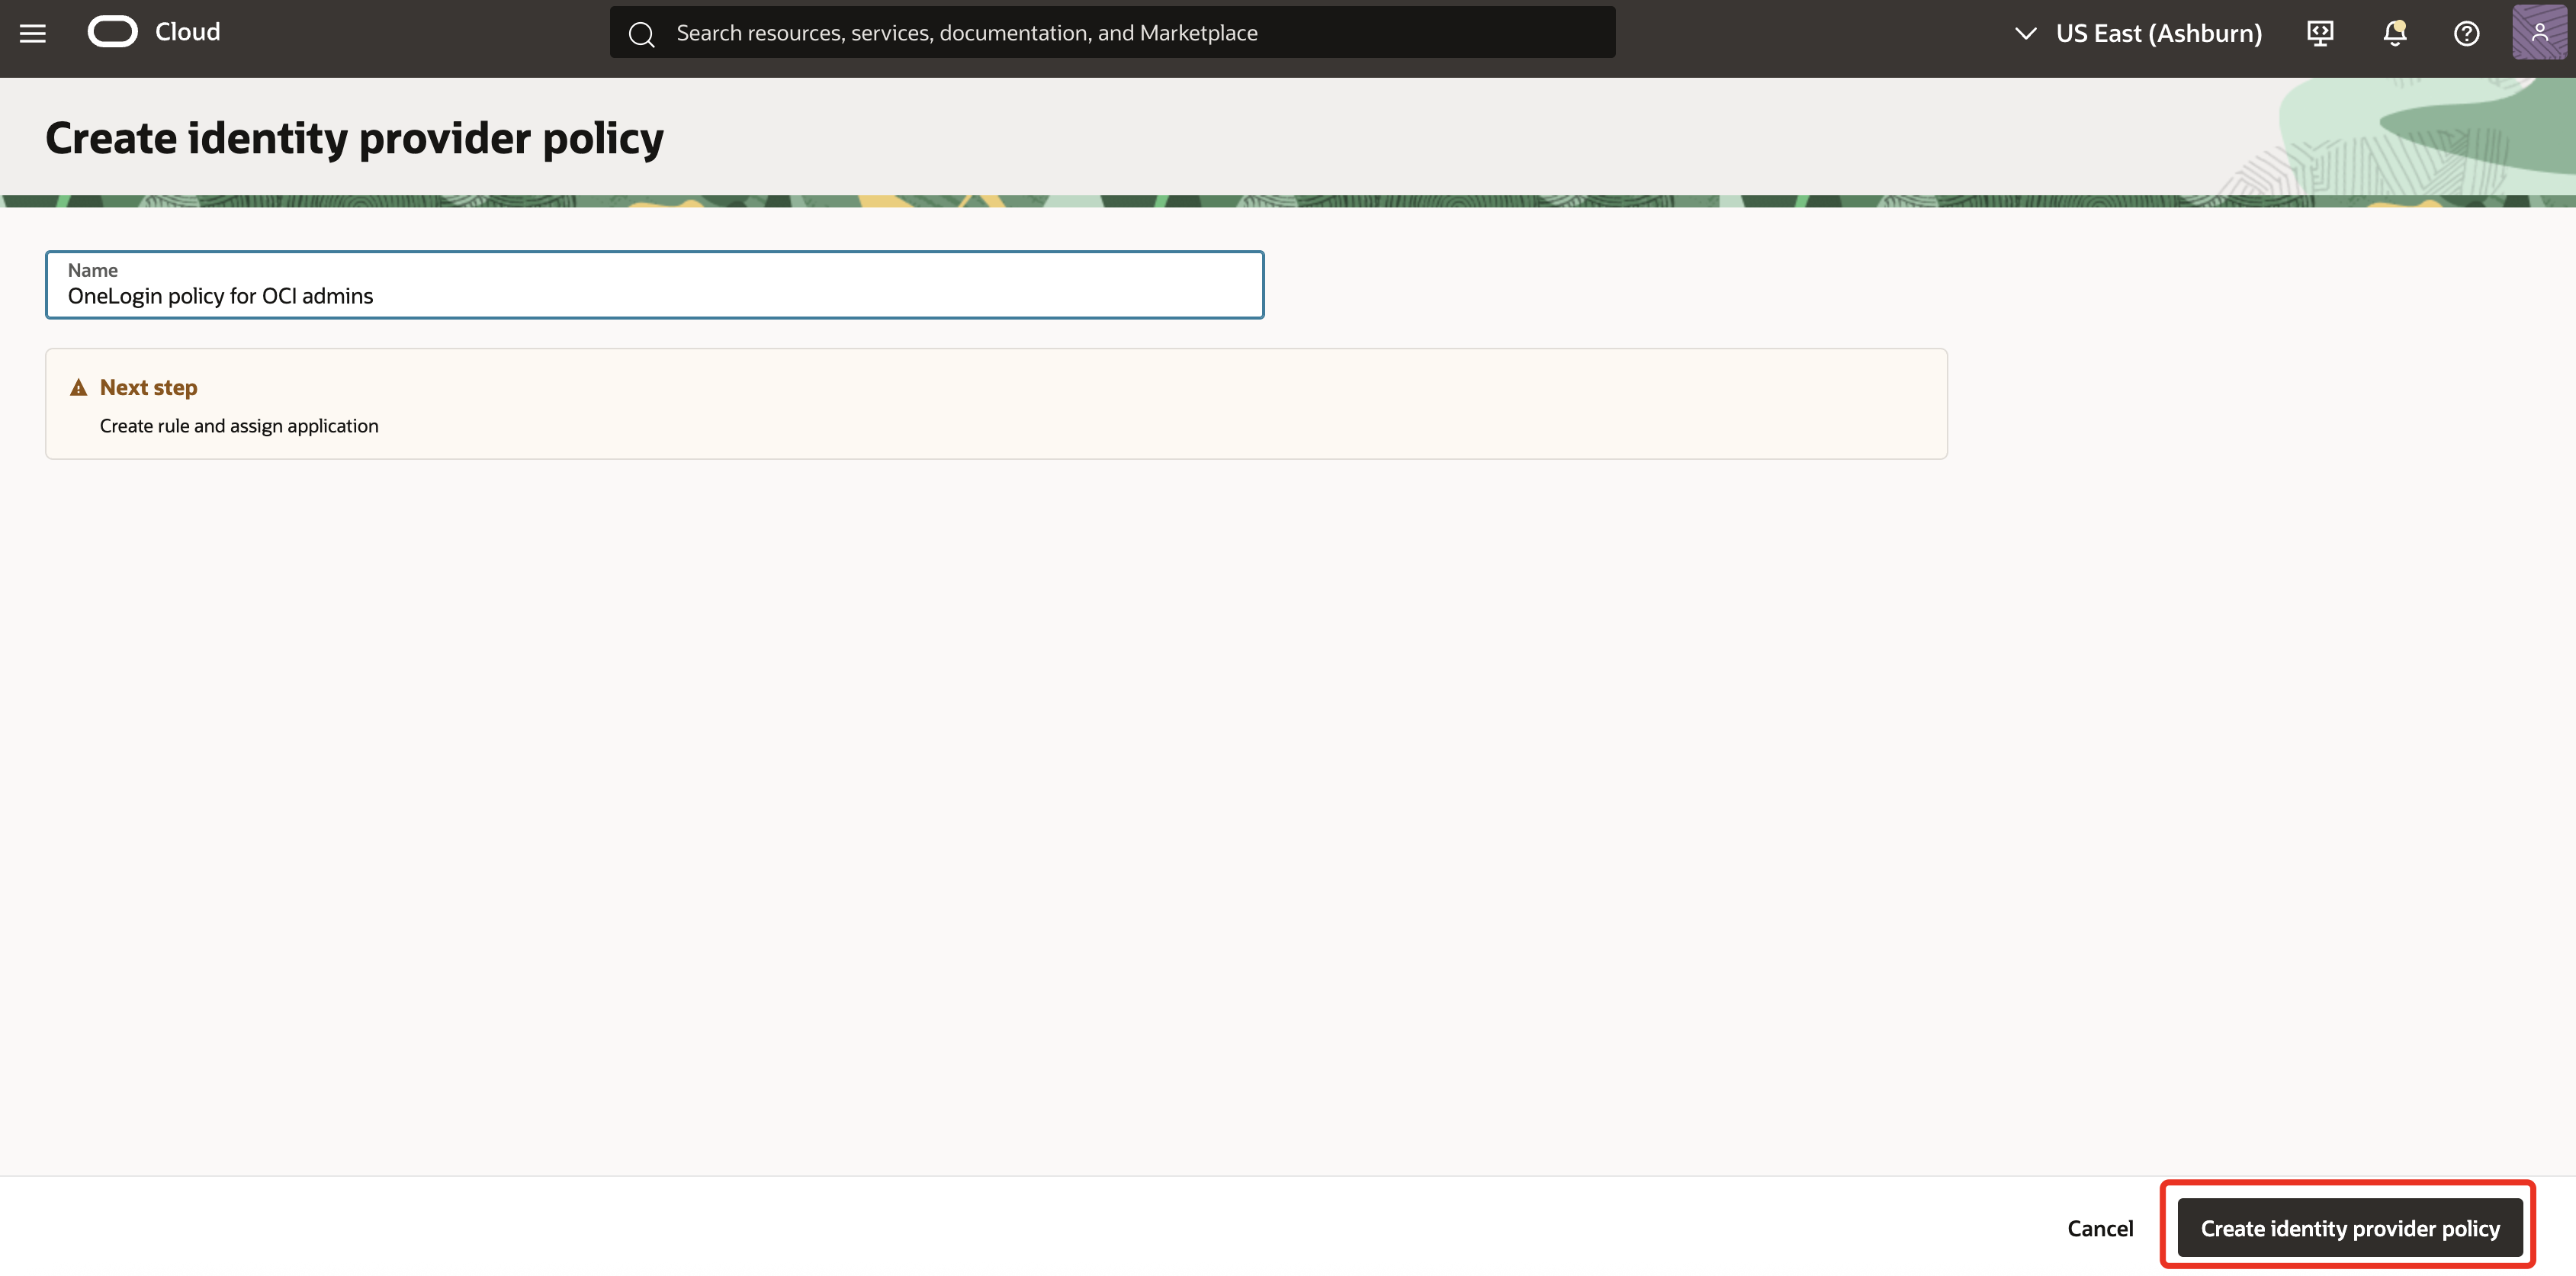
-
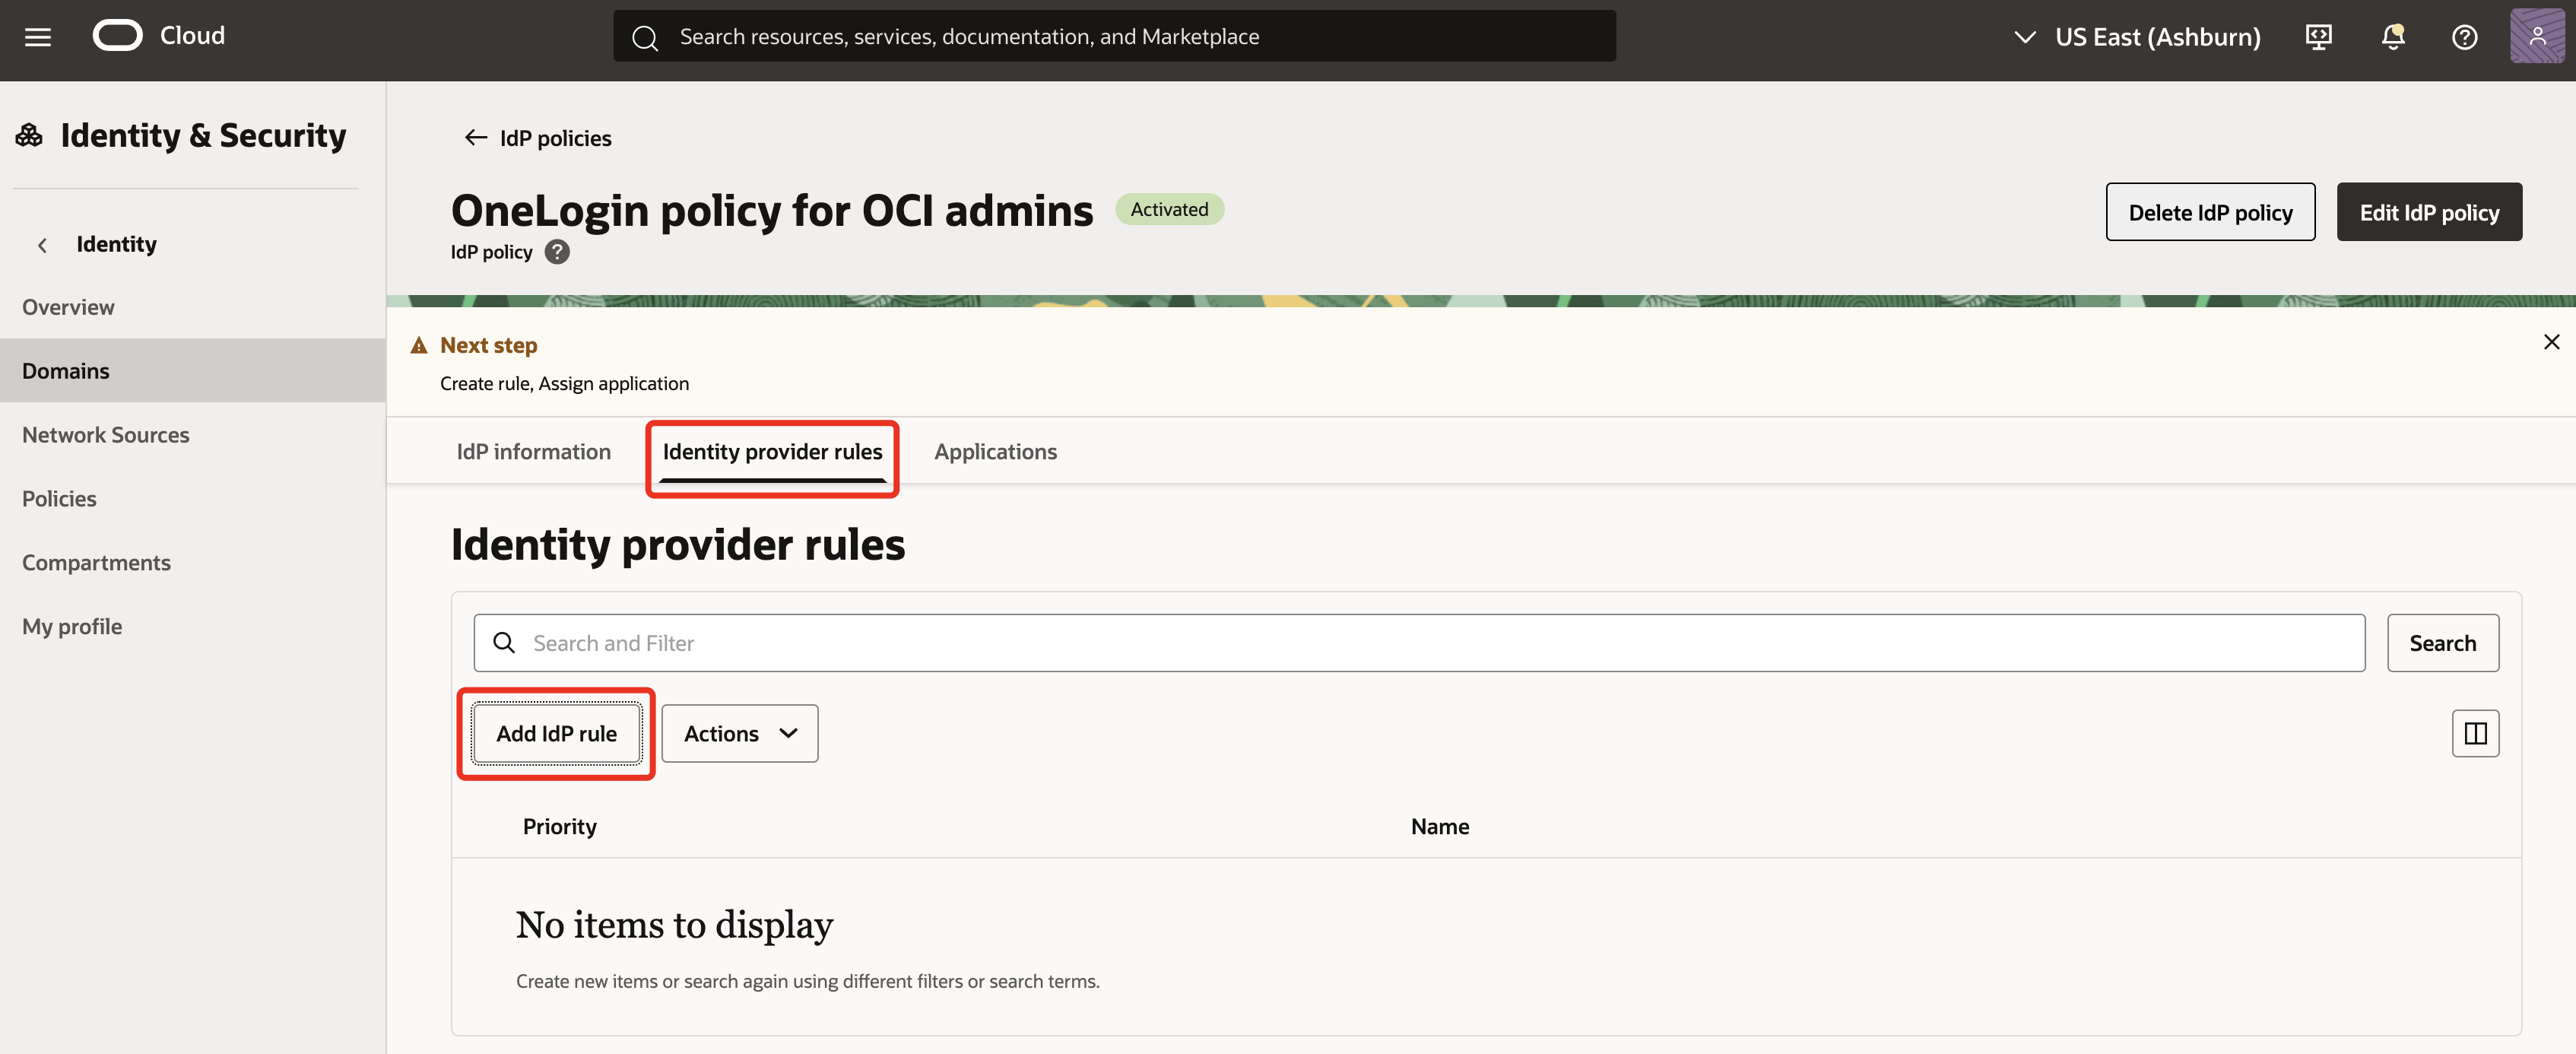
Goto Identity provider rules tab, click Add IdP rule.
-
Enter a Rule name (for example,
OCI Console access rule). Under Assign identity providers, select Username-Password and OneLogin. Once done, click Add IdP rule.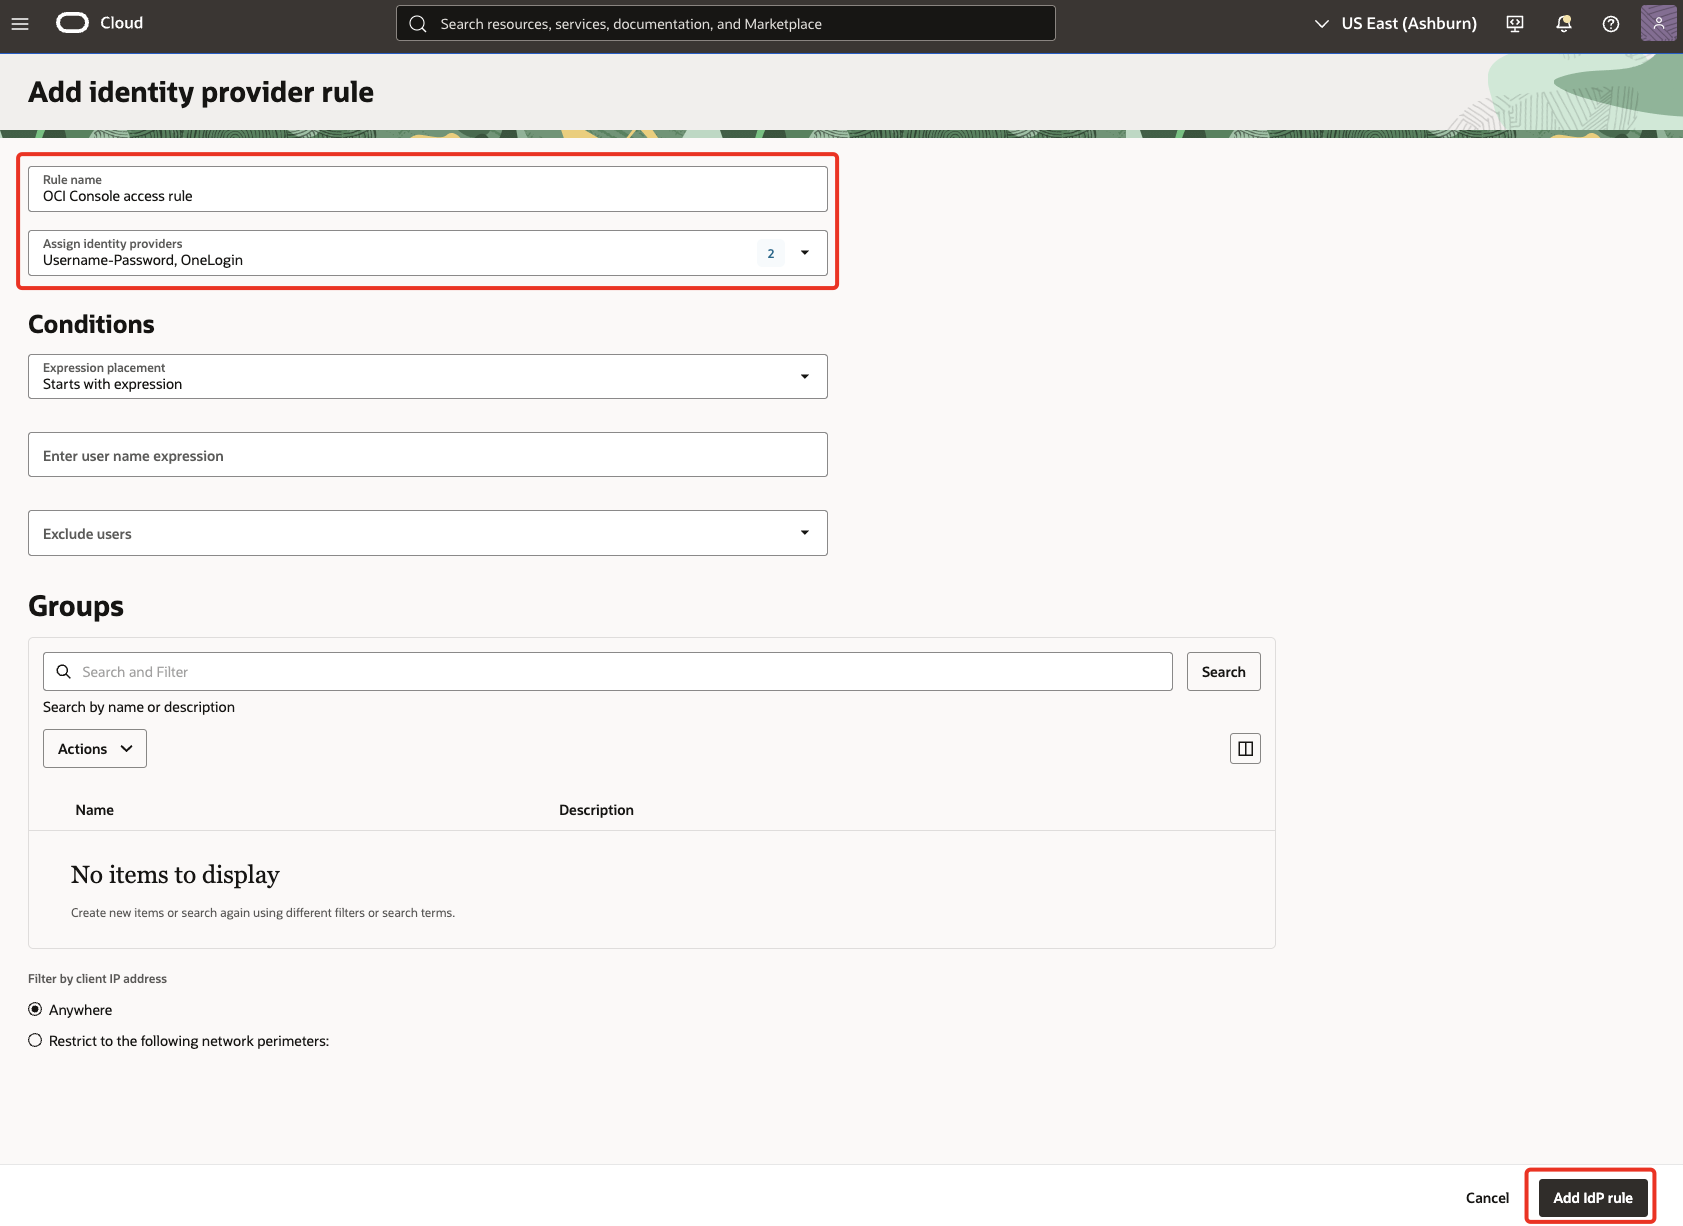
-
In
Applicationstab, click Add app, search and select OCI Console from the list. Click Add app and then Close.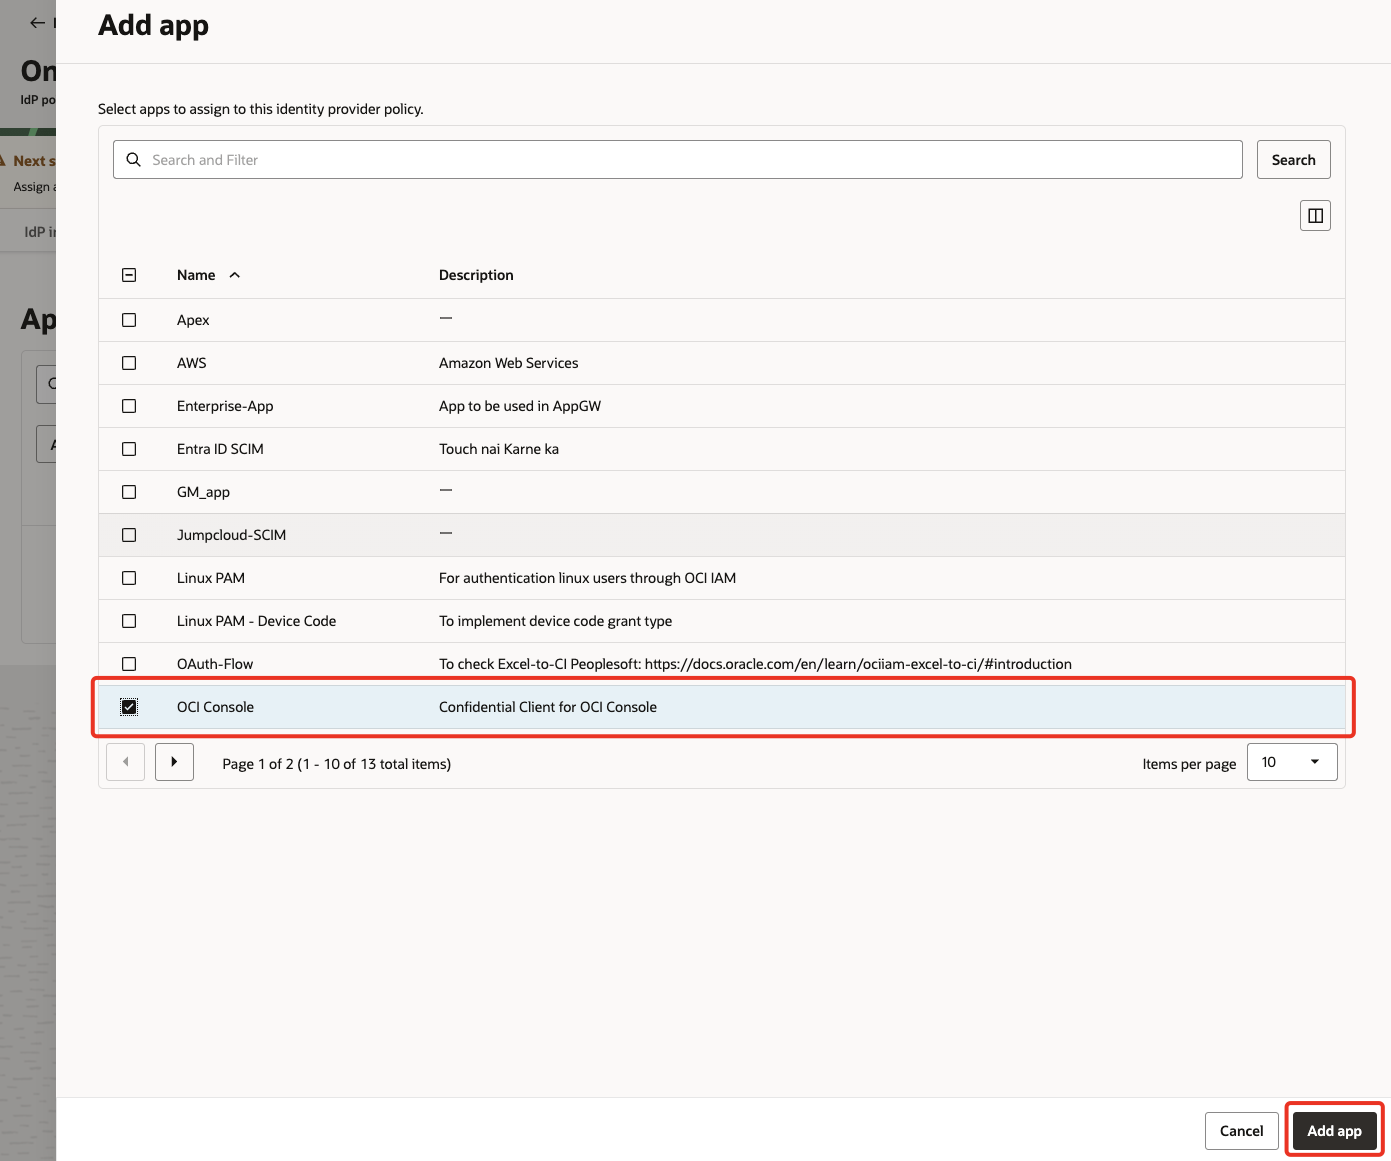
Note: Next, the sign-on policy for OCI console will be carefully changed. New rules will be added to allow federated users to bypass OCI MFA, as authentication is handled at OneLogin.
-
Back in the domains, goto Domain policies tab & click on the sign-on policy
Security Policy for OCI Console.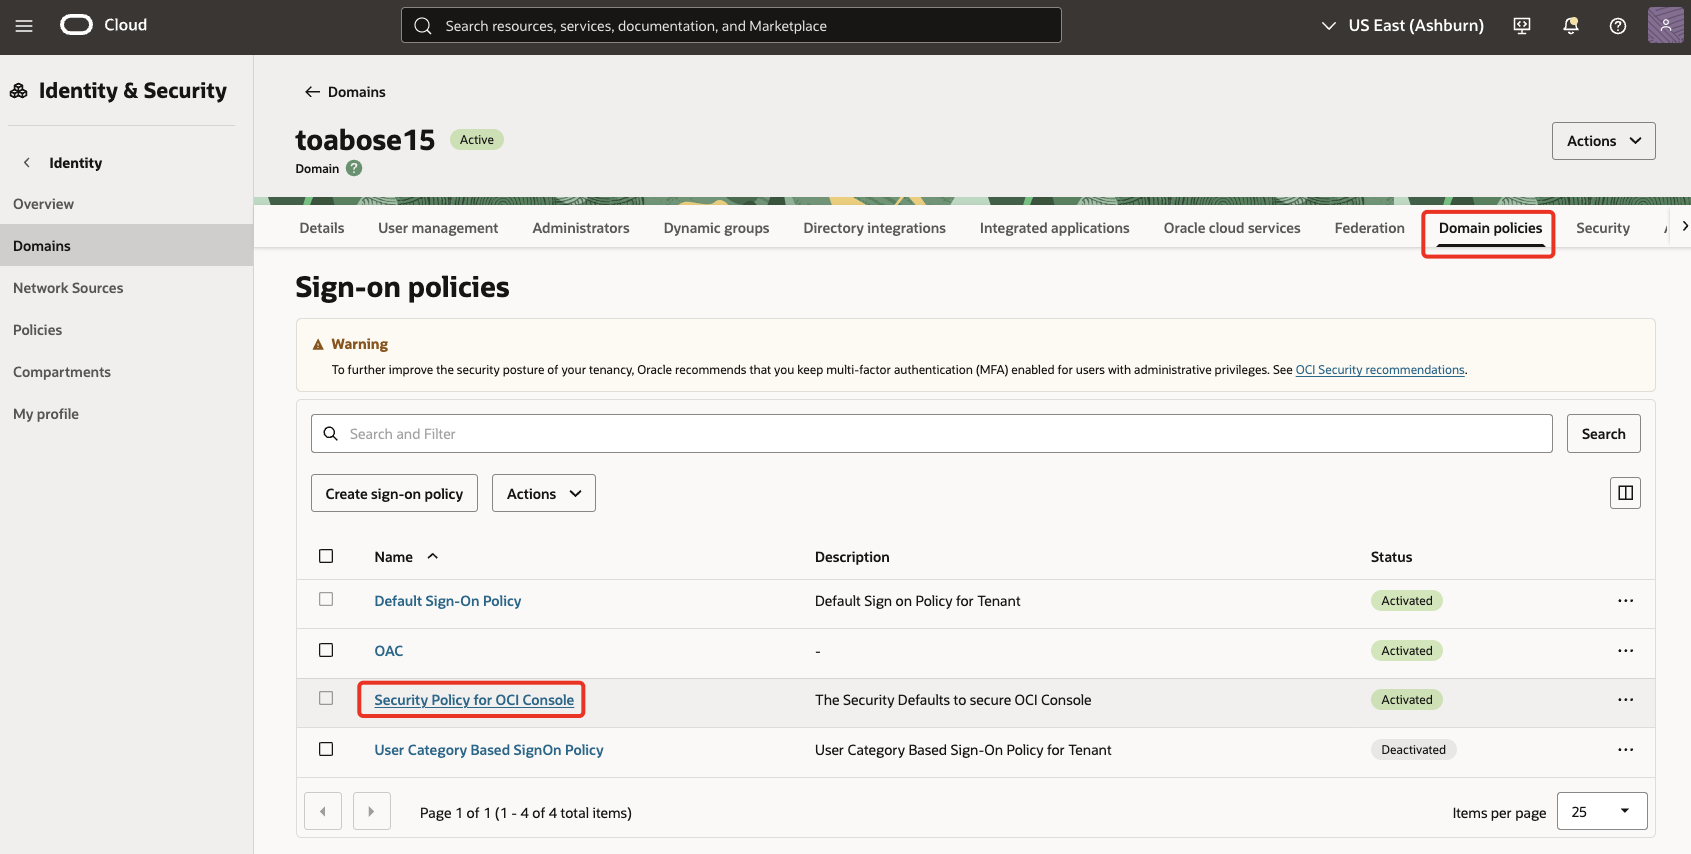
-
Under
Sign-on rulesclick on Add sign-on rule. Enter a Rule name (for example,OneLogin users) & choose theAuthenticating identity providerasOneLogin.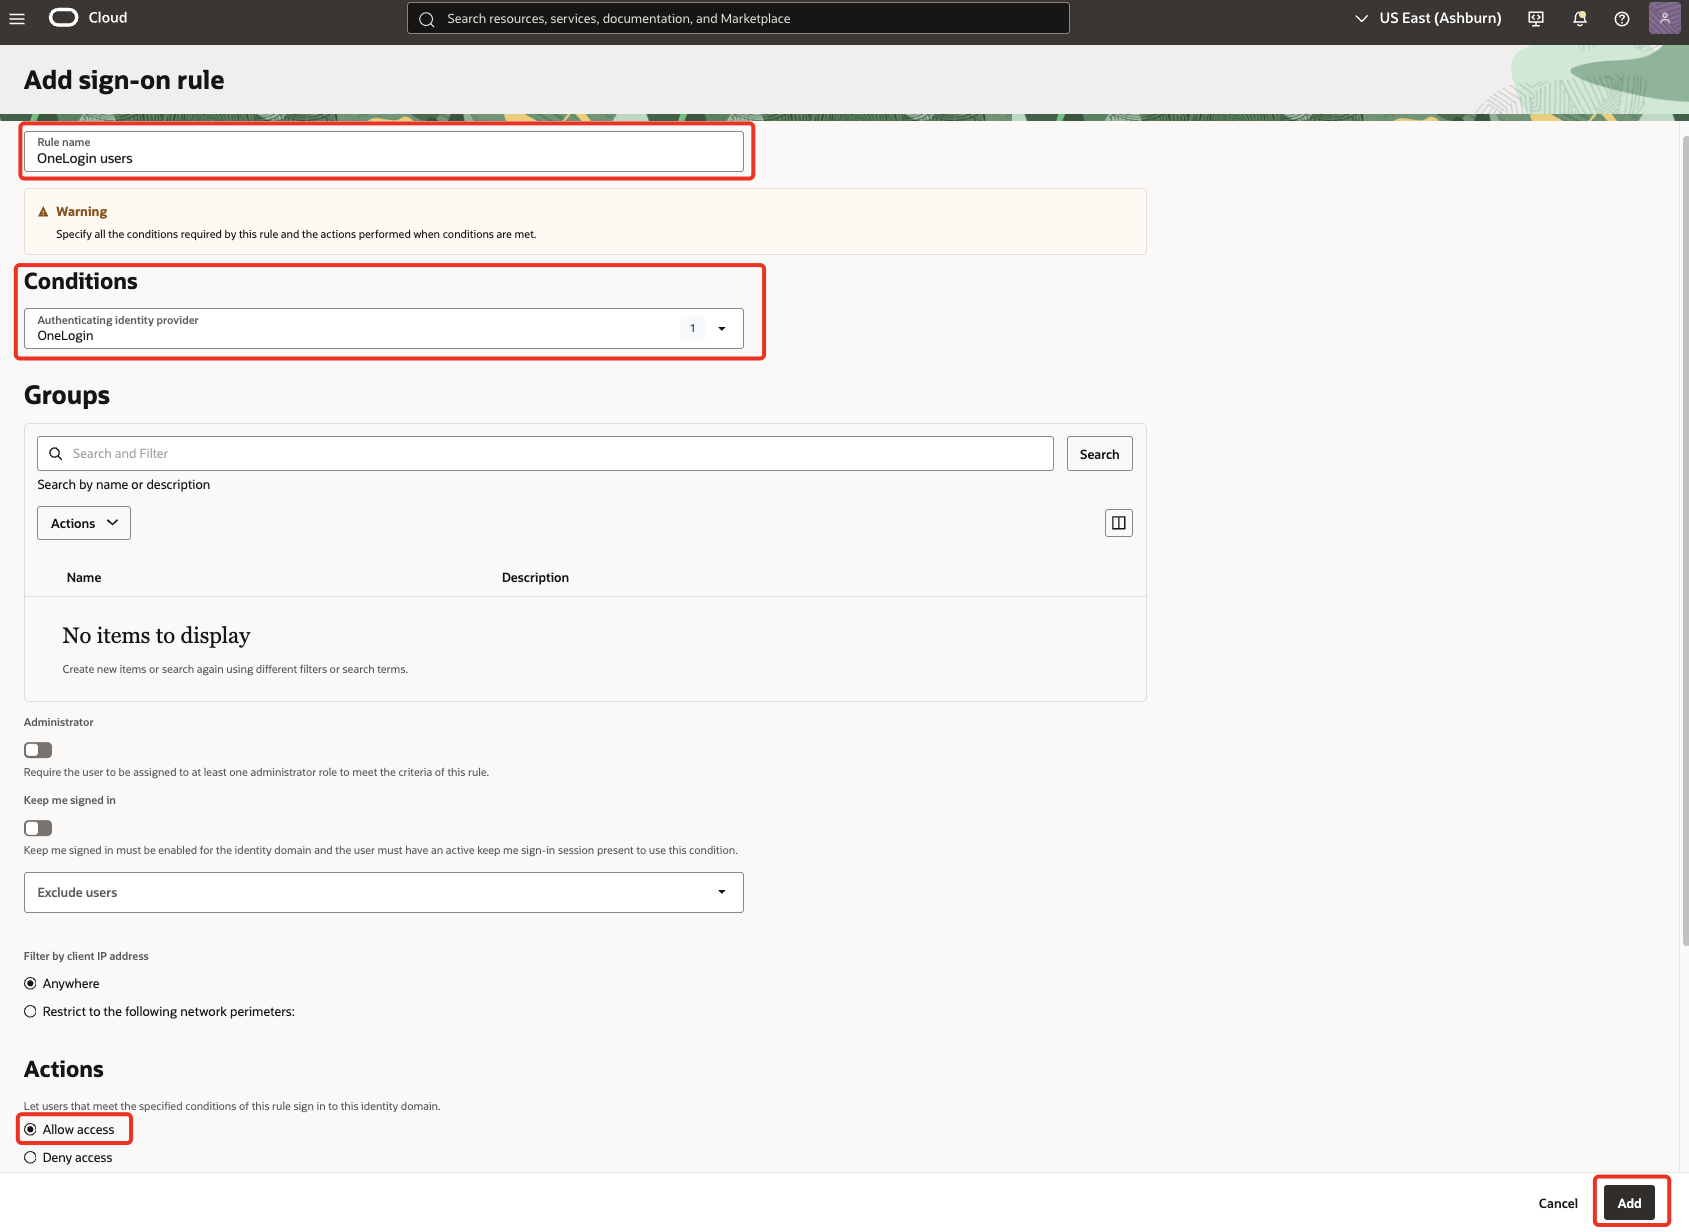
-
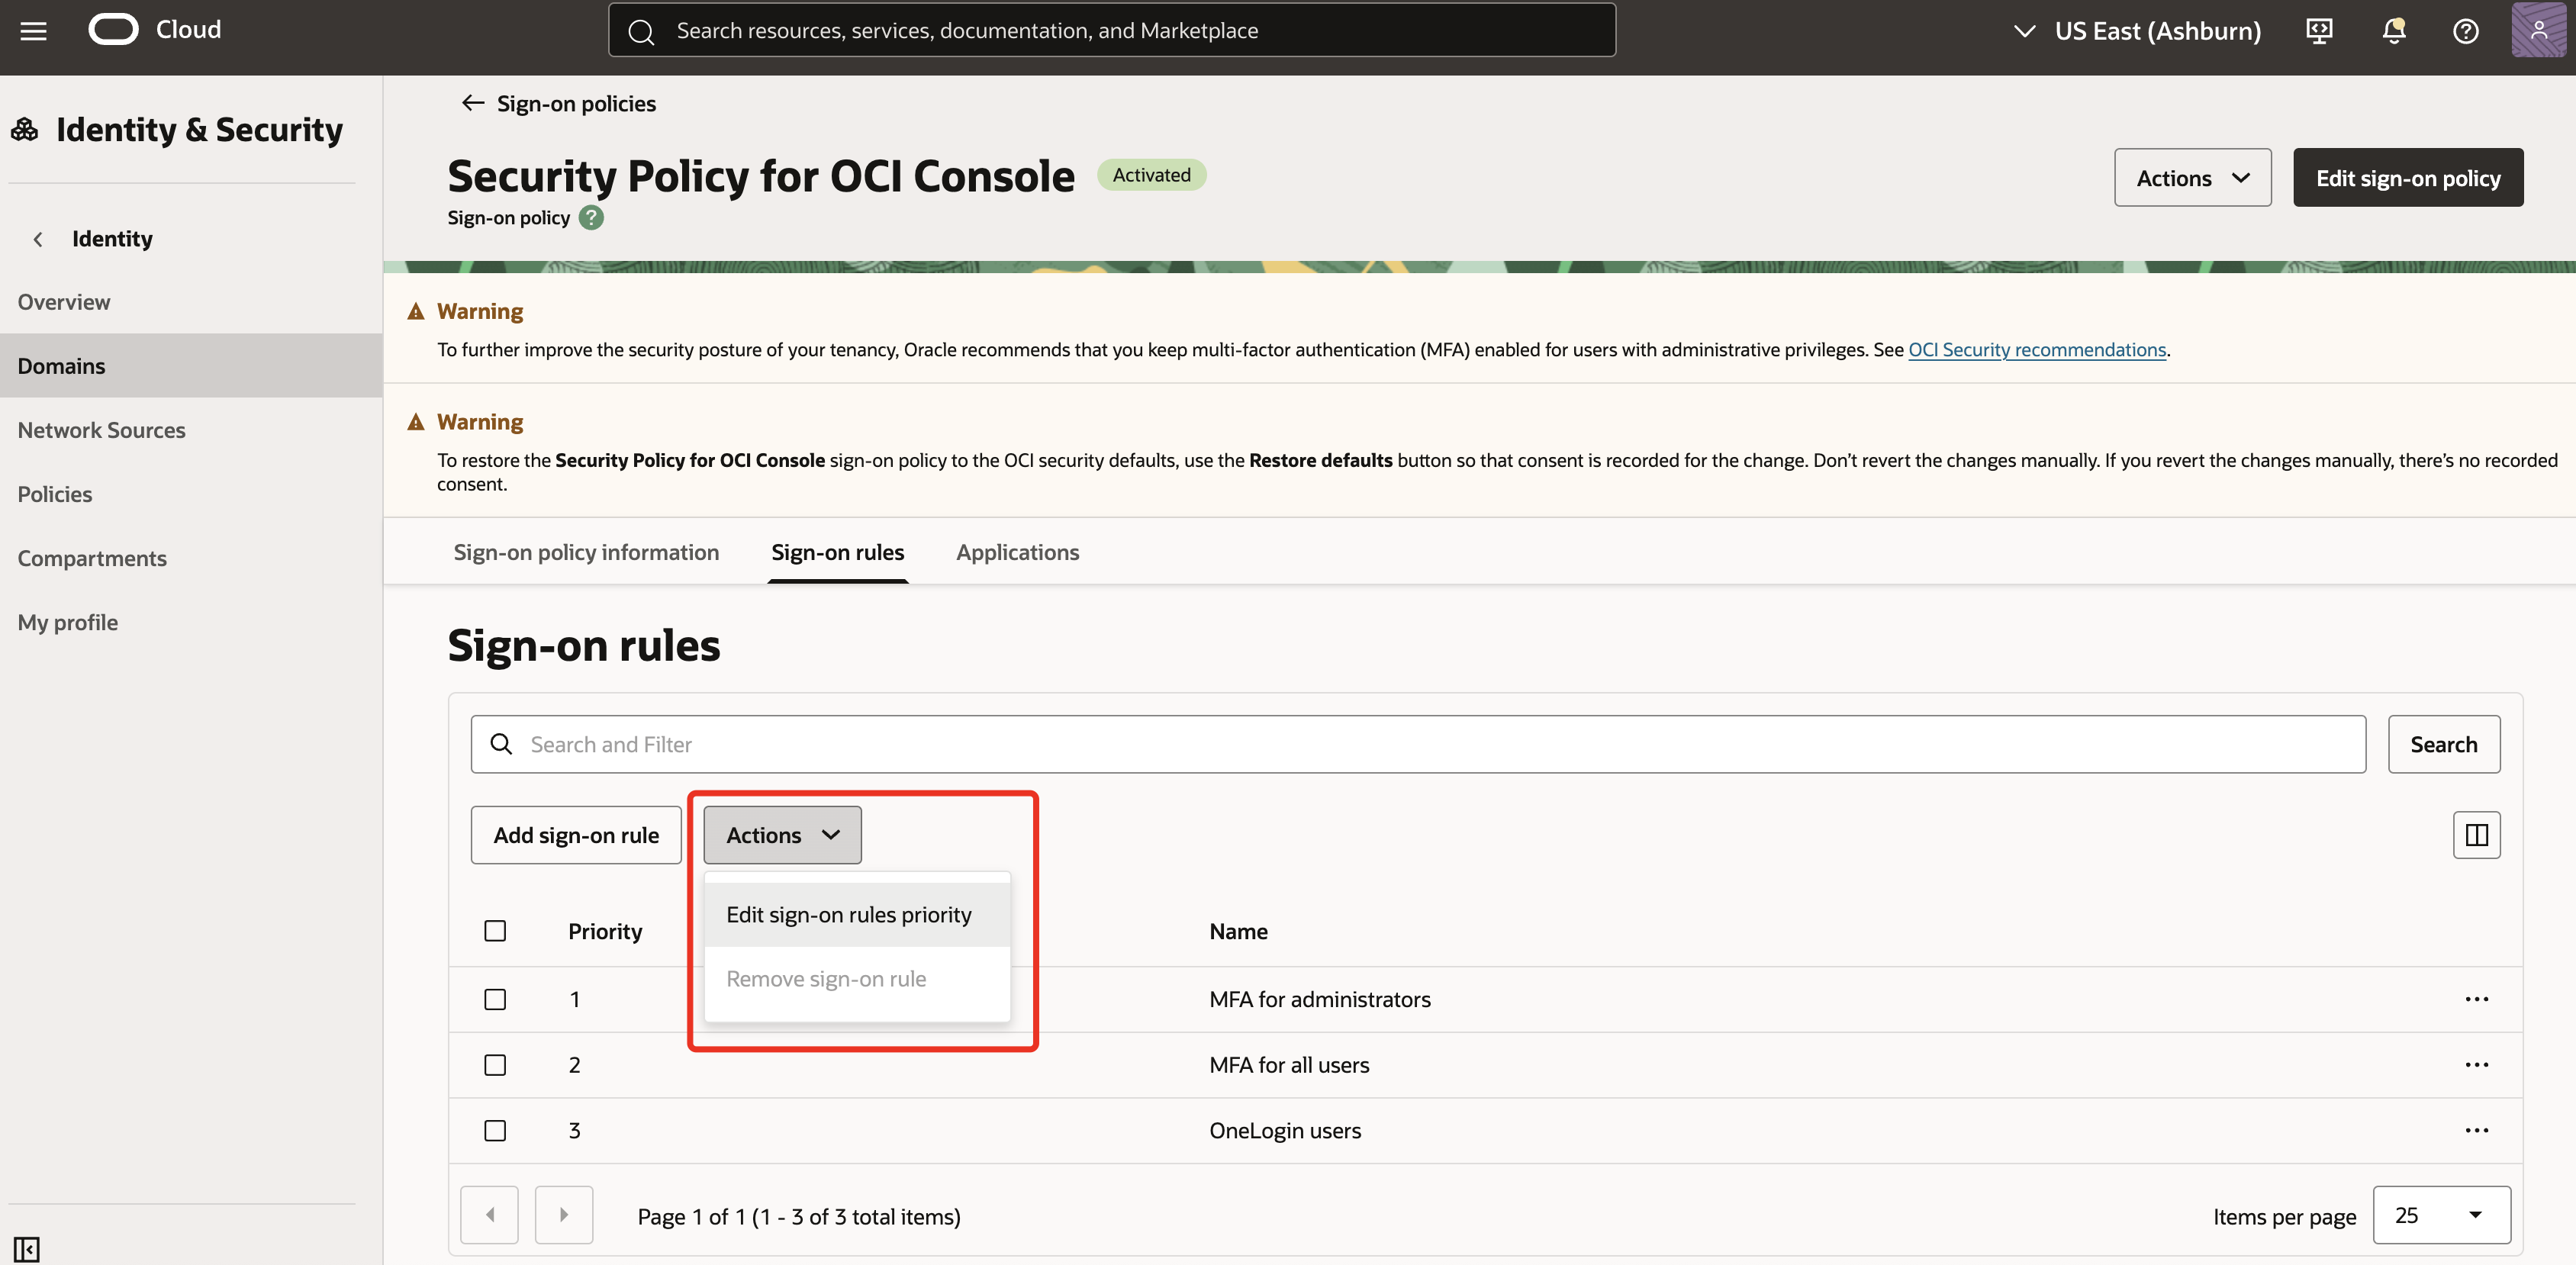
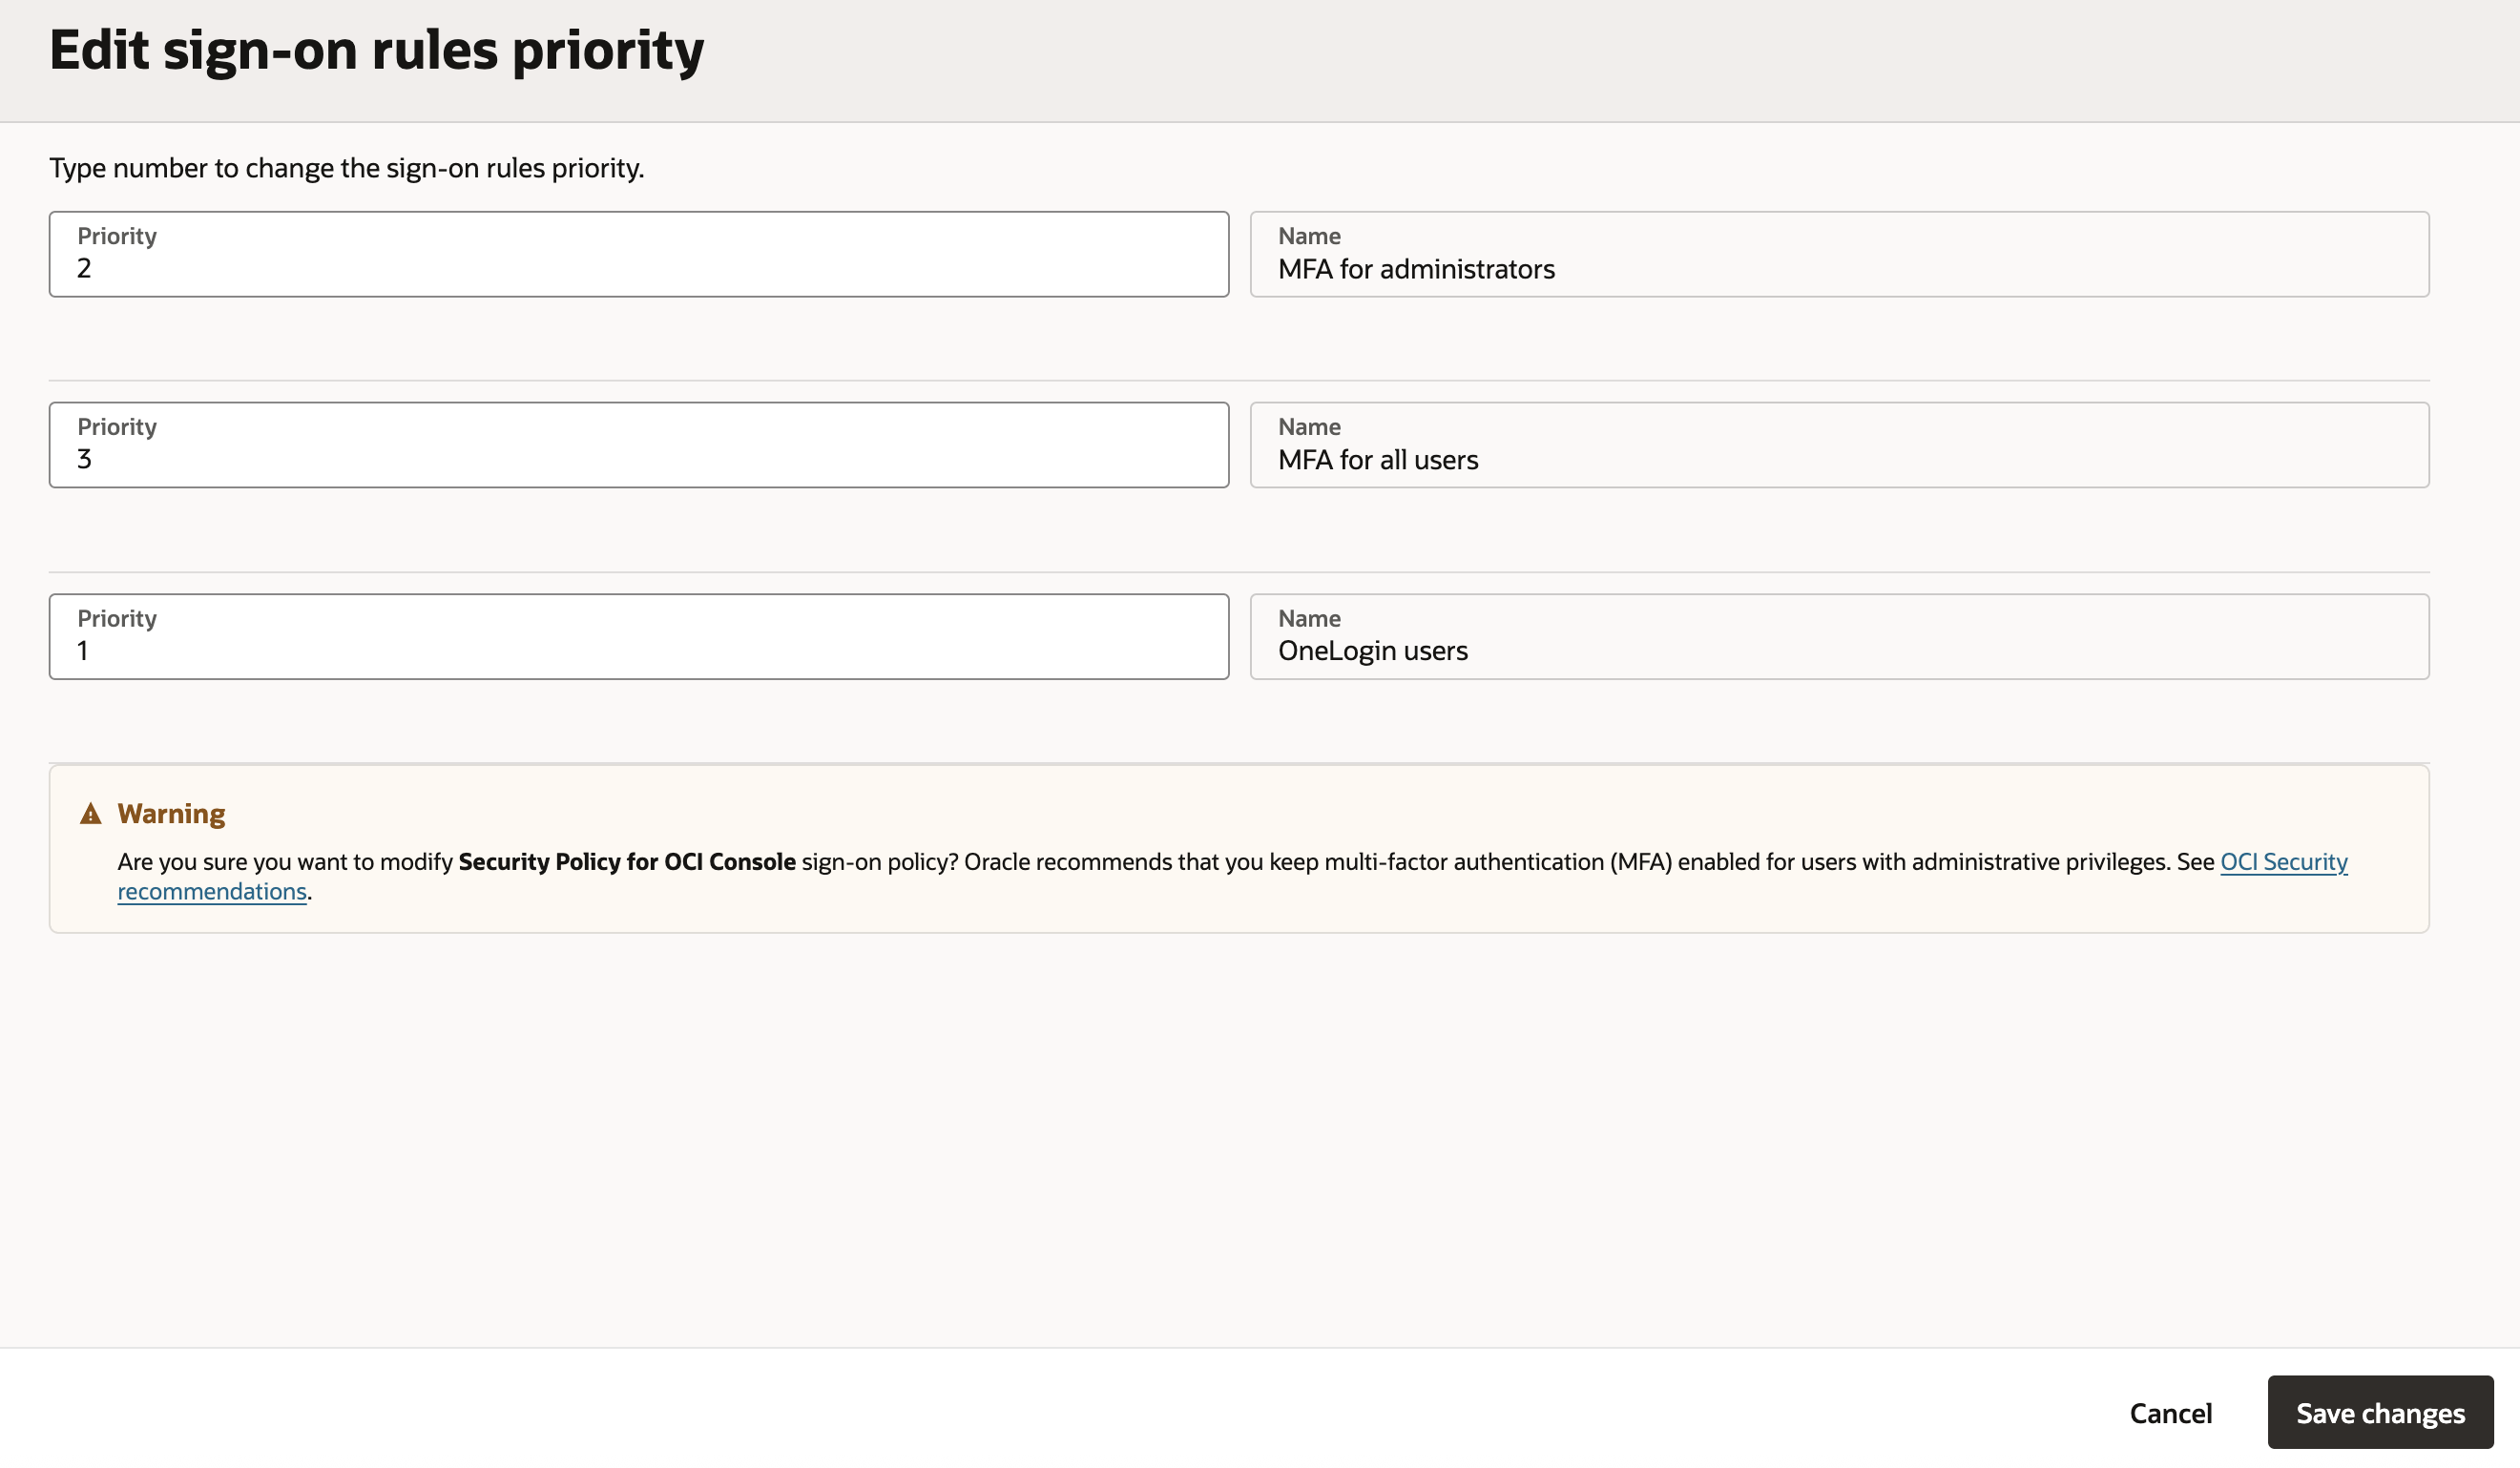
Under Actions, click on
Edit sign-on rules priority. Update the priority number of the new rule to 1 & click Save changes.
Section 2: Setup SCIM 2.0 based User Provisioning
The user lifecycle management is configured between OneLogin and OCI IAM, where OneLogin acts as the identity store. Ensure that all users intended for provisioning downstream have appropriate values populated for the following attributes:
- Username
- First Name
- Last Name
Disclaimer:
- The construct of a ‘user-group’ is different in OneLogin. Access control for applications, as well as defining scope of user-provisioning is done by Roles.
- Role membership can be defined by either creating mapping-rules or through manual assignment.
- Mapping-rules can be created for auto-assignment of users to roles, based on user-attributes like
Department,Groups, etc. - If there is a Microsoft Active Directory integration, Distinguished Name (DN) of member groups are available in
Member ofattribute.
Task 2.1: Create a Confidential Application in OCI IAM and Generate Secret Token
An OAuth 2.0 client is registered in OCI IAM. Appropriate flows are enabled and privileges are granted. The credentials for this client are collected.
-
Go to the OCI Console, navigate to Domains and select the domain that was used in Section 1.
-
Go to Integrated applications, select Add application.
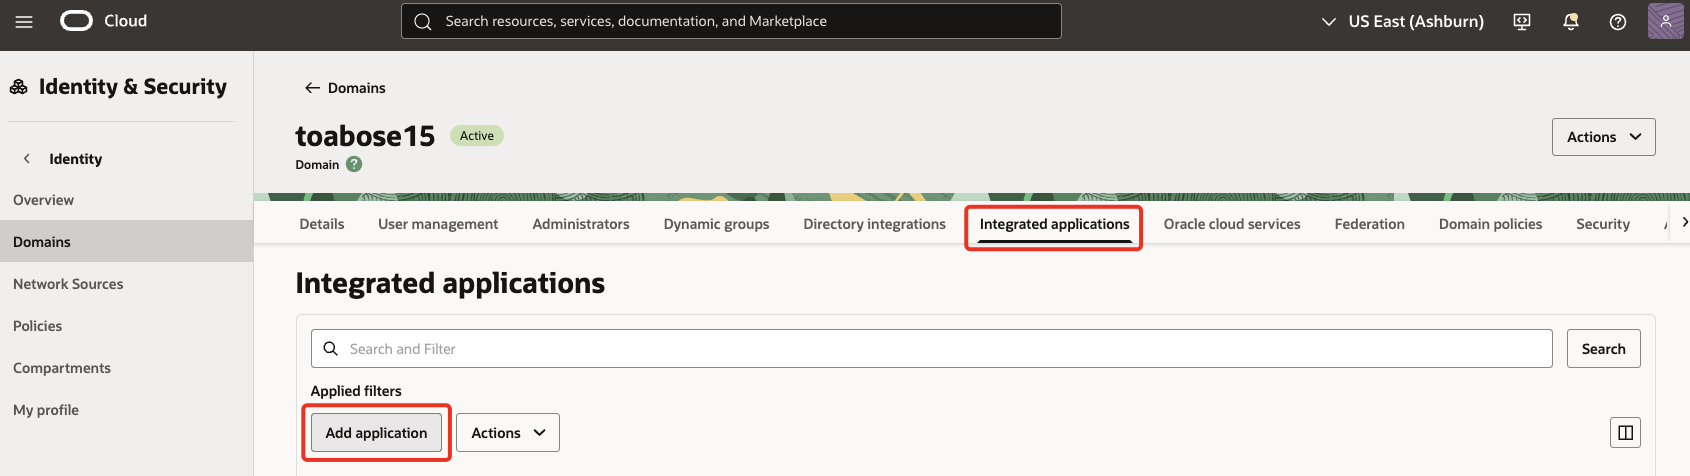
-
Select Confidential Application and click Launch workflow.
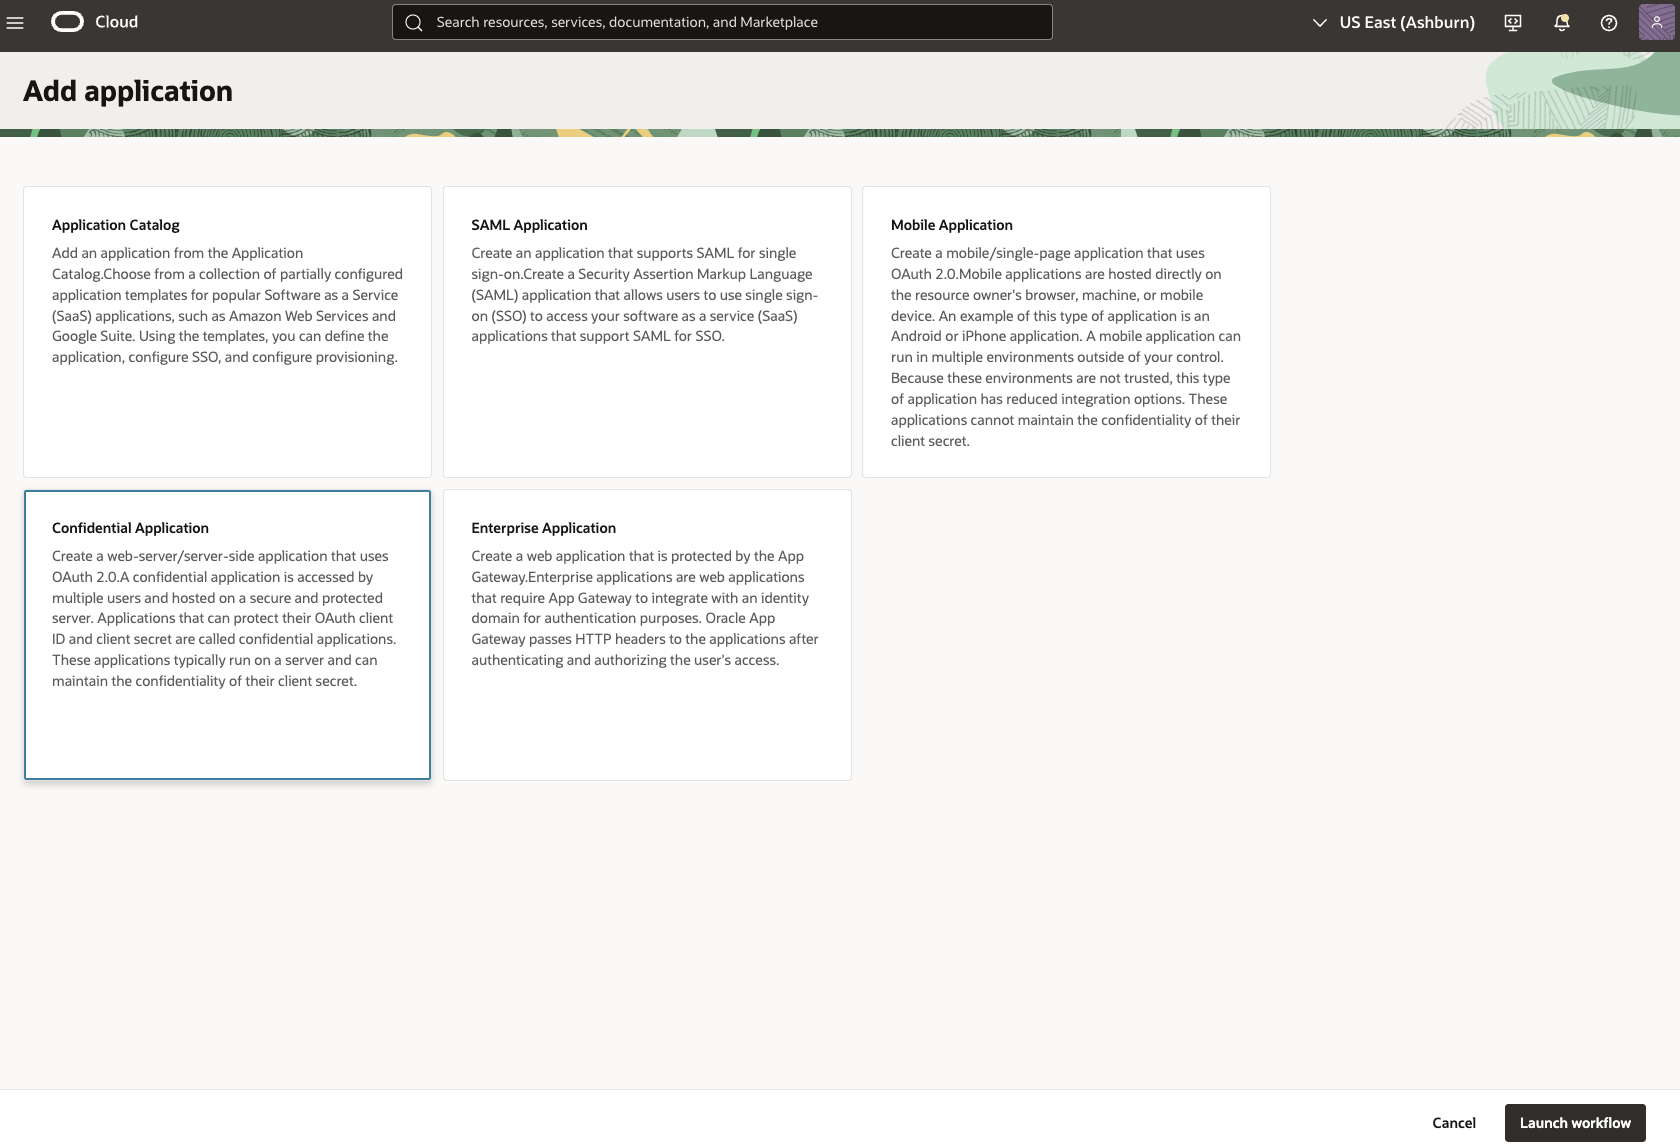
-
Enter a Name (for example,
OneLogin SCIM client) for the confidential application and click Submit.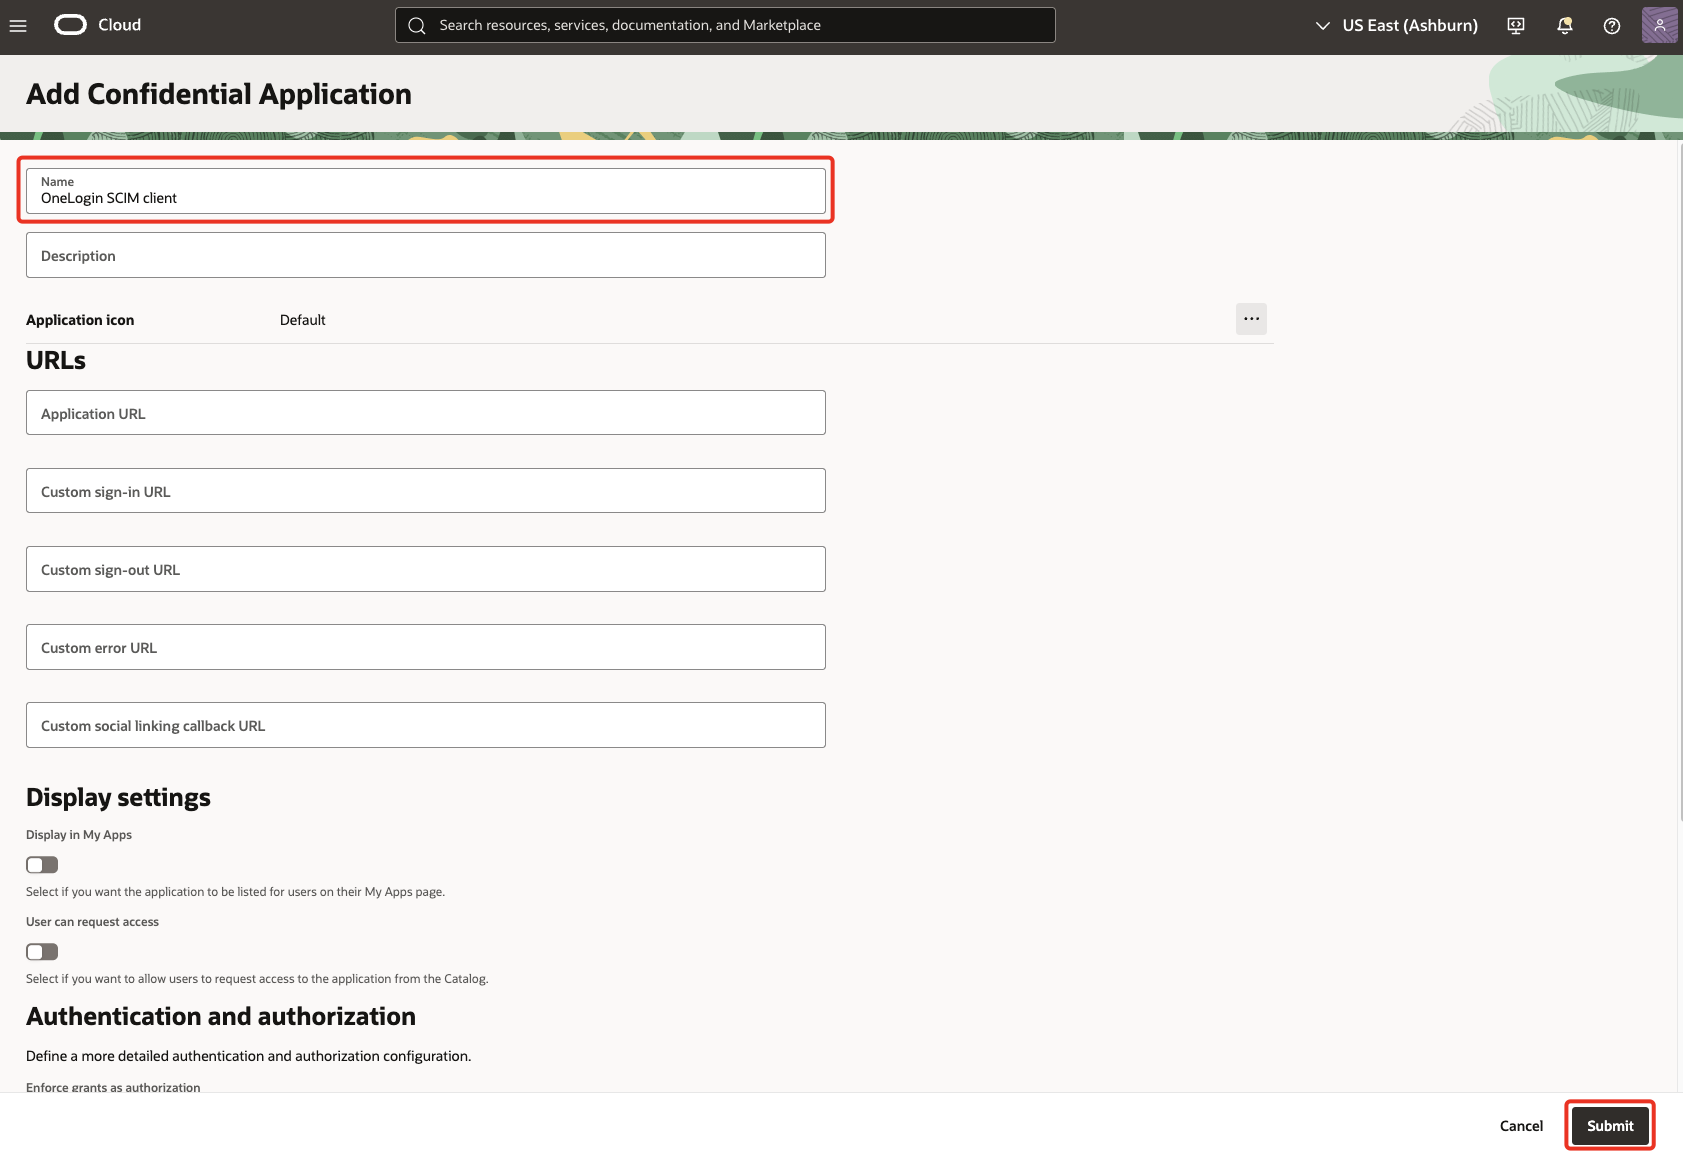
-
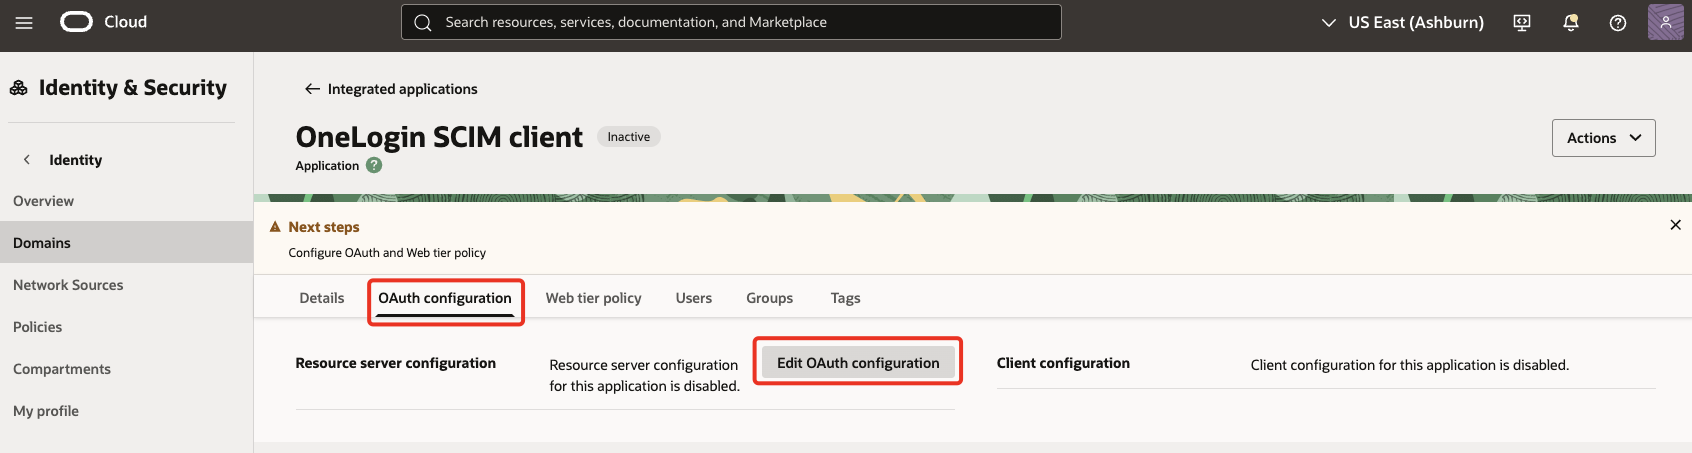
In the OAuth configuration section, select Edit OAuth configuration.
-
Under Client configuration, select
Configure this application as a client now. Place a check onClient credentials.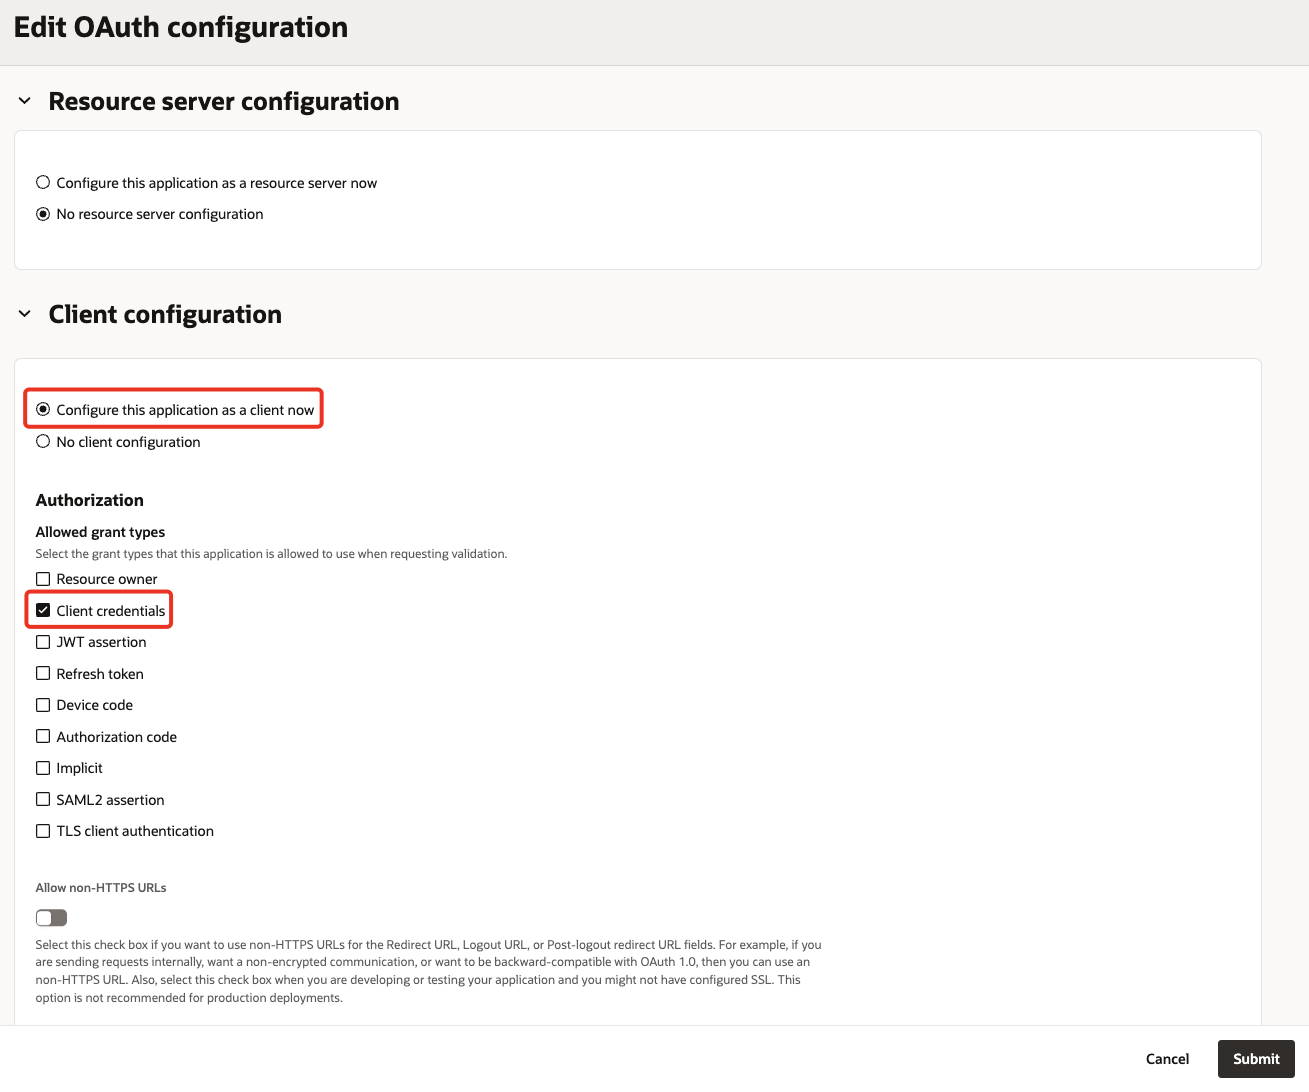
-
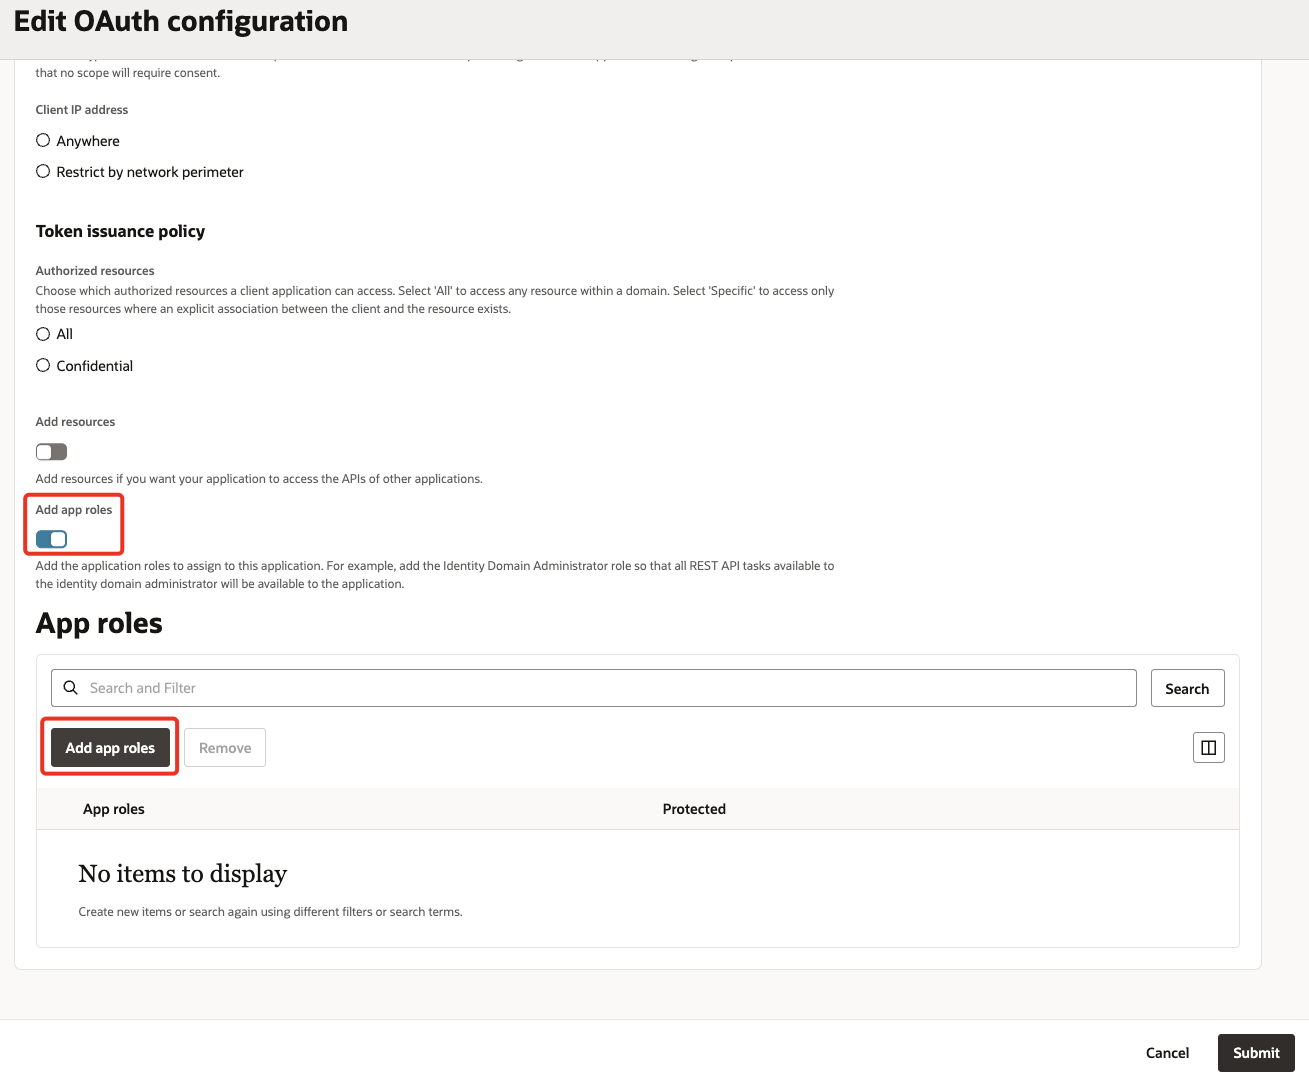
Scroll down & turn on Add app roles. Click Add app roles.
-
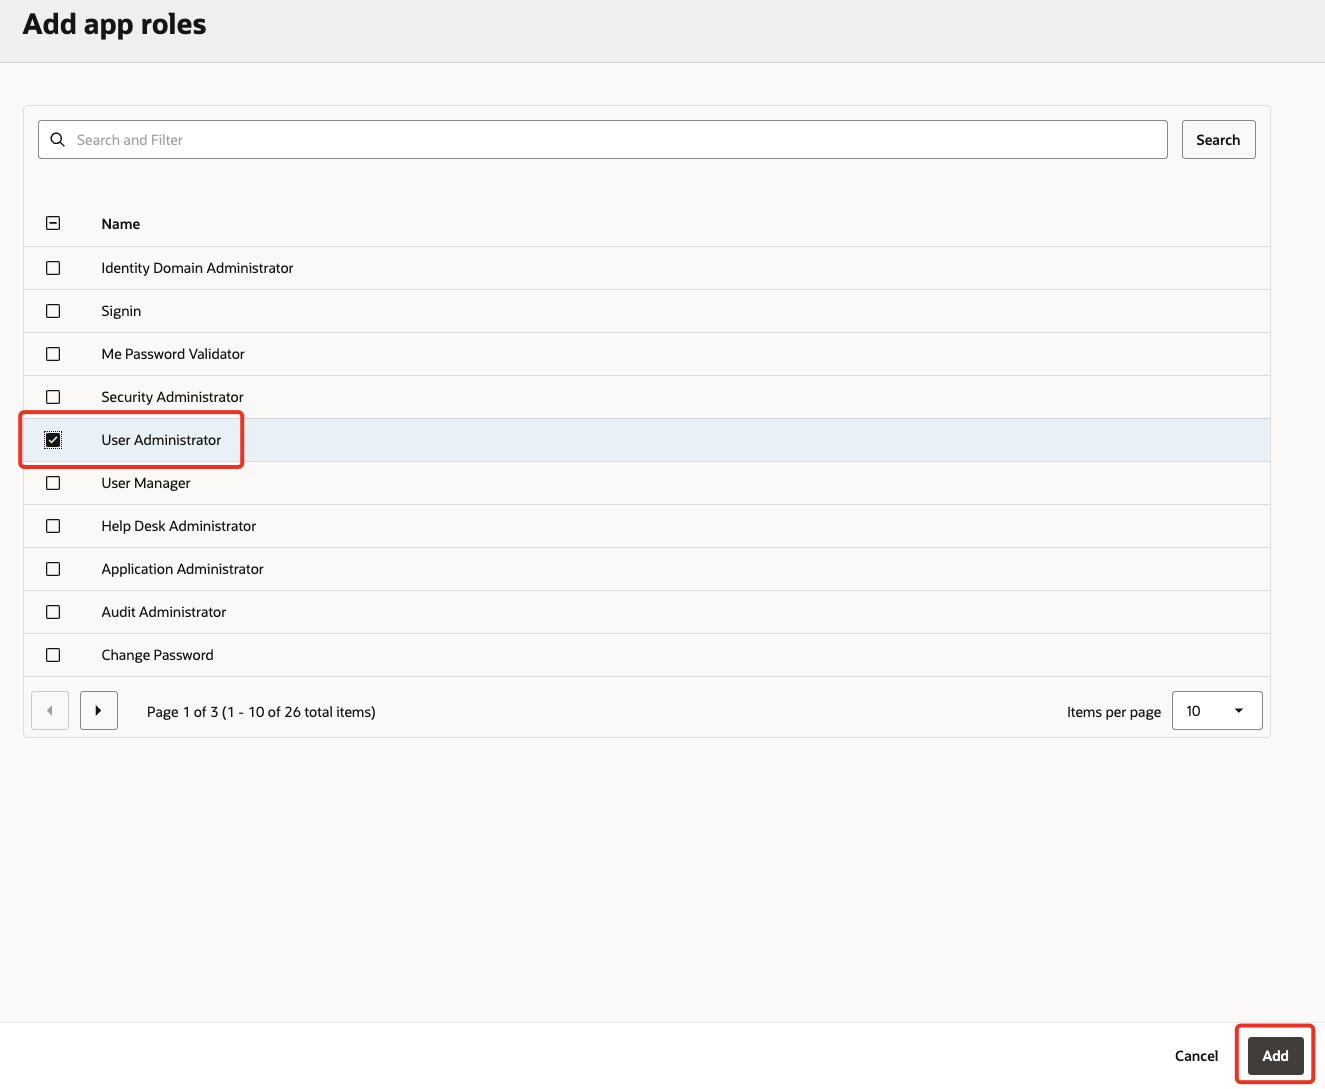
Select User Administrator and click Add.
-
Click Submit on the final screen.
-
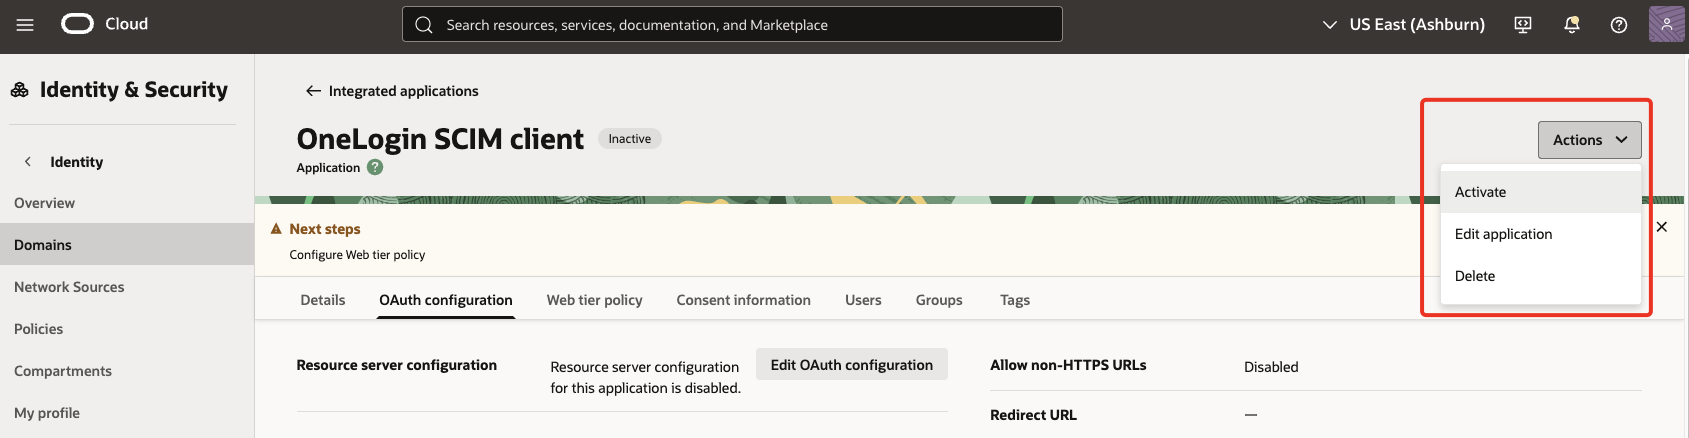
Under Actions, click Activate to activate the new application.
-
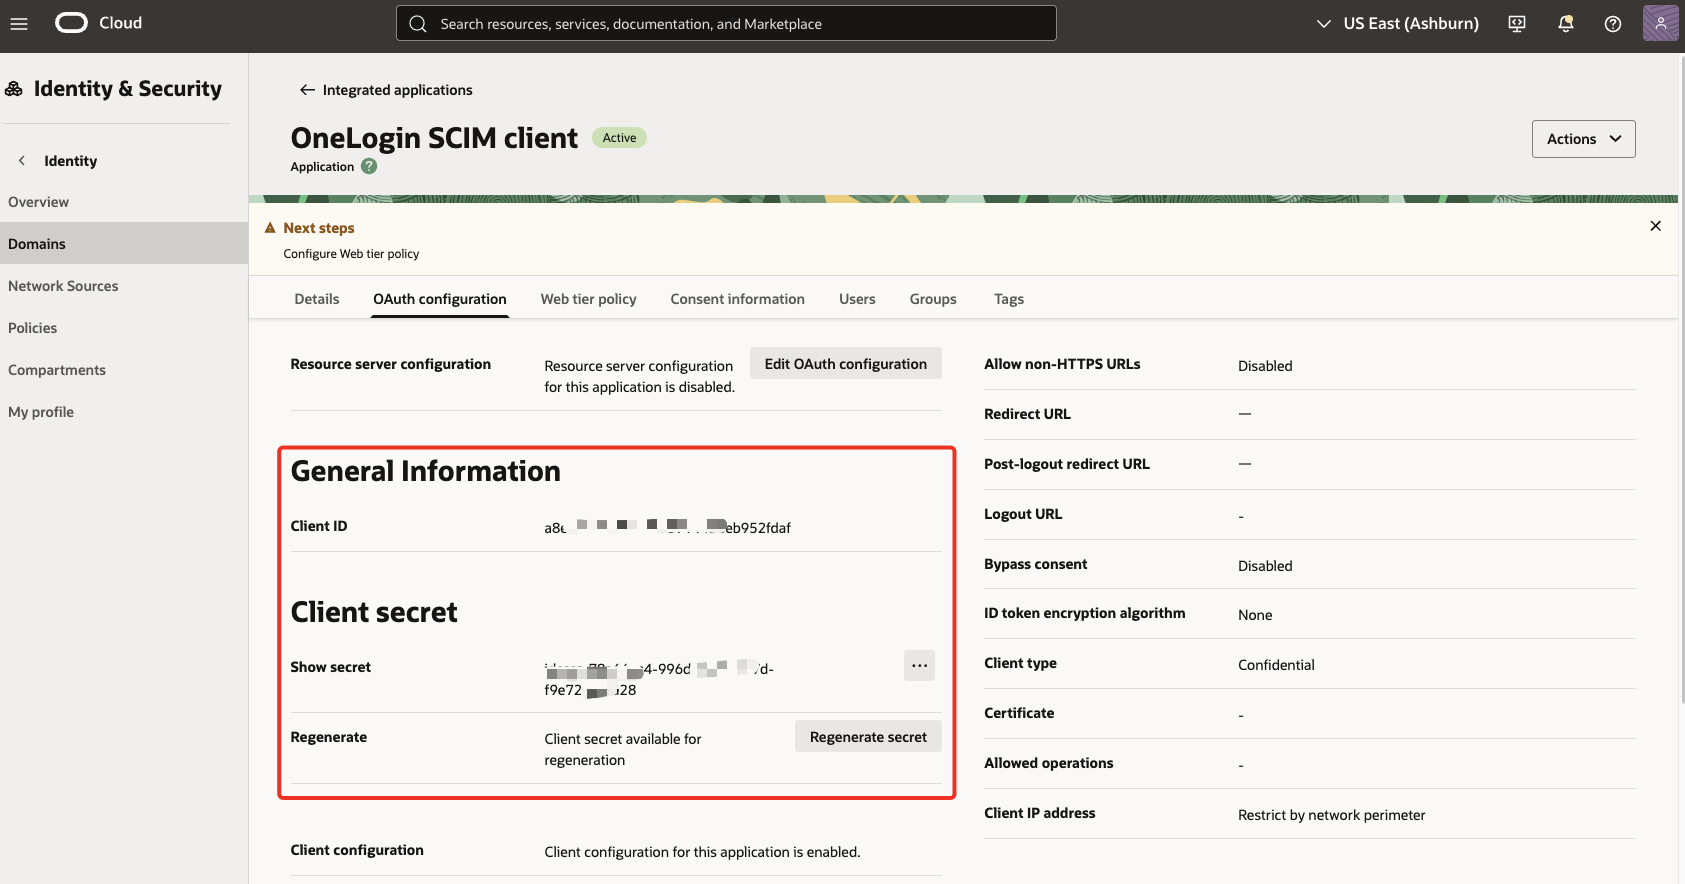
In the General Information section, note the Client ID and Client secret and select Show secret to reveal the plain text.
-
The secret token is the base64 encoding of clientID and clientsecret.
-
For Windows, open PowerShell and run the following command to generate base64 encoding.
[Convert]::ToBase64String([System.Text.Encoding]::Unicode.GetBytes('client_id:secret')) -
For MacOS, use Terminal to run the following command.
echo -n <clientID>:<clientsecret> | base64The secret token is returned. For example:
echo -n a8ee5075c7944ffb8914438eb952fdaf:XXX-XXX-4ea7-XXX | base64
YThlZTUwNzVjNzkXXXXXXk5NmQtNGVhNy04OTdkLWY5ZTcyY2RjN2XXX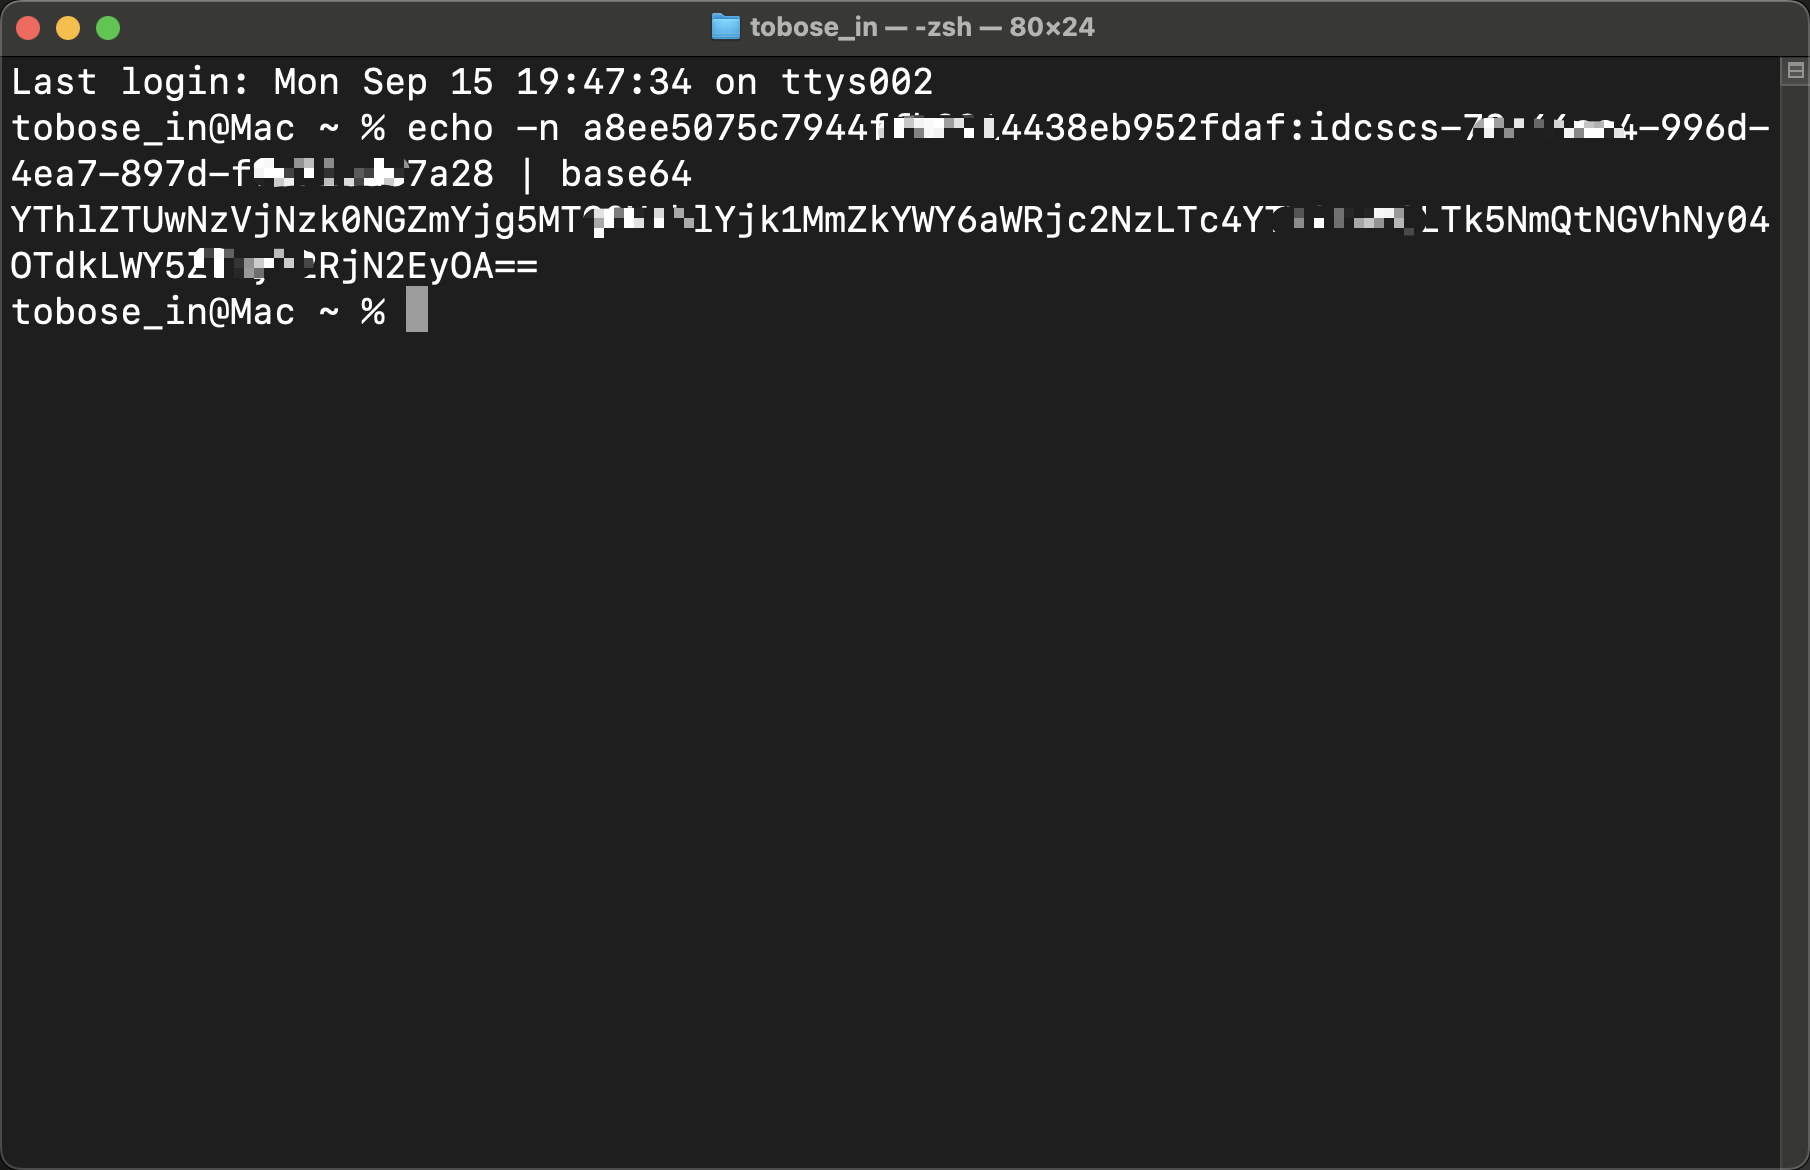
-
Make a note of the secret token.
Task 2.2: Find the SCIM endpoint of the identity domain
The SCIM endpoint details is required by the client to make API calls. The URL is constructed based on the domain details.
-
Under Domains, select Details tab. Select Copy next to the Domain URL.
https://idcs-XXX.identity.oraclecloud.com:443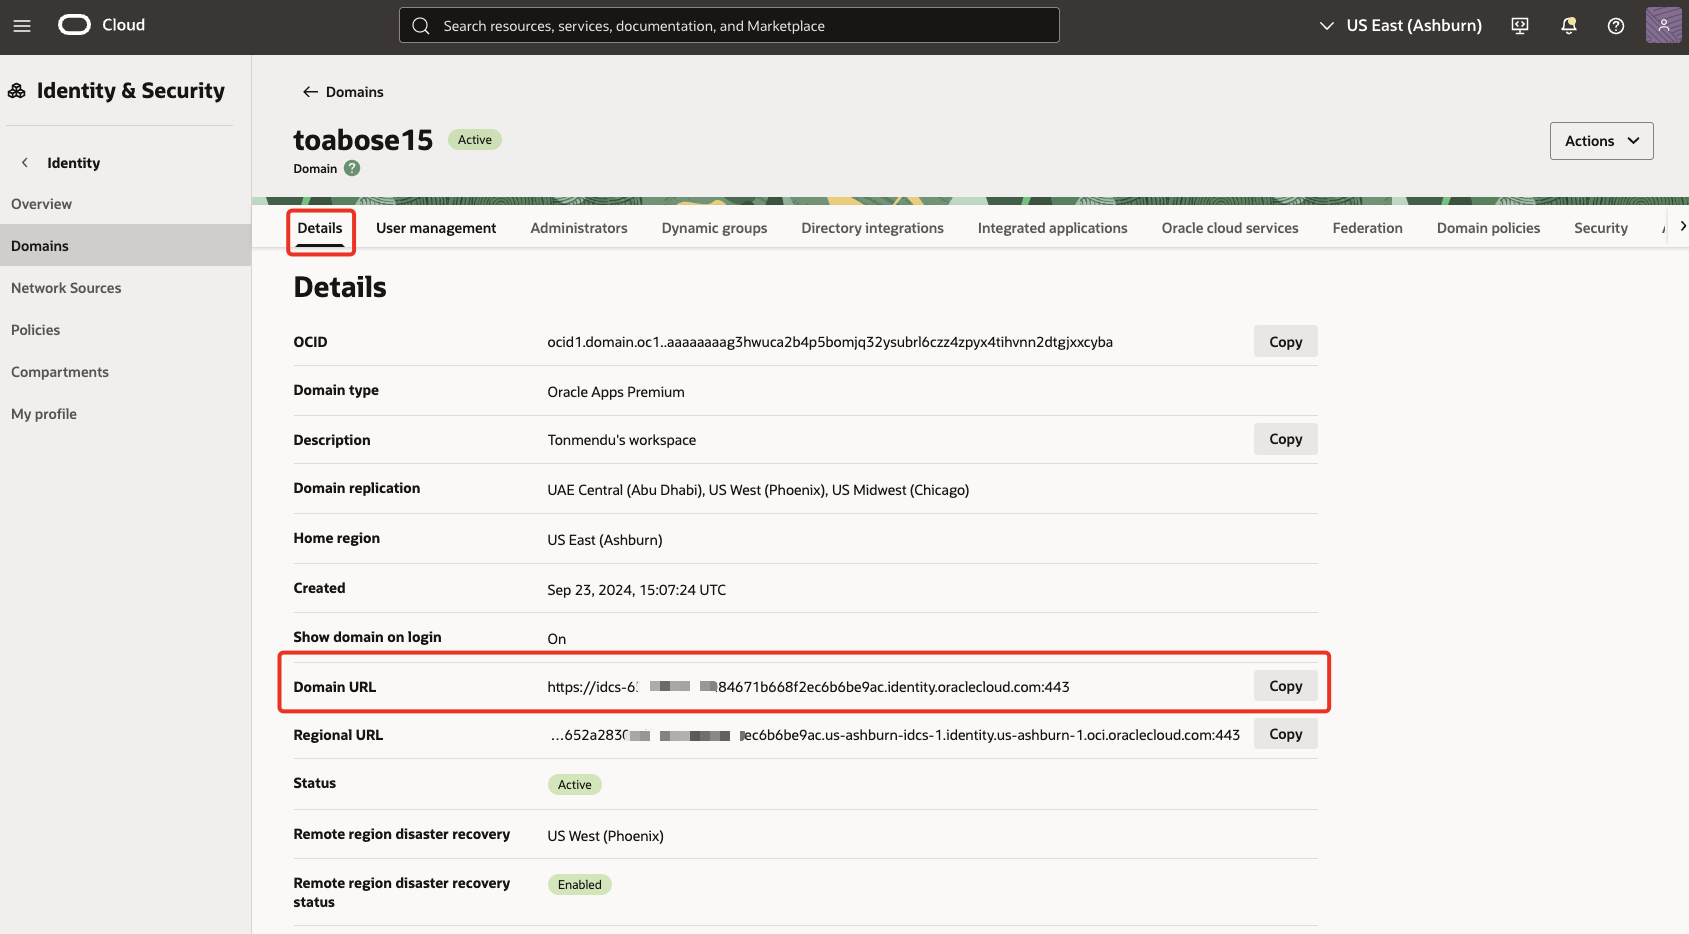
-
Add
/admin/v1to the end of the URL. The final URL should look like this:https://idcs-XXX.identity.oraclecloud.com:443/admin/v1
Task 2.3: Configure Identity Management in the OneLogin app
In OneLogin, we will use a custom application that will perform provisioning over API.
-
In the OneLogin portal, under Applications, click Add App.
-
Search & select SCIM Provisioner with SAML (SCIM v2 Core) .

-
Enter a Name (for example,
OCI IAM Domains - SCIM 2.0) . Turn off the option forVisible in portalas this app is not user-facing. Click Save.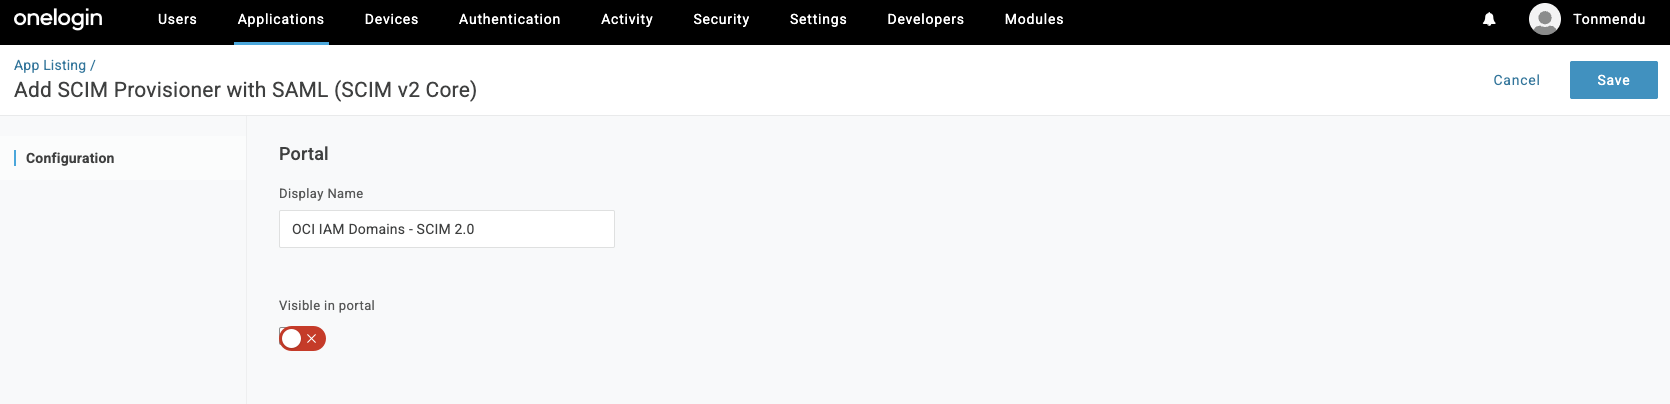
-
Under Configuration section, enter the URL from 2.2.2 under
SCIM Base URLand the bearer token from 2.1.12 inSCIM Bearer Token. Click Enable and it should turn green. Click Save.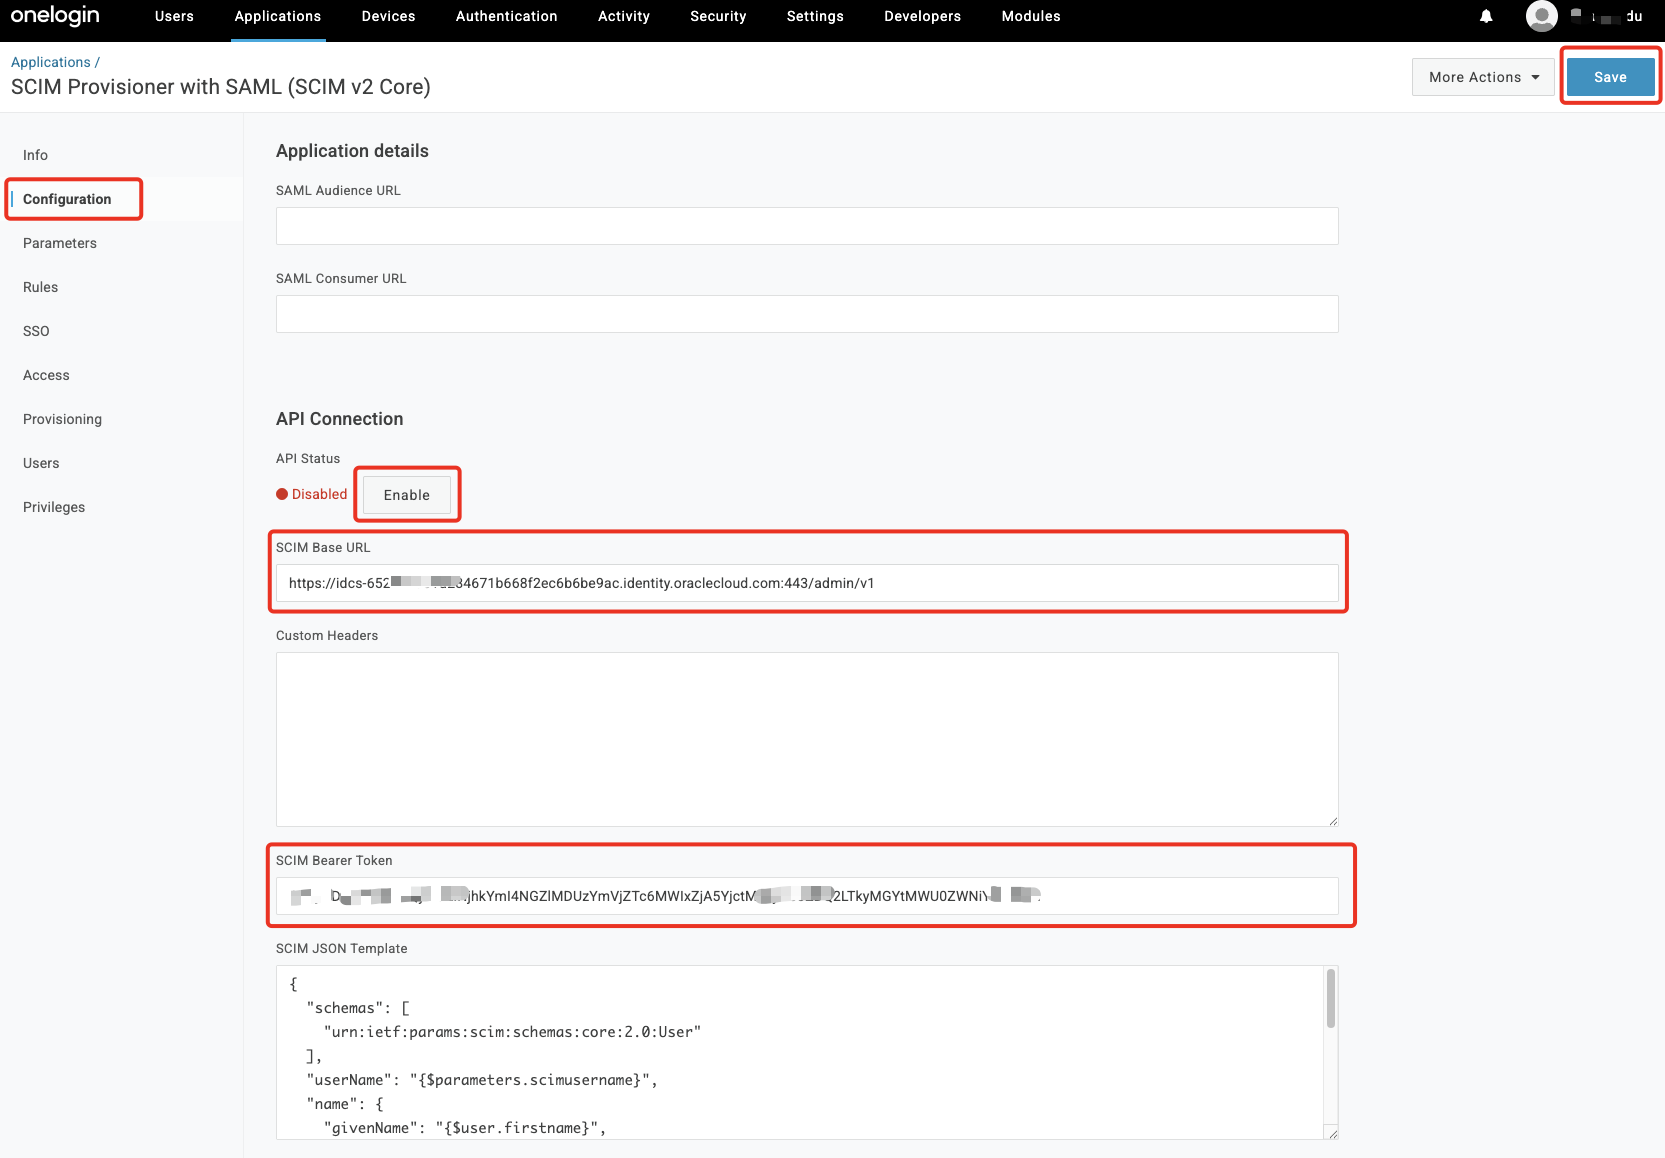
-
Under Parameters section, click on + to add custom attributes. Add the attributes for
givenNameandfamilyName& map these to the valuesFirst NameandLast Namerespectively.
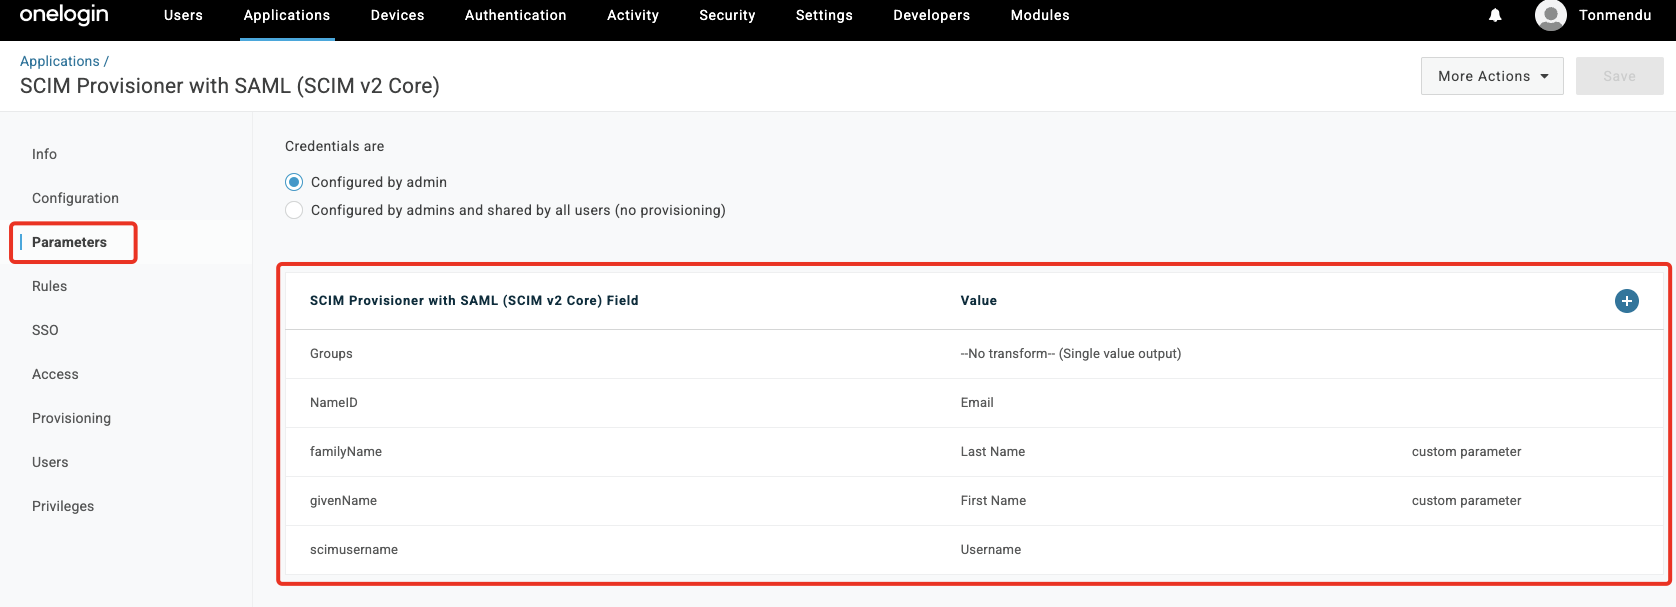
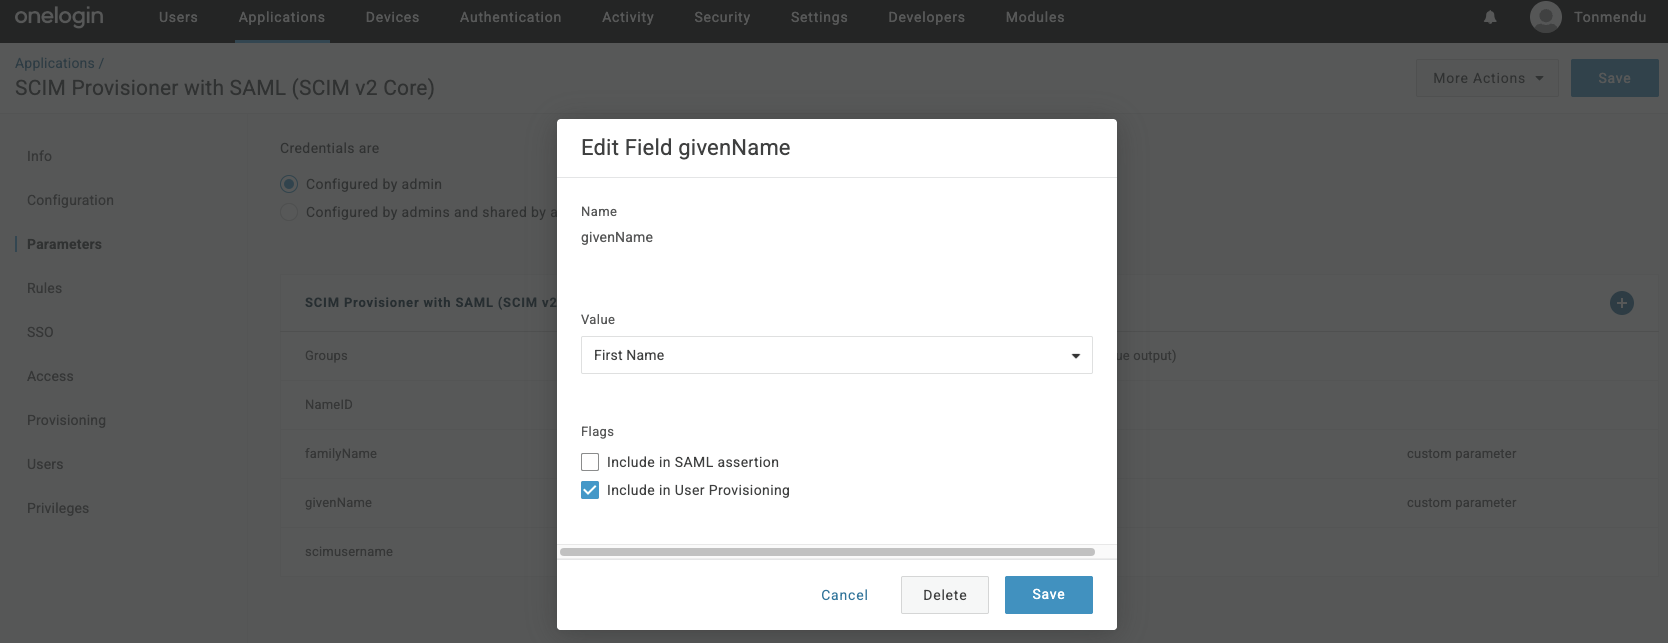
Note: Put a check on
Include in User Provisioningon each of the attributes in the parameters list. -
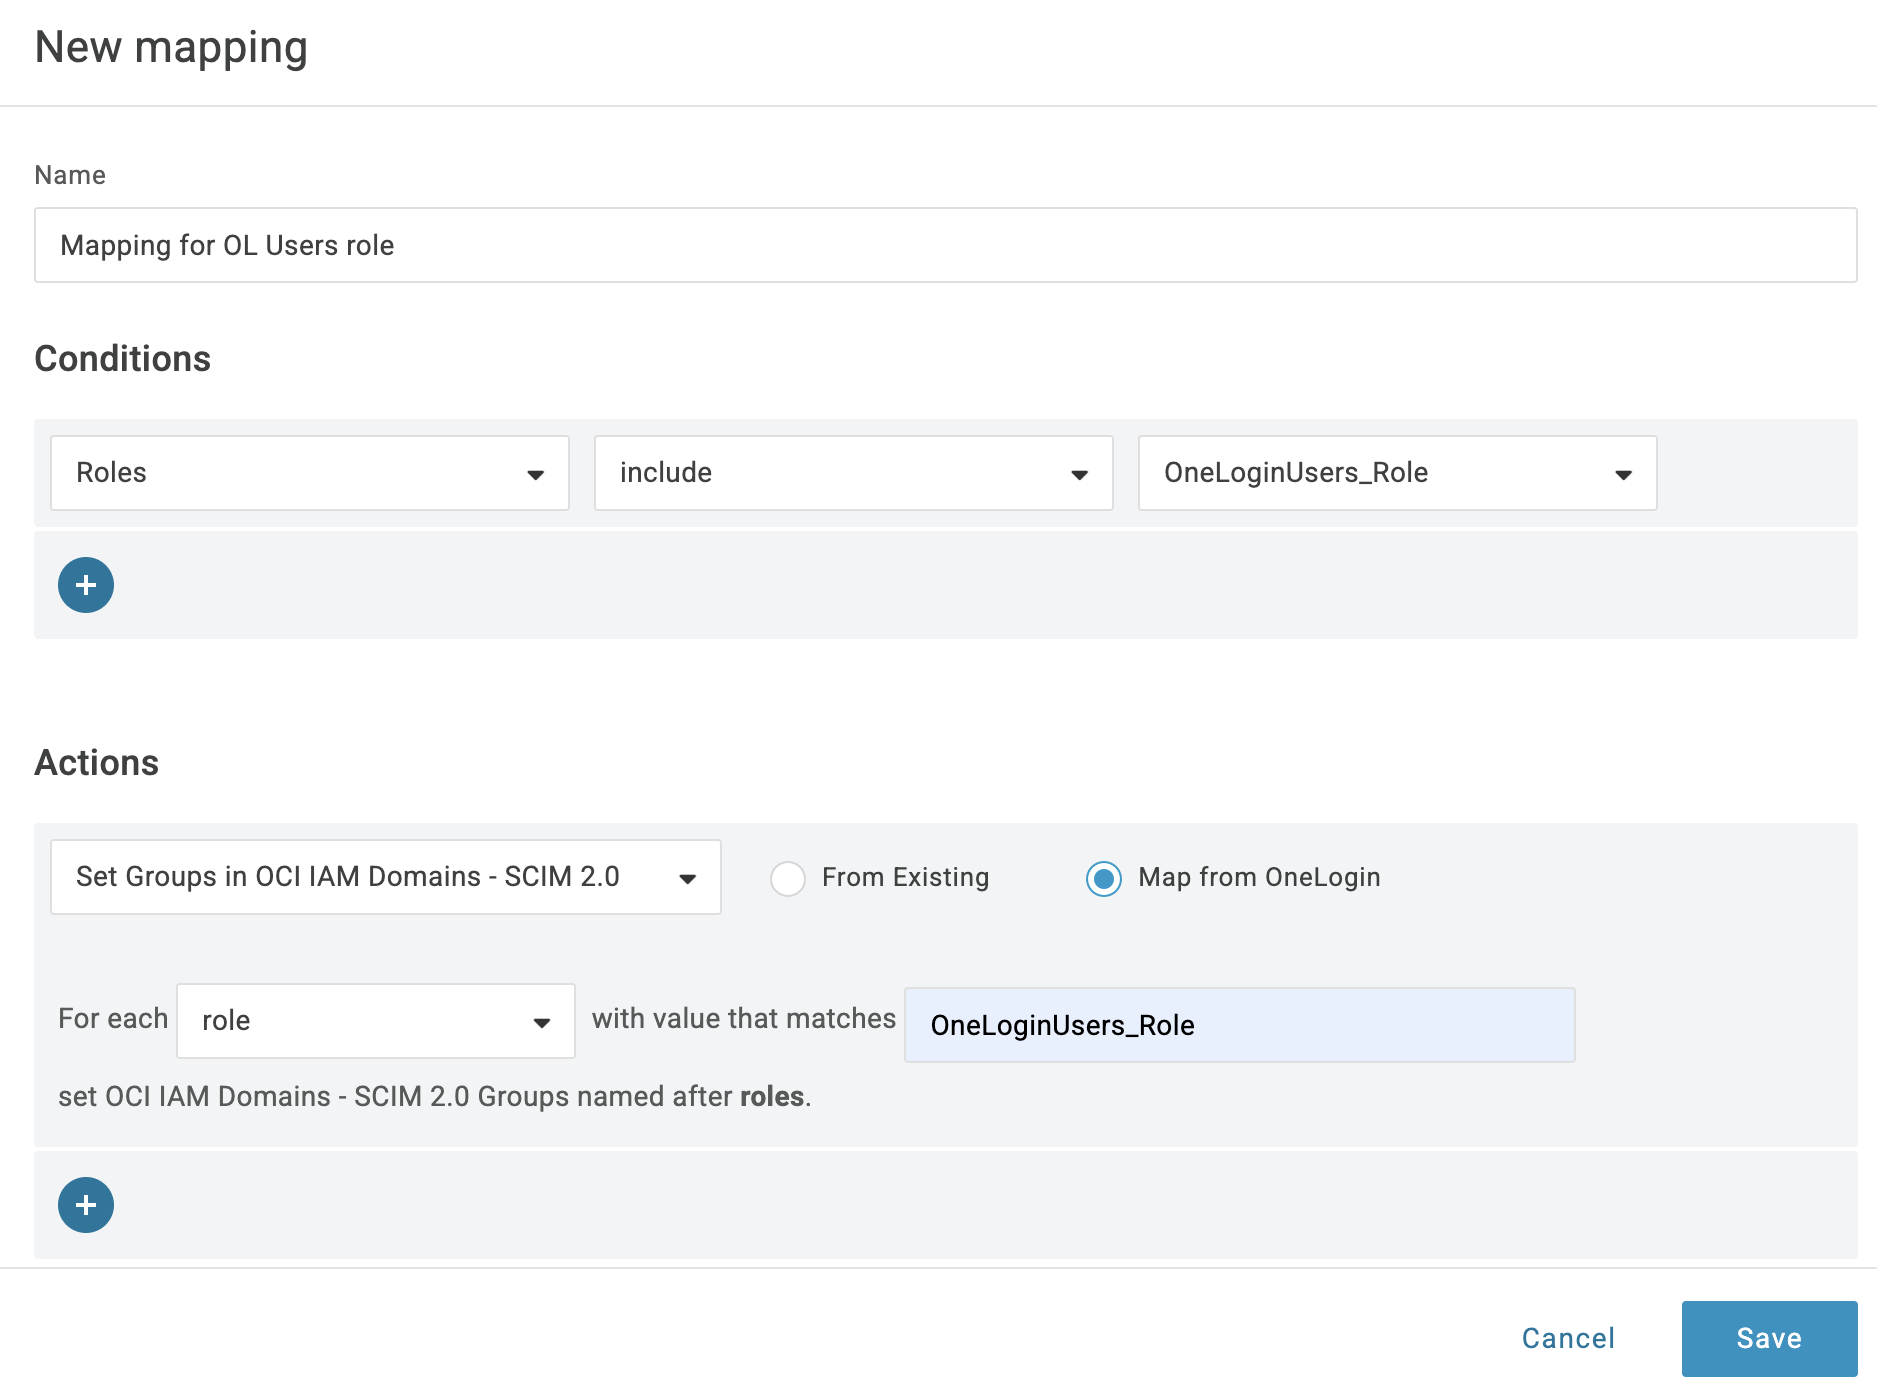
In the Rules section, click Add Rule. Enter a Name (for example,
Mapping for OL Users role).-
Under
Conditions, chooseRolesand select the role that will be synced. -
Under
ActionsselectSet Groups in OCI IAM Domains - SCIM 2.0andMap from OneLogin. -
Under filter select
roleand enter the name of the role.
-
-
In the Access section, select the
Rolethat will be used to sync the users.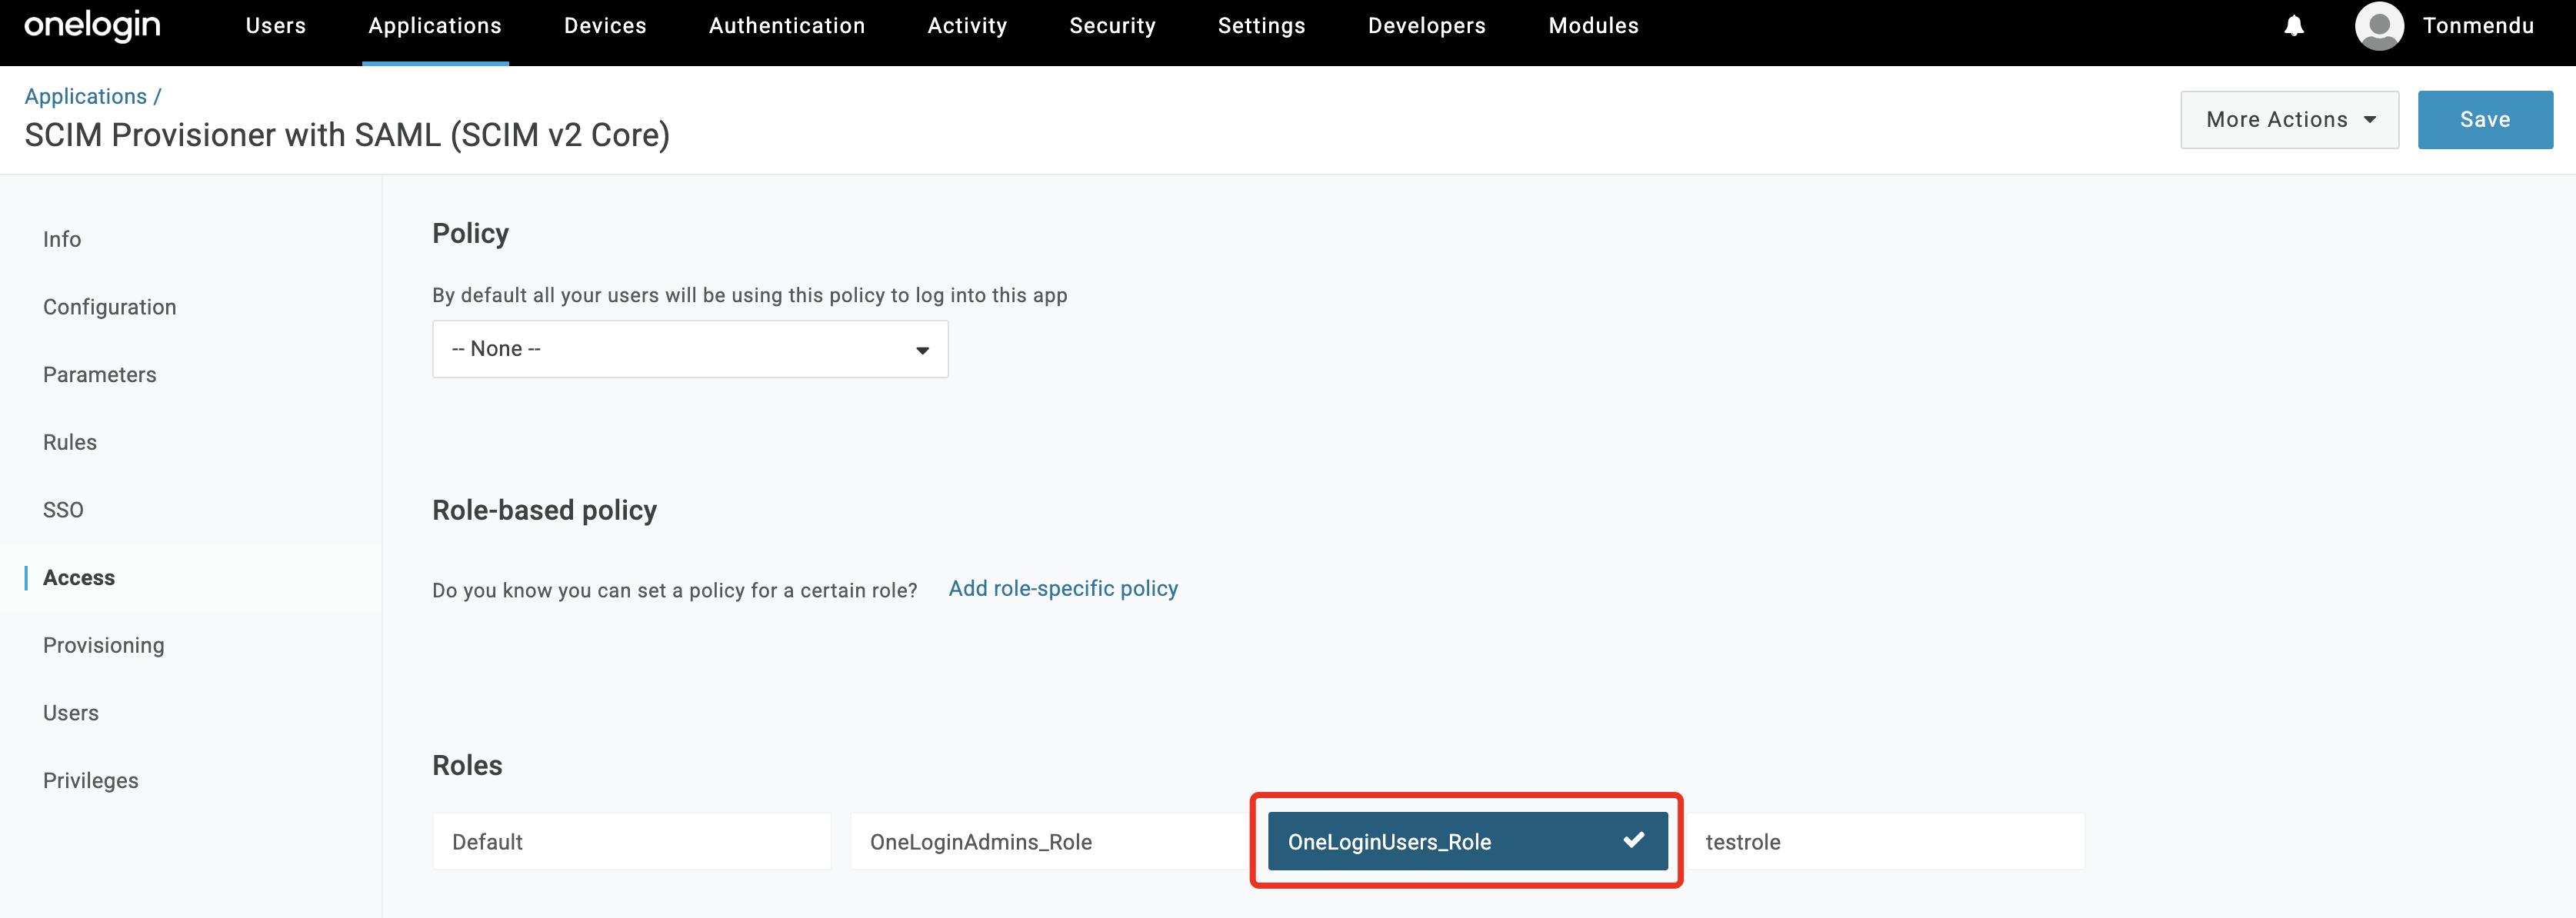
-
In the Provisioning section, uncheck the admin approval options for Create/Delete/Update users. Put a check on
Enable Provisioning& click Save. Hit Refresh to start the provisioning process.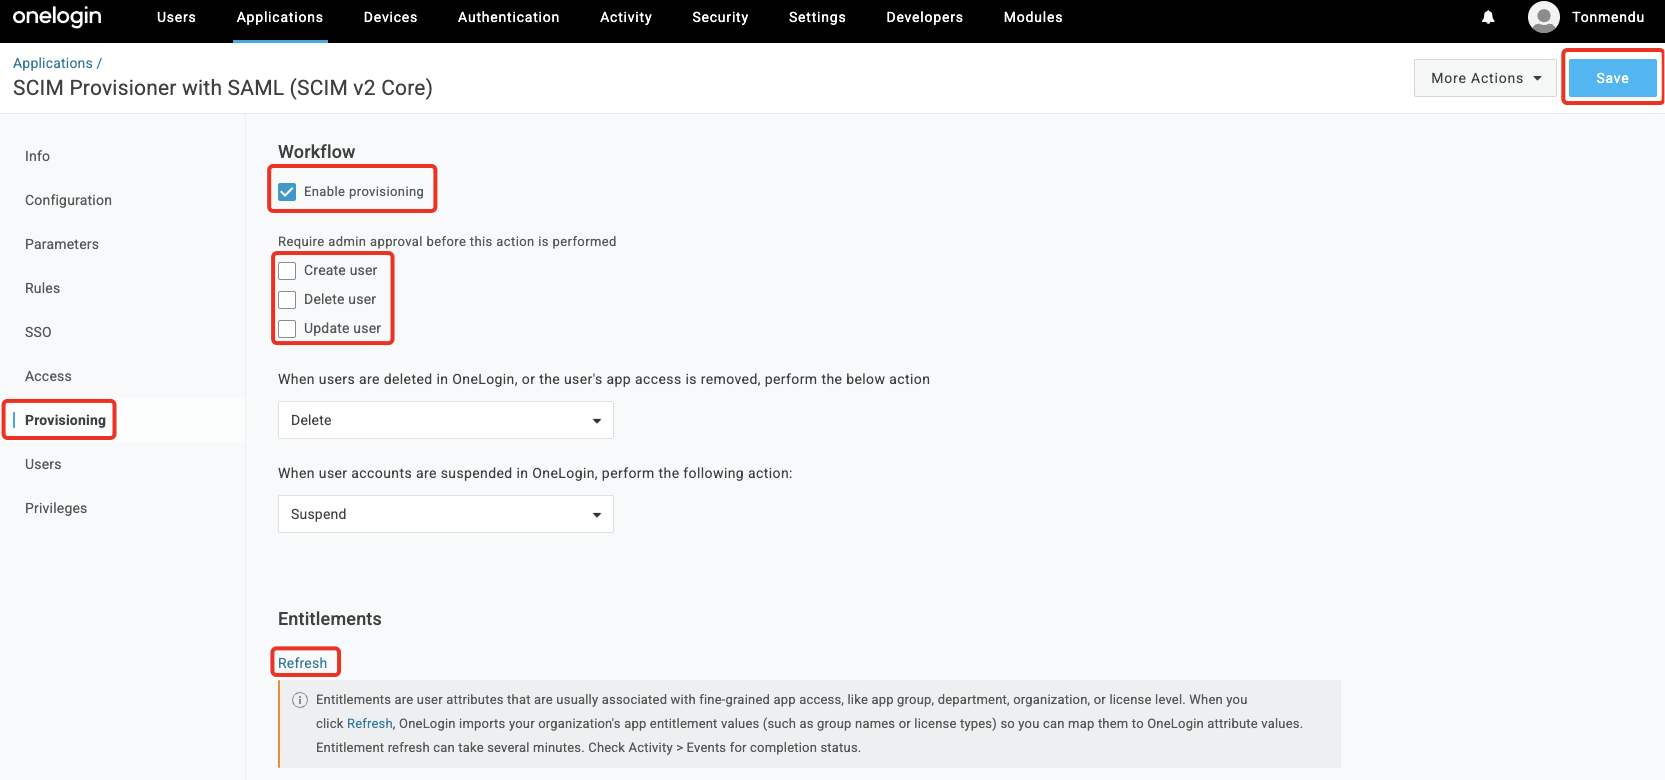
Section 3: Test and validate the login
Finally, the federated authentication is put to test.
-
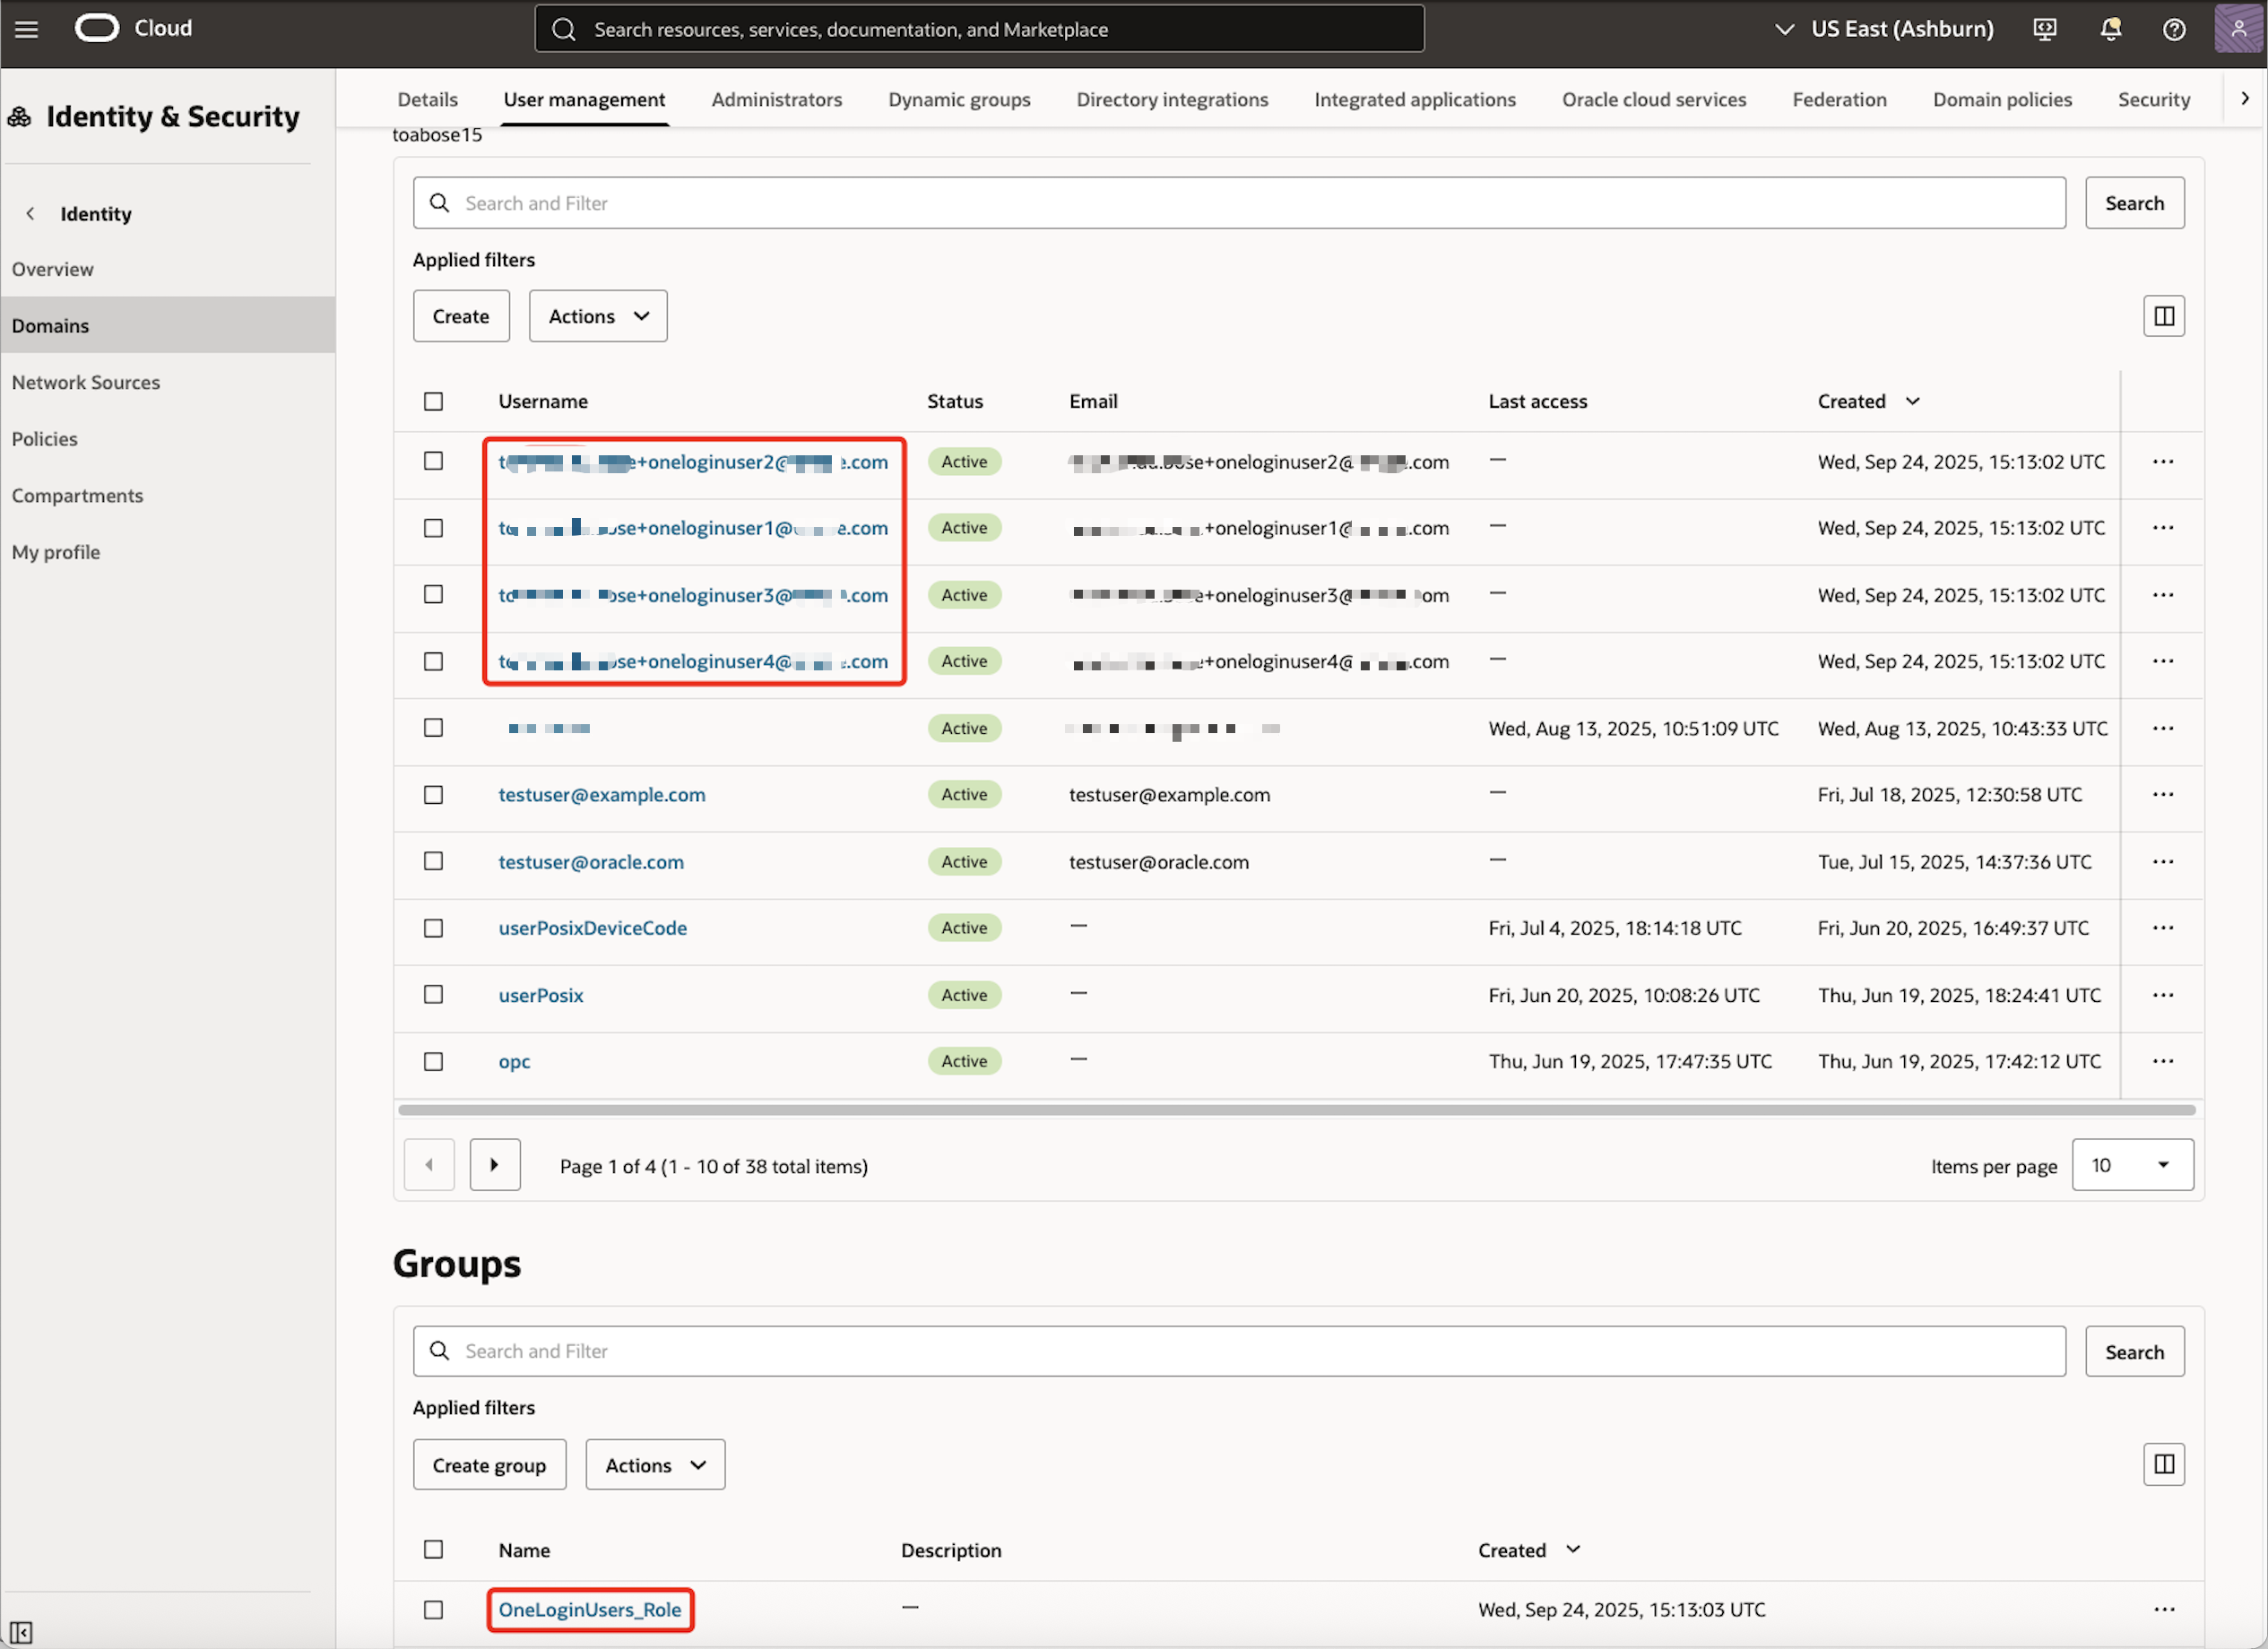
It takes a few minutes for the users to sync in. The status can be checked under
Userssection. Once it shows as ‘Provisioned’ the same users would reflect in OCI.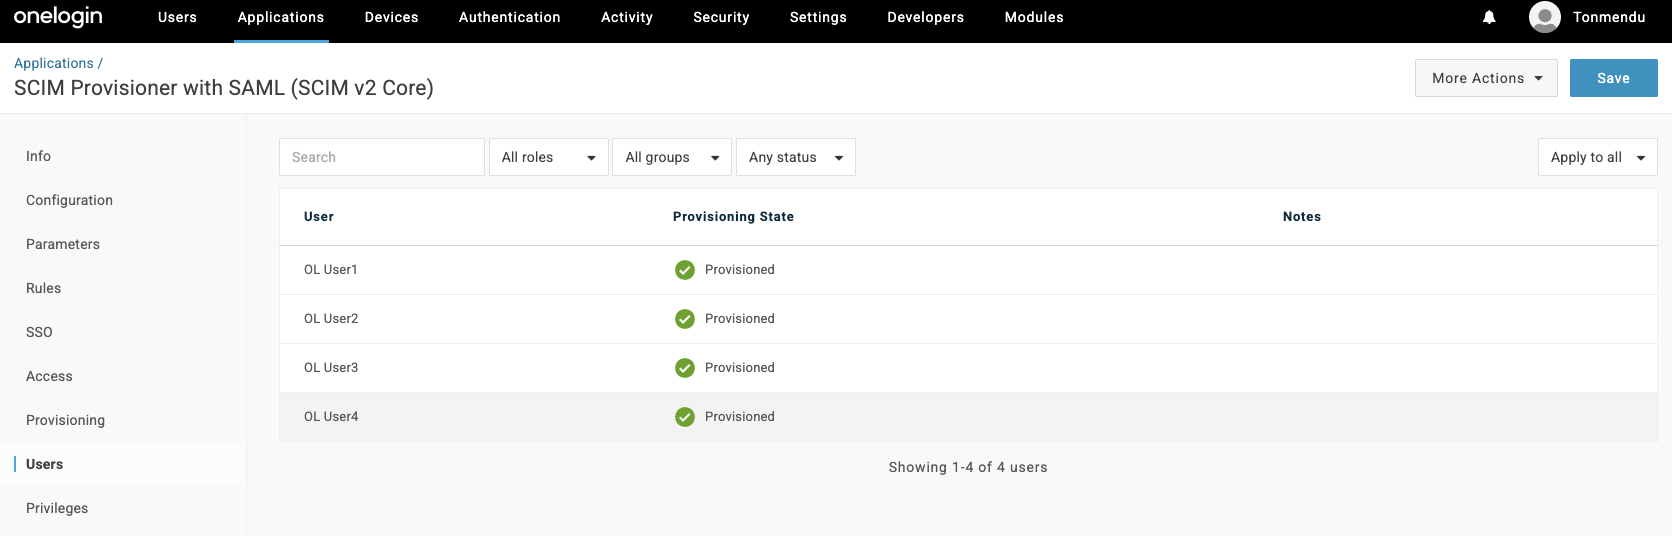
Note: Now that the identities are synchronized, we will validate the SSO login.
-
In a new browser window, open the OCI Console. Enter Cloud Account Name, also referred to as the tenancy name, and click Next.
-
Select the identity domain in which OneLogin federation has been configured.
-
In the Oracle Cloud Account Sign In page, select OneLogin. There should be a redirection to the OneLogin log in page.

-
Enter the OneLogin credentials for one of the federated users that were sycned in Section 2.
-
Upon successful authentication, there should be a redirection back to OCI Console.
Conclusion
This integration eliminates the need for administrators to manage separate OCI credentials, enhancing security and simplifying access management. This also helps in identity management, reducing administrative overhead and eliminating redundancy.